Table of Contents
Manually Creating Optimized Windows Images for VMware Horizon VMs. 5
1. Start the New Virtual Machine Wizard in the vSphere Web Client 6
2. Select the New Virtual Machine Creation Type. 6
3. Select a VM Name and Folder 7
5. Select a Datastore for the VM.. 8
6. Select the vSphere Compatibility Level 8
7. Select the Windows Version and Architecture. 9
8. Specify Virtual Hardware Settings 9
9. Continue Specifying Hardware Settings 10
11. Edit the Configuration Parameters. 12
12. Disable the Ability to Add and Remove Virtual Hardware While the VM Is Running. 13
1. Select the Custom Setup Type. 16
2. Disable the Carbon Black Helper Component If Not Required. 17
3. Exclude the Service Discovery Component 18
4. Exclude the Volume Shadow Copy Component 19
5. Begin Installation of VMware Tools. 20
6. Exit the Installation Wizard. 21
Install .Net Framework 3.5. 22
1. Select the Update & Security Settings in Windows Settings. 22
2. Select Check for Updates. 23
Installing Horizon agent on Base image.
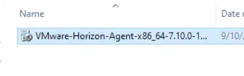
Important thing need to decide what agent you are installing and how you want to provision desktops.
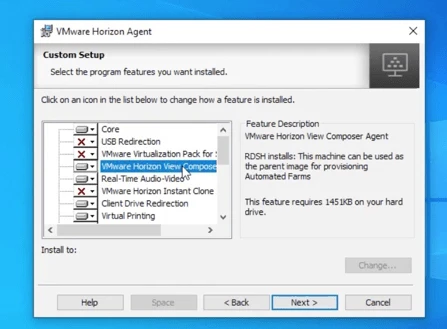
Below agent is for linked clone
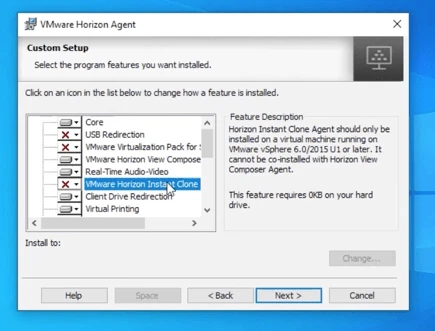
Below agent is for instant clone
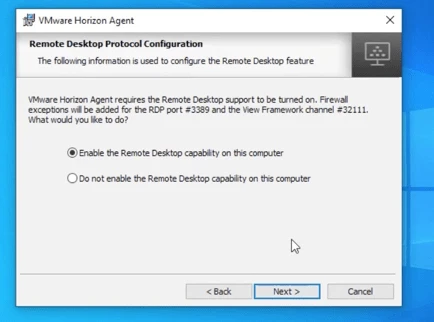
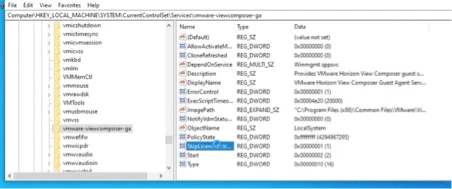
regedit > computer\HKEY_LOCAL_Machine\system\currentcontrolset\servics\vmware-viewcomposer-ga
set to 0
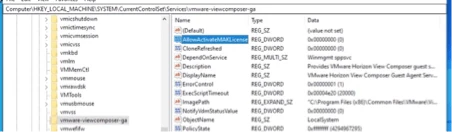
If you want to use MAK activation
Manually Creating Optimized Windows Images for VMware Horizon VMs
1. Start the New Virtual Machine Wizard in the vSphere Web Client
- In vSphere Web Client, right-click a data center, cluster, host, or VM folder.
- Select New Virtual Machine.
2. Select the New Virtual Machine Creation Type
- Select Create a new virtual machine.
- Click NEXT.
3. Select a VM Name and Folder
- Provide a name in the Virtual machine name field.
- Select a location.
- Click NEXT.
4. Select a Cluster or Host
- Select a cluster or host as the compute resource.
- Click NEXT.
5. Select a Datastore for the VM
- Select a datastore or datastore cluster where you would like to store the VM.
- Click NEXT.
6. Select the vSphere Compatibility Level
- Select the lowest version of ESXi that this VM would be deployed to.
Tip: See Hardware Features Available with Virtual Machine Compatibility Settings. - Click NEXT.
7. Select the Windows Version and Architecture
- Select the Guest OS Version with the correct architecture (32- or 64-bit) and, when required, enable VBS. (Choose Microsoft Windows Server 2016 when deploying Windows Server 2019 on ESXi 6.x.)
- Click NEXT.
8. Specify Virtual Hardware Settings
- Select 2 CPUs. (This should be tested and adjusted to real production values later.)
- Select 2.5 GB of memory. (This should be tested and adjusted to real production values later.)
- Expand the Memory section.
- Select Reserve all guest memory (All locked).
- Choose an appropriate hard disk size.
- Expand the New SCSI controller section.
- Select VMware Paravirtual.
- From the VM Network list, select the appropriate network.
- Expand New Network.
- Select VMXNET3.
- Click on ADD NEW DEVICE.
- Select CD/DVD Drive.
- Scroll down
9. Continue Specifying Hardware Settings
- Select Datastore ISO File and browse to the Windows ISO file.
- Select Connect.
- Delete the New USB Controller.
- Expand the Video card section.
- Select the maximum Number of Displays that will be used.
- Use the following table to determine which number to enter in the Total amount of video memory field.
Note: The table that follows describes the small amount of RAM on the ESXi host that is required for video overhead in addition to system memory. This VRAM size requirement depends in on the display resolution and number of monitors configured for end users.
| Display Resolution Standard | Width, in Pixels | Height, in Pixels | 1-Monitor Overhead | 2-Monitor Overhead | 3-Monitor Overhead | 4-Monitor Overhead |
| VGA | 640 | 480 | 1.20 MB | 3.20 MB | 4.80 MB | 5.60 MB |
| WXGA | 1280 | 800 | 4.00 MB | 12.50 MB | 18.75 MB | 25.00 MB |
| 1080p | 1920 | 1080 | 8.00 MB | 25.40 MB | 38.00 MB | 50.60 MB |
| WQXGA | 2560 | 1600 | 16.00 MB | 60.00 MB | 84.80 MB | 109.60 MB |
| UHD (4K) | 3840 | 2160 | 32.00 MB | 78.00 MB | 124.00 MB | Not supported |
Important: You are not yet finished with the Customize Hardware wizard page. Now that you have edited the virtual hardware settings, you can configure the VM options.
10. Specify VM Options
- At the top of the page click on VM Options.
- Expand the Advanced section.
- Scroll down.
11. Edit the Configuration Parameters
Click EDIT CONFIGURATION.
Note: In the next step, you are going to disable the hotplug feature. With hotplug enabled, NICs and SCSI controllers appear as removable devices, and the Safely Remove Hardware option for the virtual hardware appears in the Windows System Tray (notification area). To prevent this option from appearing, you will disable the capability. When using VMware App Volumes, you must either add enough controllers for the maximum number of disks you will be using or not set this option.
12. Disable the Ability to Add and Remove Virtual Hardware While the VM Is Running
- Click ADD CONFIGURATION PARAMS.
- For Name, type
devices.hotplug, and for Value, typefalse. - Click OK. You are returned to the Customize Hardware > VM Options tab of the wizard.
- Click NEXT on the wizard page.
13. Complete the Wizard
Click FINISH.
Install Windows
Access the VMware Tools Disk Image from vSphere Web Client
Click Install VMware Tools.
9.2. Mount the VMware Tools Disk Image on a Virtual Drive of the VM
Click on MOUNT and go back to the the remote console.
9.3. Open the Load Driver Dialog Box
Click Load driver.
9.4. Open the File Browser
Click Browse.
9.5. Browse to the Correct PVSCSI Driver
- Go to E:\Program Files\VMware\VMware Tools\Drivers\pvscsi\Win8\amd64.
- Click OK.
9.6. Select the Driver
With the VMware PVSCSI driver selected, click Next.
10. Use the Default Installation Location
Click Next.
11. Monitor Installation Progress
Wait for Windows to be installed.
VMware Tools and config
Click Next.
1. Select the Custom Setup Type
- Select Custom.
- Click Next.
2. Disable the Carbon Black Helper Component If Not Required
- Deselect VMware Carbon Black Helper, unless you use Carbon Black.
- Scroll down.
Note: If you leverage NSX enable the NSX File and Network Introspection drivers.
3. Exclude the Service Discovery Component
- Deselect Service Discovery, which enables the discovery of various services running inside a virtual machine. This component is not necessary.
- Scroll down.
4. Exclude the Volume Shadow Copy Component
- Deselect Volume Shadow Copy Services Support. This component is not necessary.
- Click Next.
5. Begin Installation of VMware Tools
Click Install.
6. Exit the Installation Wizard
Click Finish.
7. Do Not Restart the VM
Click No.
Install .Net Framework 3.5
Open a command prompt and run the following command:
DISM/Online/Enable-Feature/FeatureName:NetFx3/All/LimitAccess/Source:D:\sources\sxs
Install any required component that leverages Windows Update, such as C++ runtimes, Office, and so on. The following screenshot shows an example of successfully running this command.
Update Windows
Install the latest Windows OS updates.
1. Select the Update & Security Settings in Windows Settings
Press Windows Key+I, to open Windows Settings, and click Update & Security.
2. Select Check for Updates
Note: For earlier non-LTSB/LTSC Windows 10 versions, click Advanced options first and select Defer feature upgrades so that new features are not downloaded and installed. Deferring feature upgrades does not affect security updates.
Click Check for updates and wait for the updates to be installed.
3. Restart the VM
Click Restart now. Run Windows Update again until no more updates are available and no restarts are required.
Important commands
DISM /Online /Enable-Feature /FeatureName:NetFx3 /All /LimitAccess /Source:D:\sources\sxs