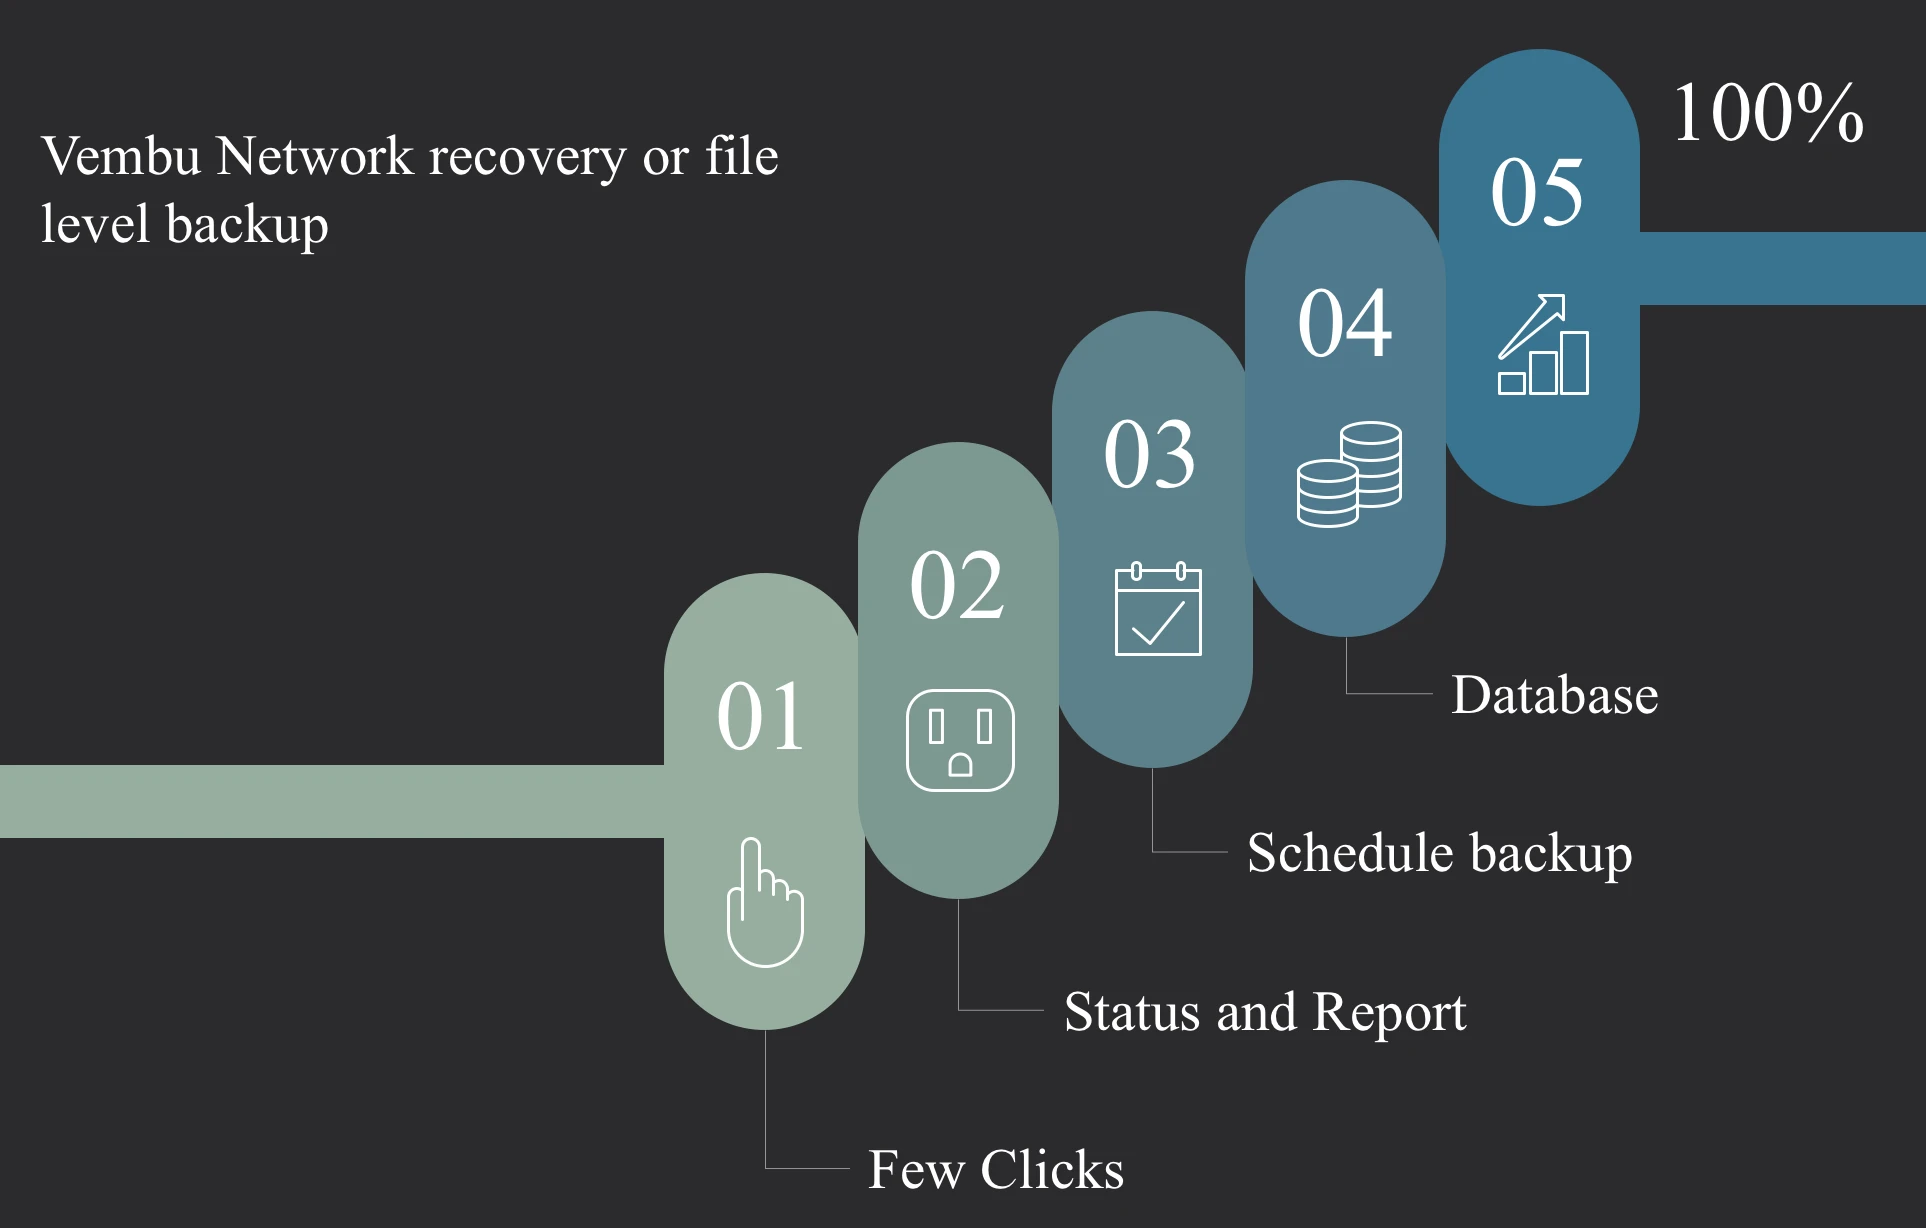
Taking backups of all the files or folders might not be an efficient solution for some enterprises, so its very important that we understand the requirement of an enterprise. For Example Some business requirements involve taking backup of only the critical files and applications and these critical data needs to be protected on a near-continuous basis. In Such requirements taking a disk image backup containing all the OS configurations might not be considered an efficient backup policy. It’s very important to have a backup solution that can be tailored to your needs by offering you control over data.
Vembu NetworkBackup ensures protection to all your business critical data across file servers, application servers, and workstations.
- Backup Files/Folders
- Backup System State, Active Directory & Registry
- Backup Exchange, SQL, Sharepoint & Outlook
- Encrypt your data, both at-rest and in-flight
- Retain files that you need along with its versions, spanning years
Topic Outline:
 Registration VM with Vembu BDR backup server
Selecting files and options
Configuration Scheduling
Configure Retention
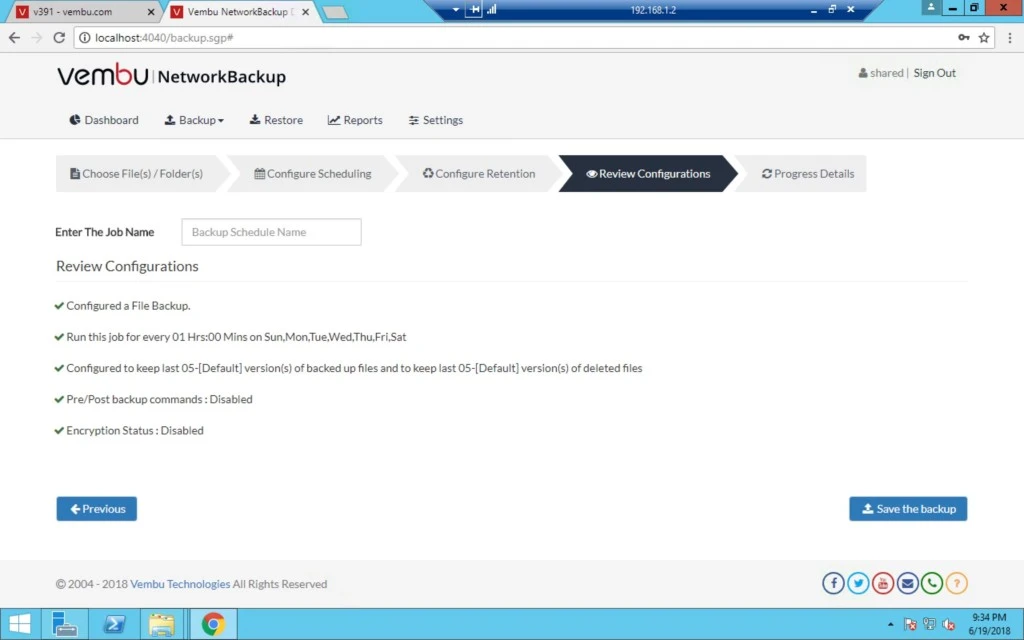
Review Configurations
Details
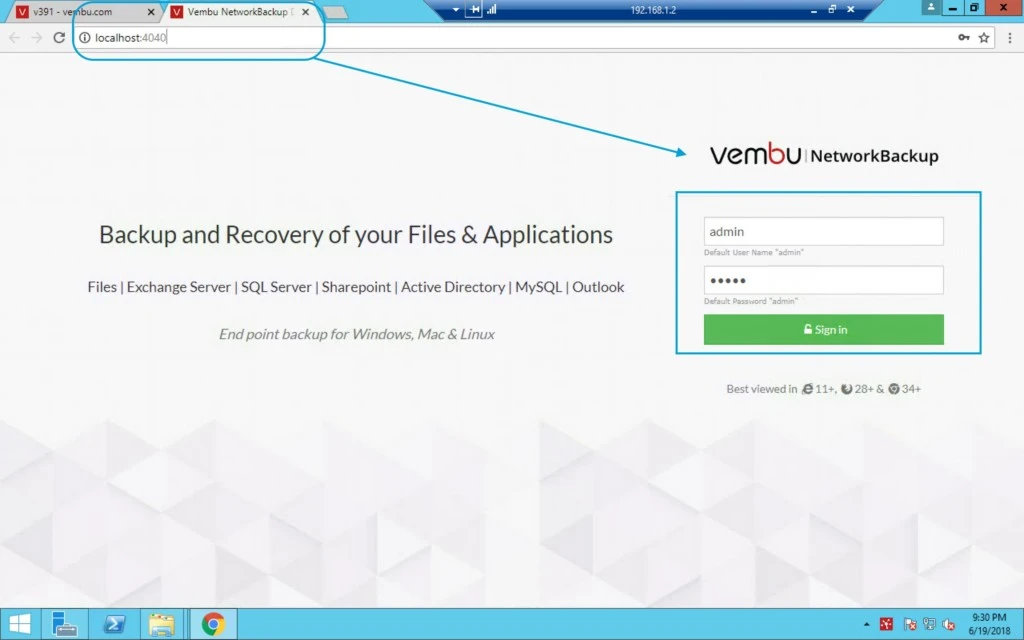
1. After network backup setup installation in my previous article of installation of network file recovery, We will look into Backup and Recovery of your files and applications.
http://localhost or IP:4040/ after this provide username and password (if you have customized this during installation then use that customized username and password)
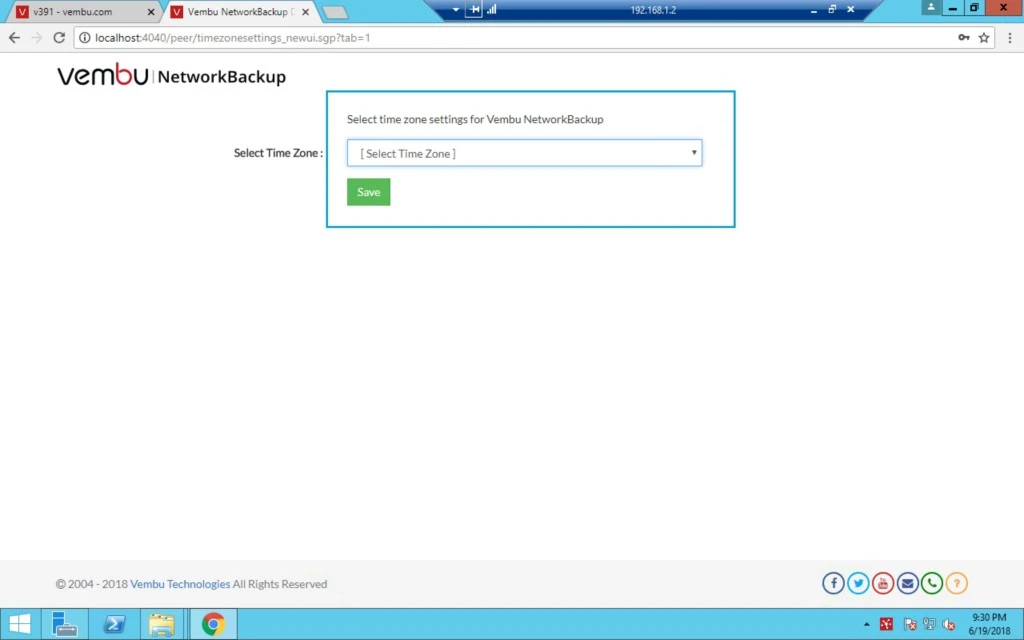
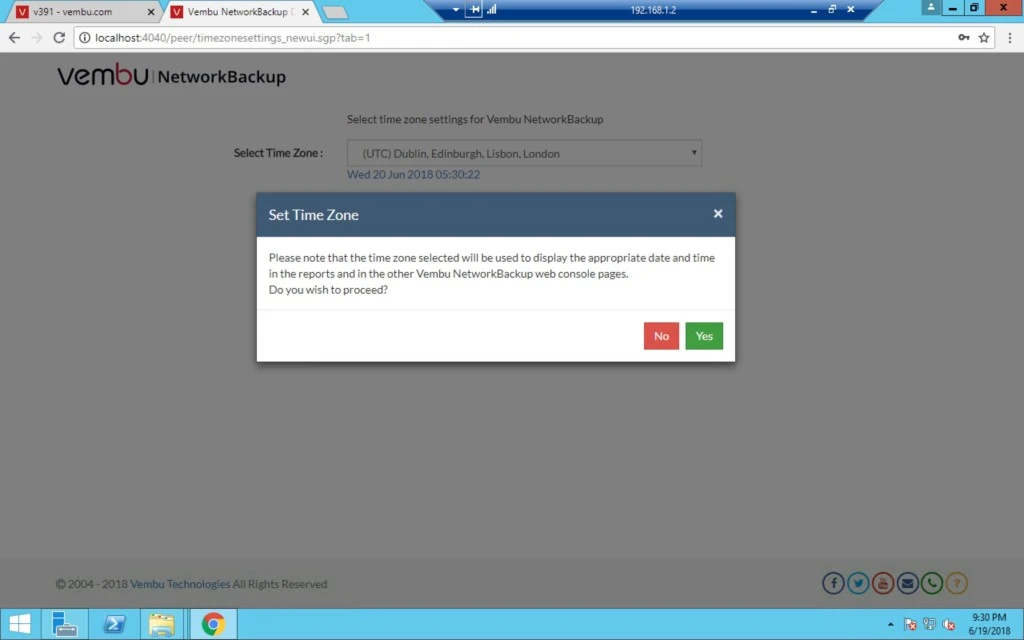
2. Select Time Zone as per your region.
3. Click on Yes.
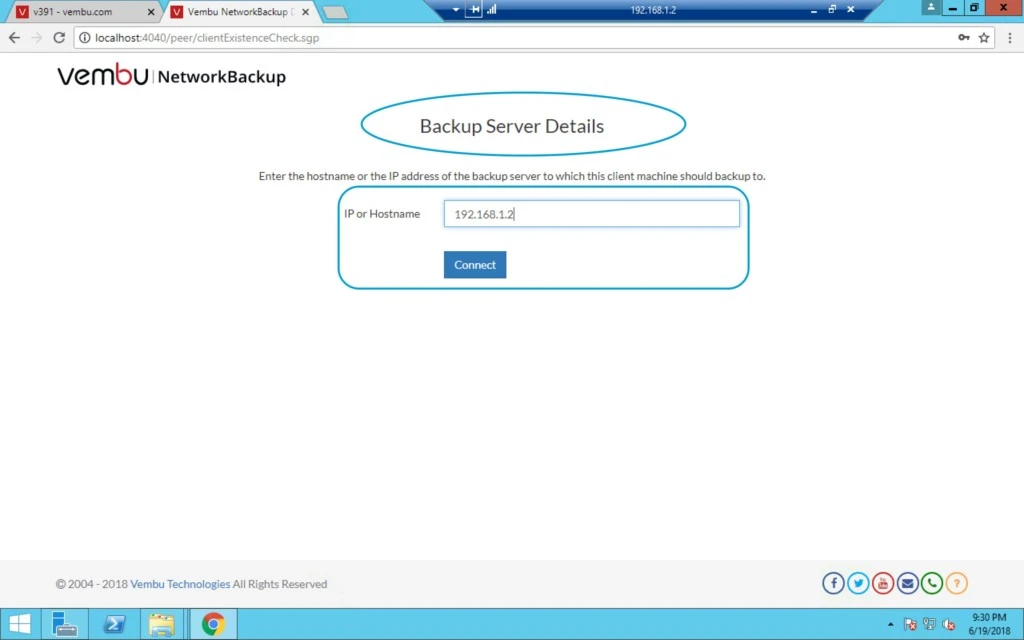
4. Here you have to provide your Vembu BDR server IP.
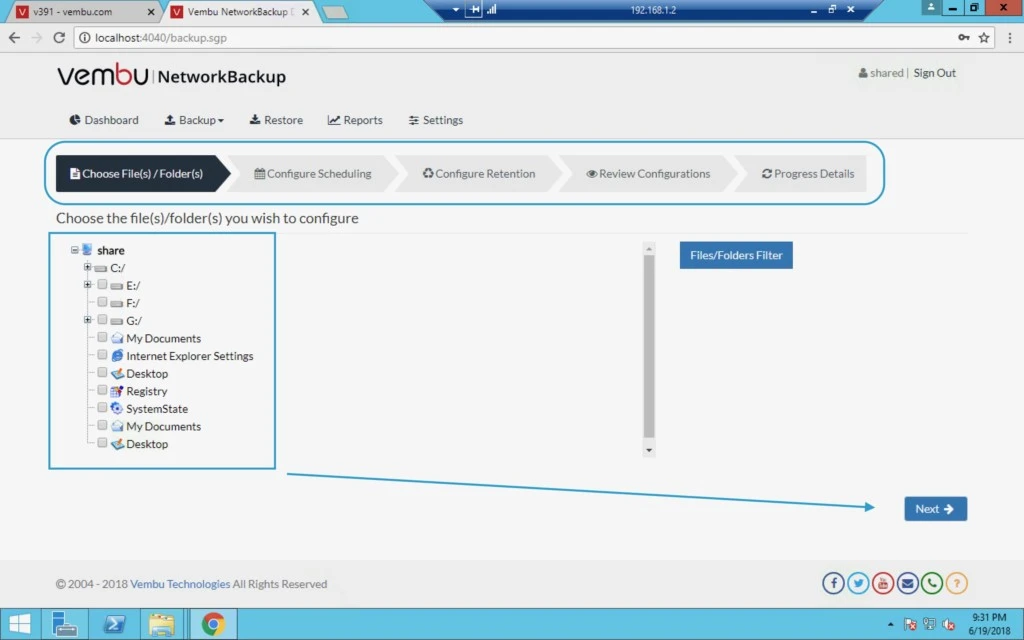
5. Now at this point on the left-hand side, you can see local machine drives and other folders for which you can configure the backup (File Level Backup).
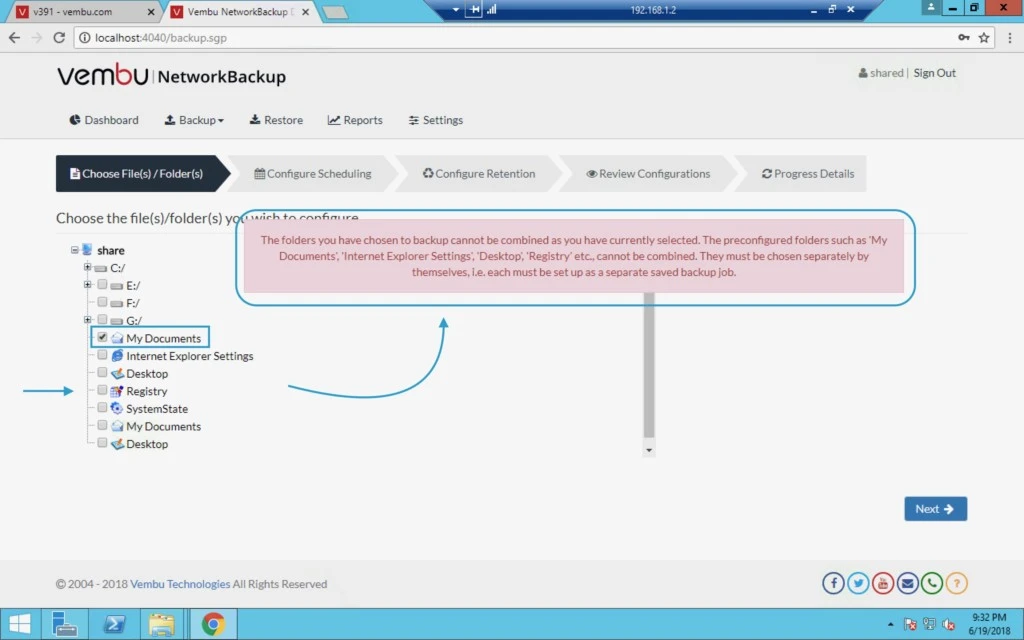
6. On below screen, you can see My Documents, Internet Explorer Settings, Desktop etc when you select “My Documents” and trying to select other files it will show you an error that selected items could not be combined so you have to configure backup separately for these.
7. After that, you can configure or schedule timing for backup like hourly or define the time as per your requirement along with days like Sunday or Monday.
There are few more options available like you can run this backup Daily, Weekly, Continuous or Just Once.
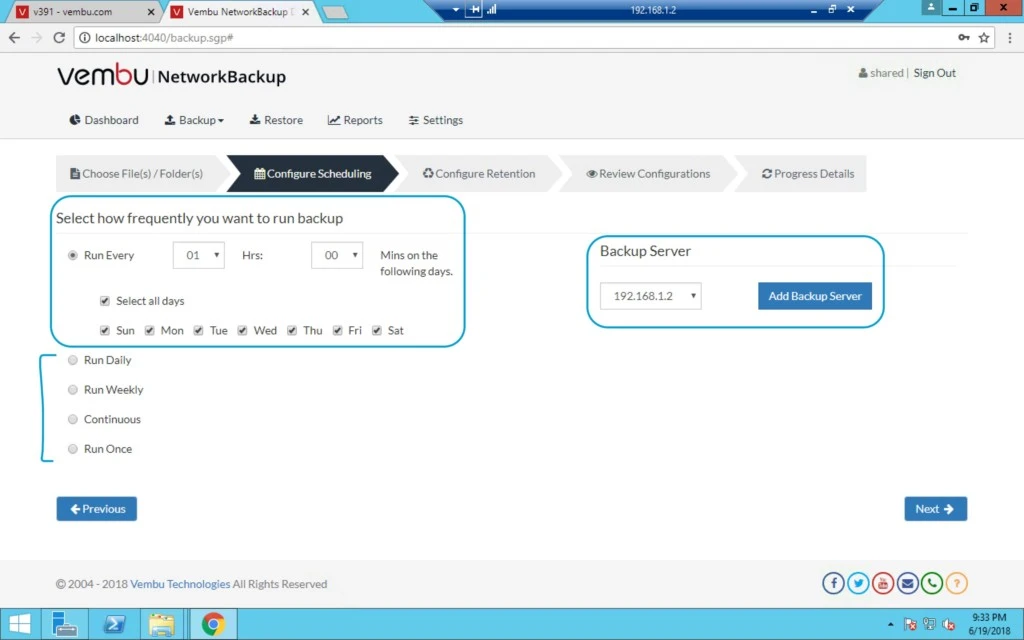
8. On the right-hand side, you can select Vembu BDR server if you have more than one then select from a drop-down list.
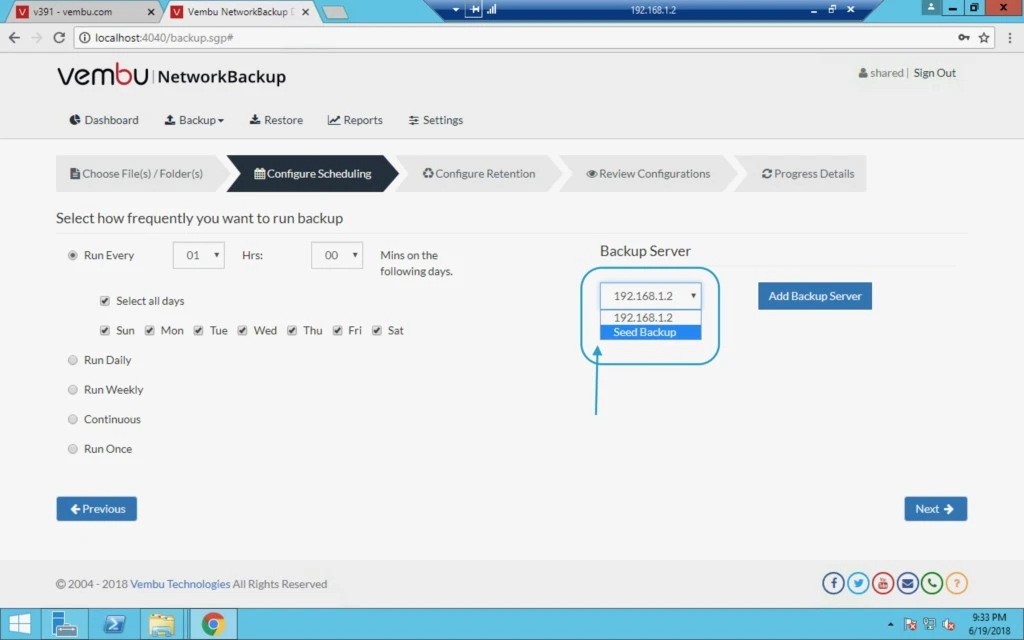
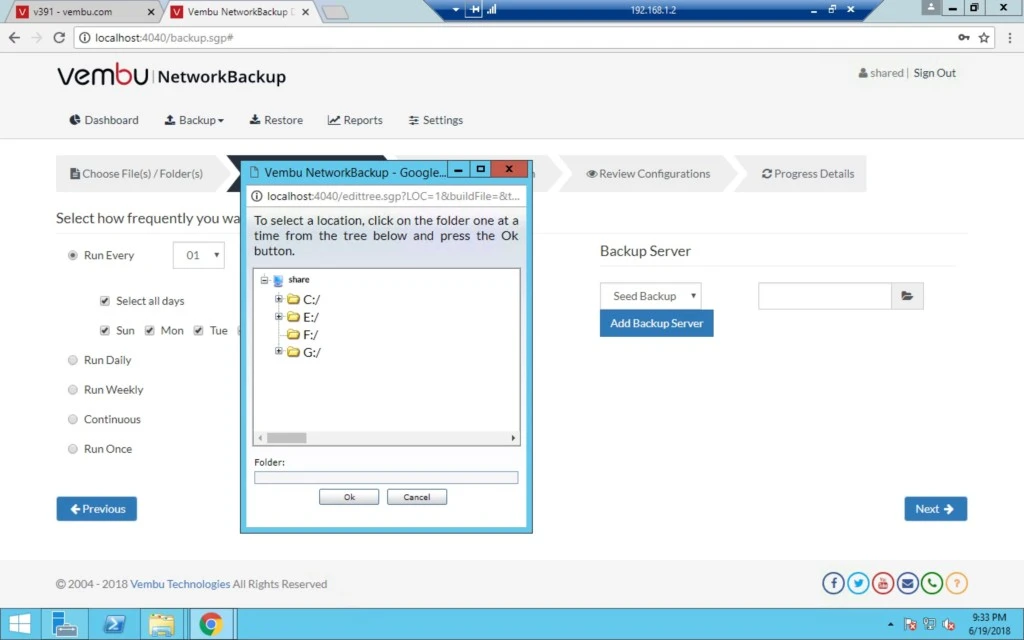
9. We can also schedule the backup for seed backup and click on the second option for Seed backup server.
Seed Backup migration is very efficient feature when it comes to copying a large backup initial data from a client machine to a backup server which helps in fastening the backup process and this can be taken in an external local drive connected to the client machine and then this drive can be easily moved to the remote backup server’s environment to migrate the data into the backup server. After performing the client side Seed Backup Migration steps, data migration and incremental backups can run directly from the client to the remote backup Server. (Reference storgrid.com)
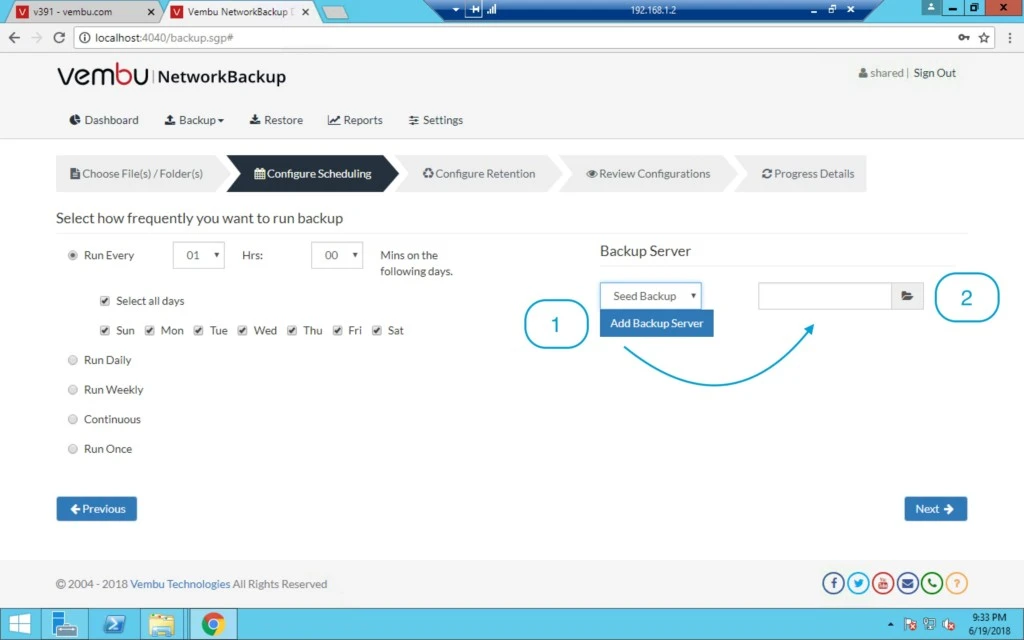
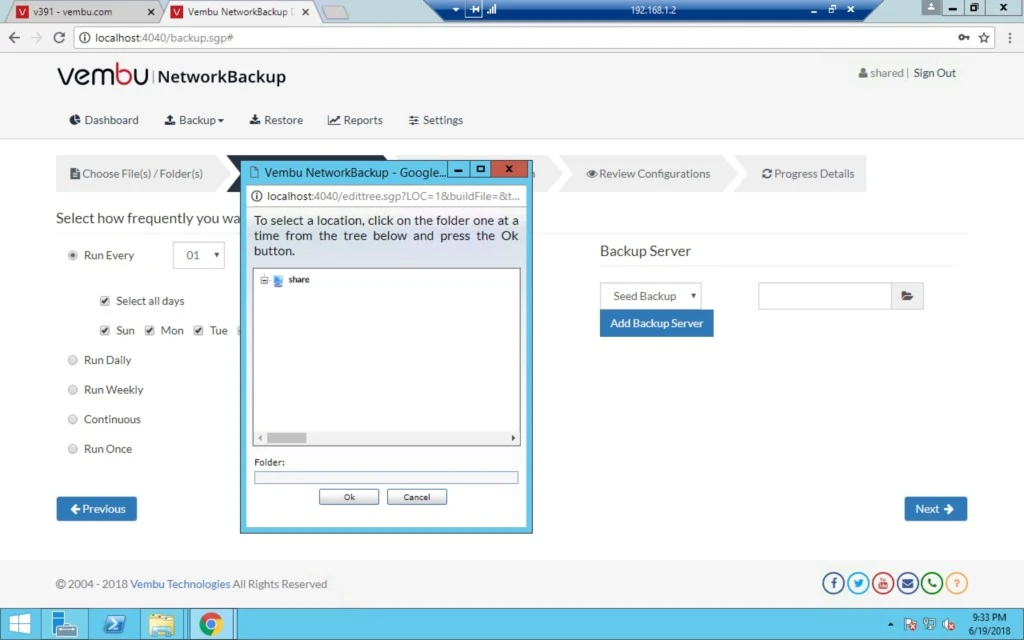
10. Here you can select the drive where you will keep this backup.
Seed backup migration is one of the key features in the Vembu BDR suite, where a user can get the initial full backup data stored locally and get it transferred over a storage medium (HDD/USB) to a backup server.
Advantages:
- This will be helpful for users with low bandwidth network and large backup size.
- At most times, reduce bandwidth and time consumed.
11. Now we have two options on the left-hand side.
A) Backed up files
B) For deleted files
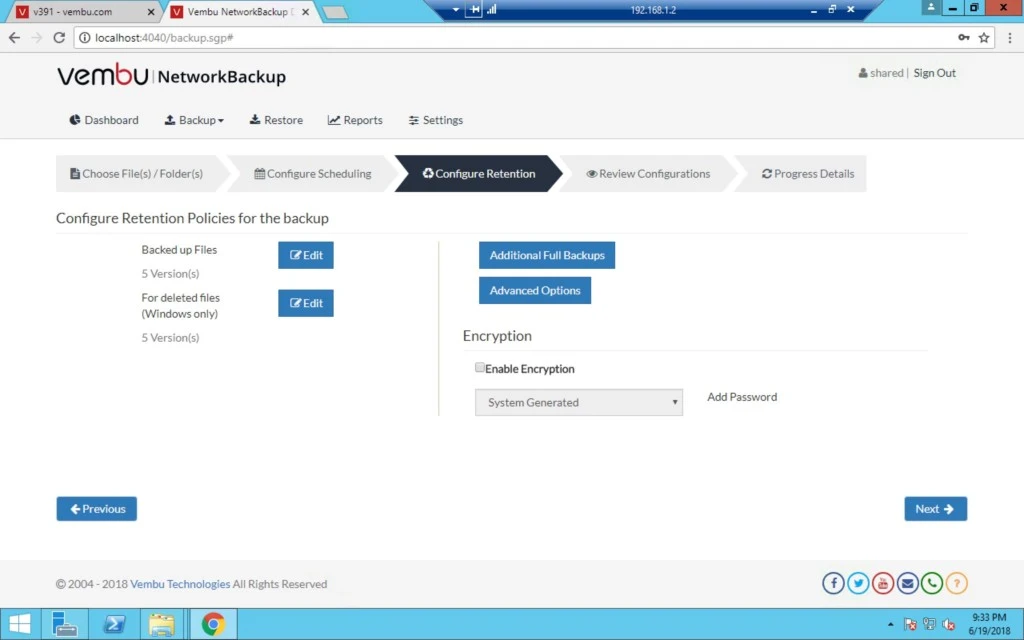
12) Backed up files -> under this you have two options.
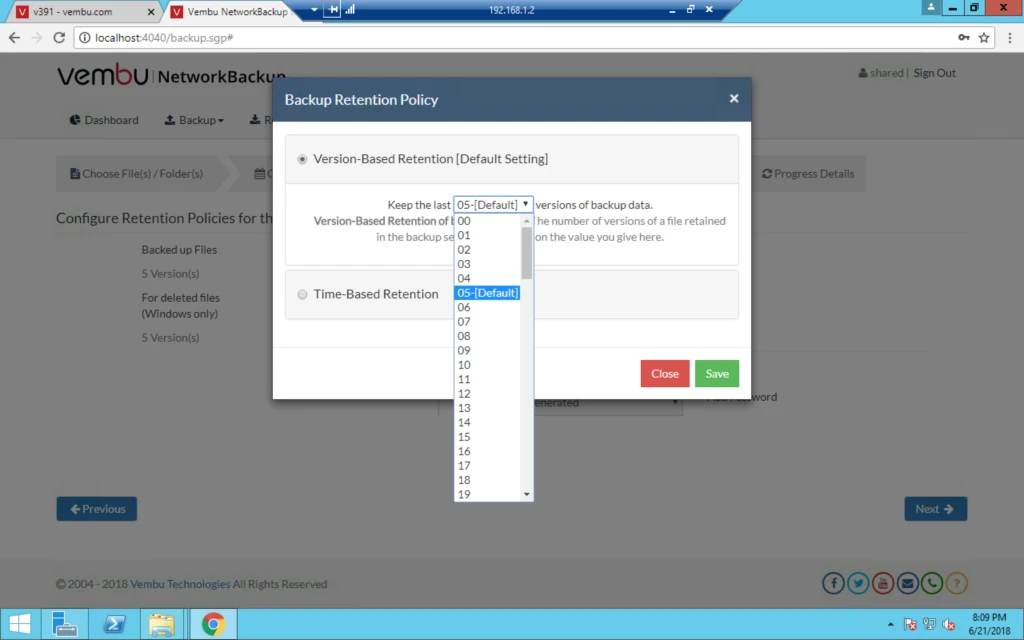
i) Version Based retention: here you can keep up to 99 versions and default is 5.
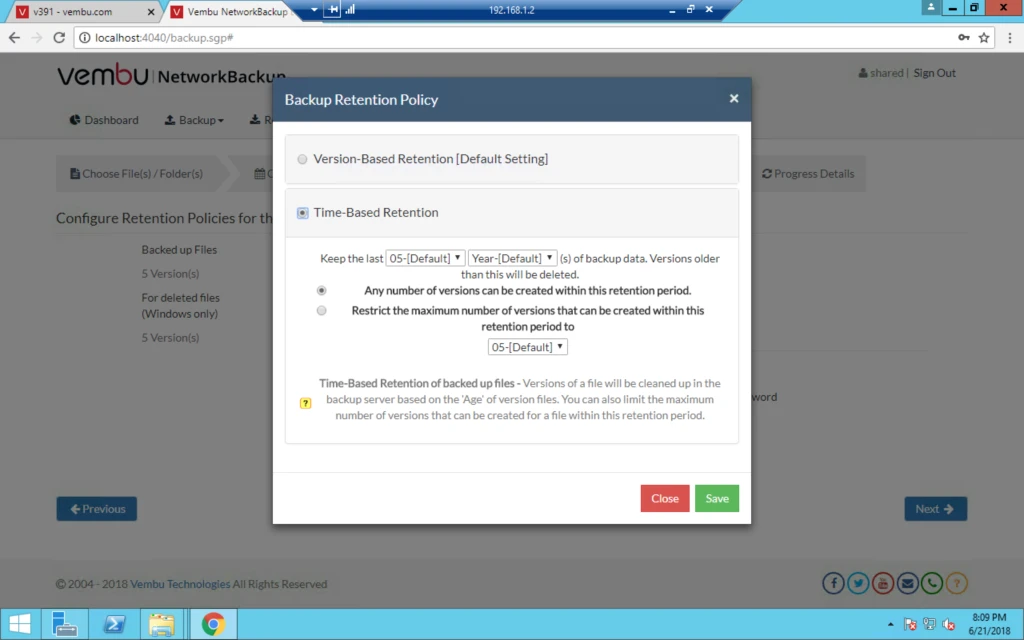
ii) Time-based retention: Maximum up to 10 and default is 5 with Days, Weeks, Months and Year.
Restrict the maximum number of versions that can be created within this retention period to Default 5 and Max 99.
13) Now Deletion Policy :
- Version-Based Retention.
- Time-Based Retention.
- Don’t retain deleted files.
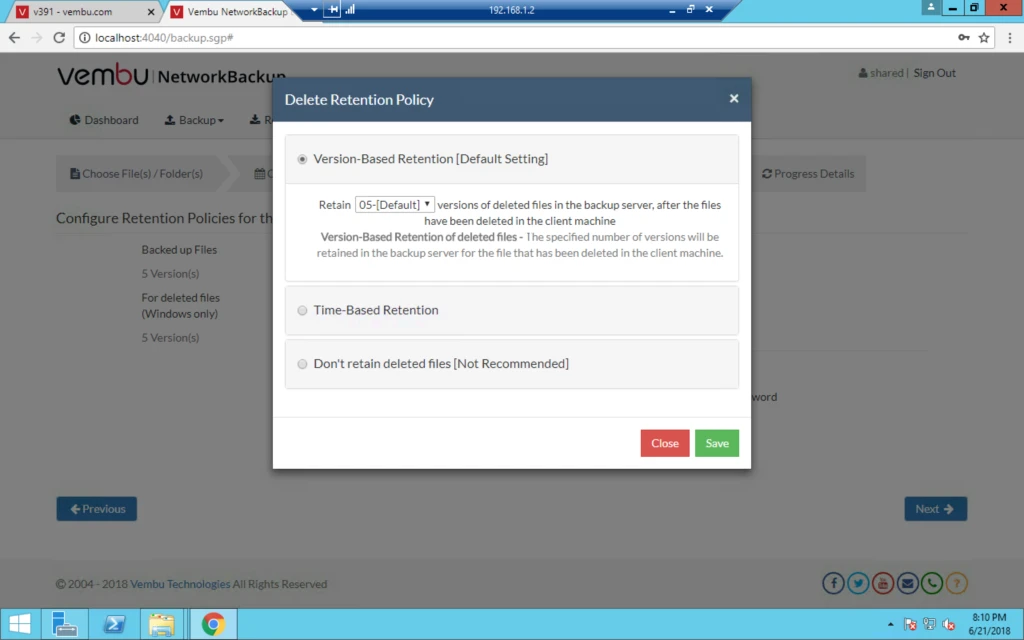
i) Time-Based Retention of deleted files – The versions of a file will be retained for the specified time period after the file has been deleted in the client machine.
ii) Don’t retain deleted files – If files are deleted in the client machine, ALL versions of these files will be deleted from the server as well.
iii) If you click on Additional full backup then you can see below screen.
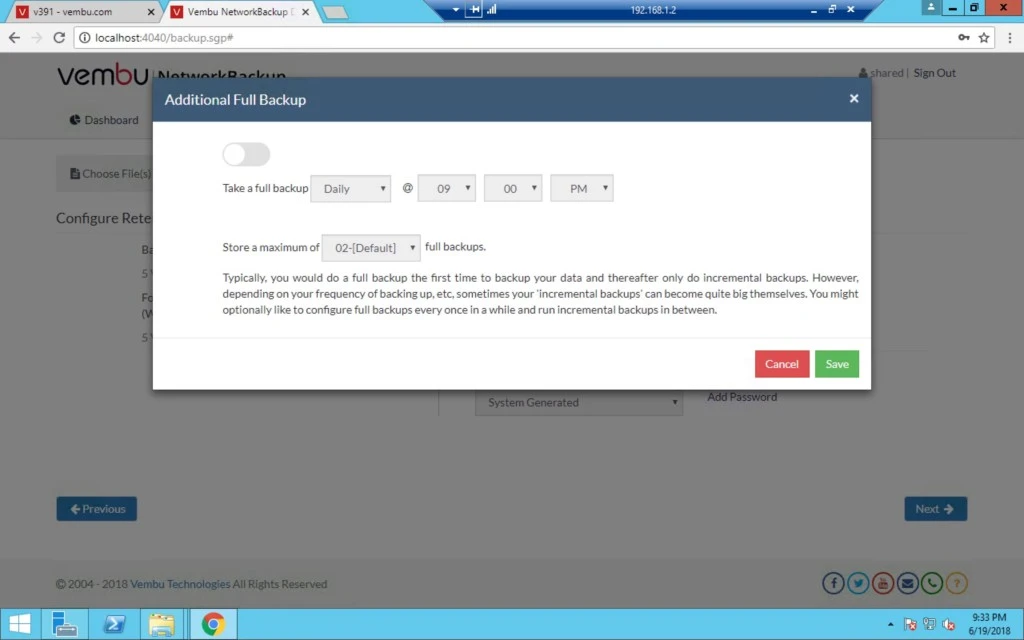
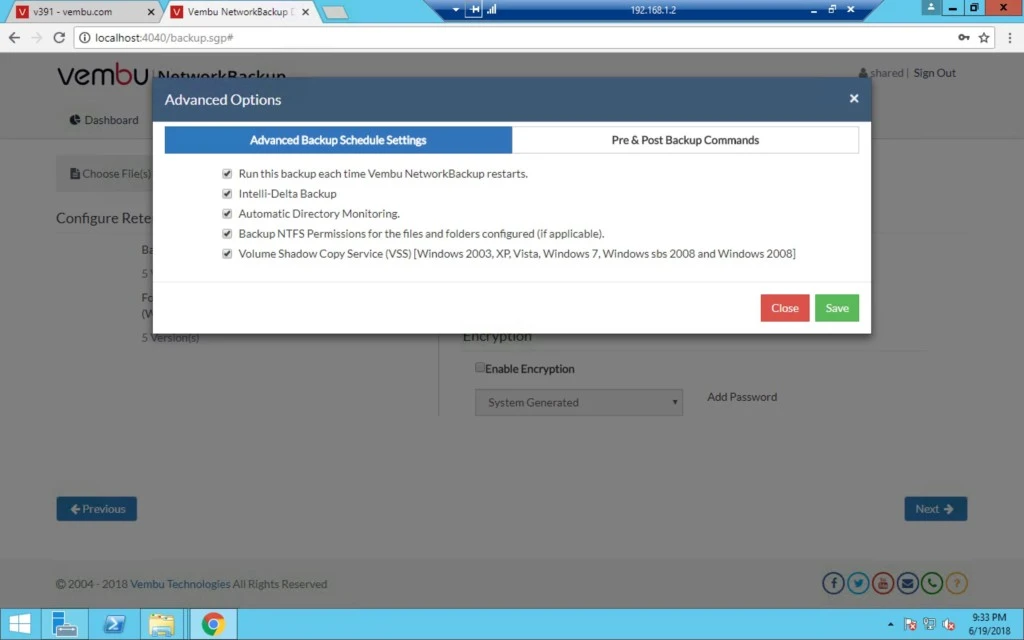
14. In Advanced option, you have two choices :
a) Advanced backup schedule settings
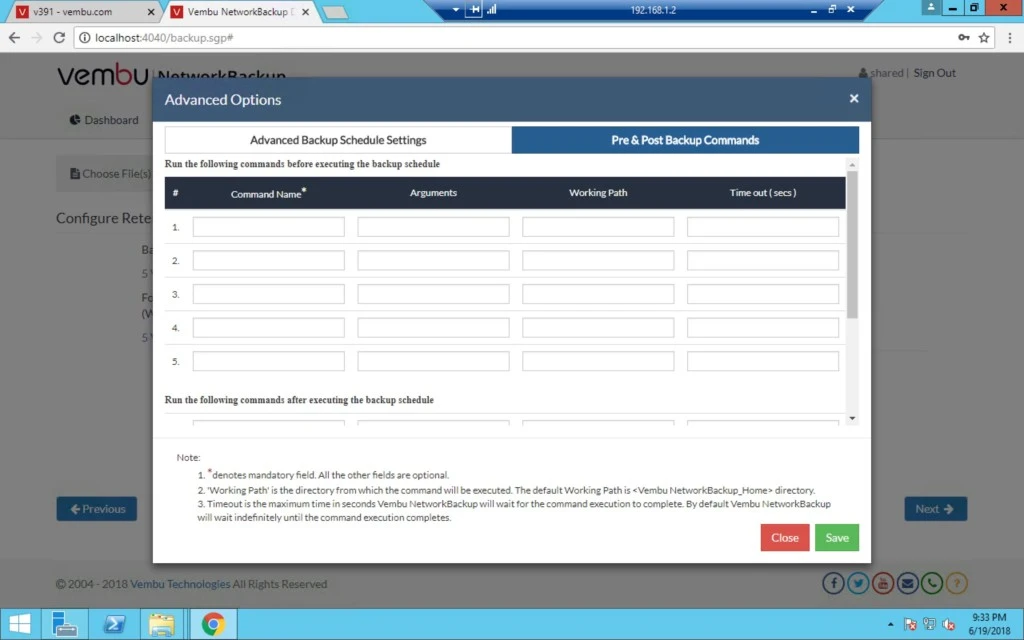
b) Pre & Post backup commands
15. If you have any script or command which you want to run before and after backup then configure here.
16. Now Type Job name is a mandatory field and after that Save this job.