0

New Vembu BDR Suite v4.0

New Features:

  • Hyper-V cluster backup: Vembu support backing up the VMs in the cluster and even if VMs configured for backup are moved from one host to another, the incremental backup will continue to happen without any interruption.
  • Shared VHDx backup: Vembu supports backup of the shared VHDx of Hyper-V.
  • CheckSum based incrementals: Vembu uses CBT for incremental backups. And for some CBT failure cases, we will be using CheckSum for the incremental to happen without any interruption.
  • Credential Manager: No need to enter credentials every time, Vembu Credential manager allows you to manage the credentials of the host and the VMs running in it.

Enhancement:

  • Where it was left off for Vembu ImageBackup: In Vembu ImagBackup, if the backup job gets interrupted due to network failure, it will resume from where it was left off.
  • Improved proxy functionality: All backup related requests are triggered by the BDR backup server, the proxy agent will only process the request sent by the BDR Server.
  • Virtual hardware selection: You can now configure the specification of the Virtual Hardware during the live recovery like the socket and core counts, memory, hard disk provision type, and network adapter.
  • Improved Hyper-V live recovery: During the recovery of the backed-up Hyper-V, a separate agent is pushed to the target machine for performing the full VM recovery.
  • Improved Application-aware for Hyper-V Backups: For all Hyper-V VMs, you can individually select the VM to which you want to enable Application Aware processing.
  • Abort Offsite Replication: You can now abort the replication job from the Vembu OffsiteDR server.
  • ODR Activation: You can now activate or deactivate a particular BDR server connected to an OffsiteDR server.
  • Quick VM Recovery report: You will get a report for Quick VM recovery process with details like VM Name, Recovery point, Start and End time, target hypervisor and the status of the recovery.
  • API’s to fetch storage details: The new set of APIs is designed to give a detailed report on storage utilization like the size of the VM, storage space utilized by a backup job, compression rate, etc.
  • VM disk inclusion: Previously, after the initial full backup, the newly added disk of the VM is backed up only on the next additional full backup. From v4.0, the newly added disk will be backed up along with the successive incremental.
0

How to Restore MS SQL database via Vembu

Topic outline:

MS SQL Restore

Previously Restored Data

Restore Data from Backup  

Time Stamp

Type of Restore

Recovery State


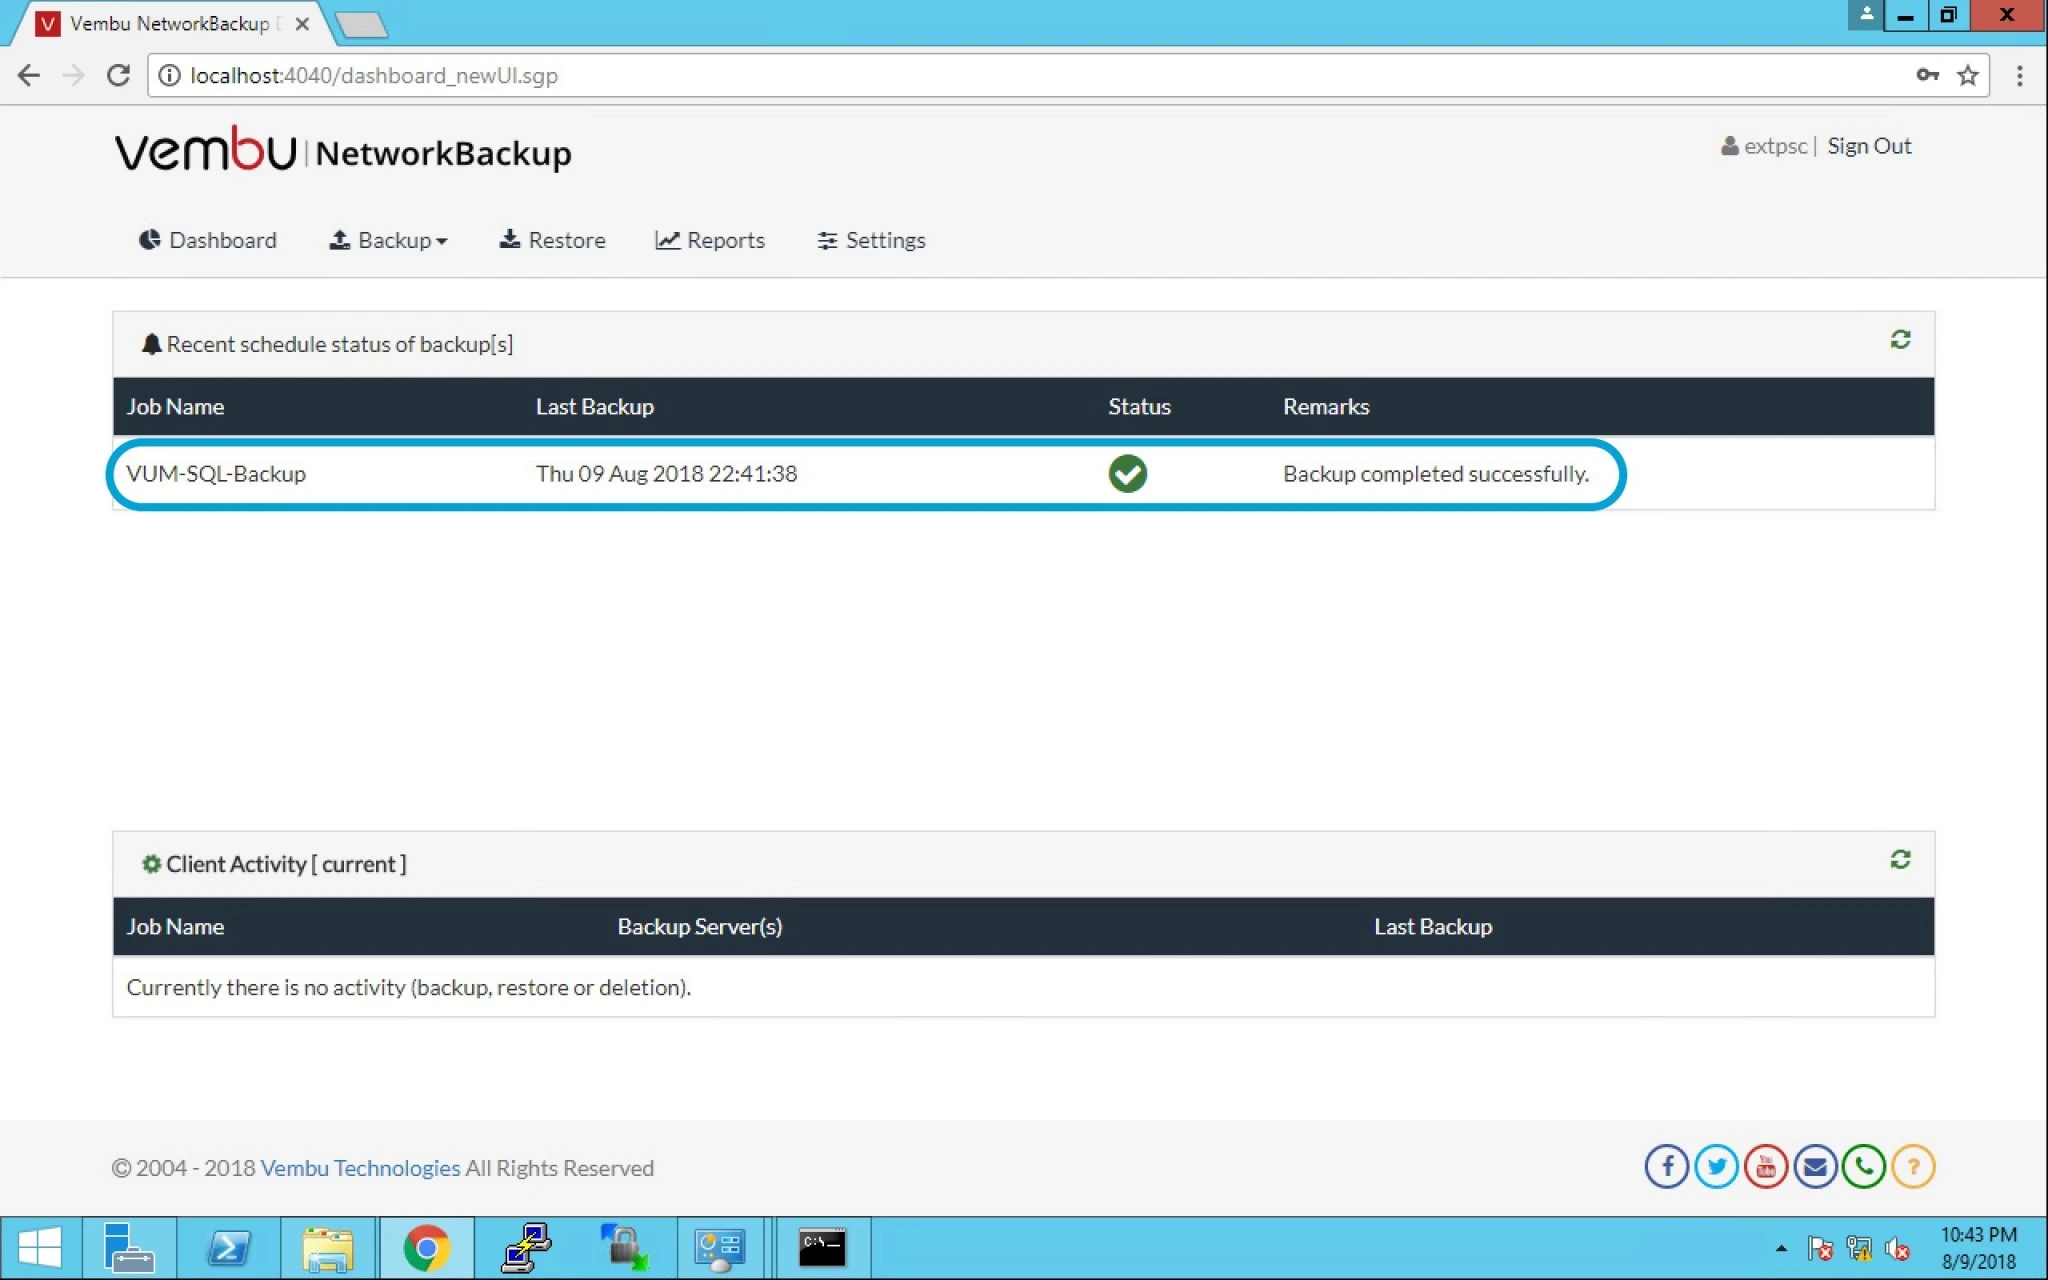
  1. Login into Vembu Network Backup page and check the last successfully completed backup.


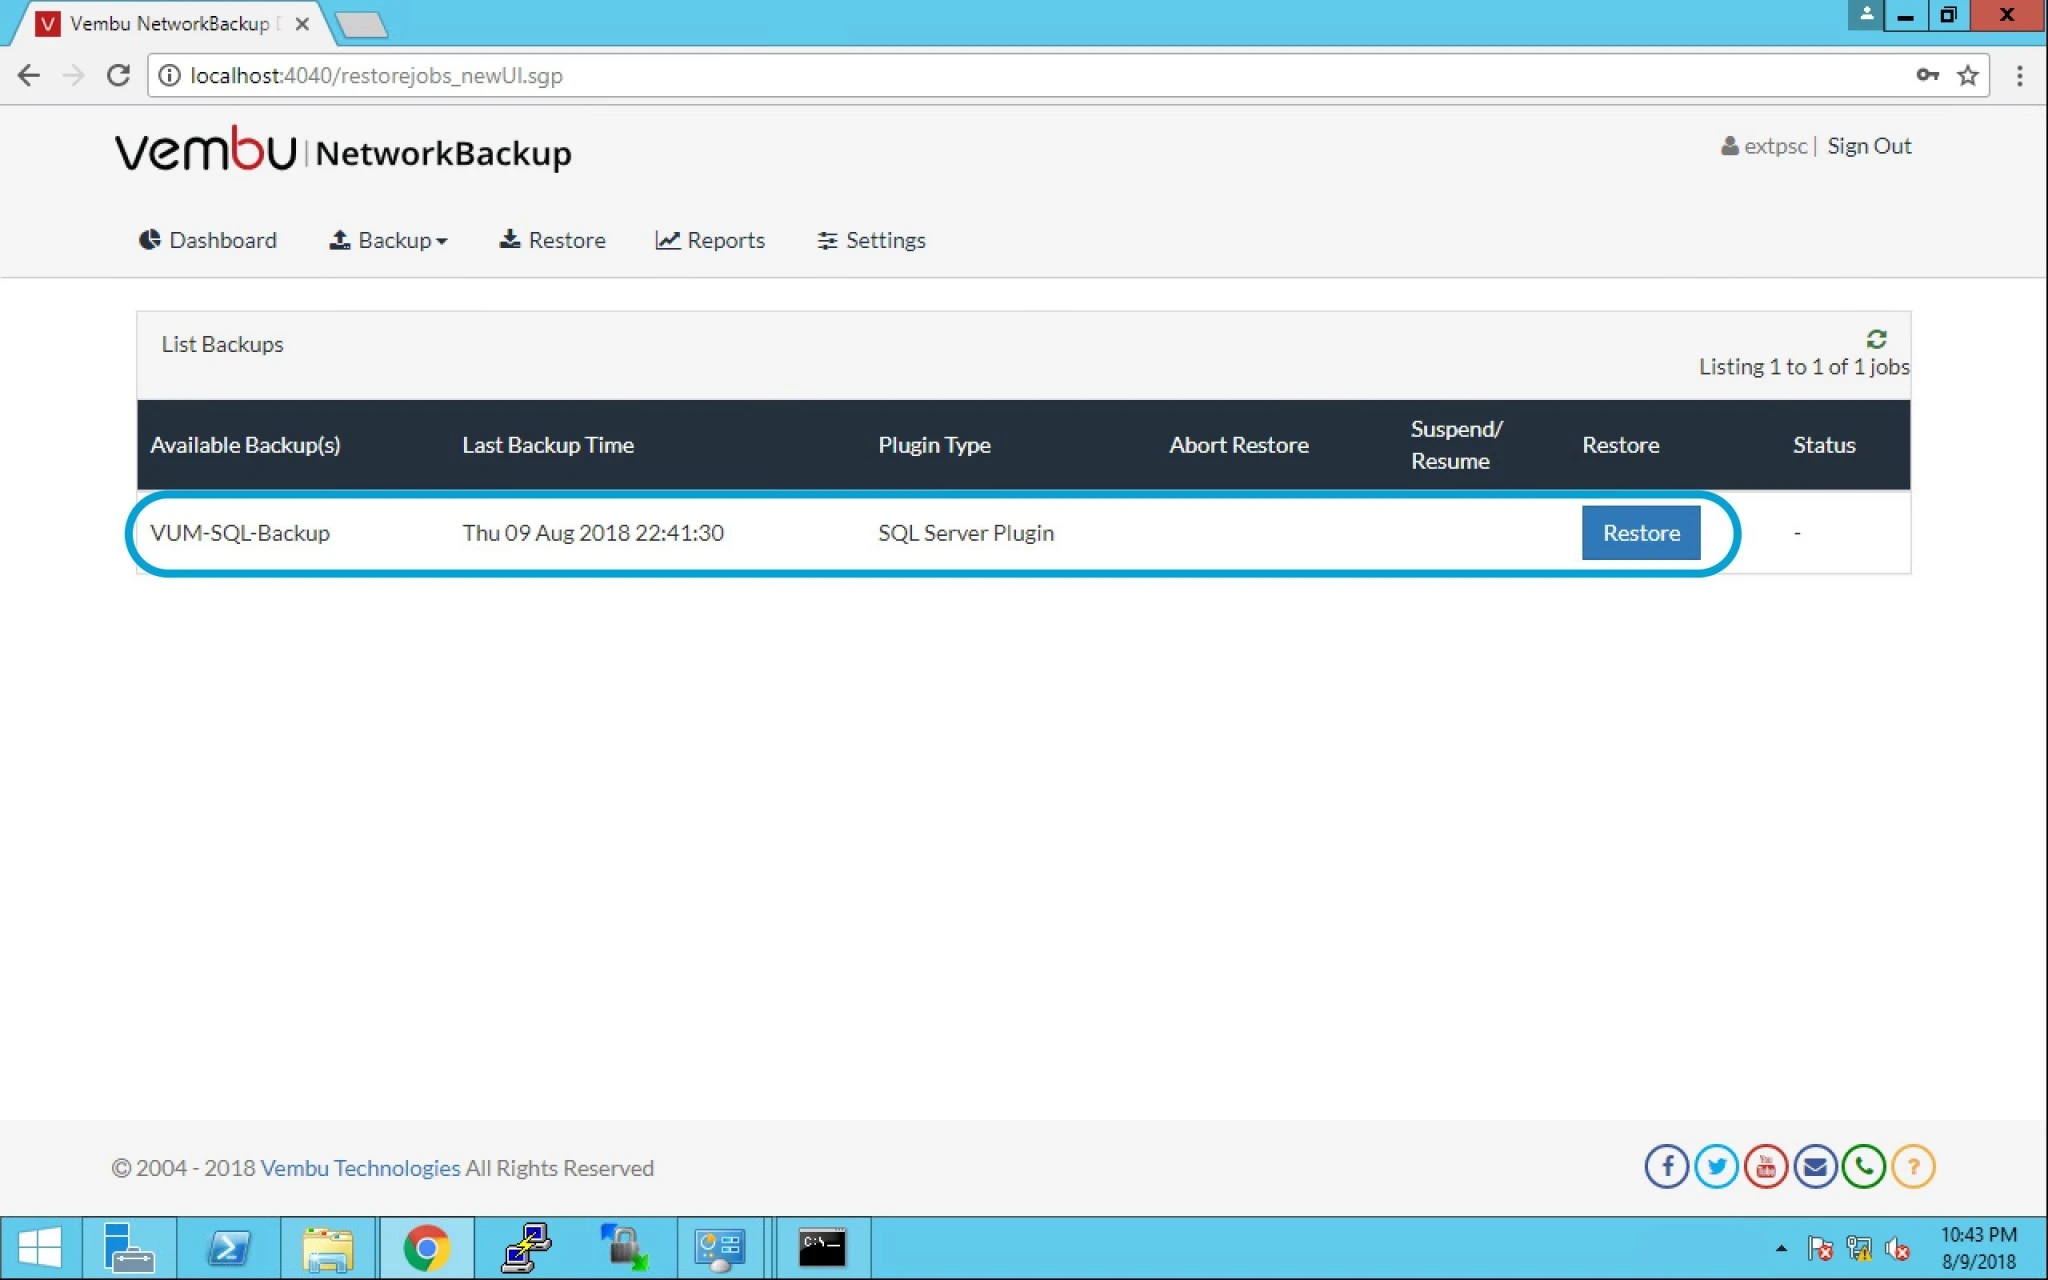
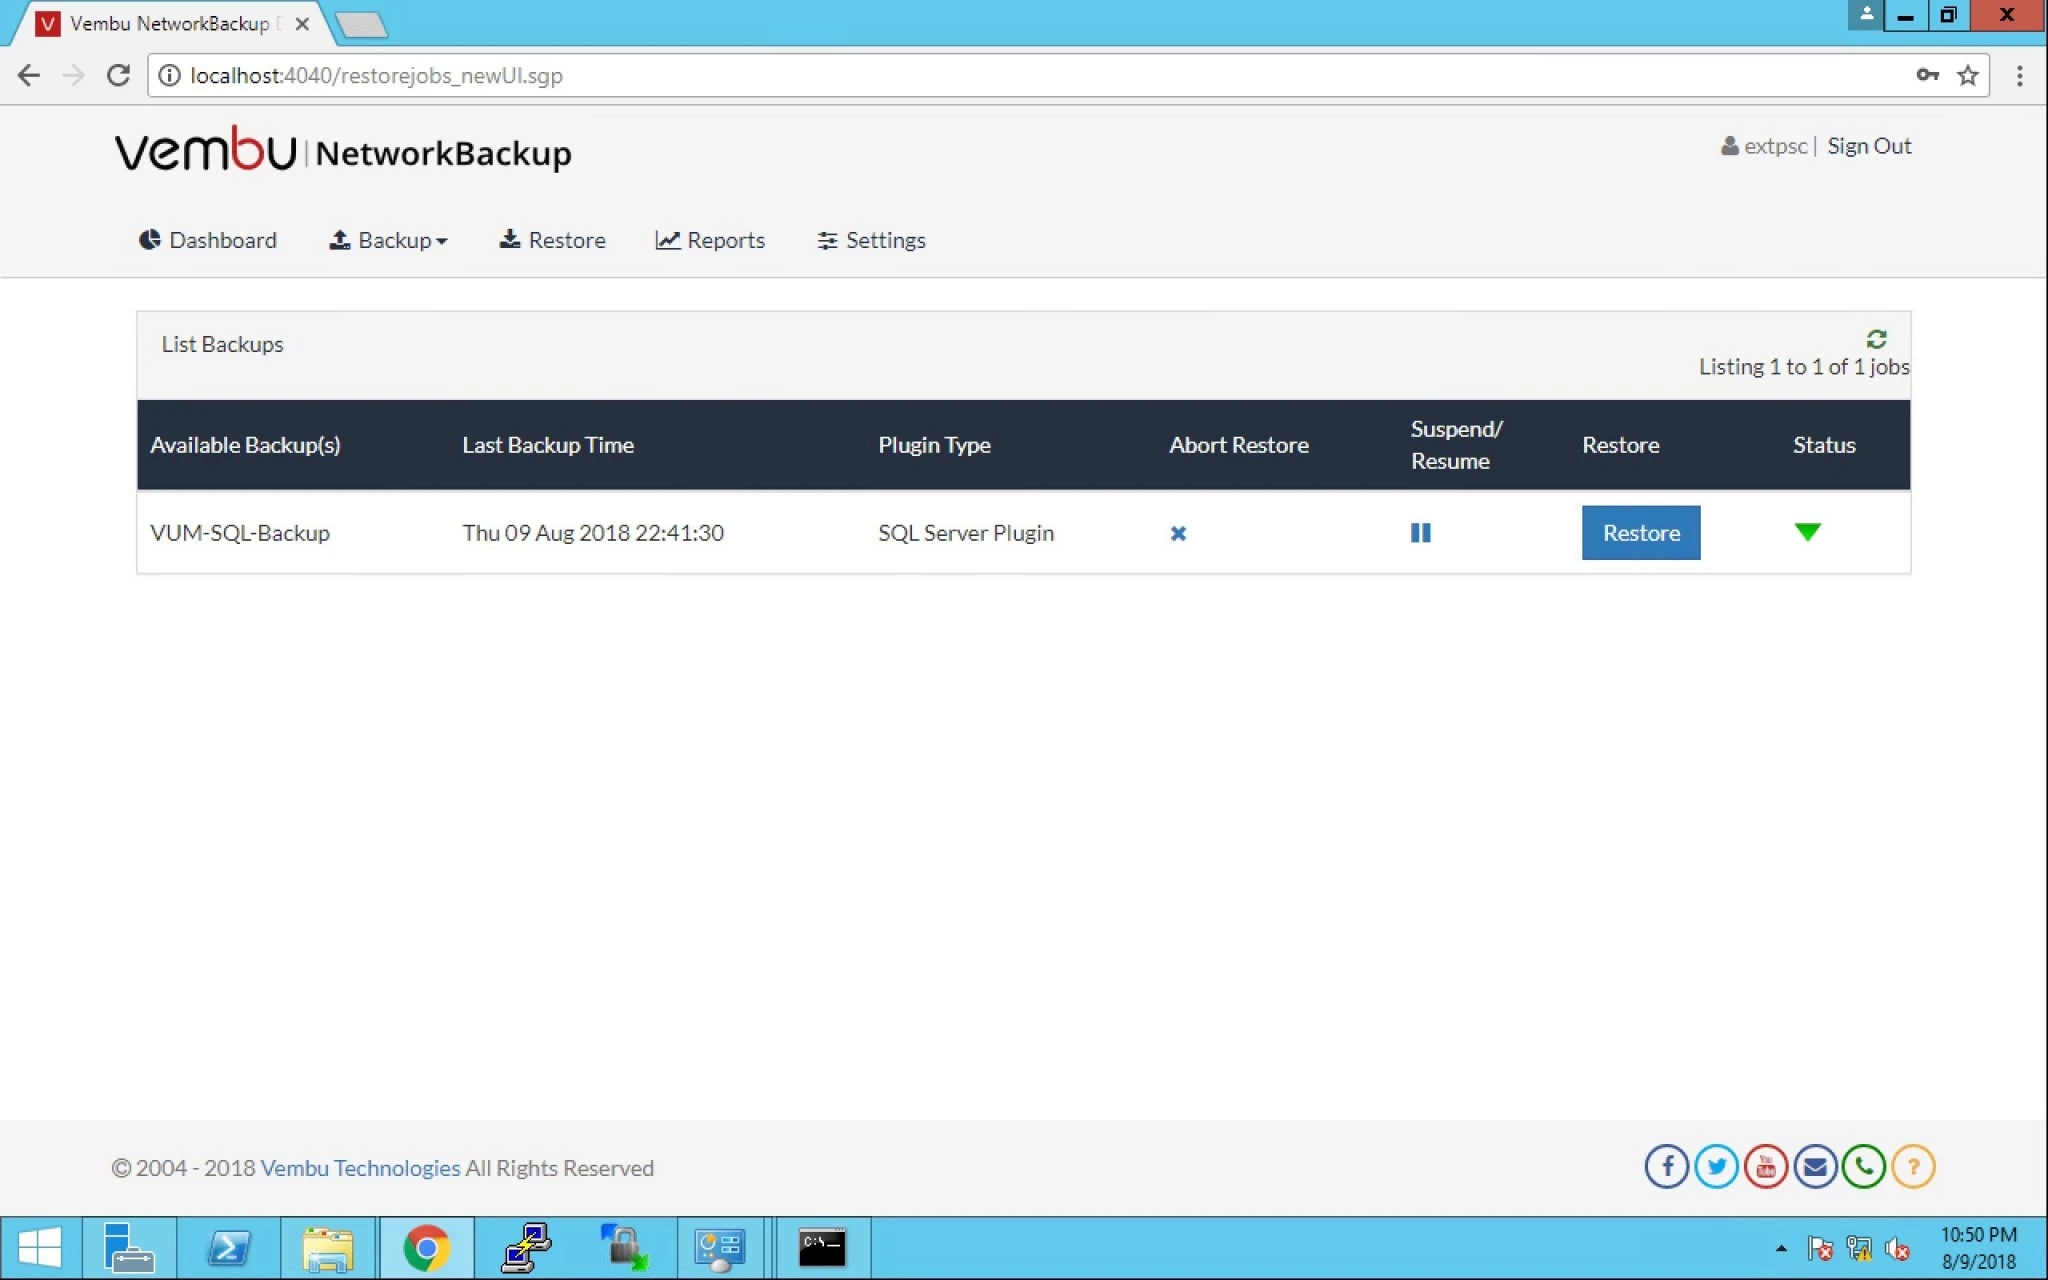
2. Now Click on Restore option and you can see available backup to restore.


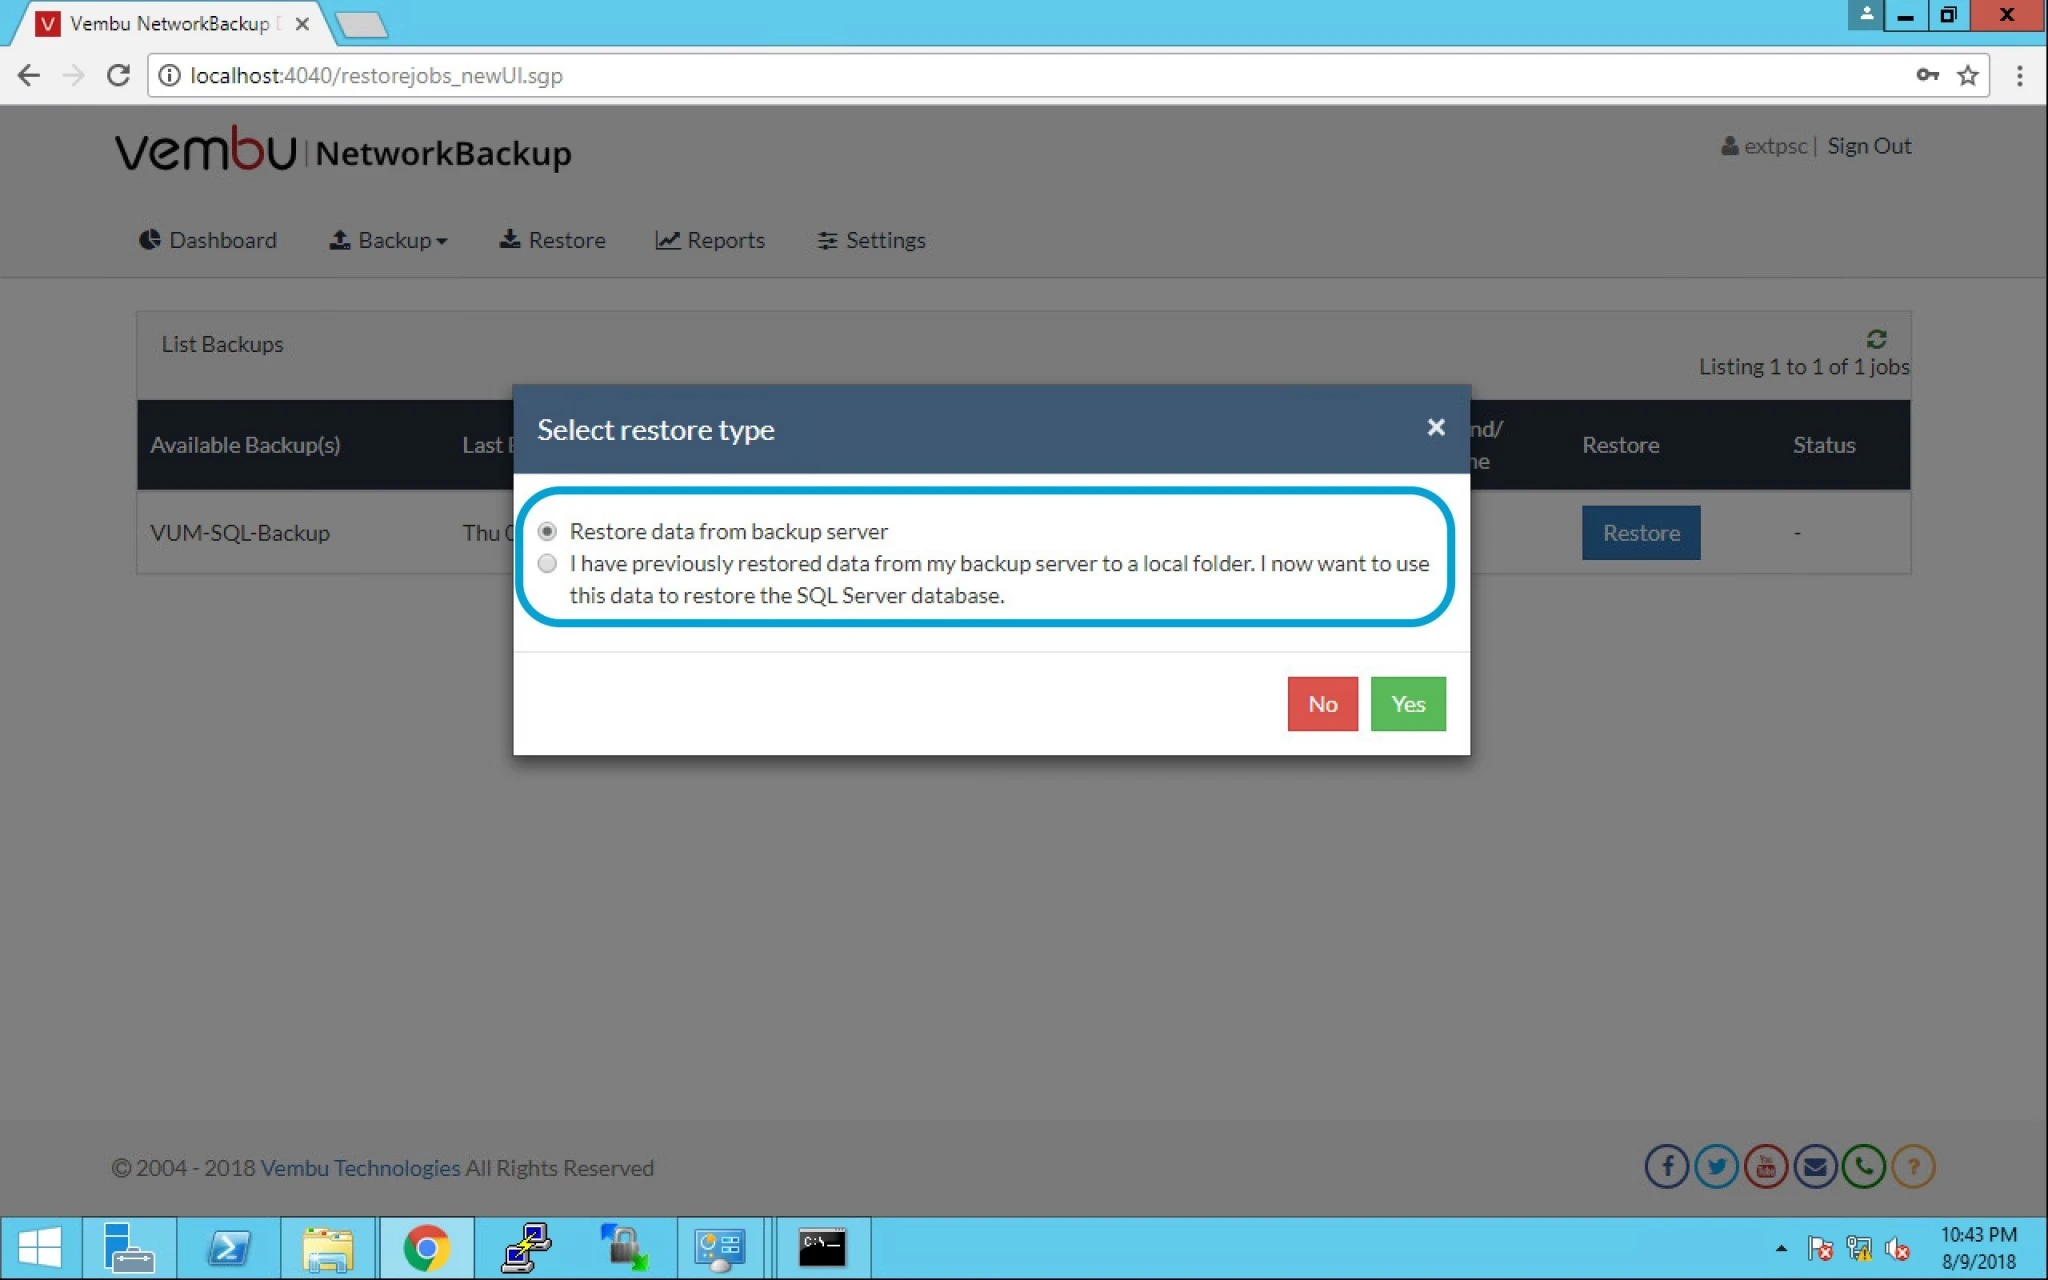
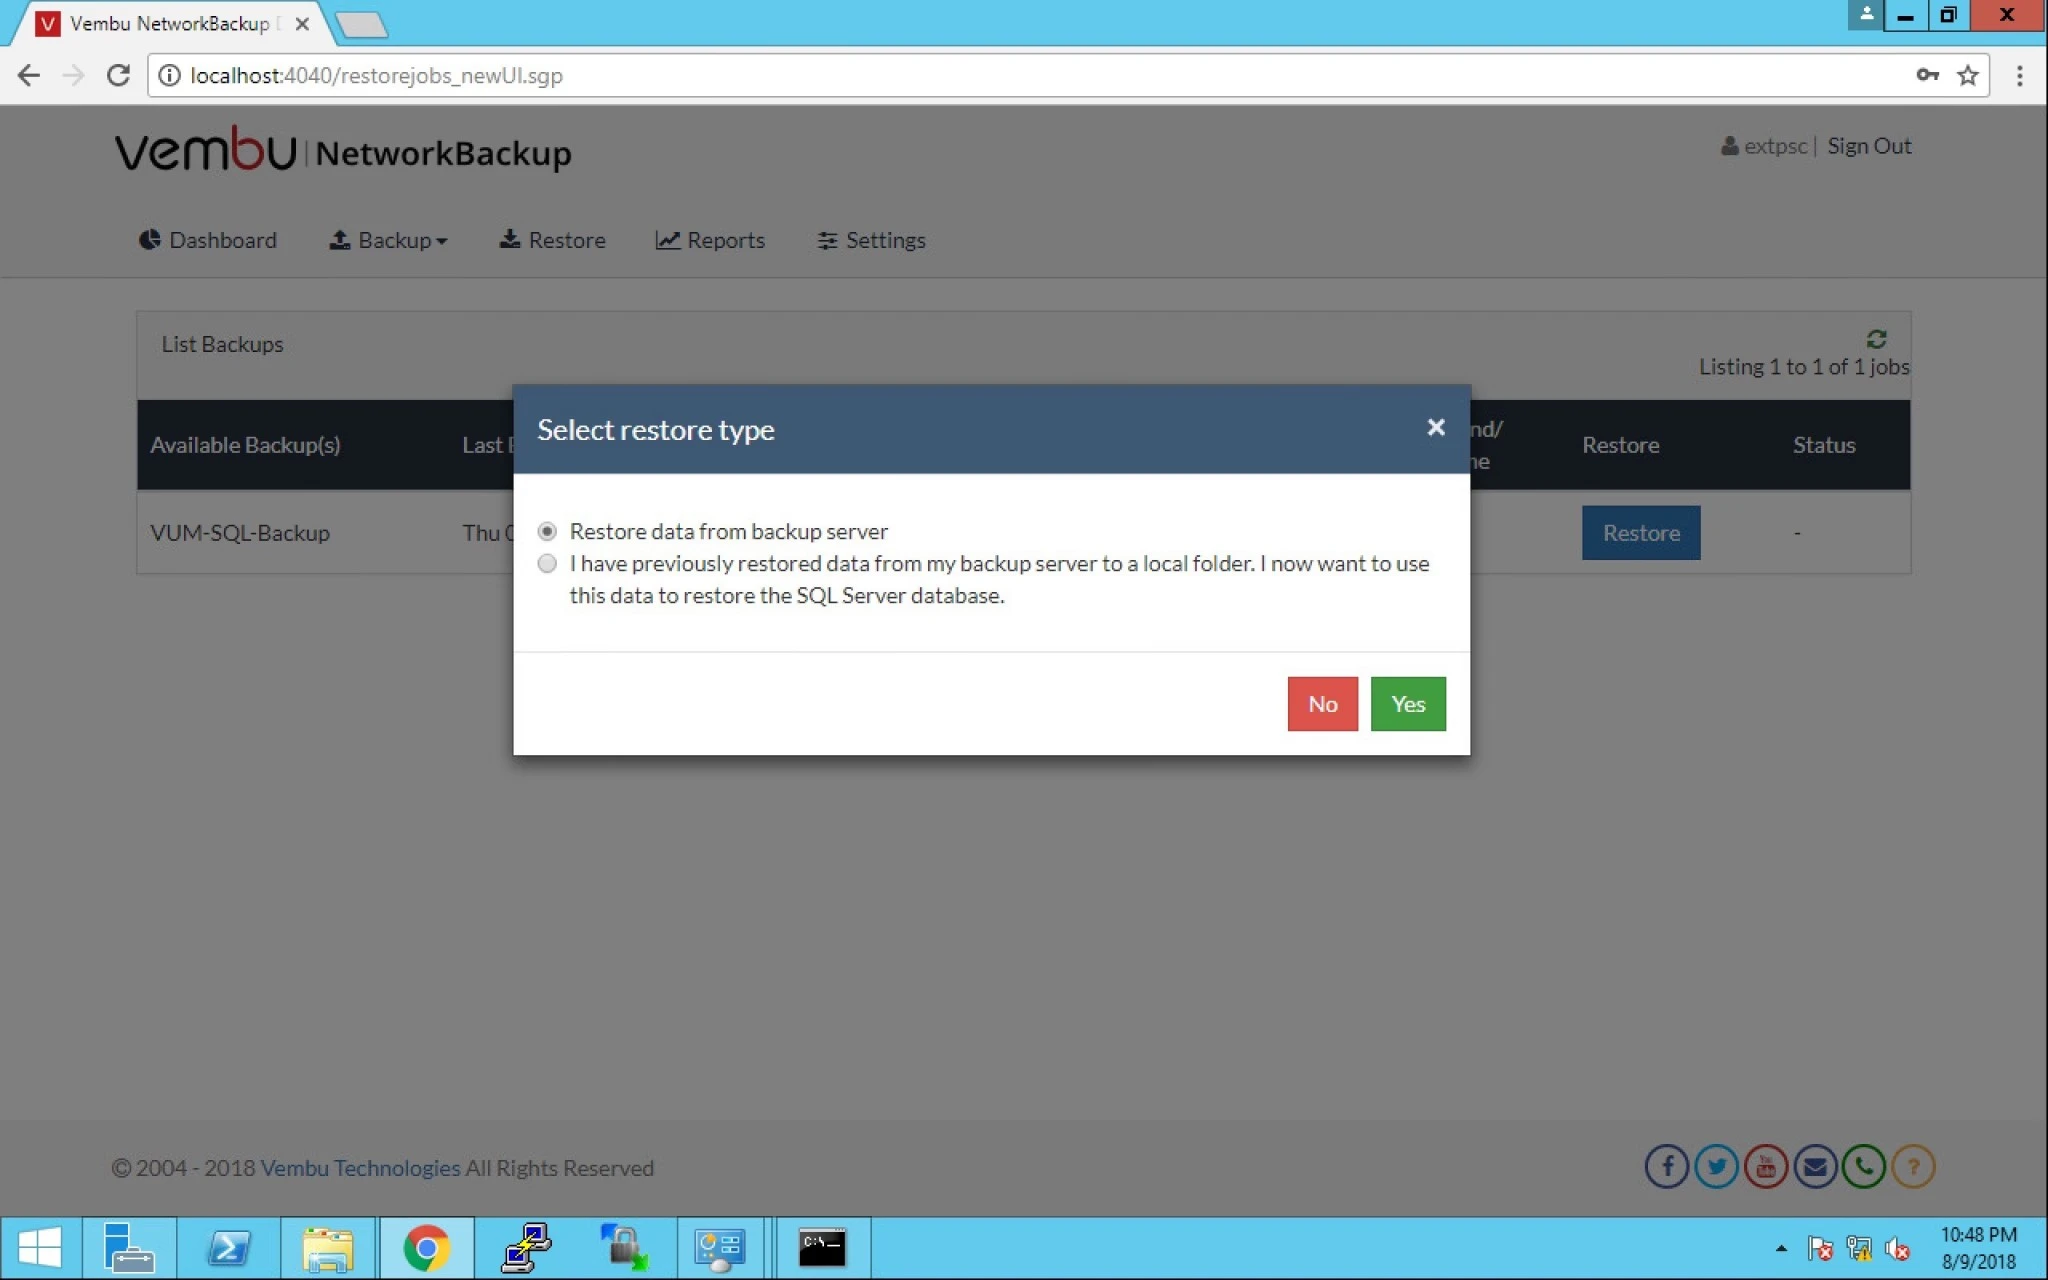
3. Now there are two options given below:

a) Restore Data from backup server. And

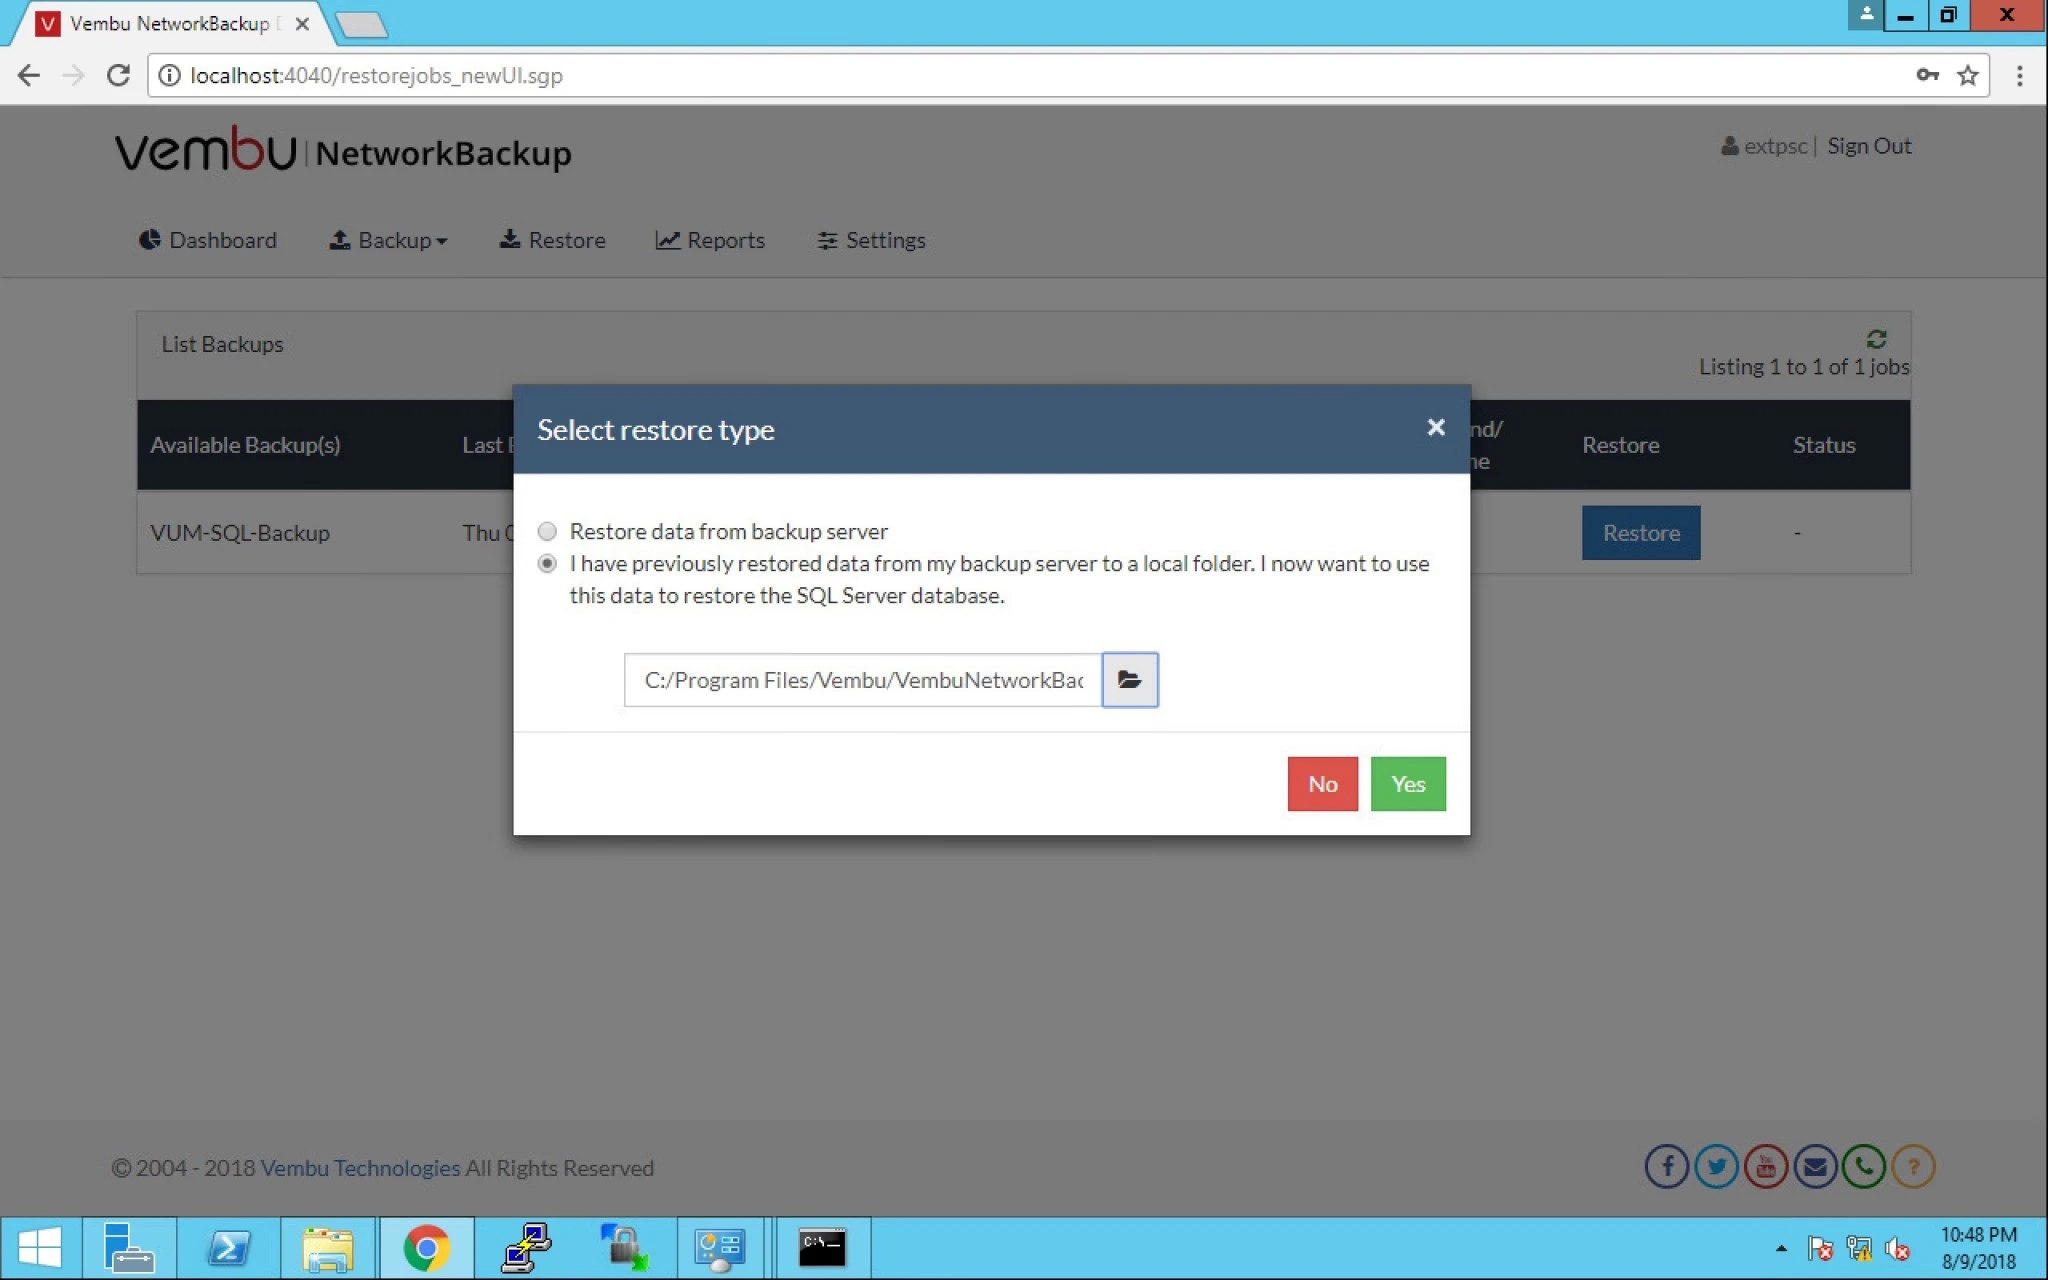
b) I have previously restored data from my backup server to a local folder. I now want to use this data to restore the MS SQL Server. 


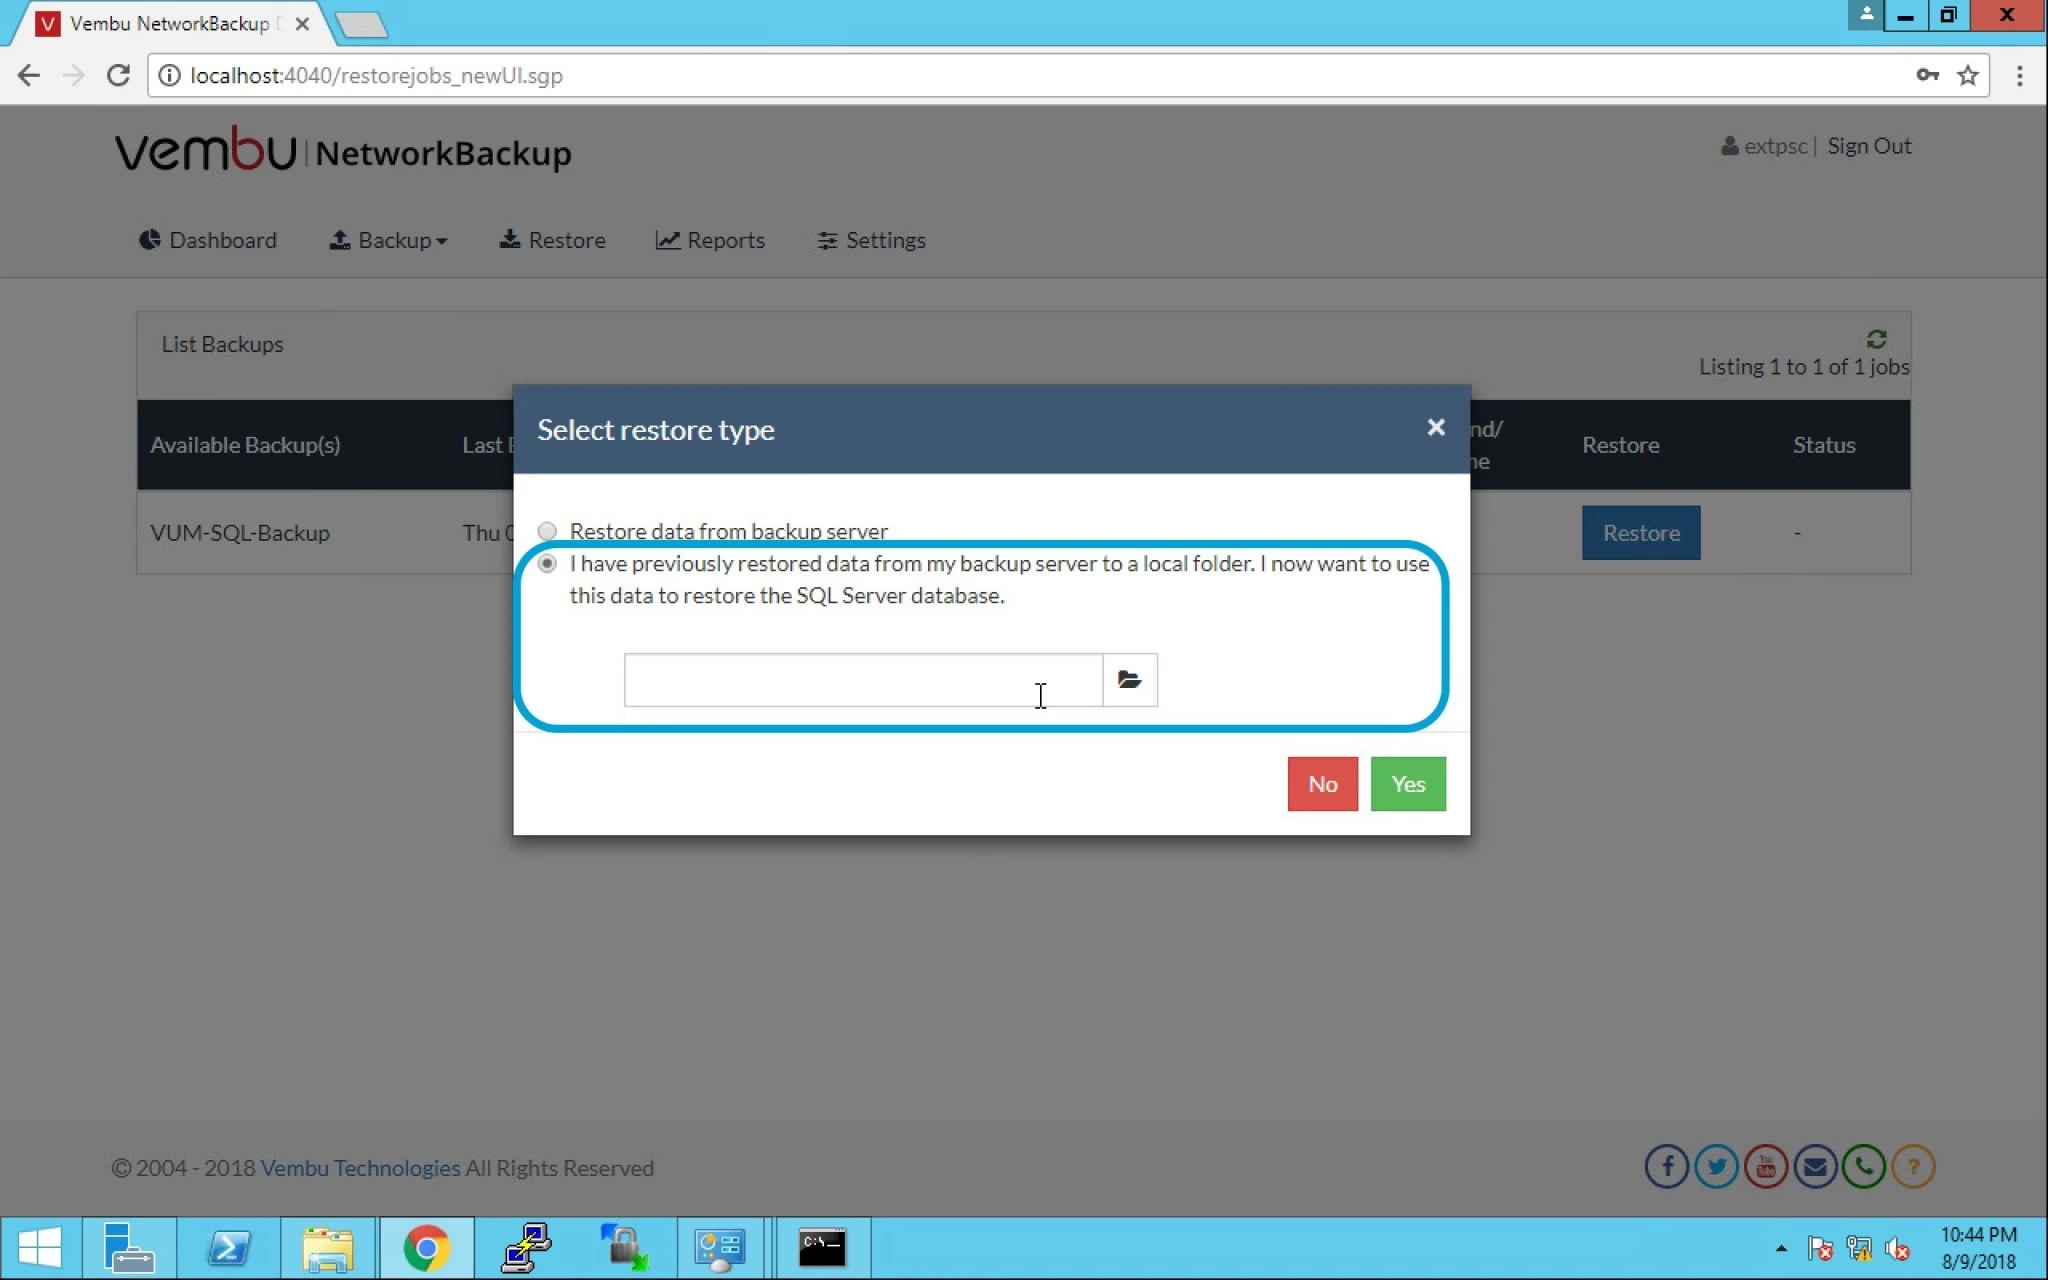
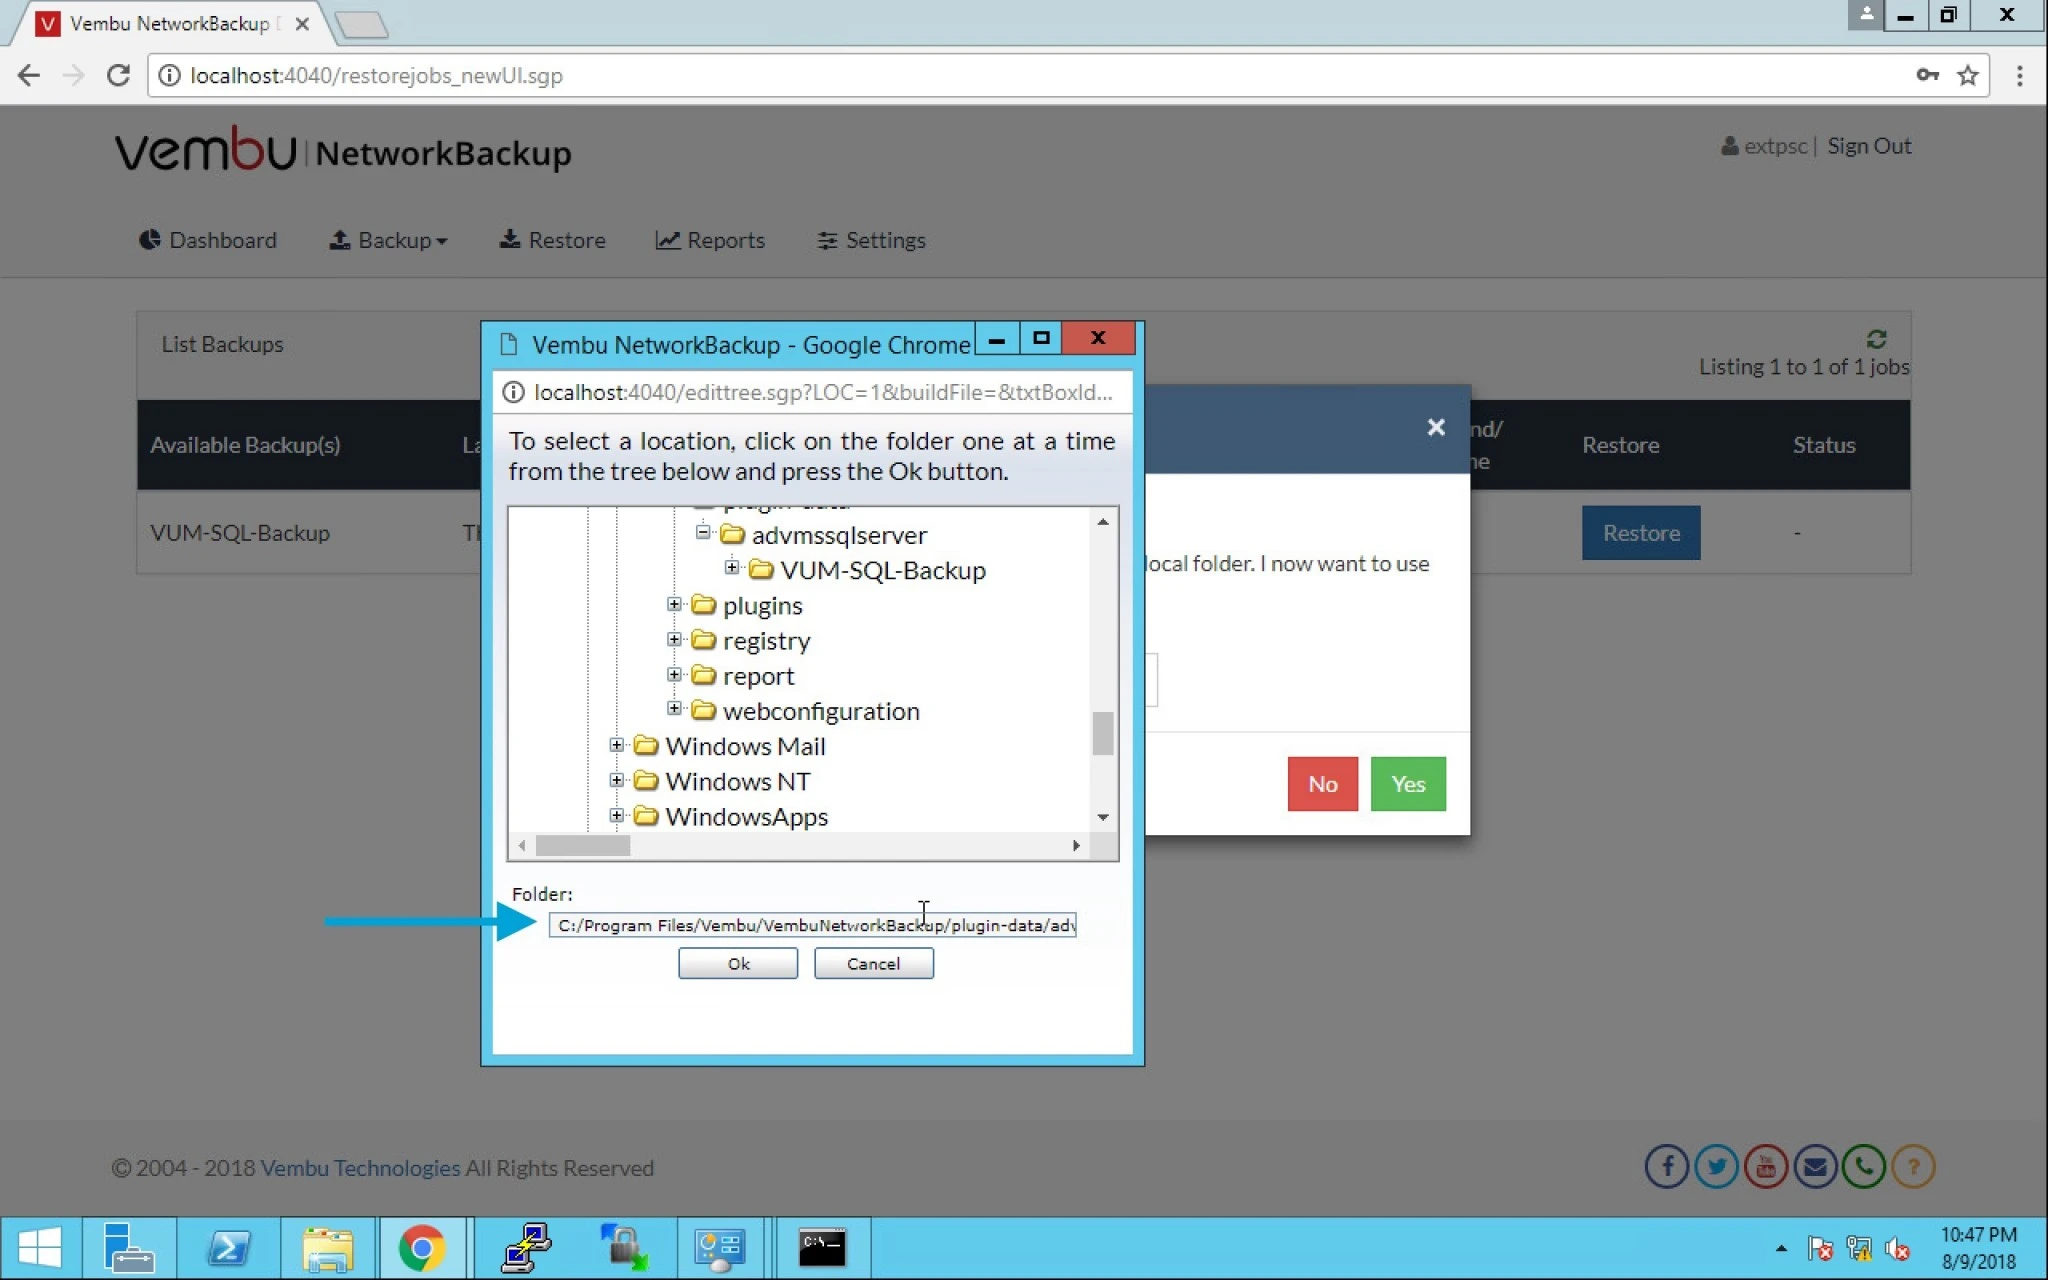
4. Browse the previously restored data from the backup server to a local folder.


5. Select the data location of the folder or path to the folder . Click Ok.


6. Click on Yes.


7. Let’s select the first one to get an overview of this option “Restore data from backup server”.


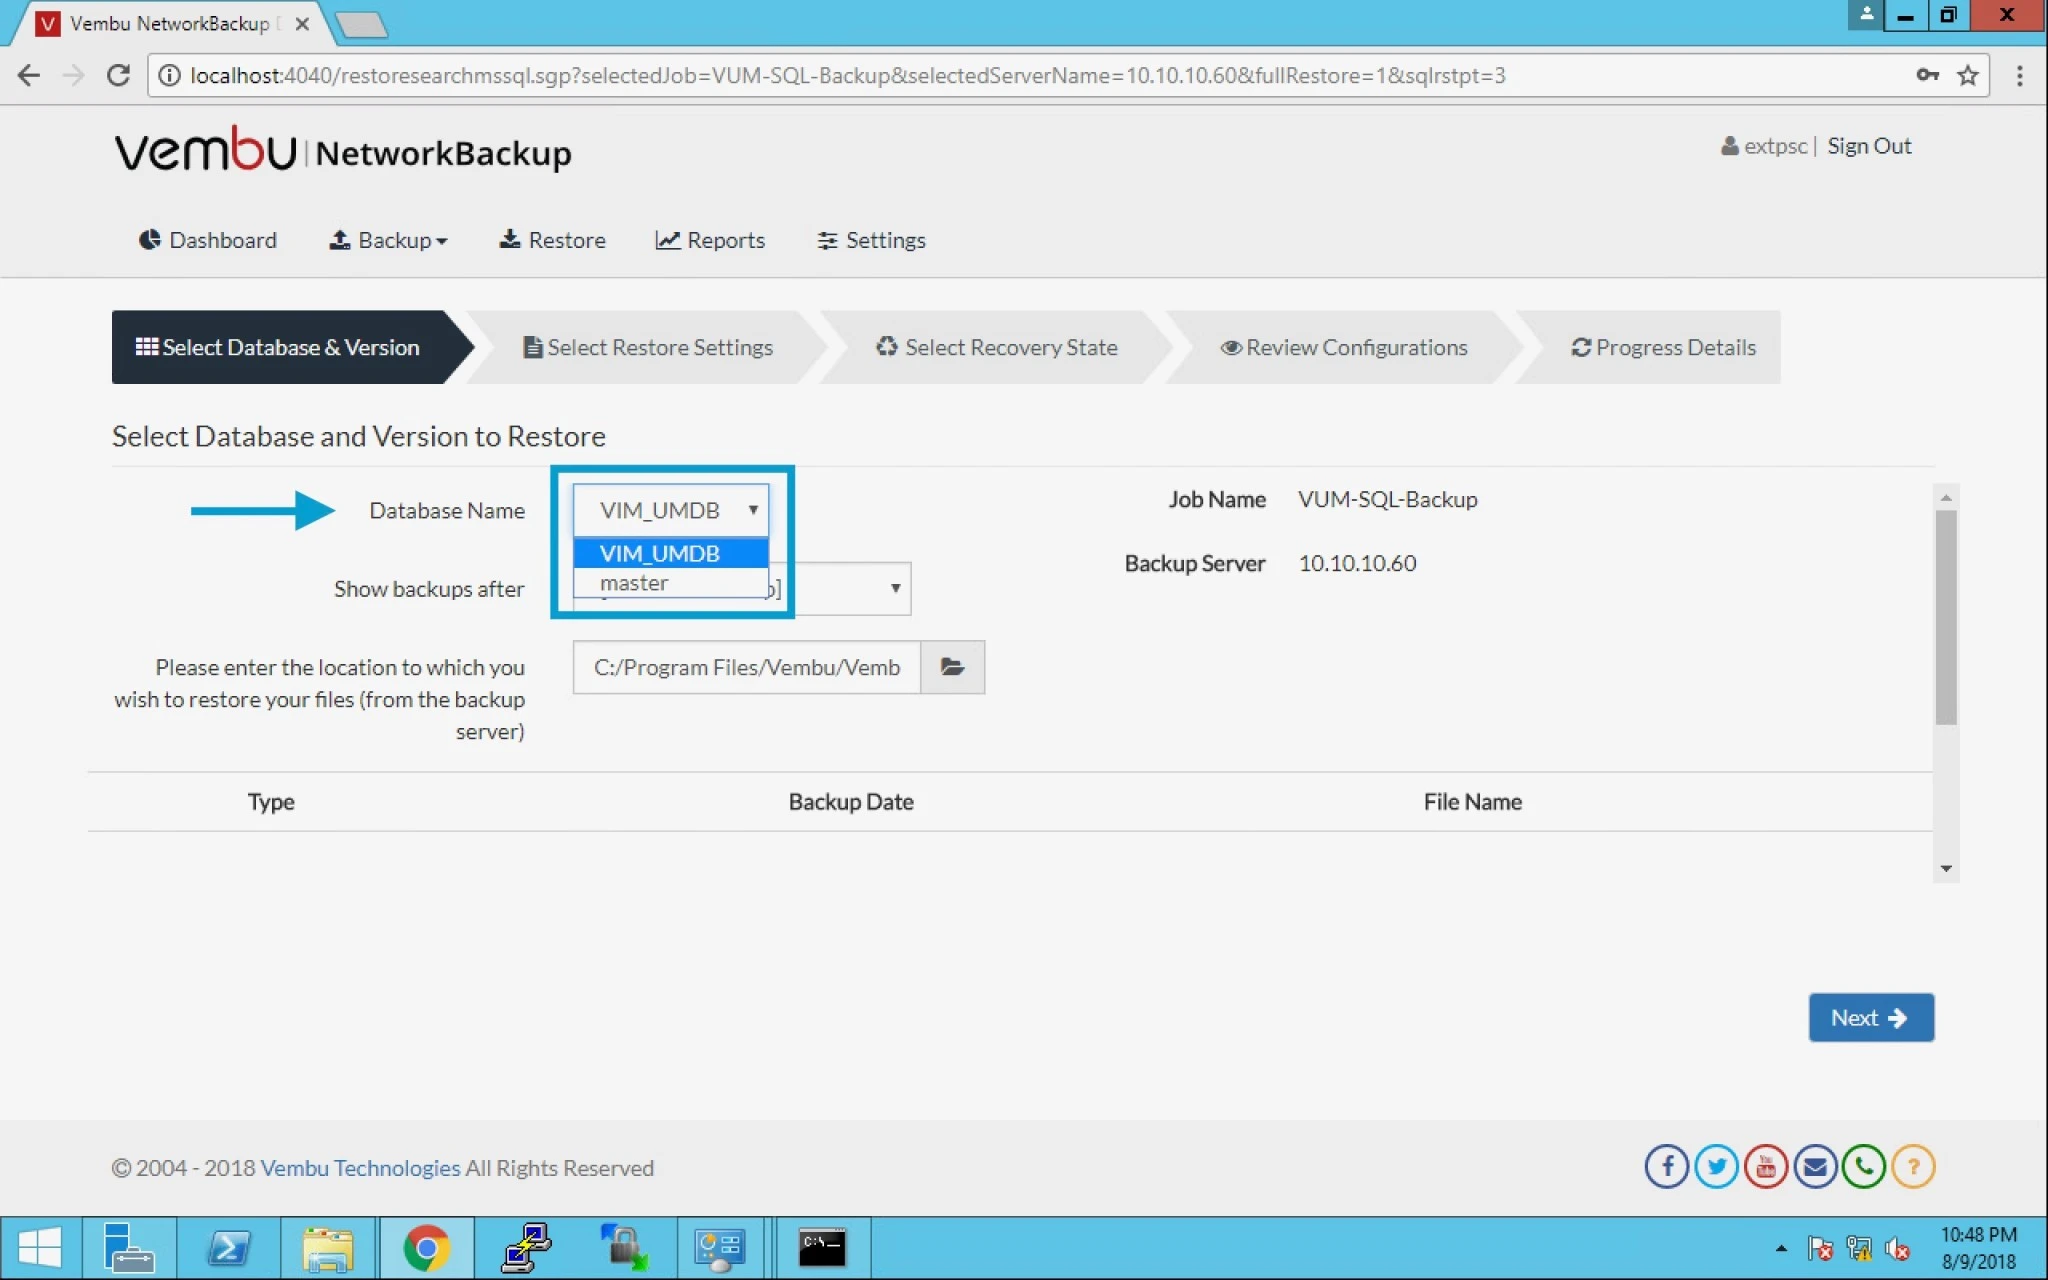
8. Now select the below information:

a) Database Name.

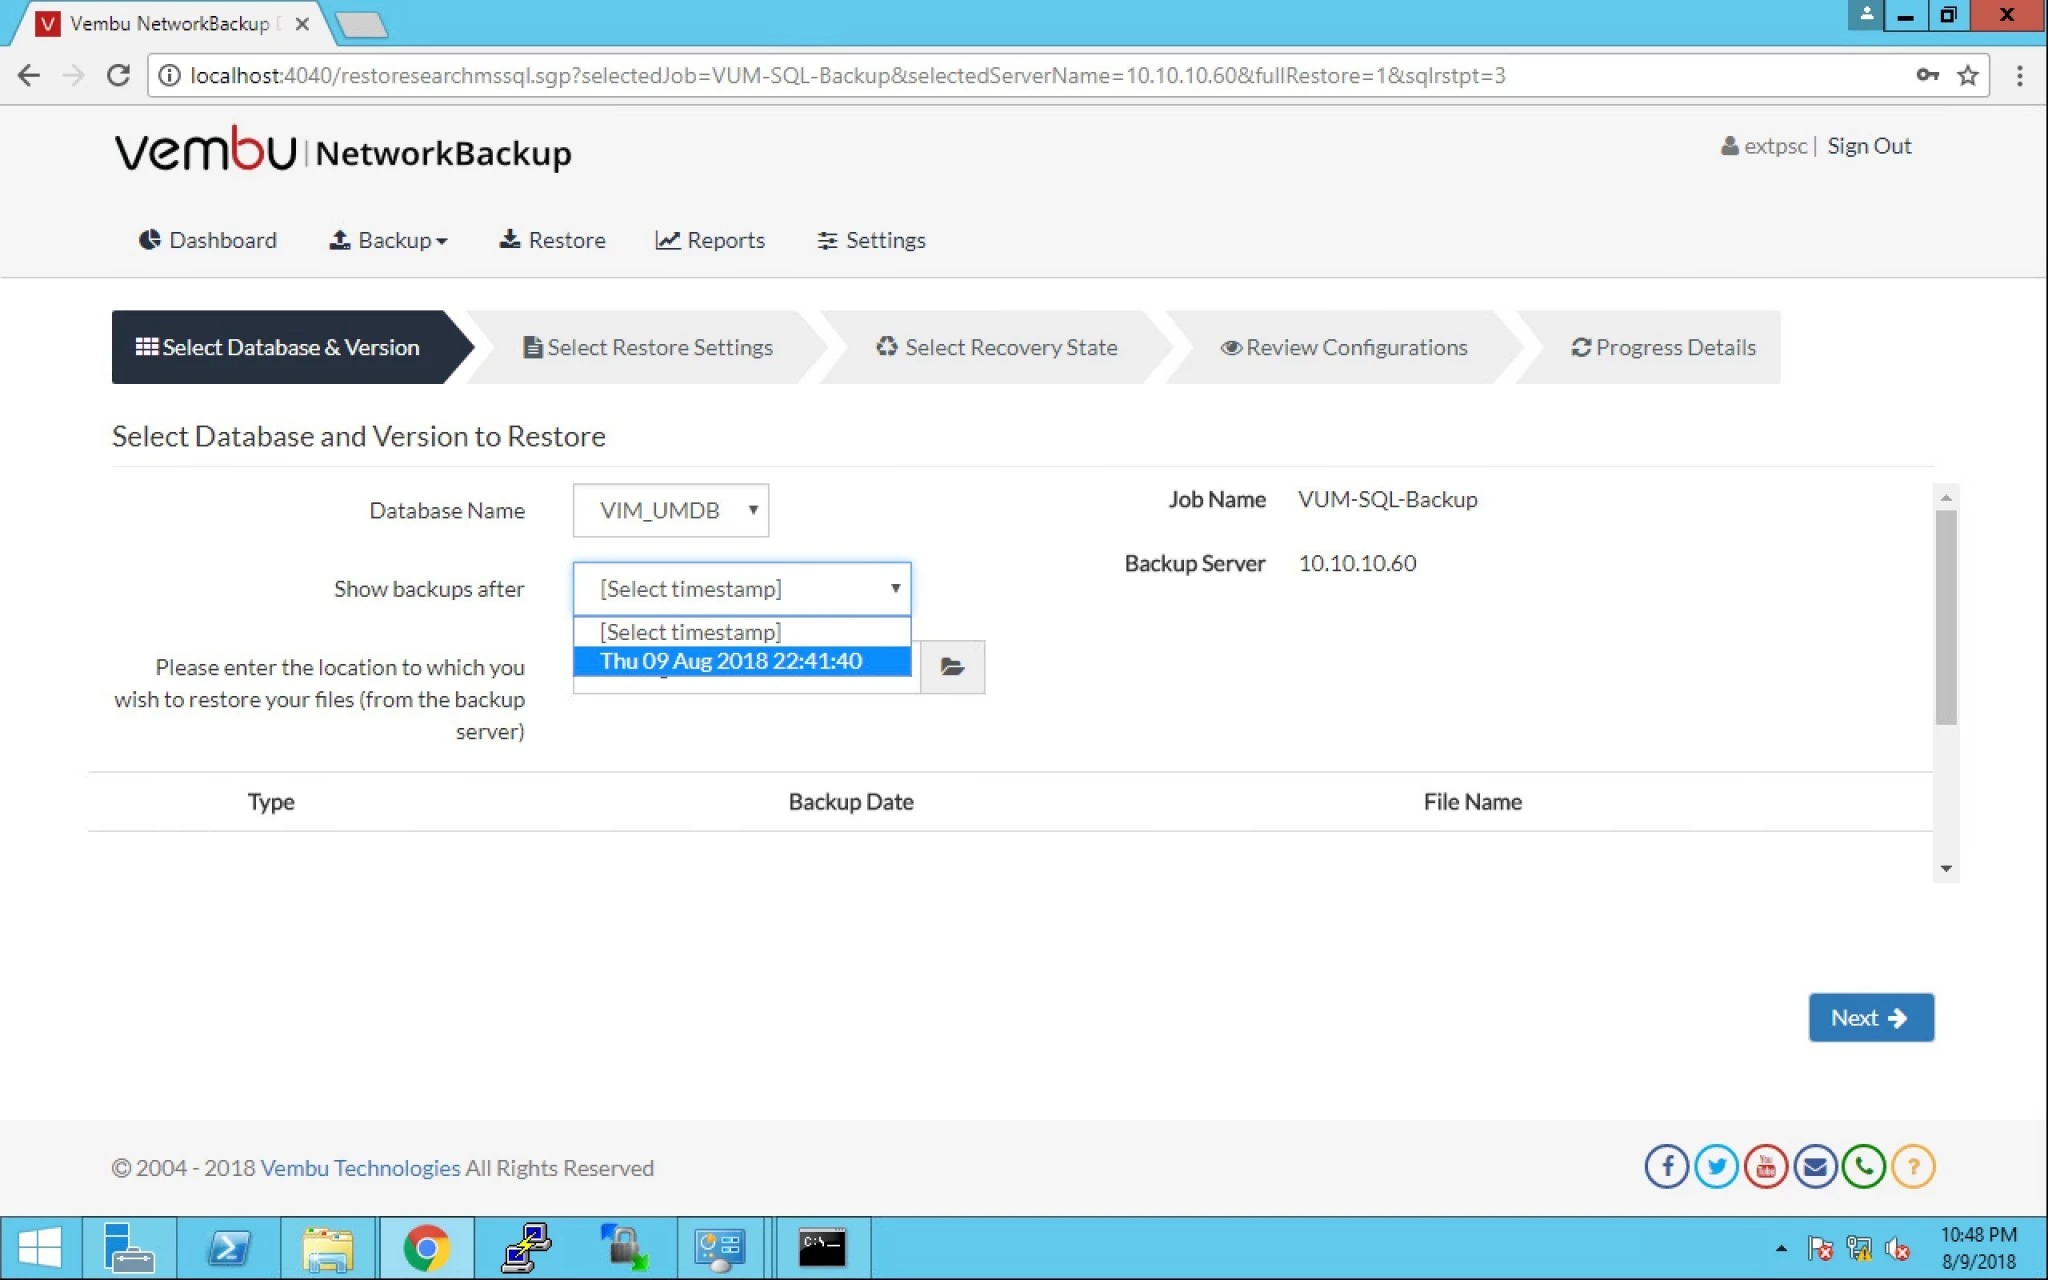
b) Select Time Stamp.

c) Location of file.


9. We have selected the VIM_UMDB as the database name.


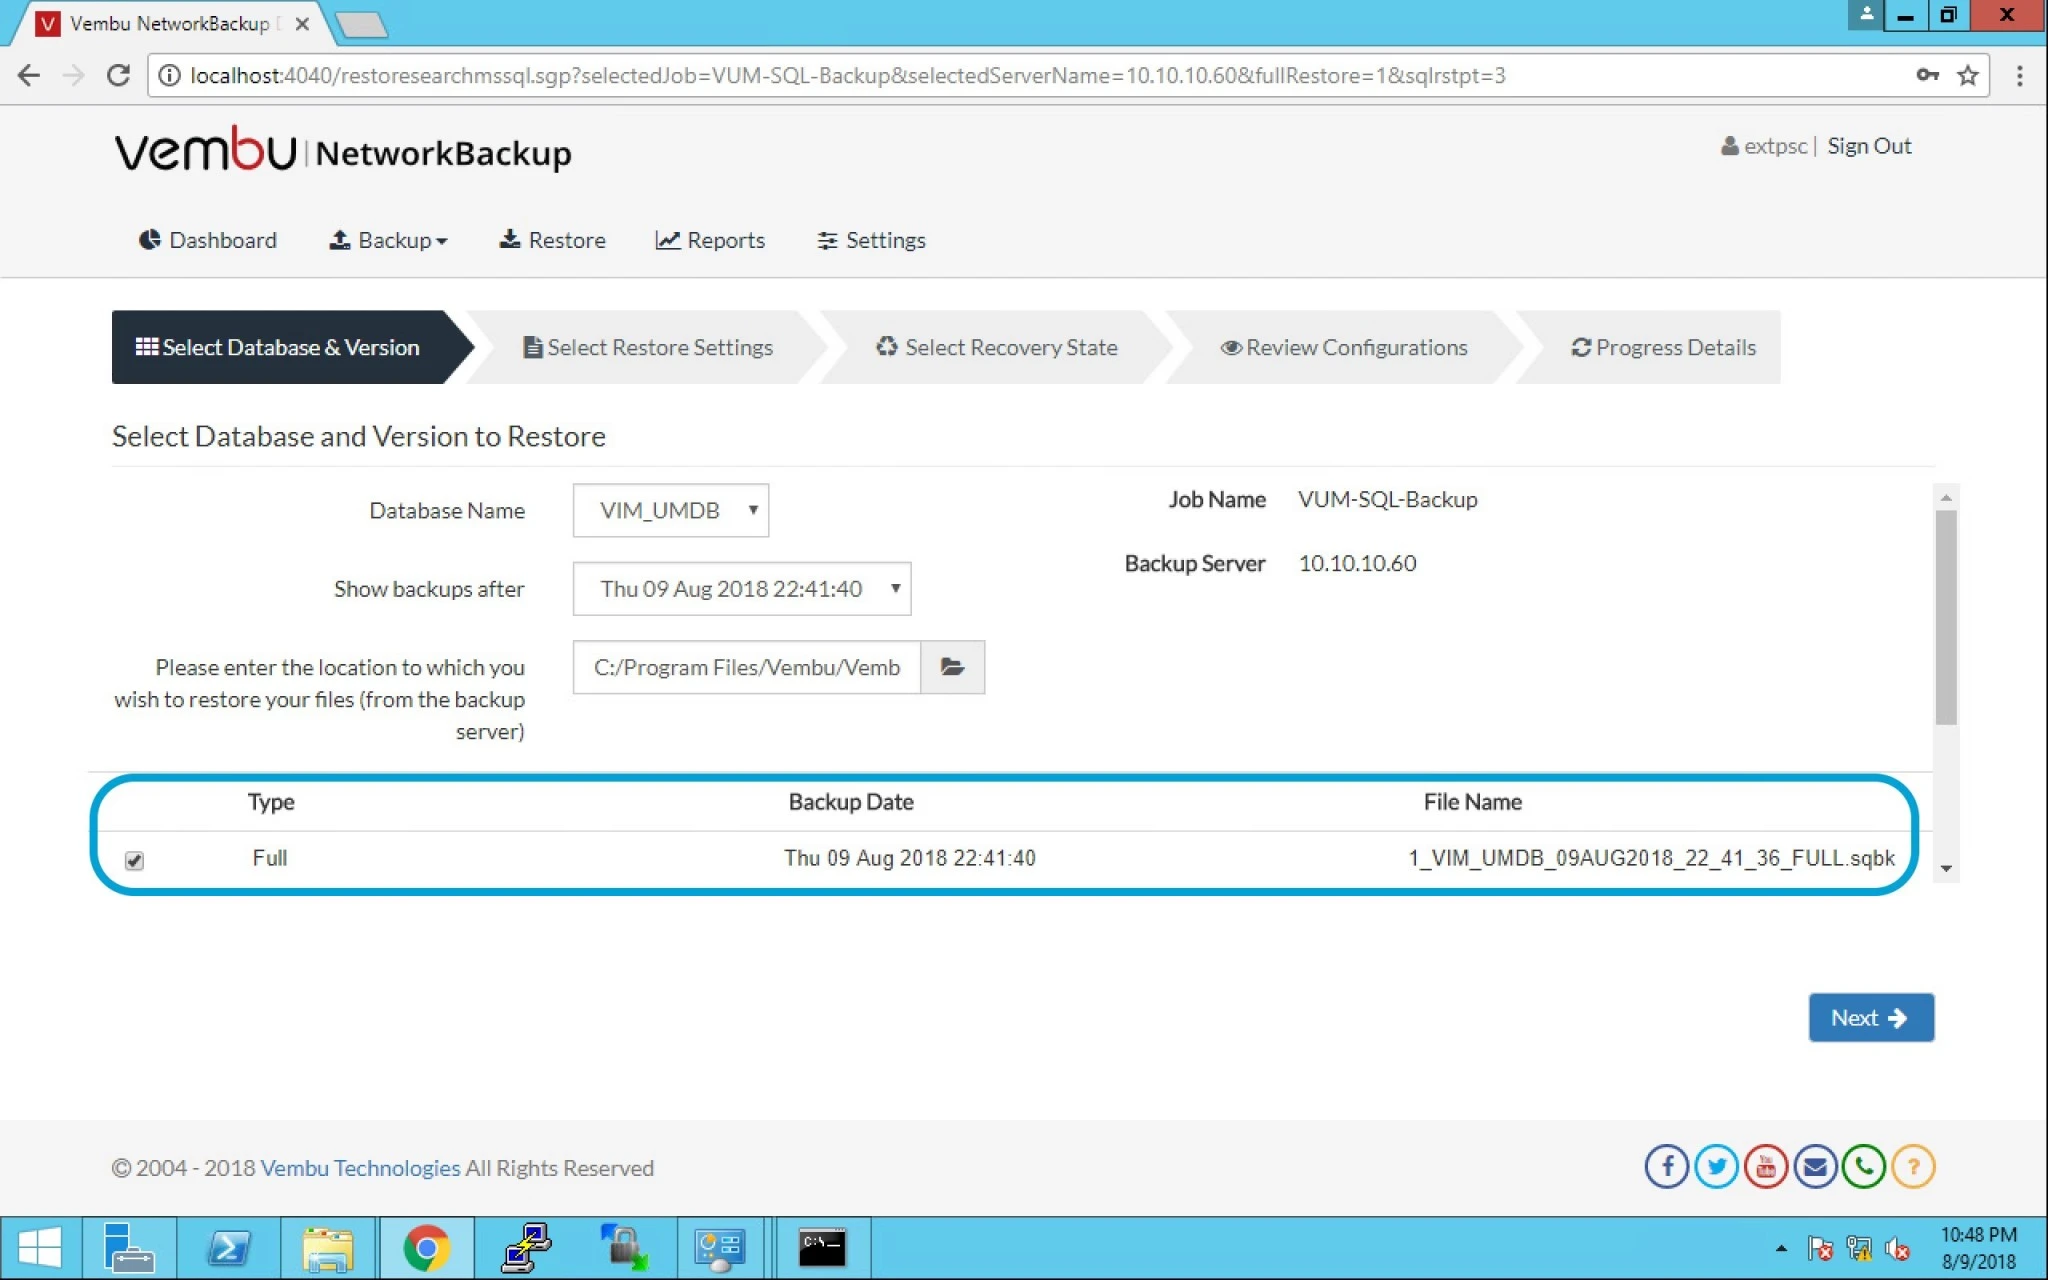
10. We have selected the the Time Stamp of the backup for restore.


11. We have the prompt with the Full Backup to be restored option. Select Full and click next.


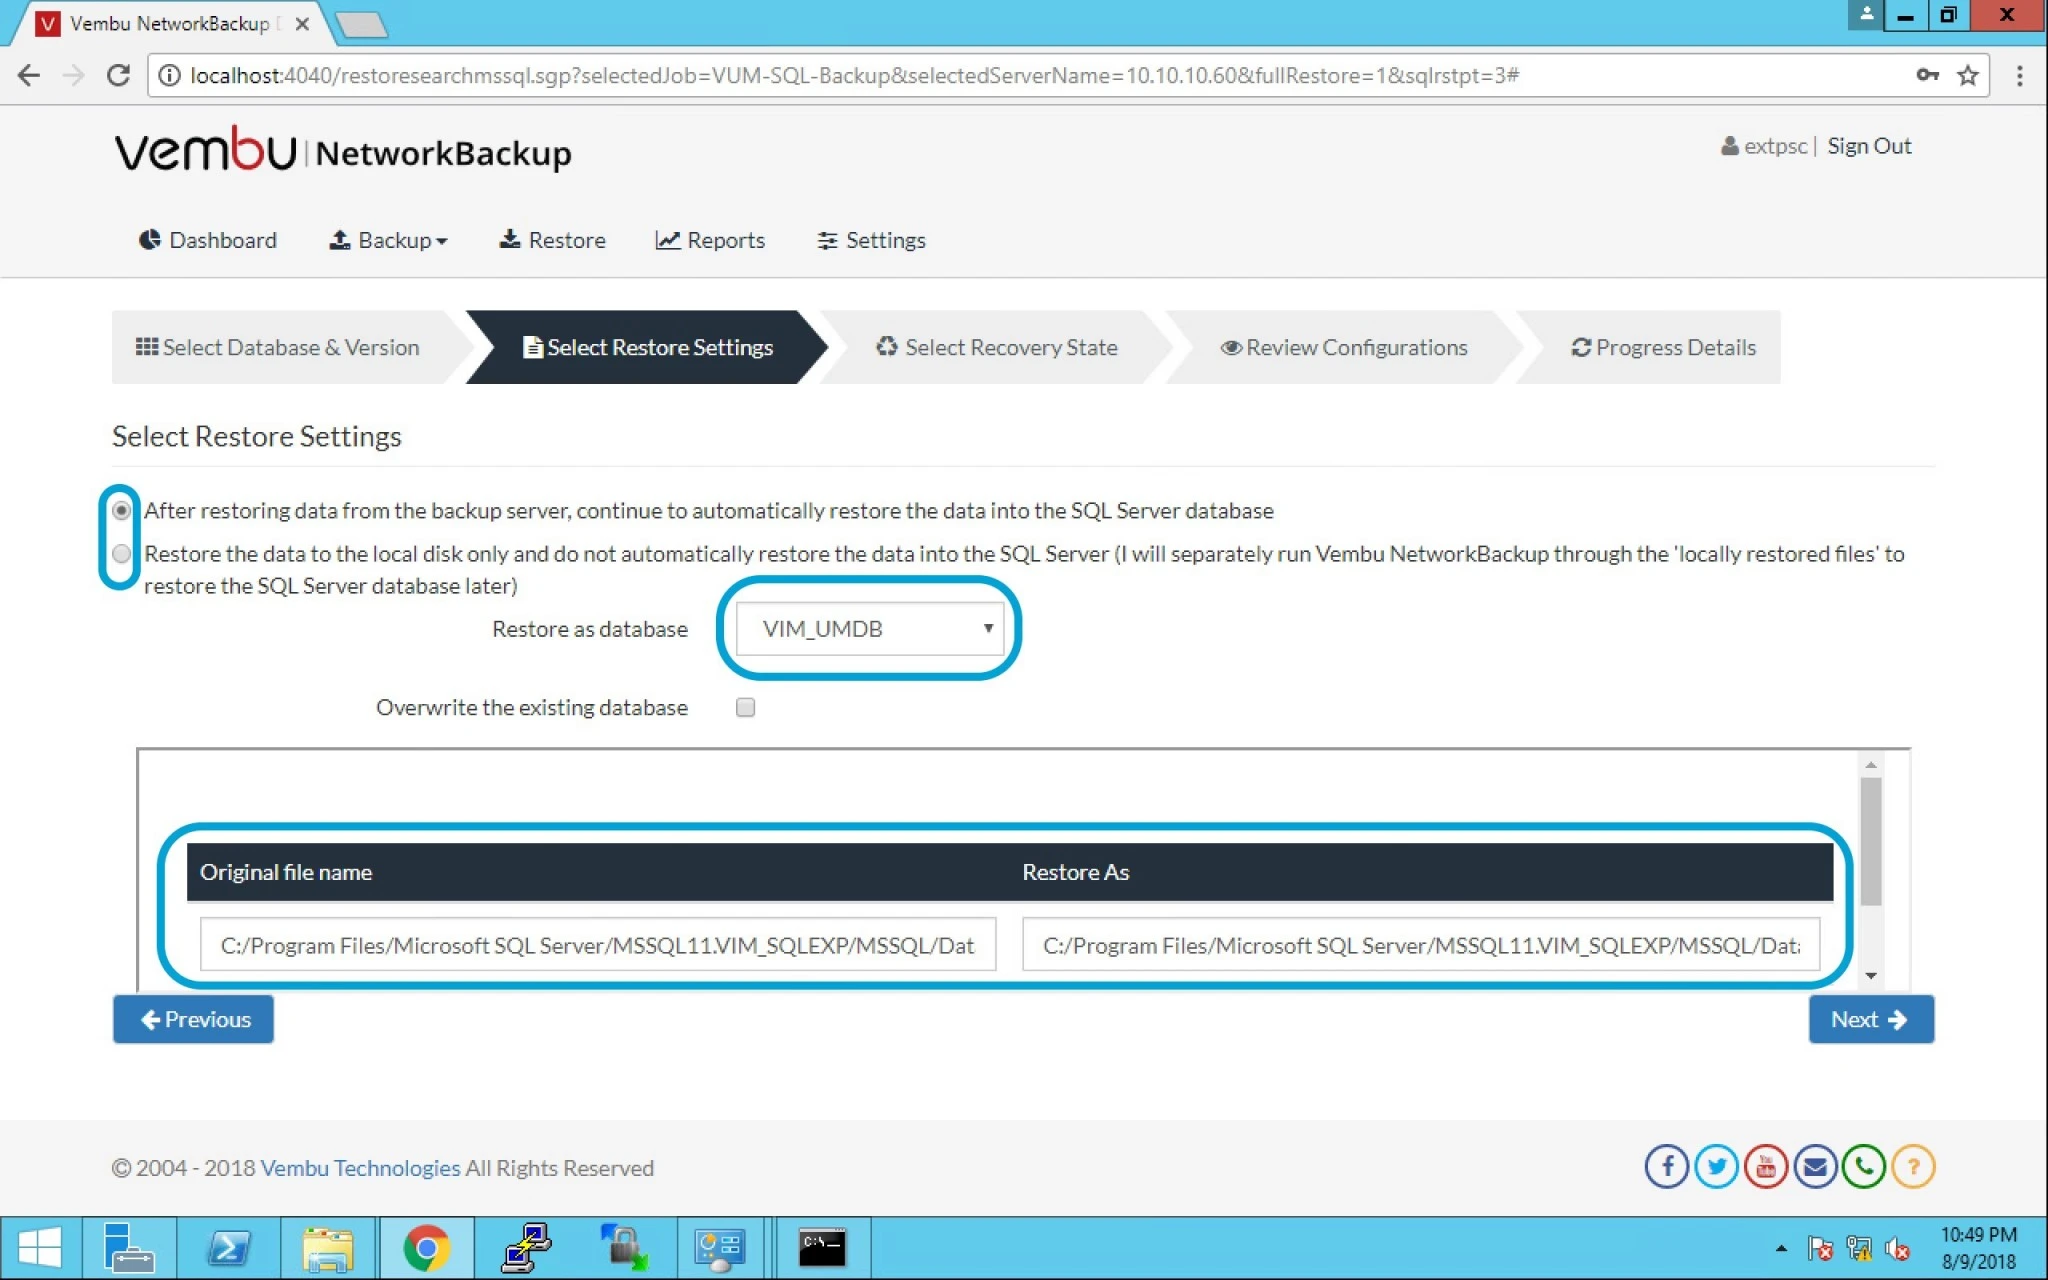
12. After restoring data from backup server, continue to auto restore data into SQL Server Database.

  • Choosing this option will let user restore data into SQL Server database, where user have the option to either overwrite an existing database or restore as separate database.


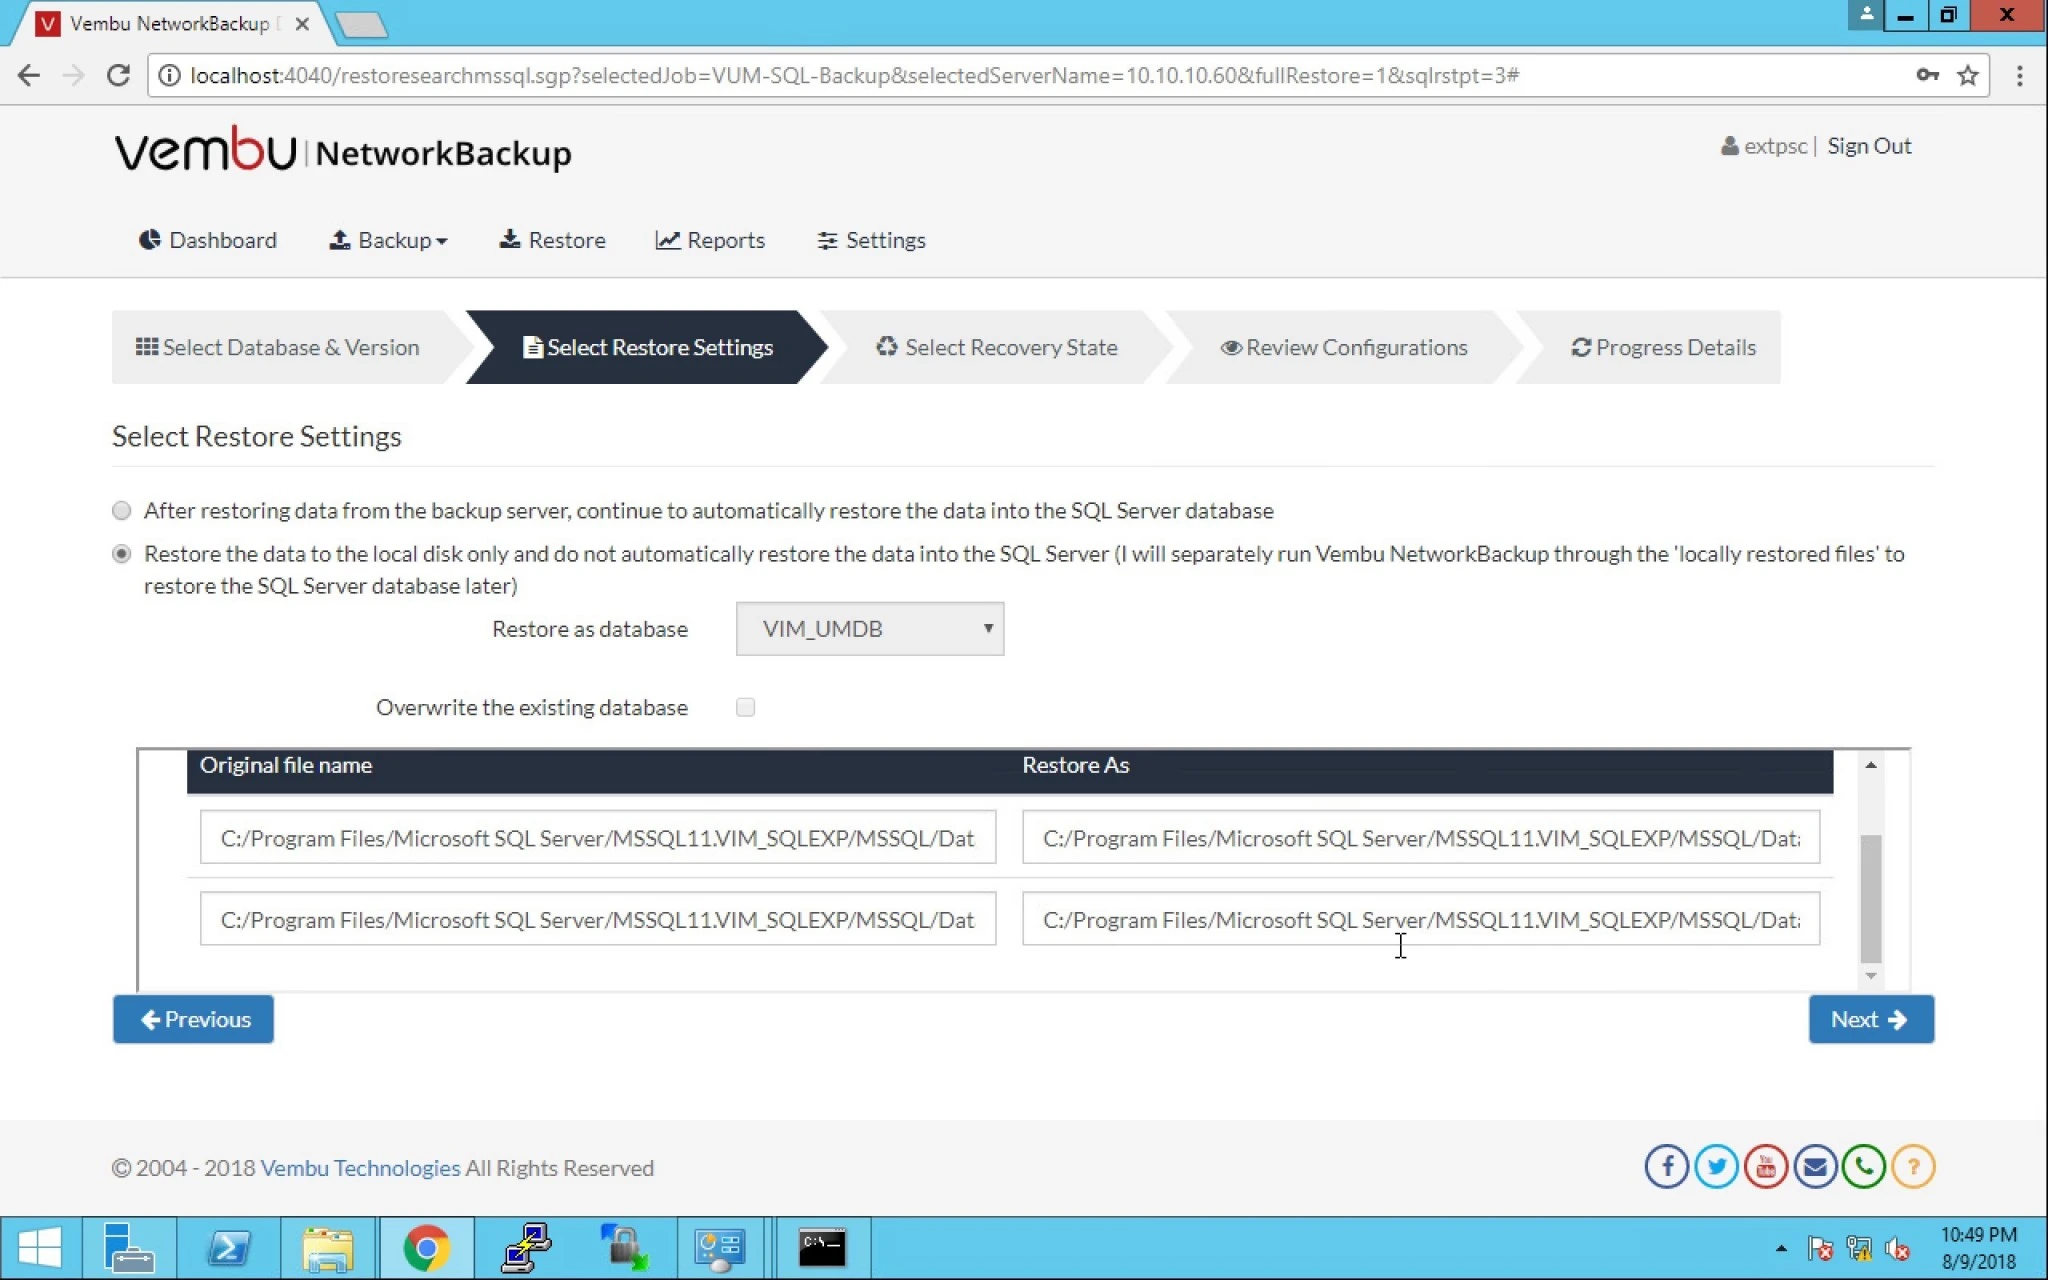
13. Restore data from backup server only (we will separately run Vembu NetworkBackup through the ‘locally restored files’ to restore the SQL Server database later).

  • Choosing this option will restore data in a separate user defined location instead restoring data into SQL Server.


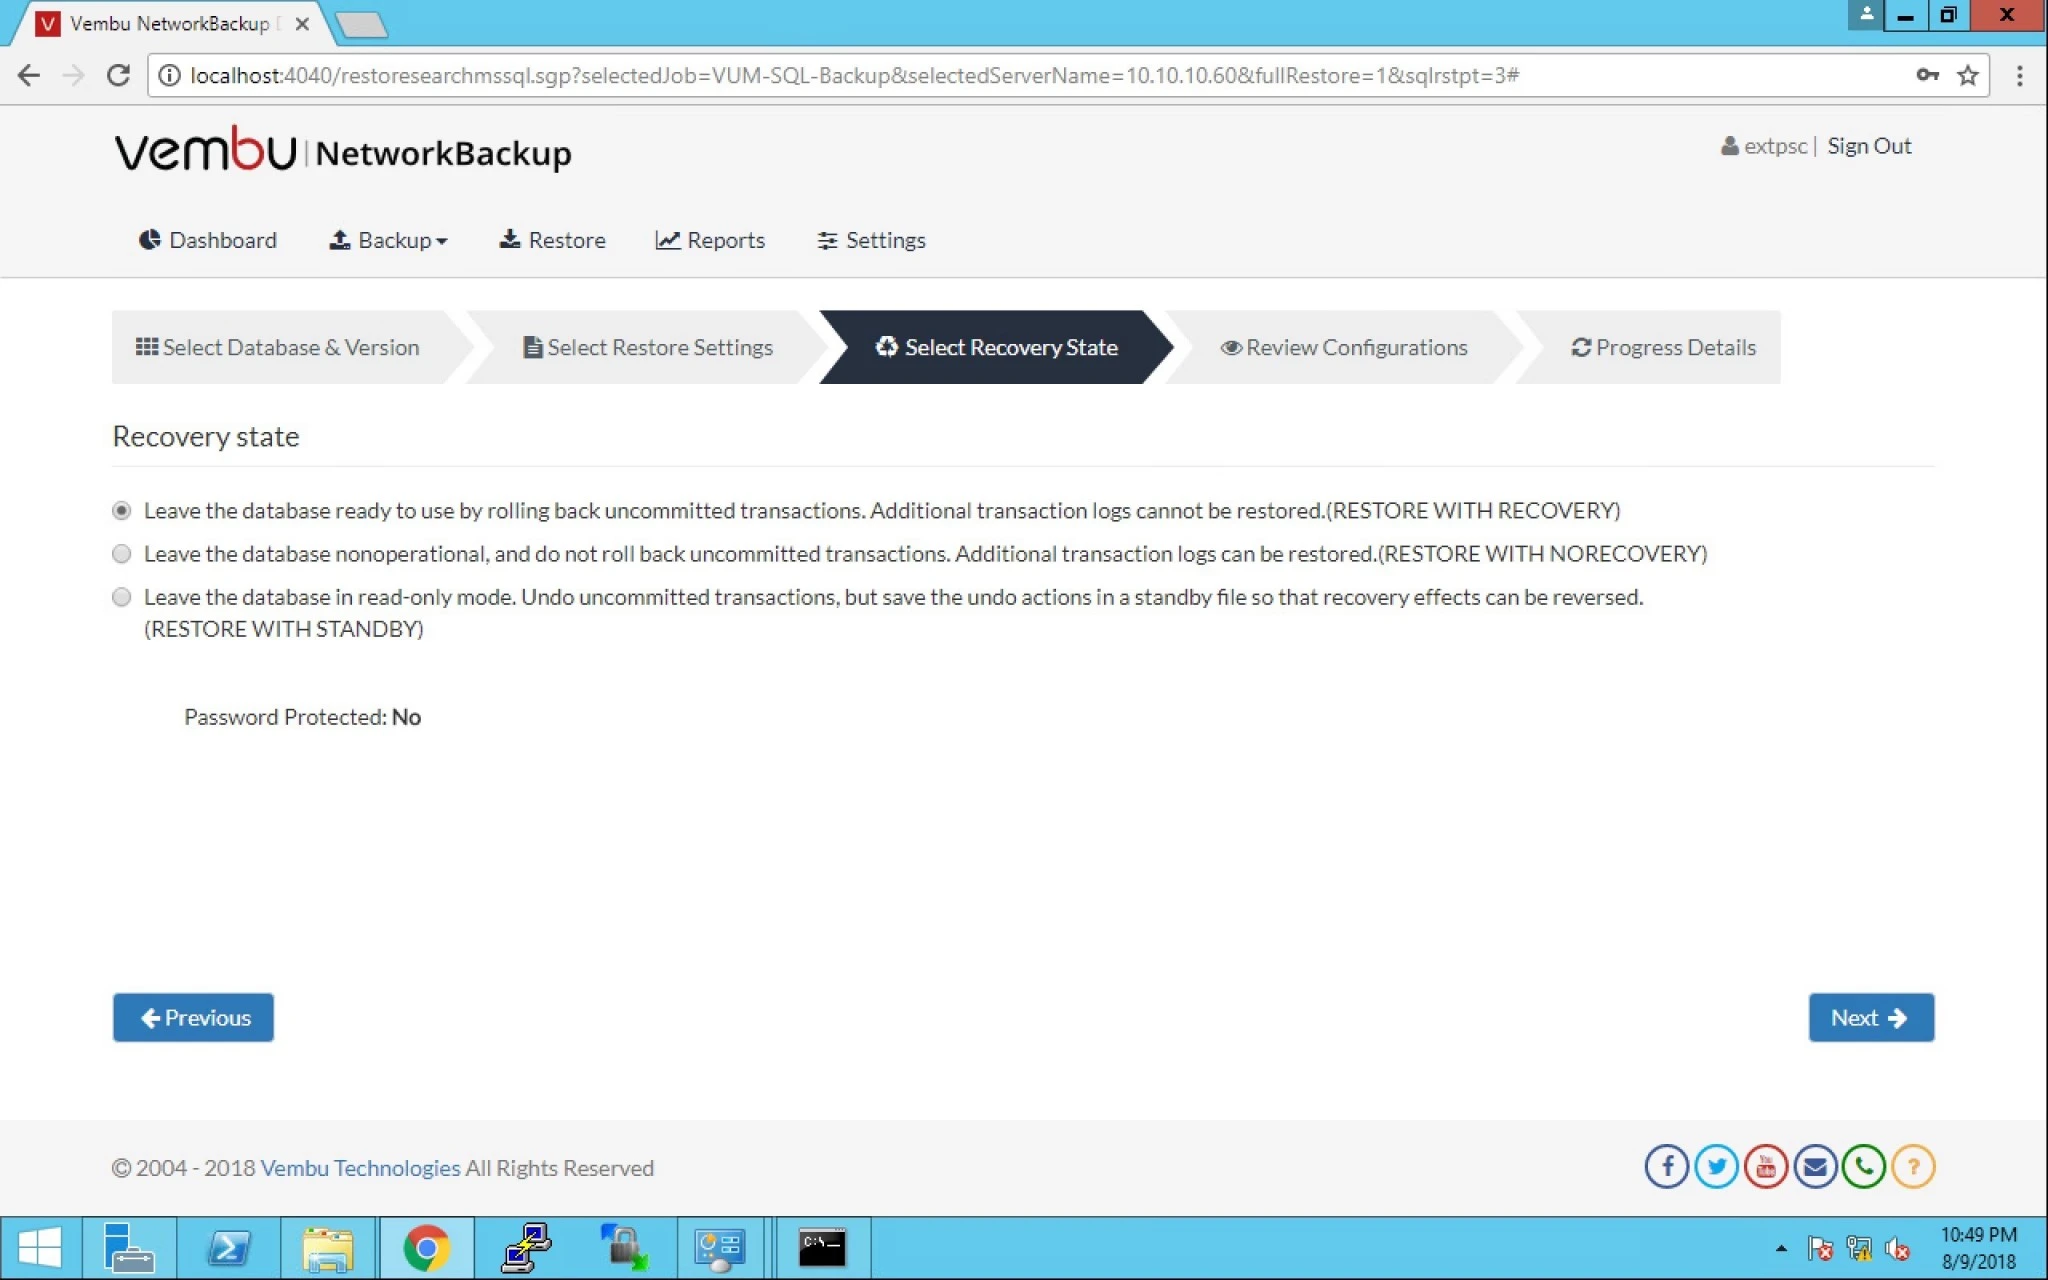
14.  We have got these three options given below:

  • Leave database in ready-to-use state by rolling back uncommitted transactions. Additional transaction logs cannot be restored (Restore with recovery).
  • Leave database non-operational, and do not rollback uncommitted transactions. Additional transaction logs can be restored (Restore with Non-Recovery).
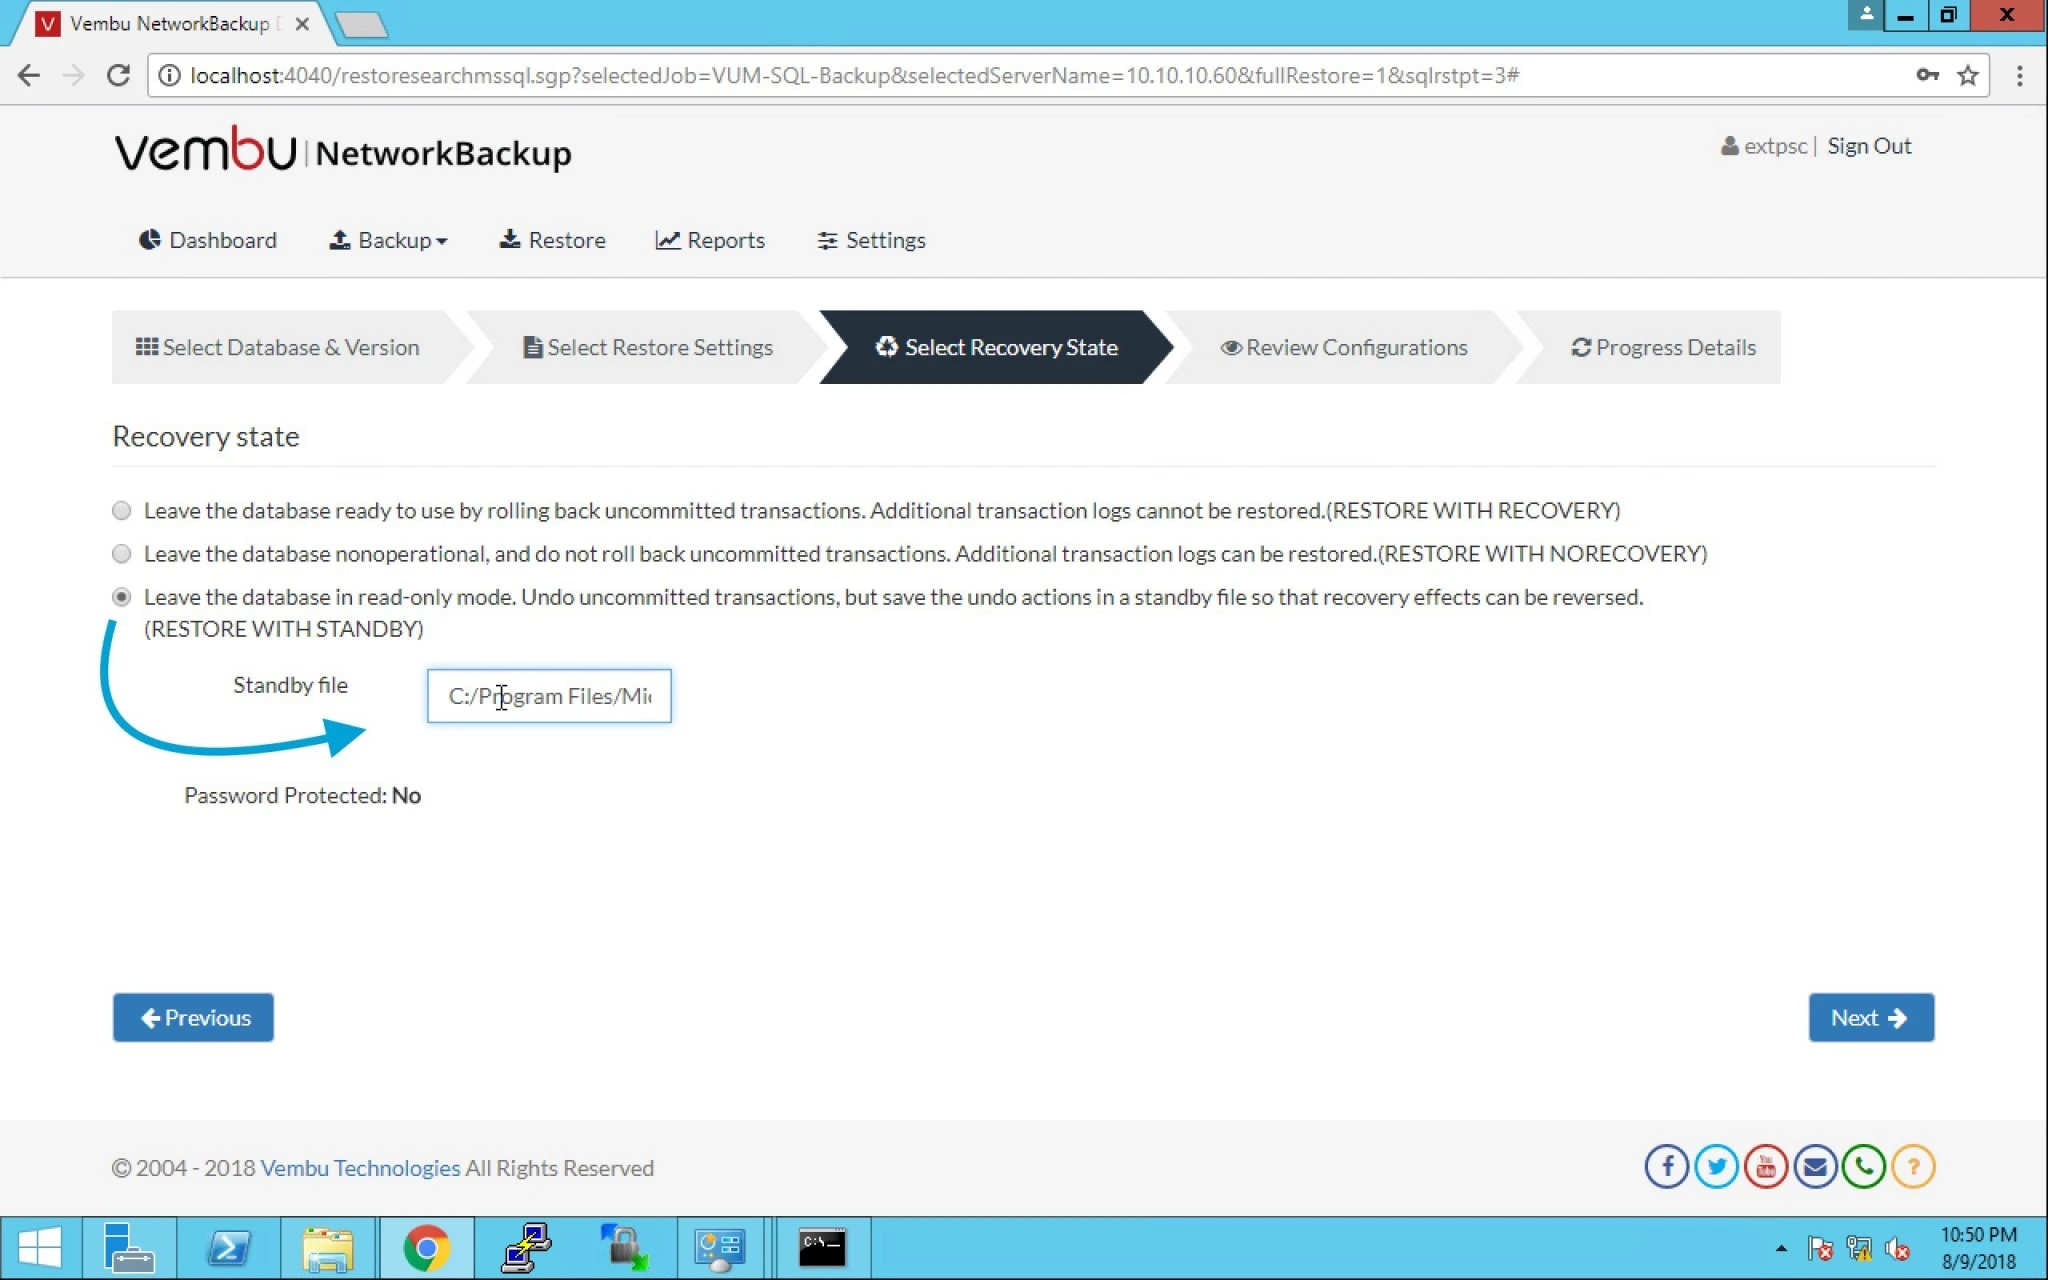
  • Leave database in read-only mode. Undo uncommitted transactions, but save undo action in a standby file so that recovery effects can be reversed (Restore with Standby).


15. Lets choose the third option here and provide the Standby file location. Click Next.


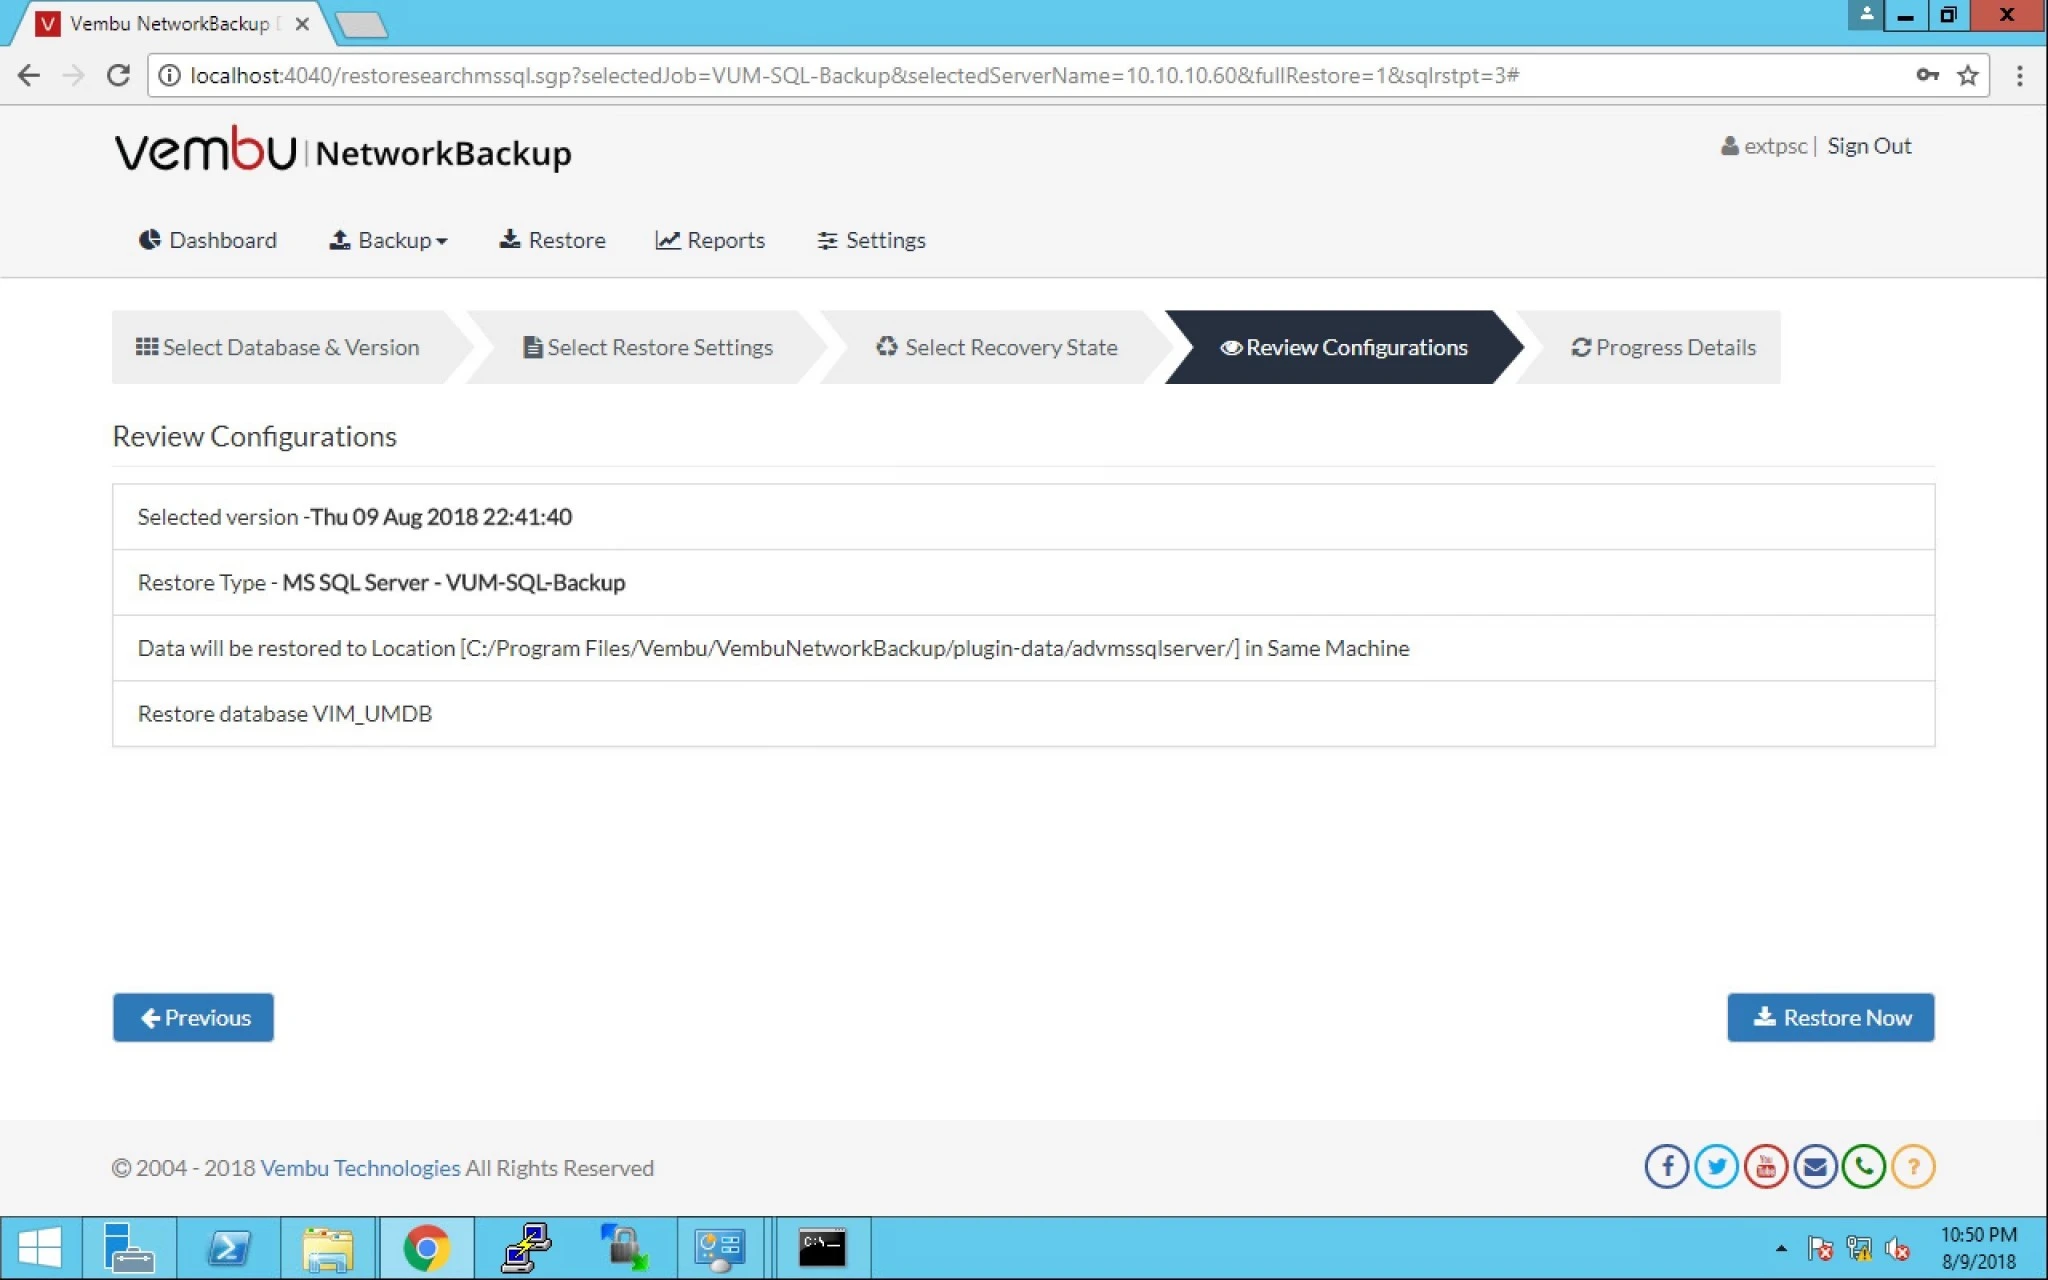
16. Now you can review the configuration and click on Restore Now.


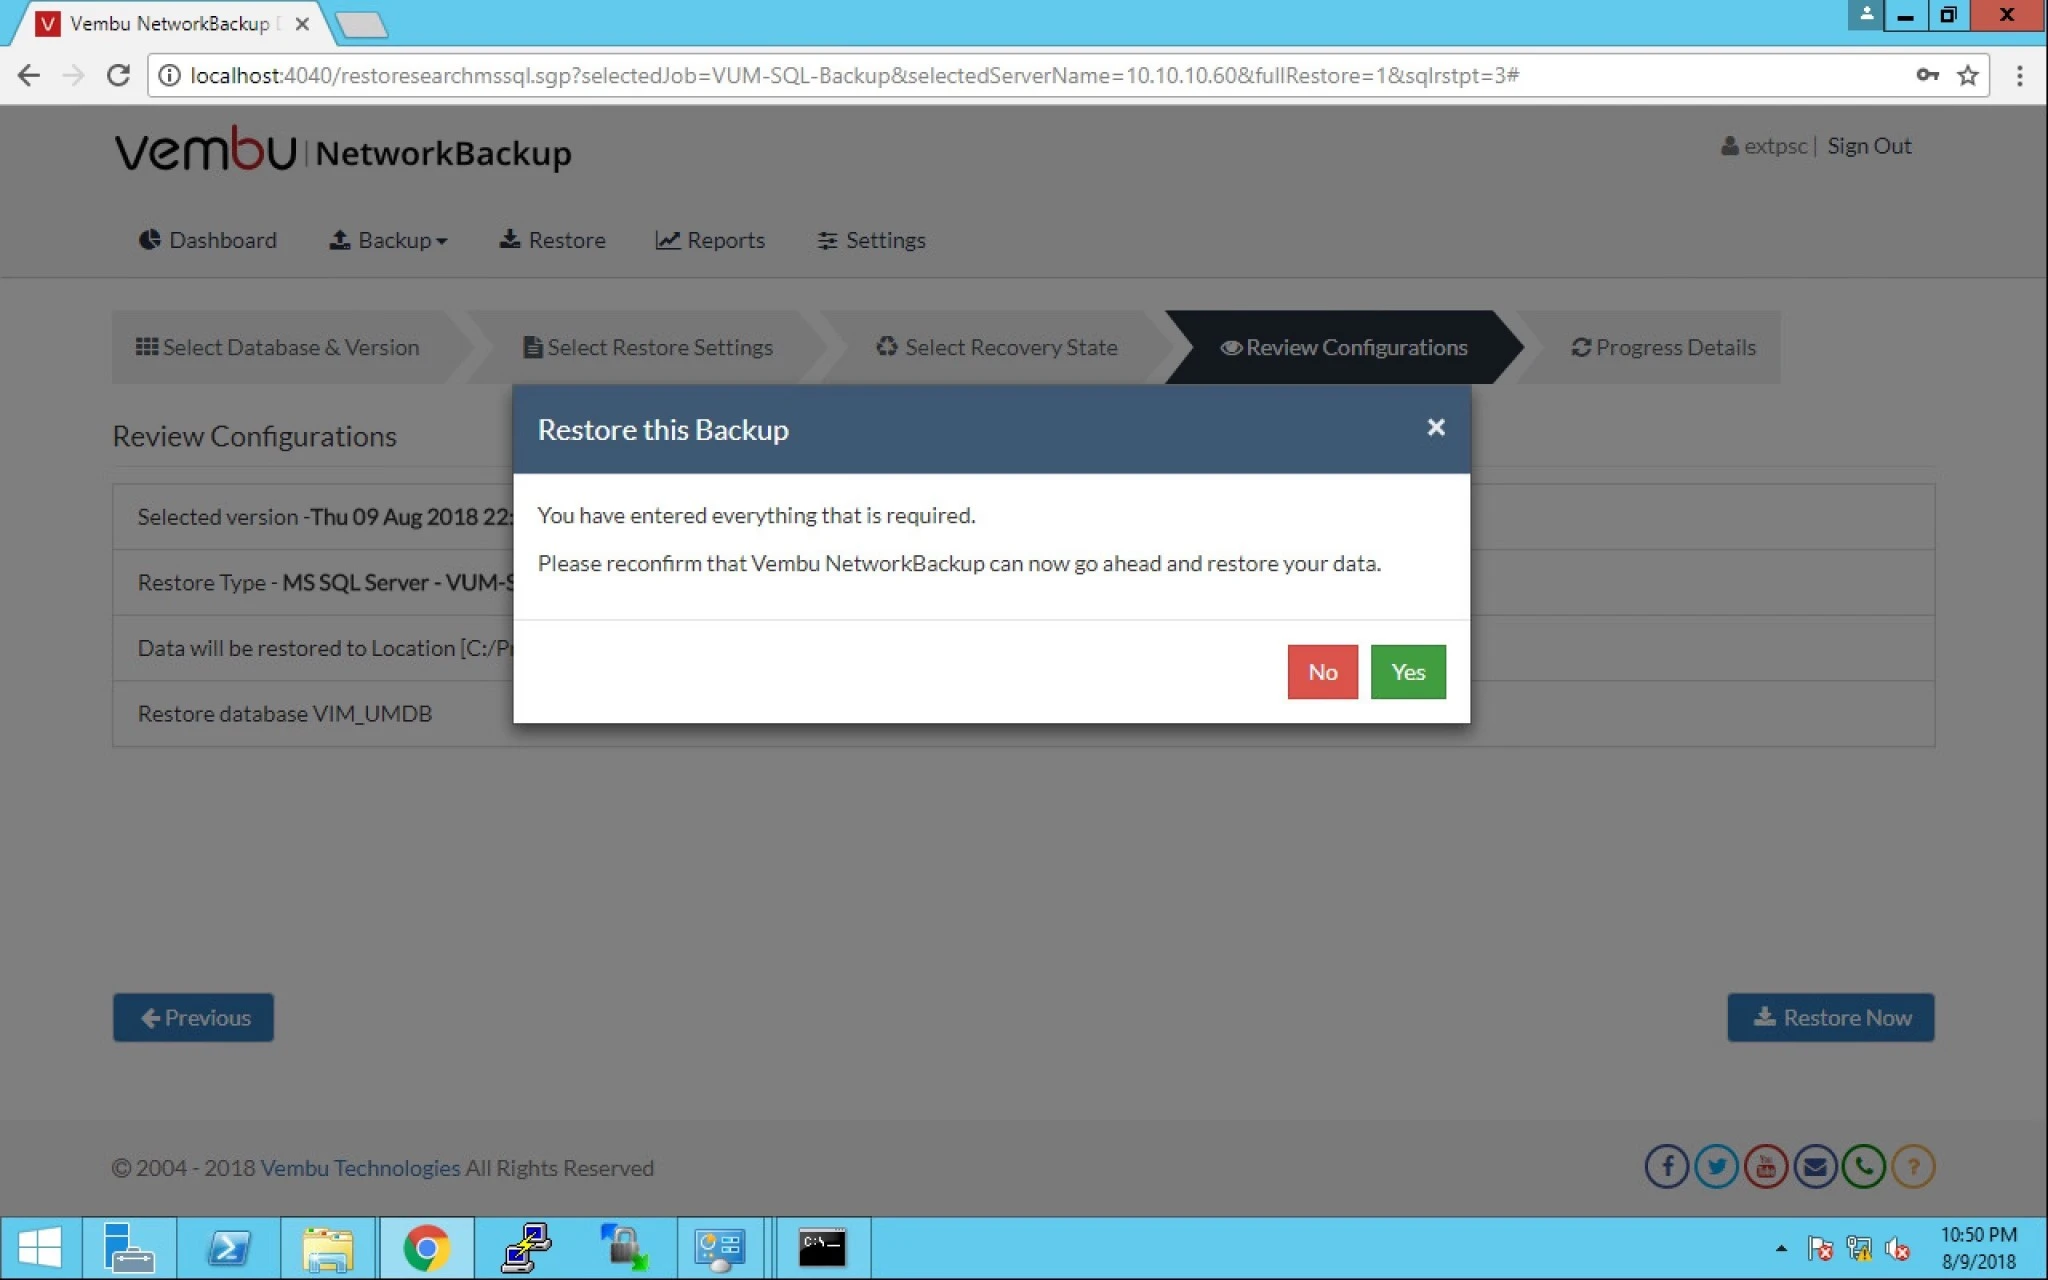
17. It will prompt you to confirm the restore operation to be executed. Click yes.


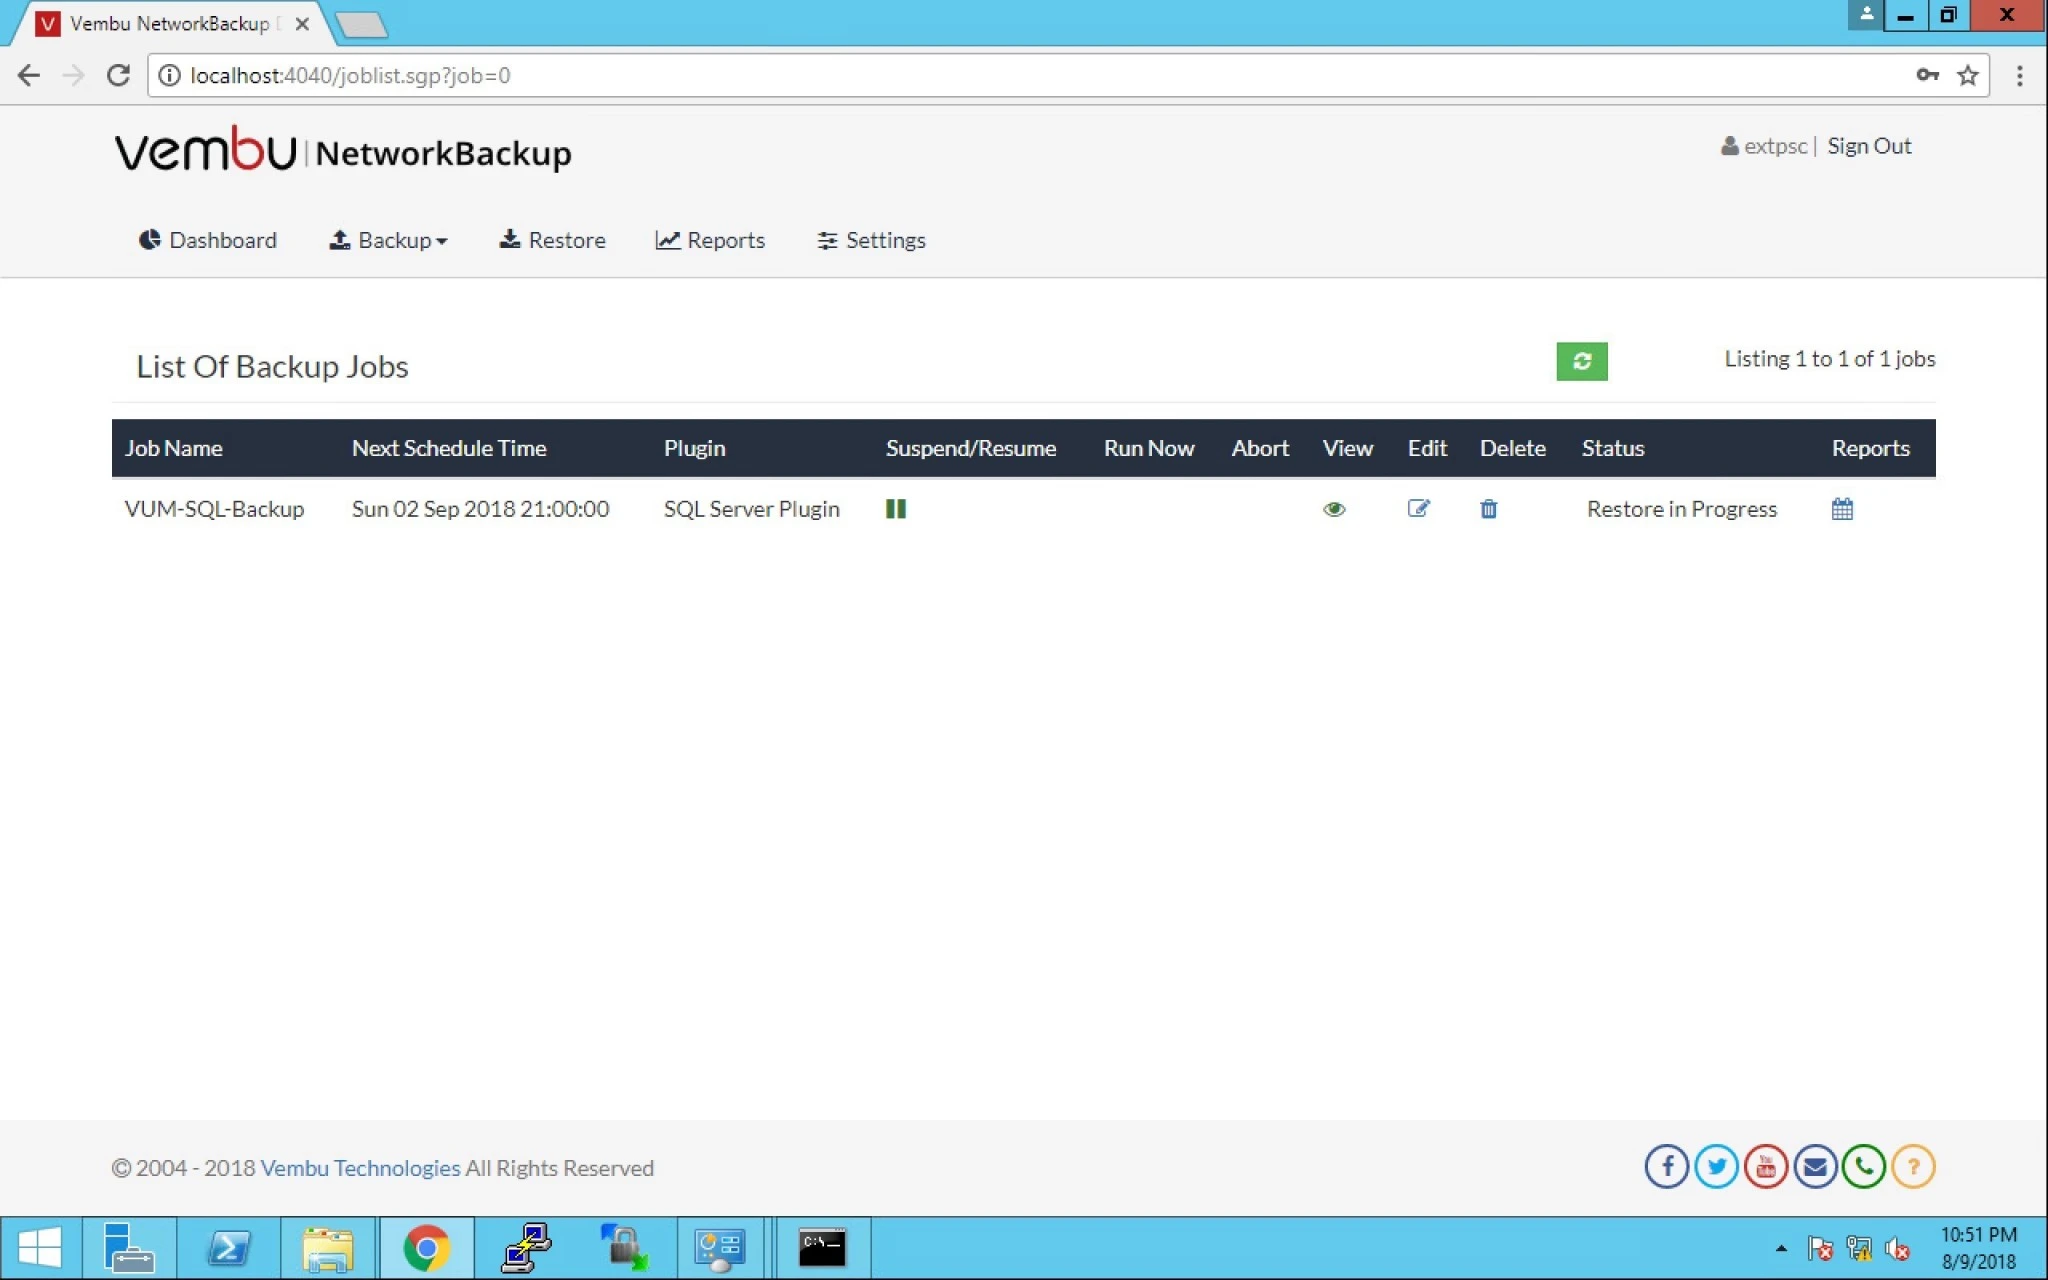
18. You can see the status for successful completion of the restore job.


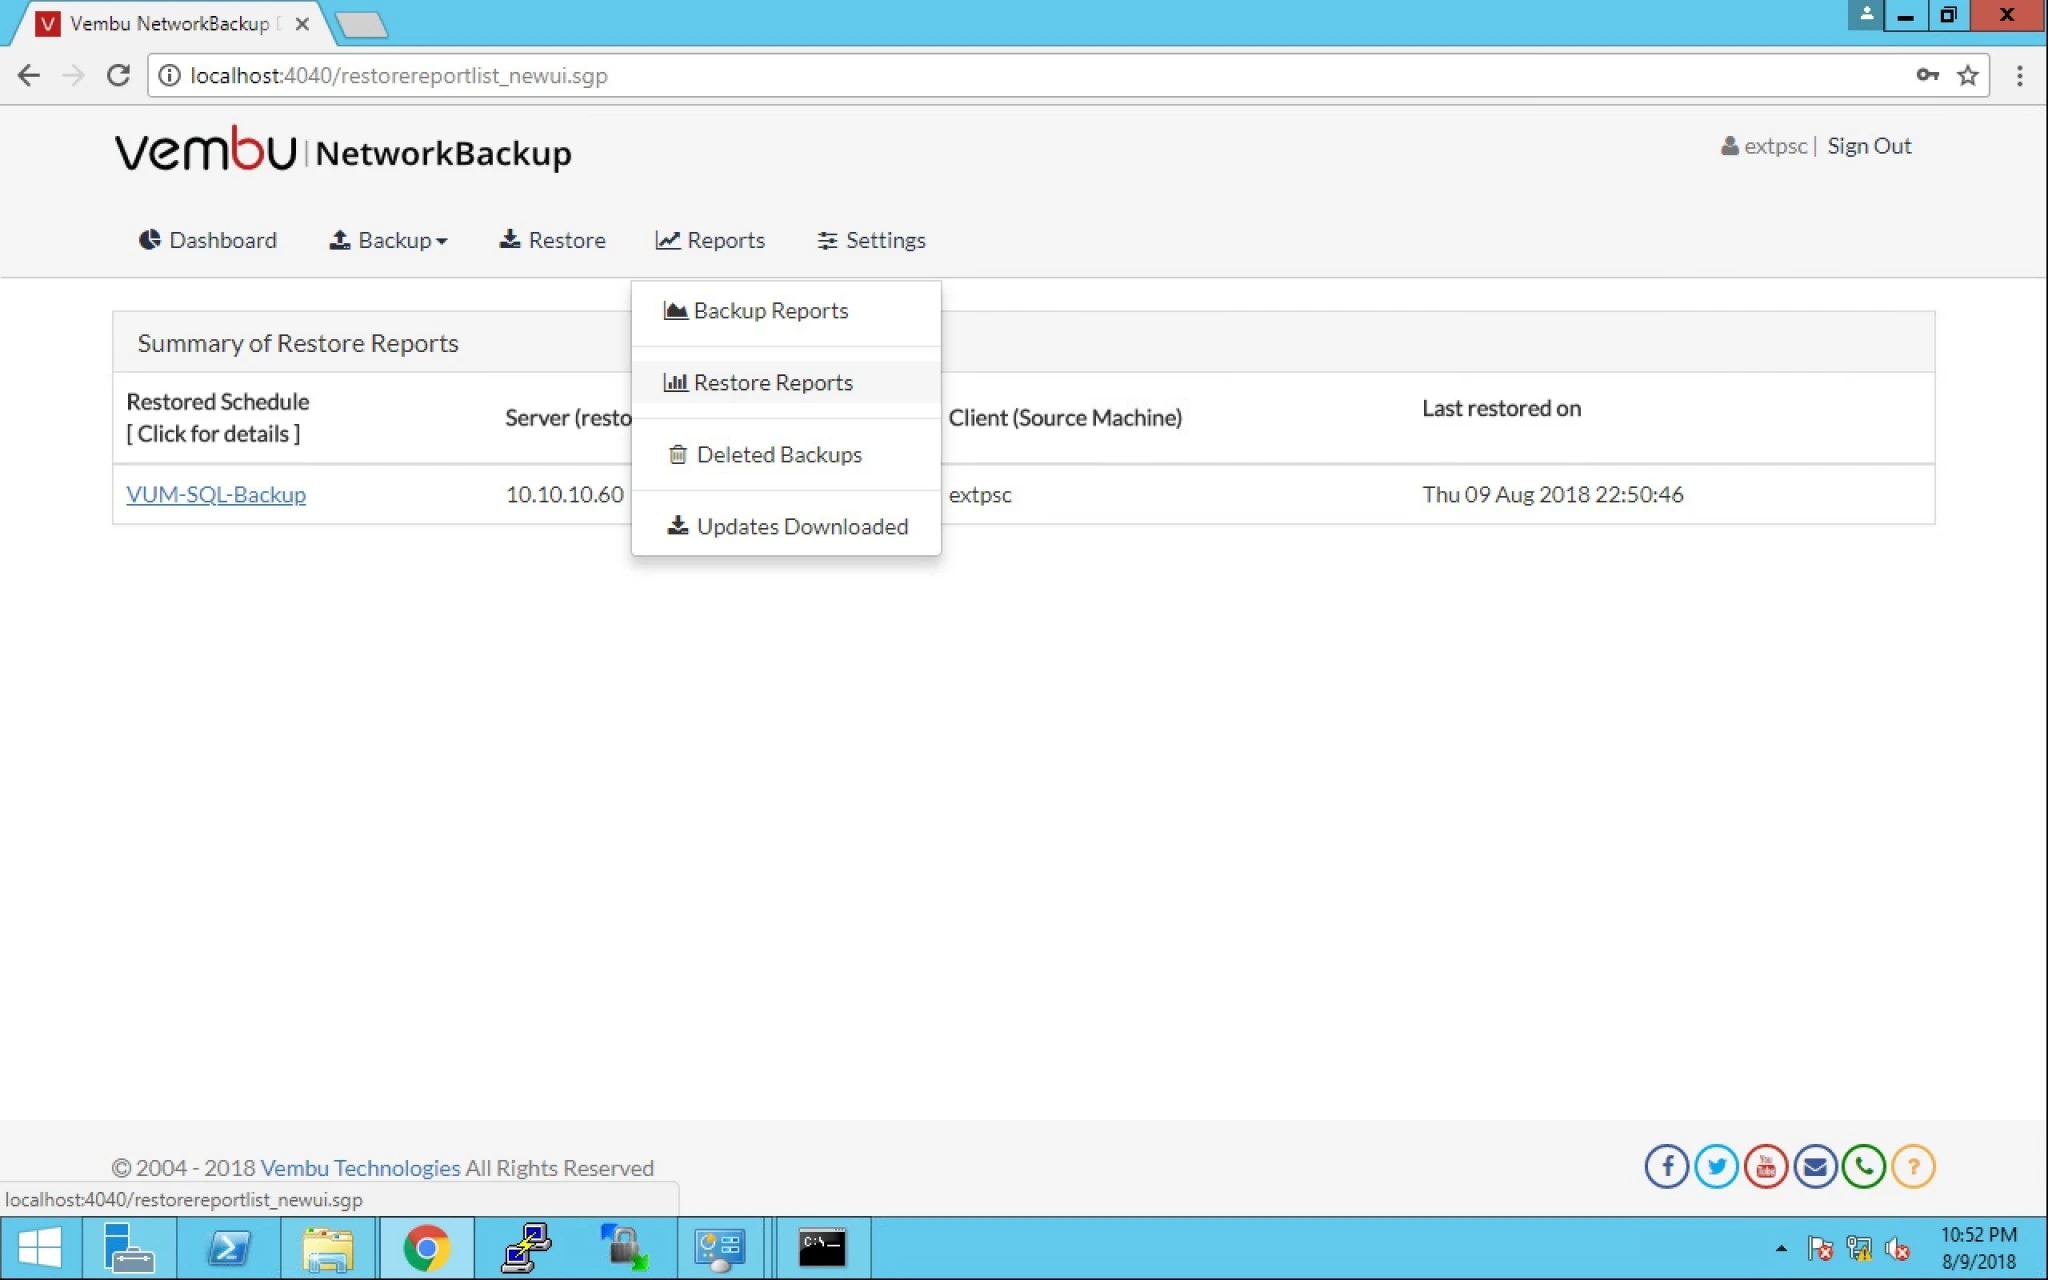
19. You can also check the report by clicking on Reports > Restore Reports.


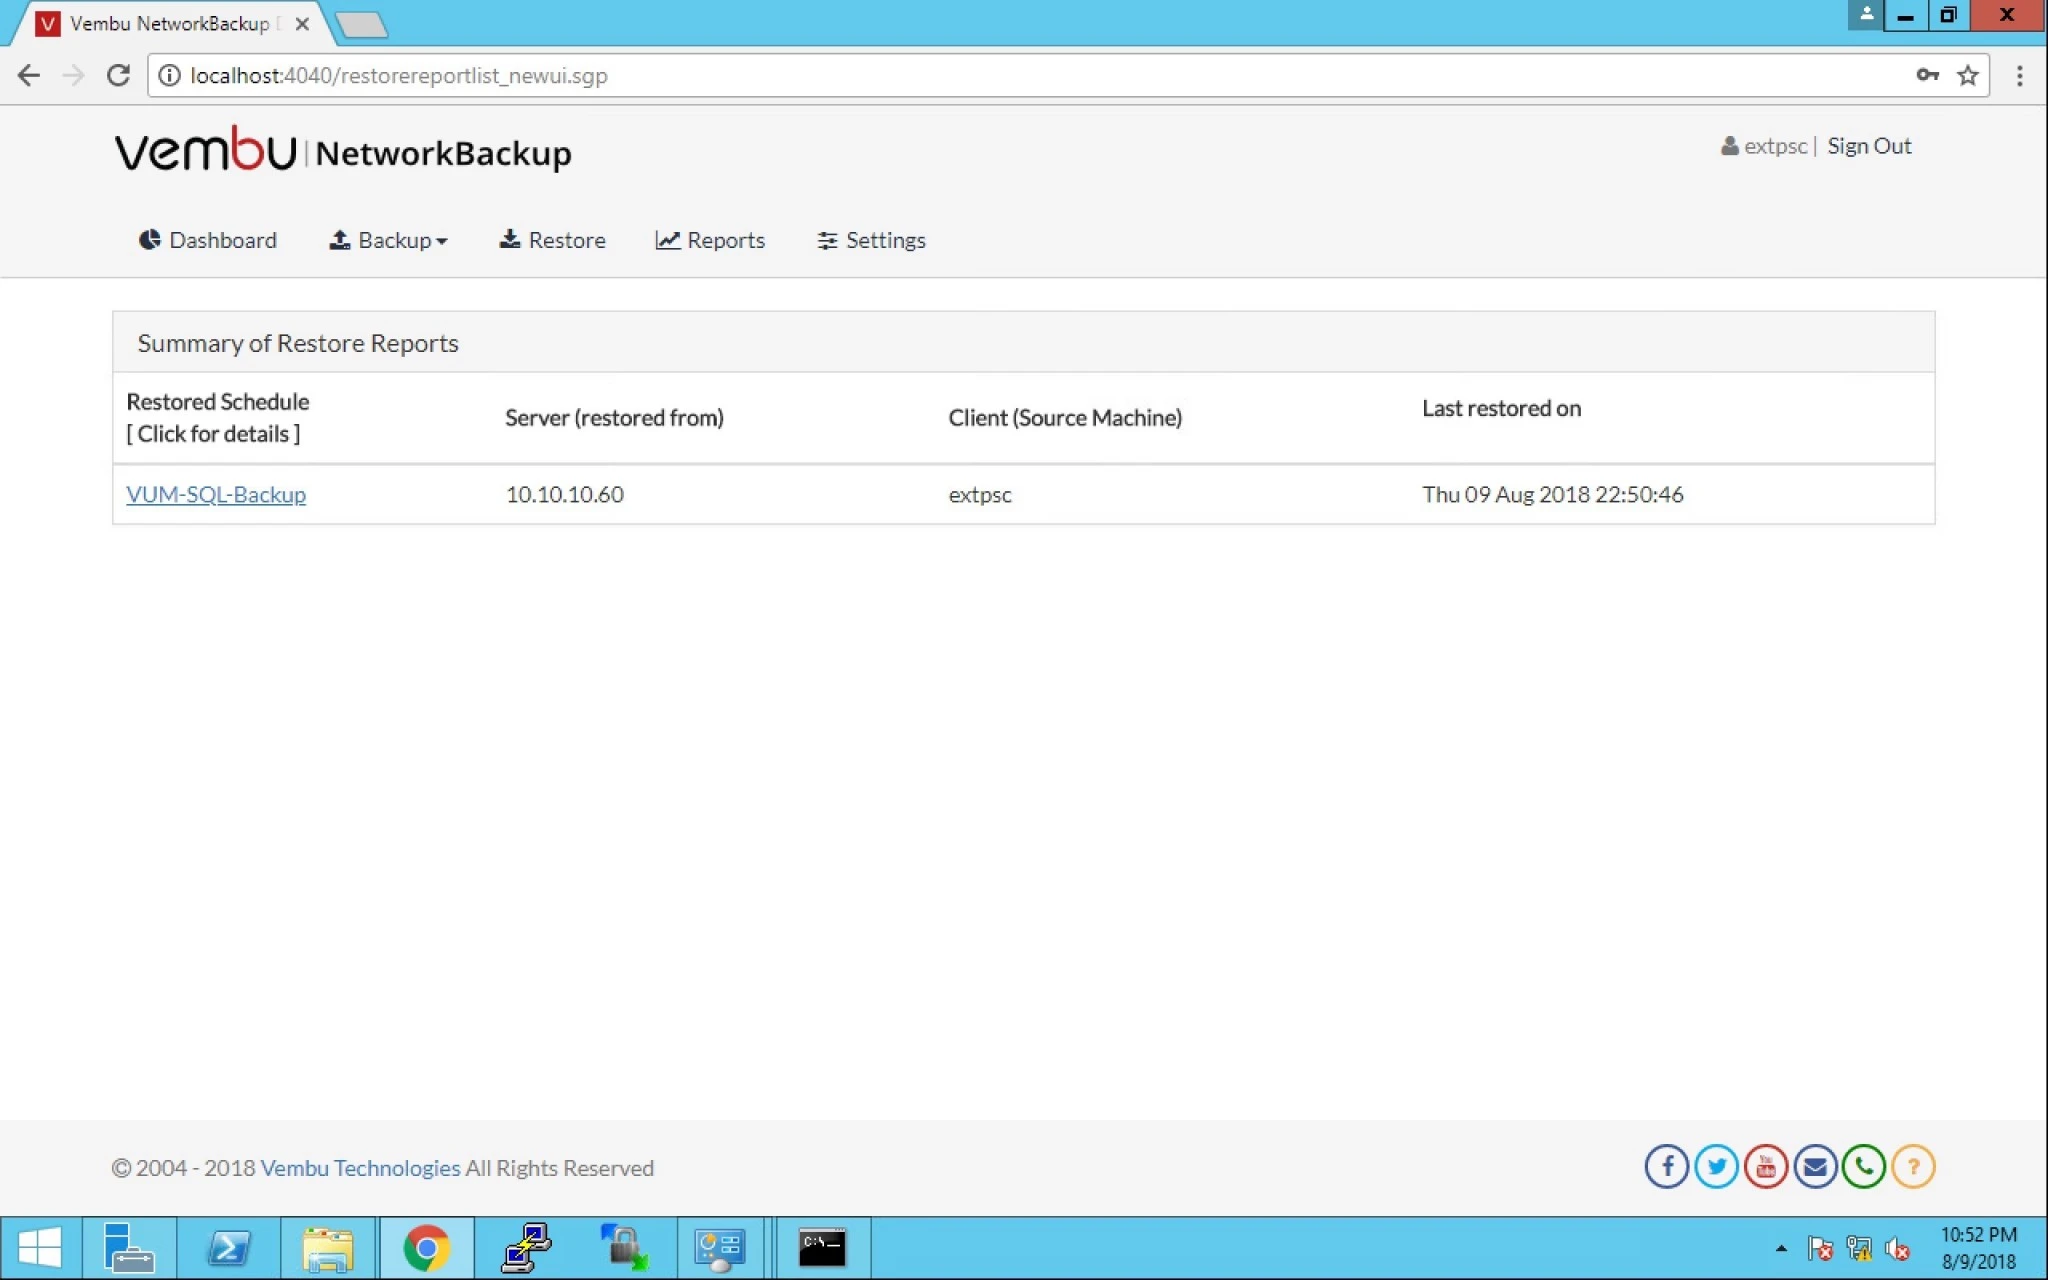
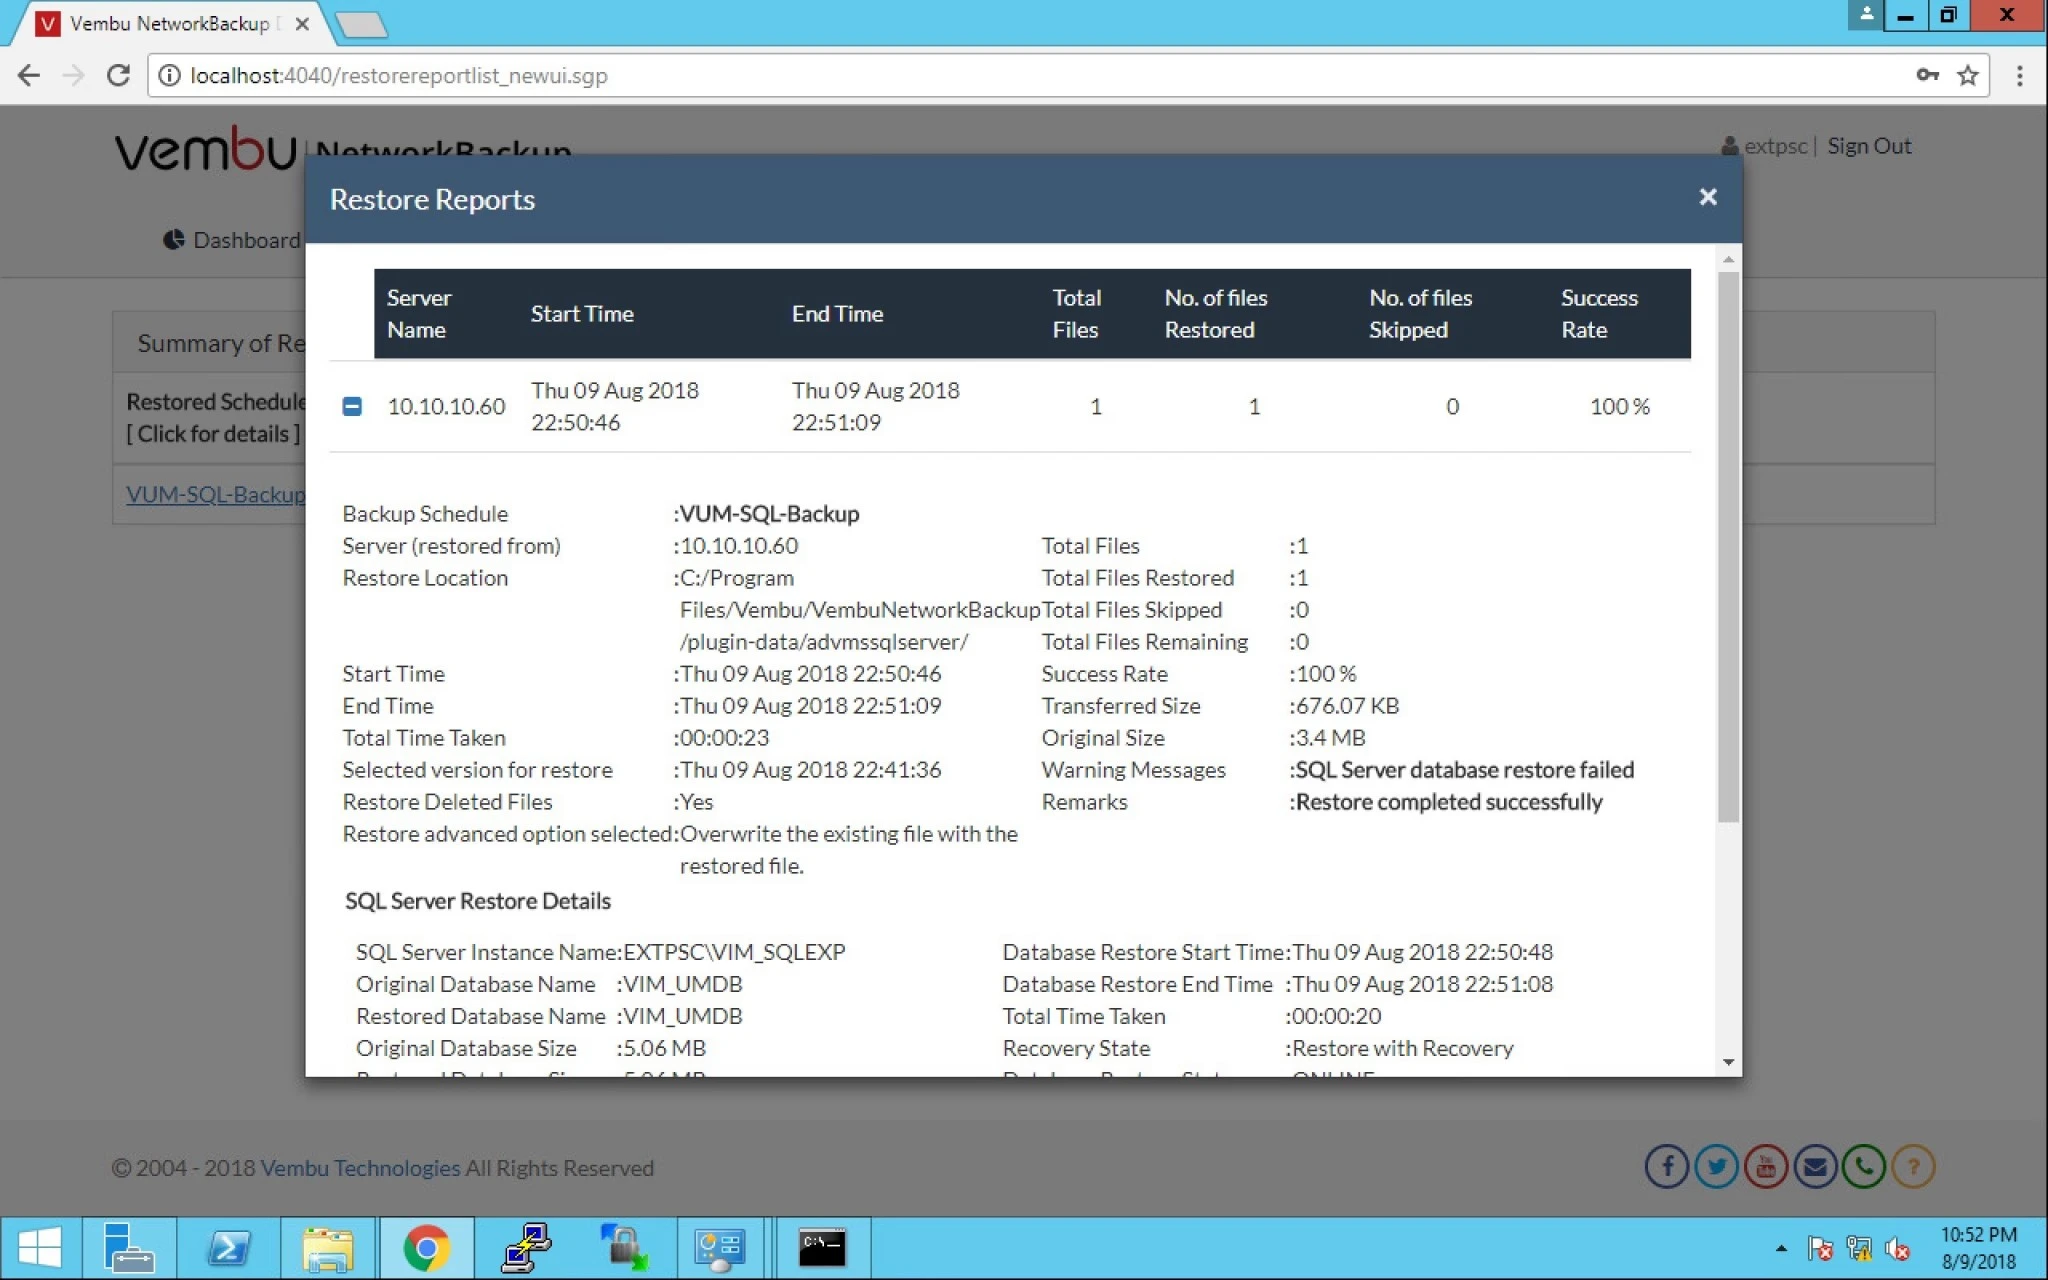
20. Click on Summary option and on VM hyperlink for report.


21. This is the restore report with all the details.


0

How to Backup MS SQL via Vembu

Topic Outline:

Backup MS SQL Database

Database Options

Scheduling

Differential & Transaction

Encryption 


If you are using Vembu BDR suits then you have a application backup option also. we will take MS SQL backup via Vembu Network Backup.

  1. First download the Vembu Network Backup (Click here).

2.  After that install on the server where you are running MS SQL.

3.  Open the console by typing URL : http://IP of server:4040 where the port is 4040.

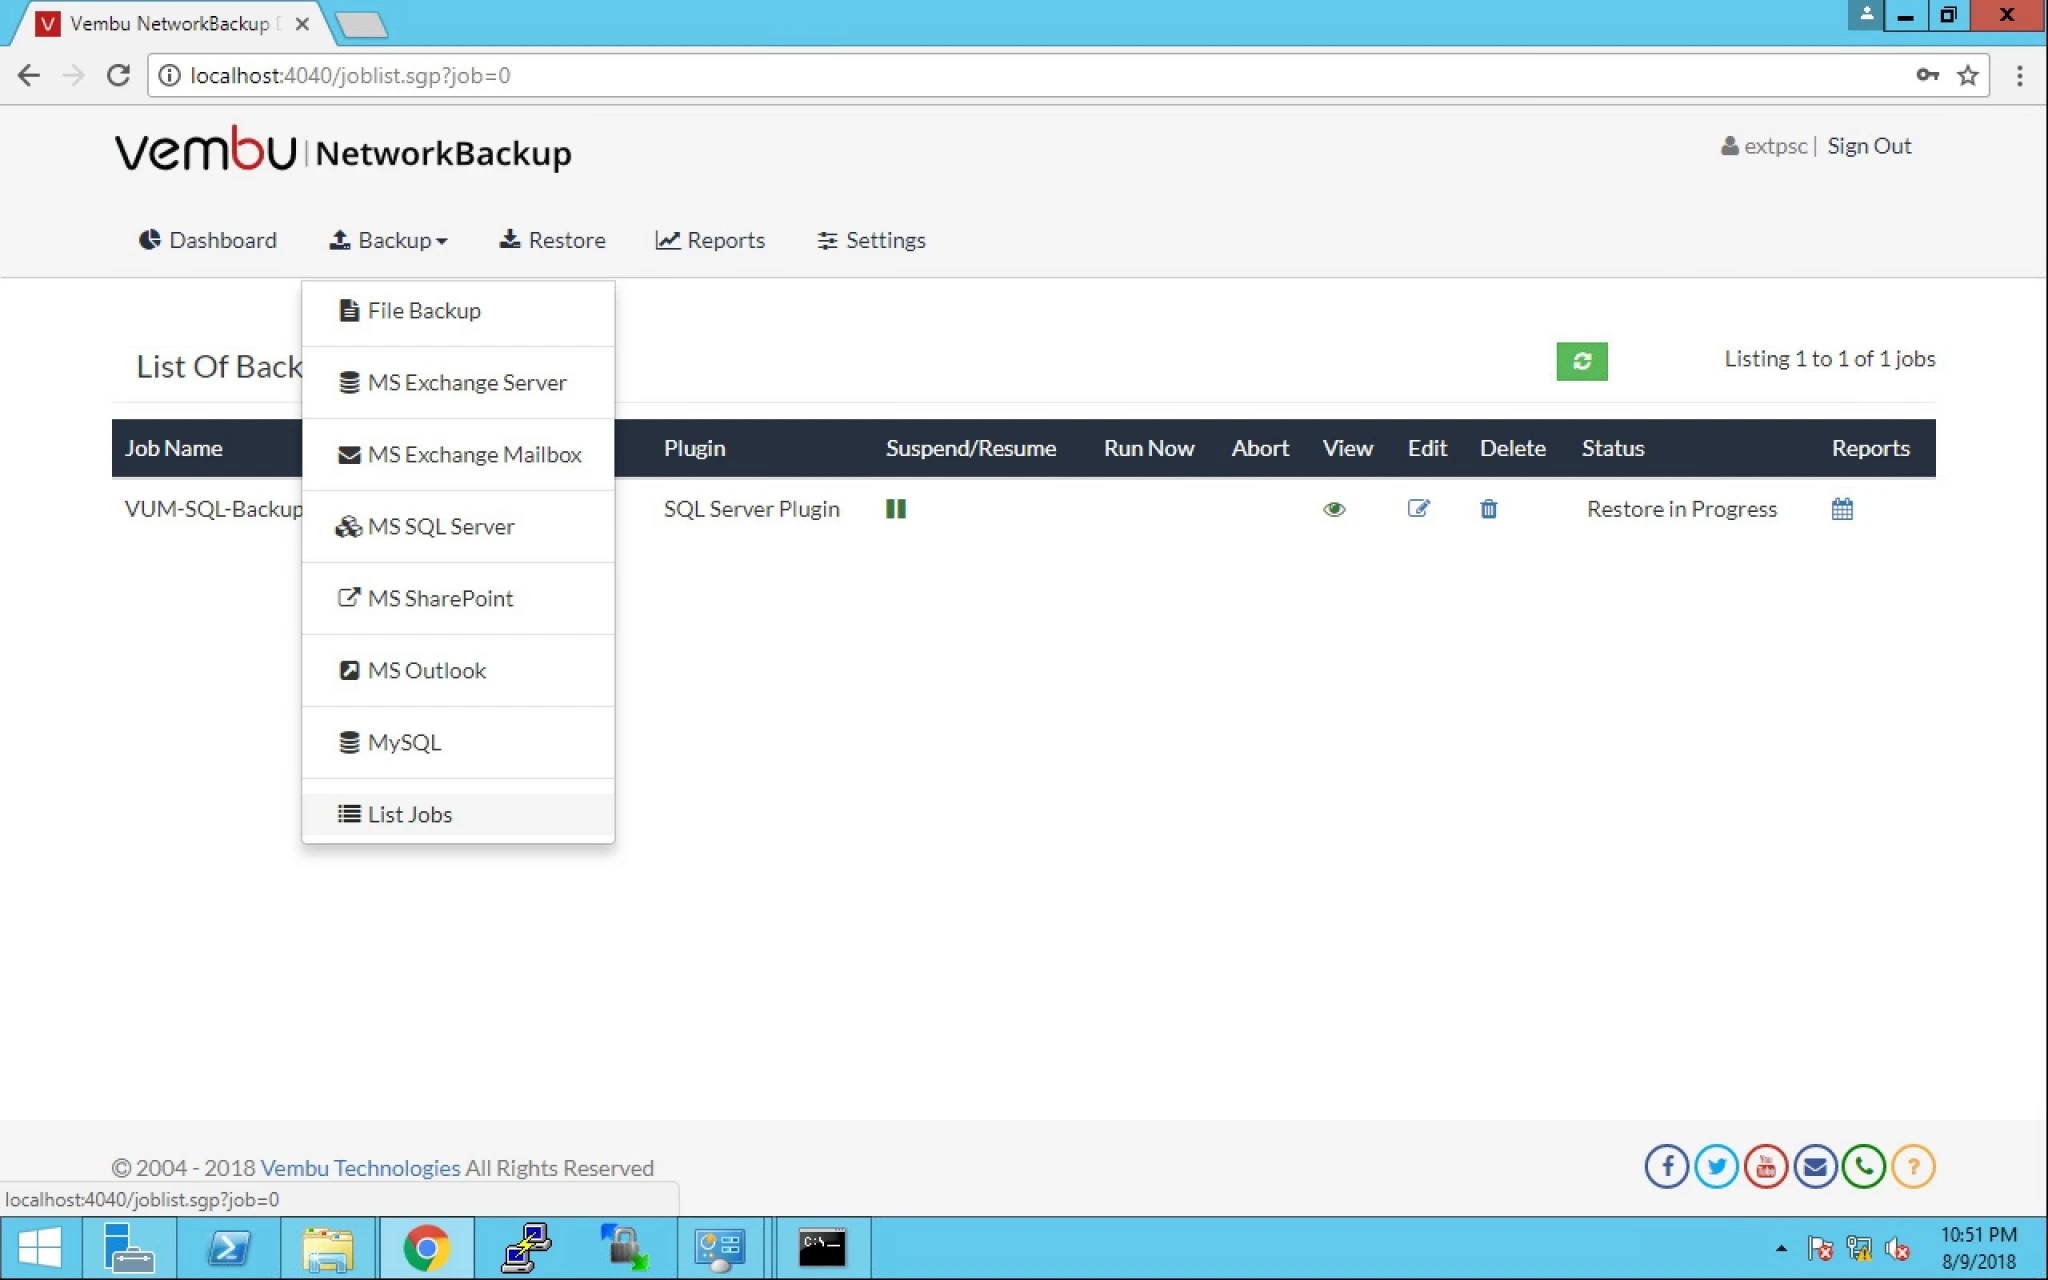
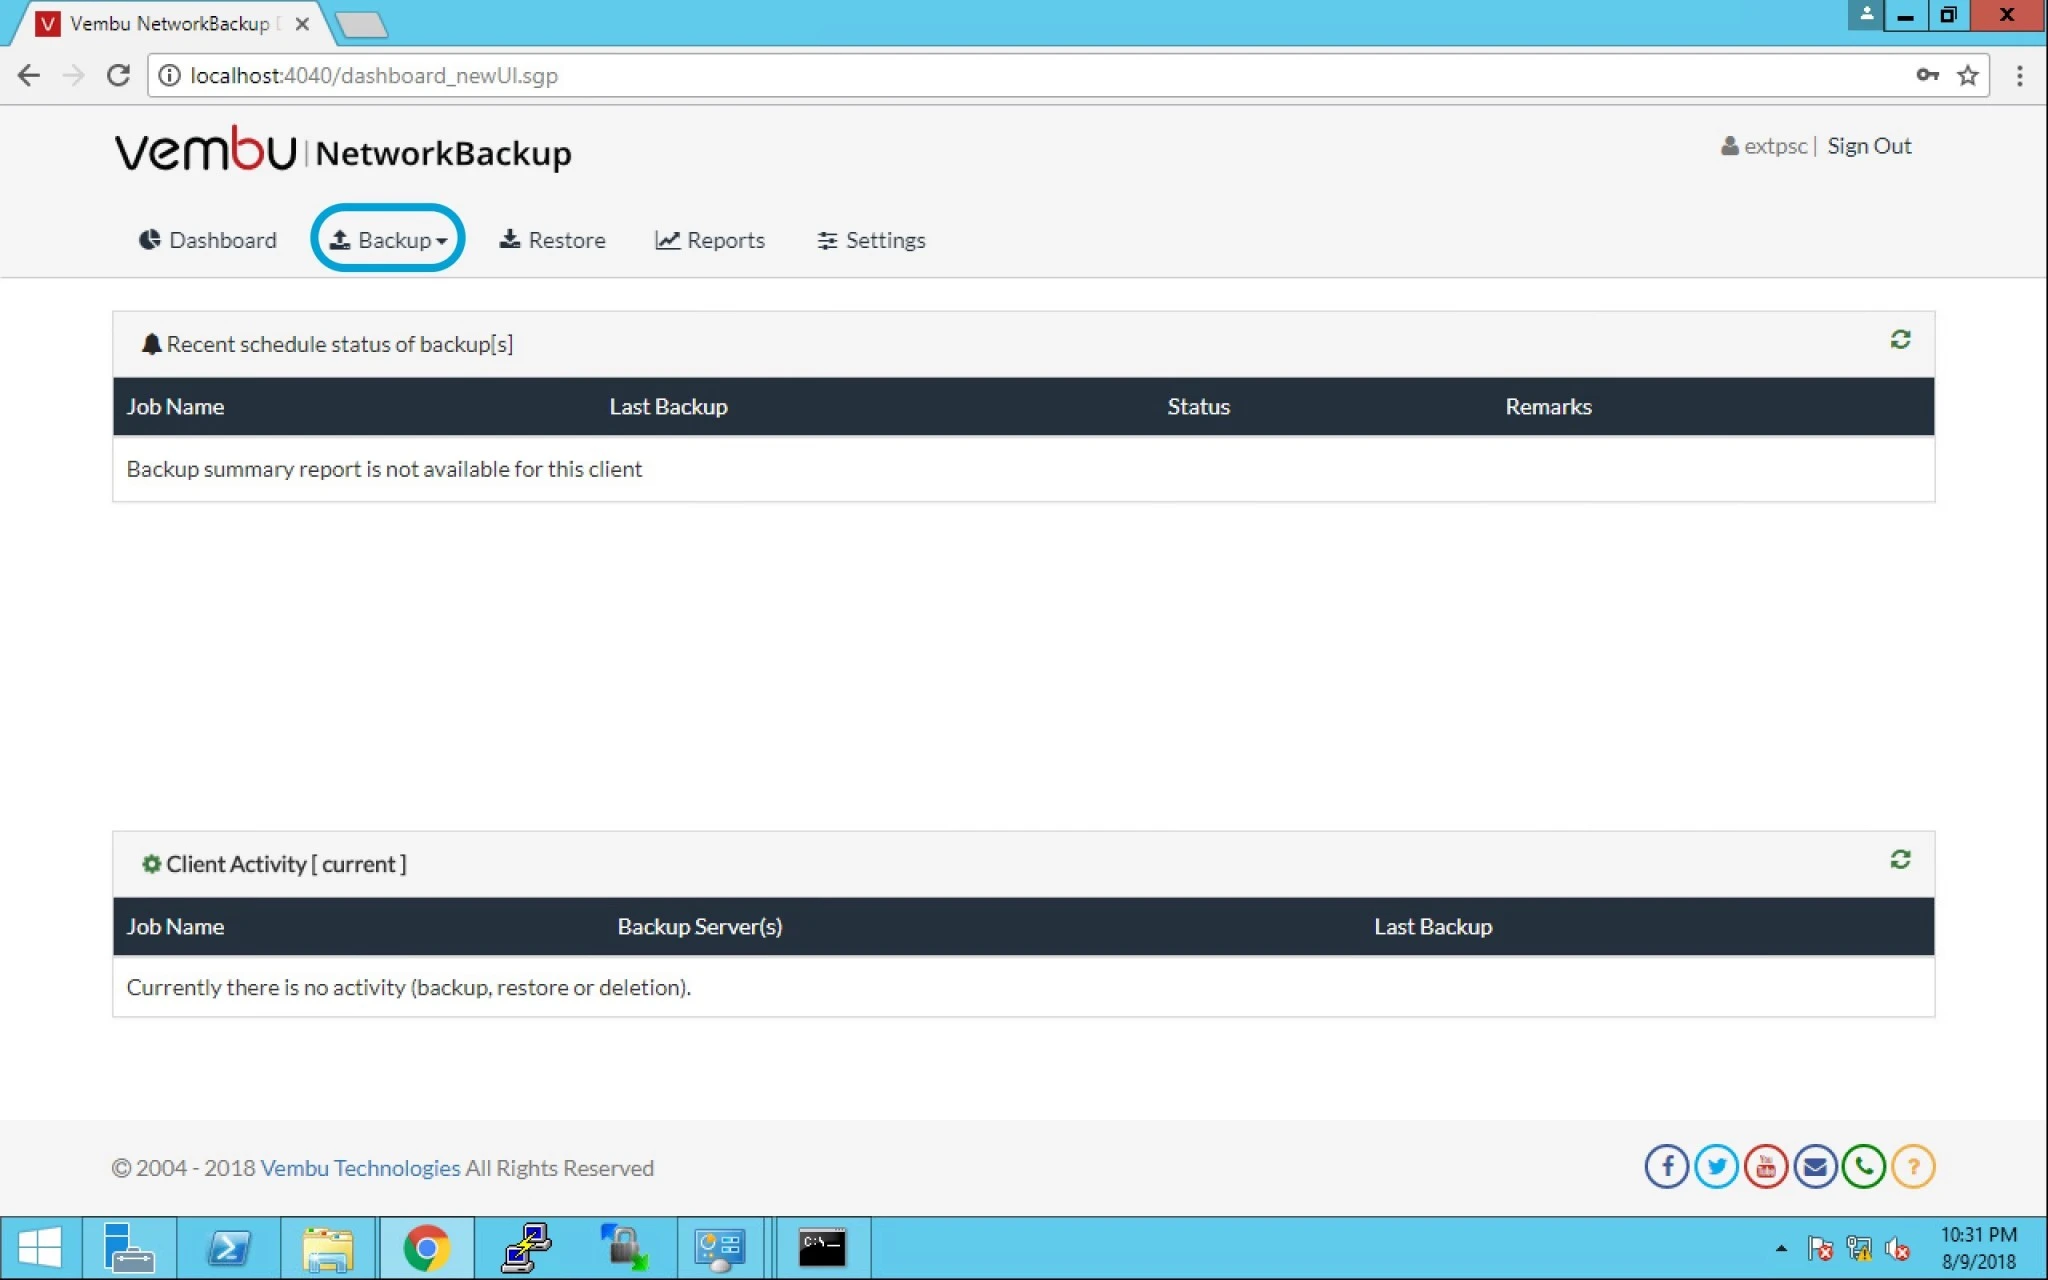
4.  Go to Backup tab as seen in the below image.


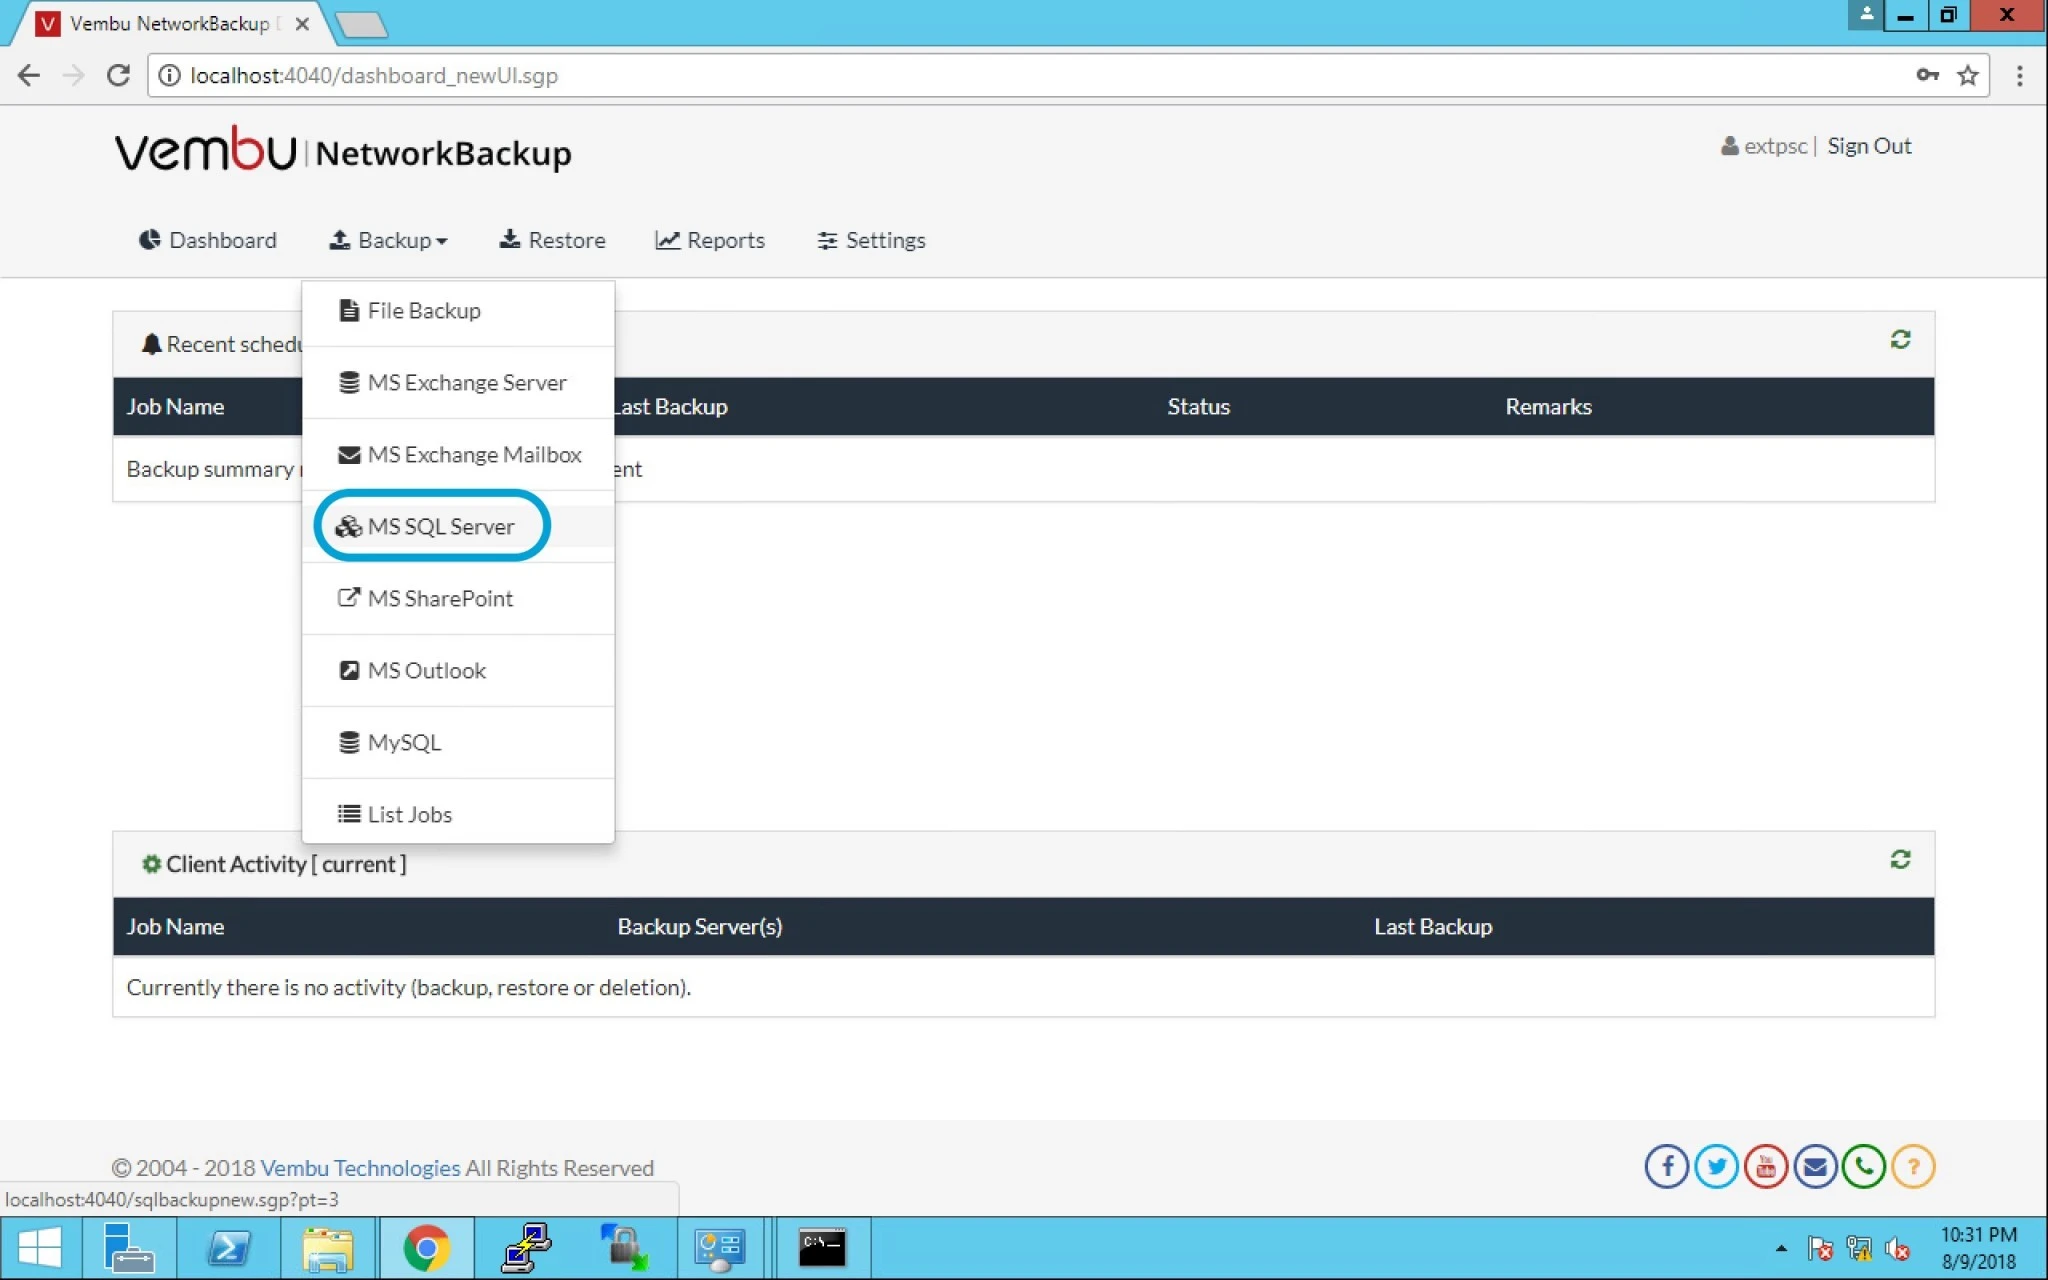
5. Now Click on the MS SQL Server option.


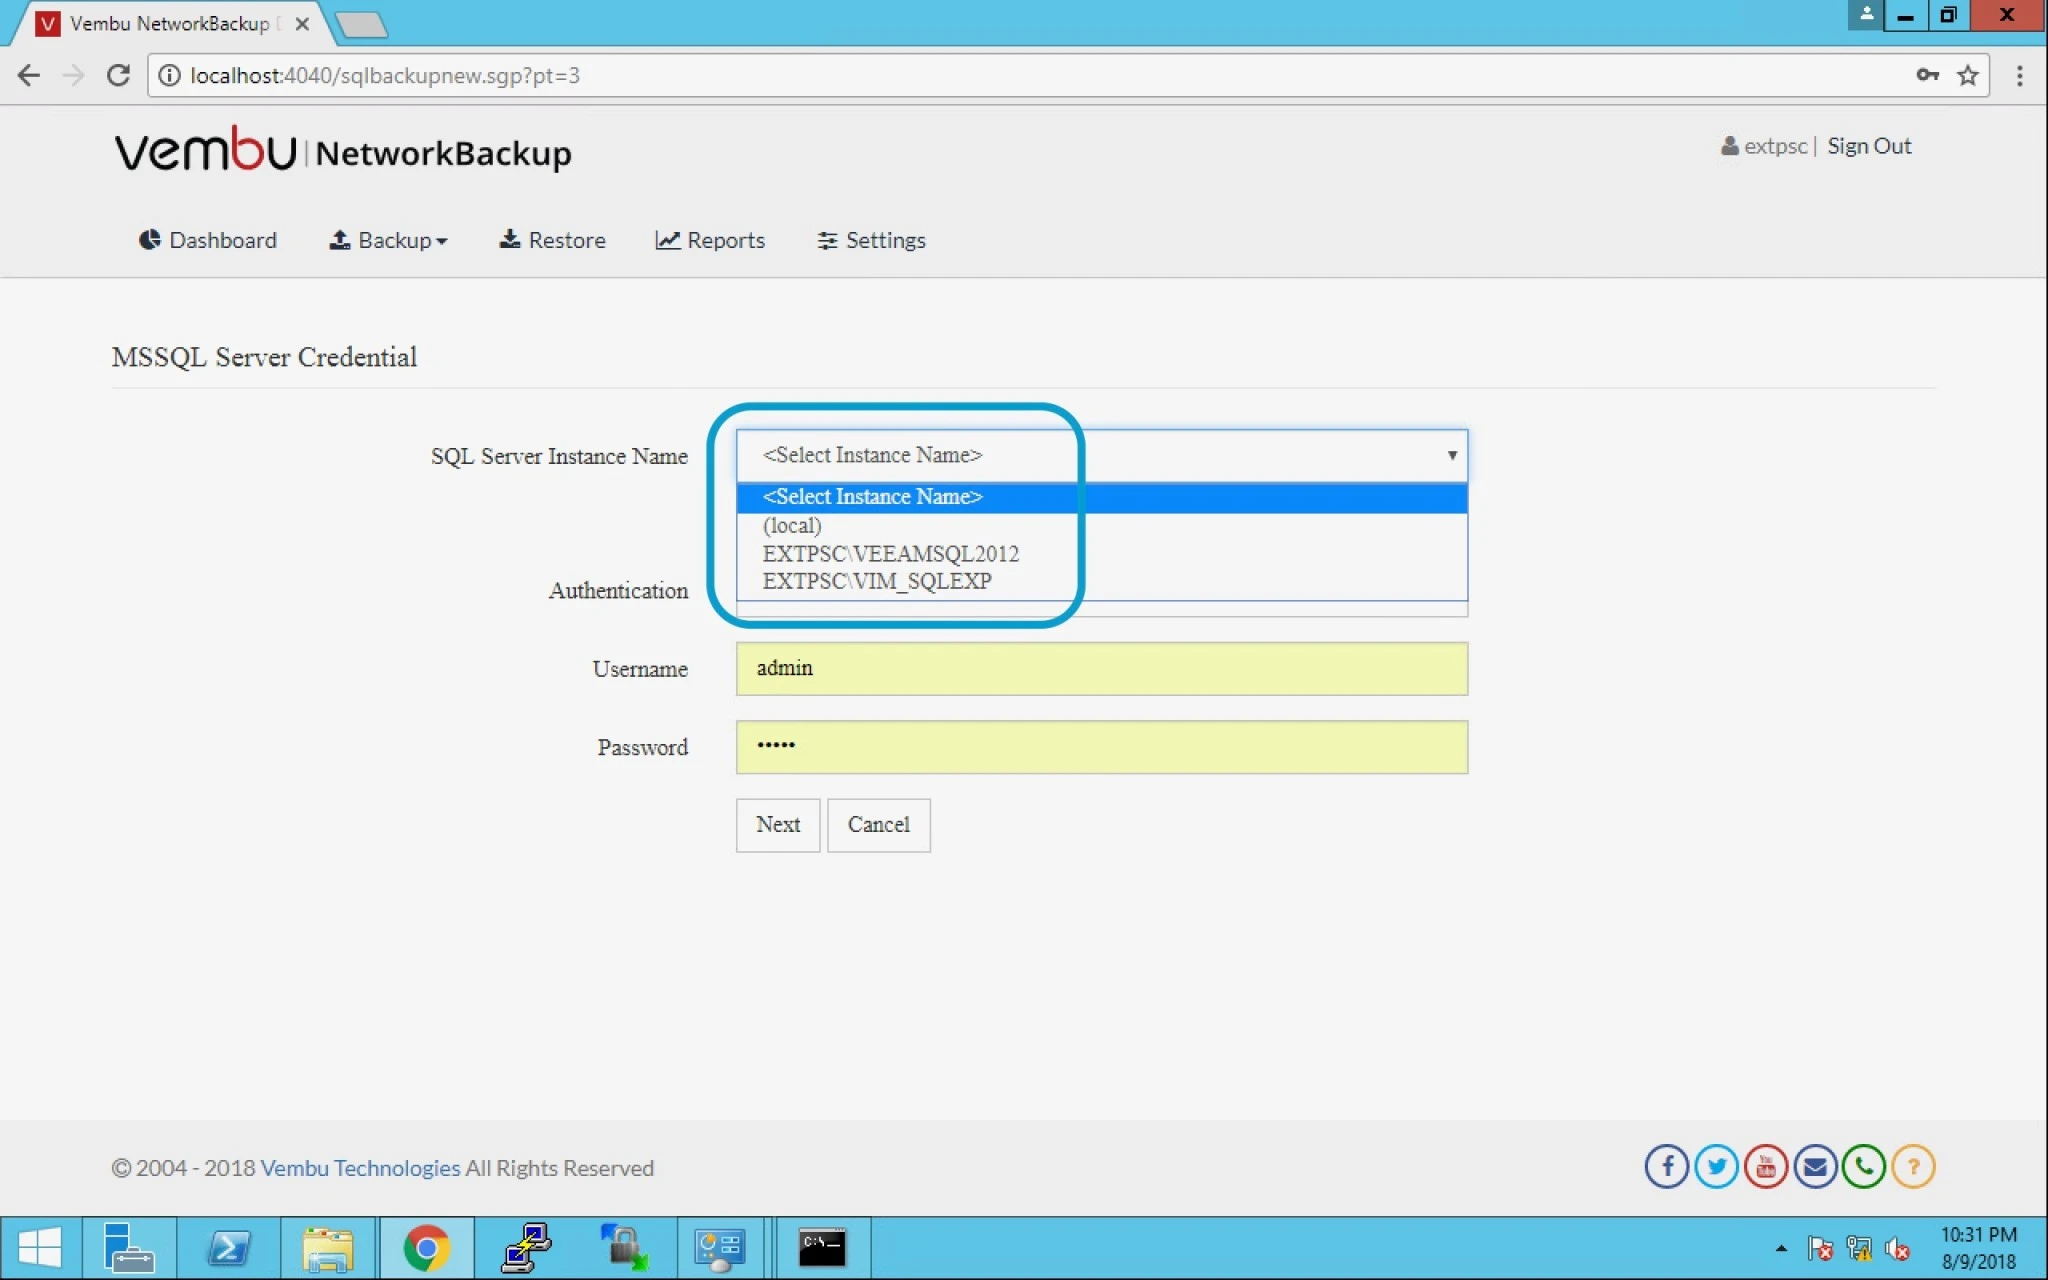
6. After this you can see below options:

SQL Server Instance name – you can select the database as per your requirement.


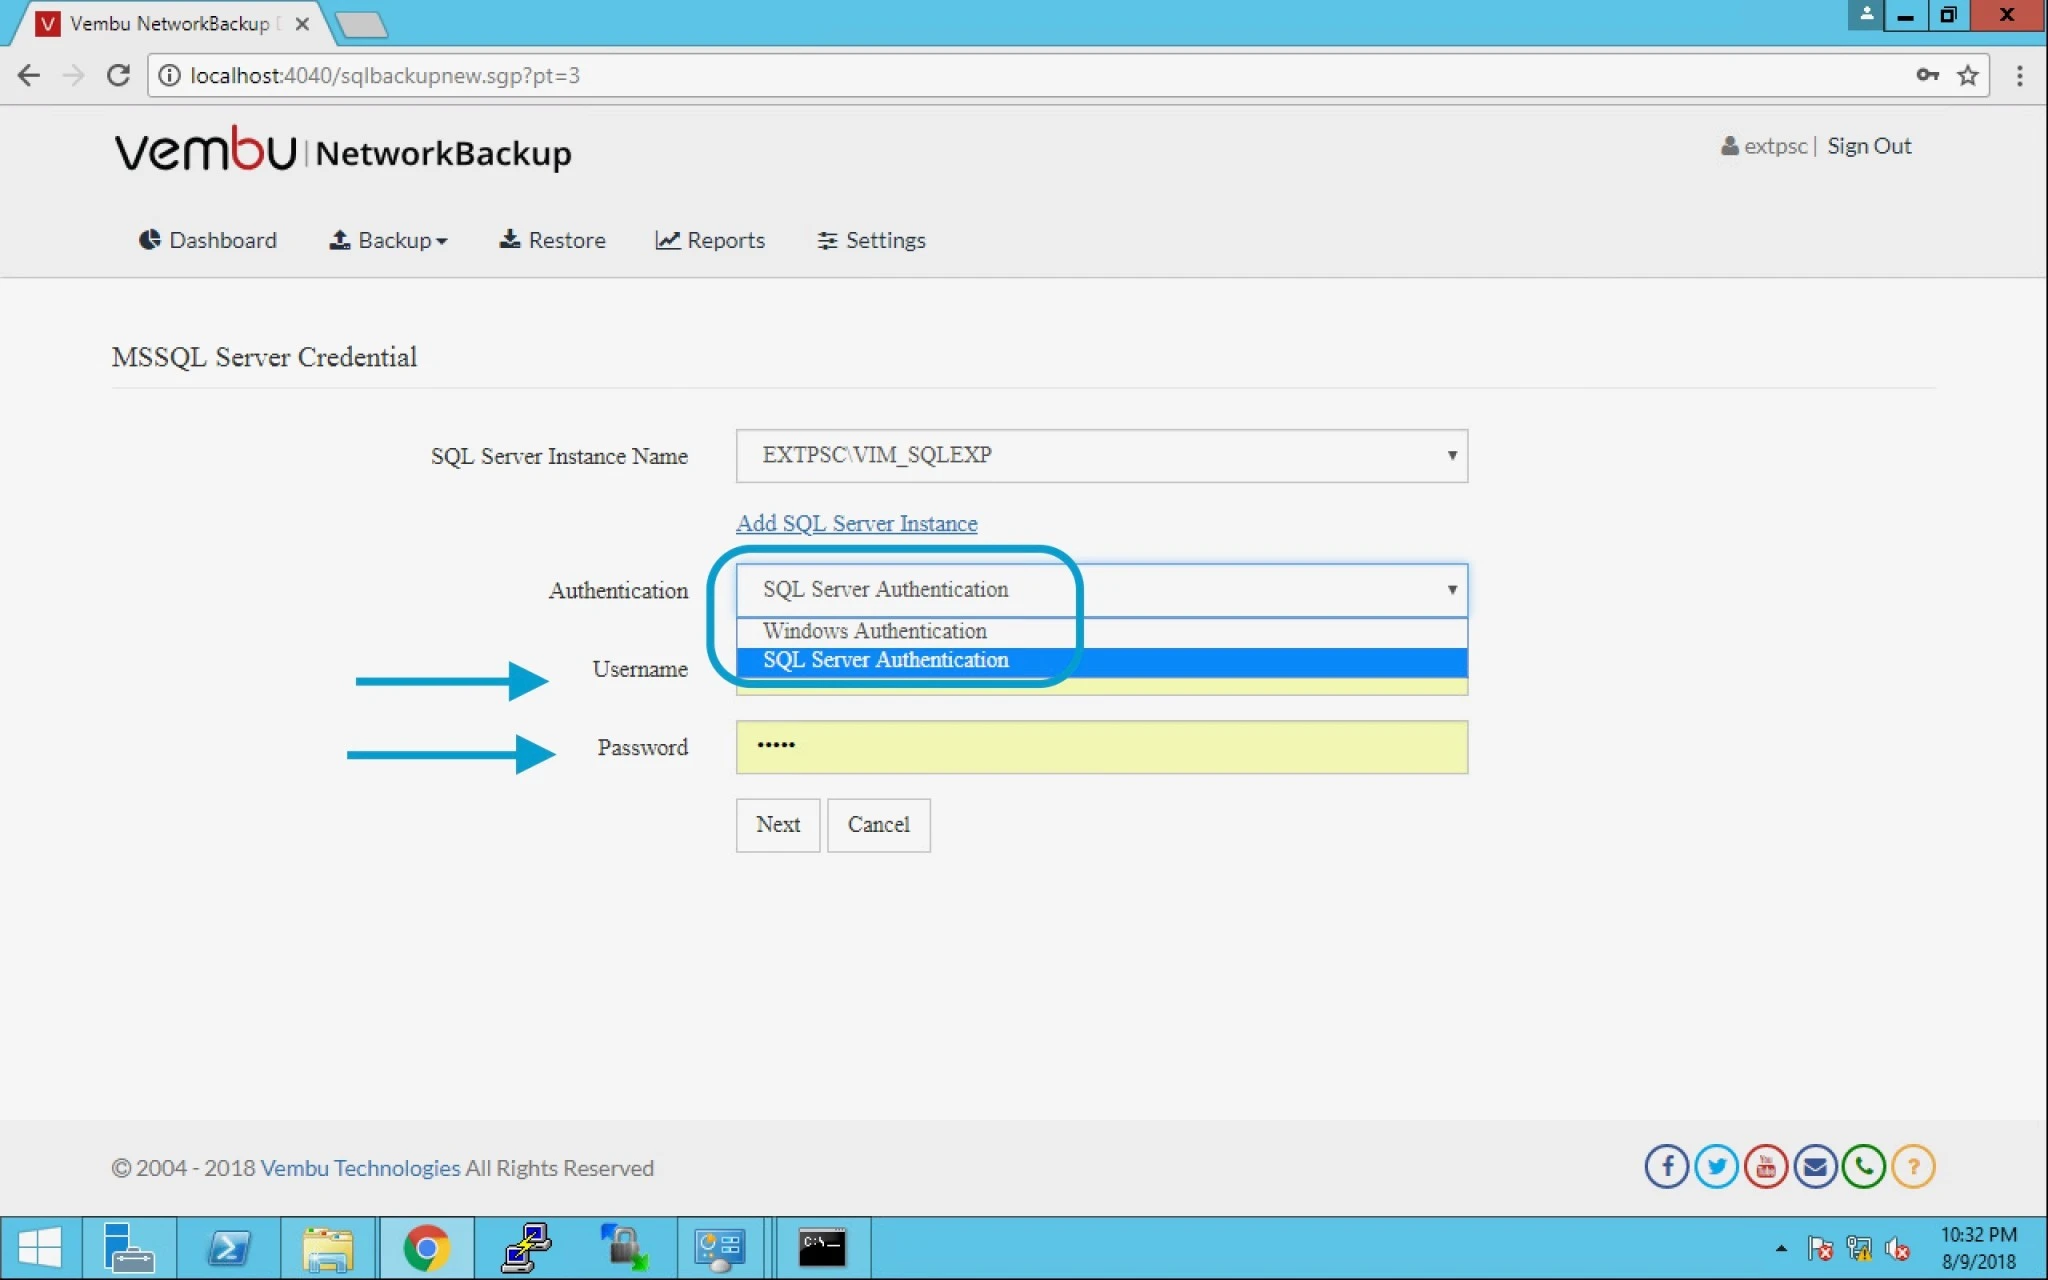
7.  Authentication – use Windows or SQL Server Authentication.

Provide username and Password. Click next.


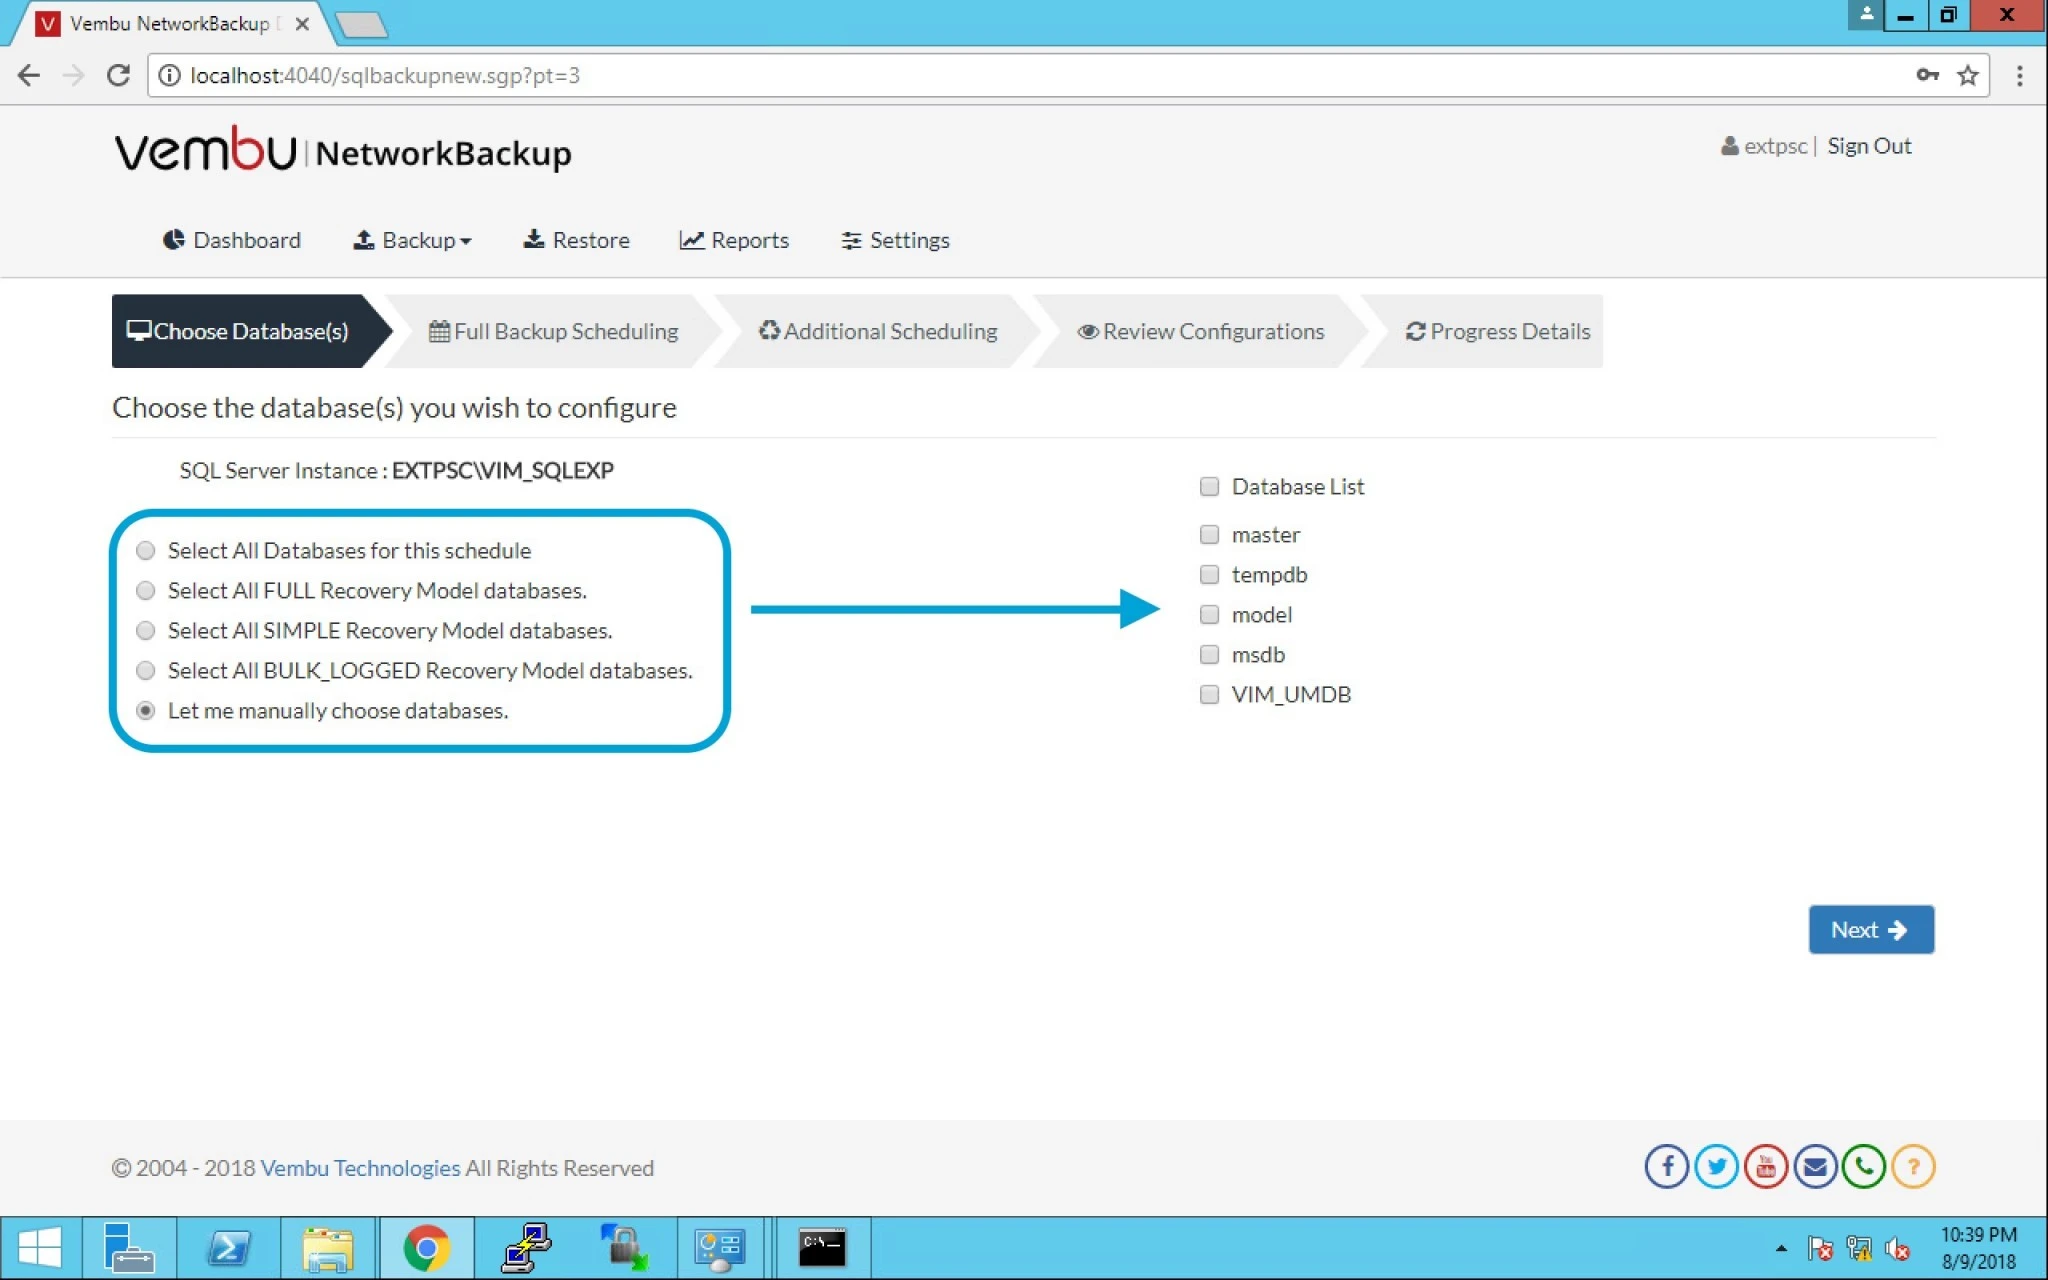
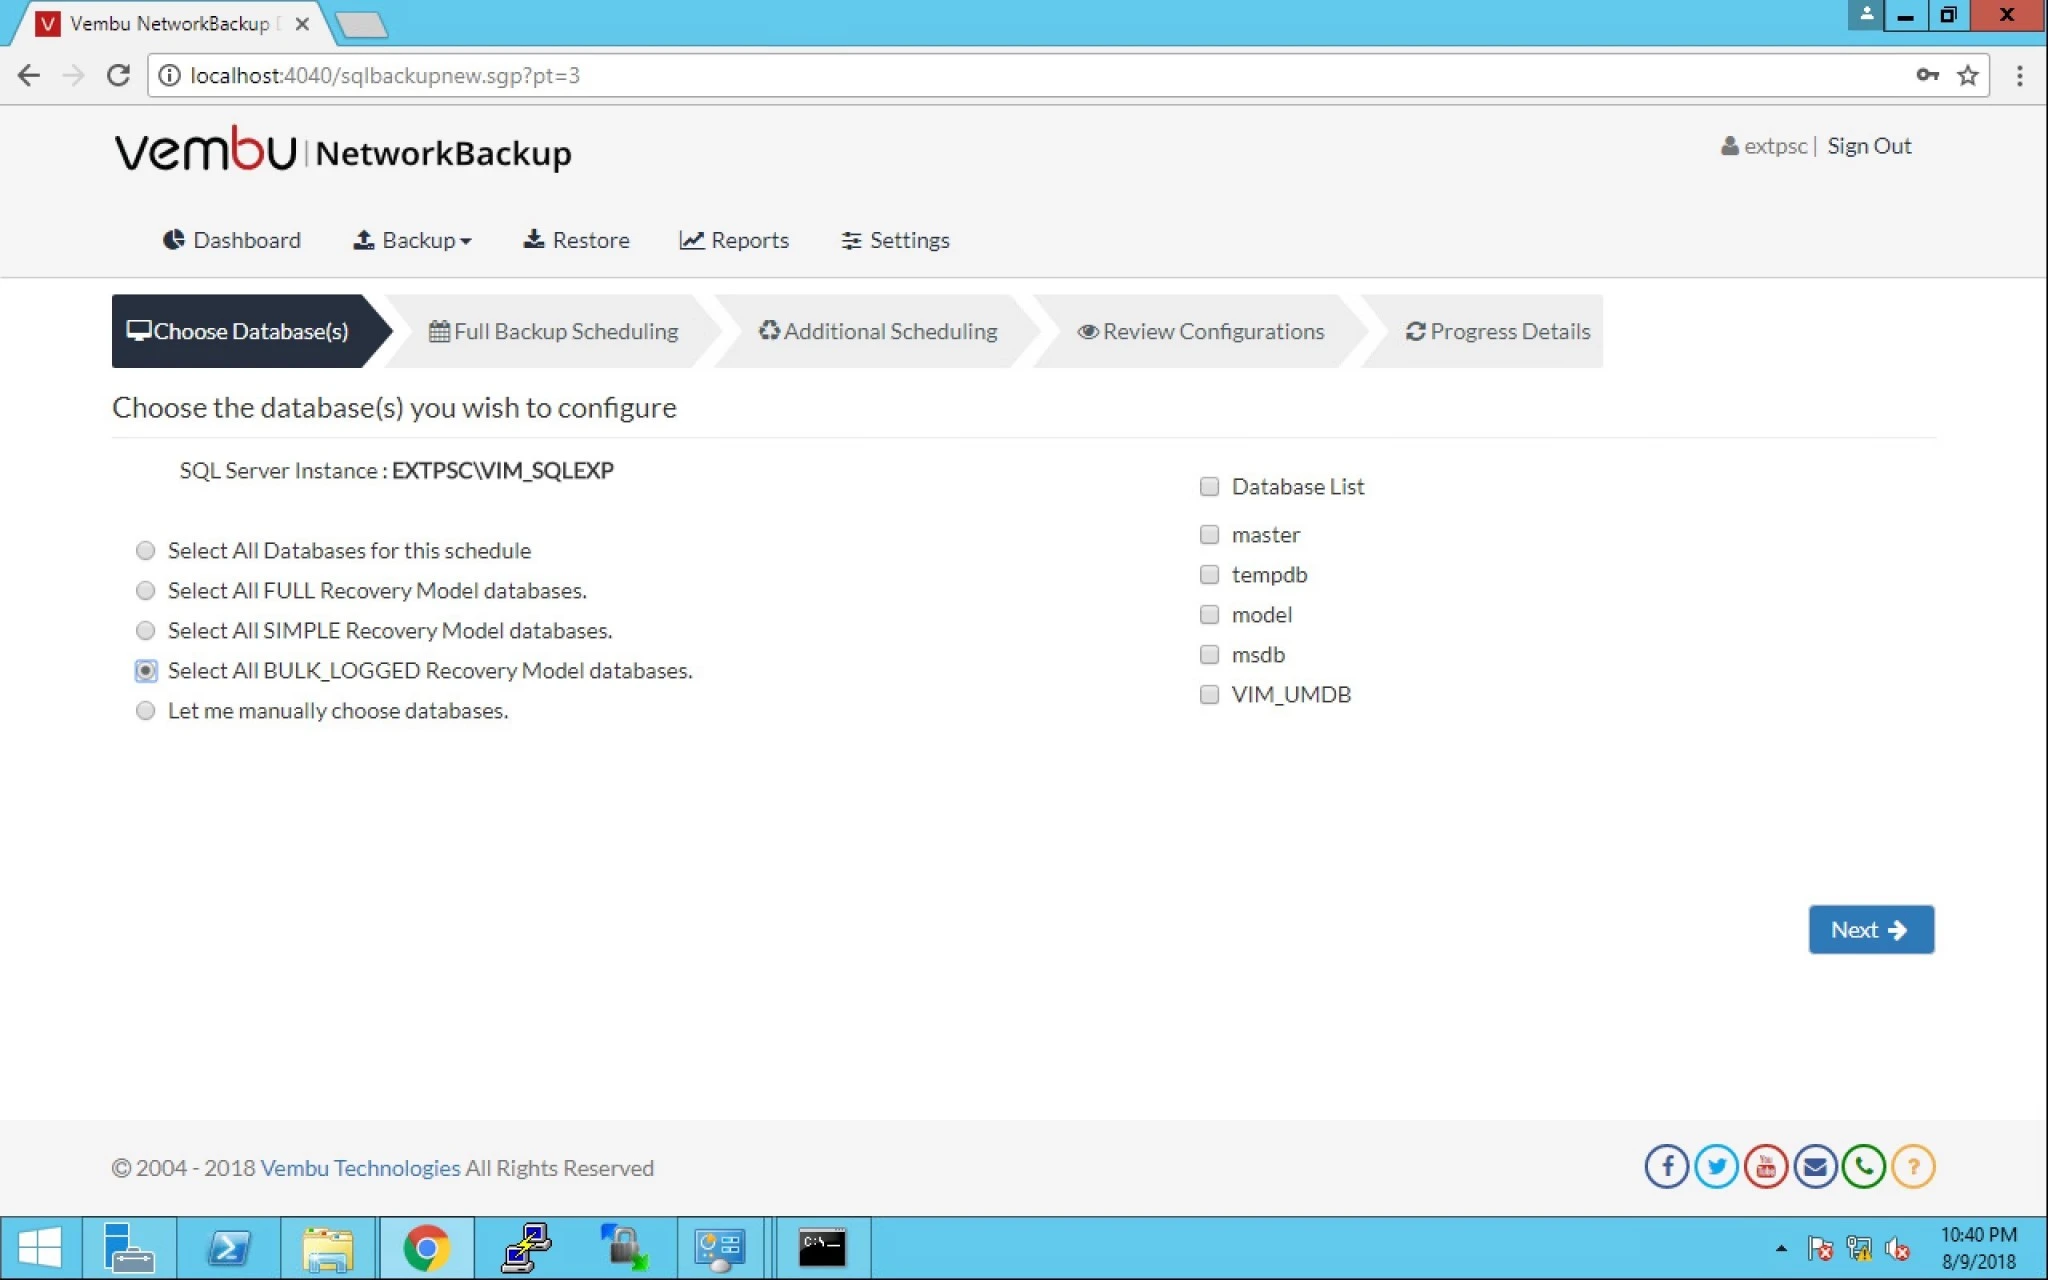
8. After choosing database, you can now select from the given below options to backup SQL instance.


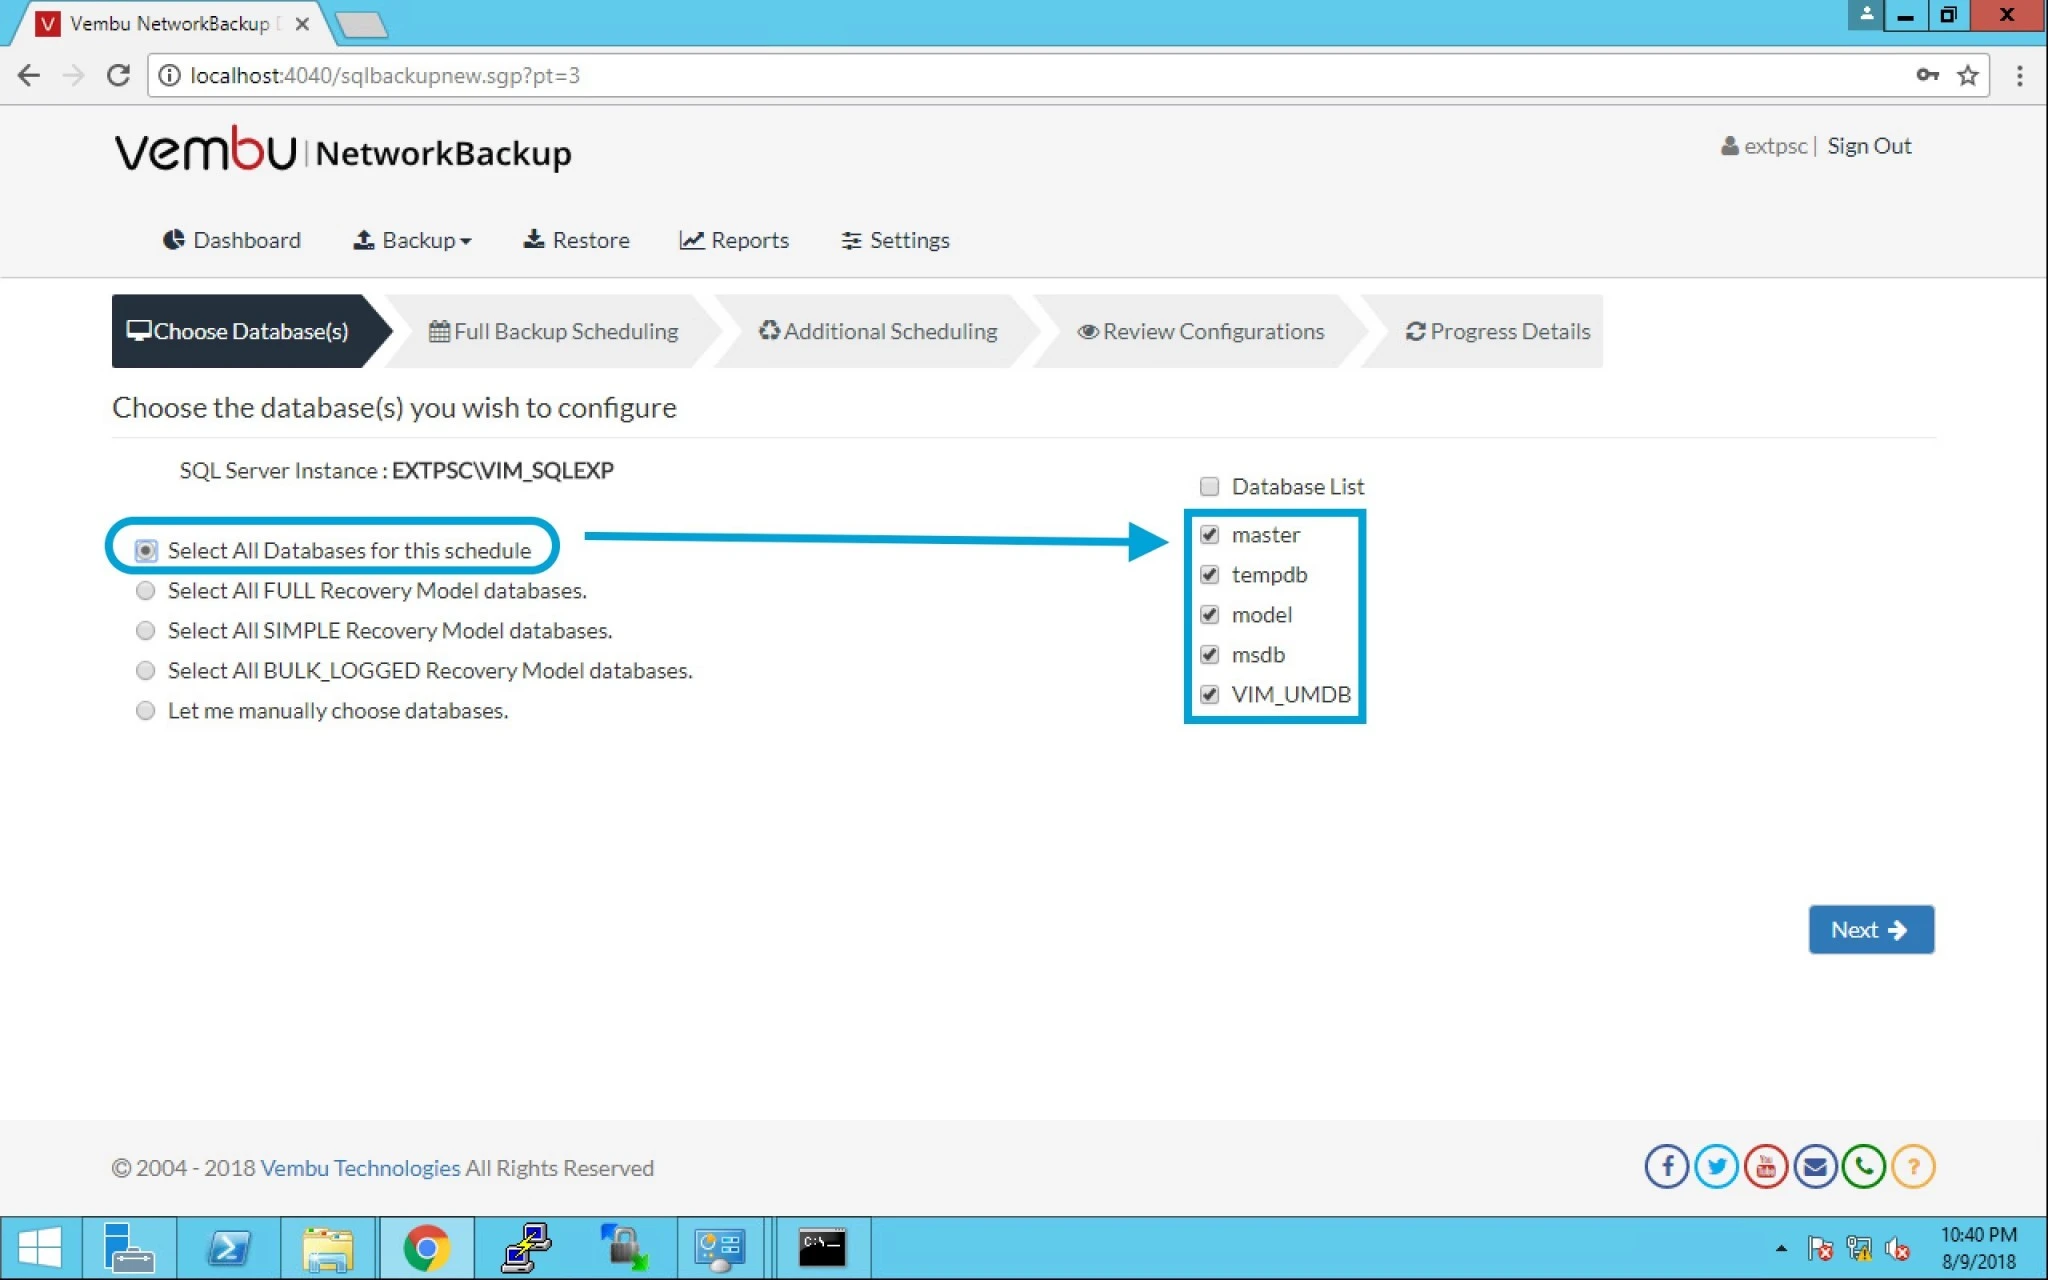
9. Lets assume we choose the first option then it will automatically select the table given on right hand side.


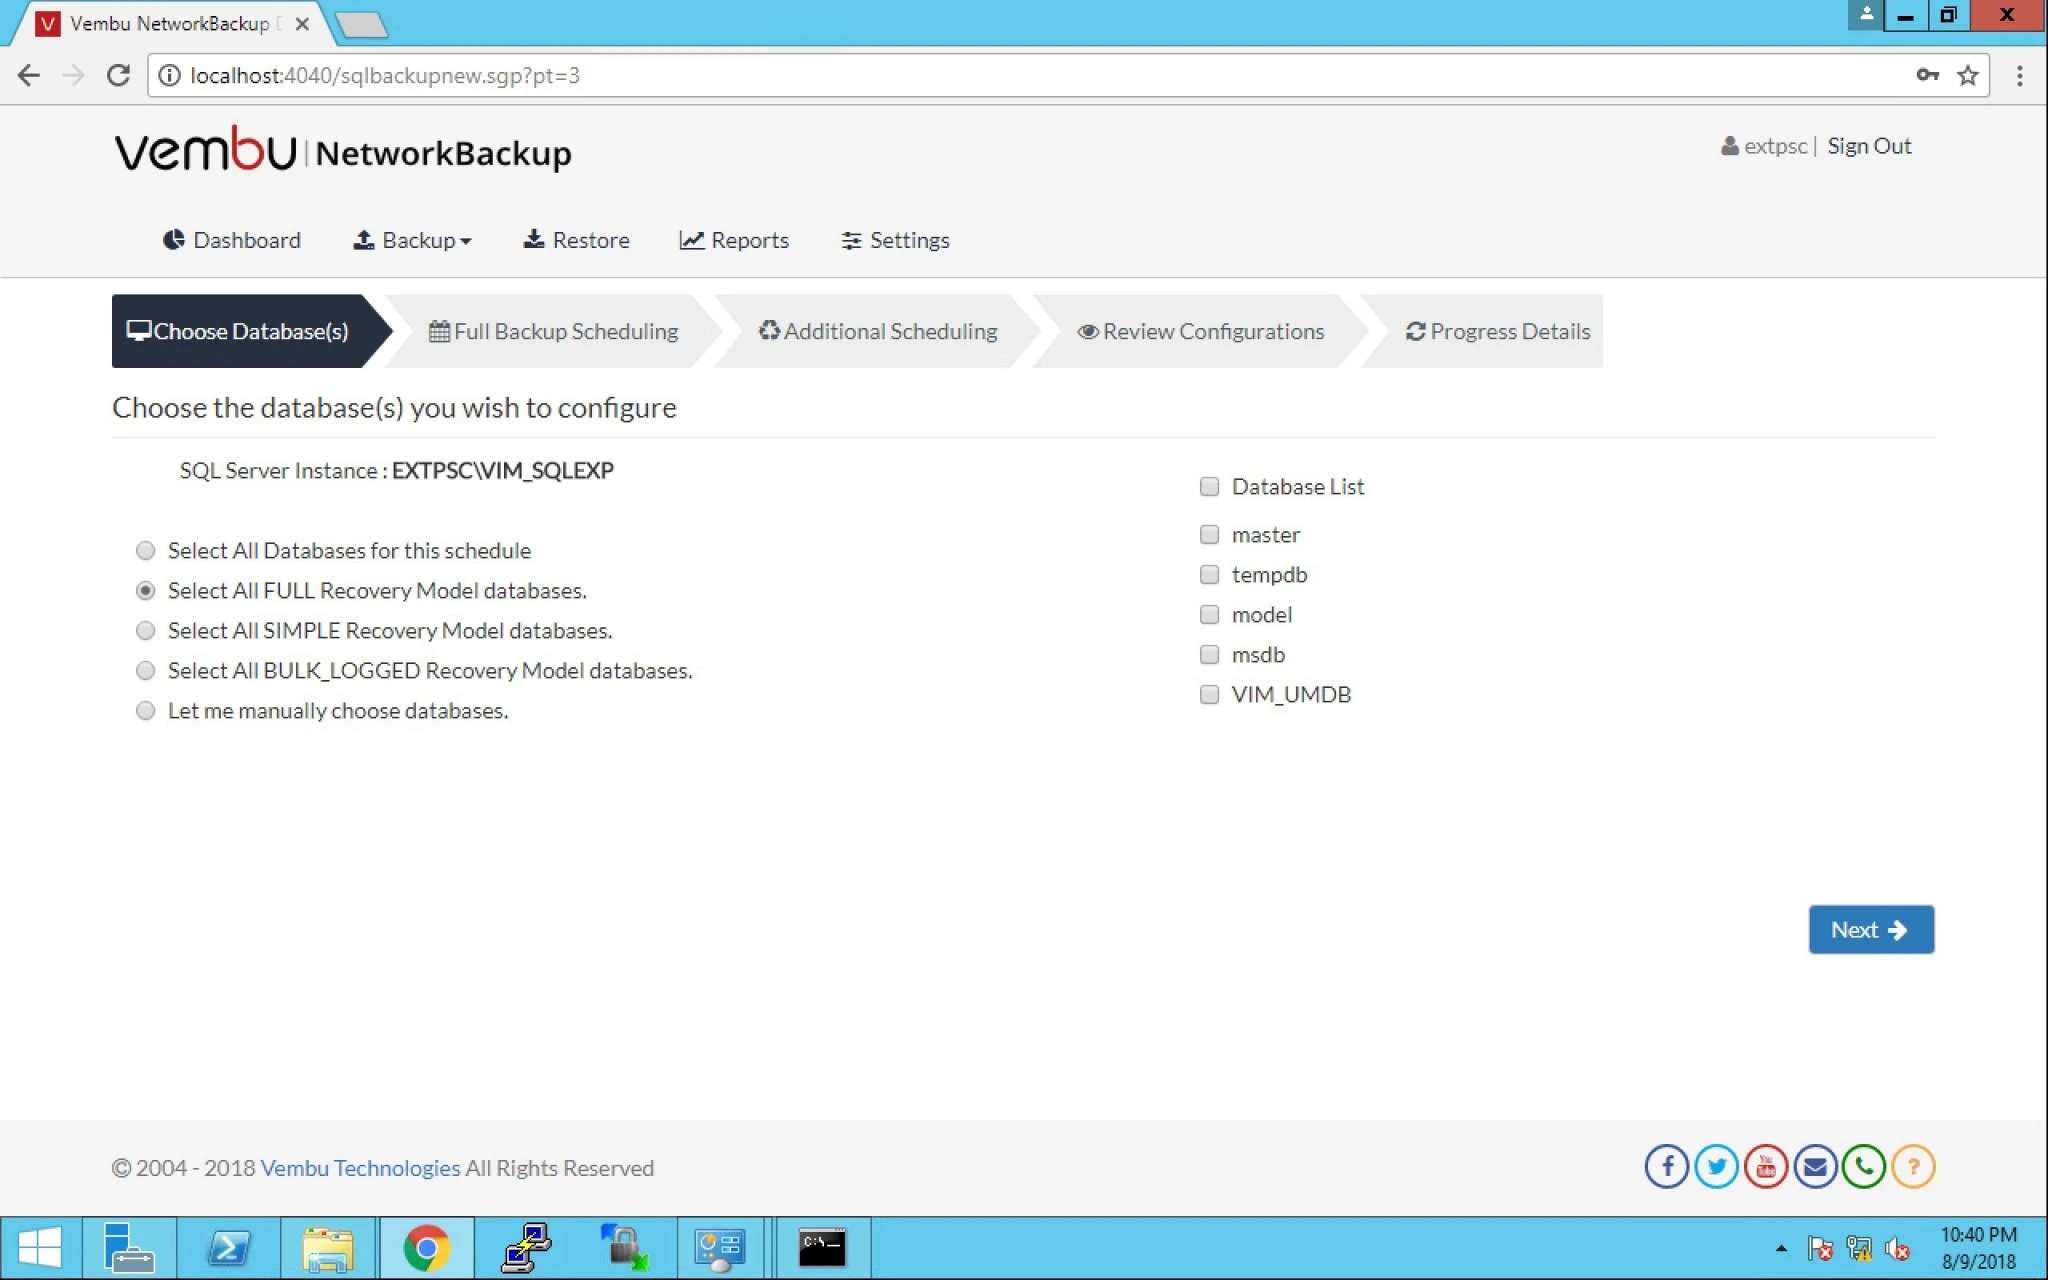
10. Similarly when we choose the second option “All FULL Recovery Model databases”, the R.H.S table isn’t selected automatically.


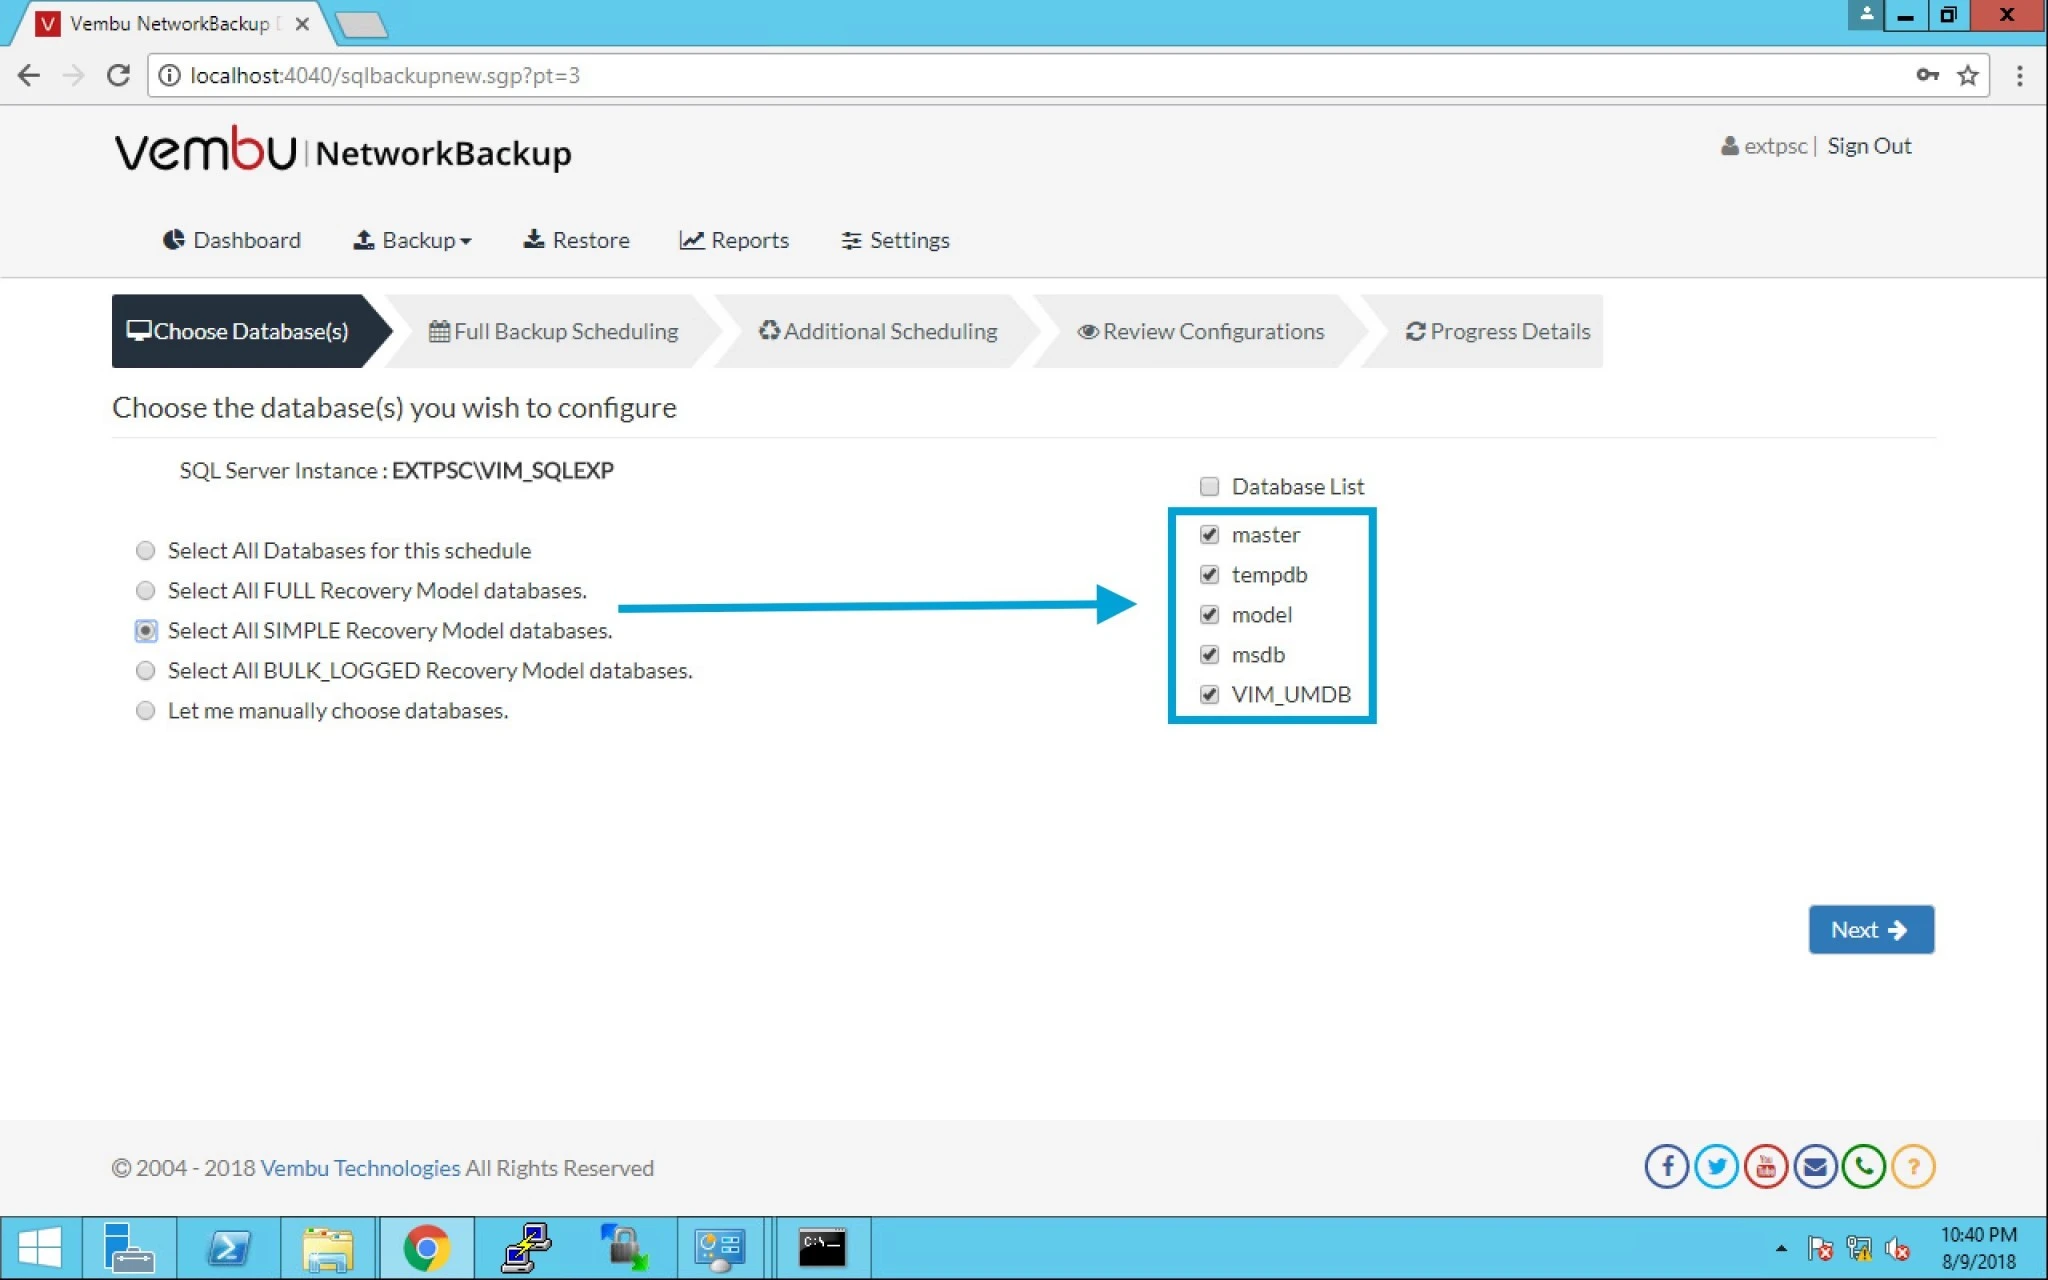
11.  When we go ahead and select the third option “All SIMPLE Recovery Model databases”, the R.H.S table is selected by default.


12. Select “All BULK_LOGGED Recovery Model databases” will not automatically select the R.H.S table.


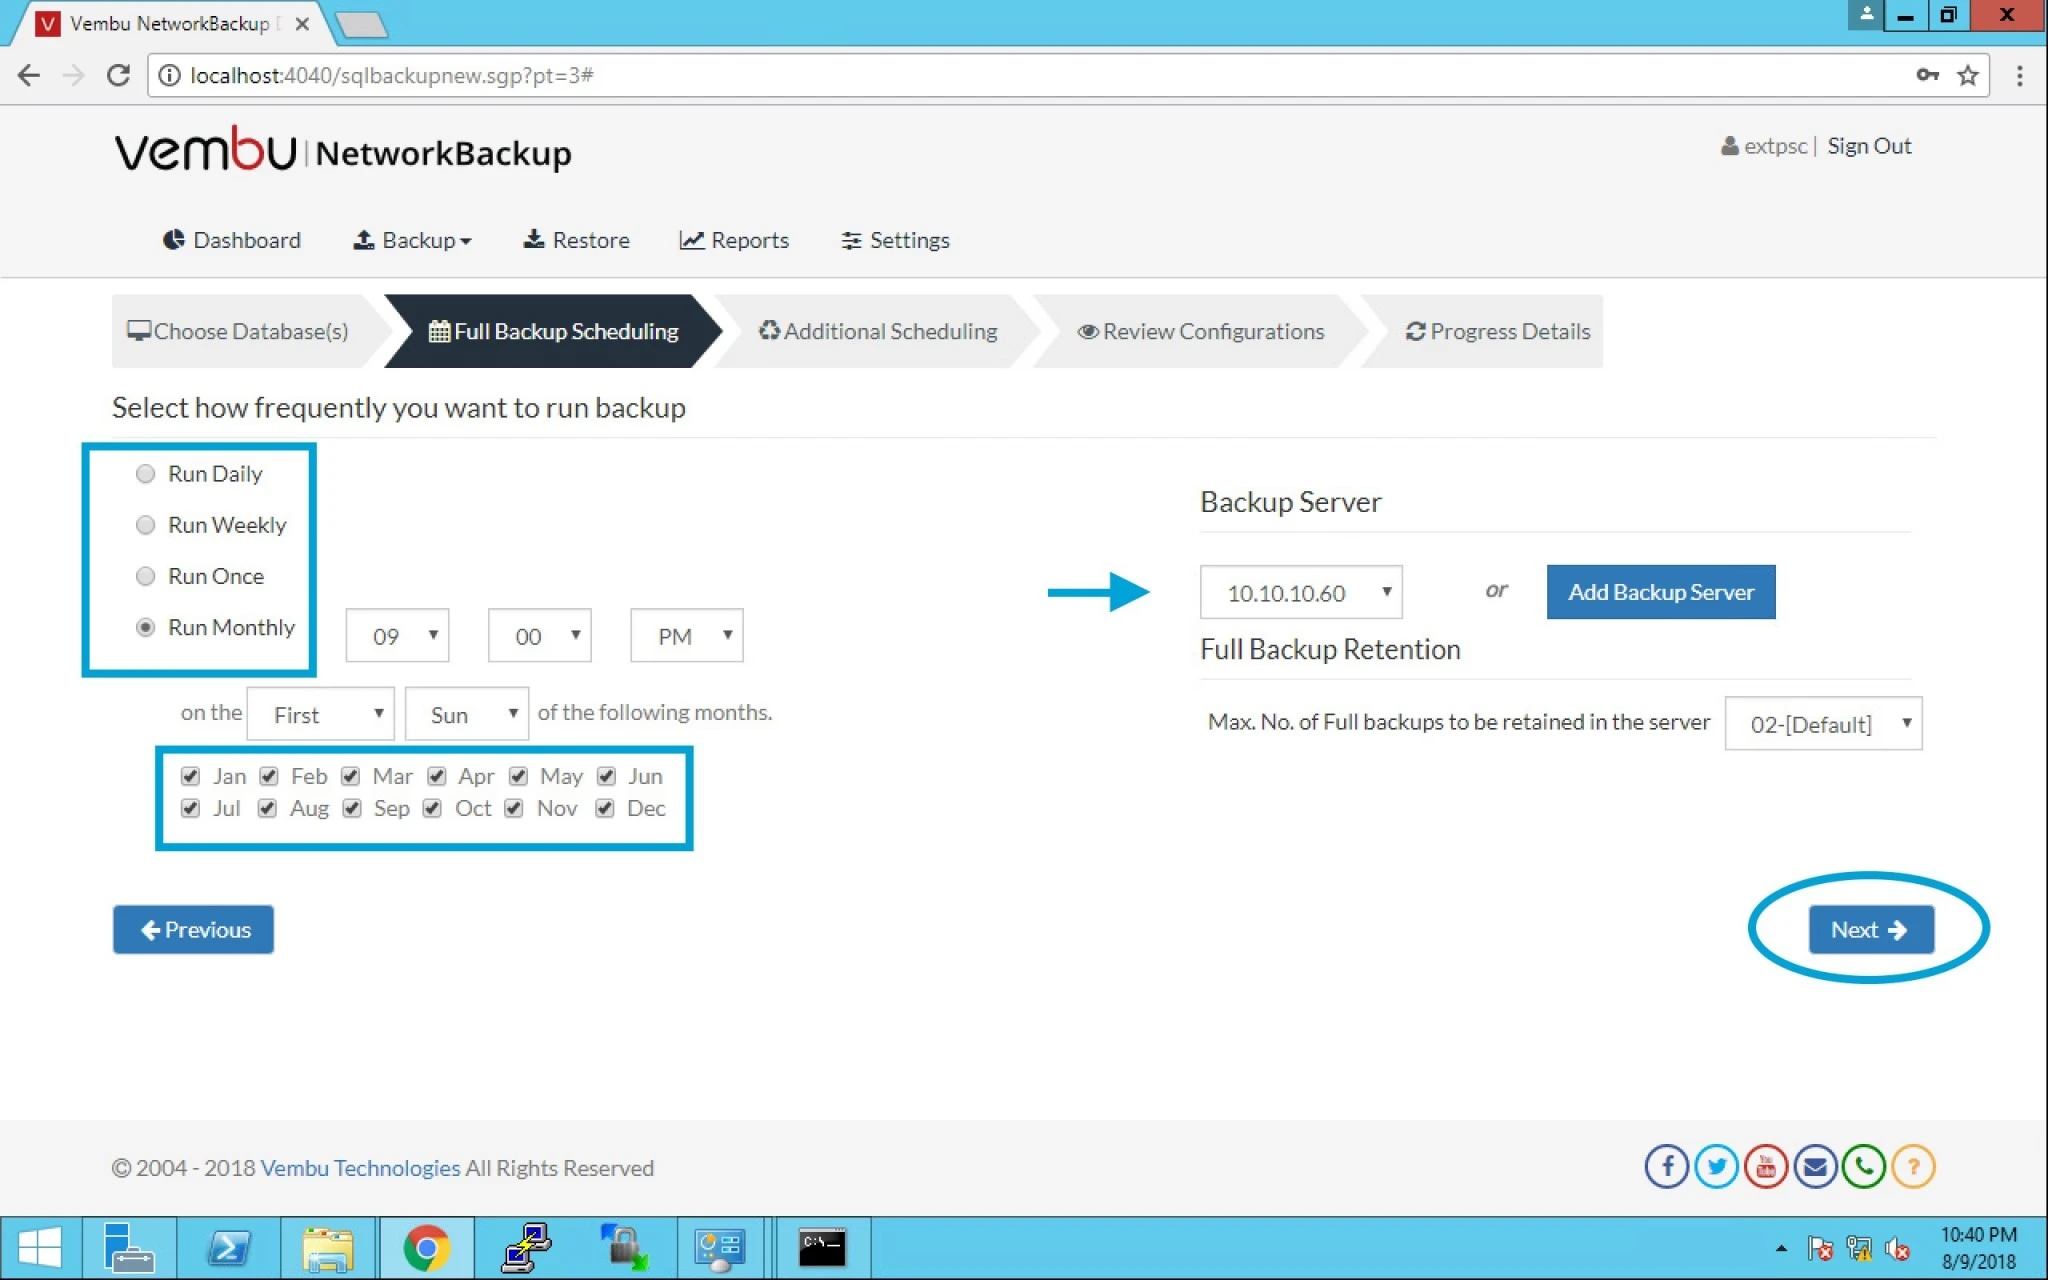
13.  In this option you can select the Frequency or when it will take backup like as given below:

a) Run Daily

b) Run Weekly

c) Run Once

d) Run Monthly

You can specify the time as well.


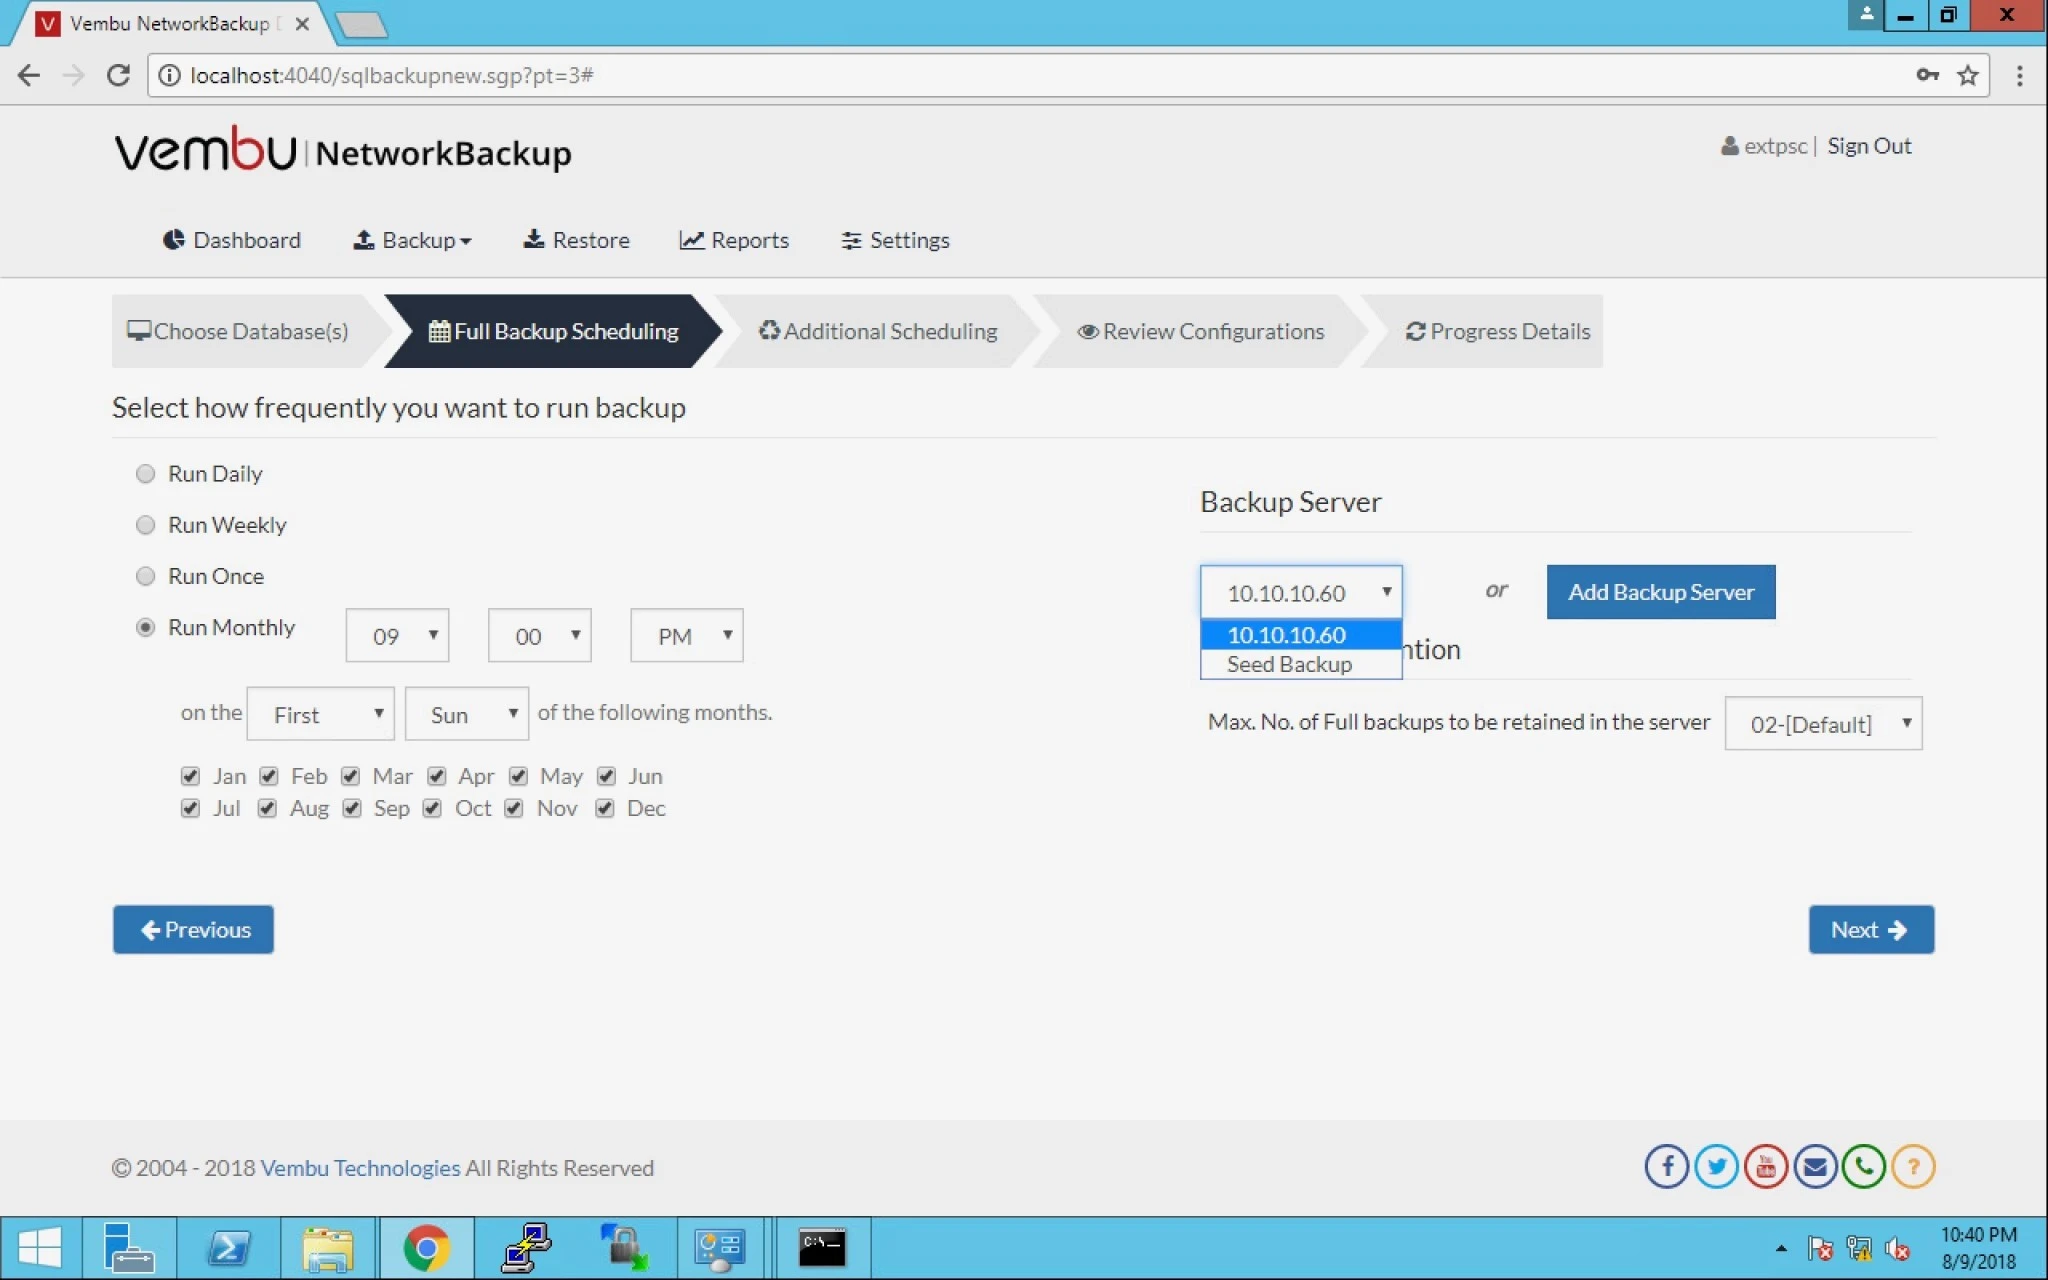
14. On the right hand side you can select Backup server or you have the option to add a backup server right here.


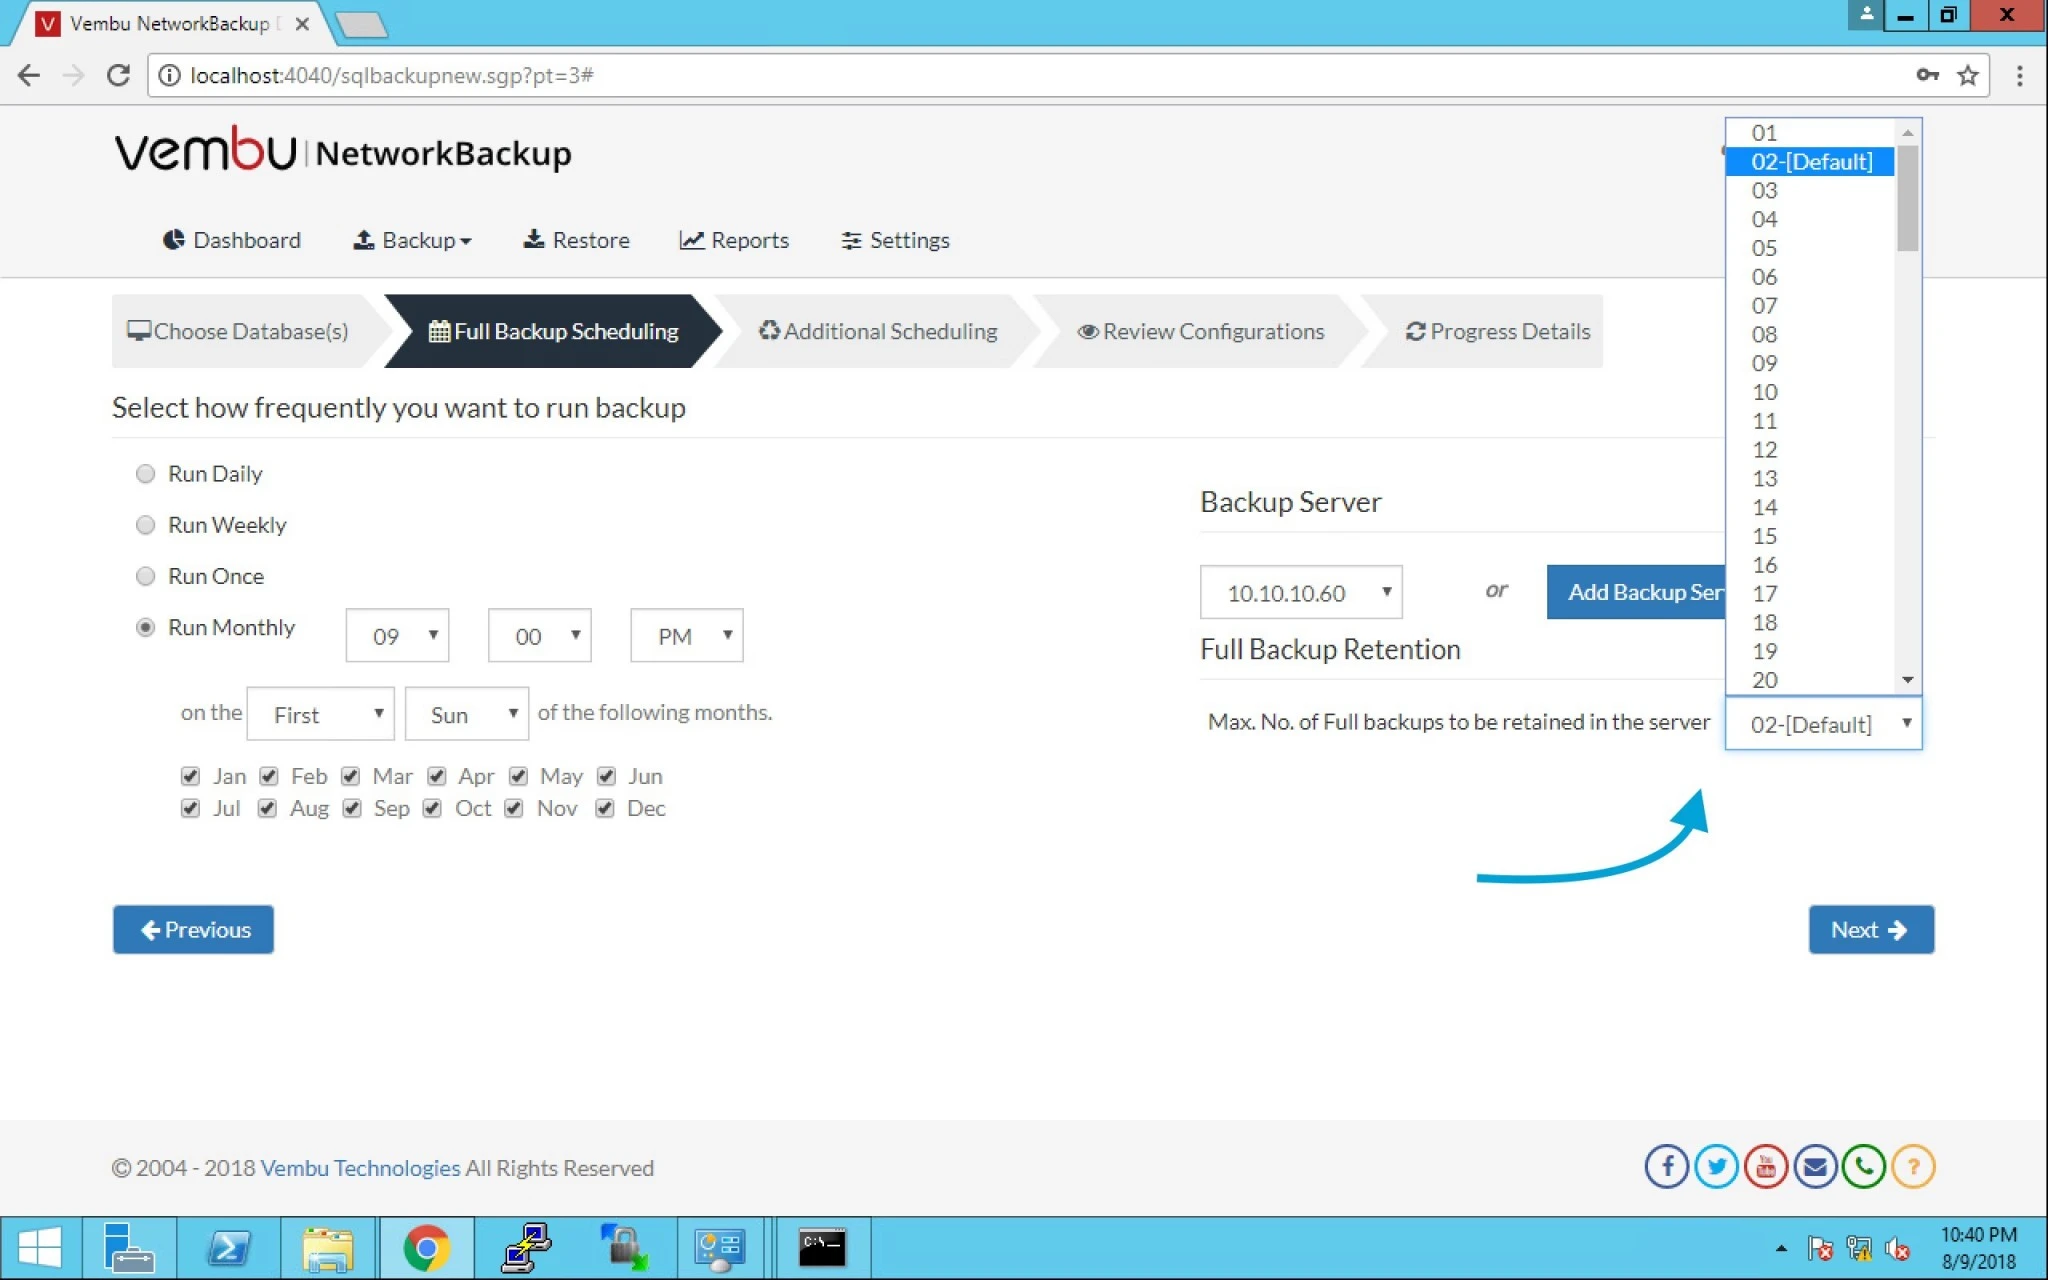
15. Here you can select Retention for this backup and click next.


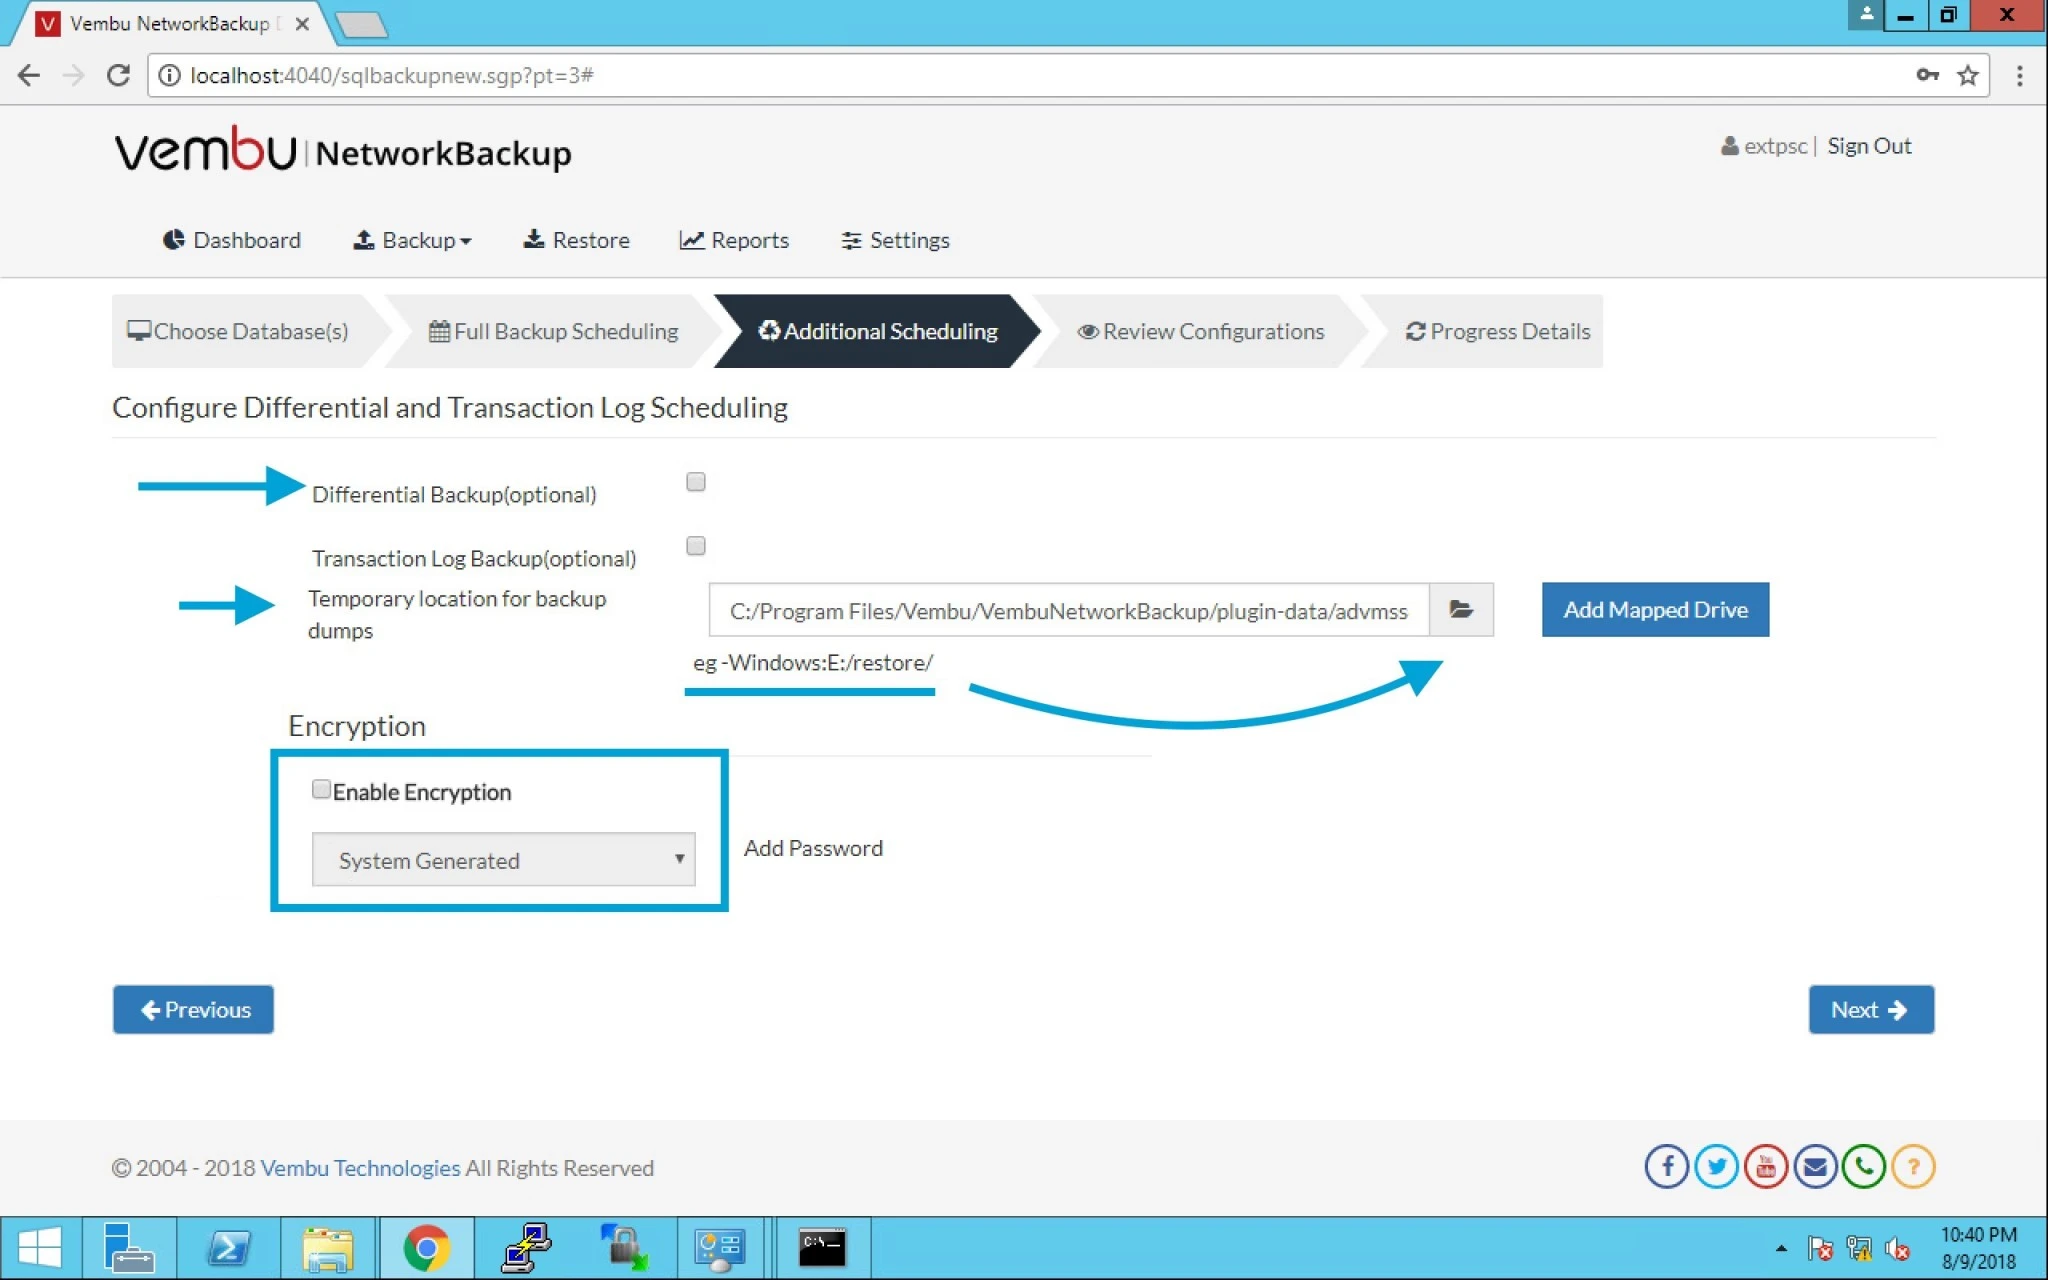
16. Here you have the options like Differential backup or Transaction Log Backup or even you can keep this in Temporary location.

Note: you can also select Encryption as per company policy or customer requirement.


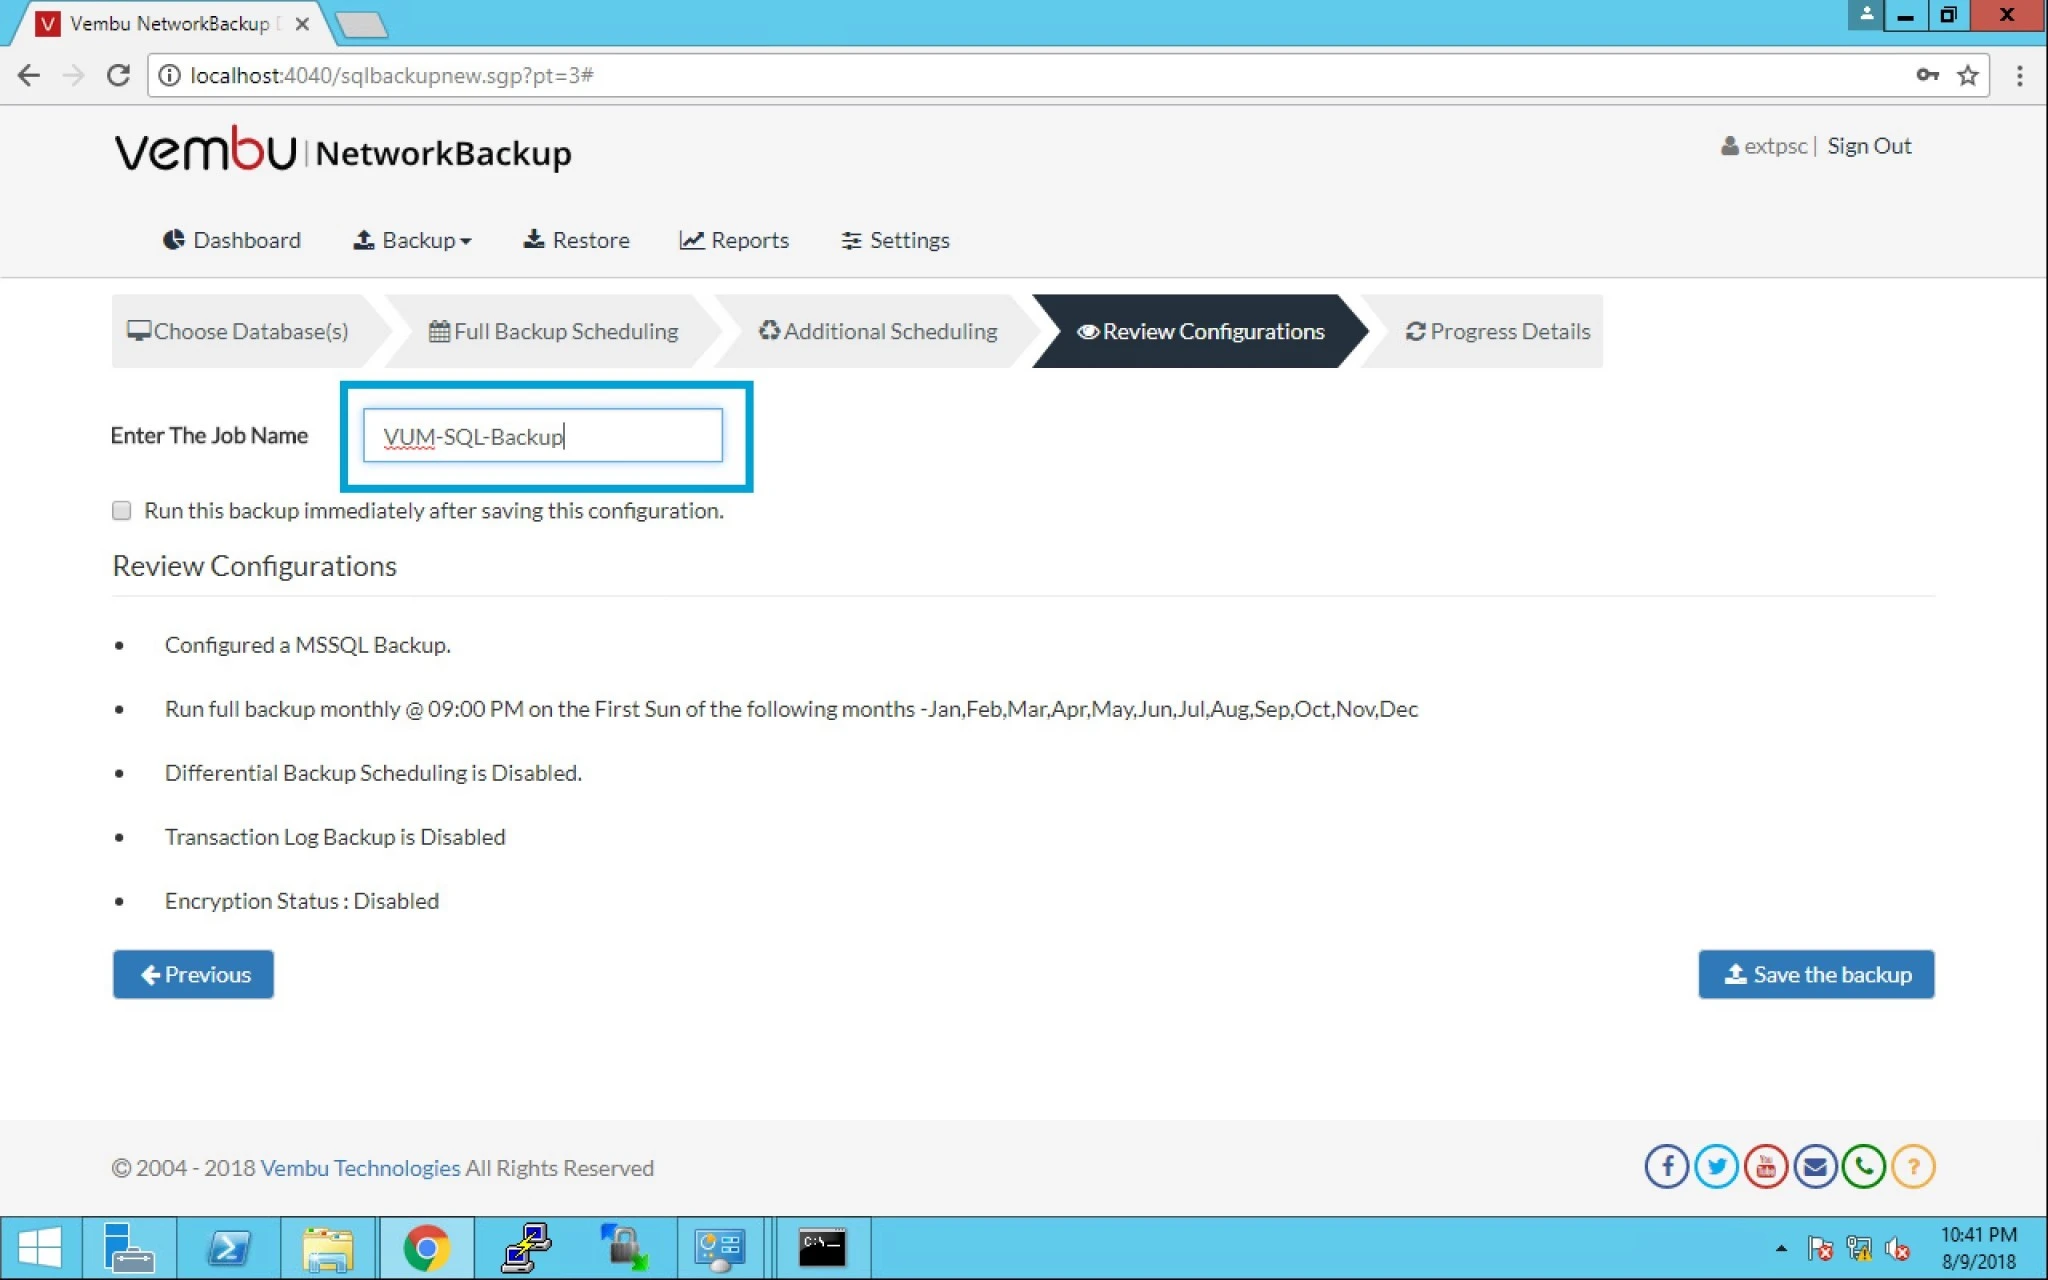
17. Enter your Job name and save the backup. Click next.


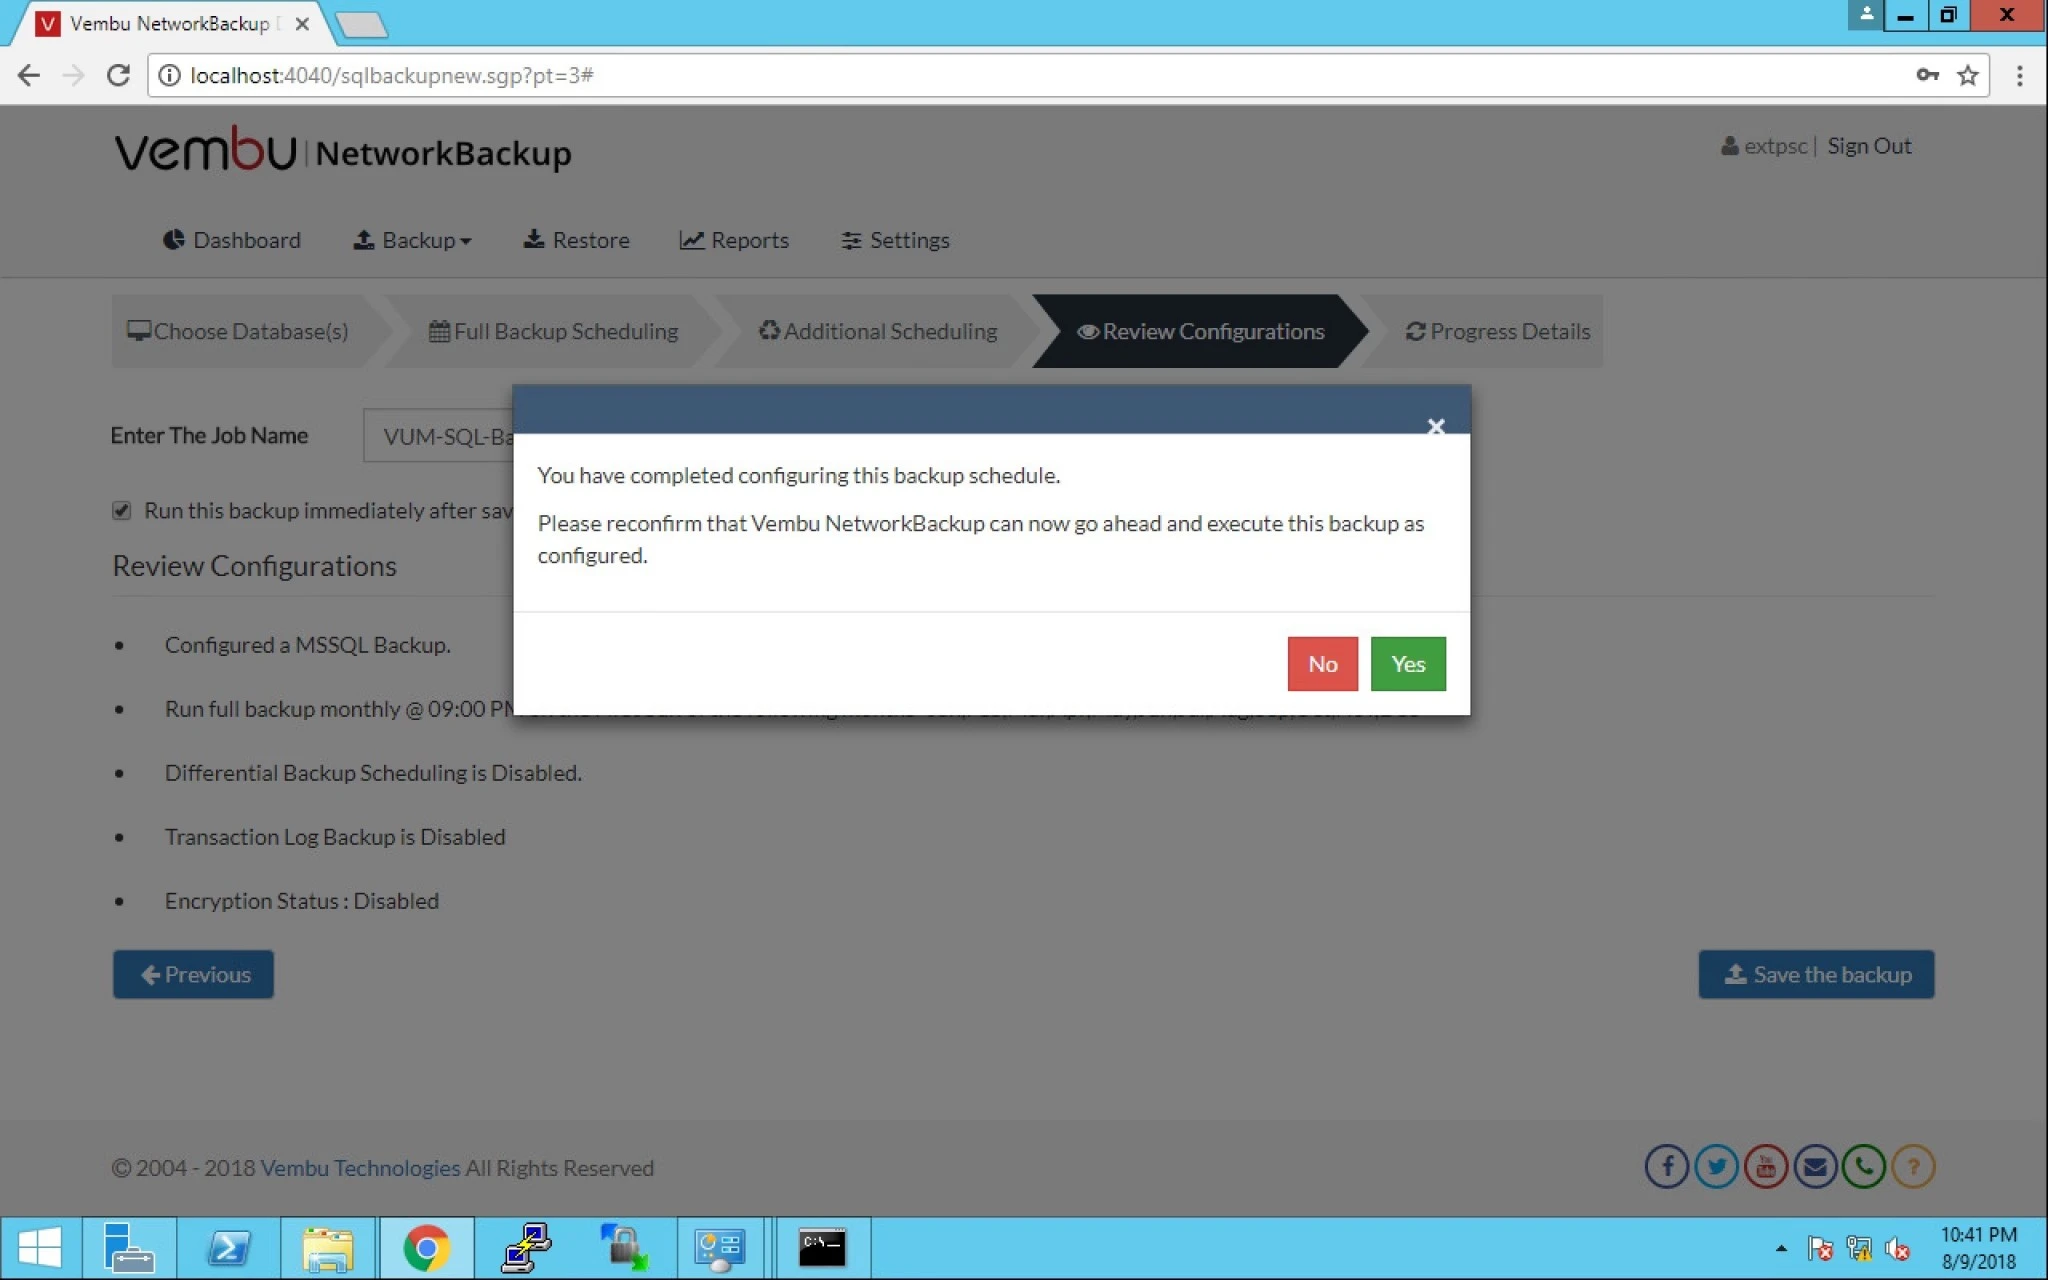
18. It will prompt you to reconfirm to go ahead and execute the backup configured.


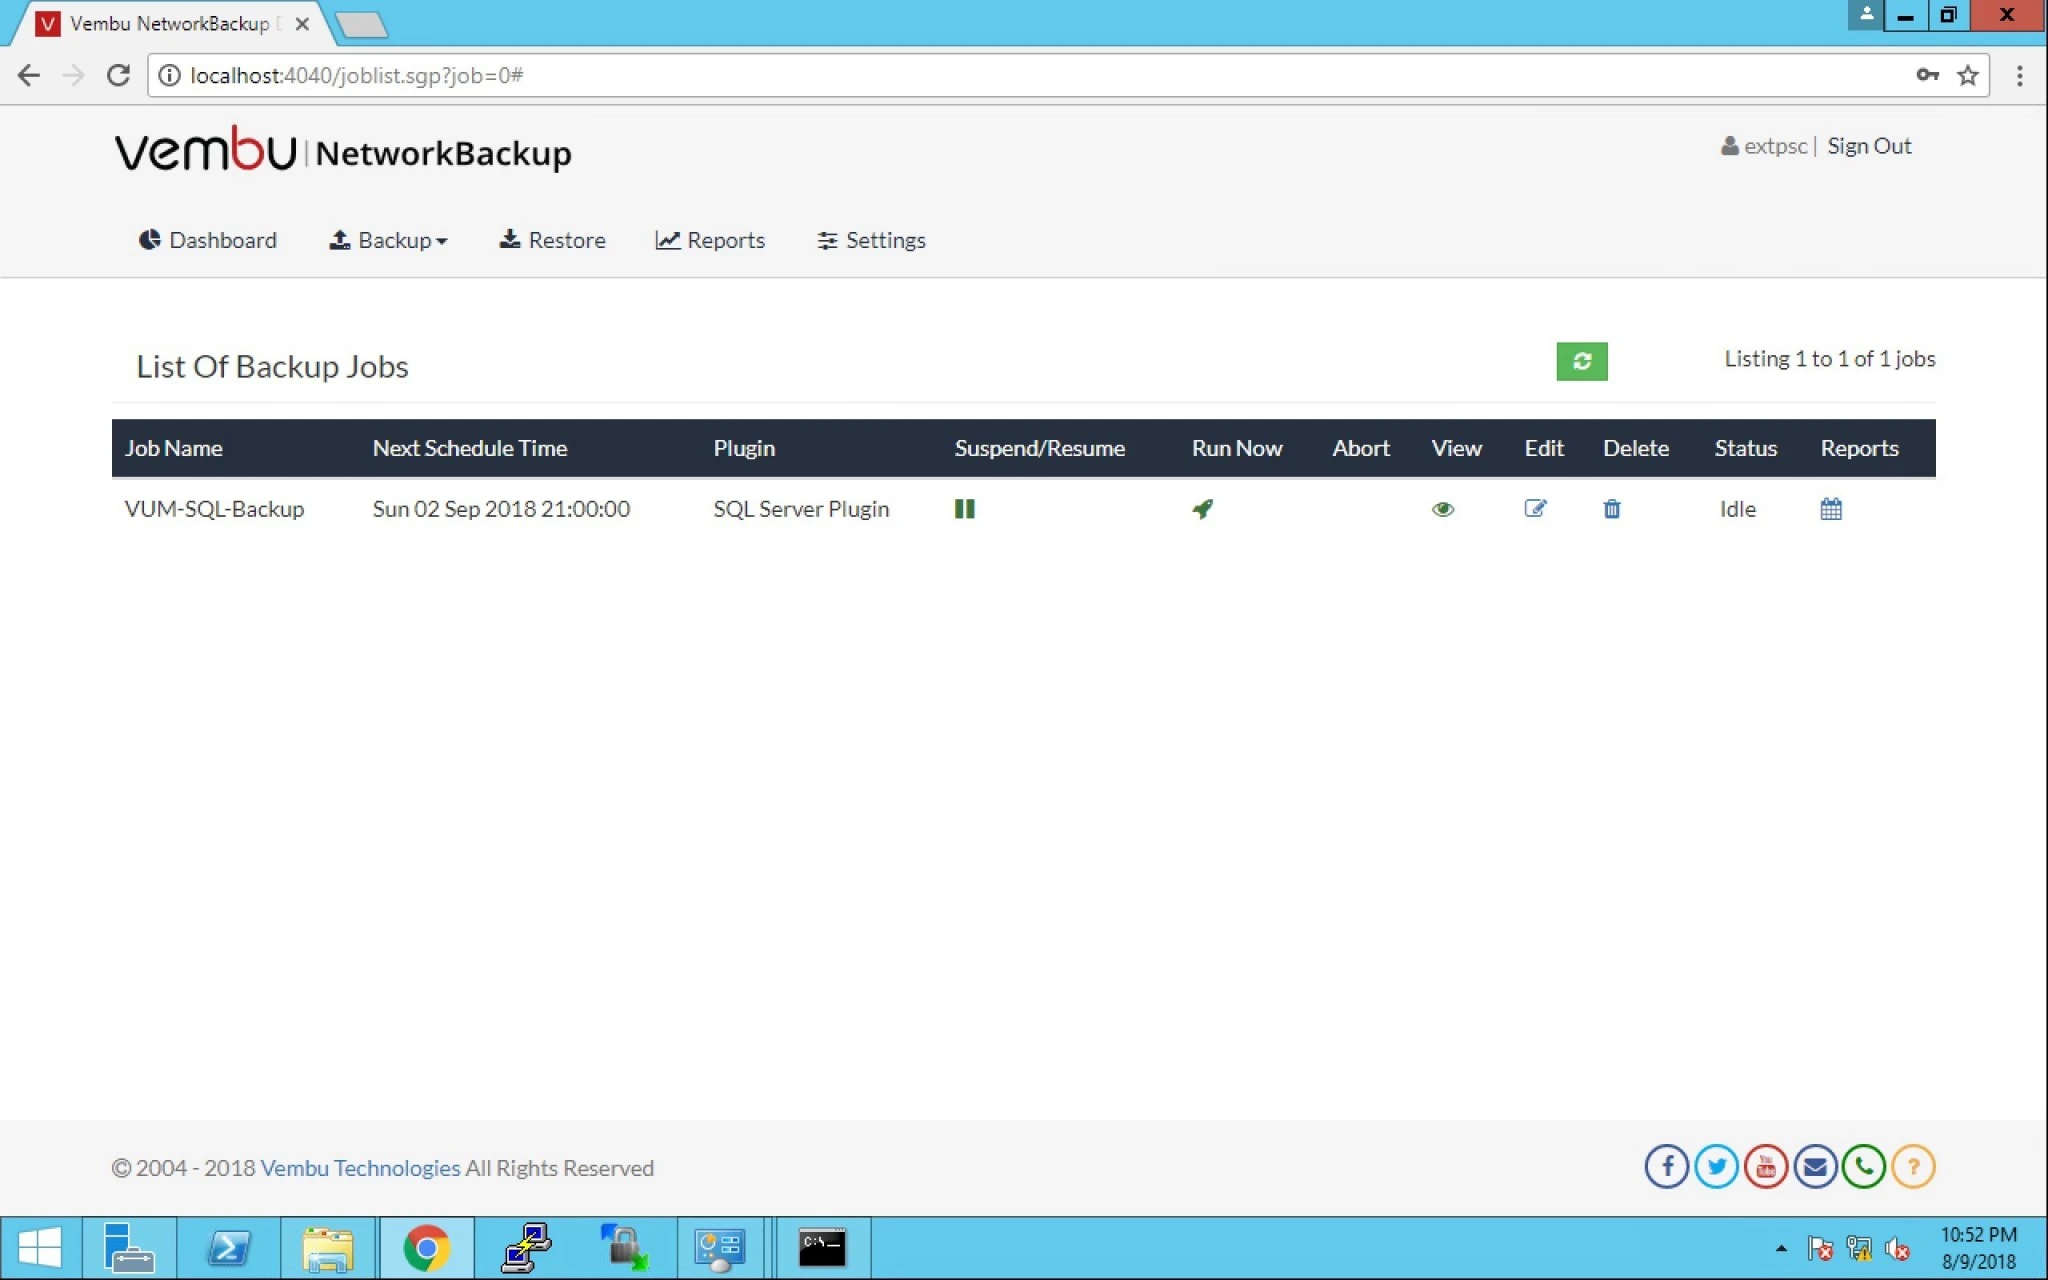
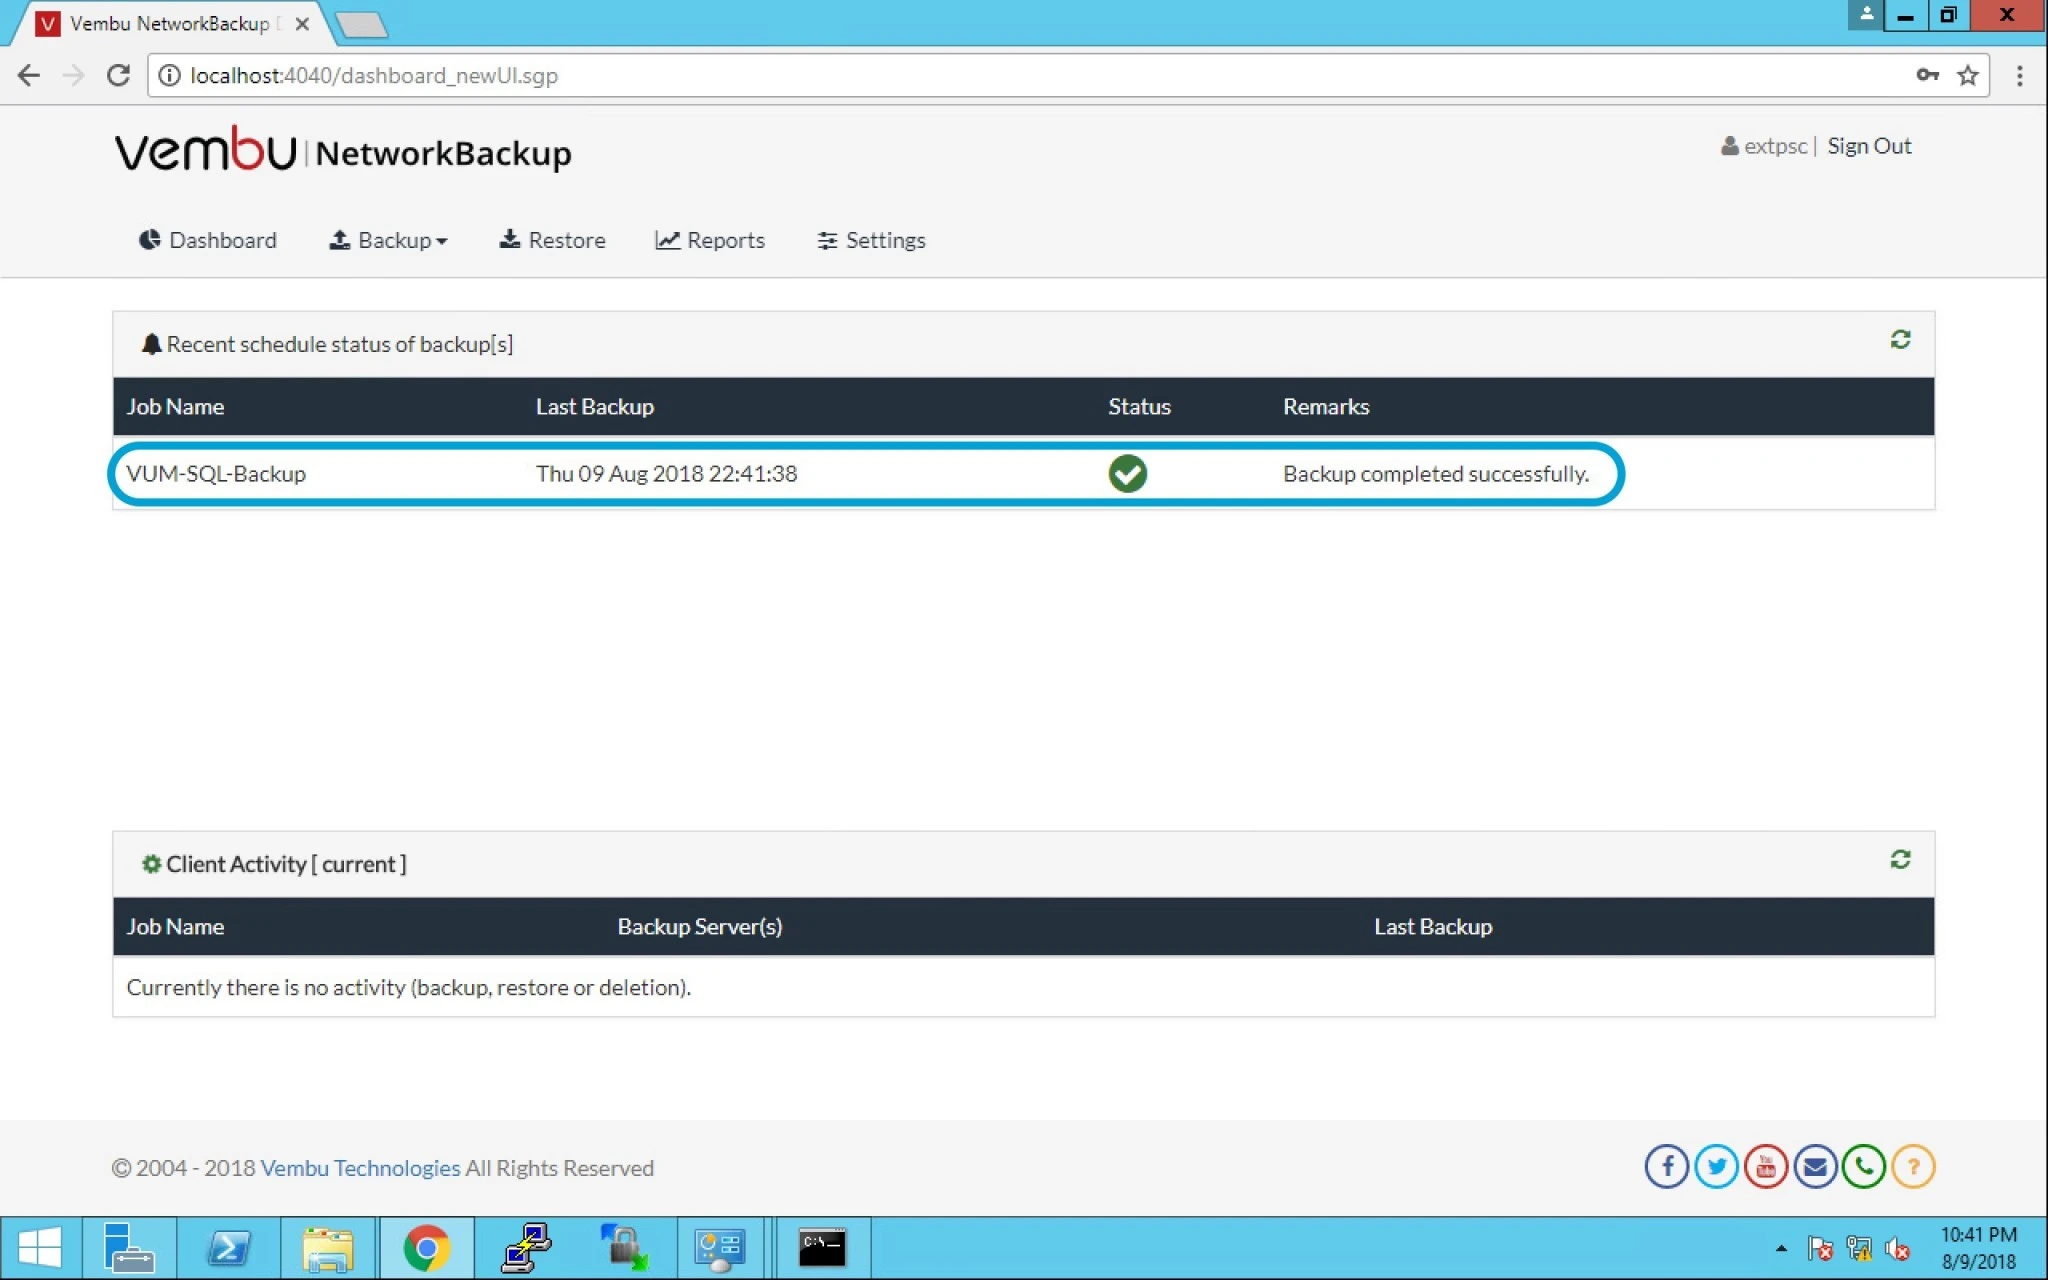
19. You can check the status under dashboard option for the backup executed successfully.


0

Vembu BDR Disaster Recovery Option

Topic Outline:

Disaster Recovery

Restore Options

Restore Time

Restore Report


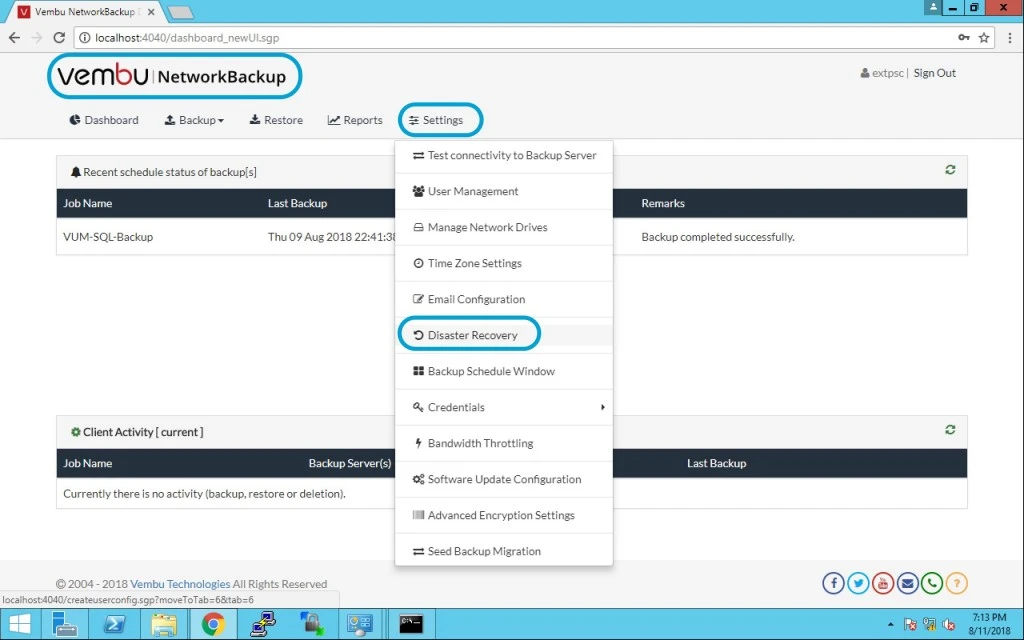
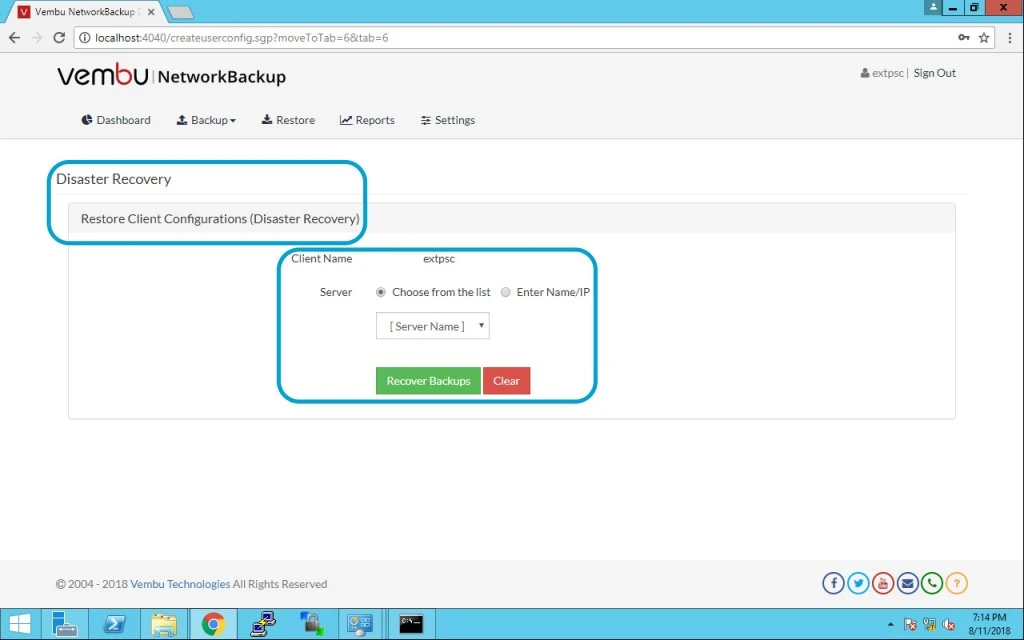
When there is a requirement for a client machine to reinstall a fresh Vembu NetworkBackup, in a case you loose all the configured backup jobs. In such a situation the Disaster recovery solutions is a life saving solution and that allows you to restore client configuration from backup servers.

Lets assume you have a client data which is relocated to another machine where resuming backup jobs will be required.

Note: If the backup job is encrypted or password protected, then the user will be required to provide the secured key or password by editing the backup job before resuming it.


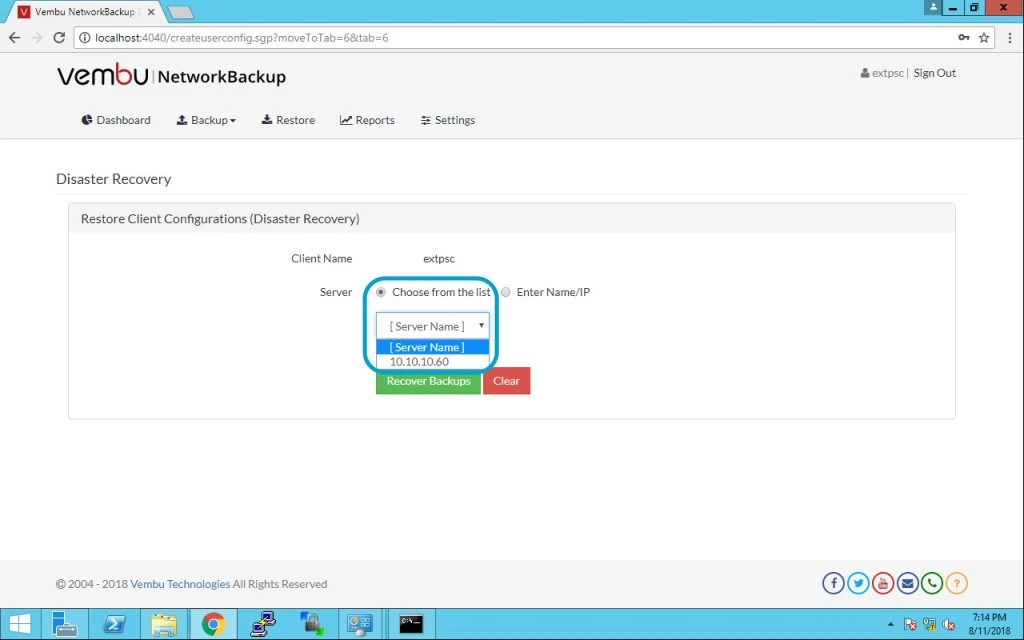
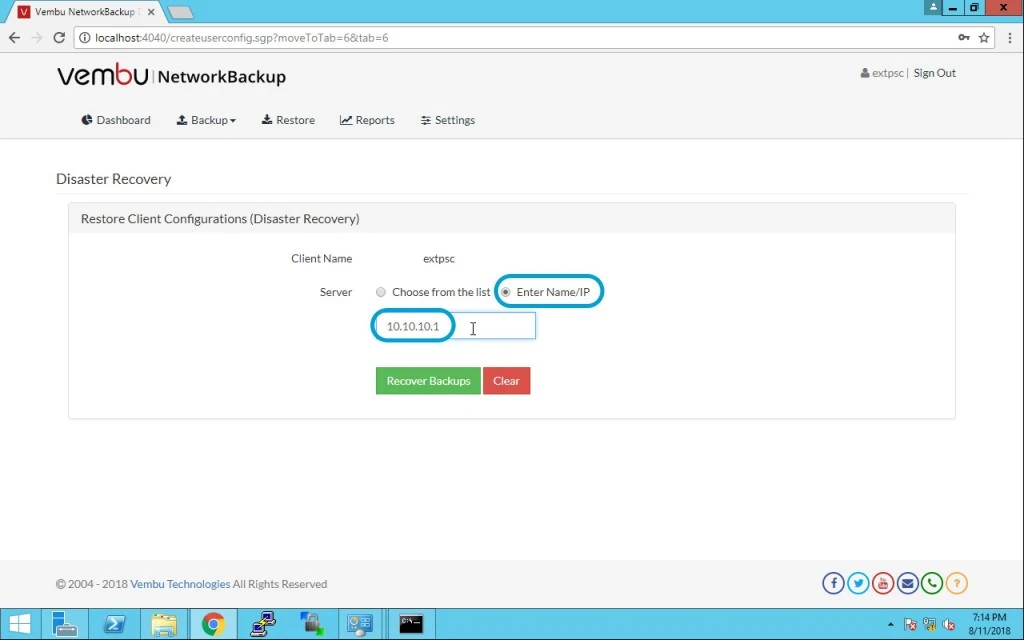
Choose servers

  • User can either choose servers from the list of added servers or provide a server IP


  • Note: Before doing this disaster recovery task it should be well tested and functioning perfectly via test connectivity.


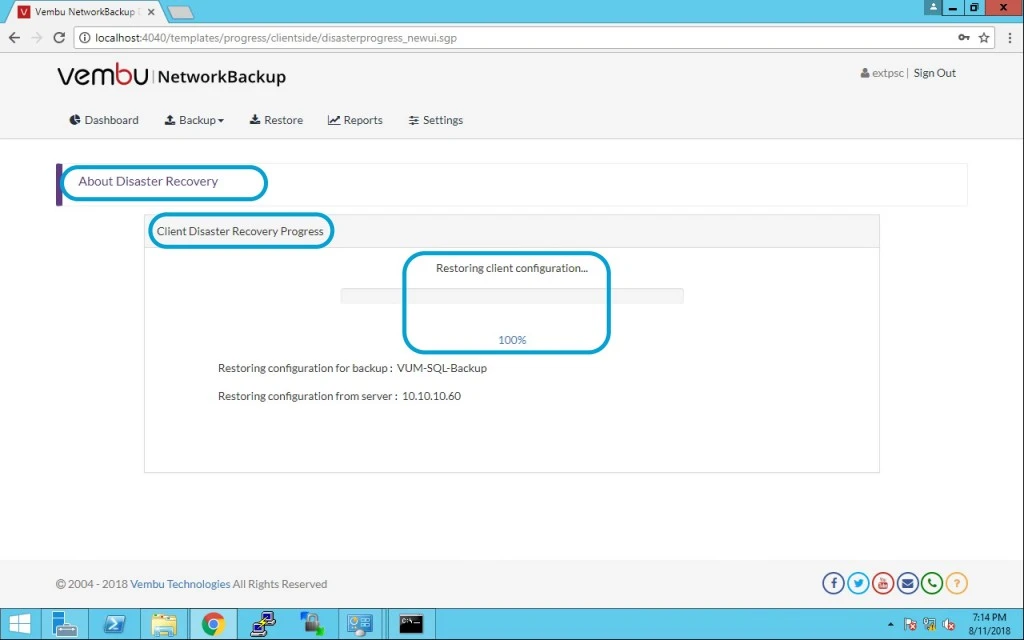
Here you can see the progress and percentage for completion.(Note: In my case this is fast and done in seconds)


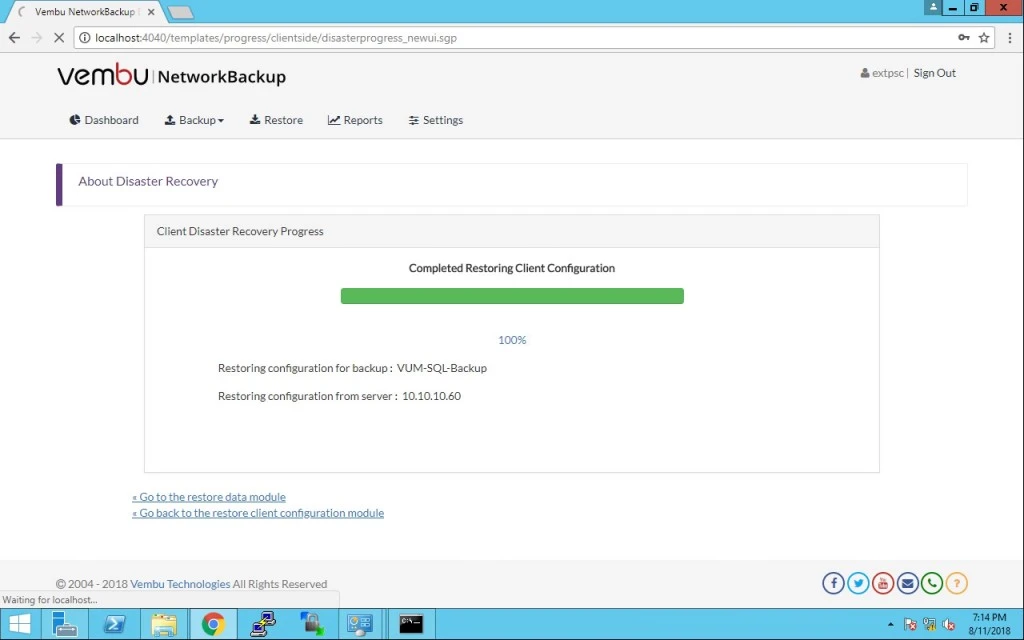
After completion of this restore job you can see below status.


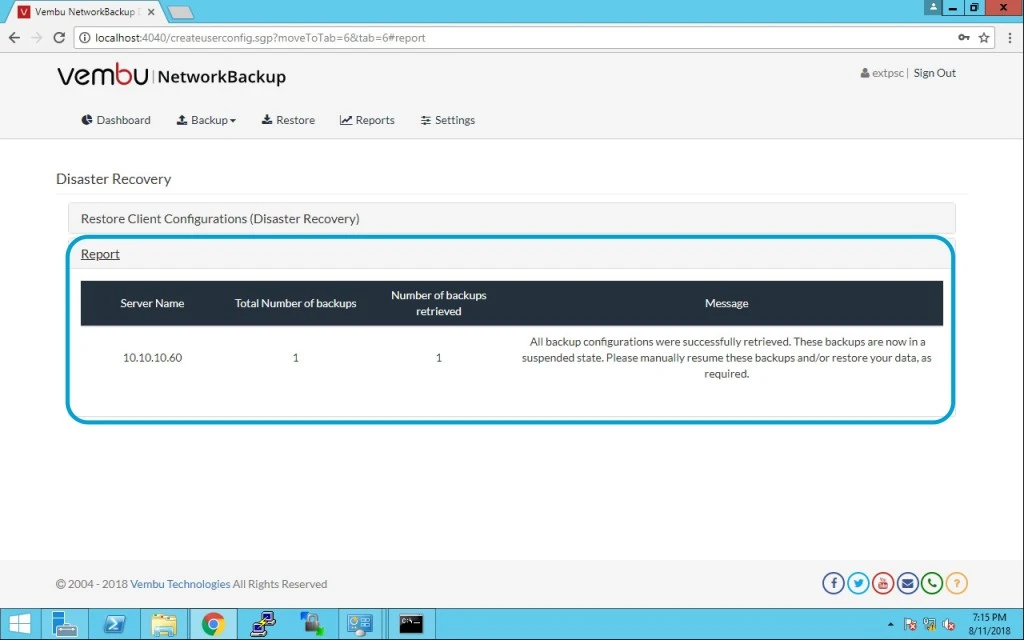
Once restore completes successfully, you will be redirected to reports page with the report for successful restore completion. Here you can see all the reports for disaster recovery.

0

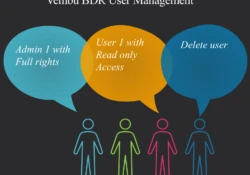
Vembu BDR User Management

Topic Outlines:

User Management

New User

User Password Management


In the organisation, we have to manage or control the user management for better logs and tracking. In Vembu BDR suit you can achieve by create user or multiple users and assign them the permissions on user basis.

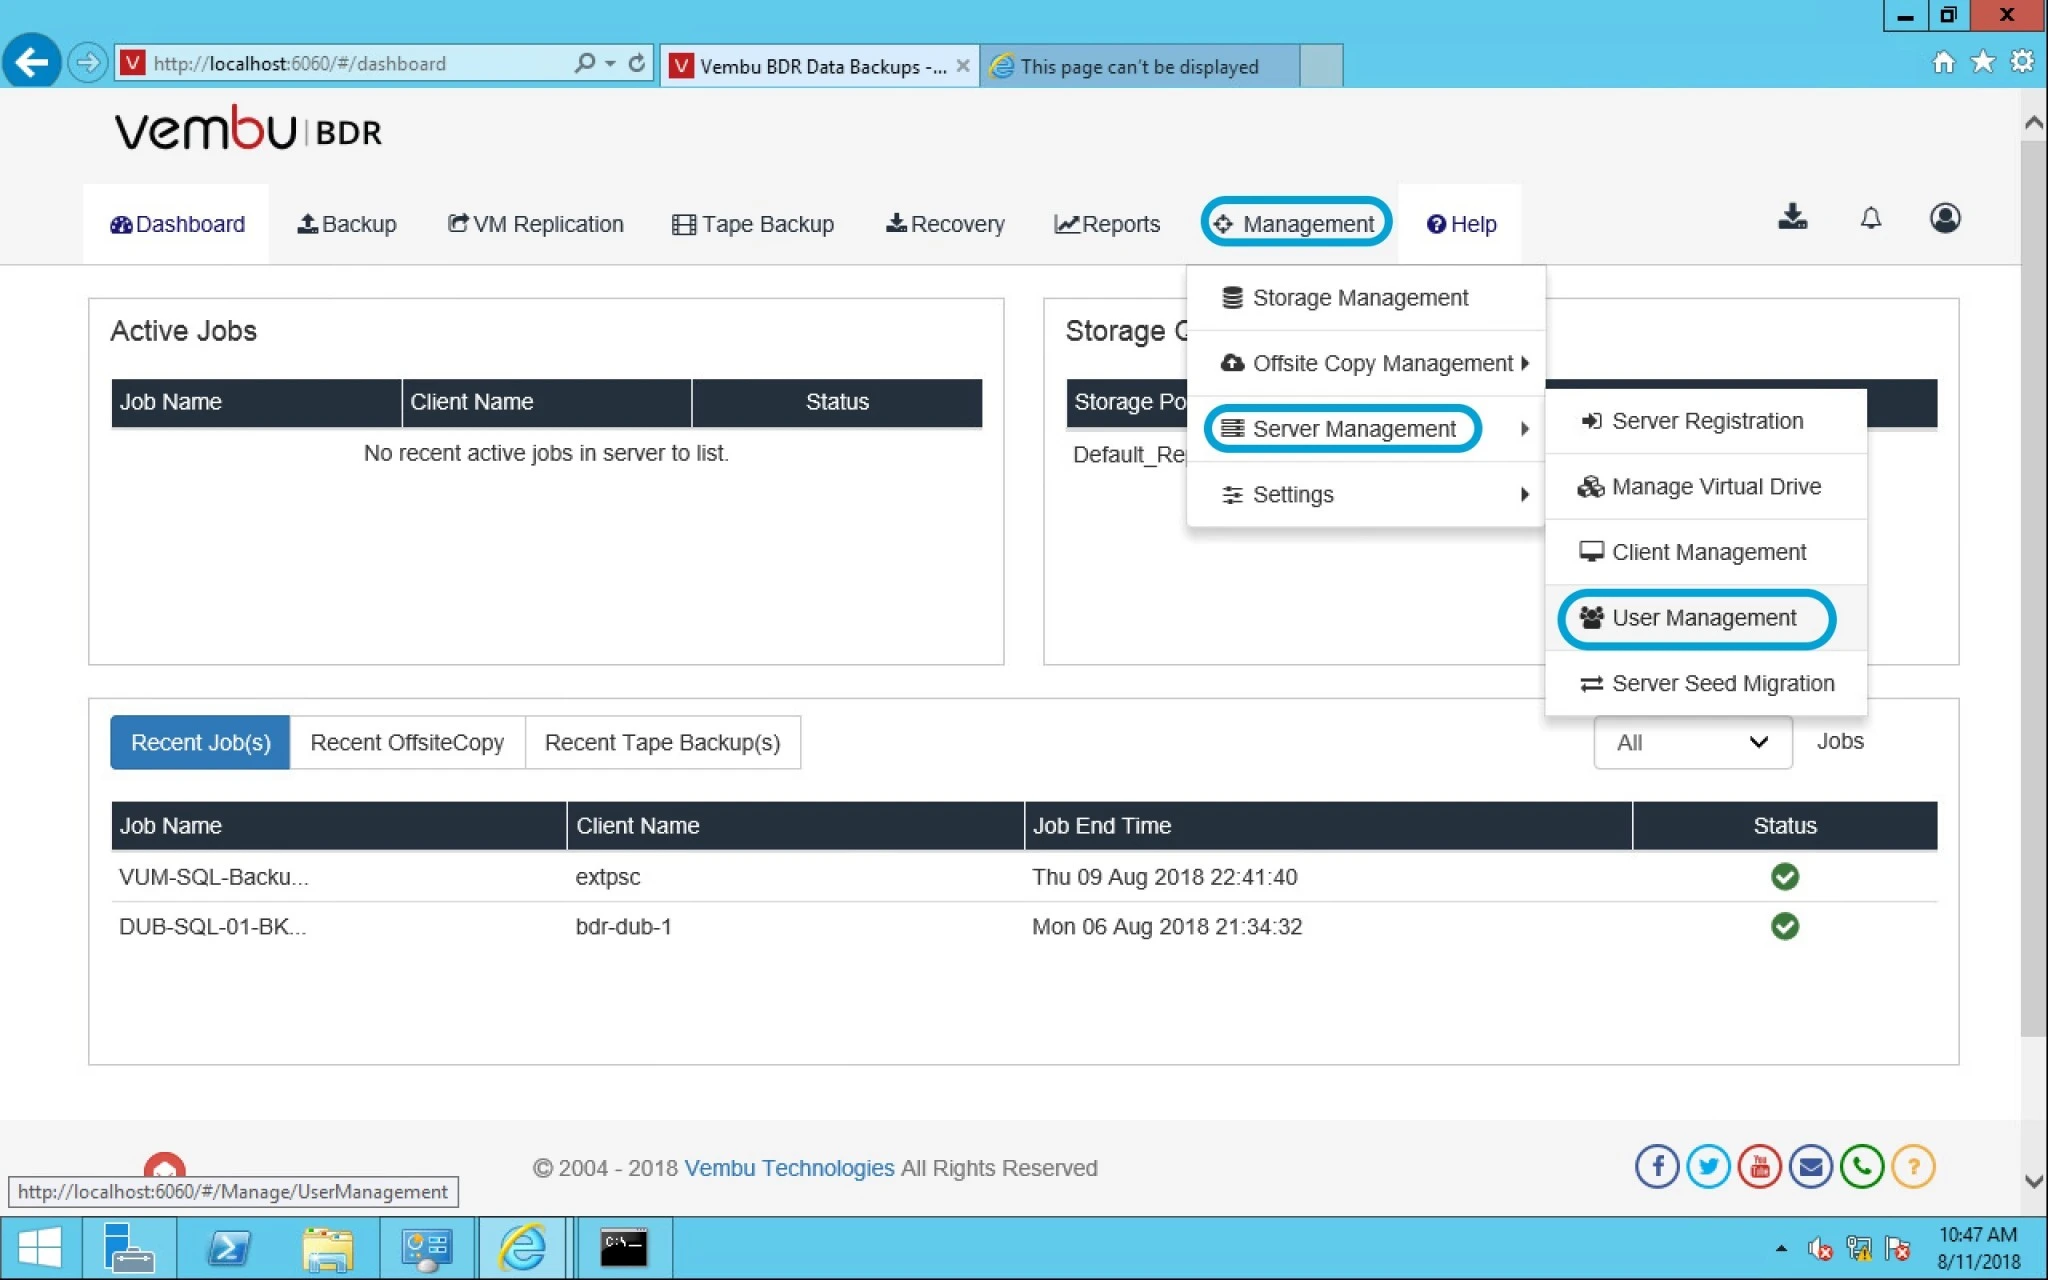
Now Login into Vembu BDR console > Management > under Server management > click on User management.


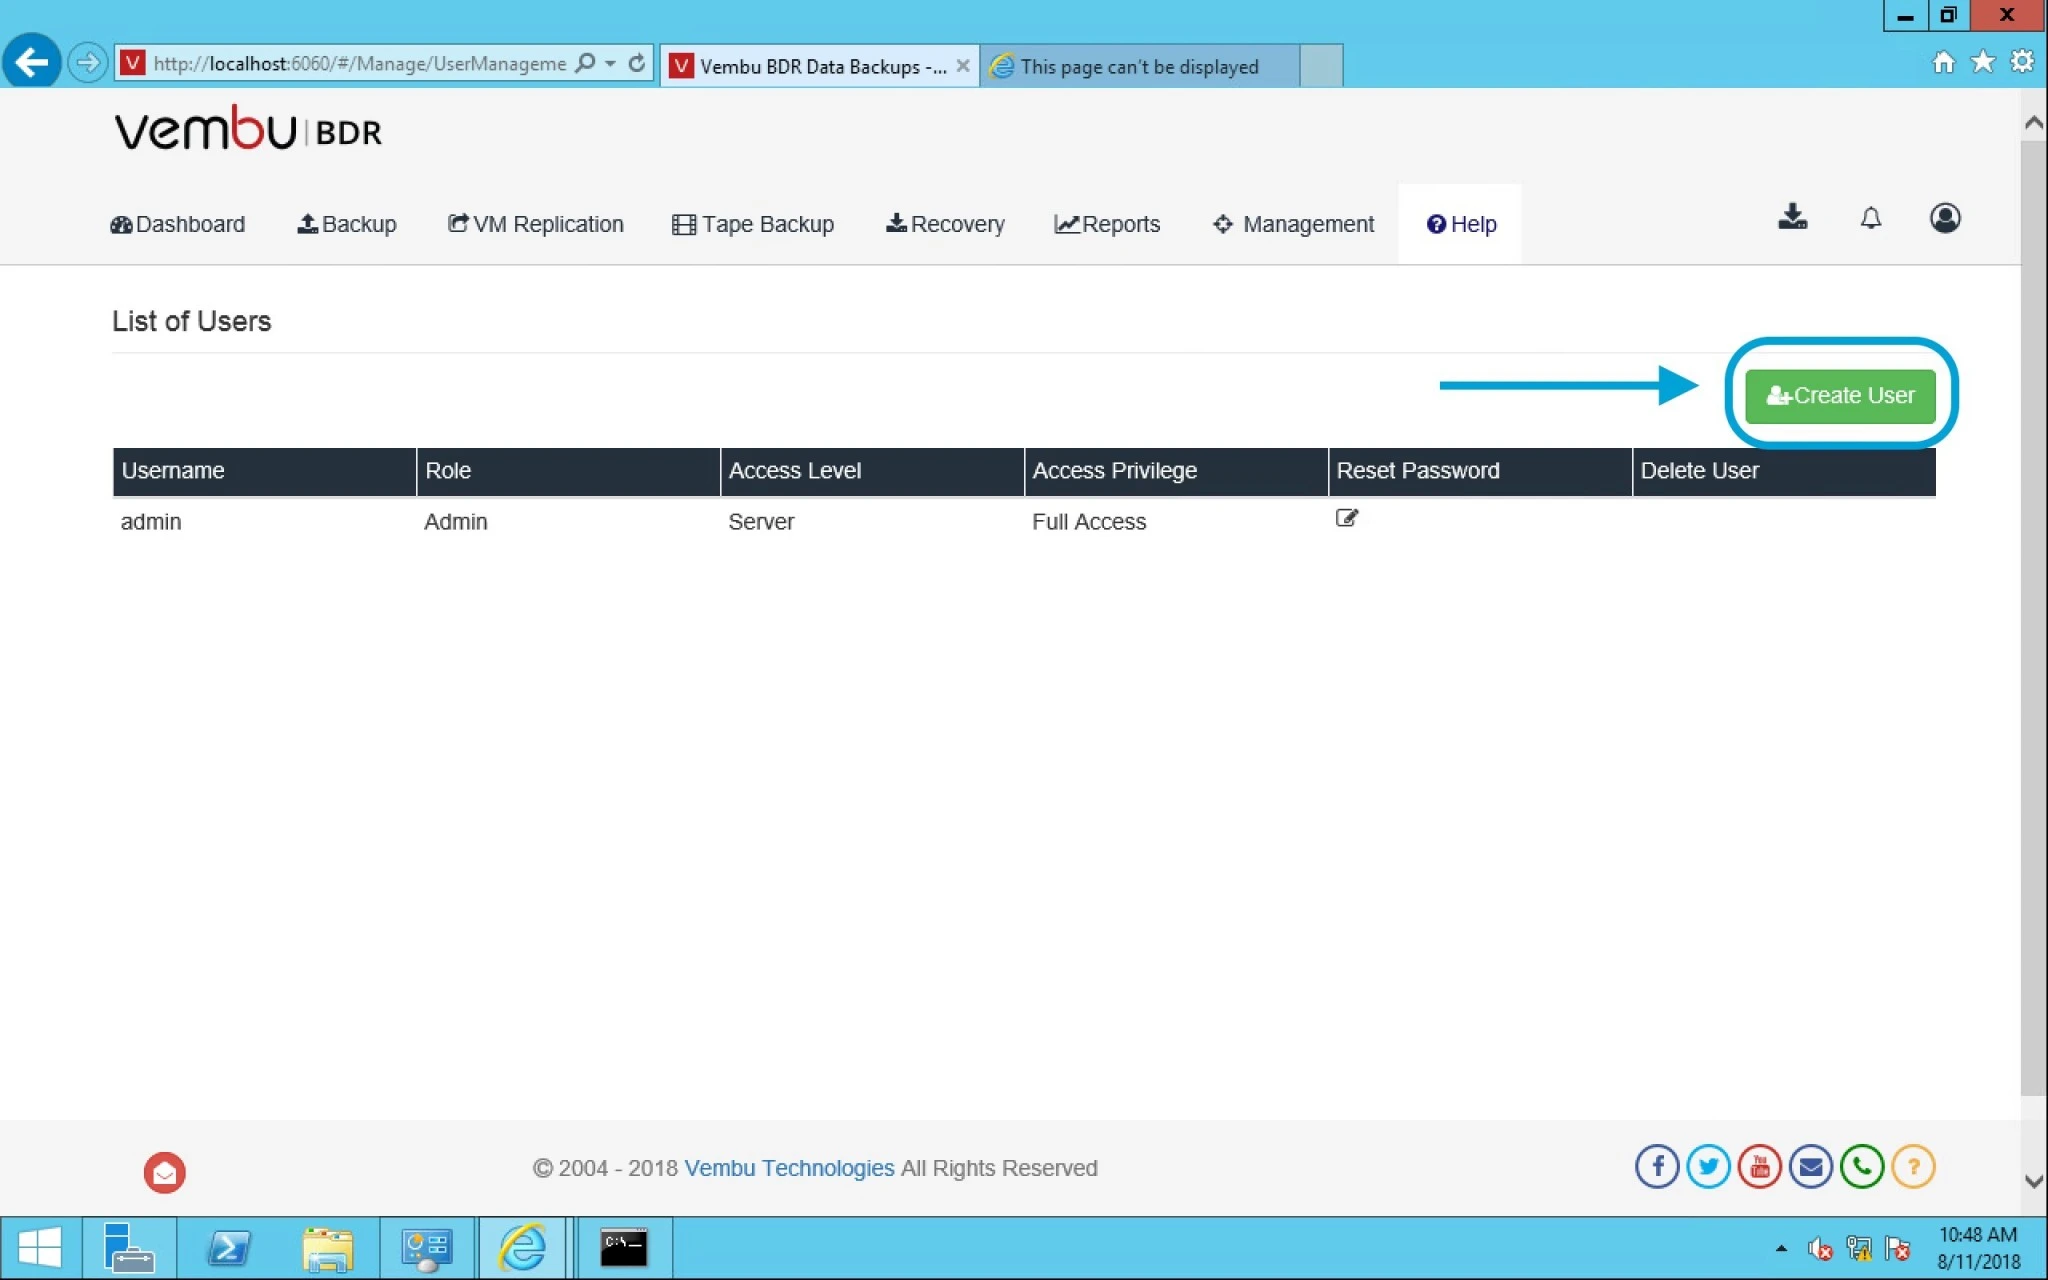
On this page, click on Create user button.


It will prompt you a window with following options given below:

  • User name- Provide user name as per requirement.
  • Access privilege- Full access or just read only.
  • Password- Password for user login
  • Confirm Password- Confirm password provided

Finally click on Create user option.


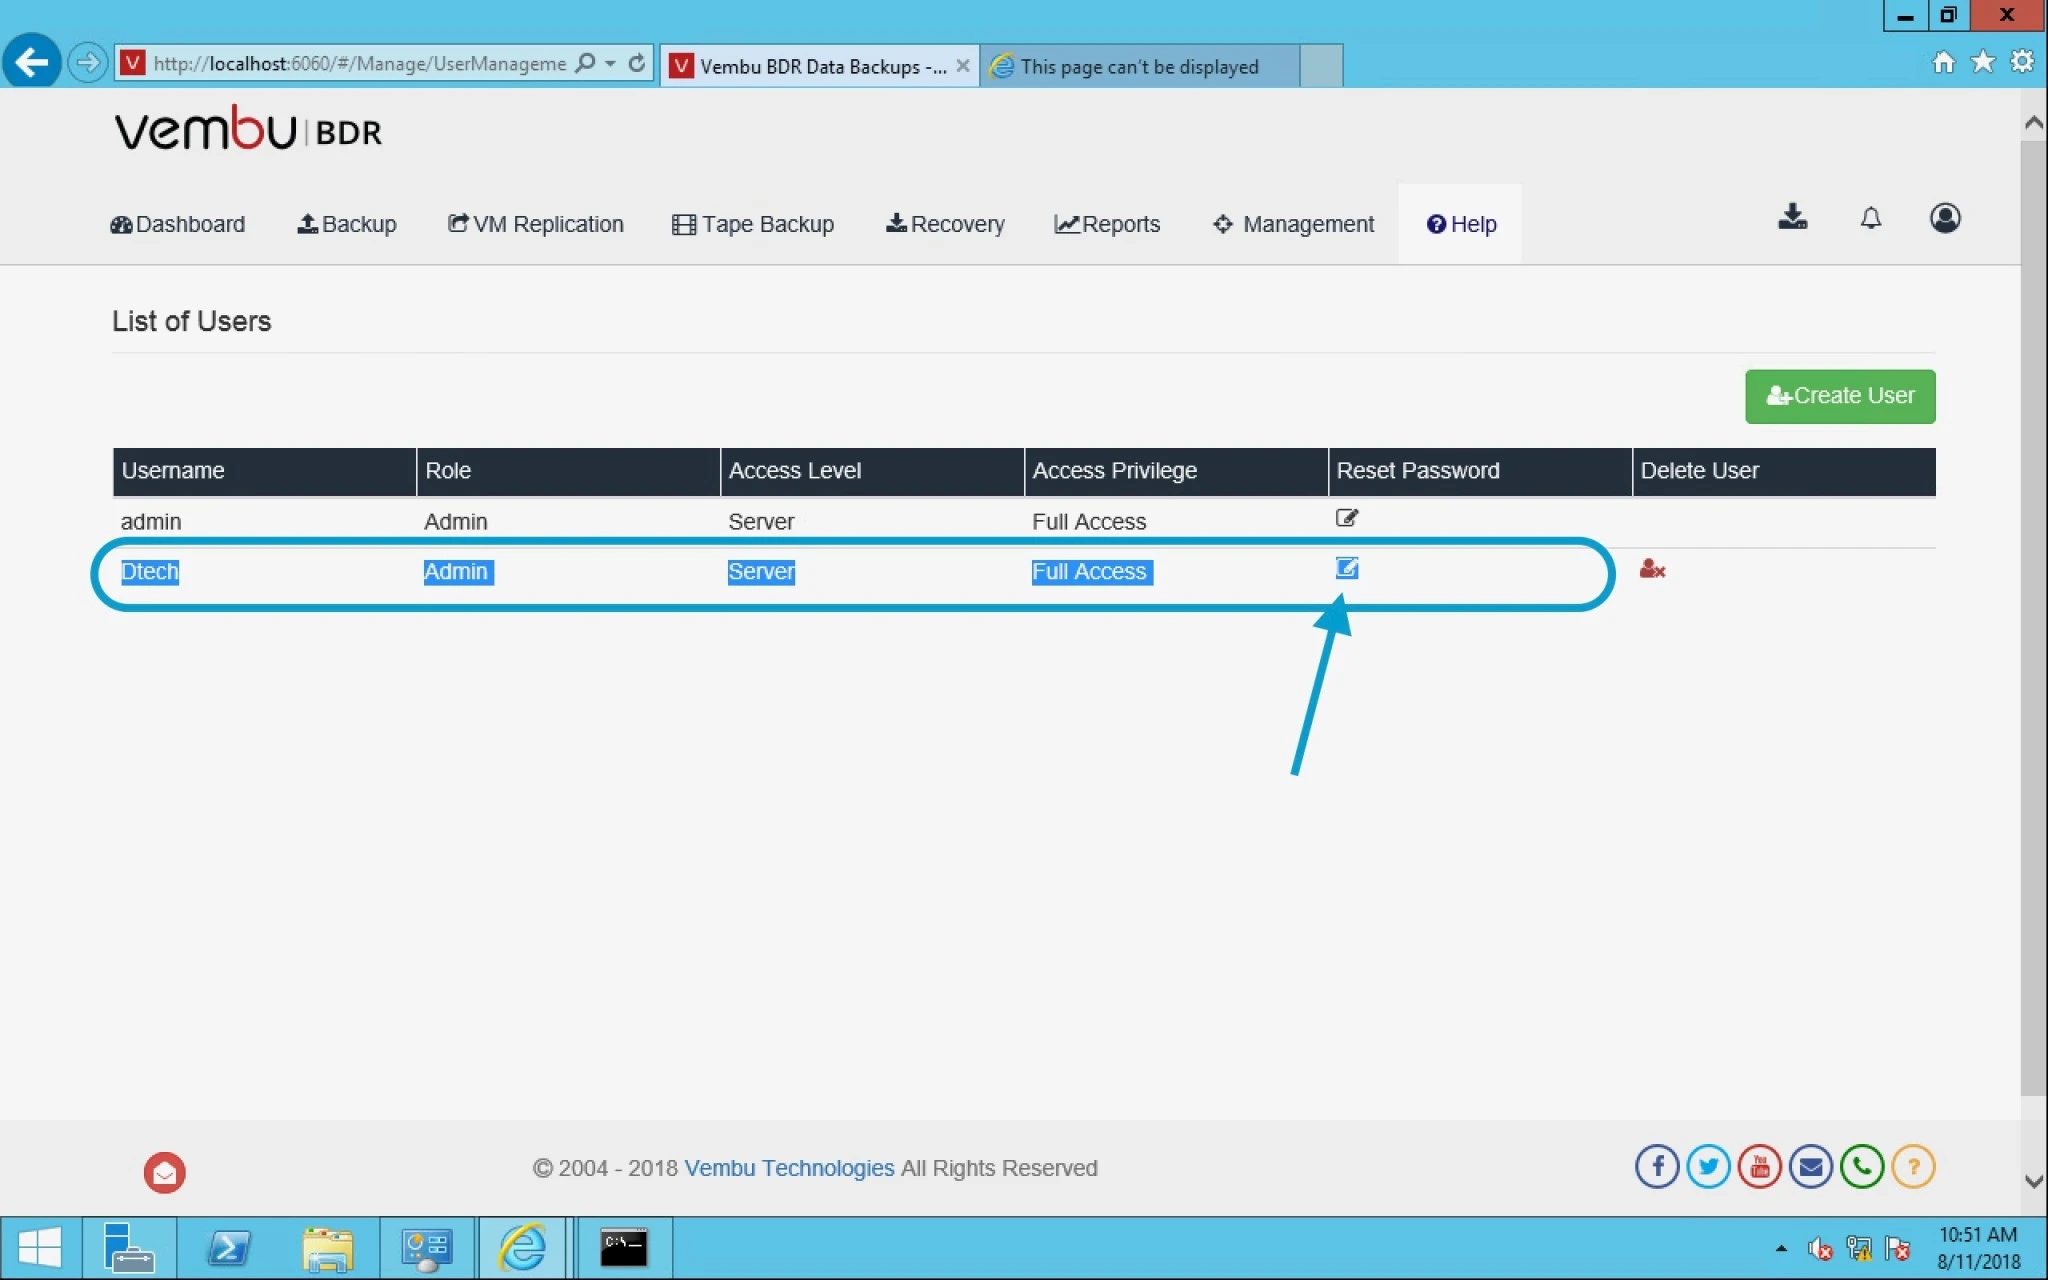
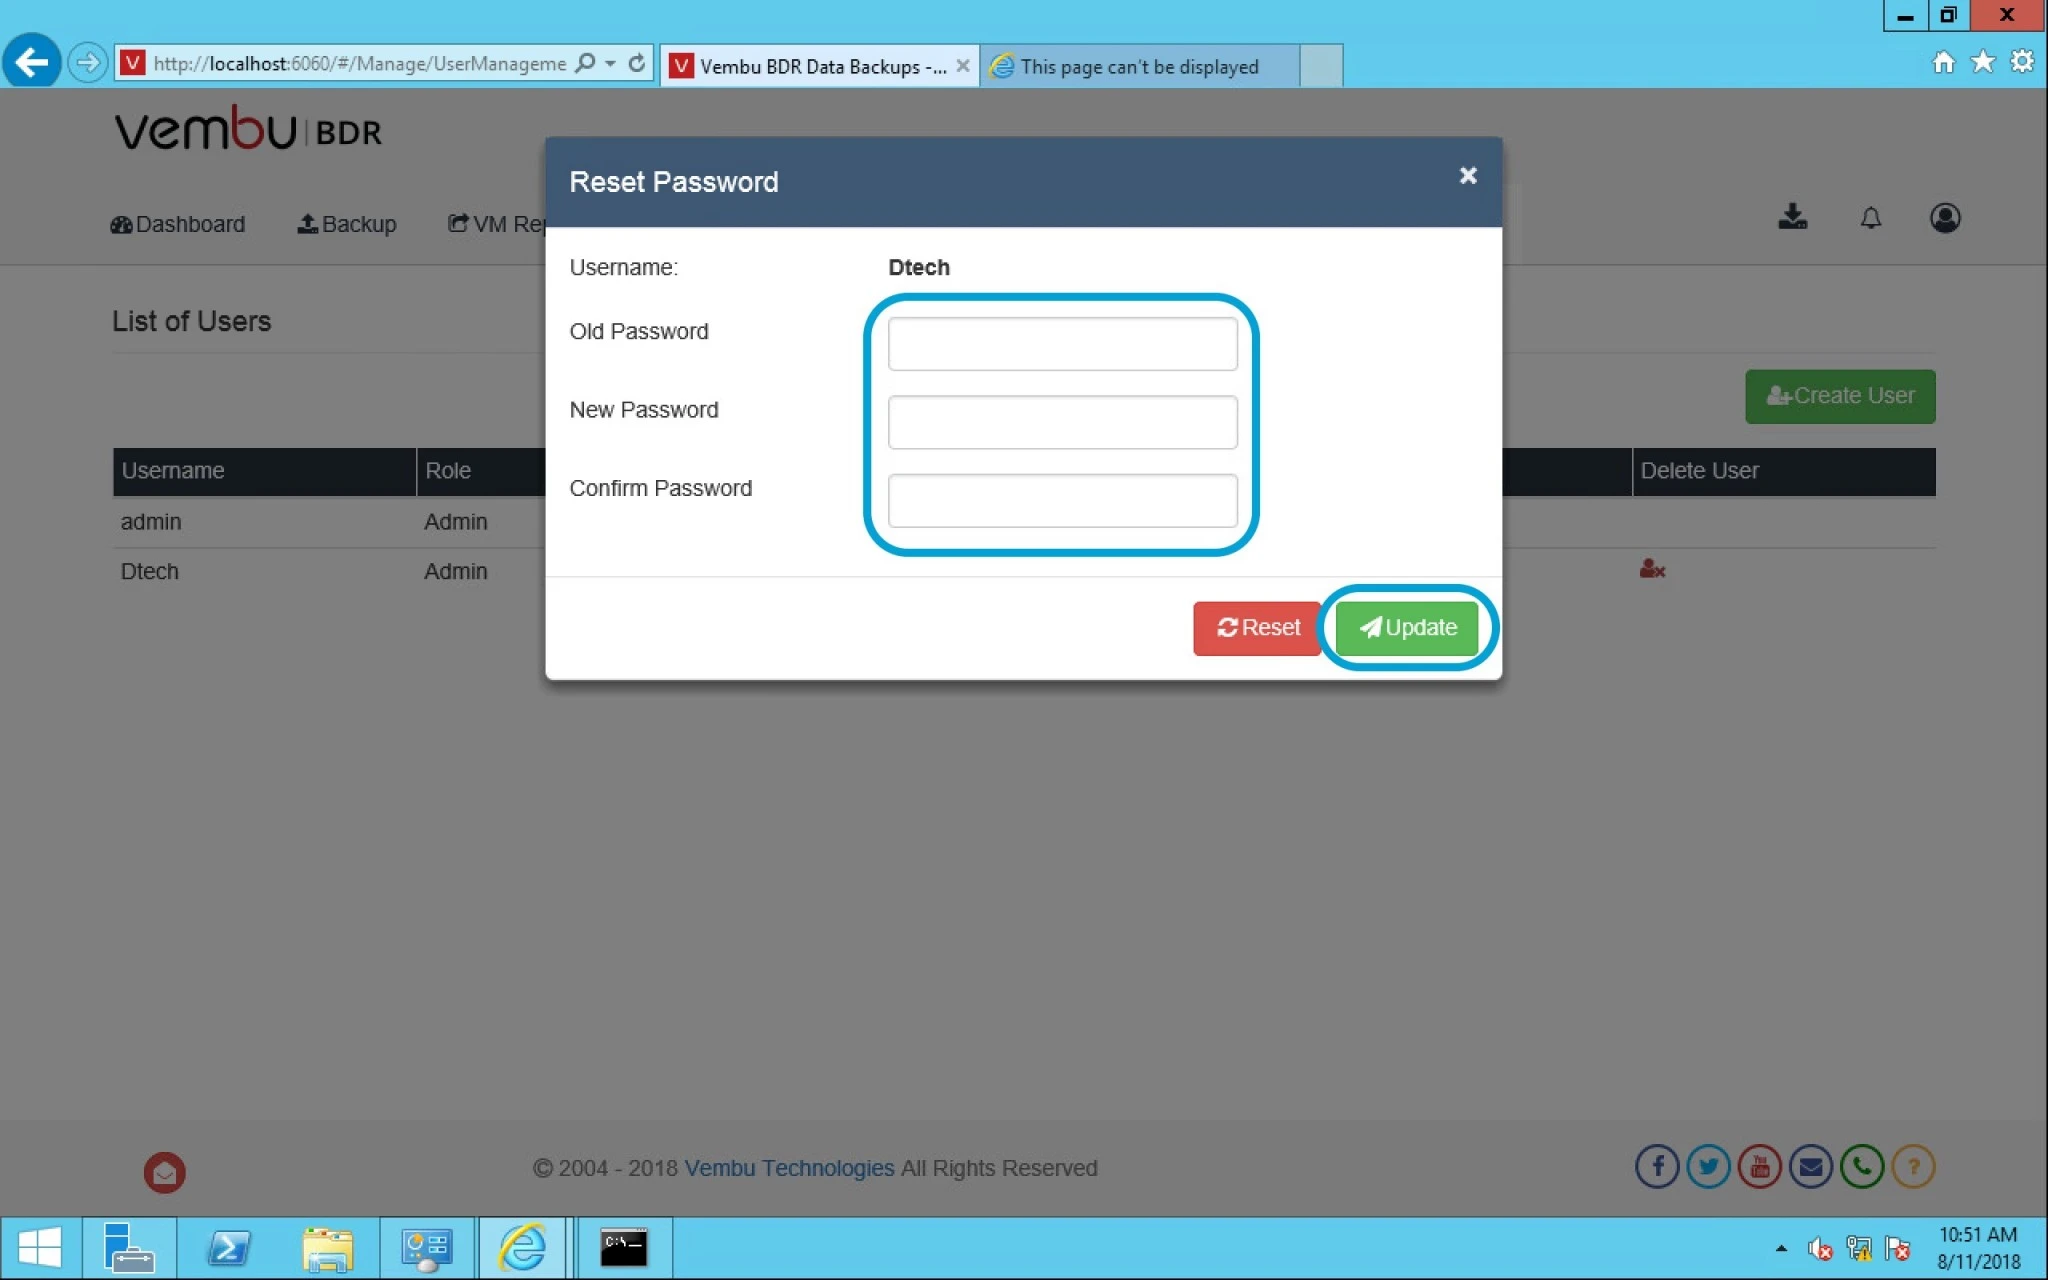
After creation of a user,  you can see that user under list of Users along with their access privilege status and the reset password option. From here you can also delete a user.


After user creation or in case of a user forgot their password then you can use edit option from lists user and change the password here and click on update.


0

How to failover vm via Vembu BDR

Topic Outline: 

 Failover VM Restore Version vCenter tasksLet suppose you are doing some work on your VM and suddenly it crash, now if you have Vembu BDR protection then you can use Vembu replica failover process which helps you to recover the replicated VMs at target host or other location in case of disaster. Using Vembu VMBackup, your critical VMs can be replicated from one VMware ESXi host to another. So, in case of system crash or software failure, you can instantly failover the VMs to the required recovery point at target host.

Background:

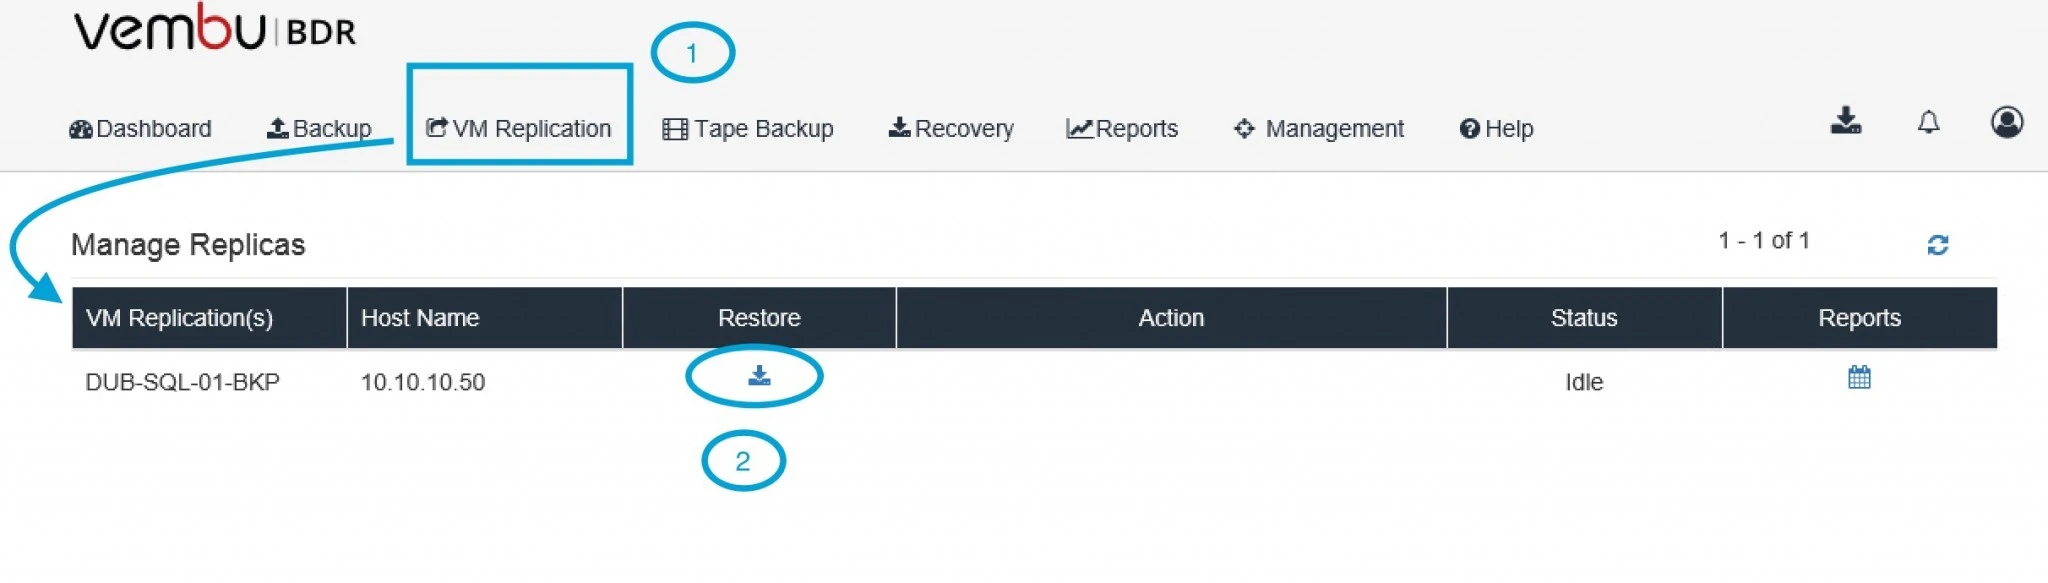
When you will use Vembu BDR failover process in this process it will create a VM and to the replica VMs from the source VM for a while when the source VM is temporarily not available due to corruption or system crash. During that time this VM act as Main or Production VM.If the VM replication is configured with Network and IP-Remapping, the replica VM will run with the configured Network & IP configurations during the failover process. If Network & IP-ReMapping options were not configured during VM replication configuration, then IT admins need to manually assign Network and IP after failover process.Now if you want to recover to a specific point then you can also choose from available recovery points, and it is also possible to failover group of replica VMs which are actually dependant on one another that are available in the configuration.Now it will use VMware snapshot option and data created after failover will be maintained as delta file (vmware temp files) which will be committed/reverted later based on the user choice or requirement.Now Let see how to failover one vm and test the options.First login into Vembu BDR and go to VM Replication option > under that you can see number of VMs now choose one VM or multiple VMs as per your requirement and click on restore option mentioned in point 2.
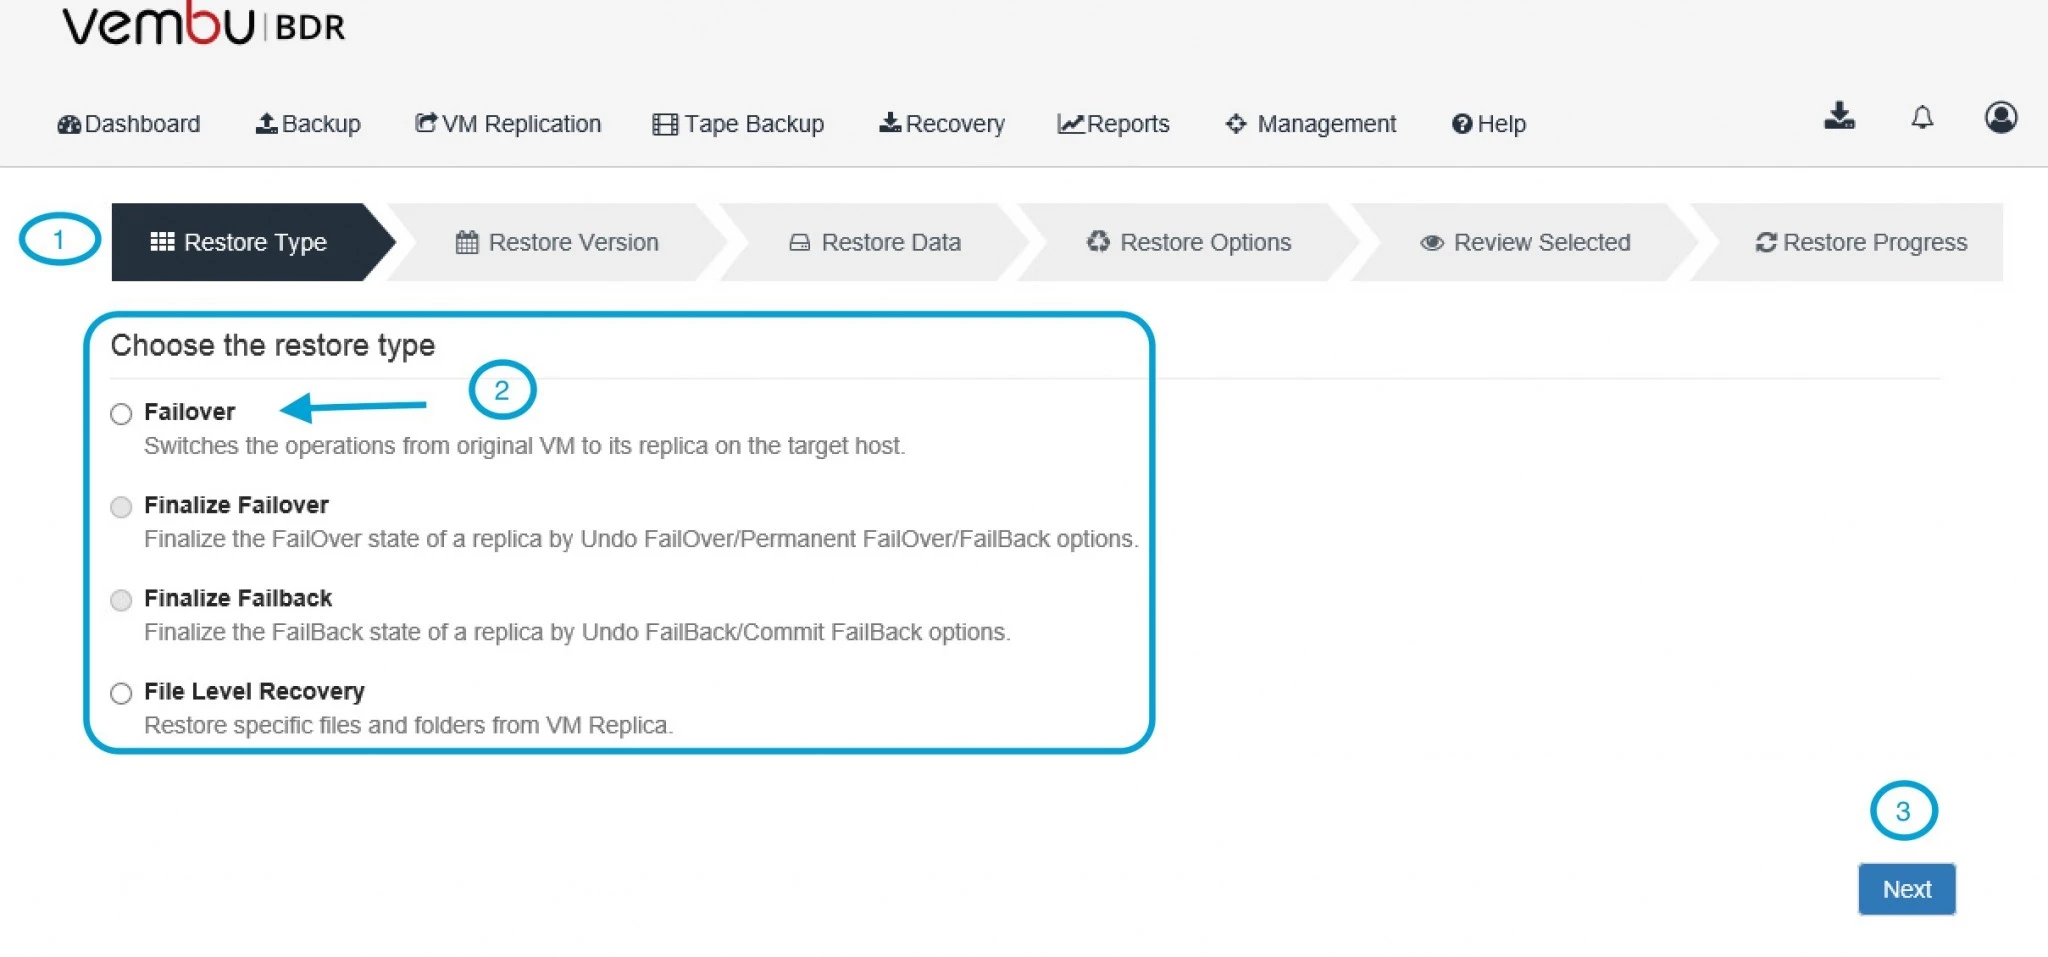
 After that click on Failover option. here only two options are highlighted 1. Failover and 2. File Level Recovery (click here).
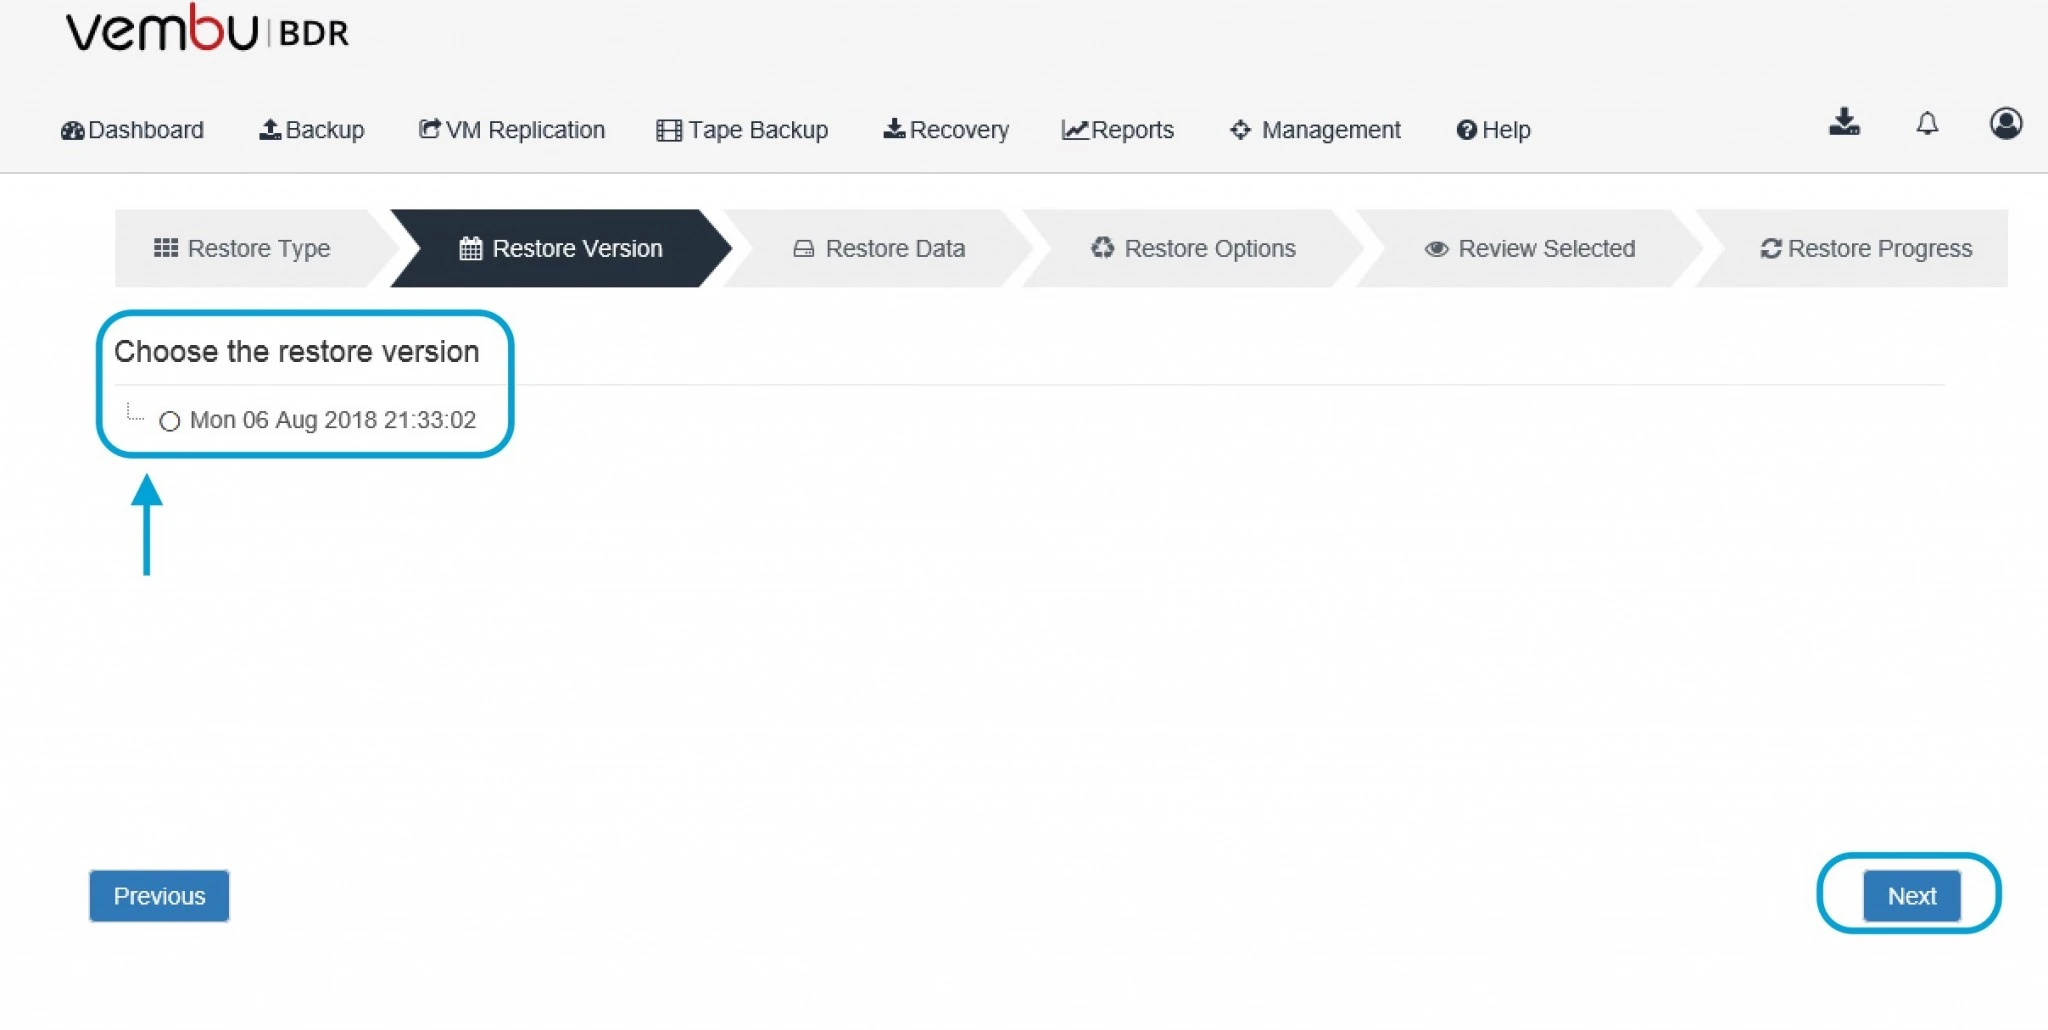
 Now at this point you can select restore version and click next.
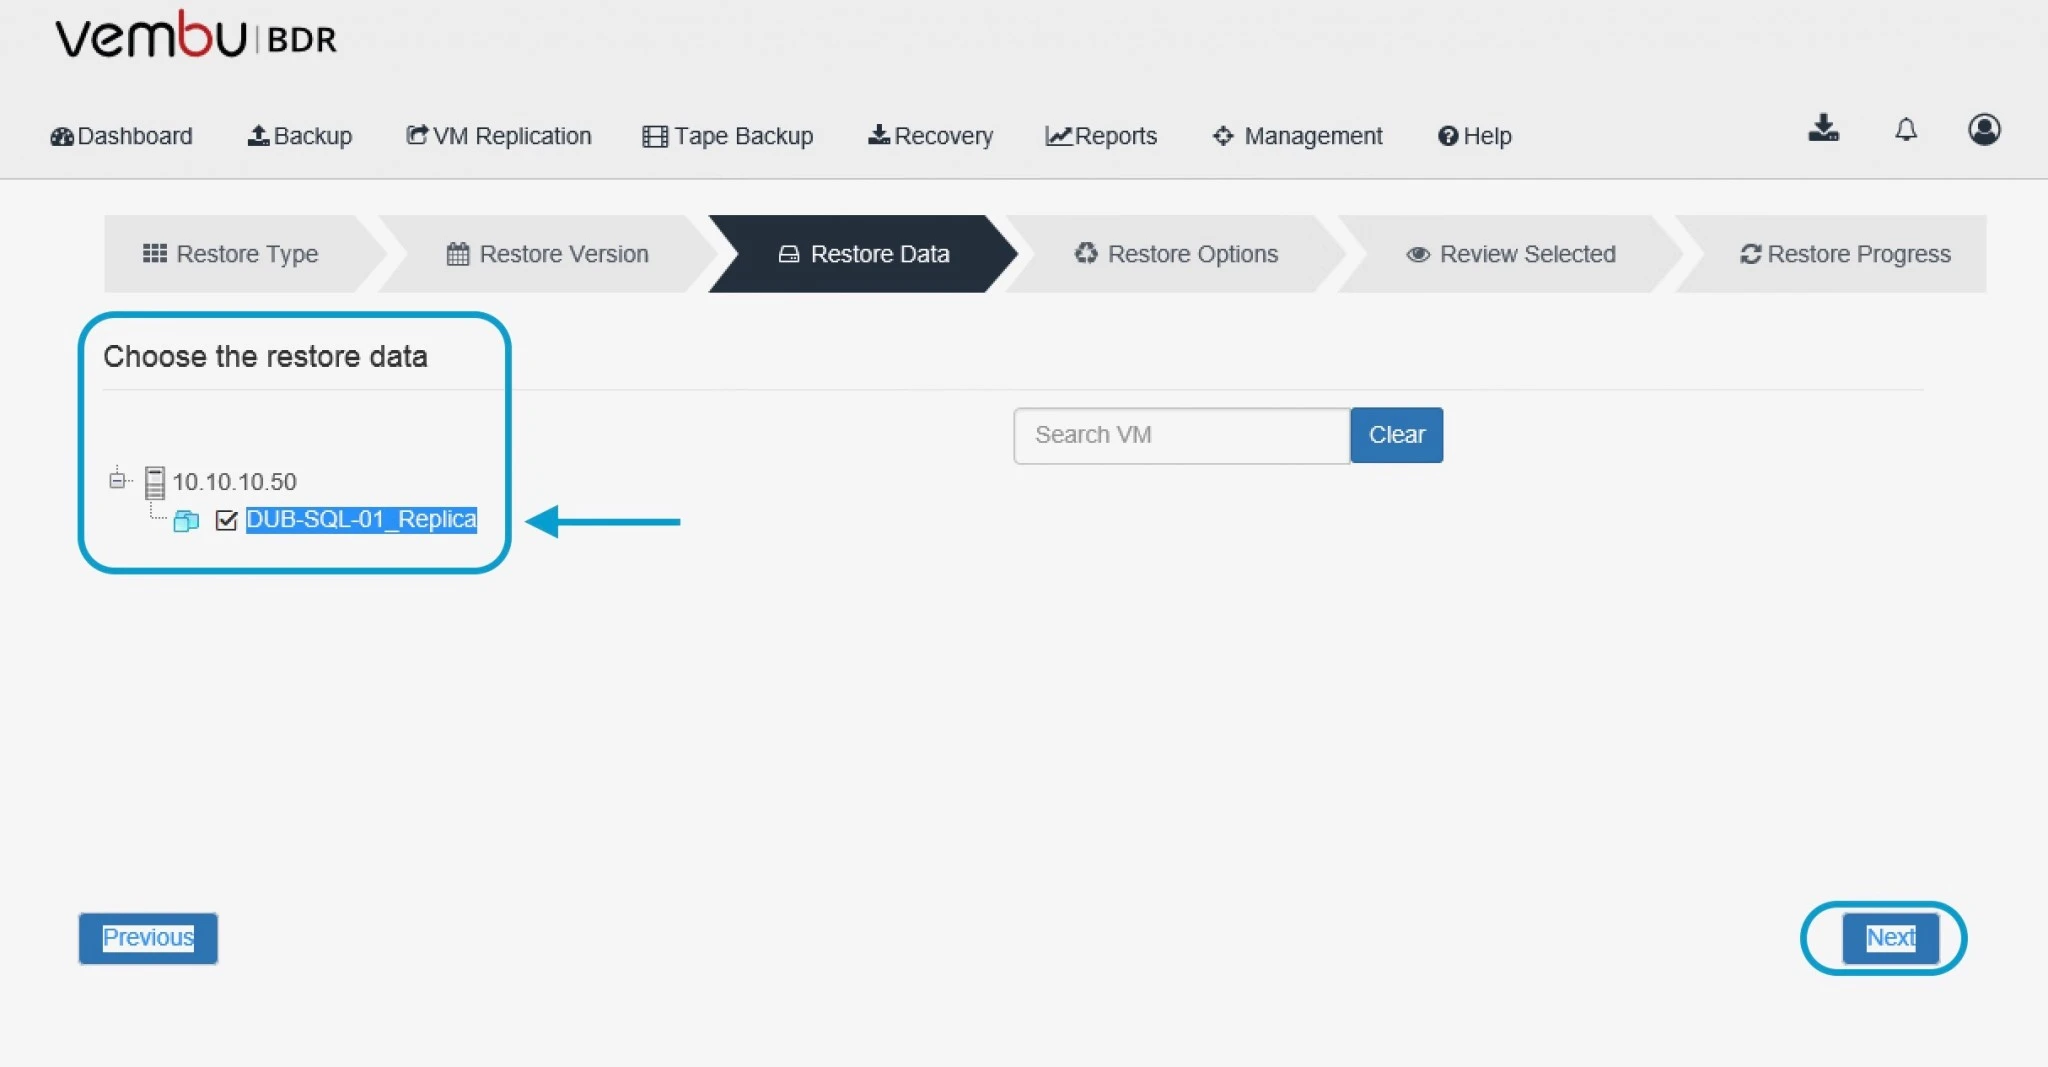
After this choose the restore data and select the VM from the list of replicated VMs and proceed next.
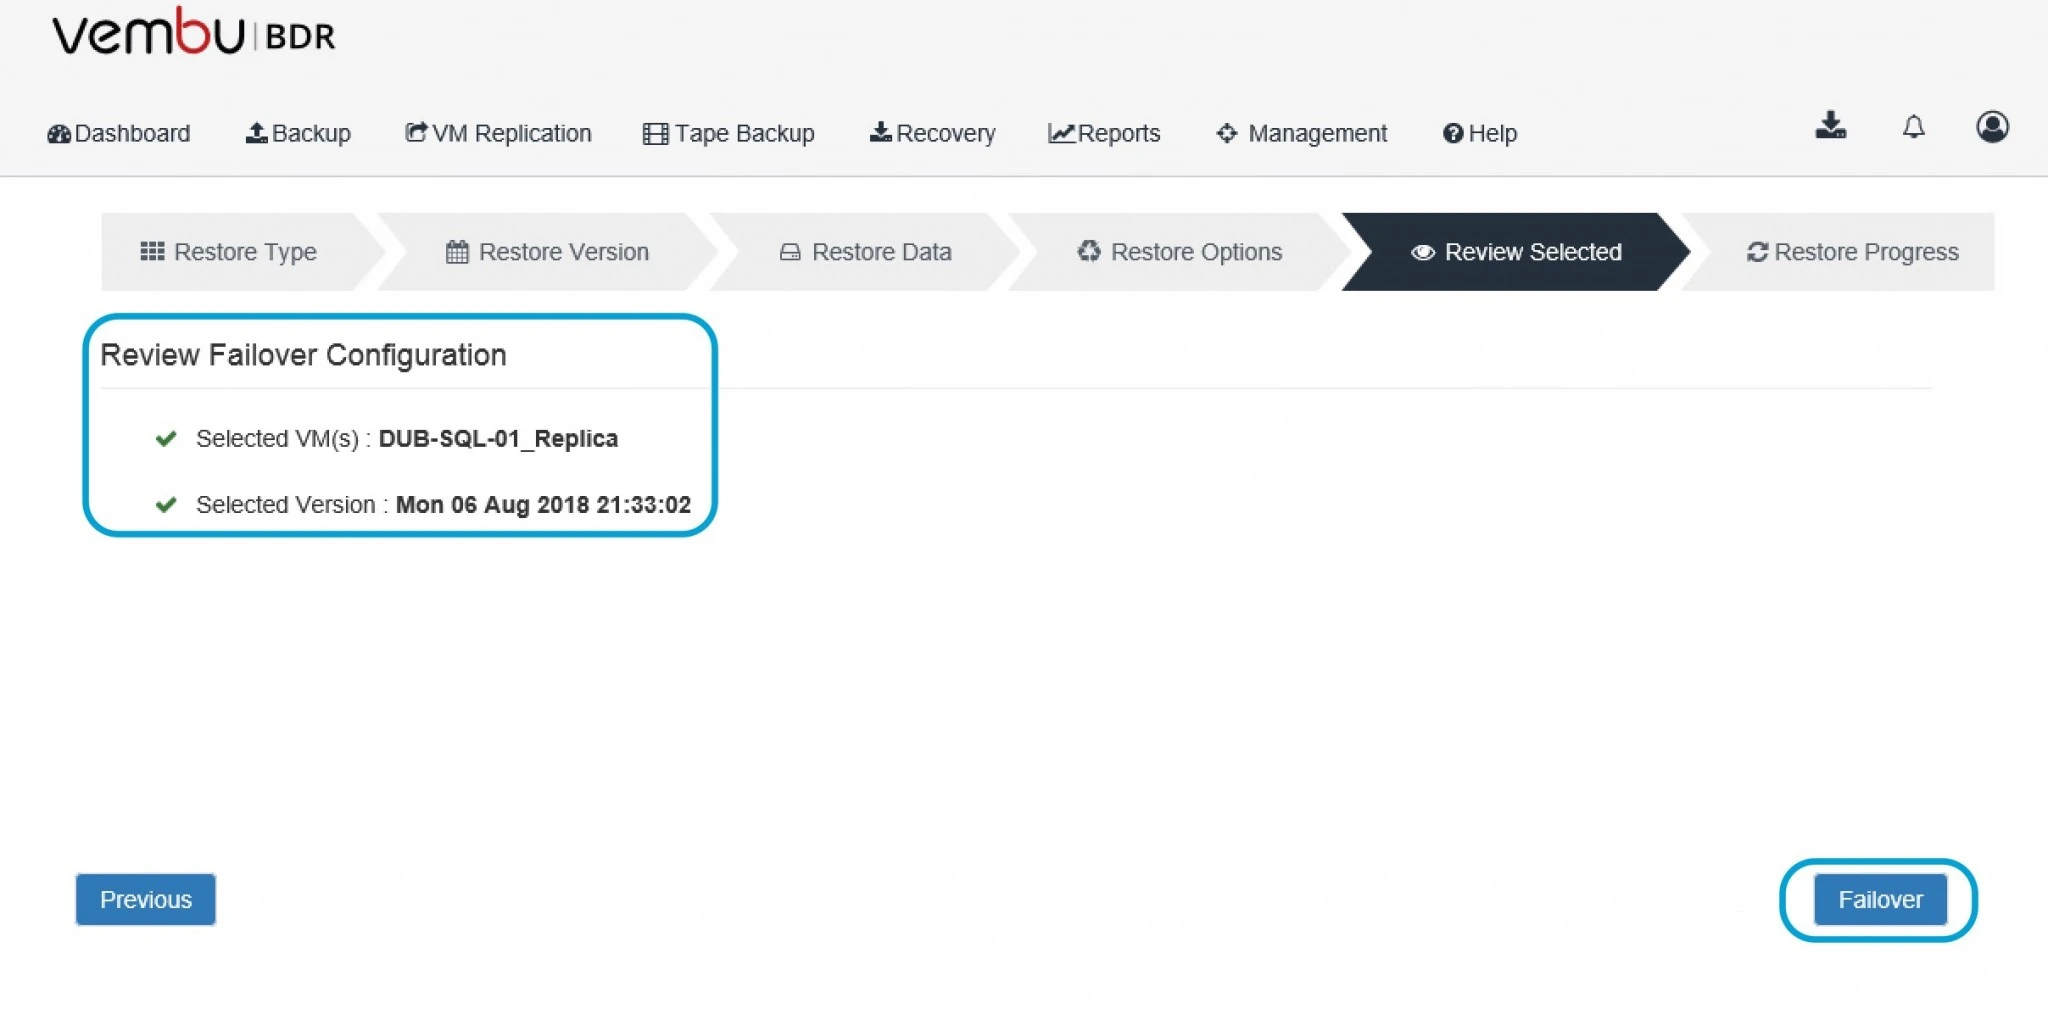
At this point review your Failover configuration settings and click the option Failover
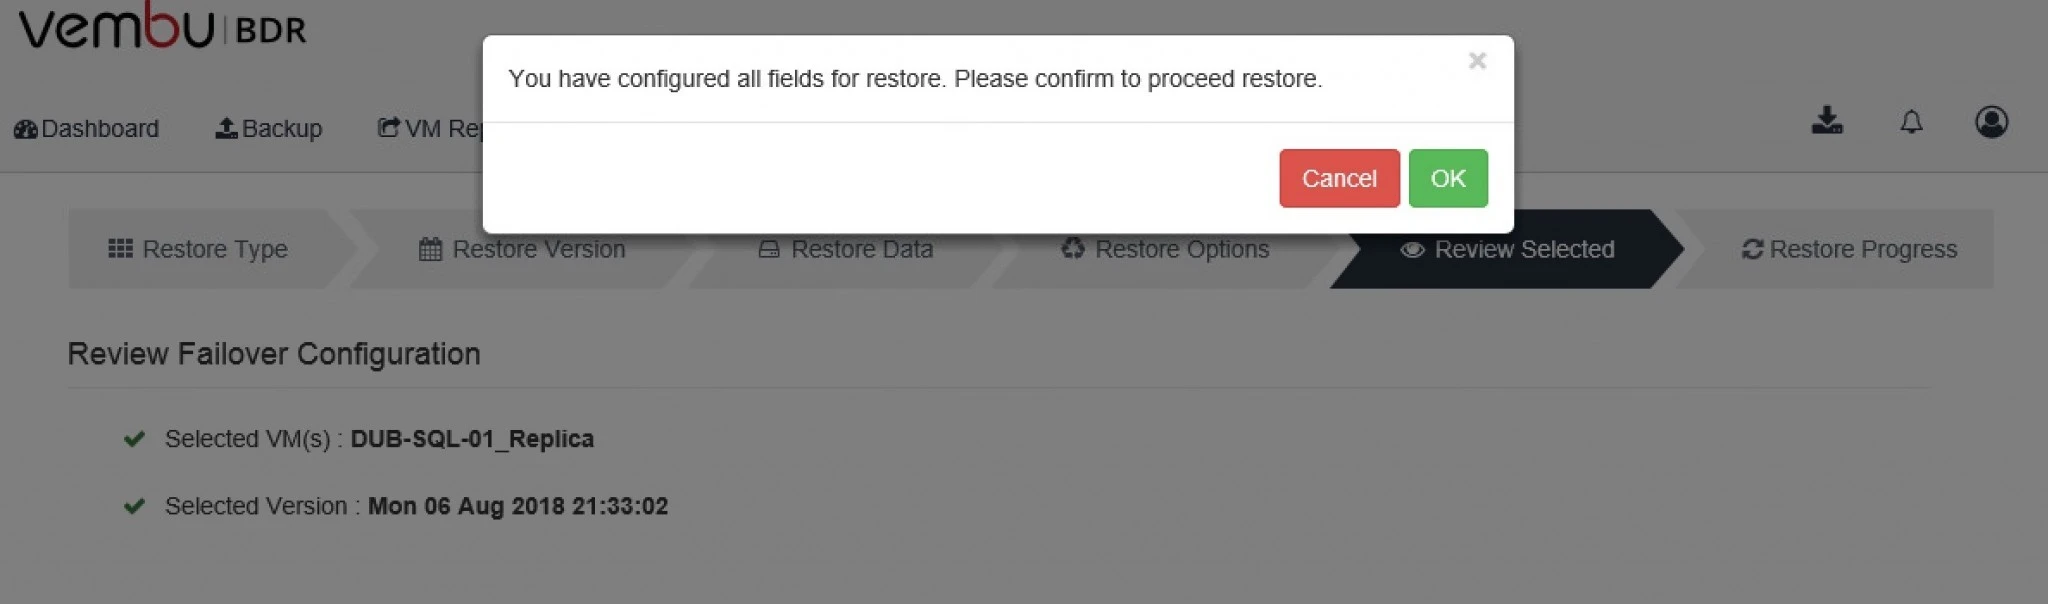
Click ok to proceed further.
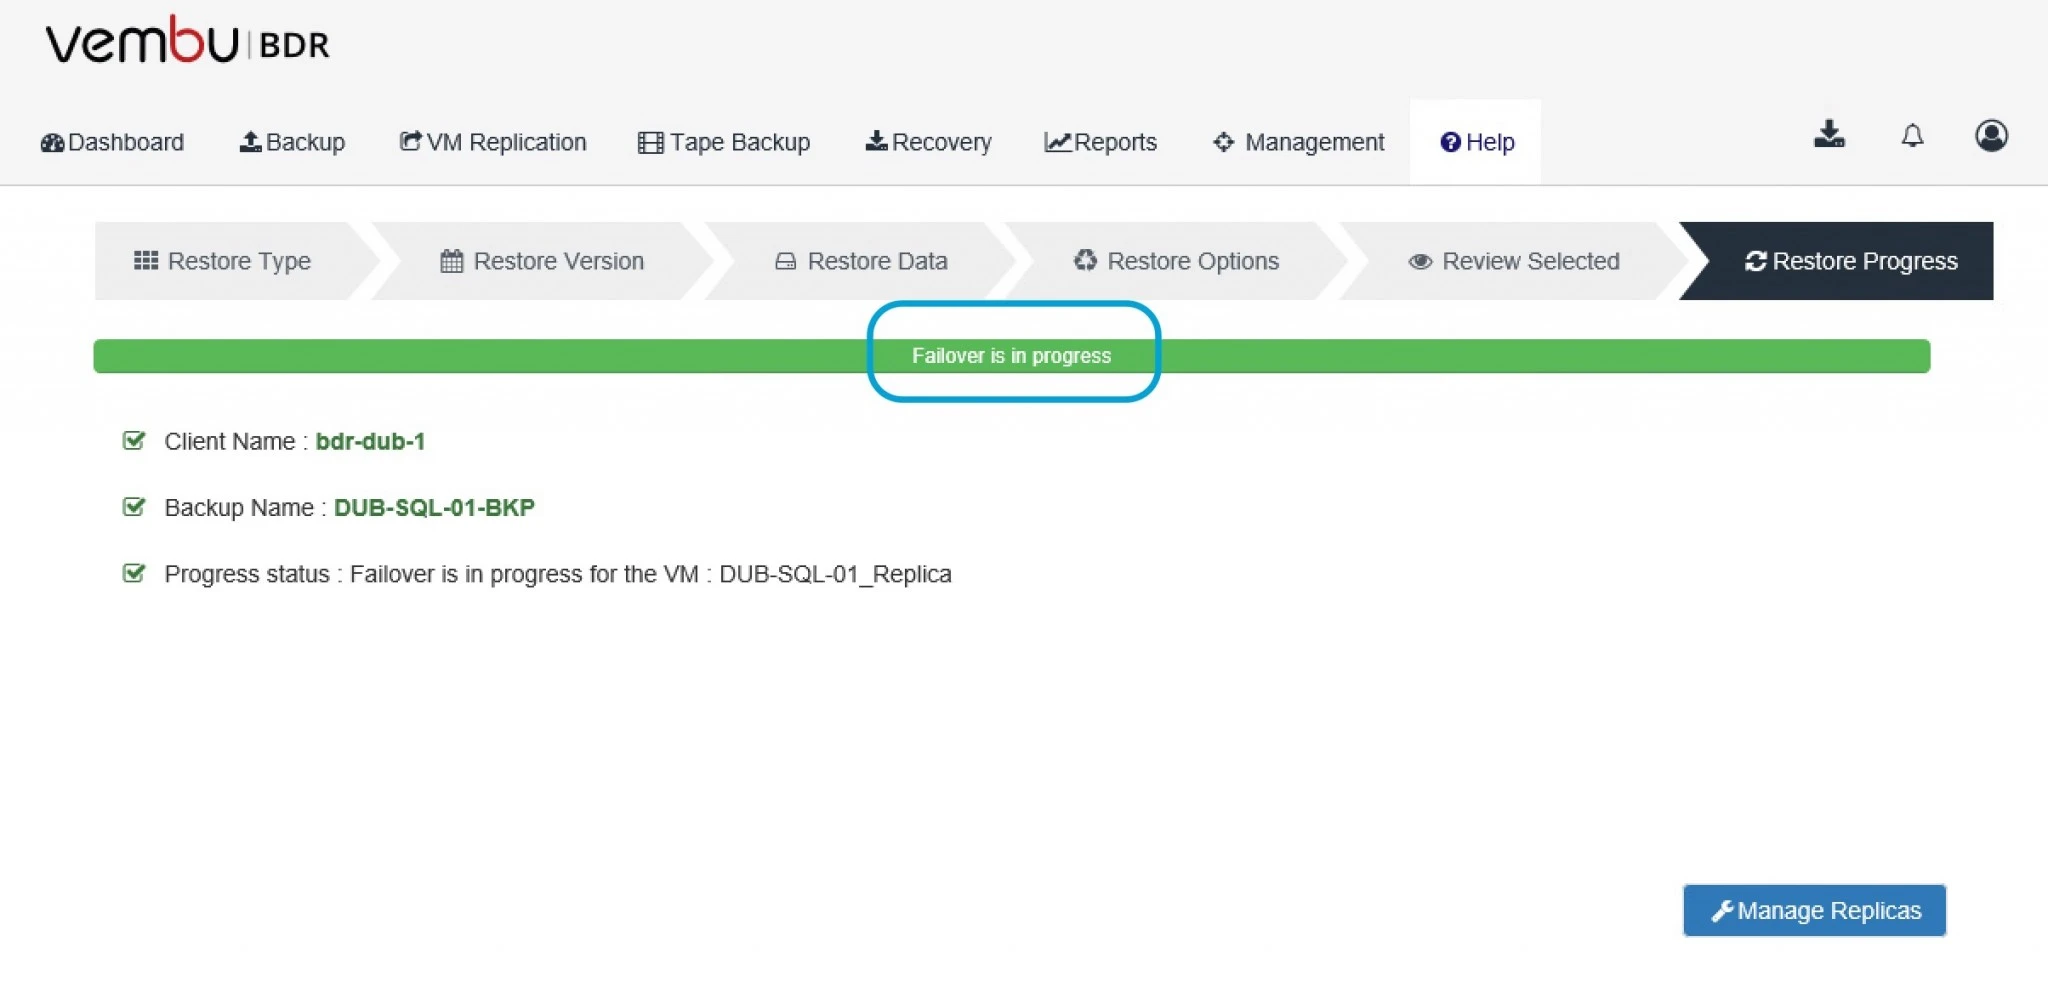
Now, Failover would have progress as you can see in below image. After this click the option Manage Replicas to proceed to next
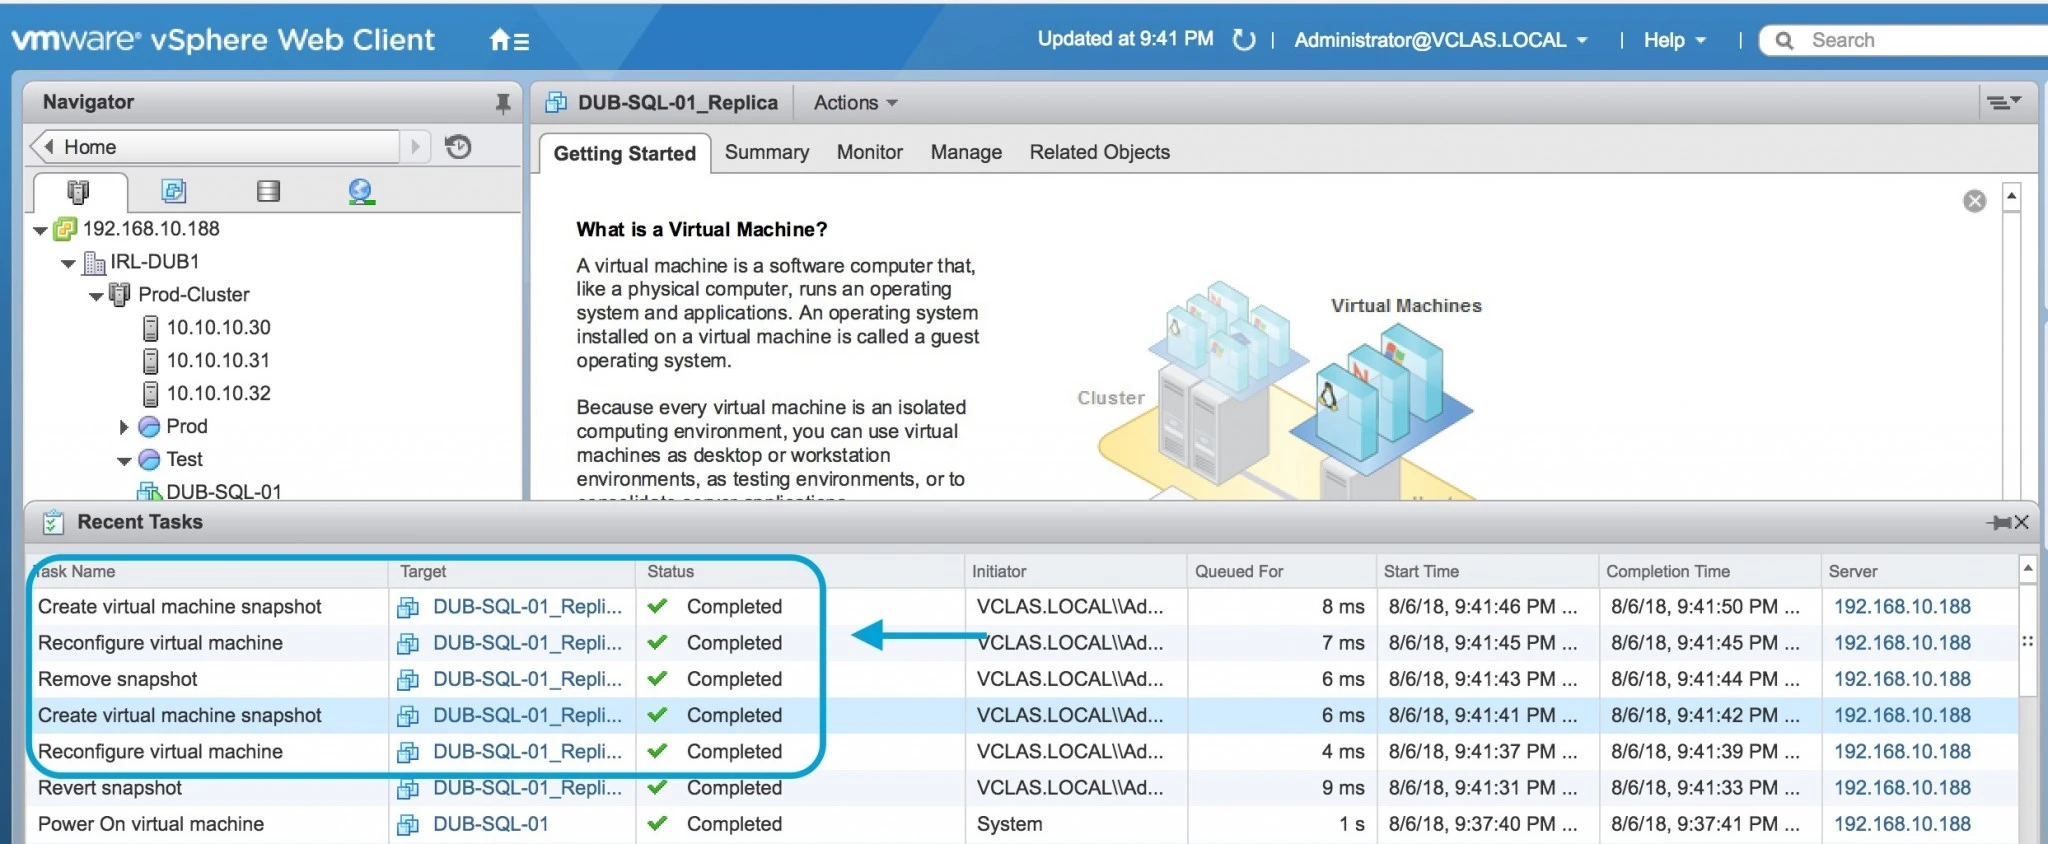
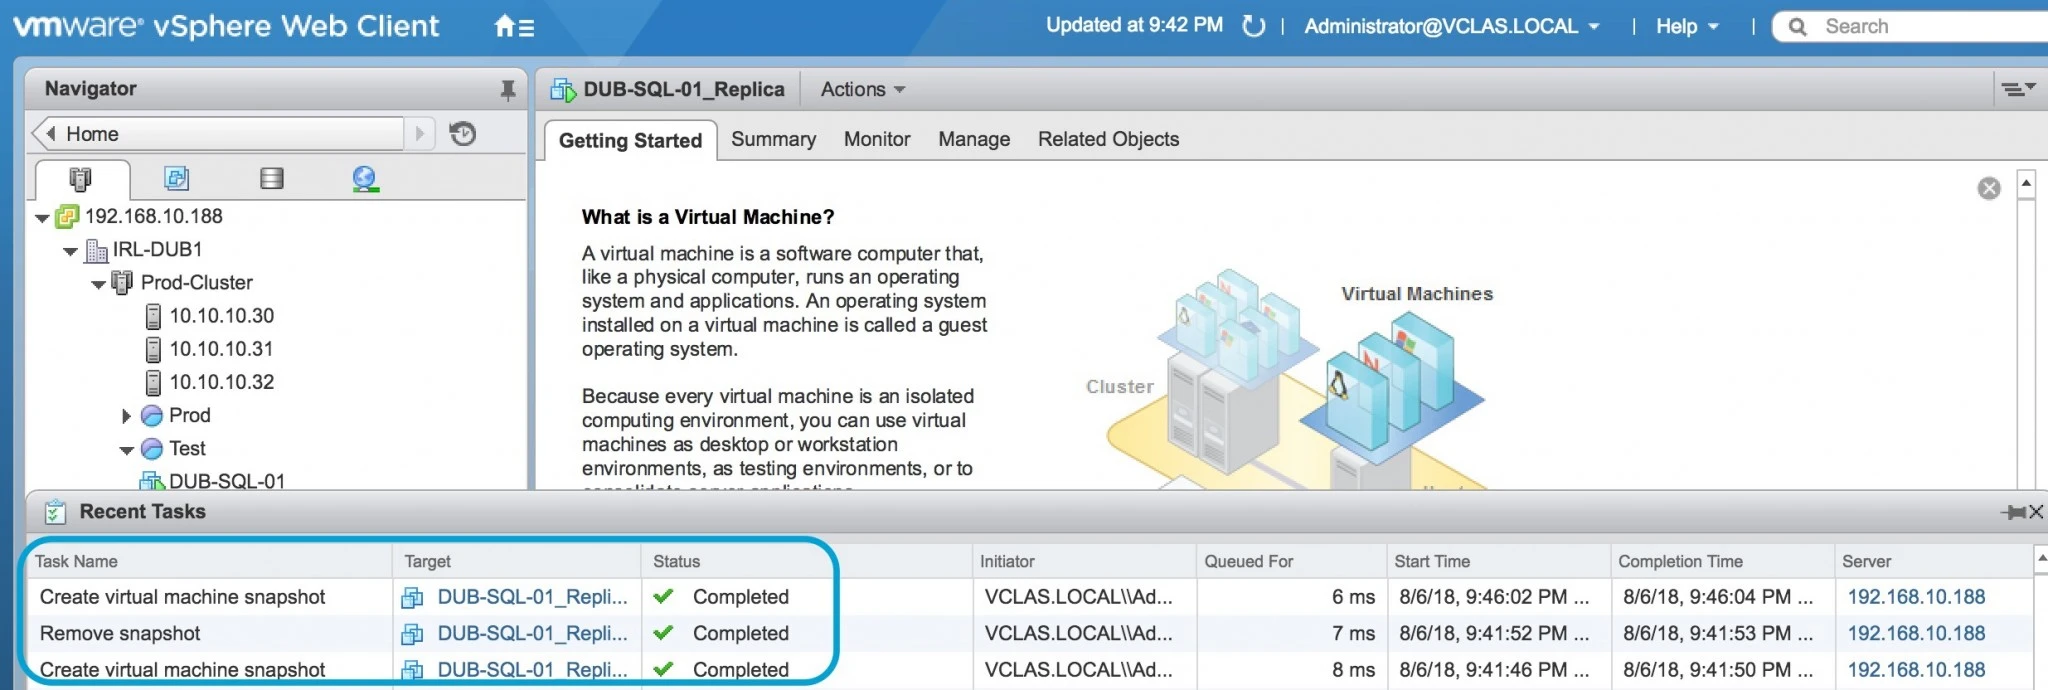
During this progress you can see the task under vCenter server it’s creating VM snapshot and reconfiguring VM.
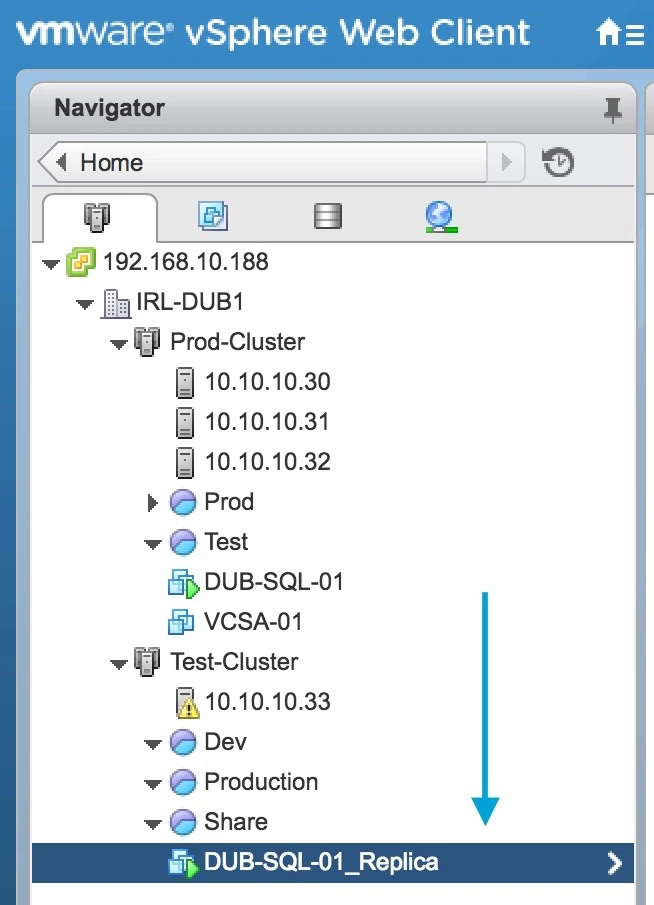
Once Failover process completed you can access your VM and start working.
 
0

How to failback vm via Vembu BDR

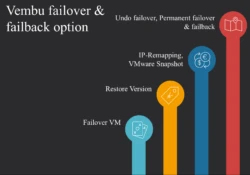
Topic Outline:Restore TypeRestore DataFinalize Type vCenter Activity We have already seen the background process or steps for failover a vm.When you will use Vembu BDR failover process in this process it will create a VM and to the replica VMs from the source VM for a while when the source VM is temporarily not available due to corruption or system crash. During that time this VM act as Main or Production VM.Failover is a temporary state that may be further finalized using any of the below processes:
  • Undo Failover
  • Permanent Failover
  • Failback
Lets see these options and meaning.
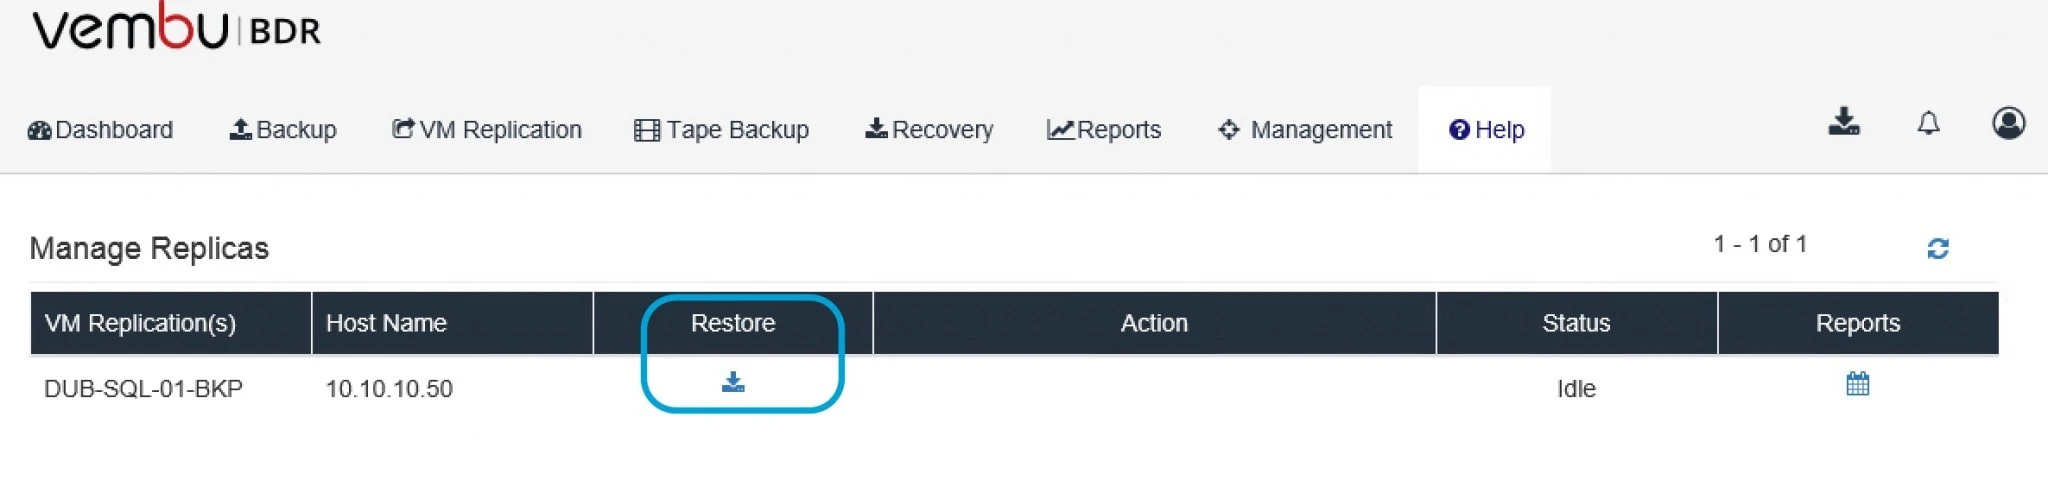
  1. Go to Vembu BDR login screen under manage replicas click on restore option.
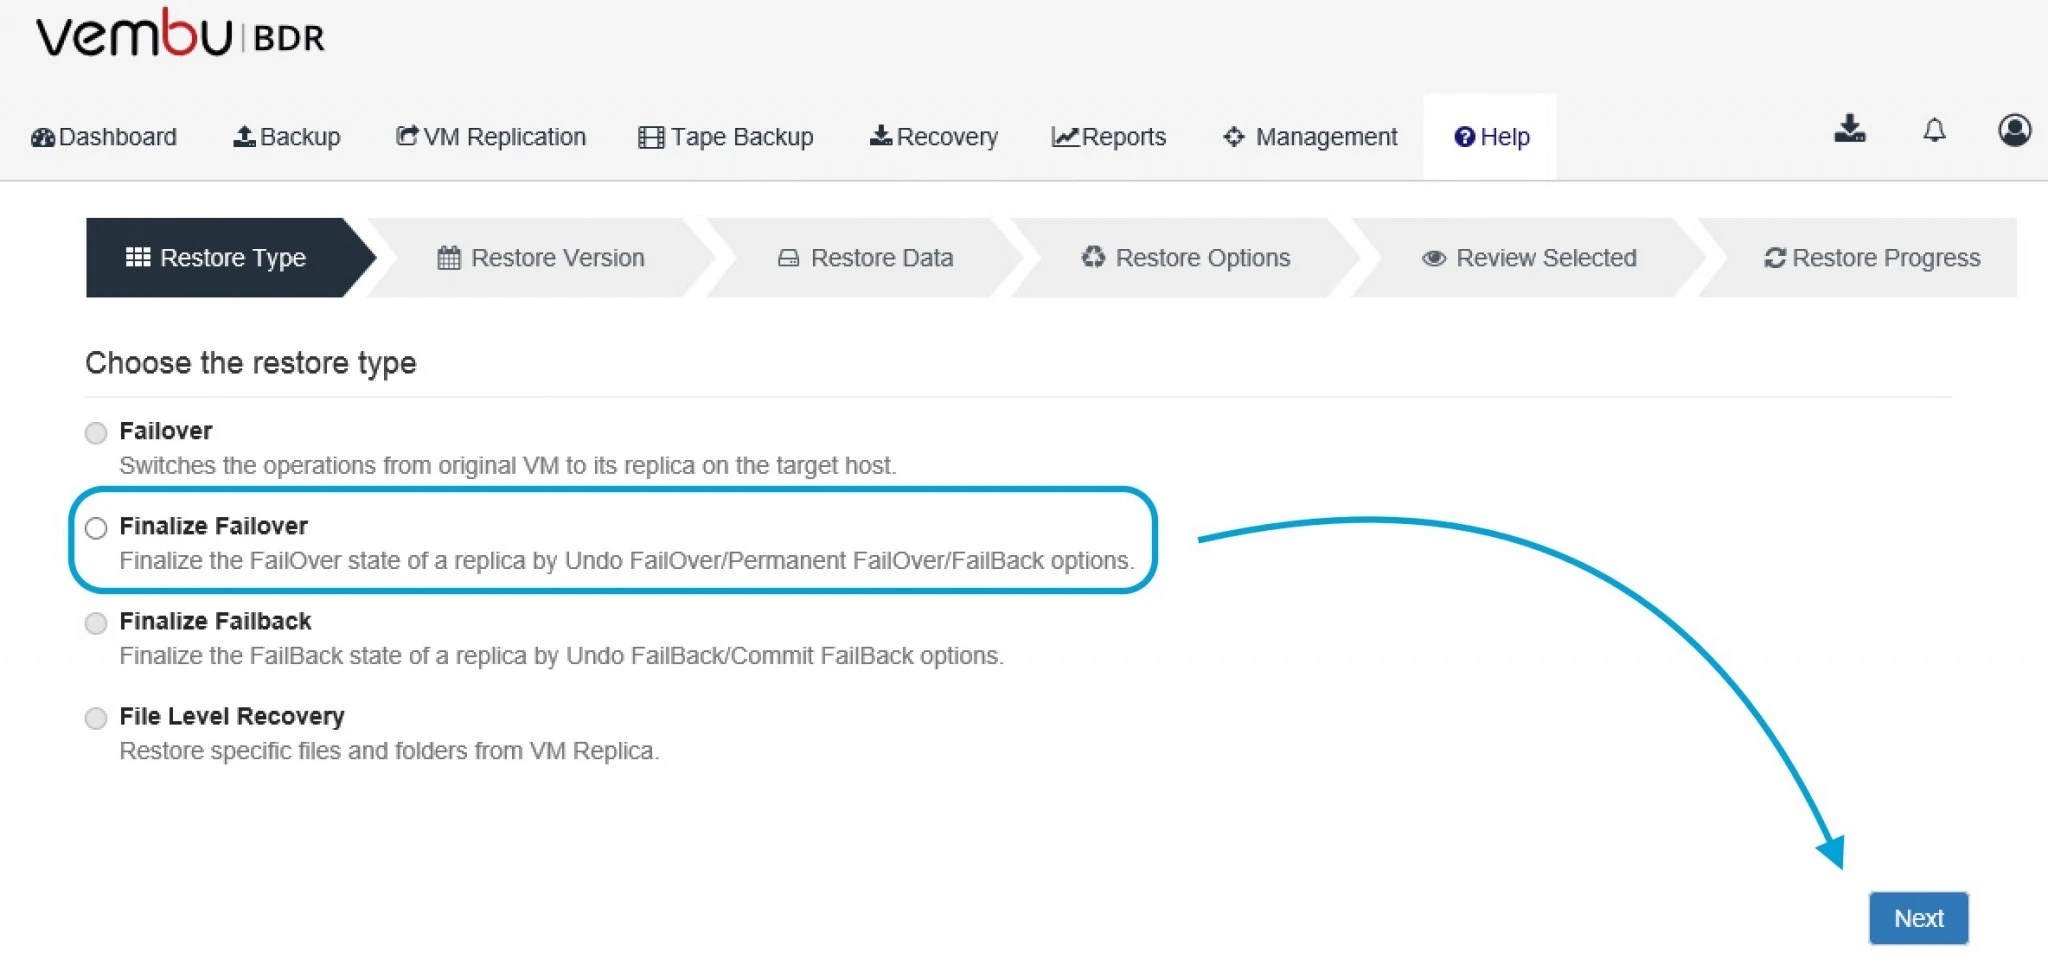
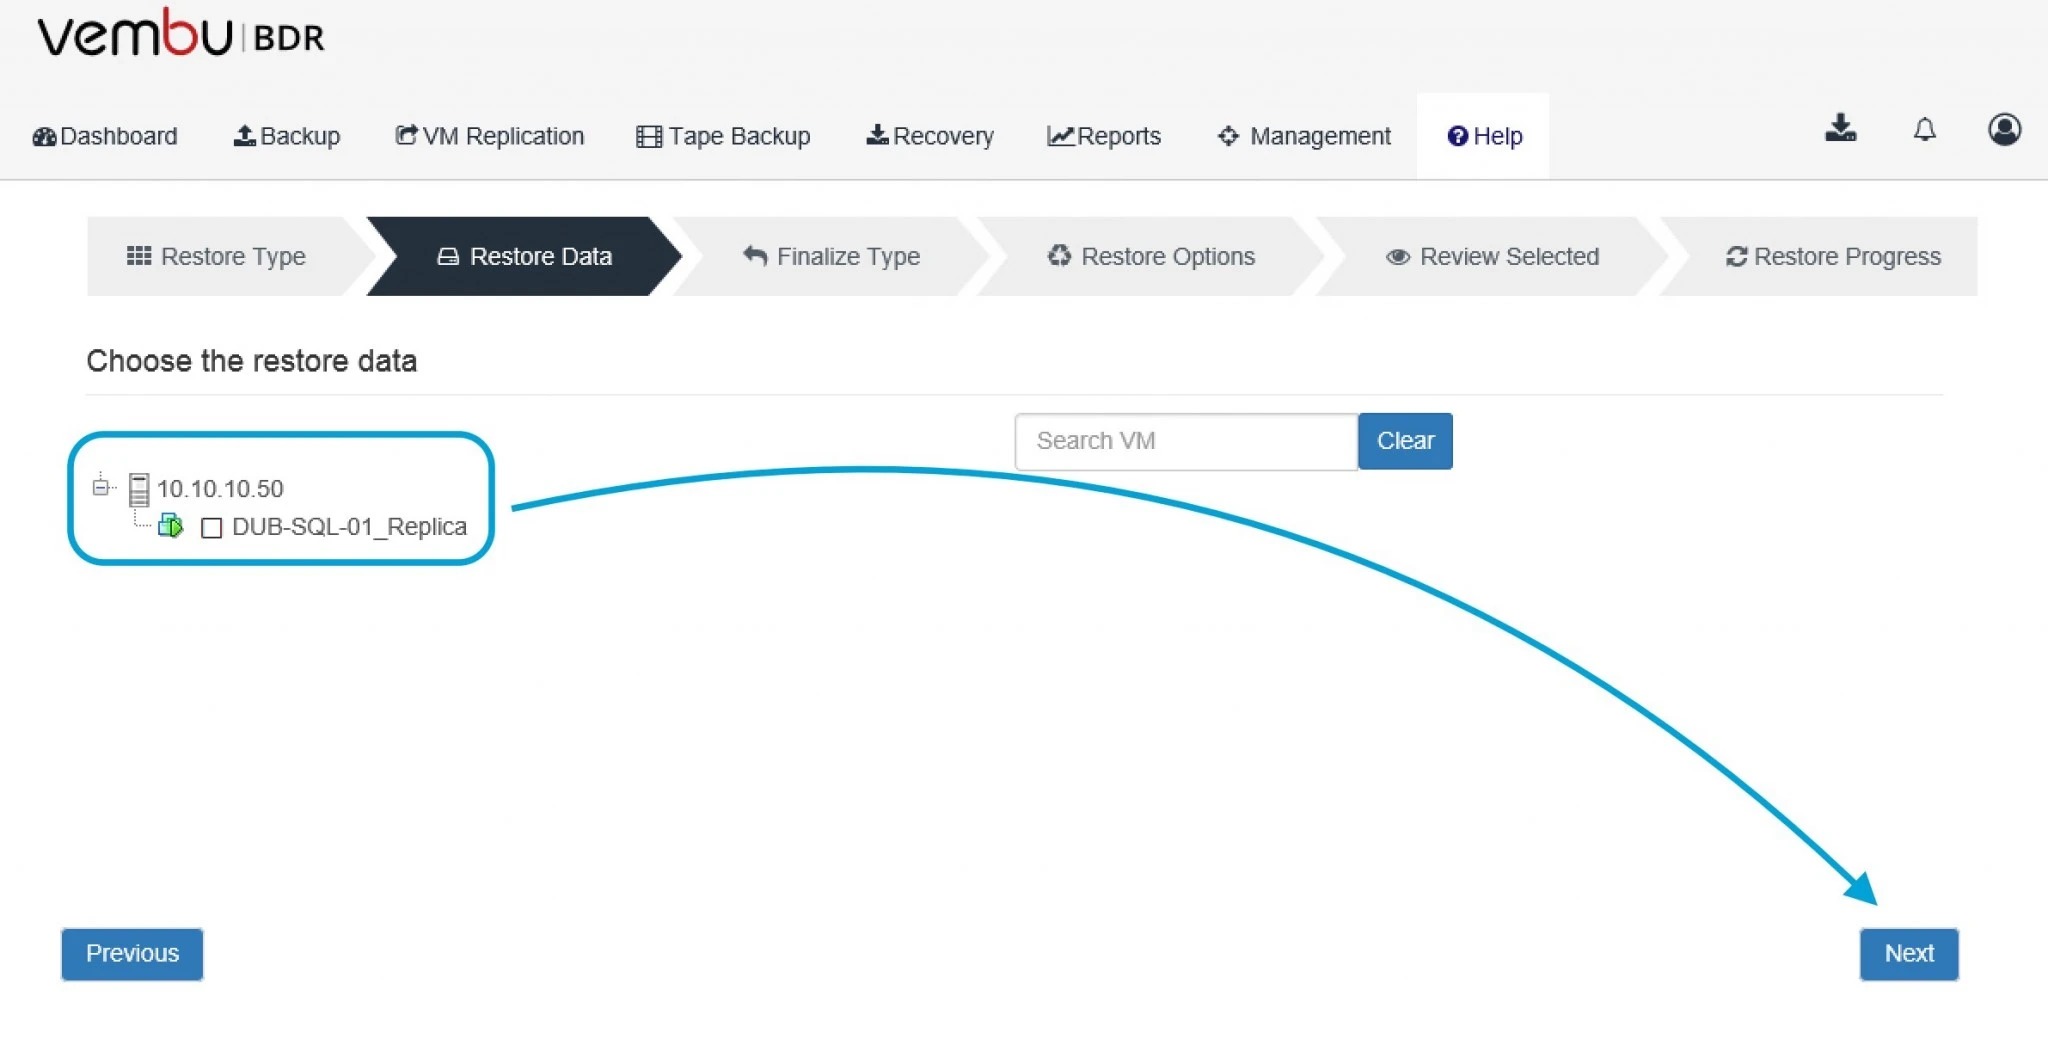
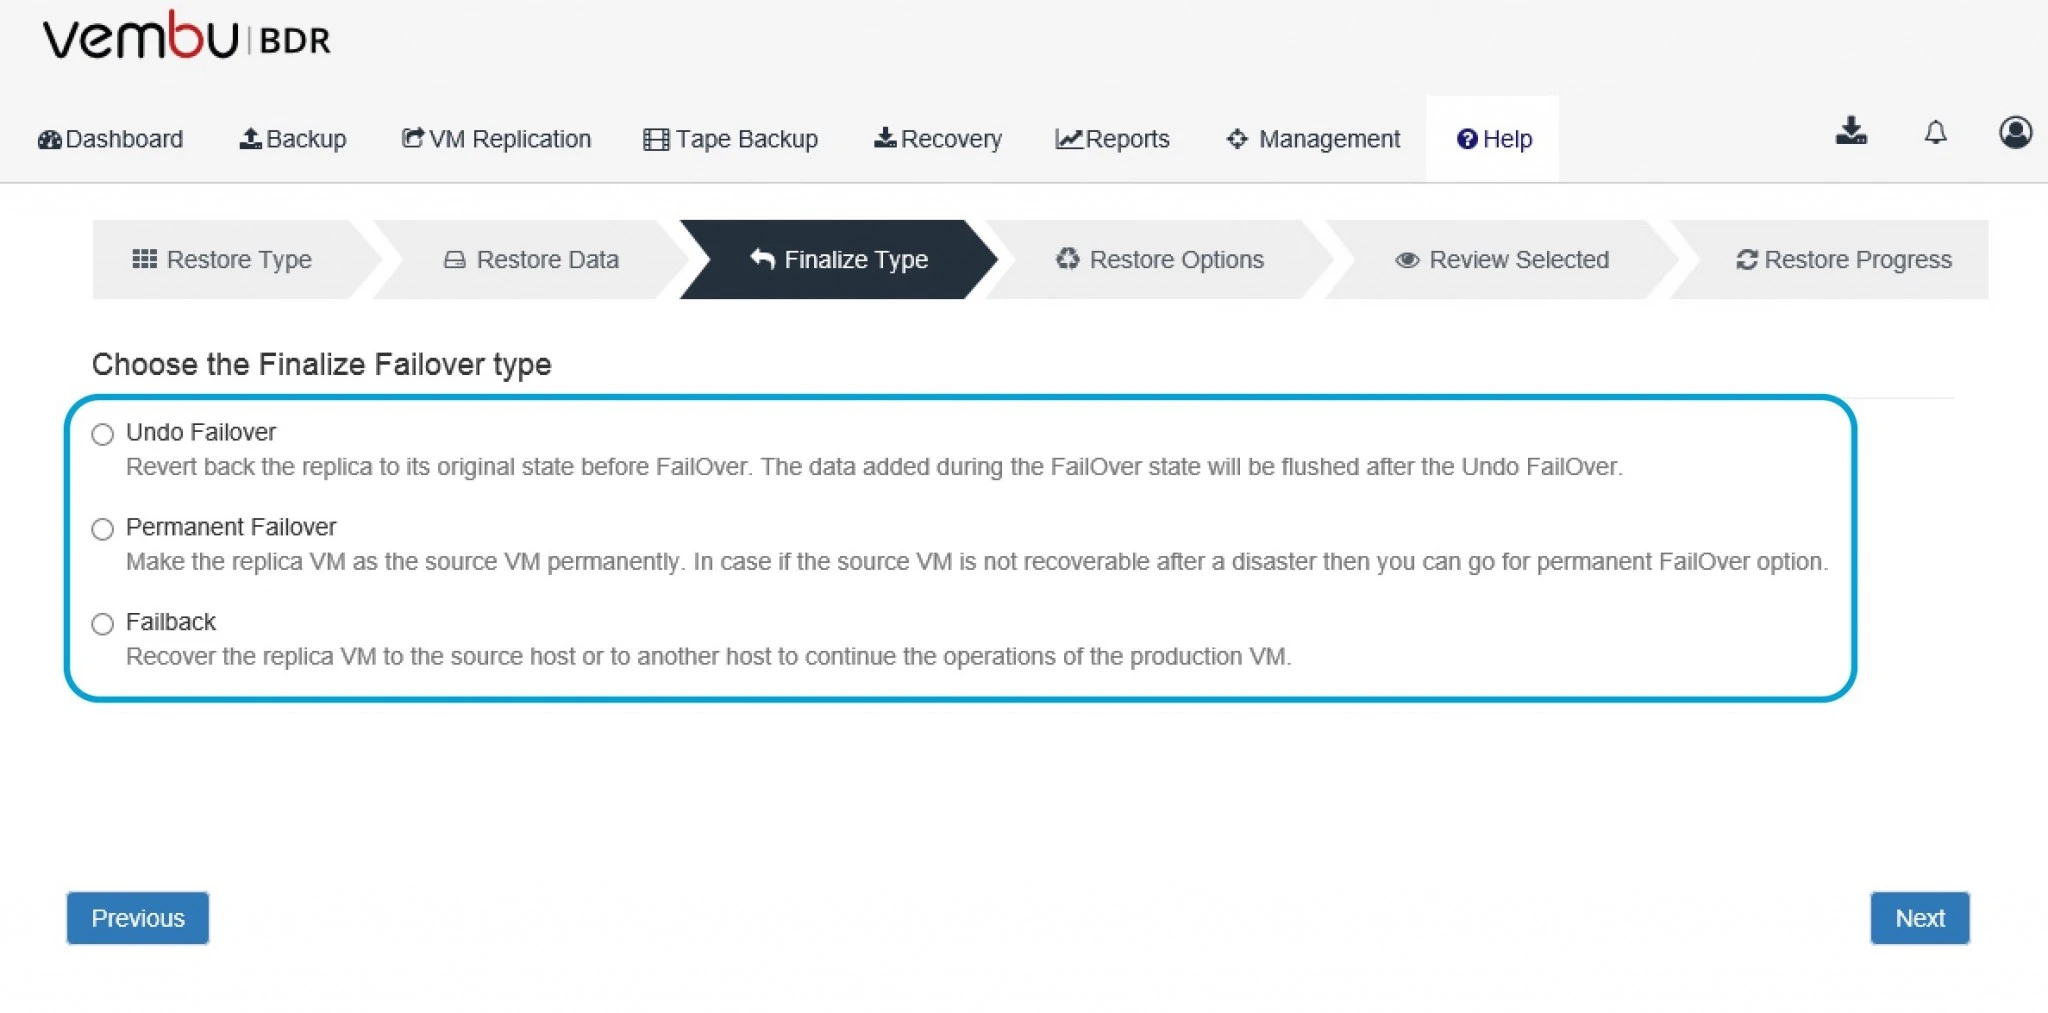
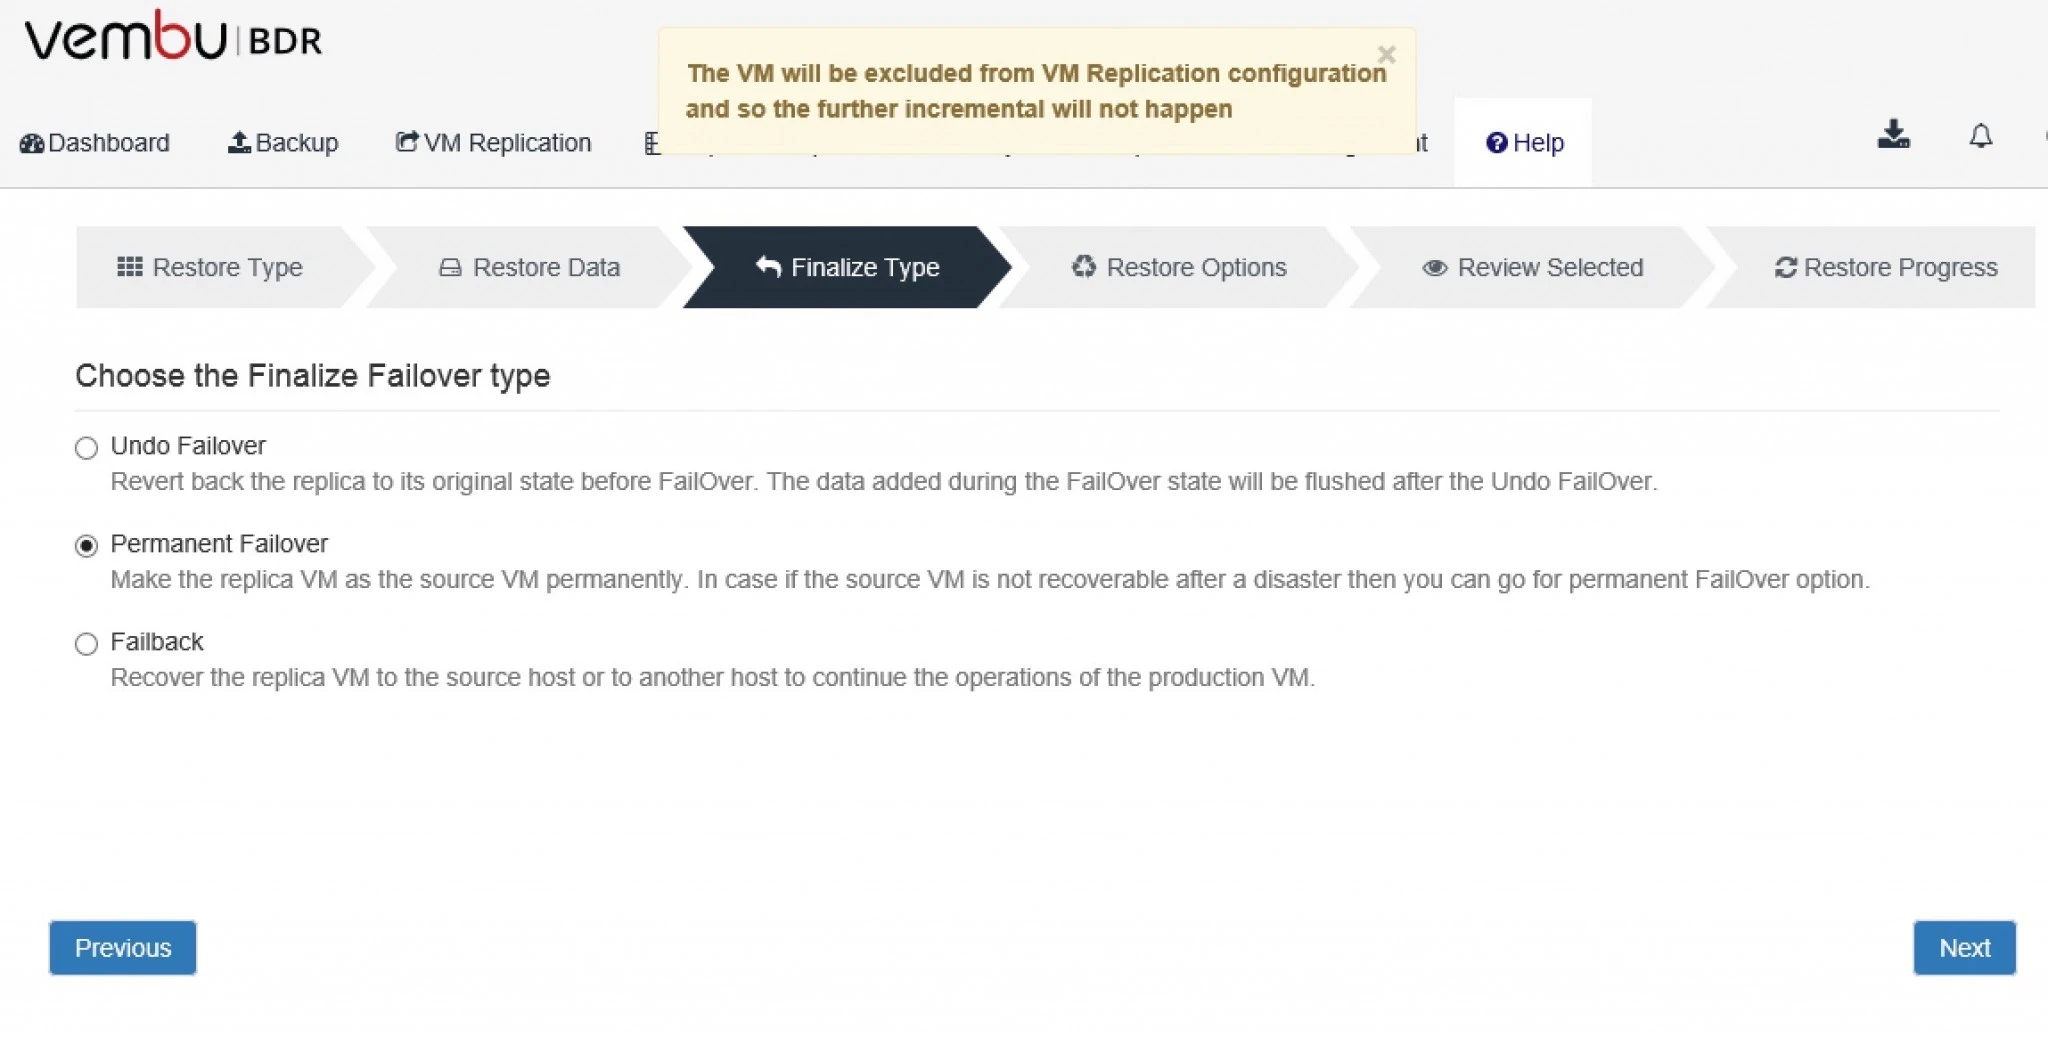
 2. Here you can see all these options but only one is highlighted which is Finalize Failover select and click on next.3. Here select the VM and click next. 4. Failover is a temporary state that may be further finalized using any of the below processes:
  • Undo Failover
  • Permanent Failover
  • Failback
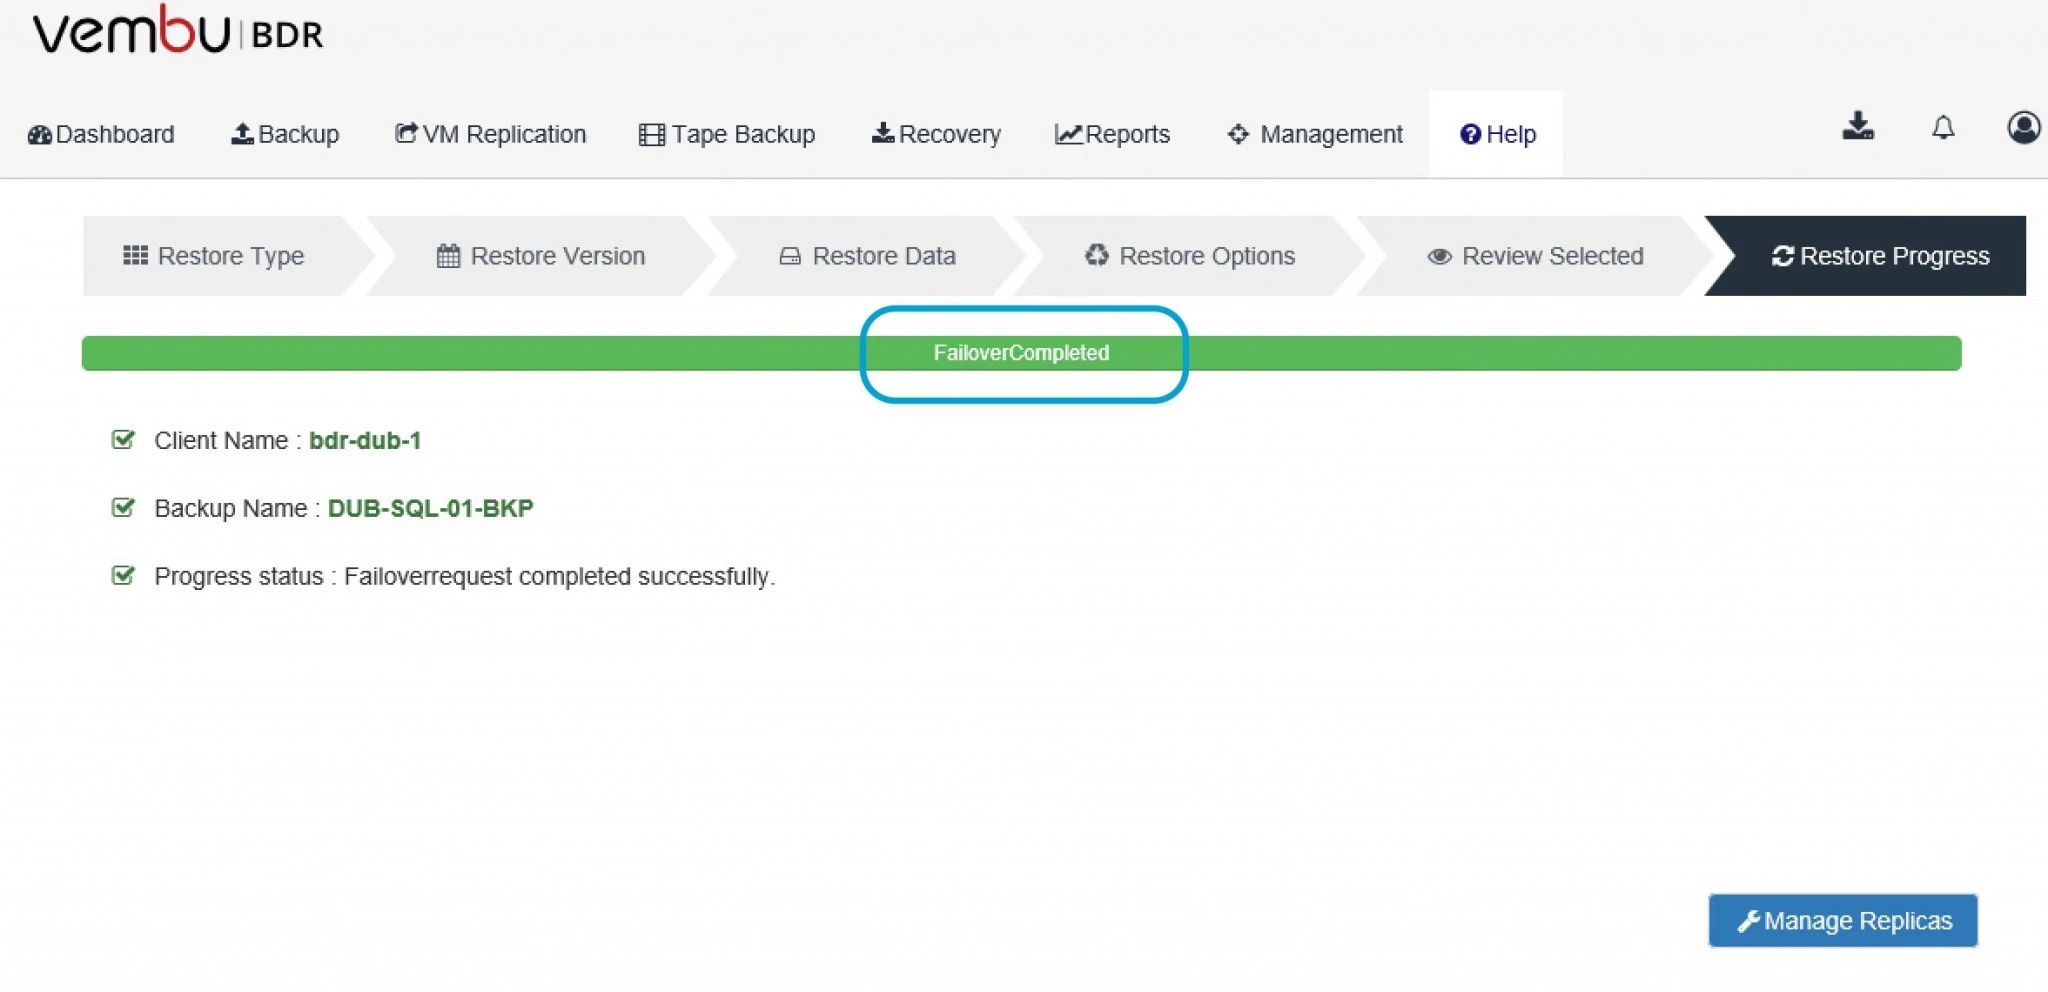
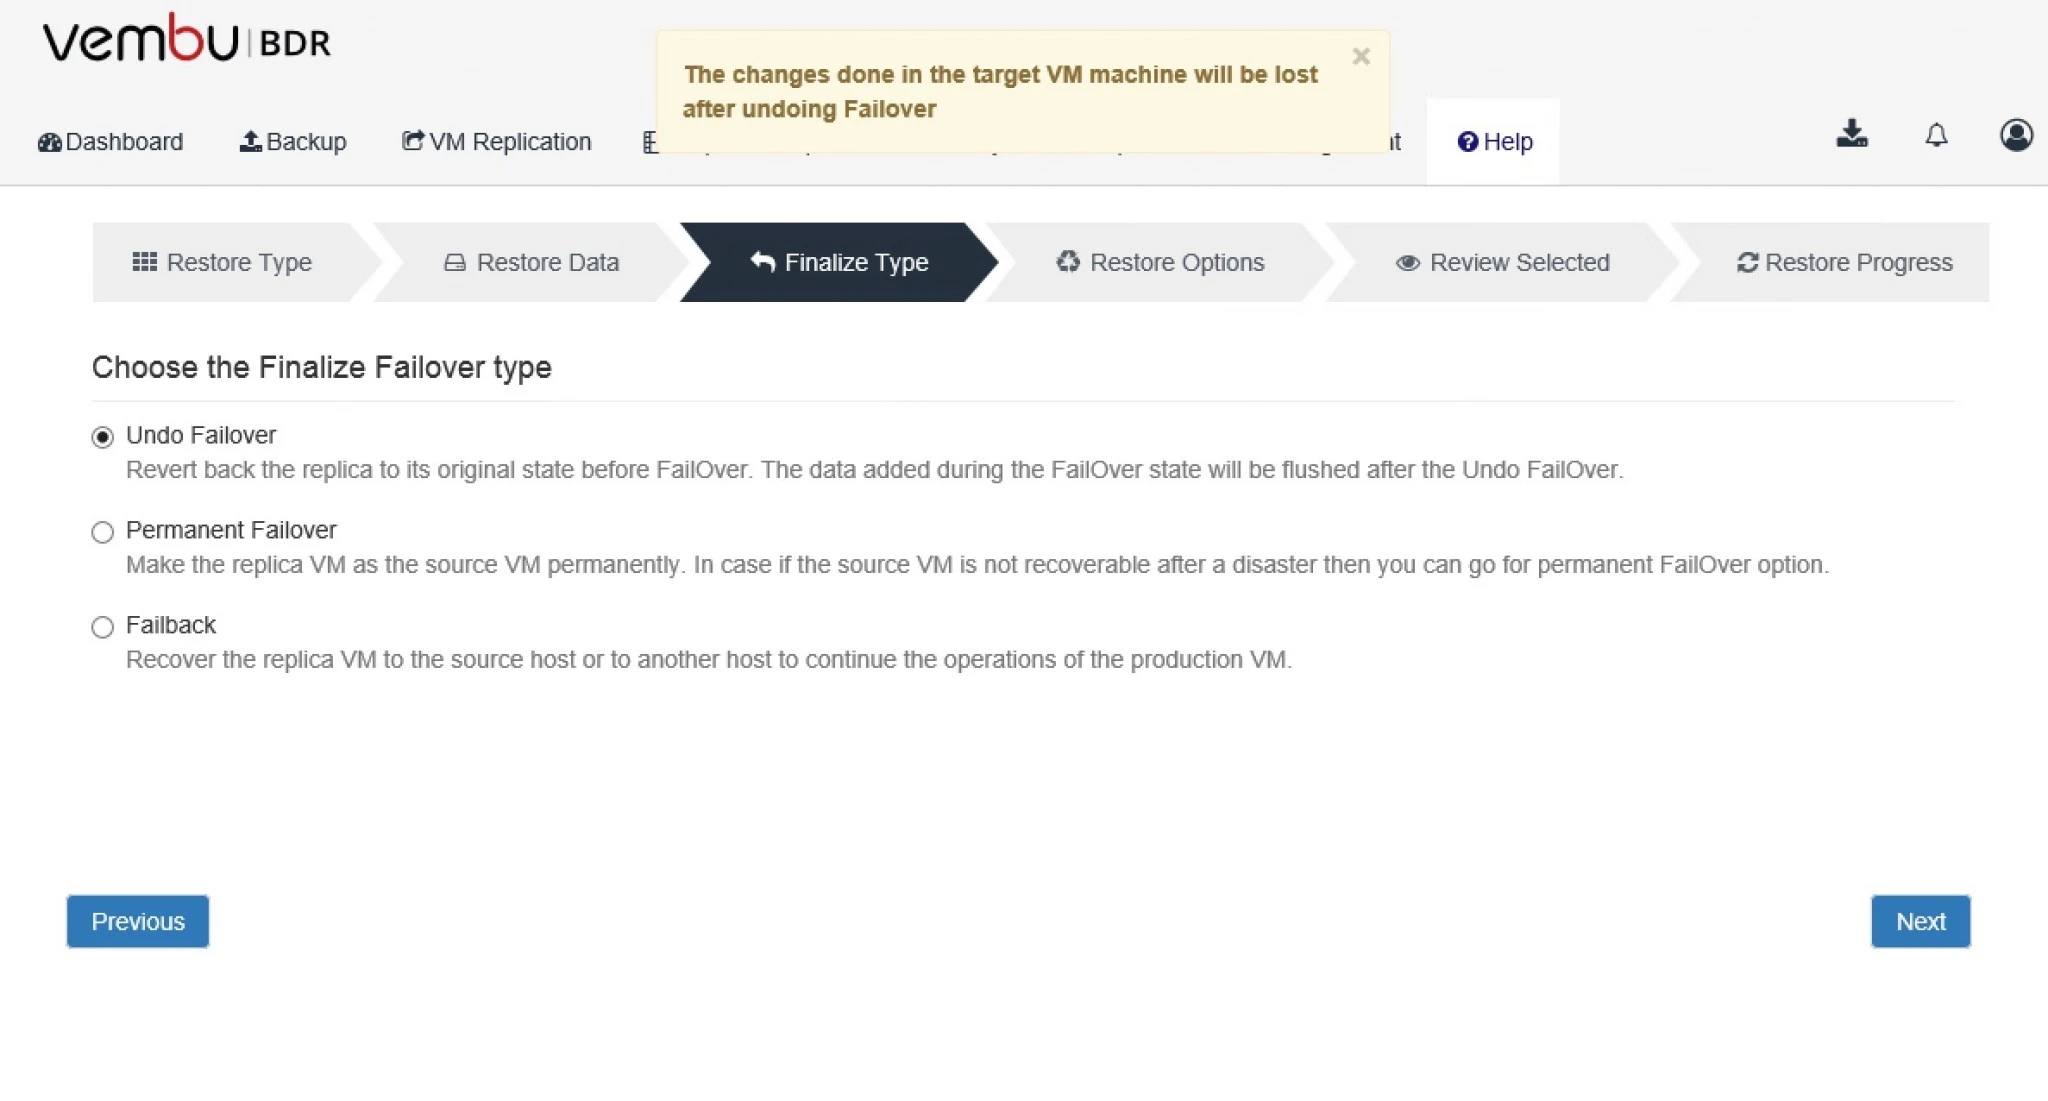
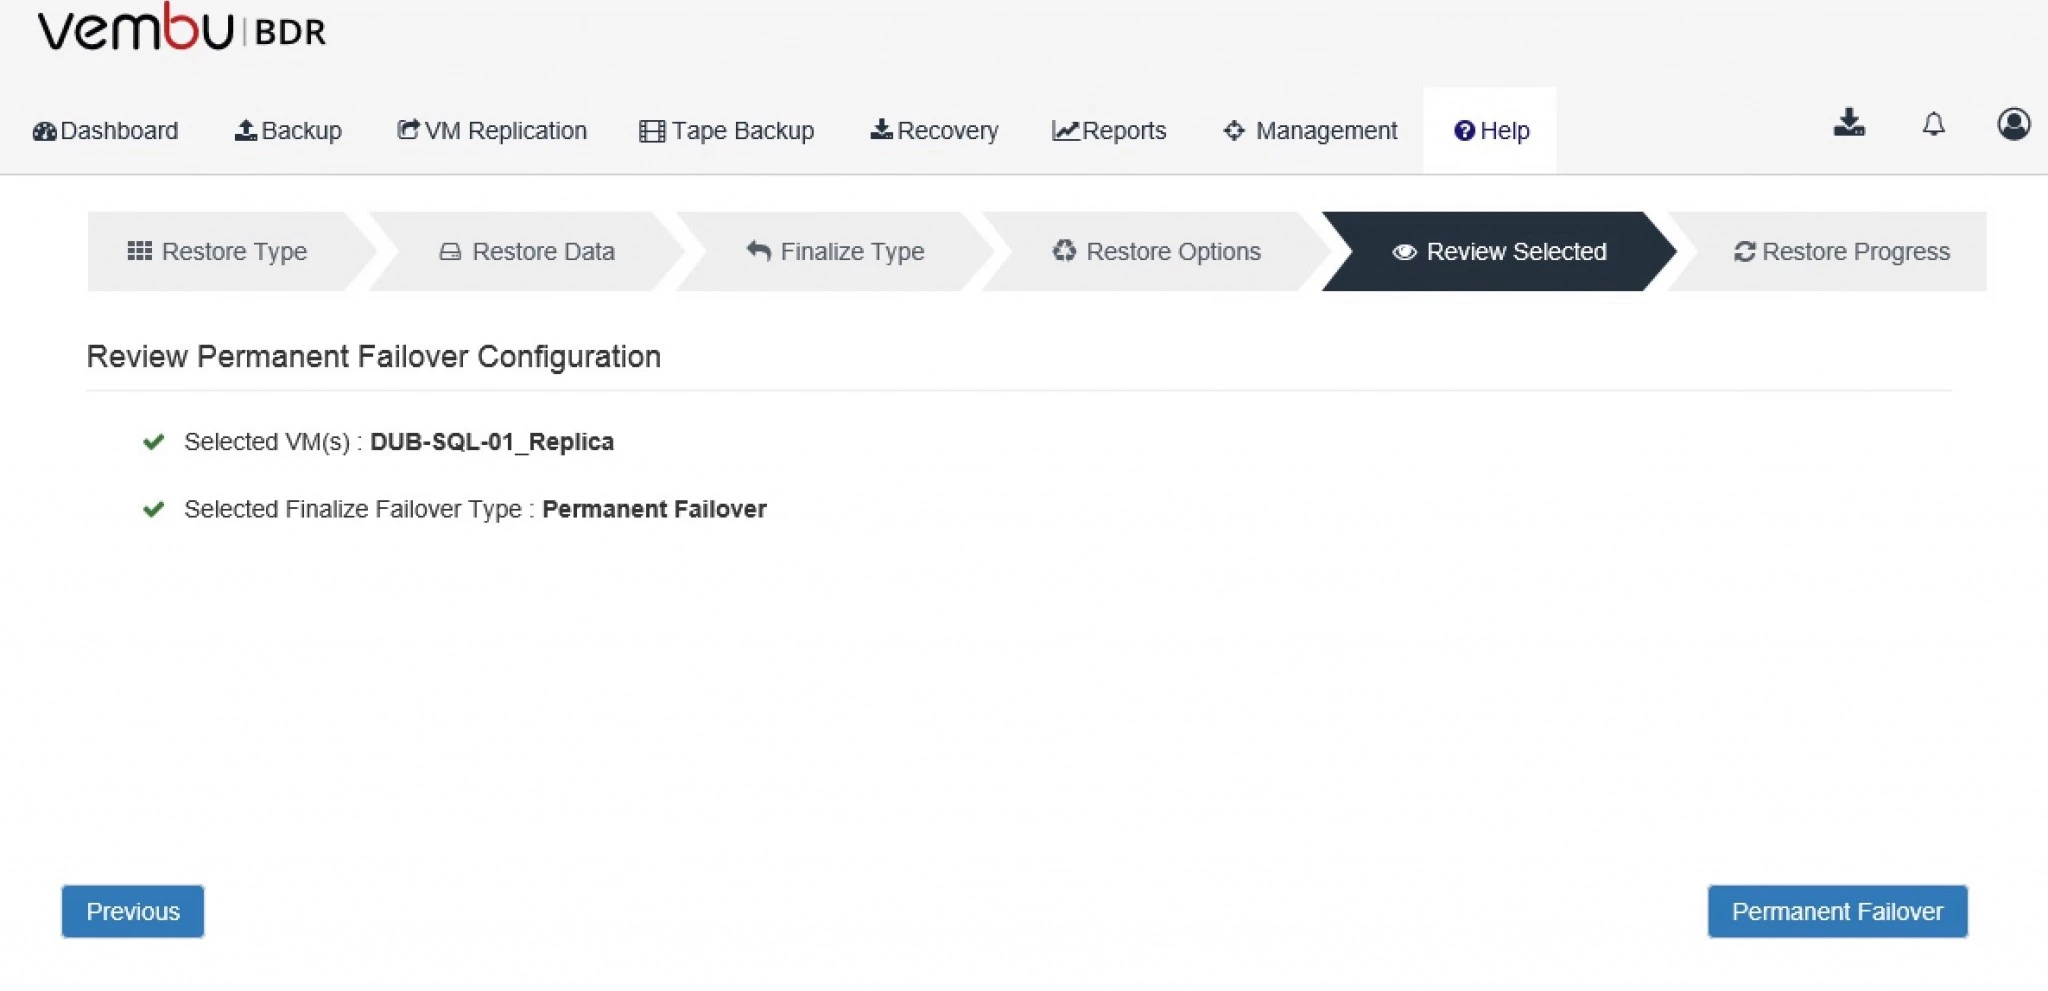
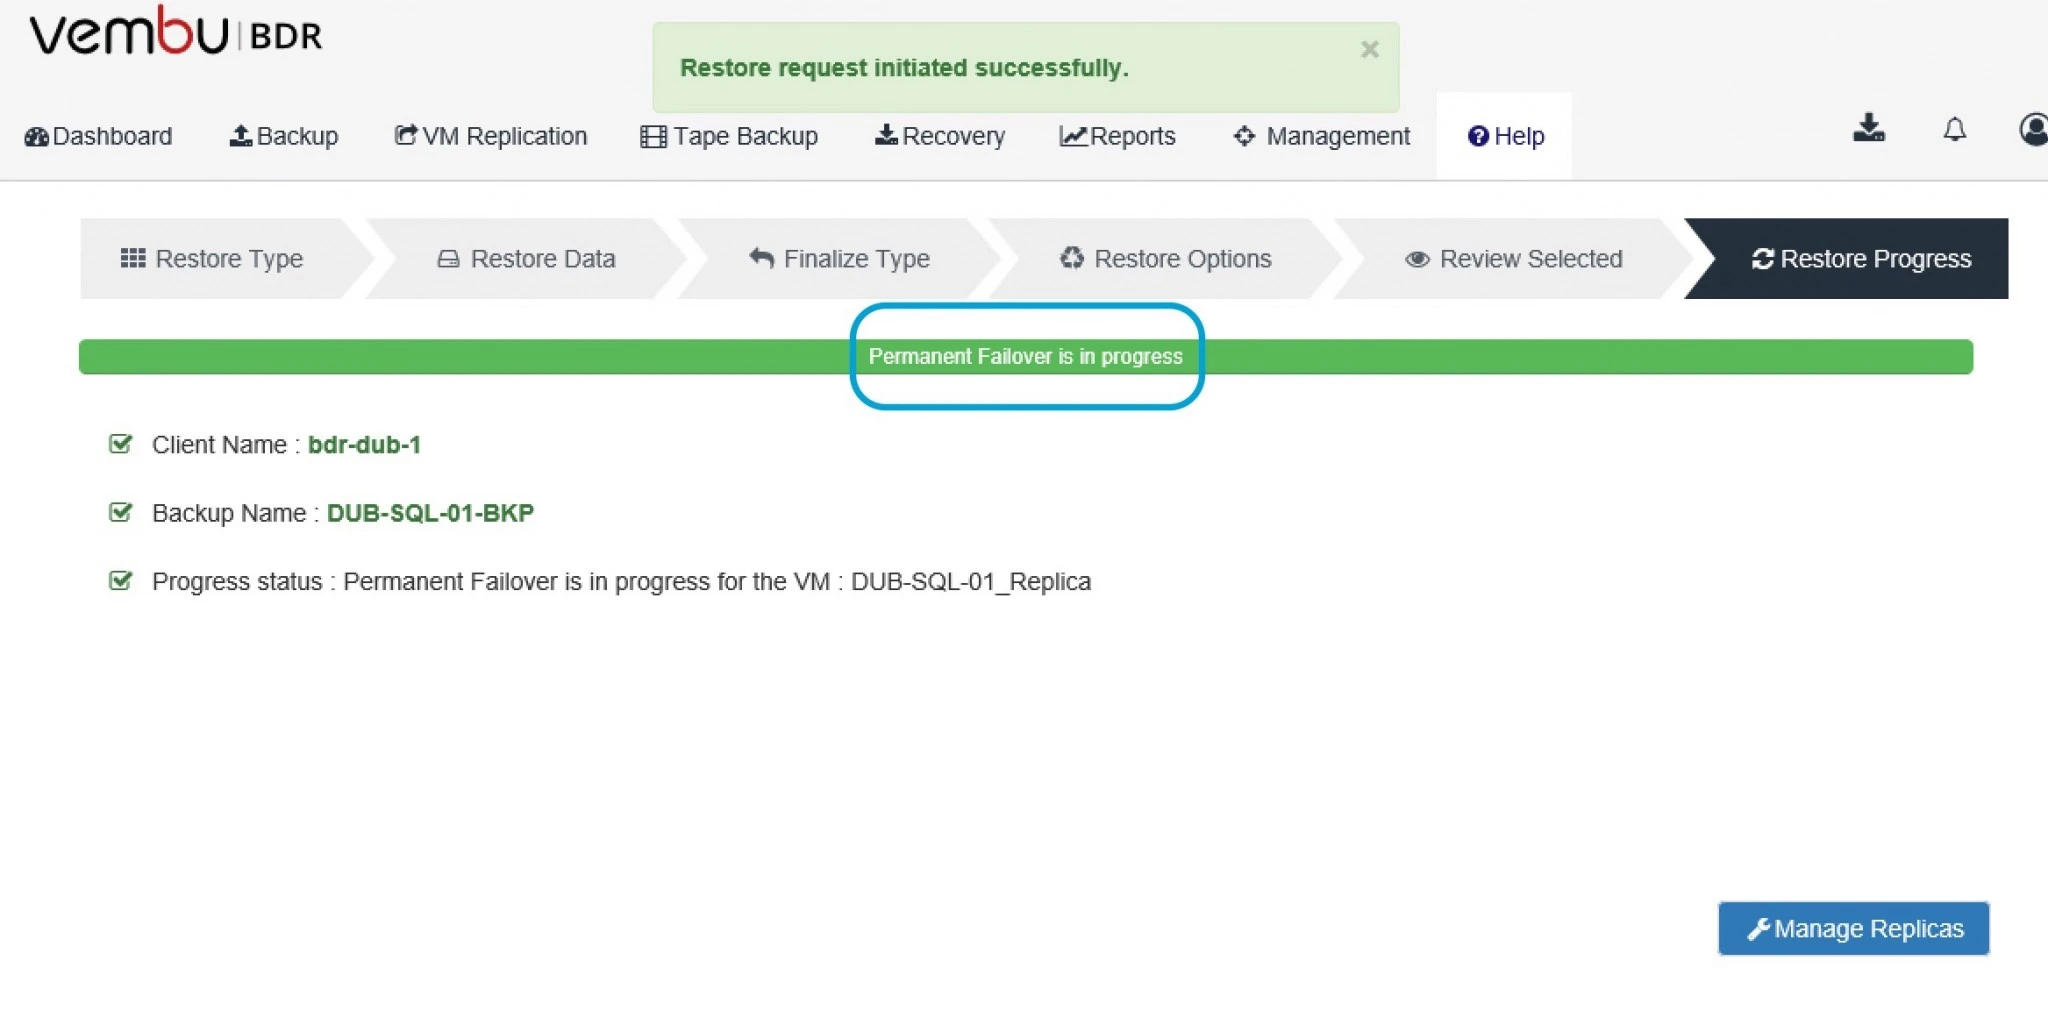
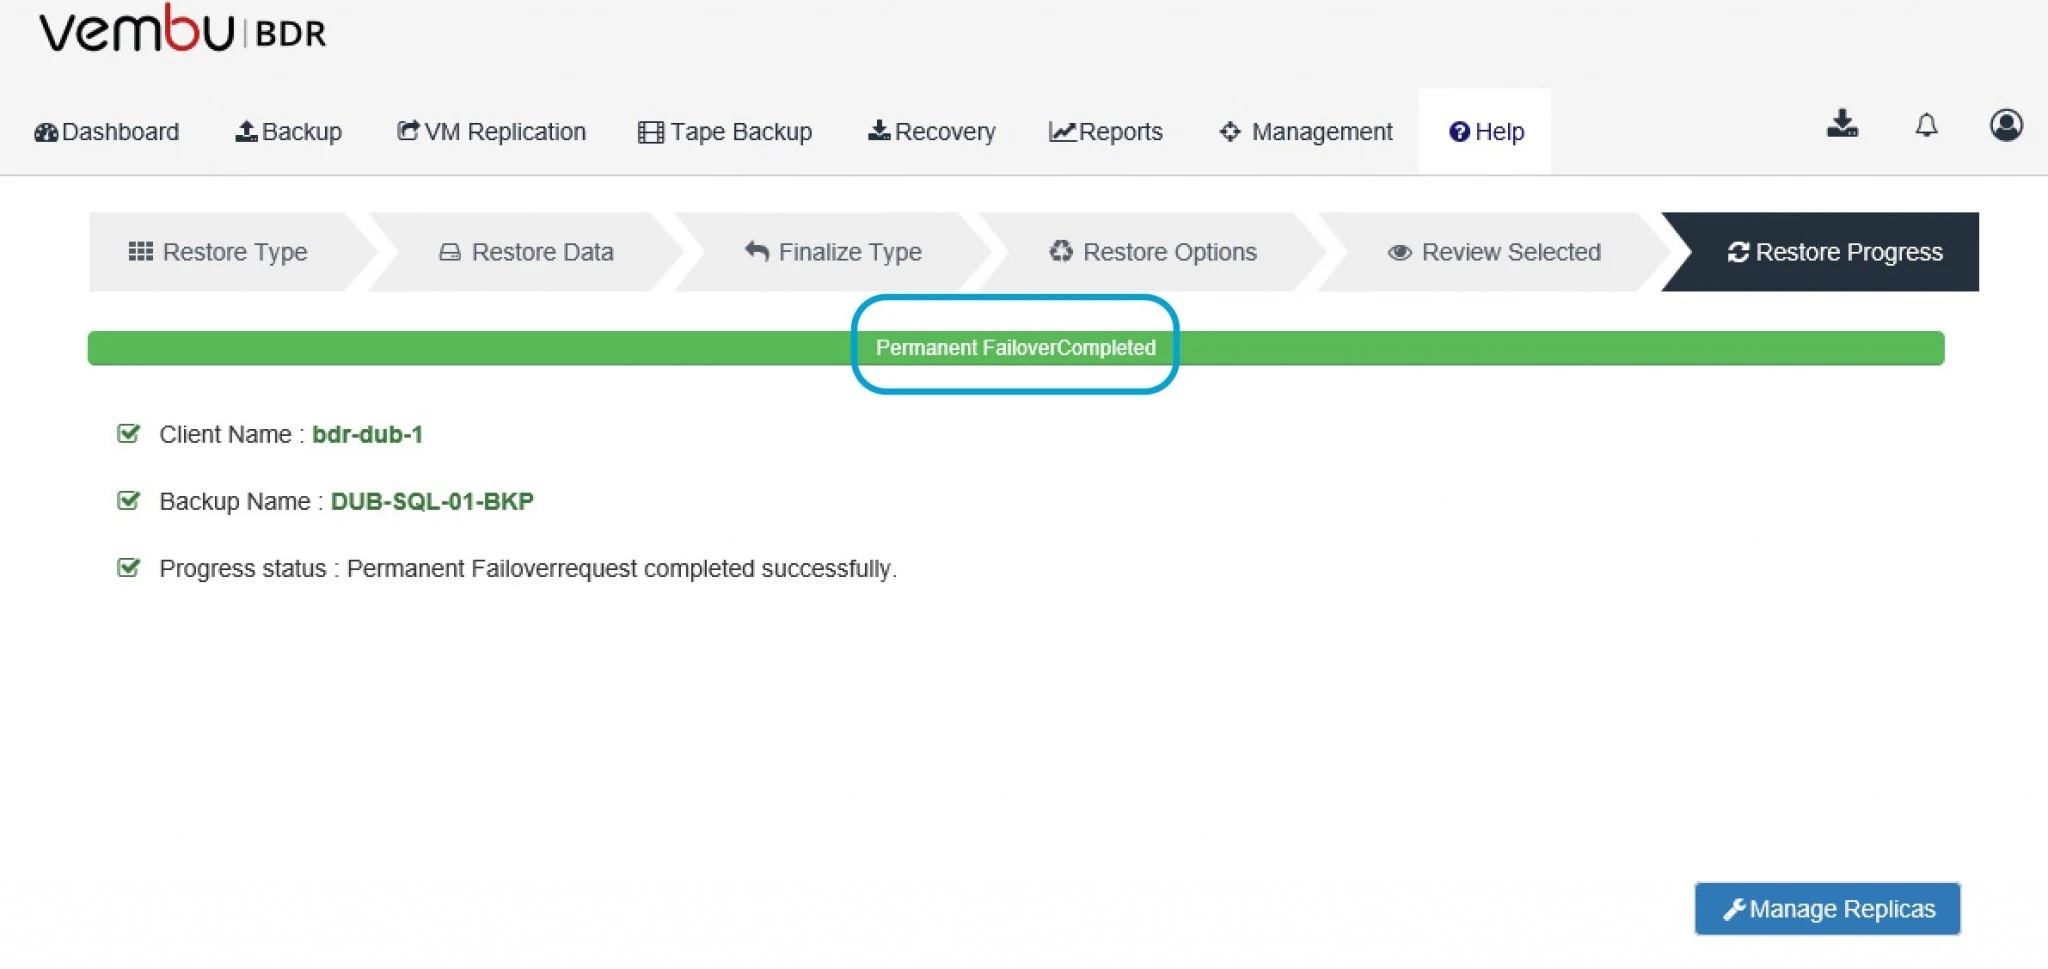
 Lets talk about these options:5. Permanent Failover: In case the source machine is not recoverable after a disaster or you want to continue business operations with the replica VM itself, then you can use permanent failover option. Permanent Failover helps IT admin to use the replica VM for production purpose permanently instead of source VM.All changes made during the failover process will be committed to the disk once the permanent failover is done. So, all the snapshots of the replica VMs will be consolidated. Further incremental will be blocked for the replica VM after the permanent failover process and the VM will be excluded from the VM replication job. 6. Undo Failover:  Undo Failover is a process of reverting back the replica to its original state before failing over replica VM. The data added after failing over the replica VM will be terminated after the Undo Failover process.Undo Failover might be useful if the replica failover was initiated for testing purpose or if you get the original production server back after troubleshooting and if you don’t want the data that has been added after the failover process. 7. Failback:  If you want to resume the source VM operation after disaster recovery and shift the production load back to the source VM, you can use failback process. (source: vembu.com) 8. Here it will start progress as per your selection. 9. In vCenter server under recent tasks you can see the progress for this VM. 10. It will show you the completed status under the restore progress option.
0

Restore Files with Vembu Network Recovery Option

Topic Outline:

 Restore File/Files

 Recover particular one file/files and folder/folders from FLR backup in Vembu BDR.

File Level Restore (FLR) addresses these issues by providing a way to access individual files within a restore point. This access makes it possible to read copies of files or restore them from within restore points to any other available location.

To restore specific file/files or folder/folders from image backups without restoring the entire disk(s), we can use “File Level Recovery” option by attaching the backup disk(s) to the Disk Management and then copying the required files or folders from the attached volume.

Follow the below steps to perform File Level Recovery from Vembu Network Backup Server

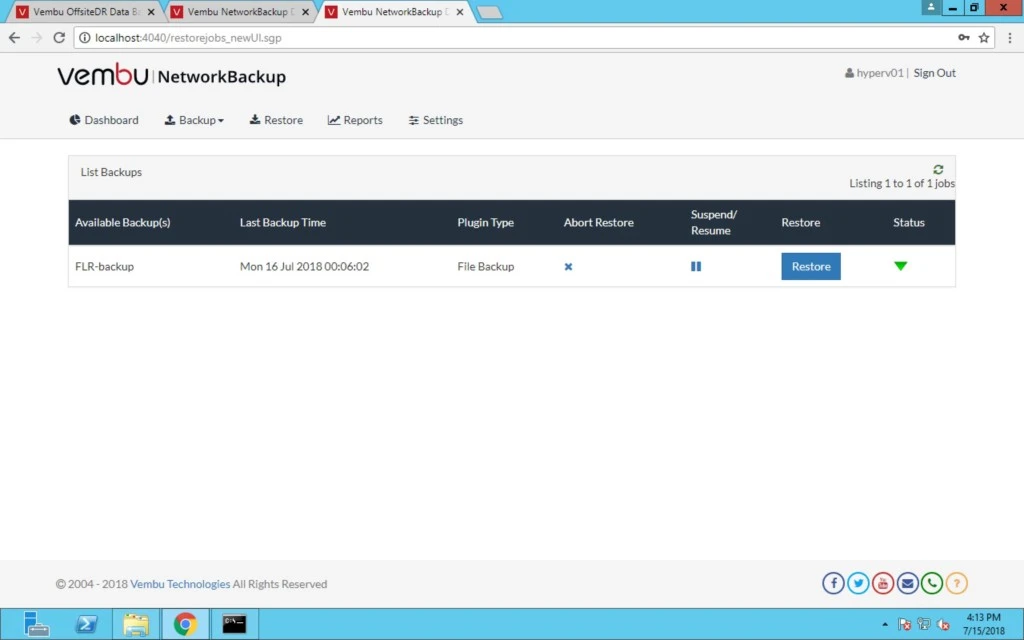
  • Login Vembu Network Backup web console and check the last successful backup.
  • Navigate to Recovery -> Restore (for the particular backup) -> File Level Recovery and click “Next” button to proceed.
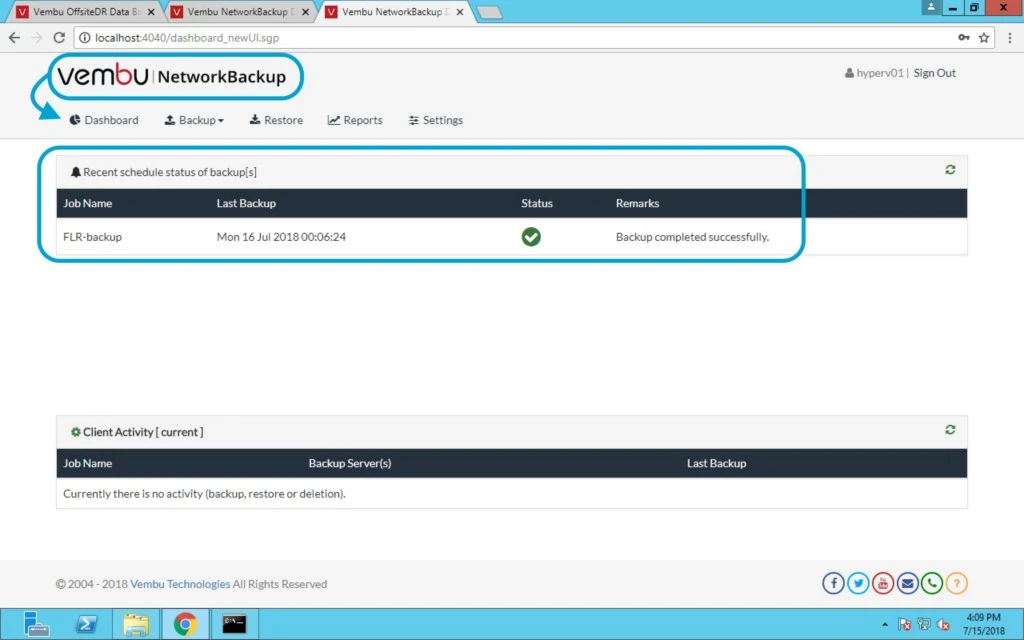


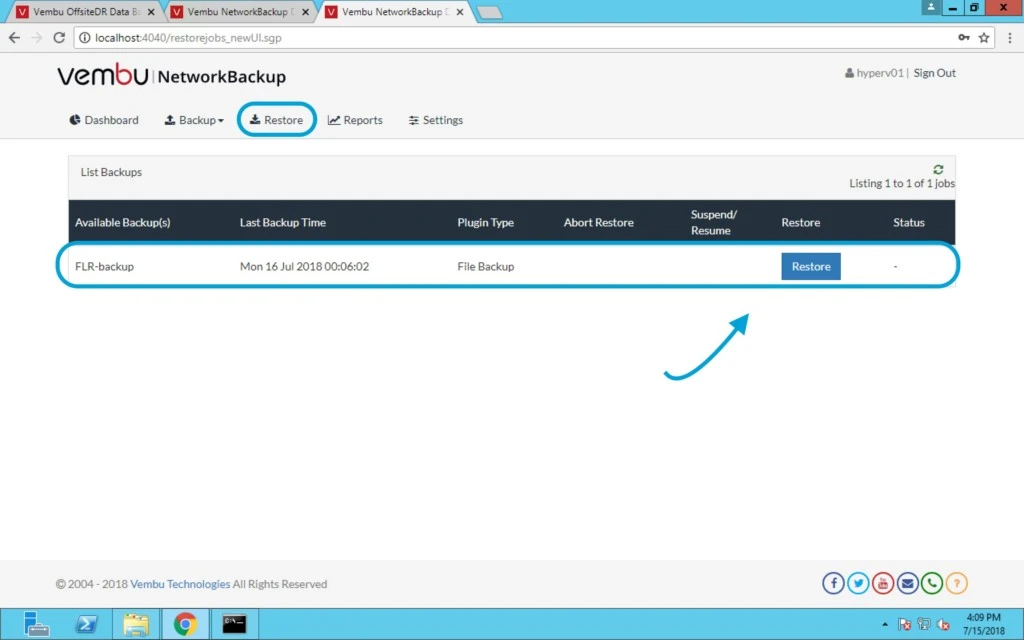
Now Go to Restore tab and Click on Restore button which is highlighted in blue.
 

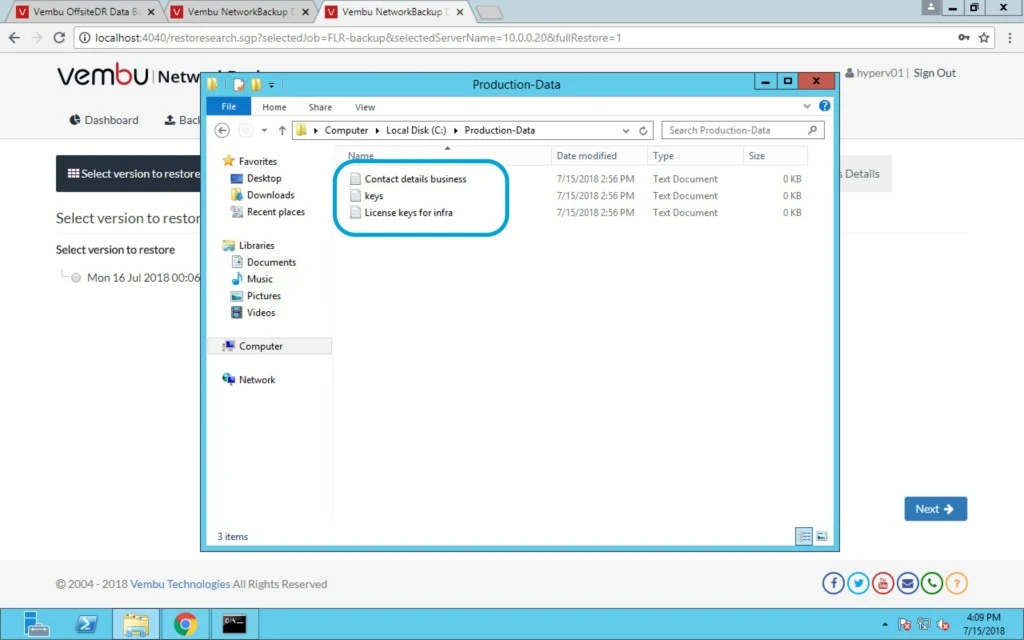
In the below screen we have three files for demo purpose, first i will delete one file and then we will restore it.
 

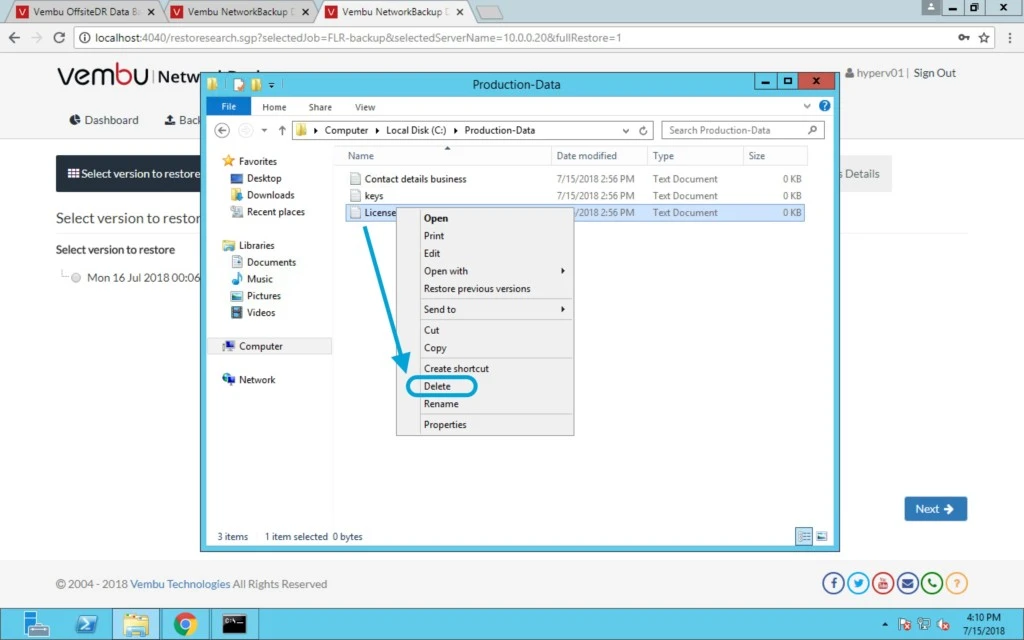
Case scenario: If a user deletes any file or folder accidentally in production environment, in that case FLR is good option.

You need to right click on the file and click delete.
 

Even you also have versioning control for restore points.
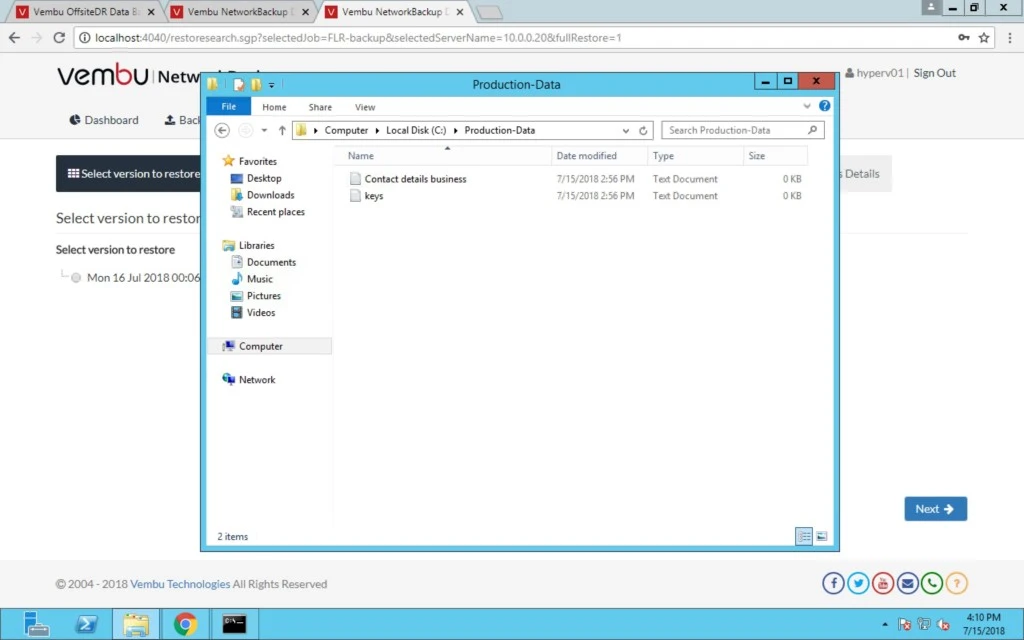
 

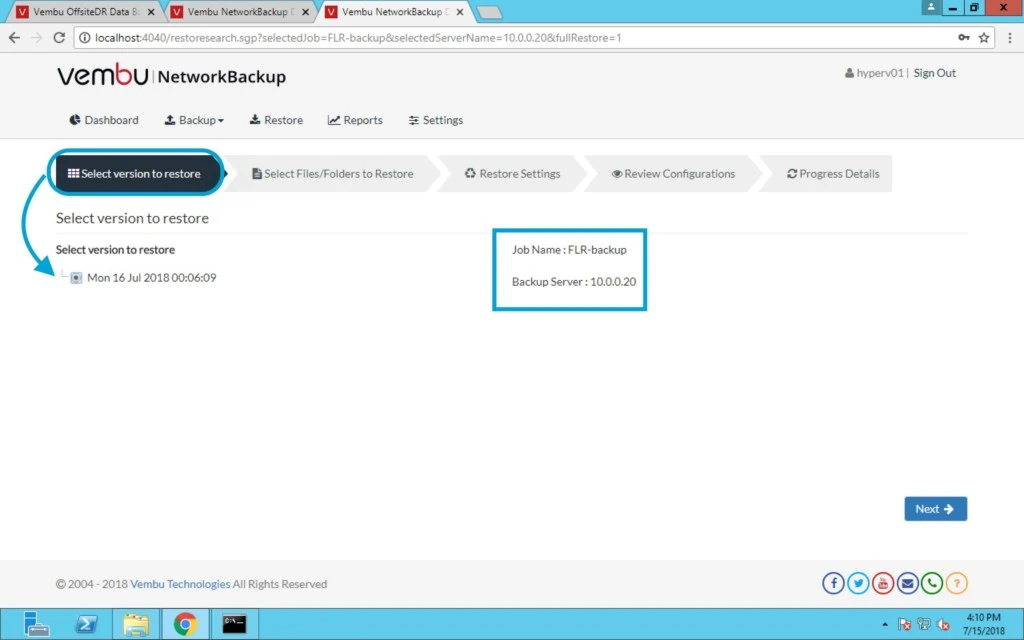
Now Select version to restore file and you can have multiple restore points here.
 

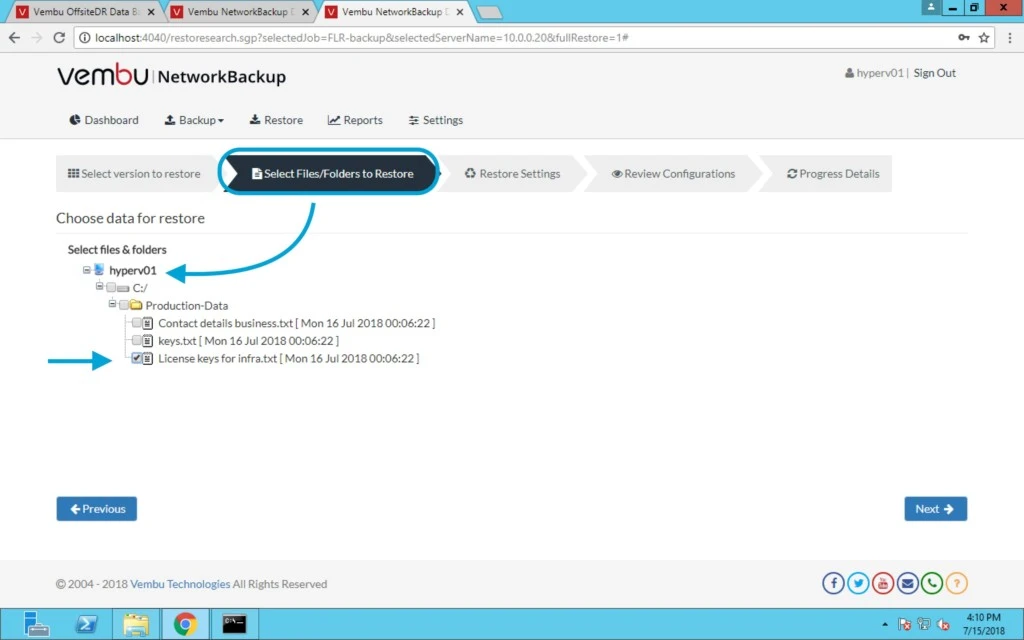
In this section select Files/Folders to restore > select the file.
 

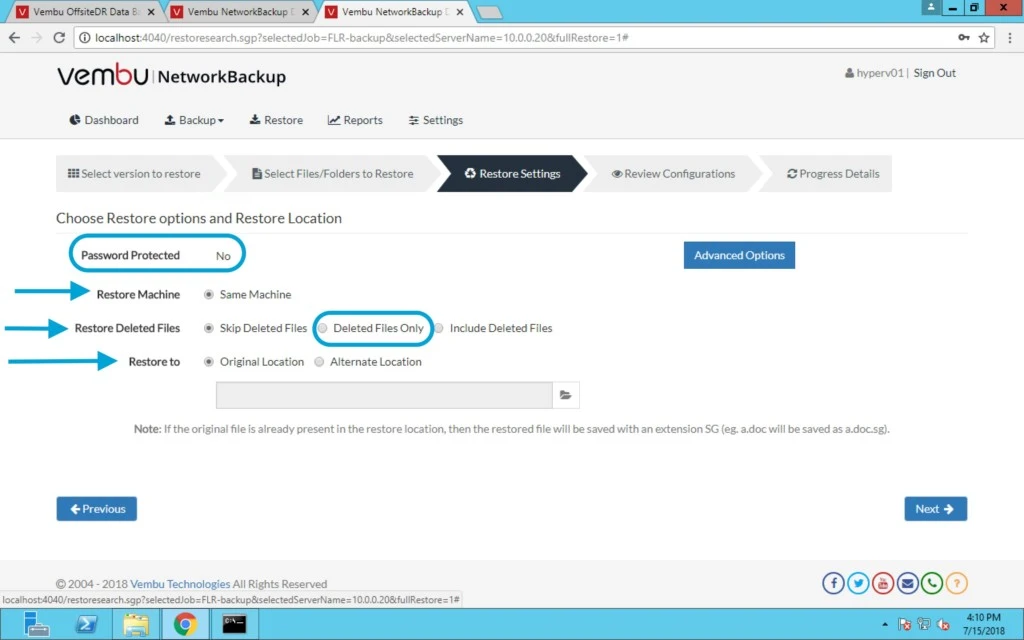
In Restore Settings Section; if file is password protected then need to provide password.

There are some more settings like:

Restore to Same Machine

Restore Deleted files only, include deleted files or skip deleted files.

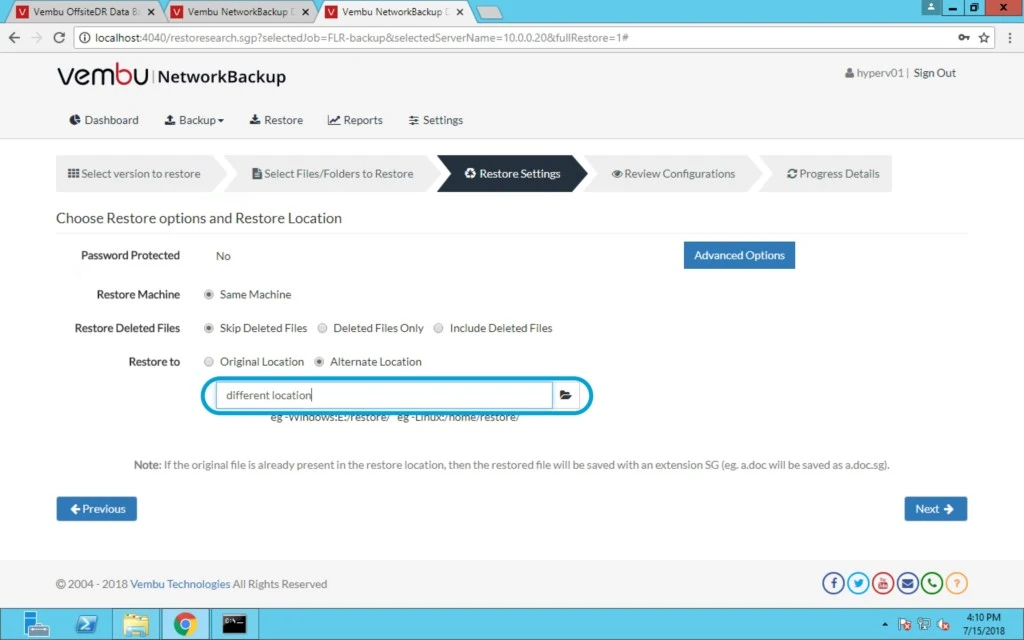
Under Restore to option > you can restore this file on Original location or different location.


For different location you have to click on folder option and provide the path.
 

Under Advanced Options you have three options:

a) Rename the restored file with a .SG extension and keep the existing file as it is. [Recommended]

b) Rename the existing file with a .SG extension and restore the backed up file as it is.

c) Overwrite the existing file with the restored file. If the existing file is different from the backed up file being restored, the contents of the existing file will be lost. [Not Recommended]

Note: If the original file is already present in the restore location, then the restored file will be saved with an extension SG (eg. a.doc will be saved as a.doc.sg).
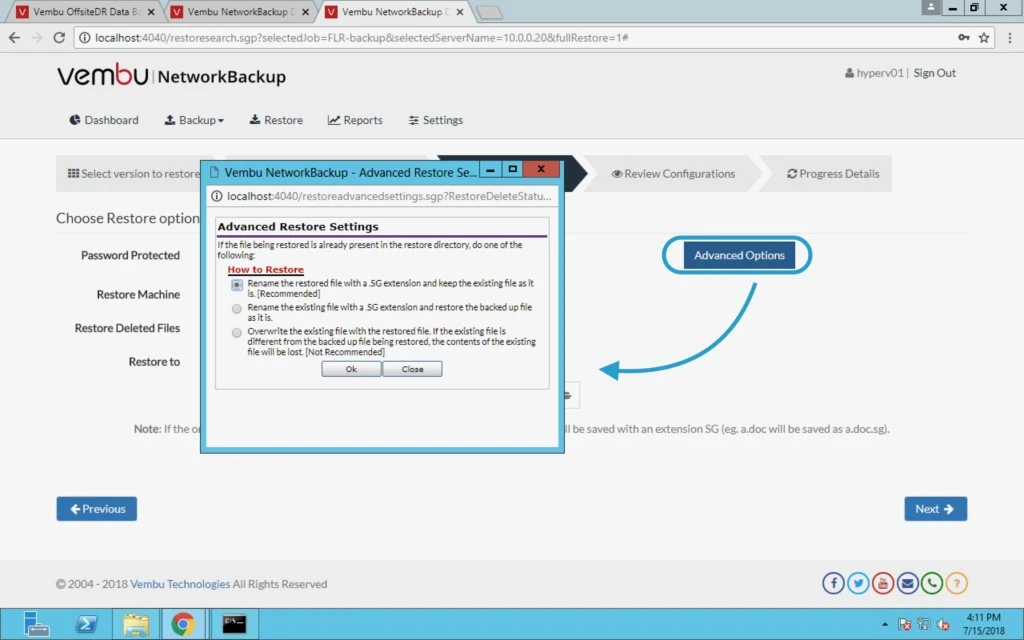
 

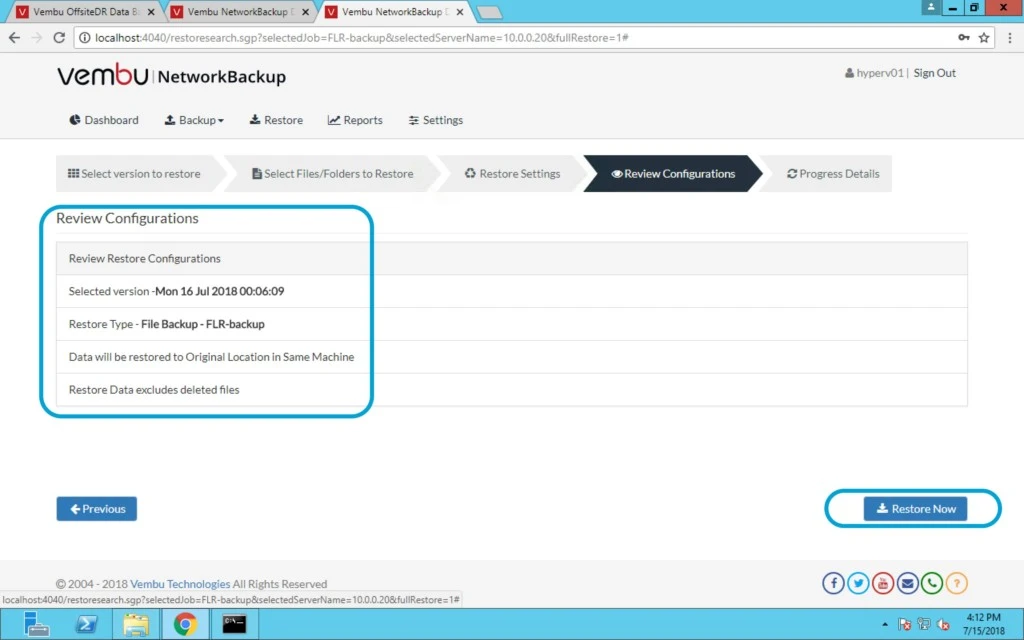
Final step click on restore and check the location of file as per your selection by reviewing the configuration. Click on restore now button.
 

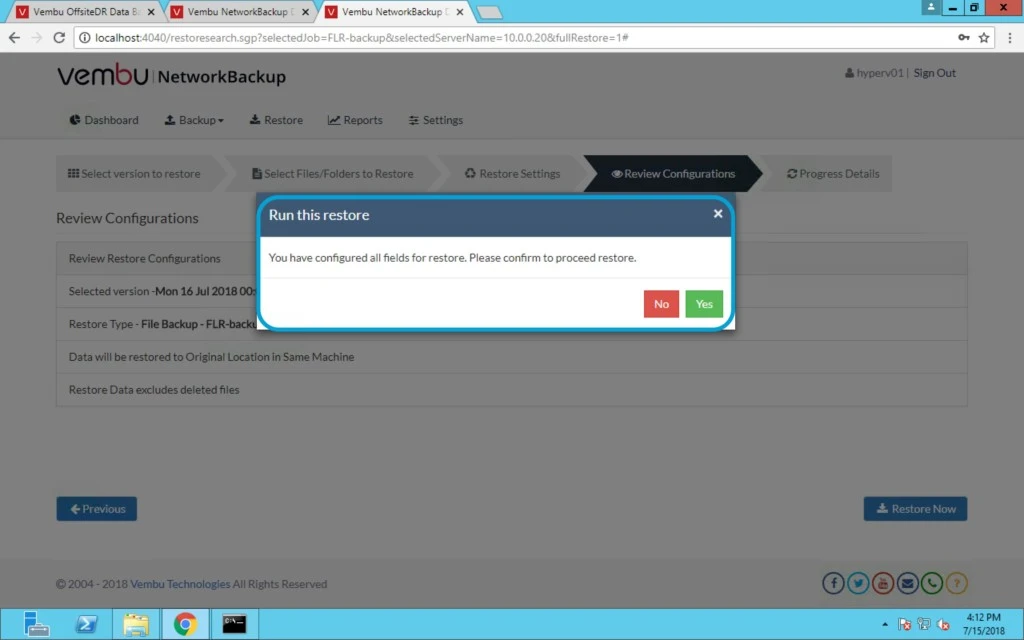
Click Yes.
 

Finally your file has been restored within few clicks.
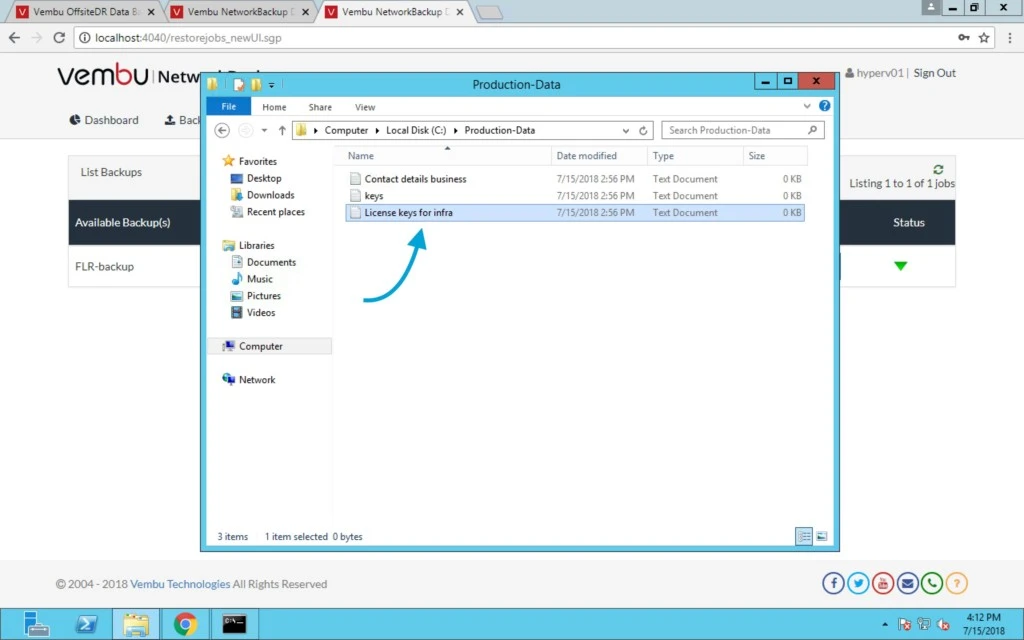
 

On Vembu Network Backup server you can check the status of last backup restored.