0

vCloud Usage Meter 3.6.1 Hot Patch

Refer to below release notes before upgrade.

https://docs.vmware.com/en/vCloud-Usage-Meter/3.6/rn/VMware-vCloud-Usage-Meter-361-Hot-Patch-2-Release-Notes.html 

https://docs.vmware.com/en/vCloud-Usage-Meter/3.6/rn/VMware-vCloud-Usage-Meter-361-Hot-Patch-3-Release-Notes.html

Before Installing this Hot Patch

  • Create a backup of your vCloud Usage Meter appliance.
    —> Snapshot
  • Ensure there are no current running tasks in UM, like auto-collect or hourly reporting.
  • Verify that the SSH protocol on the vCloud Usage Meter appliance is enabled.
  • Verify that root access to the vCloud Usage Meter appliance is enabled.
  • Download the patch from VMware website
  • SCP the zip file to the appliance (use >> usgmtr account)
  • Check SHA to ensure consistency

1. Take a snapshot of Usage meter VM.

2. Open virtual machine console from vCenter server.

image

if this is not installed try: apt-get install snmpd snmp or yum install net-snmp

3. Winscp the Usage meter

image

4. SSH into VMware vCloud Usage Meter

image

image

run this command to install.

Unzip the file first

image

usgmtr@localhost:/tmp/vCloudUsageMeter-3.6.1.0-14877528-hot_patch_3> rpm –install vCloudUsageMeter-3.6.1.0-14877528-hot_patch_3.rpm

image

Post this restart VM.

Login into Console and check if everything is fine.

image

Send a test email > email alerts.

After this delete the Snapshot

0

VMware vRealize Operations Manager remote collector

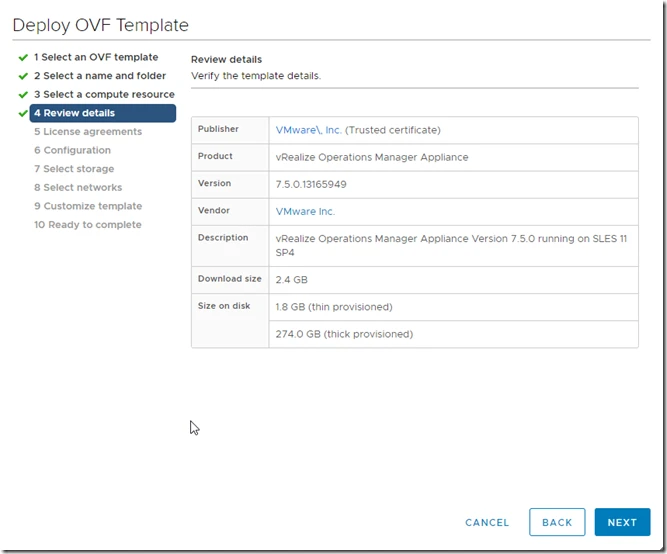
Download the OVA file from vmware

1. upload it in your vCenter server.

image

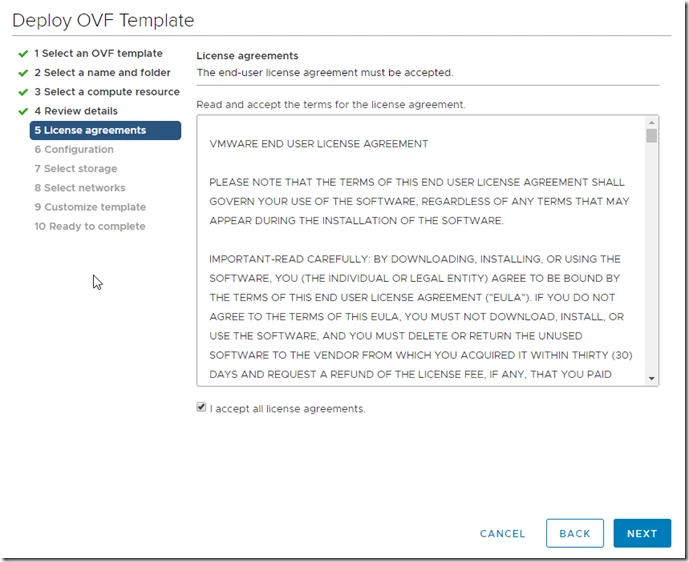
2. Now click on “I accept all license agreements”

image

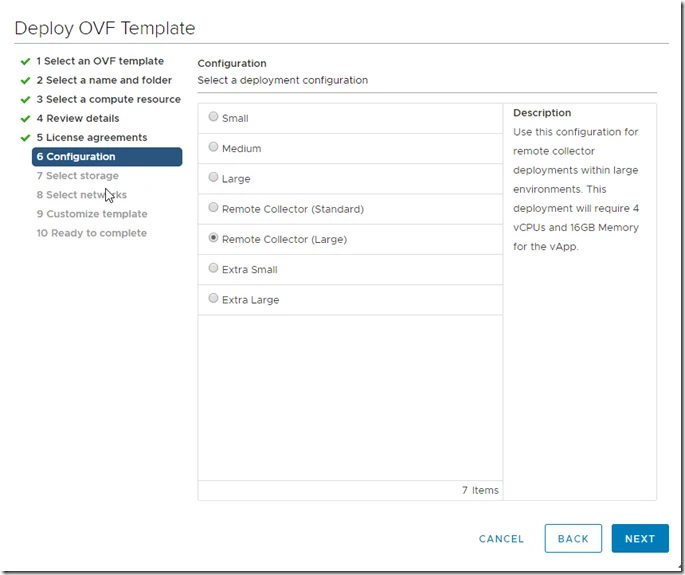
3.  Select as Remote collect (Large) as per your requirement.

image

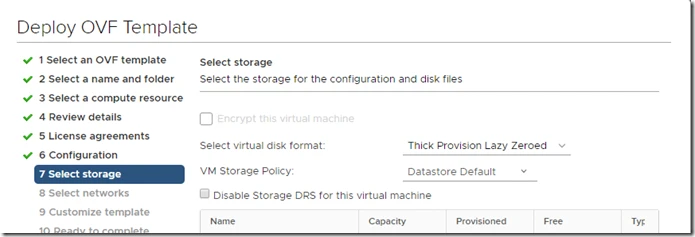
4.  Select datastore

image

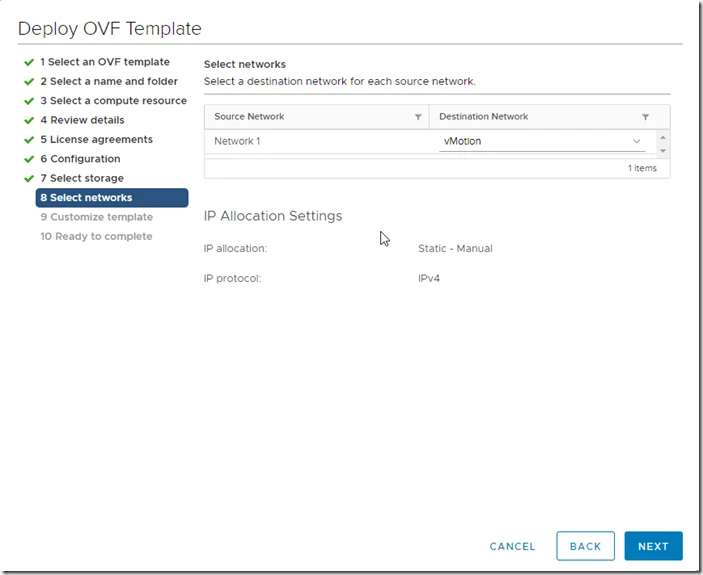
5. Select Network

image

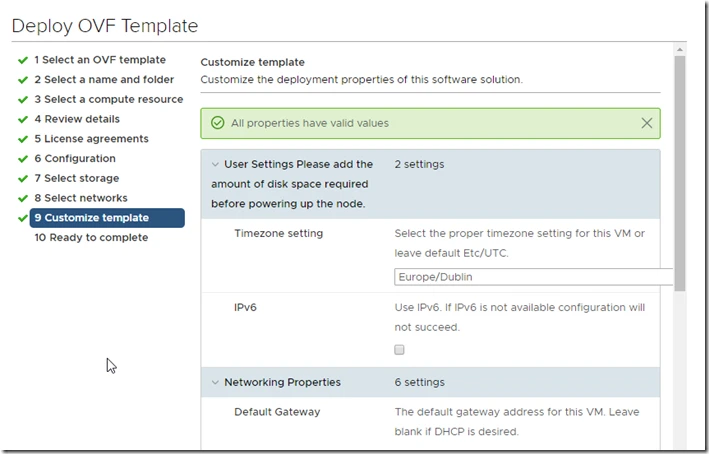
6. Provide IP and other details.

image

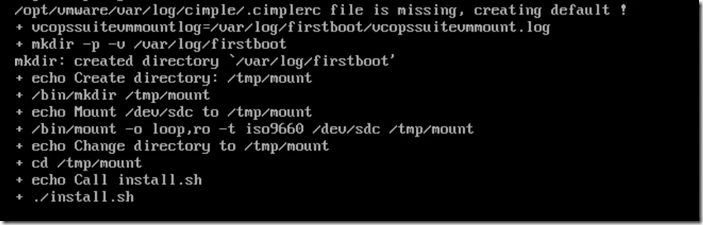
7. It will wait and install required modules in appliance.

image

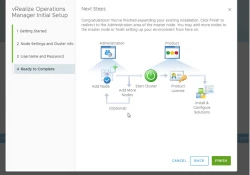
8. Now appliance is deployed, lets configure it.

Open collector https://IP/admin

image

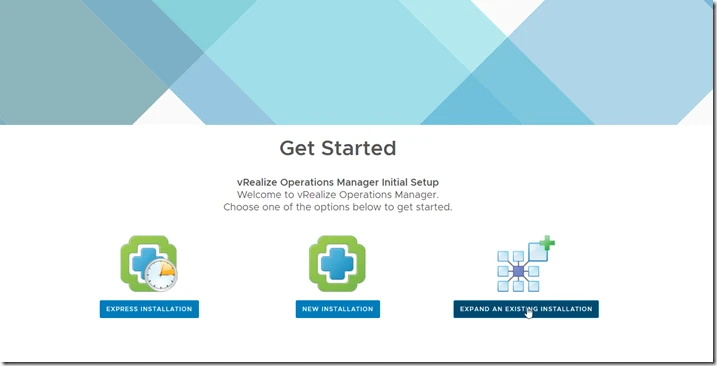
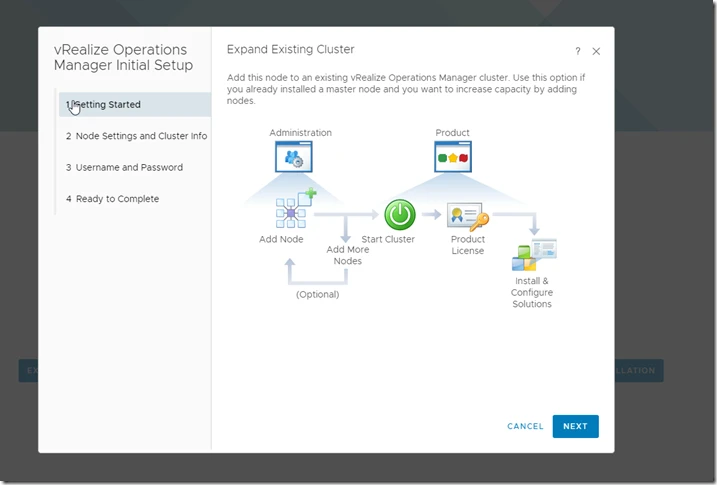
9. Click on Expand an existing installation

image

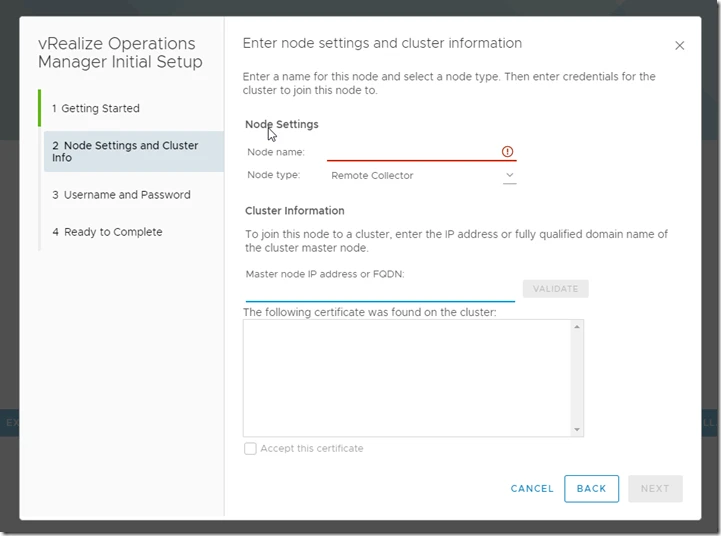
10. Node name as per company naming convention.

image

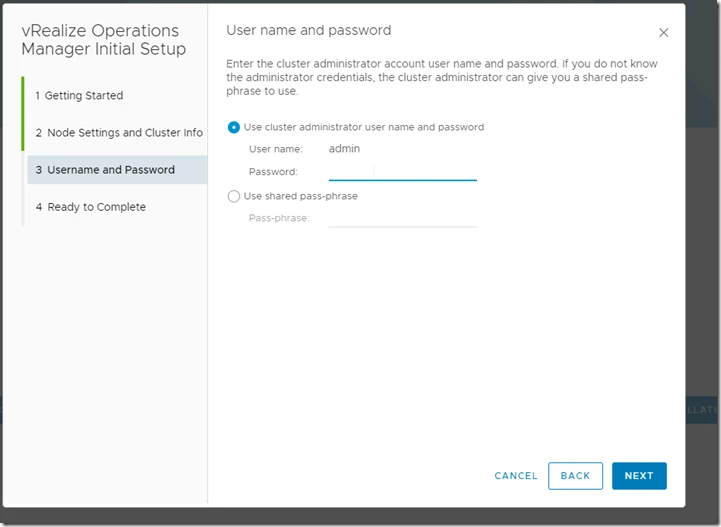
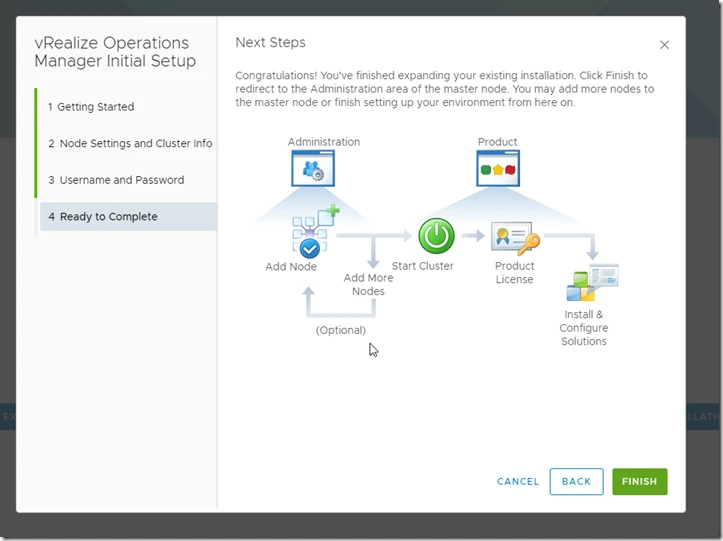
11. Now provide Master node ip or name also accept the Thumbprint.

 image

image

image

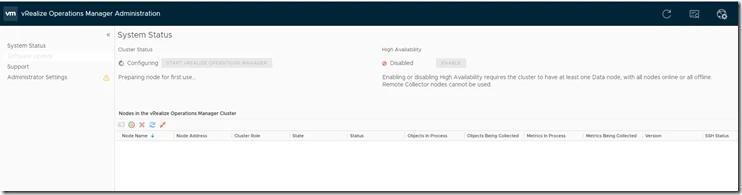
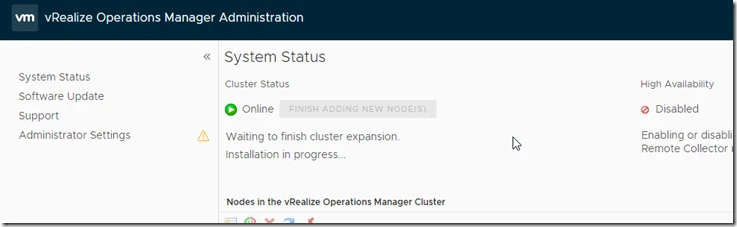
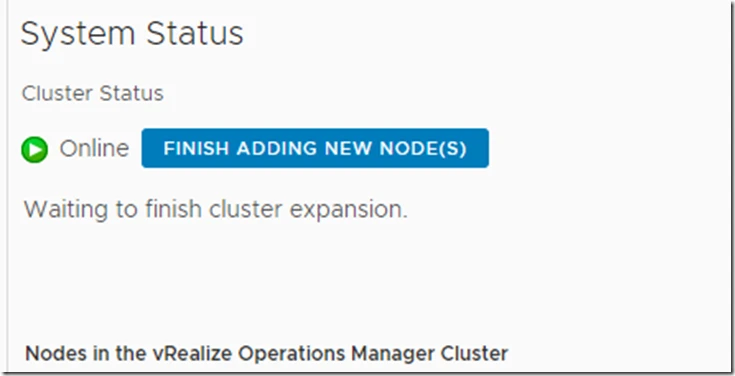
In master node you can see this message.

image

image

image

NFS datastores decrease within a couple of days after host reboot

NFS datastores decrease within a couple of days after host reboot

  1. The performance of VMs decrease on NFS datastores within a couple of days after a host reboot.
  2. IO Meter tests show increasing latencies and a significant drop of IOPS after a week, and gets worse after 2 to 3 weeks.
  3. A host reboot fixes the issue temporarily.


Login via ssh.

[root@Dtech-ESXi-01:~] esxcfg-advcfg -g /SunRPC/MaxConnPerIP
Value of MaxConnPerIP is 4

[root@Dtech-ESXi-01:~] esxcfg-advcfg -s 32 /SunRPC/MaxConnPerIP
Value of MaxConnPerIP is 32

The value should be bigger than the maximum number of shares mounted from the same IP address.
Reboot the host after changing the value.

Note: There is no impact by implementing the above workaround.


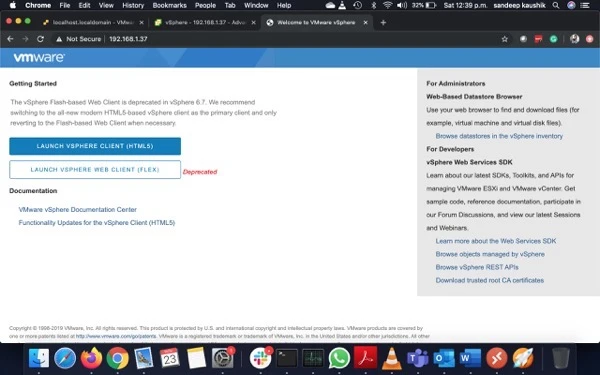
Finally vSphere 6.7 Flash-based Web Client Deprecated

In vSphere 6.7 U3 finally Flash-based Web Client Deprecated.


Screenshot 2019 11 23 at 12 39 52 p m


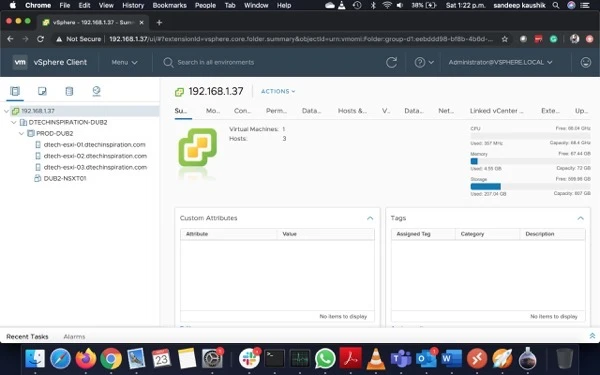
UI First Look

Screenshot 2019 11 23 at 1 22 09 p m

What’s New

vCenter Server 6.7 Update 3 supports a dynamic relationship between the IP address settings of a vCenter Server Appliance and a DNS server by using the Dynamic Domain Name Service (DDNS). The DDNS client in the appliance automatically sends secure updates to DDNS servers on scheduled intervals.

With vCenter Server 6.7 Update 3, you can configure virtual machines and templates with up to four NVIDIA virtual GPU (vGPU) devices to cover use cases requiring multiple GPU accelerators attached to a virtual machine. To use the vMotion vGPU feature, you must set the vgpu.hotmigrate.enabled advanced setting to true and make sure that both your vCenter Server and ESXi hosts are running vSphere 6.7 Update 3. vMotion of multi GPU-accelerated virtual machines might fail gracefully under heavy GPU workload due to the maximum switchover time of 100 secs. To avoid this failure, either increase the maximum allowable switchover time or wait until the virtual machine is performing a less intensive GPU workload.

With vCenter Server 6.7 Update 3, you can change the Primary Network Identifier (PNID) of your vCenter Server Appliance. You can change the vCenter Server Appliance FQDN or host name, and also modify the IP address configuration of the virtual machine Management Network (NIC 0). For more information, see this VMware blog post.

With vCenter Server 6.7 Update 3, if the overall health status of a vSAN cluster is Red, APIs to configure or extend HCI clusters throw InvalidState exception to prevent further configuration or extension. This fix aims to resolve situations when mixed versions of ESXi host in a HCI cluster might cause vSAN network partition.

vCenter Server 6.7 adds new SandyBridge microcode to the cpu-microcode VIB to bring SandyBridge security up to par with other CPUs and fix per-VM Enhanced vMotion Compatibility (EVC) support. For more information, see VMware knowledge base article 1003212.


Reference: https://docs.vmware.com/en/VMware-vSphere/6.7/rn/vsphere-vcenter-server-67u3-release-notes.html

0

Adjusting Round Robin IOPS limit from default 1000 to 1 or 10 Mb

ESXi hosts using iSCSI/FC/FC/FCoE storage experiences latency issues with no signs of latency on the SAN side.

I got  a client request to setup his storage infrastructure to get high performance for his few applications that requires high reads and writes (IOPs) like database and sap applications etc.

Now Setup is ESXi hosts, iSCSI SAN with 10G backend card and 10G midline switches.

As per vendor recommendation we have to change the settings on storage and VMware environment.So, I decided to change the setting on ESXi for IOPS.

ESXi Round Robin PSP (Path Selection Plug-in) uses a round-robin algorithm to balance the load across all active storage paths. A path is selected and used until a specific quantity of data has been transferred. After that quantity is reached, the PSP selects the next path in the list.
The quantity at which a path change triggered is known as the limit.

ESXi Round Robin PSP supports two types of limits:
IOPS limit: The Round Robin PSP defaults to an IOPS limit with a value of 1000. In this default case, a new path is used after 1000 I/O operations are issued.
Bytes limit: The bytes limit is an alternative to the IOPS limit. The bytes limit allows for a specified amount of bytes to be transferred before the path is switched.
Adjusting the limit can provide a positive impact to performance and is recommended by some storage vendors to change IOPS limit to 1.

Reference: VMware KB 2069356

All My datastores are using Round Robin policy.

Now Login into ESXi hosts via putty.

Screenshot 2019 11 23 at 3 19 02 p m

Run this command to see what is default or current value set.

>esxcli storage nmp device list you can see below output:

eui.018c7bf1773f0b88
Device Display Name: STARWIND iSCSI Disk (eui.018c7bf1773f0b88) Storage Array Type: VMW_SATP_ALUA Storage Array Type Device Config: {implicit_support=on; explicit_support=off; explicit_allow=on; alua_followover=on; action_OnRetryErrors=on; {TPG_id=1,TPG_state=AO}} Path Selection Policy: VMW_PSP_RR Path Selection Policy Device Config: {policy=rr,iops=1000,bytes=10485760,useANO=0; lastPathIndex=0: NumIOsPending=3,numBytesPending=1524224} Path Selection Policy Device Custom Config: Working Paths: vmhba65:C0:T0:L1 Is USB: false

Now we are going to run the command to change the IOPS.

for i in `esxcfg-scsidevs -c |awk ‘{print $1}’ | grep eui.018c7bf1773f0b88`; do esxcli storage nmp psp roundrobin deviceconfig set –type=iops –iops=1 –device=$i; done

replace eui or naa id as per your organisation configuration.

Output will be:

Screenshot 2019 11 23 at 3 49 33 p m

Note:

You have to run this command on each ESXi hosts and per LUN basis.

You do not need to restart the host for the changes to take effect.

Testing the result:

I am running IOMeter to test the speed.

Configure Syslog on ESXi Hosts

Configure Syslog on ESXi Hosts

You can use the vSphere Web Client or the esxcli system syslog vCLI command to configure the syslog service.

Procedure

  1. In the vSphere Web Client inventory, select the host.
  2. Click Configure.
  3. Under System, click Advanced System Settings.
  4. Filter for syslog.
  5. To set up logging globally, select the setting to change and click Edit.
  6. Description
    Syslog.global.defaultRotateMaximum number of archives to keep. You can set this number globally and for individual subloggers.
    Syslog.global.defaultSizeDefault size of the log, in KB, before the system rotates logs. You can set this number globally and for individual subloggers.
    Syslog.global.LogDirDirectory where logs are stored. The directory can be located on mounted NFS or VMFS volumes. Only the /scratch directory on the local file system is persistent across reboots. Specify the directory as [datastorenamepath_to_file, where the path is relative to the root of the volume backing the datastore. For example, the path [storage1] /systemlogs maps to the path /vmfs/volumes/storage1/systemlogs.
    Syslog.global.logDirUniqueSelecting this option creates a subdirectory with the name of the ESXi host under the directory specified by Syslog.global.LogDir. A unique directory is useful if the same NFS directory is used by multiple ESXi hosts.
    Syslog.global.LogHostRemote host to which syslog messages are forwarded and port on which the remote host receives syslog messages. You can include the protocol and the port, for example, ssl://hostName1:1514. UDP (default), TCP, and SSL are supported. The remote host must have syslog installed and correctly configured to receive the forwarded syslog messages. See the documentation for the syslog service installed on the remote host for information on configuration.
  7. To overwrite the default log size and log rotation for any of the logs.Click the name of the log that you want to customize.
  8. Click Edit and enter the number of rotations and the log size you want.
  9. Click OK.

Ref: https://docs.vmware.com/en/VMware-vSphere/6.7/com.vmware.esxi.install.doc/GUID-9F67DB52-F469-451F-B6C8-DAE8D95976E7.html#GUID-9F67DB52-F469-451F-B6C8-DAE8D95976E7

View System Logs

View System Logs

System logs provide detailed information about system operational events.

Procedure

  1. From the direct console, select View System Logs.
  2. Press a corresponding number key to view a log.vCenter Server Agent (vpxa) logs appear if you add the host to vCenter Server.
  3. Press Enter or the spacebar to scroll through the messages.
  4. Perform a regular expression search.Press the slash key (/).
  5. Type the text to find.
  6. Press Enter.
  7. The found text is highlighted on the screen.
  8. Press q to return to the direct console.


Ref: https://docs.vmware.com/en/VMware-vSphere/6.7/com.vmware.esxi.install.doc/GUID-3BDB5CC2-34F8-4B36-A363-6CF178C74DA2.html

0

Limiting disk I/O from a specific virtual machine

How to Limiting disk I/O from a specific virtual machine

  1. To manually configure disk I/O limits for a virtual machine:

  2. Power off the virtual machine in preparation for changing the configuration parameters.

  3. Locate the virtual machine in the vSphere Client inventory.

  4. Right-click the virtual machine and click Edit Settings.

  5. Click the Resources tab.

  6. Select Disk, and enter the desired IOPs value under Limit – IOPs for each disk. By default, this is set to Unlimited.

  7. Start the virtual machine. The virtual machine I/O is limited to the specified values.

Join the vCenter Server Appliance to an Active Directory Domain

How to Join the vCenter Server Appliance to an Active Directory Domain

You can join a Platform Services Controller appliance or a vCenter Server Appliance with an embedded Platform Services Controller to an Active Directory domain and attach the users and groups from this Active Directory domain to your vCenter Single Sign-On domain.

Important:

Joining a Platform Services Controller appliance or a vCenter Server Appliance with an embedded Platform Services Controller to an Active Directory domain with a read-only domain controller (RODC) is unsupported. You can join a Platform Services Controller or a vCenter Server Appliance with an embedded Platform Services Controller only to an Active Directory domain with a writable domain controller.

Prerequisites

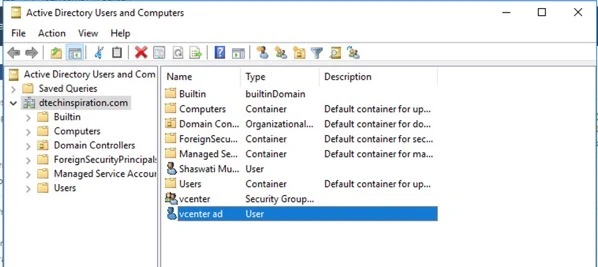
Create a User account in Active Directory so that you can use while joining AD in vCenter Server. 

Screenshot 2019 11 23 at 5 09 33 p m


Procedure


  • Use the vSphere Web Client to log in as [email protected] (as per you domain setup) to the vCenter Server instance in the vCenter Server Appliance.The address is of the type http://appliance-IP-address-or-FQDN/UI.
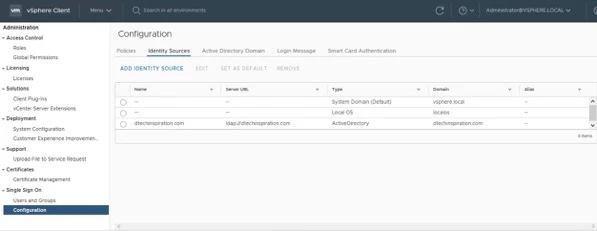
  • vSphere Client navigation pane, click Administration > Single Sign On > Configuration.

Screenshot 2019 11 23 at 5 31 15 p m

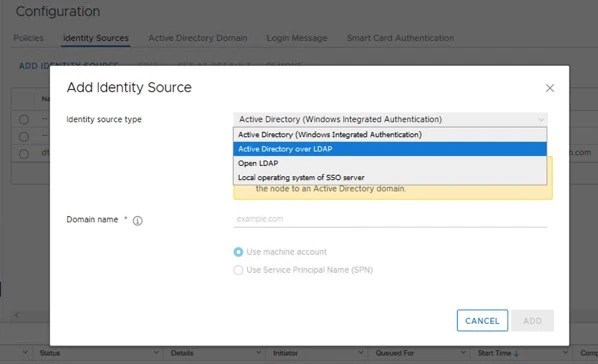
  • Select the Identity Sources > Add identity Source > 

Screenshot 2019 11 23 at 5 33 35 p m

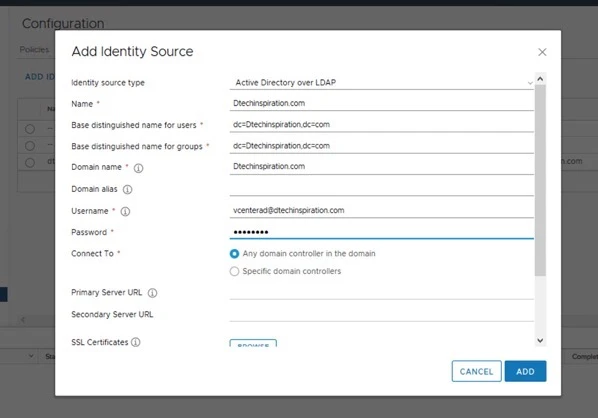
  • Select the Active Directory over LDAP. (In future version Microsoft and VMware going to support)

Screenshot 2019 11 23 at 5 37 47 p m


Note: After adding into Active Directory you “Do Not require a reboot”.

ESXi 6.x host is disconnected from vCenter Server

ESXi 6.x host is disconnected from vCenter Server


ESXi hosts appear as Not Responding in vCenter Server.

Or showing disconnected in vCenter Server.


Running esxcli commands on the ESXi host fail with the error:

Error interacting with configuration file /etc/vmware/lunTimestamps.log: Timeout while waiting for lock, /etc/vmware/lunTimestamps.log.LOCK, to be released. Another process has kept this file locked for more than 30 seconds. The process currently holding the lock is smartd(PID). This is likely a temporary condition. Please try your operation again.

Note: PID is the process ID for the smartd service.

In the /var/log/hostd.log file, you see entries similar to:

Error interacting with configuration file /etc/vmware/lunTimestamps.log: Timeout while waiting for lock, /etc/vmware/lunTimestamps.log.LOCK, to be released. Another process has kept this file locked for more than 30 seconds. The process currently holding the lock is smartd(PID). This is likely a temporary condition. Please try your operation again.


To work around this issue, disable smartd daemon on the host.

To disable smartd daemon:

Connect to the affected ESXi host with an SSH session. For more information, see Using ESXi Shell in ESXi 5.x and 6.0 (2004746).
Run this command to stop the smartd service:

/etc/init.d/smartd stop

Run this command to stop the smartd service from starting on reboot:

chkconfig smartd off


Ref: https://kb.vmware.com/s/article/2145106?lang=en_US