When you are installing ESXi host in Production at that time you have to think or decide from given point of view:
- Availability
- Performance
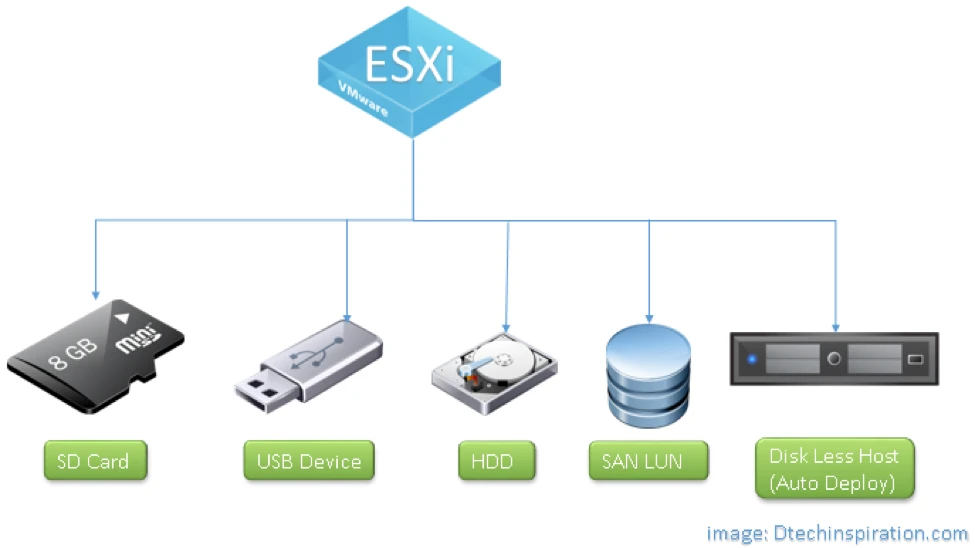
- Need to install on SAN LUN, Virtual SAN, USB, HDD, Disk Less Host
First i will talk about ESXi Hardware Requirements
Make sure the host meets the minimum hardware configurations supported by ESXi 6.0. Hardware and System Resources To install or upgrade ESXi 6.0, your hardware and system resources must meet the following requirements:
- ESXi 6.0 requires a host machine with at least two CPU cores.
- ESXi 6.0 supports 64-bit x86 processors released after September 2006. This includes a broad range of multi-core processors.
- ESXi 6.0 requires the NX/XD bit to be enabled for the CPU in the BIOS.
- ESXi requires a minimum of 4GB of physical RAM. It is recommended to provide at least 8 GB of RAM to run virtual machines in typical production environments.
- To support 64-bit virtual machines, support for hardware virtualization (Intel VT-x or AMD RVI) must be enabled on x64 CPUs.
- One or more Gigabit or faster Ethernet controllers. For a list of supported network adapter models.
- SCSI disk or a local, non-network, RAID LUN with unpartitioned space for the virtual machines.
- For Serial ATA (SATA), a disk connected through supported SAS controllers or supported on-board SATA controllers. SATA disks will be considered remote, not local. These disks will not be used as a scratch partition by default because they are seen as remote.
NOTE
You cannot connect a SATA CD-ROM device to a virtual machine on an ESXi 6.0 host. To use the SATA CD-ROM device, you must use IDE emulation mode.
Now let’s see ESXi Booting Requirements
vSphere 6.0 supports booting ESXi hosts from the Unified Extensible Firmware Interface (UEFI). With UEFI, you can boot systems from hard drives, CD-ROM drives, or USB media. Network booting or provisioning with VMware Auto Deploy requires the legacy BIOS firmware and is not available with UEFI.
ESXi can boot from a disk larger than 2TB provided that the system firmware and the firmware on any adding card that you are using support it. See the vendor documentation.
NOTE
Changing the boot type from legacy BIOS to UEFI after you install ESXi 6.0 might cause the host to fail to boot. In this case, the host displays an error message similar to Not a VMware boot bank. Changing the host boot type between legacy BIOS and UEFI is not supported after you install ESXi 6.0.
Storage Requirements for ESXi 6.0 Installation or Upgrade
Installing ESXi 6.0 or upgrading to ESXi 6.0 requires a boot device that is a minimum of 1GB in size. When booting from a local disk, SAN or iSCSI LUN, a 5.2GB disk is required to allow for the creation of the VMFS volume and a 4GB scratch partition on the boot device . If a smaller disk or LUN is used, the installer attempts to allocate a scratch region on a separate local disk. If a local disk cannot be found the scratch partition, /scratch, is located on the ESXi host ramdisk, linked to /tmp/scratch.
You can reconfigure /scratch to use a separate disk or LUN. For best performance and memory optimization, do not leave /scratch on the ESXi host ramdisk.
Due to the I/O sensitivity of USB and SD devices the installer does not create a scratch partition on these devices. When installing or upgrading on USB or SD devices, the installer attempts to allocate a scratch region on an available local disk or datastore. If no local disk or datastore is found, /scratch is placed on the ramdisk.
For environments that boot from a SAN or use Auto Deploy, you need not allocate a separate LUN for each ESXi host. You can co-locate the scratch regions for many ESXi hosts onto a single LUN. The number of hosts assigned to any single LUN should be weighed against the LUN size and the I/O behavior of the virtual machines.
VMFS5 partitioning
The ESXi installer creates the initial VMFS volumes on the first blank local disk found. To add disks or modify the original configuration, use the vSphere Web Client. This practice ensures that the starting sectors of partitions are 64K-aligned, which improves storage performance.
NOTE
For SAS-only environments, the installer might not format the disks. For some SAS disks, it is not possible to identify whether the disks are local or remote. After the installation, you can use the vSphere Web Client to set up VMFS.
How many ways to install ESXi host
- Installing ESXi Interactively
- Installing or Upgrading Hosts by Using a Script.
- Installing ESXi Using vSphere Auto Deploy.
- Using vSphere ESXi Image Builder.
Installing ESXi Interactively
Use the interactive installation option for small deployments of less than five hosts. In a typical interactive installation, you boot the ESXi installer and respond to the installer to install
ESXi to the local host disk. The installer reformats and partitions the target disk and installs the ESXi boot image. If you have not installed ESXi on the target disk before, all data located on the drive is overwritten, including hardware vendor partitions, operating system partitions, and associated data.
NOTE: To ensure that you do not lose any data, migrate the data to another machine before you install ESXi. If you are installing ESXi on a disk that contains a previous installation of ESXi or ESX, or a VMFS datastore, the installer provides you with options for upgrading.
Installing on VSAN Server
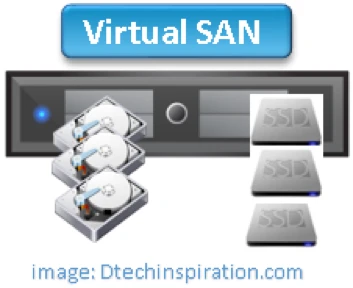
If you select a disk that is in Virtual SAN disk group, the resulting installation depends on the type of disk and the group size:
- If you select an SSD, the SSD and all underlying HDDs in the same disk group will be wiped.
- If you select an HDD, and the disk group size is greater than two, only the selected HDD will be wiped.
- If you select an HDD disk, and the disk group size is two or less, the SSD and the selected HDD will be wiped.
If you are performing a new installation, or you chose to overwrite an existing VMFS datastore, during the reboot operation, VFAT scratch and VMFS partitions are created on the host disk.
Install ESXi on a Software iSCSI Disk
When you install ESXi to a software iSCSI disk, you must configure the target iSCSI qualified name (IQN).During system boot, the system performs a Power-On Self Test (POST), and begins booting adapters in the order specified in the system BIOS. When the boot order comes to the iSCSI Boot Firmware Table (iBFT) adapter, the adapter attempts to connect to the target, but does not boot from it. See Prerequisites. If the connection to the iSCSI target is successful, the iSCSI boot firmware saves the iSCSI boot configuration in the iBFT. The next adapter to boot must be the ESXi installation media, either a mounted ISO image or a physical CD-ROM.
Prerequisites
- Verify that the target IQN is configured in the iBFT BIOS target parameter setting. setting is in the option ROM of the network interface card (NIC) to be used for the iSCSI LUN. See the vendor documentation for your system.
- Disable the iBFT adapter option to boot to the iSCSI target. This action is necessary to make sure that the ESXi installer boots, rather than the iSCSI target. When you start your system, follow the prompt to log in to your iBFT adapter and disable the option to boot to the iSCSI target.
Procedure
- Start an interactive installation from the ESXi installation CD/DVD or mounted ISO image.
- On the Select a Disk screen, select the iSCSI target you specified in the iBFT BIOS target parameter setting.
- If the target does not appear in this menu, make sure that the TCP/IP and initiator iSCSI IQN settings are correct. Check the network Access Control List (ACL) and confirm that the adapter has adequate permissions to access the target.
- Follow the prompts to complete the installation.
- Reboot the host.
- In the host BIOS settings, enter the iBFT adapter BIOS configuration, and change adapter parameter to boot from the iSCSI target.
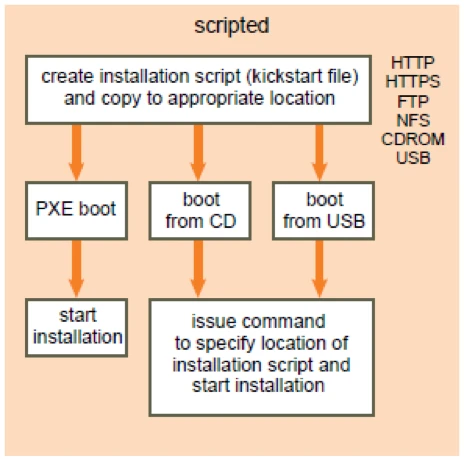
Installing or Upgrading Hosts by Using a Script.