0

How to backing up VMware workload using Vembu BDR

Topic Outline:

 Adding VMware ESXi or vCenter Server.

 Taking Backup of VM.

 Disk Settings

 Guest Processing

 VMware Guest Credentials

 Schedule Backup Job

 Retention Policies

 Final Job Status


1. Open Vembu BDR server https://vembu BDR server IP:6060.

2. Go to > Backup > VMware vSphere > Click on Add VMware vSphere Server.

3. Provide VMware vCenter Server or ESXi IP/FQDN.

4. Username and password.

5.  Keep the default port for vSphere.

6. Click on save.
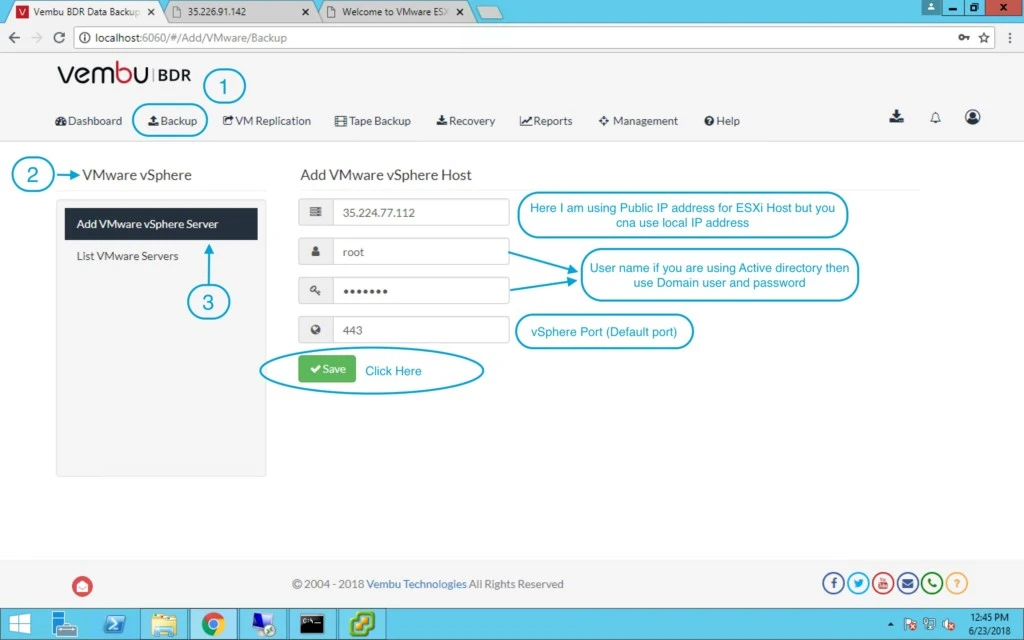
 

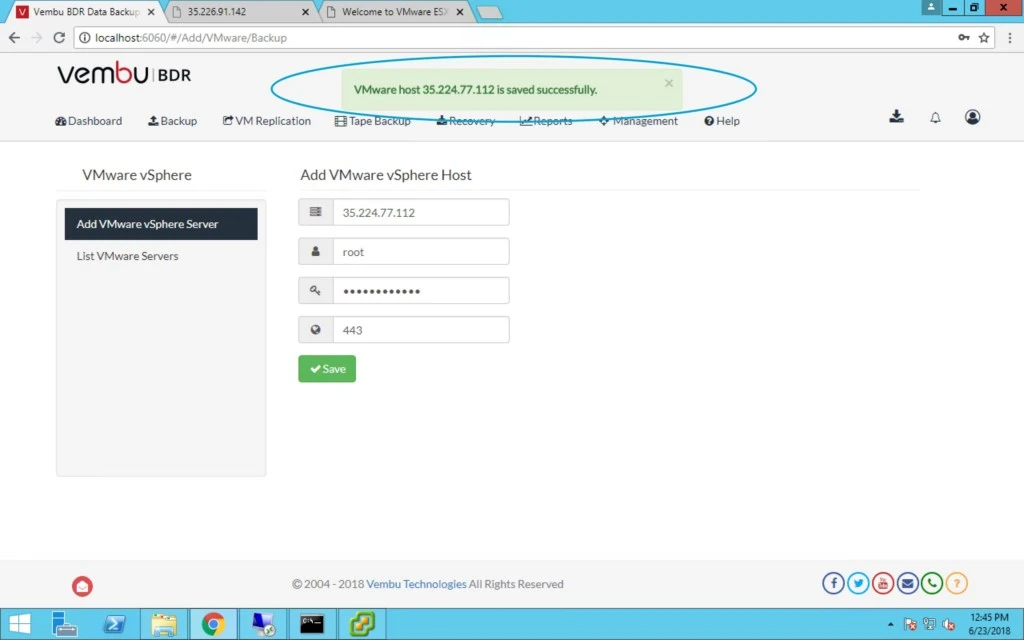
7. After click on save, it will show you successful message.
 

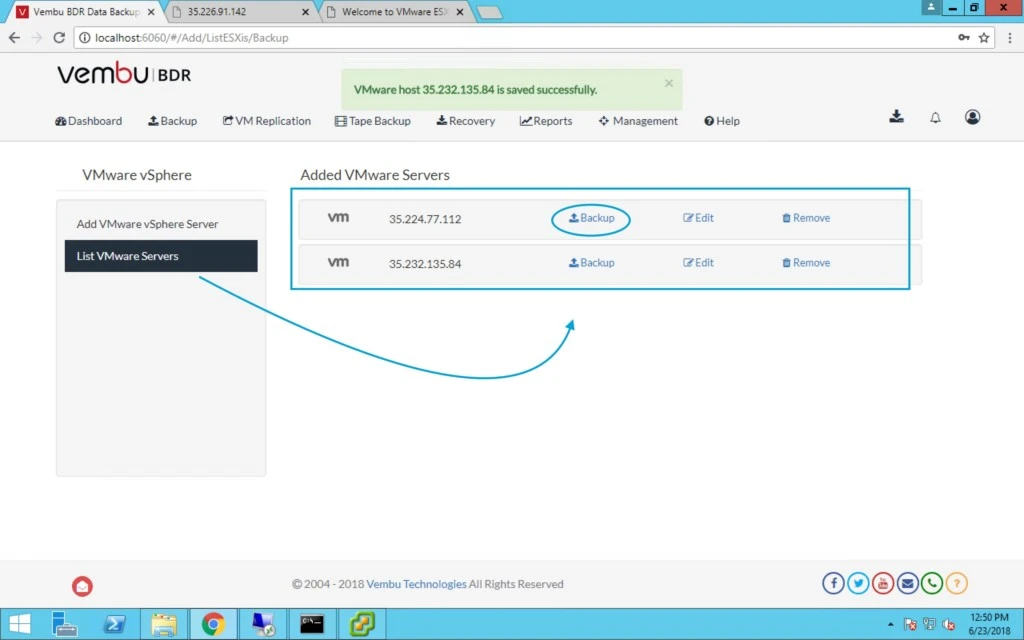
8. Now if you click on “List VMware Servers” you can see all the added servers and their list.
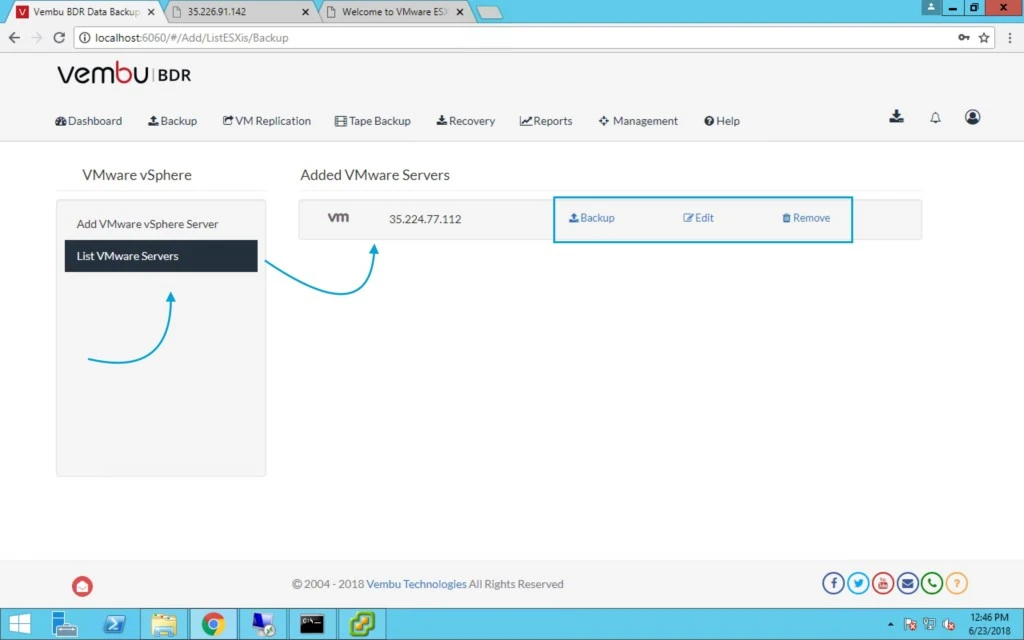
 

9. Now adding second ESXi host and you need to follow the same process.
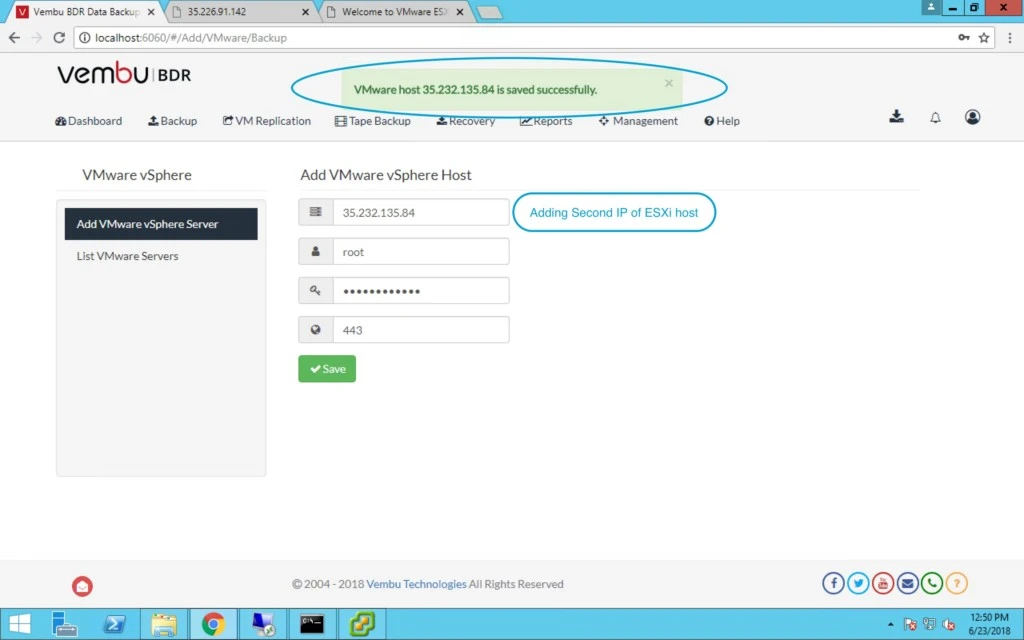
 

10. After adding VMware servers it’s time to take backup of VMs or a single  VM which is running on these vCenter/ESXi.
 

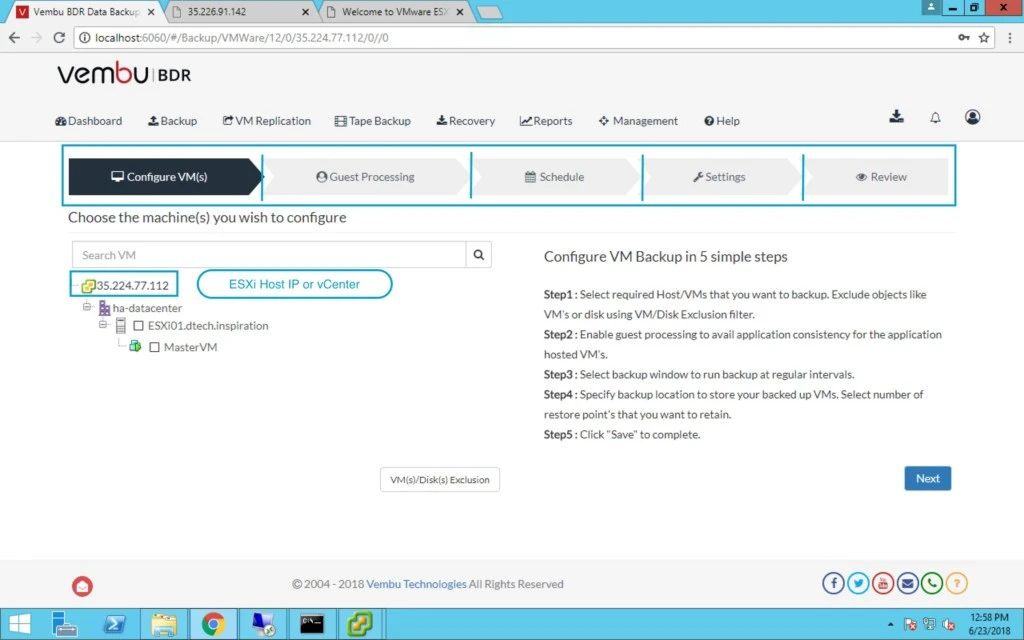
11. On below screen you can see ESXi host and all the VMs. Now you have to select VM for which you want to configure the backup.
 

12. To test how quickly a VM can be showed up or can be searched in Vembu environment, after creating a VM on vsphere environment. The result is as quickly as you will create a VM in your VMware environment, right after creation,  you will have the VM in Vembu BDR for it to be searched.
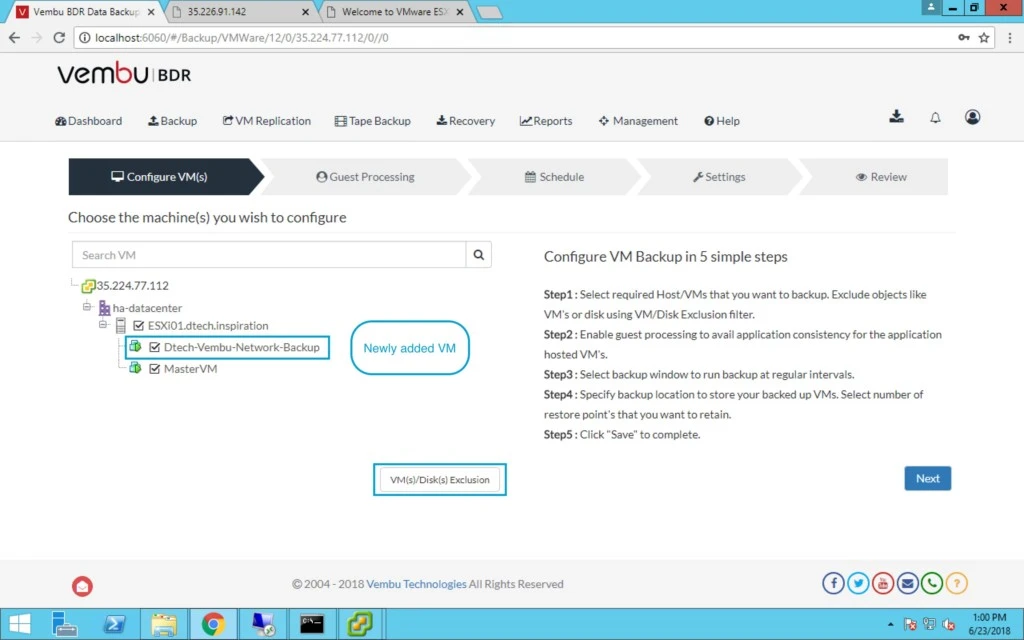


13. While selecting VM, you can also select a specific VM’s disk in exclusion setting option, if you don’t want to take backup of a specific Disk you can easily exclude that.

14. Click on Pencil symbol and select from below options.
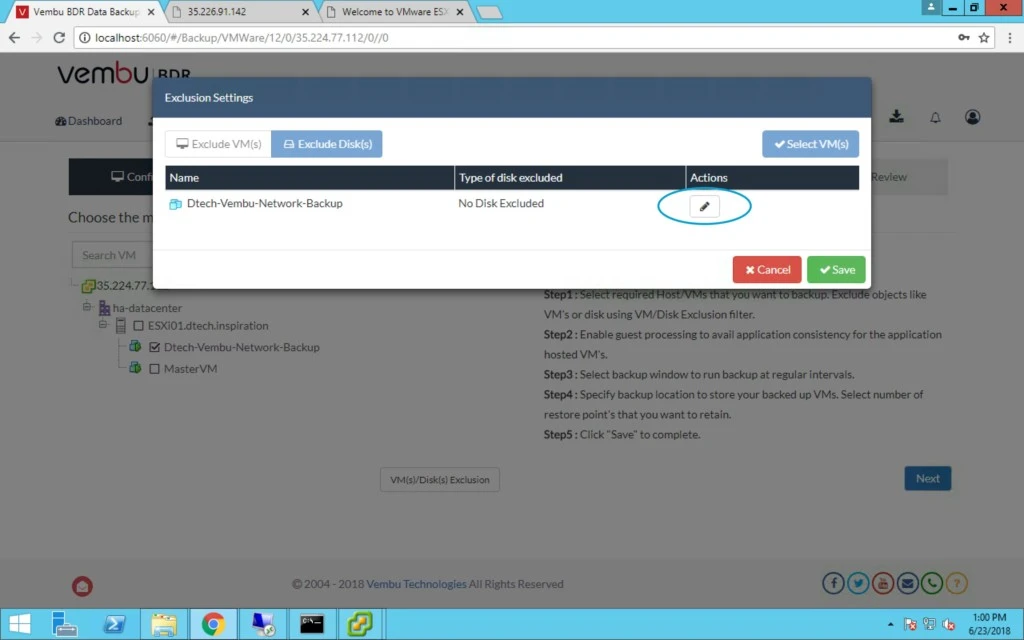
 

15. These are the options for Disk Exclusion are given below:

a) No disk excluded.

b) Include only system disks for Backup. Exclude others (typically disk 0:0).

c) Select type of disk to exclude.

Note : Removal of already configured exclusion rules will have effect only from next additional full backup. It will not have the affect on the current full Backup.
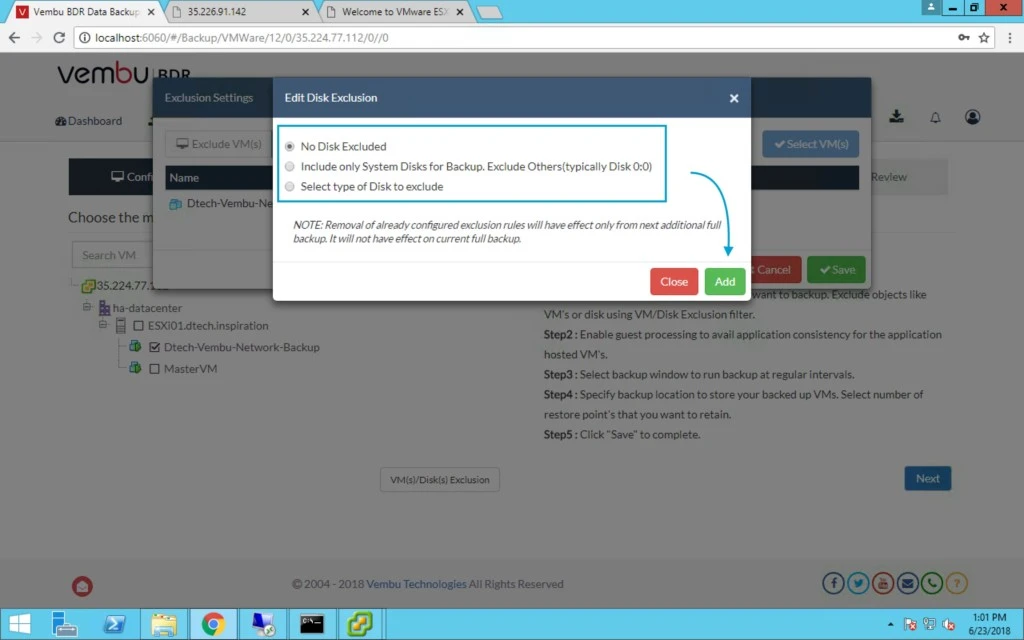


16. As per your requirement select the option and Click on add.
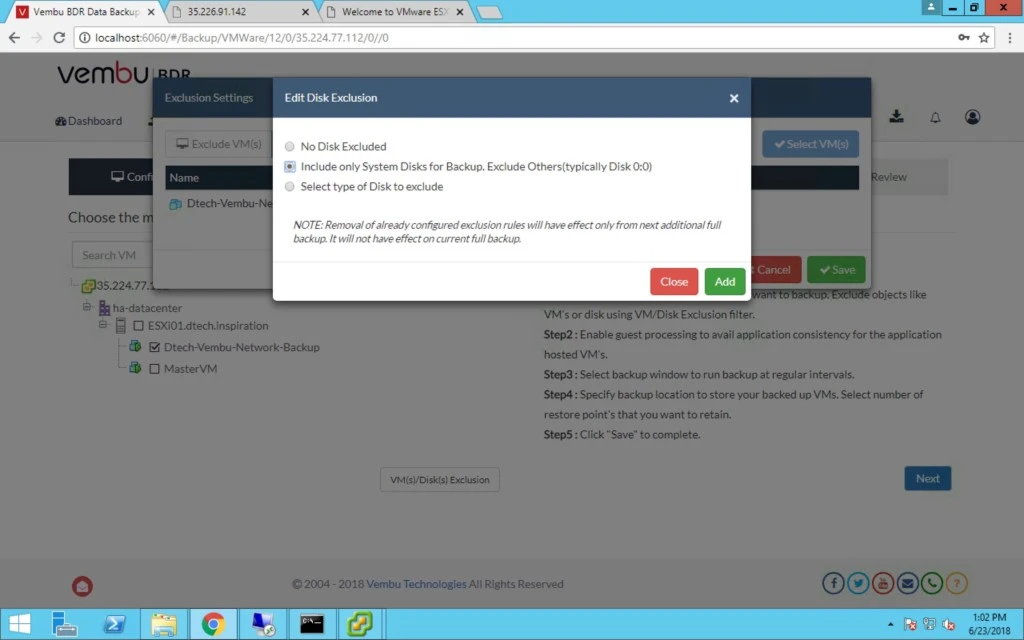
 

17. After selected the disk for exclusion then click on save button.

Note: By default No disks excluded option will be selected.

 

Host level Disk Exclusion- This exclusion type is possible when you opt to configure host level backup job. Under ‘Exclude Disk(s)’ tab, you will find the configured host(s) listed.

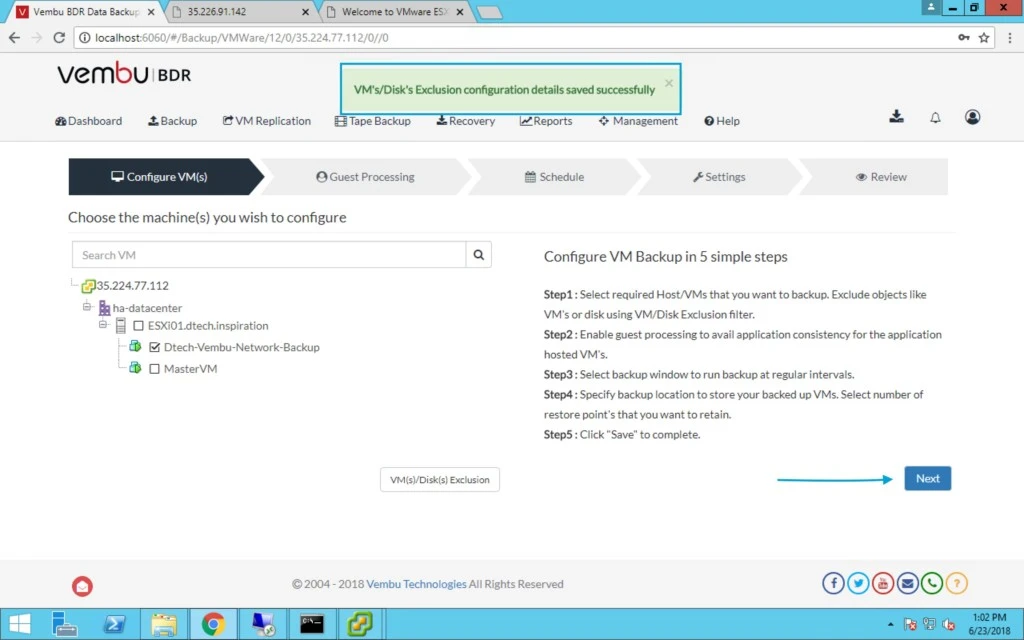
18. Once you saved the configuration for exclusion, it will prompt you a message with successfully saved and click on Next.
 

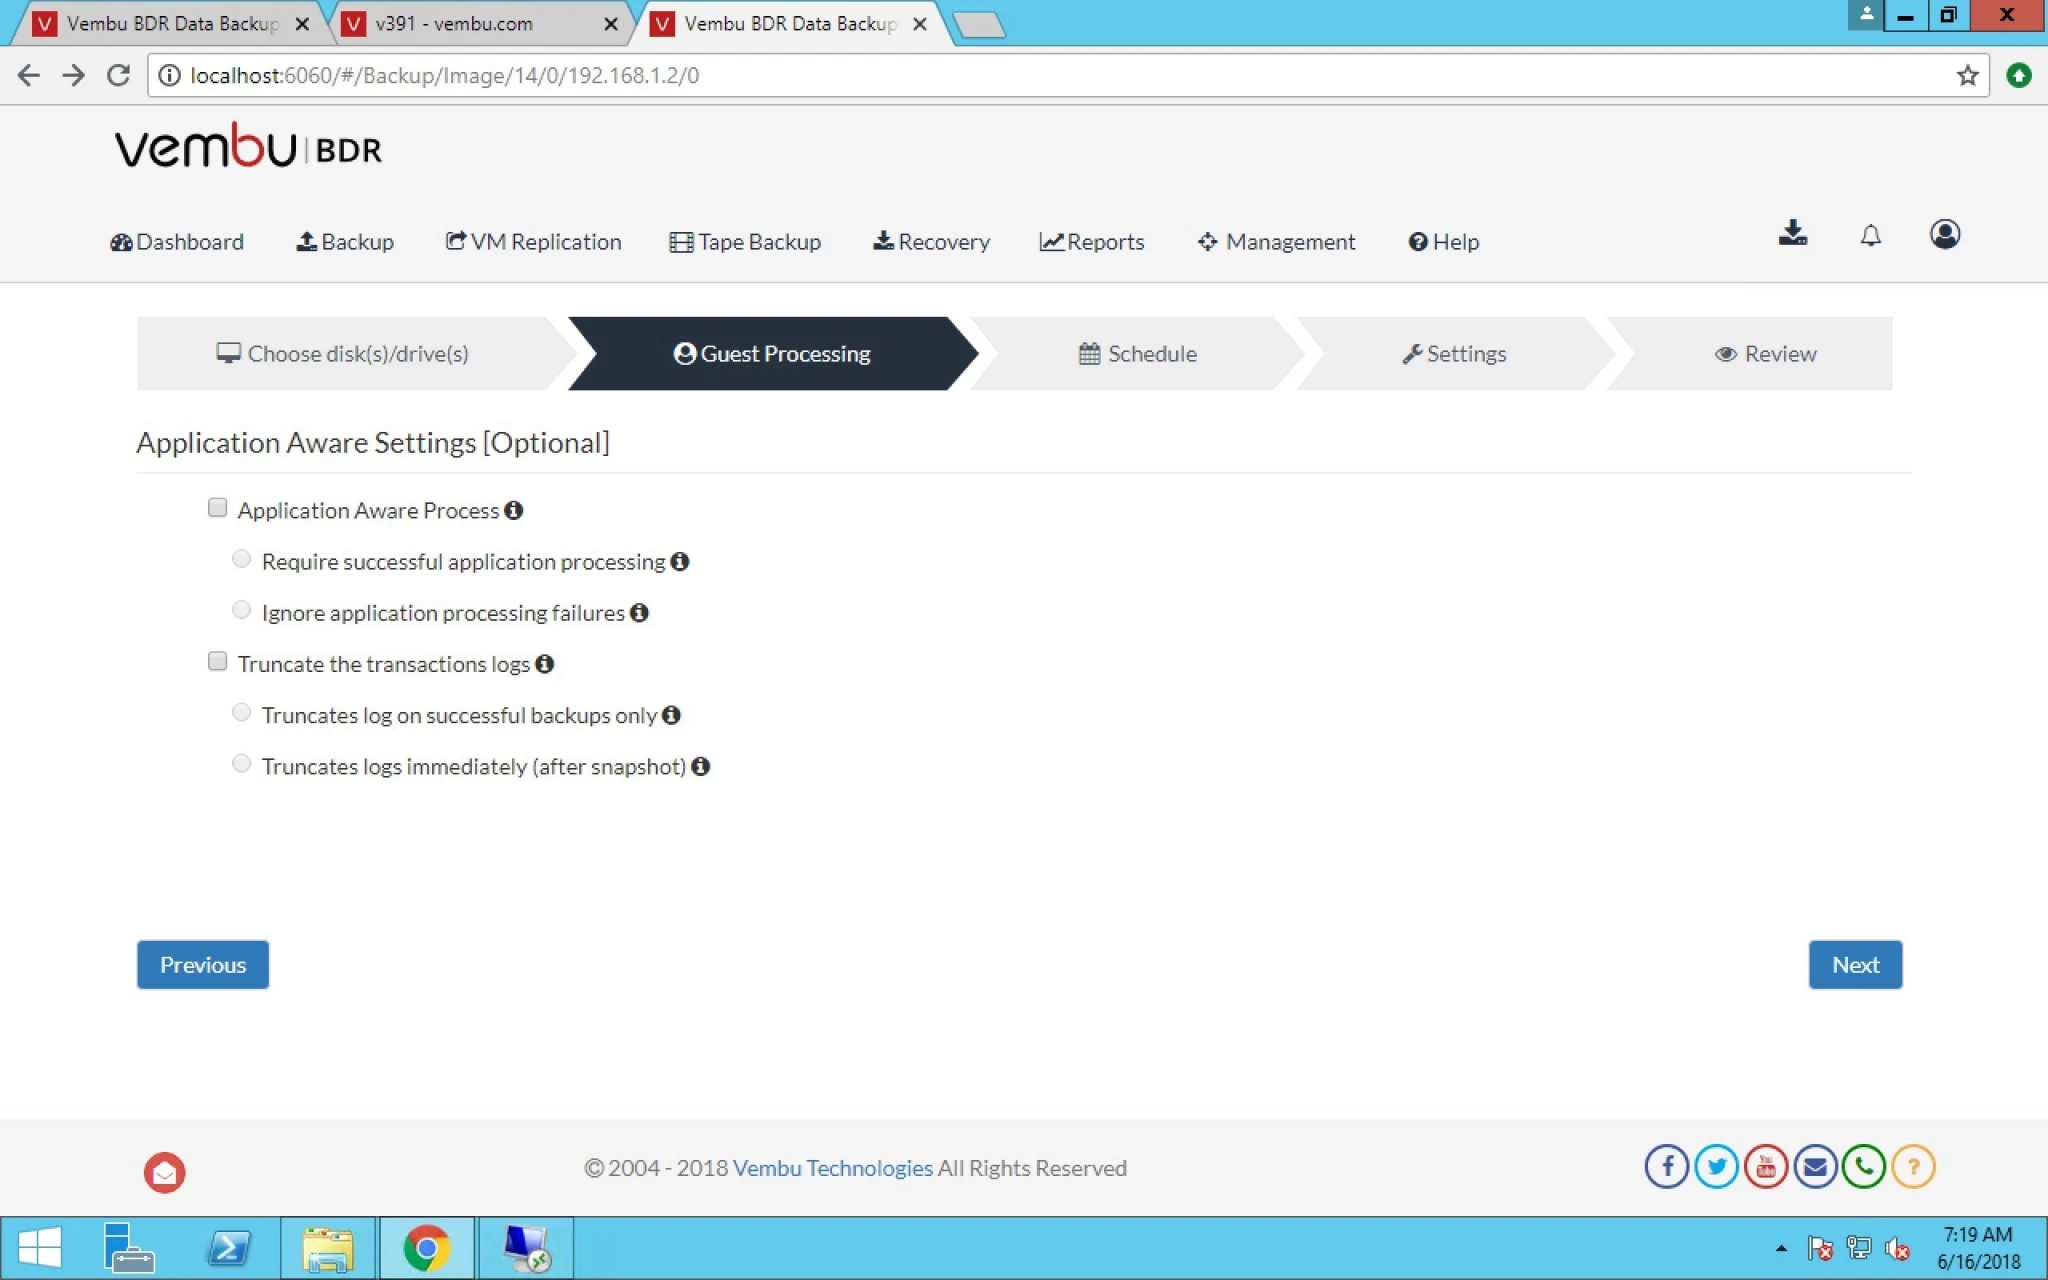
19. Here you can select Application aware settings that are optional.

a) Application Aware process.

b) Require successful application processing.

c) Ignore application processing failures.

Application-Aware VMware Backups:

VMware backups using VMware APIs, utilize application-specific VSS writers (SQL Server, Exchange) to take application-consistent backups and truncate exchange log files to free up the space.

Enabling application aware process, gives users two choices to choose:

Require successful application processing: Choosing this option lets Vembu BDR track application consistency and triggers backup process, only when all the VSS writers in the VM are in stable state.
Ignore application processing failures: This option, lets Vembu BDR trigger backup jobs whenever the job is scheduled, despite the success/failure of application processed.

Truncate the transaction logs:

Enabling this option lets Vembu BDR truncate the exchange server logs before initiating backup process. It purges and commits log files along with the .edb files and reduce storage space consumed.

Application Aware Image Process Prerequisites:

Backup jobs enabled with application-aware image process option requires that your guest OS has latest VMware Tools, all the latest packages and patches installed.
To perform application-aware image processing, you must provide guest OS login credentials for the selected VM(s) running MS Exchange server, MS SQL Server, MS SharePoint Server, MS Active Directory.(Reference vembu.com)
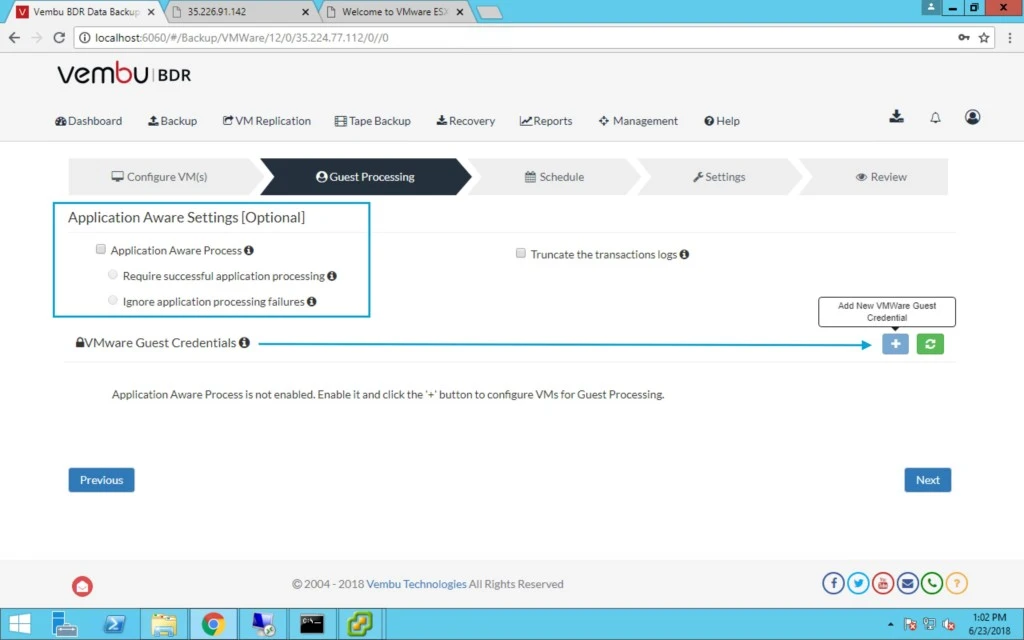


20. If you select VMware Guest credentials option then you can select VM and provide user name and password, when you click next, it will check the OS password to authenticate.
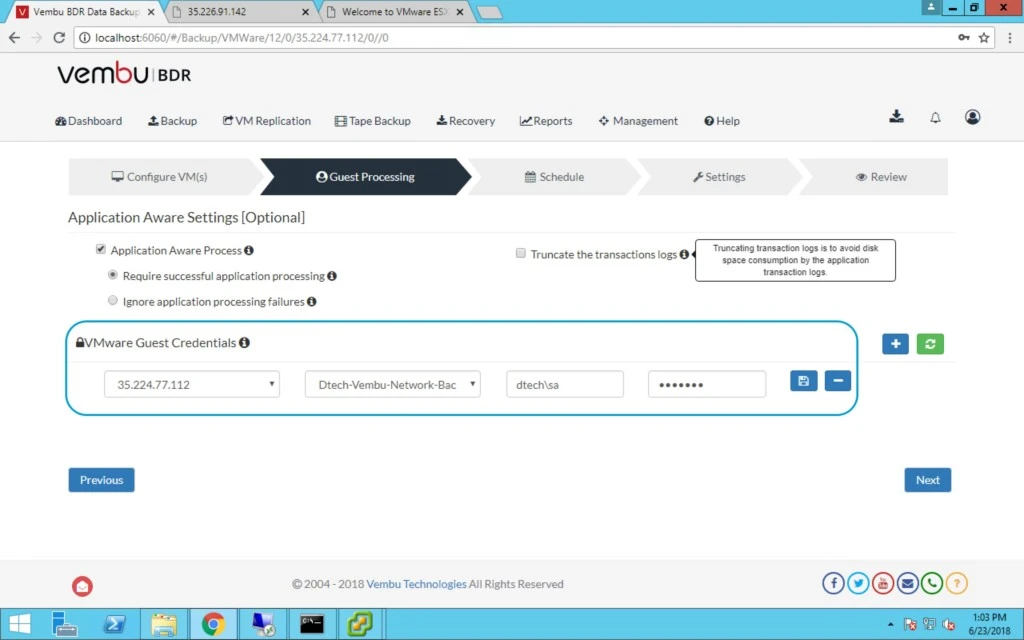
 

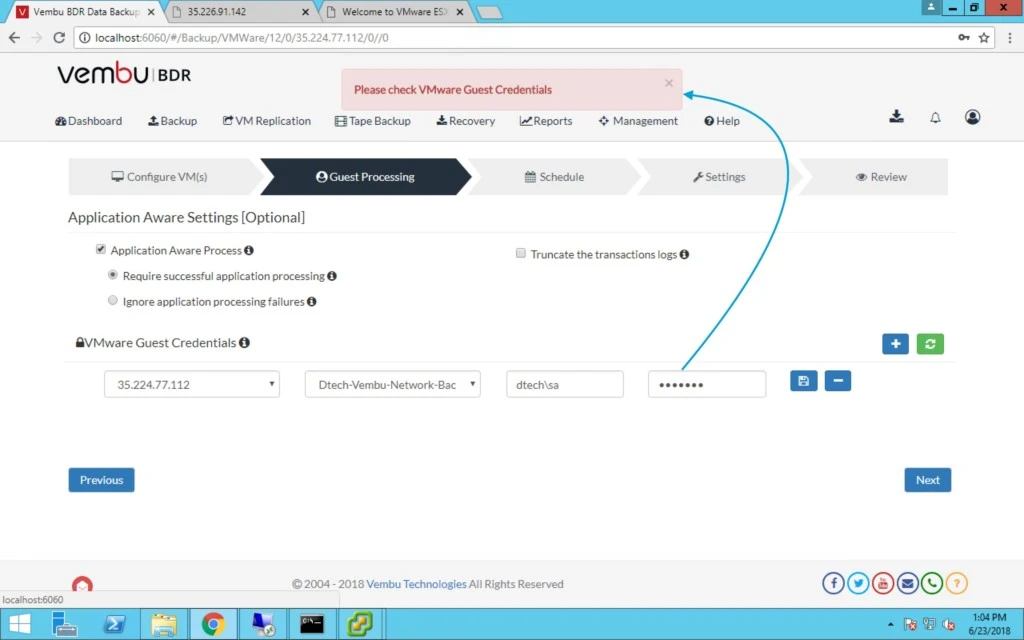
21. In my case, I intentionally provided wrong password and it prompt me an error given below.
 

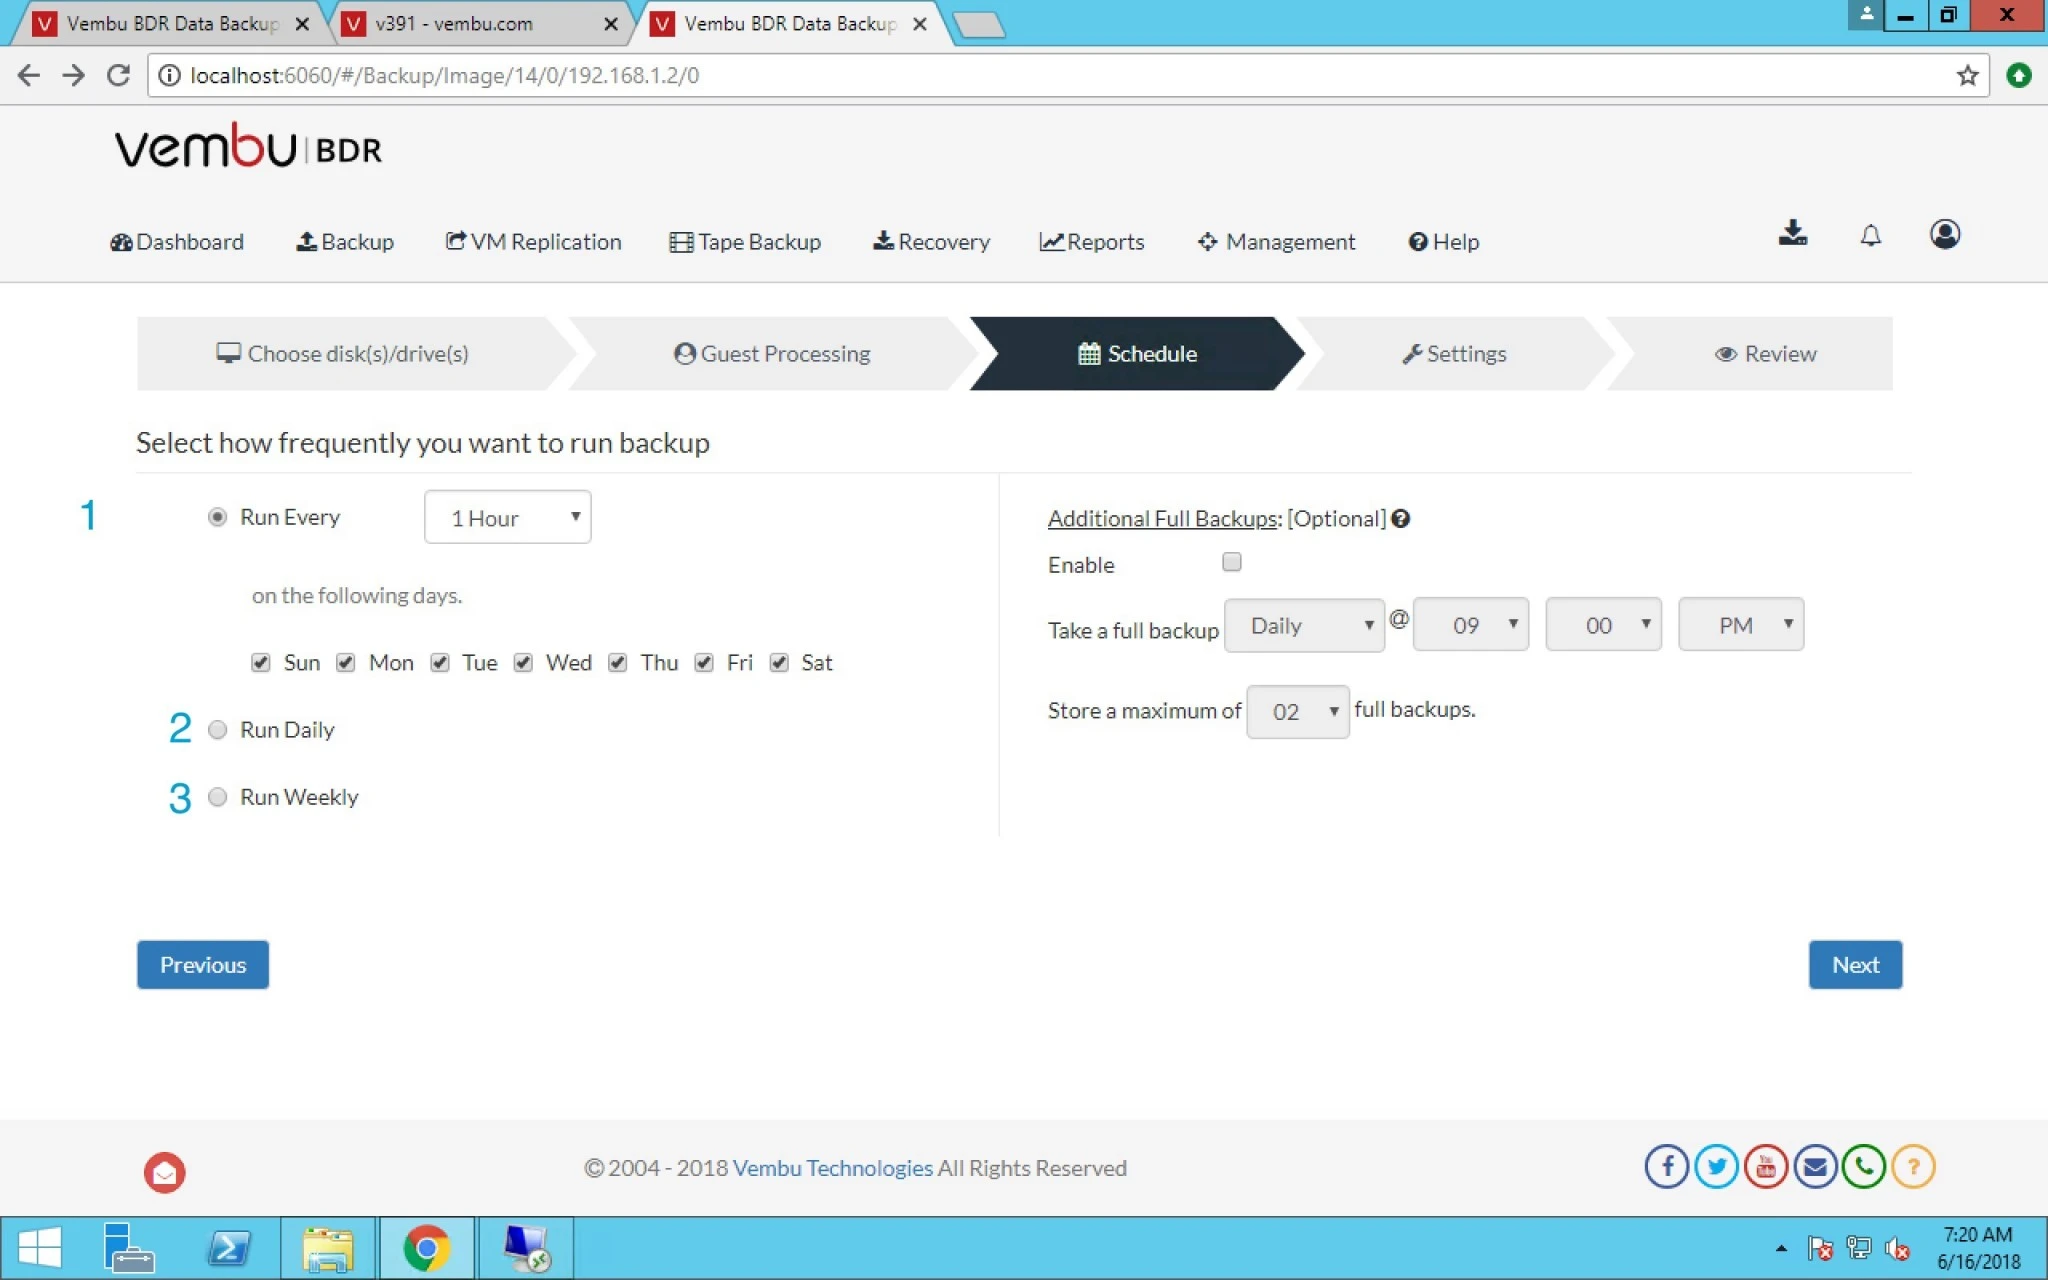
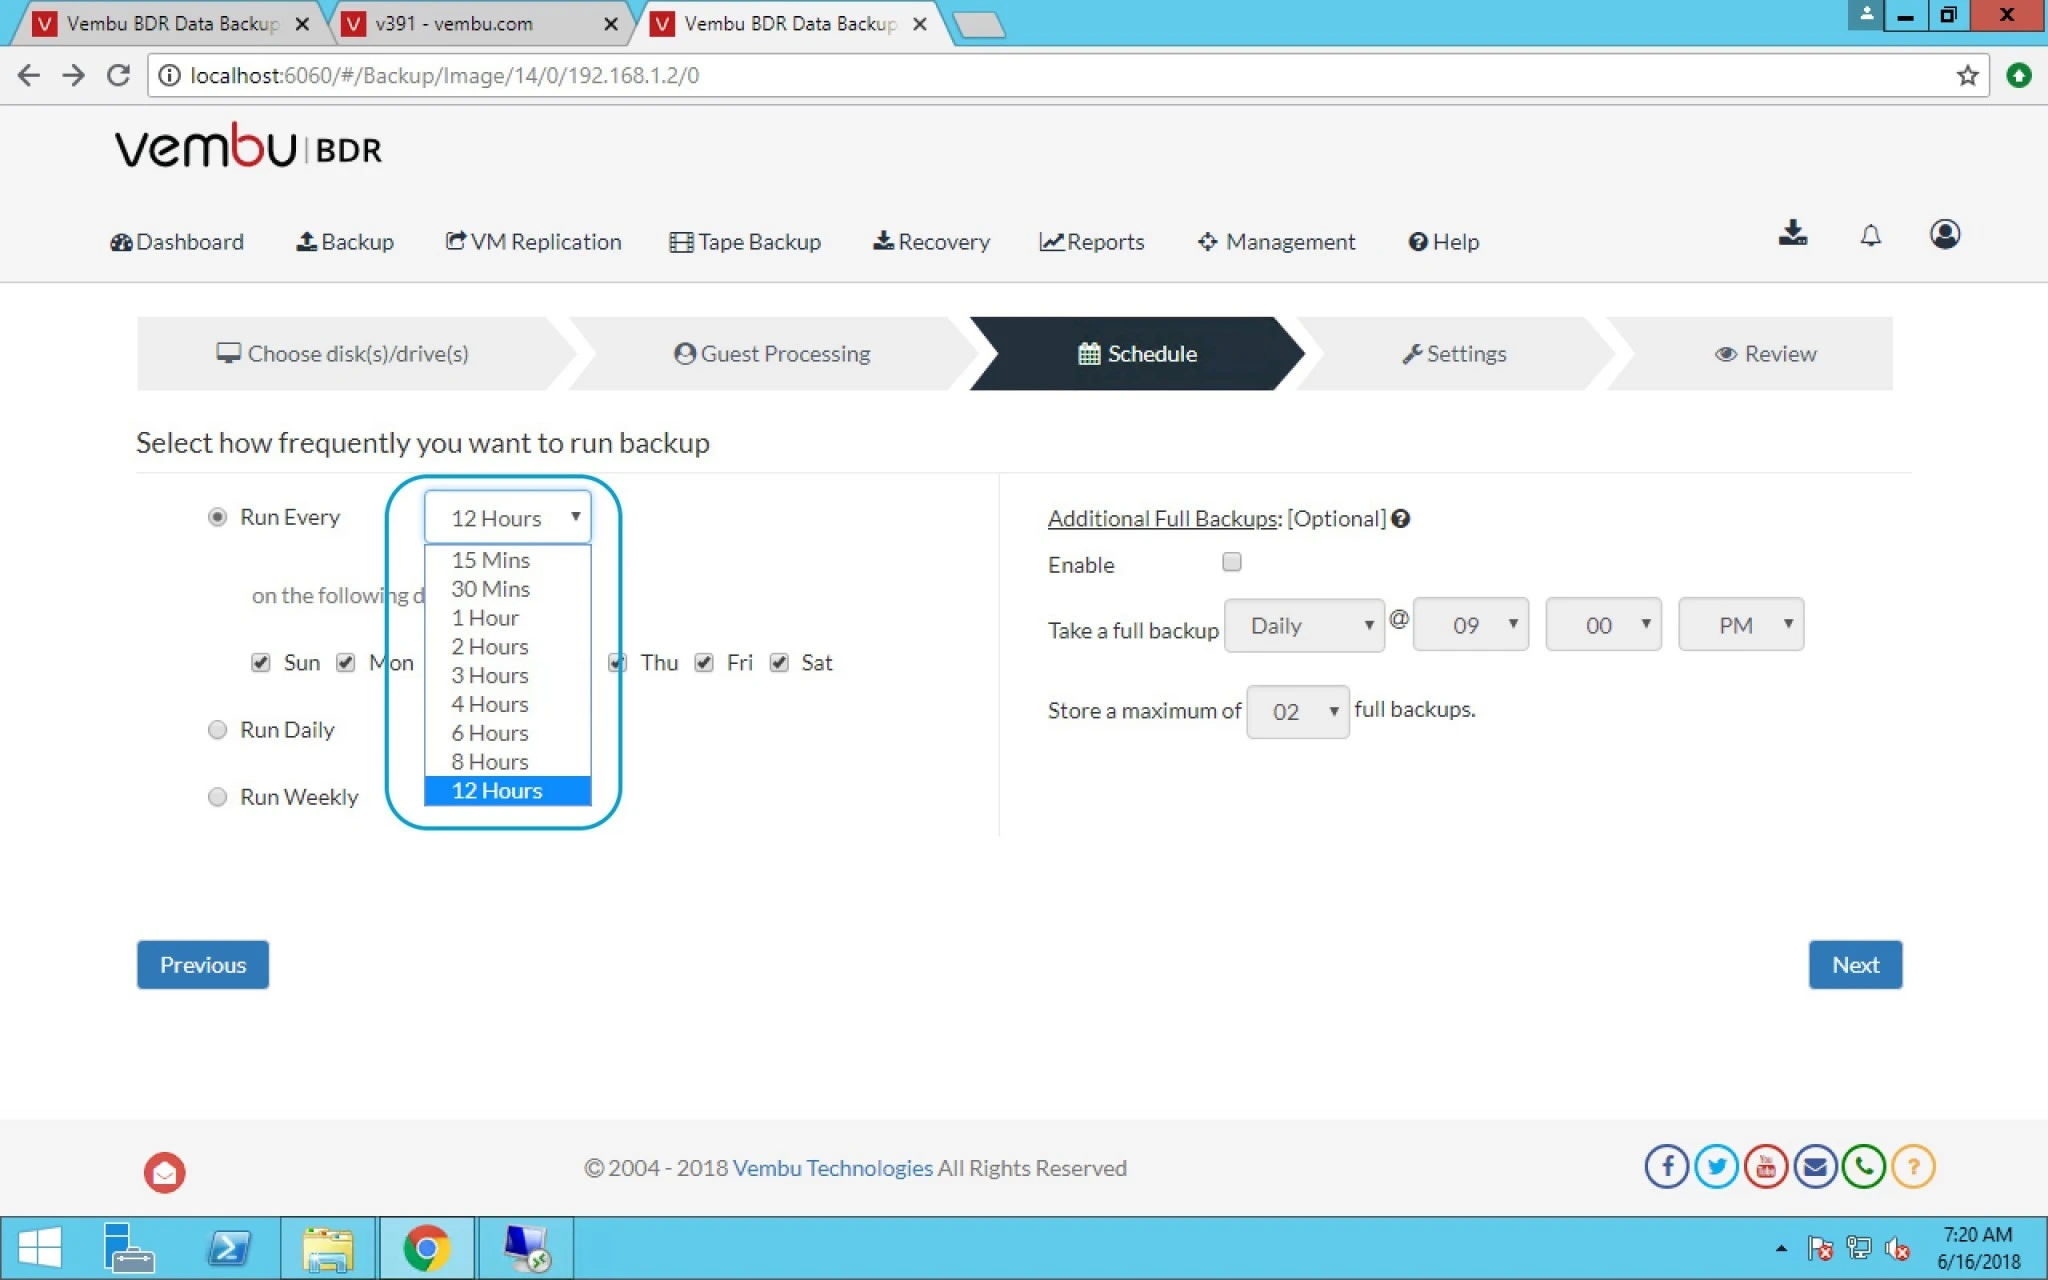
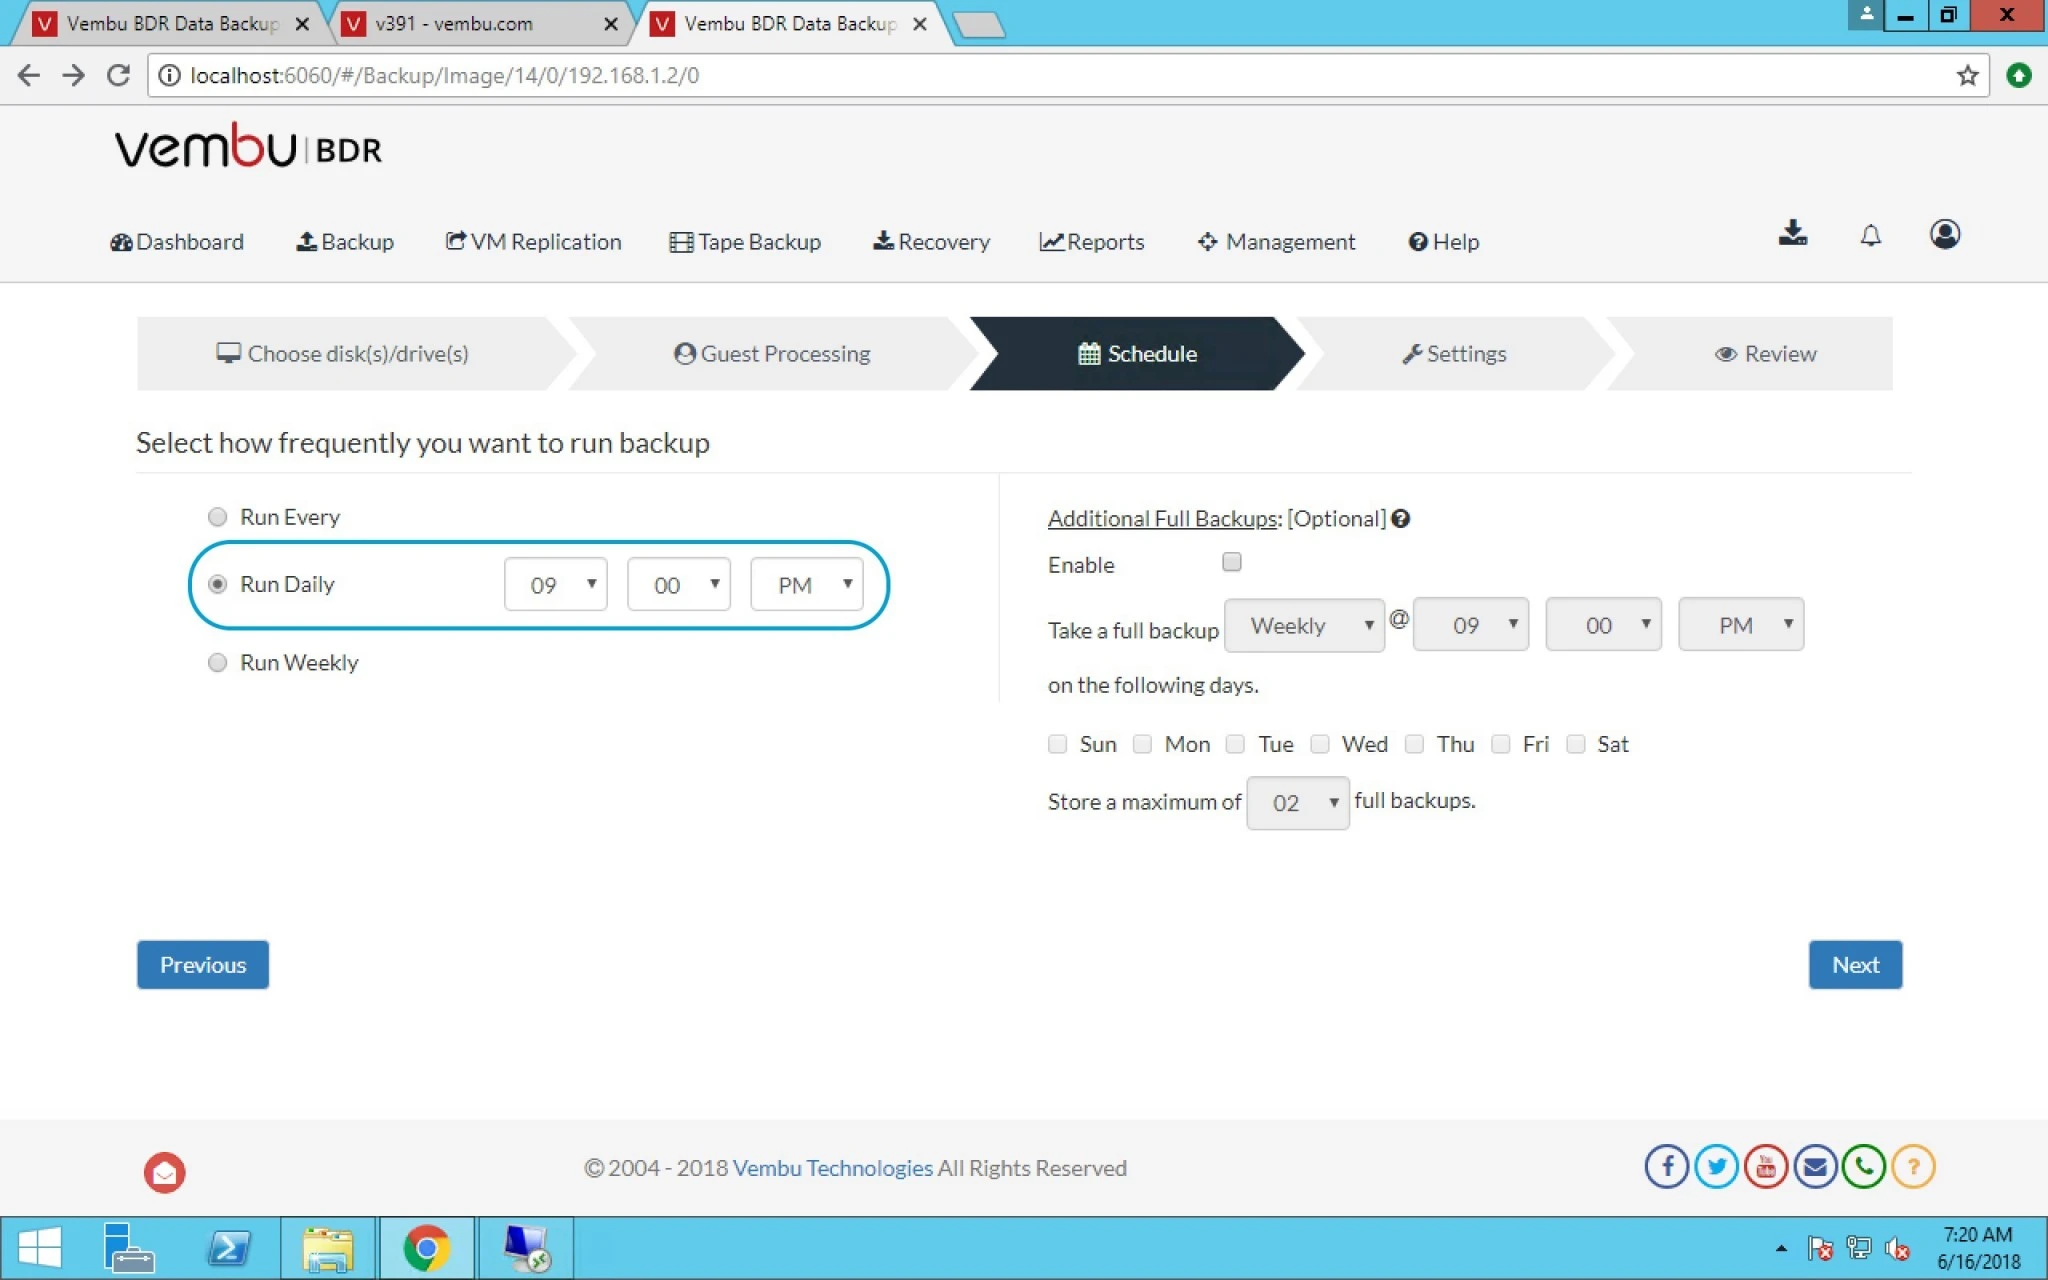
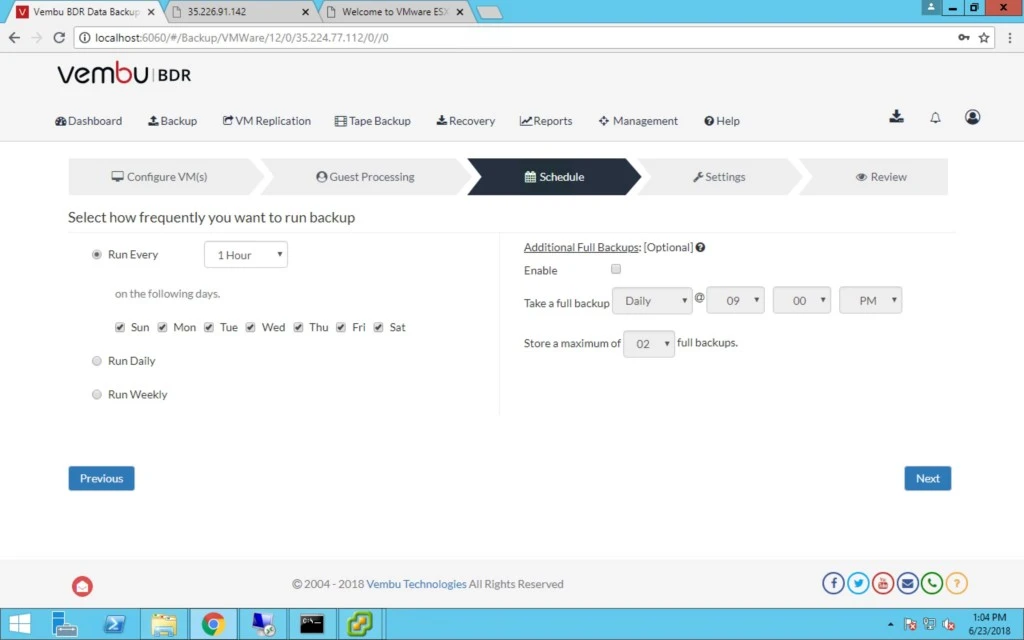
22. You can also schedule this job as per your convenience like Every Hour on selected days or Daily and Weekly basis.
 

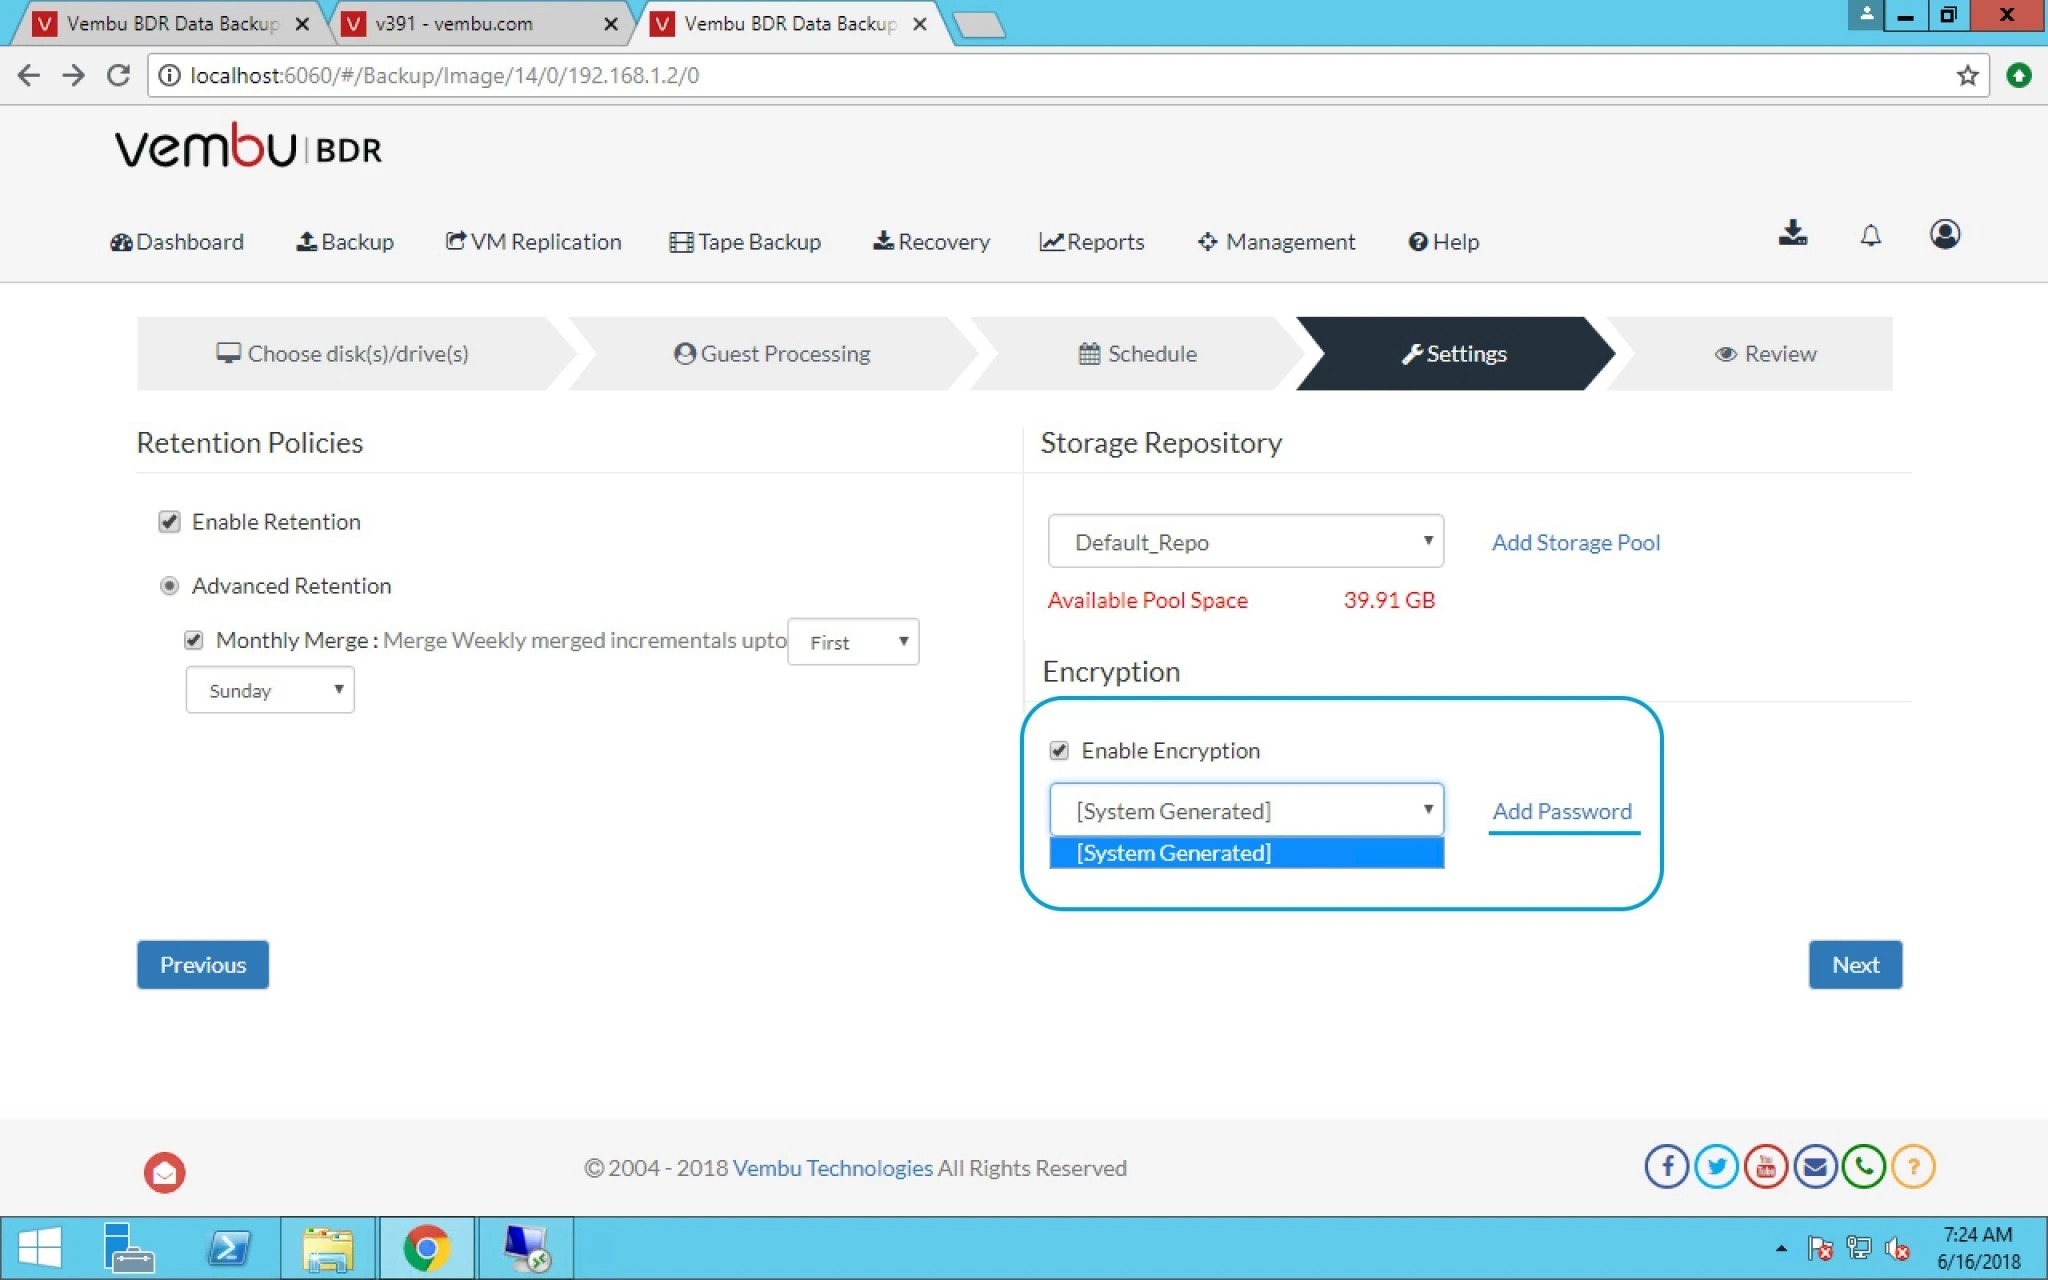
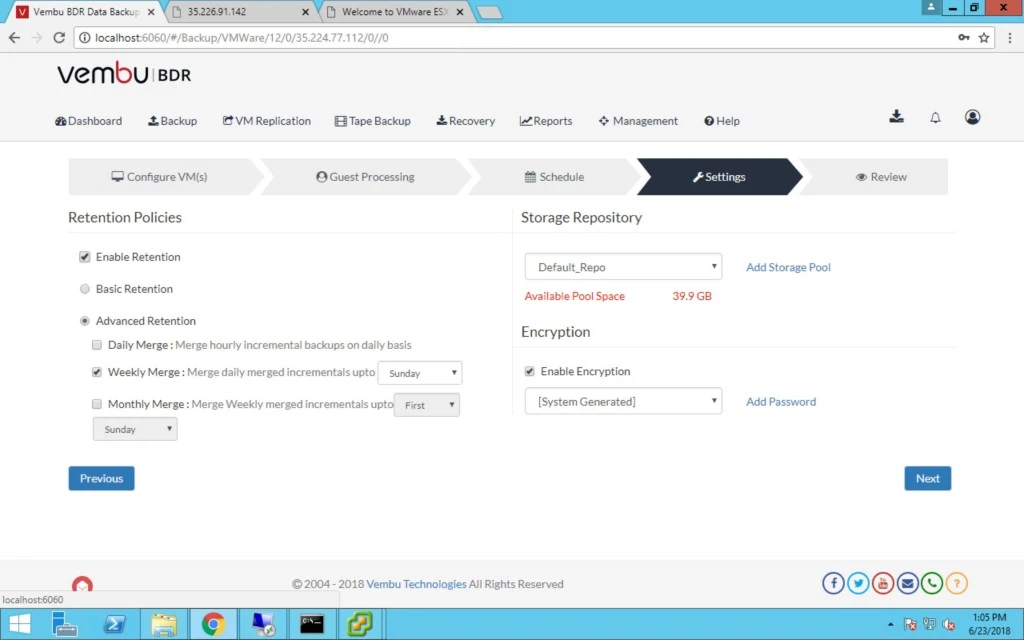
23. You can also select retention policies like basic retention or advanced retention.
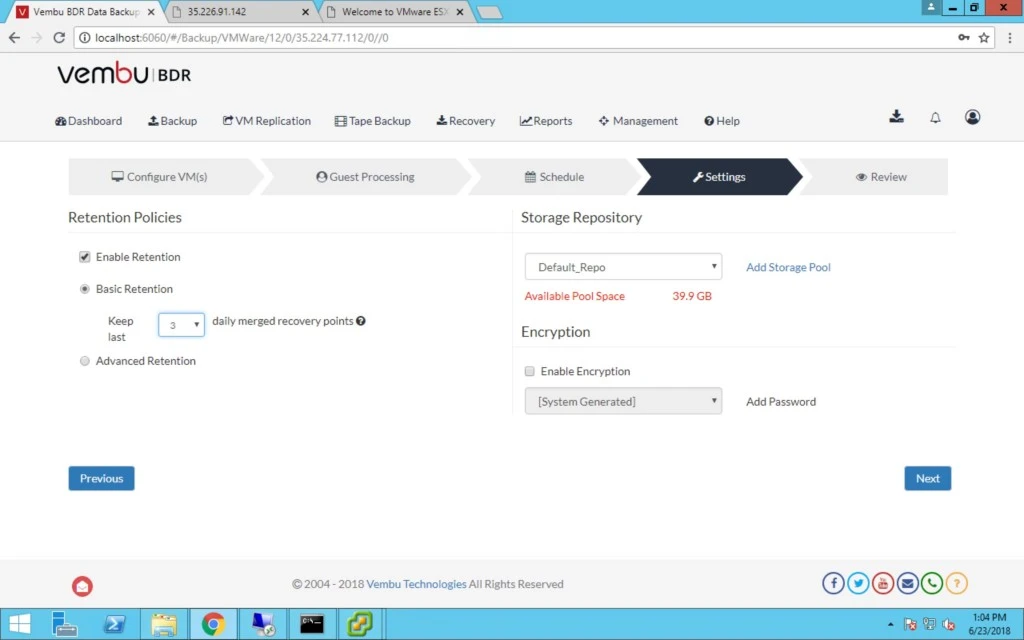
 

24. Here are some Advanced retention examples.
 

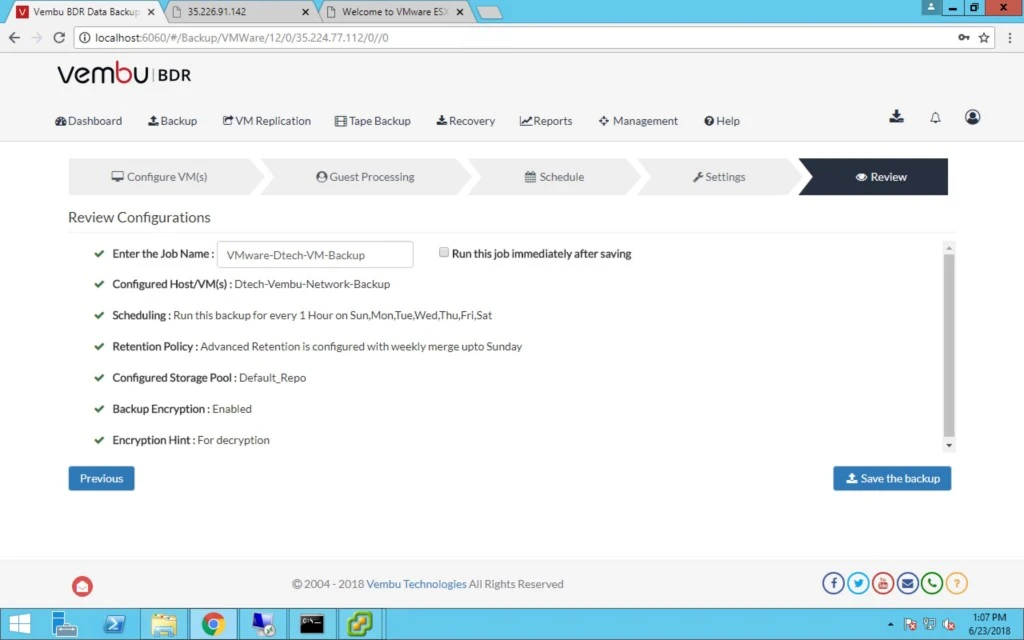
25. Finally Provide Backup Job name and save the backup Job. You can also run the job immediately after saving it.
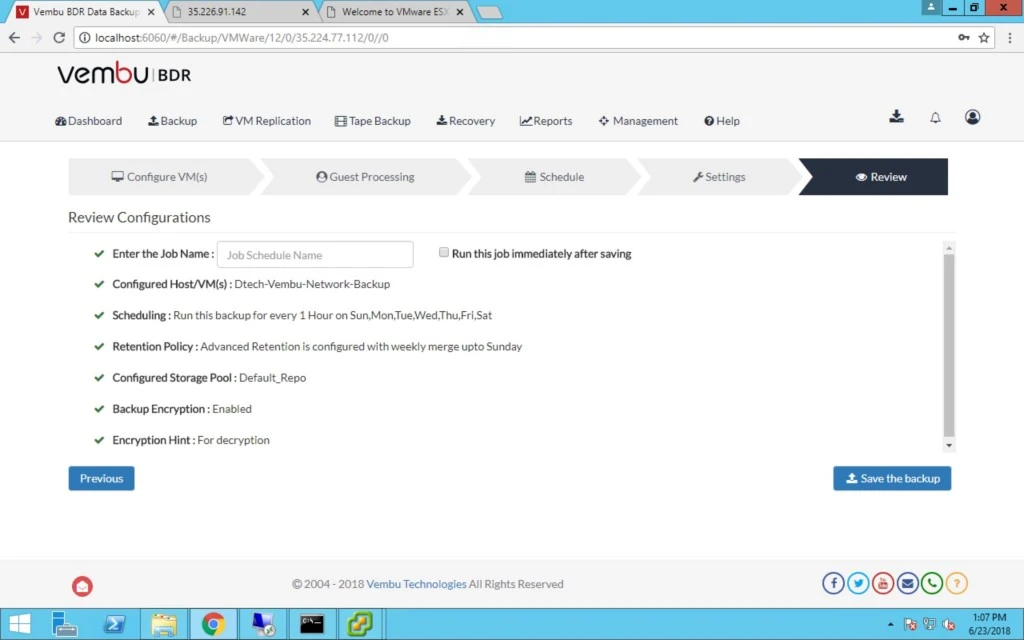
 

26. Job Name is a mandatory field which means you can’t skip this step.
 

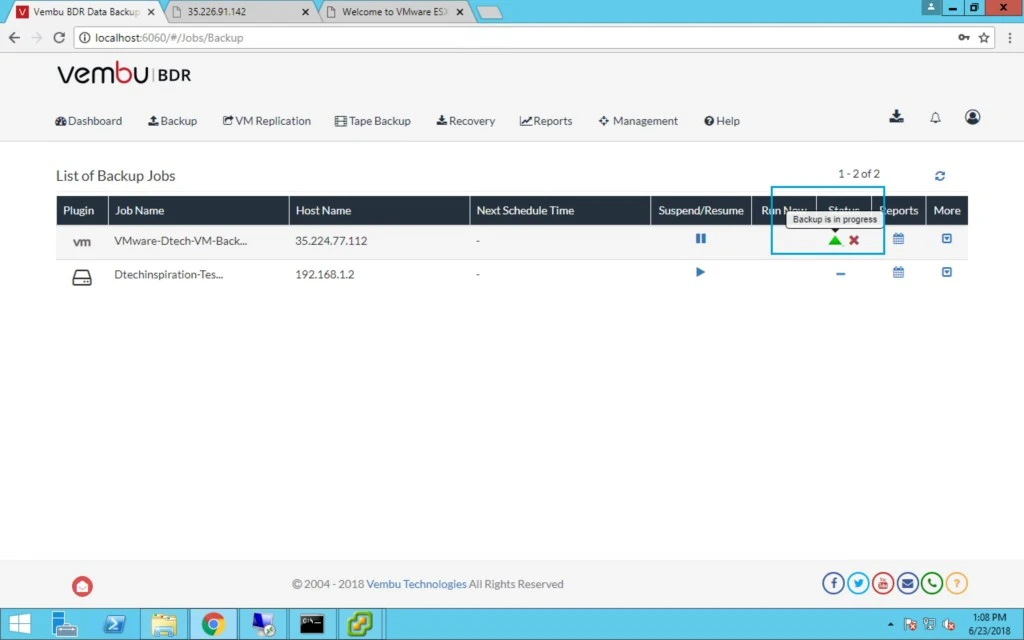
27. Now here you can check the backup status in progress.
 

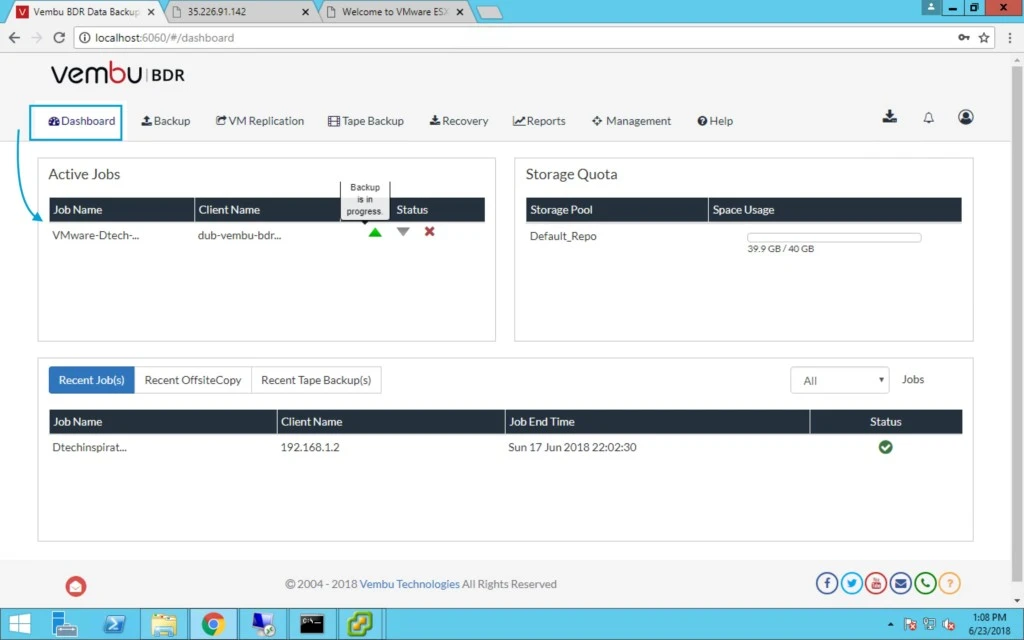
28. Click on Dashboard > under that you will see the Active jobs with a progress status.
 

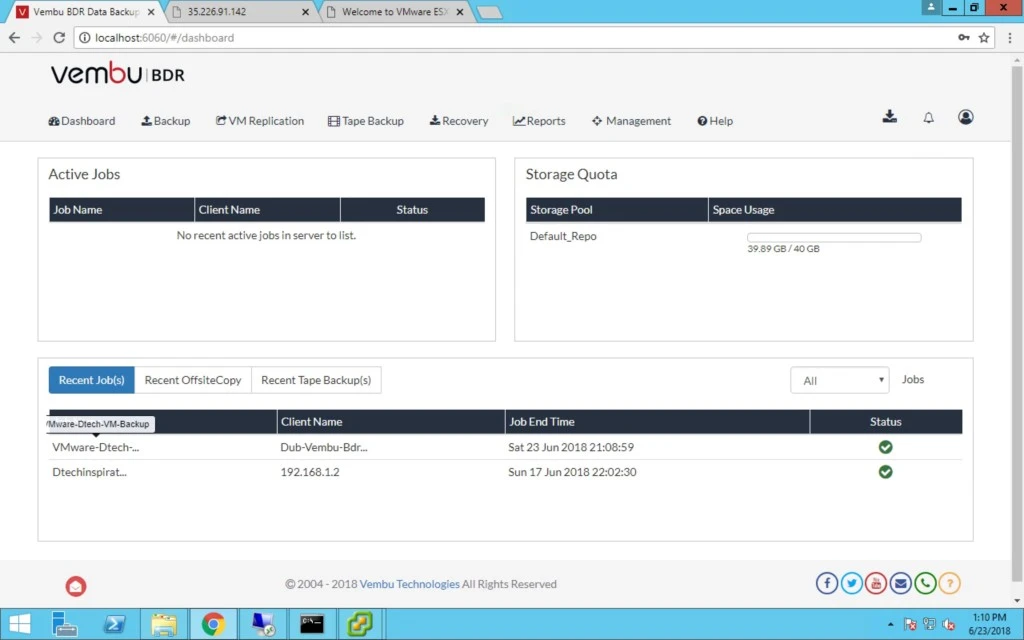
29. Under recent job you will see the job’s end time with status whether it’s failed or successfully completed.
0

How to configure Vembu Network recovery and file level backup

Taking backups of all the files or folders might not be an efficient solution for some enterprises, so its very important that we understand the requirement of an enterprise. For Example Some business requirements involve taking backup of only the critical files and applications and these critical data needs to be protected on a near-continuous basis. In Such requirements taking a disk image backup containing all the OS configurations might not be considered an efficient backup policy. It’s very important to have a backup solution that can be tailored to your needs by offering you control over data.

Vembu NetworkBackup ensures protection to all your business critical data across file servers, application servers, and workstations.

  • Backup Files/Folders
  • Backup System State, Active Directory & Registry
  • Backup Exchange, SQL, Sharepoint & Outlook
  • Encrypt your data, both at-rest and in-flight
  • Retain files that you need along with its versions, spanning years


Topic Outline:

 Registration VM with Vembu BDR backup server

 Selecting files and options

 Configuration Scheduling

 Configure Retention

 Review Configurations

 Details

1. After network backup setup installation in my previous article of installation of network file recovery, We will look into Backup and Recovery of your files and applications.

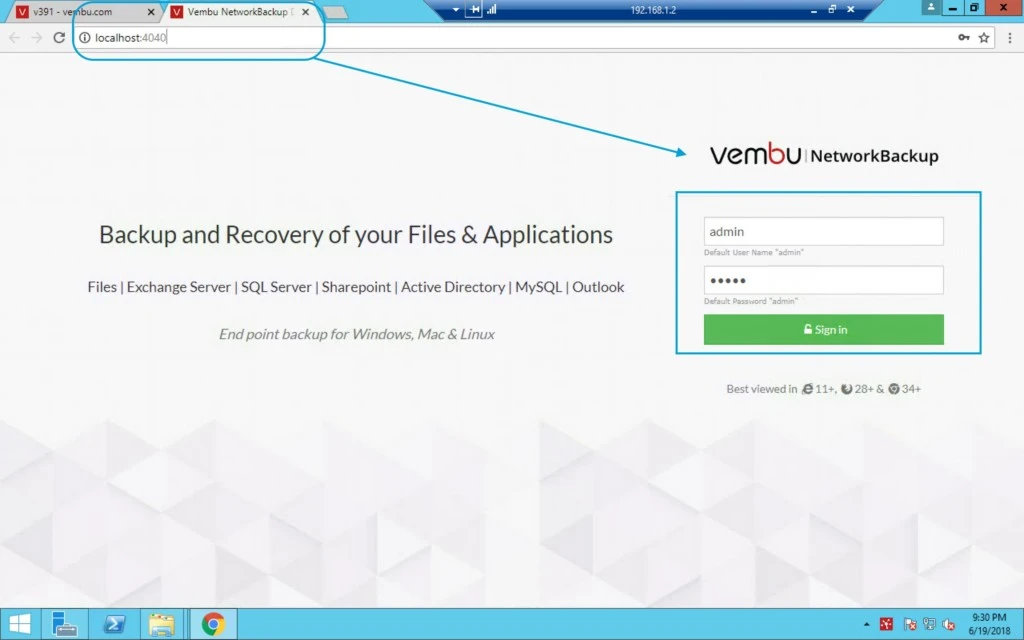
http://localhost or IP:4040/ after this provide username and password (if you have customized this during installation then use that customized username and password)


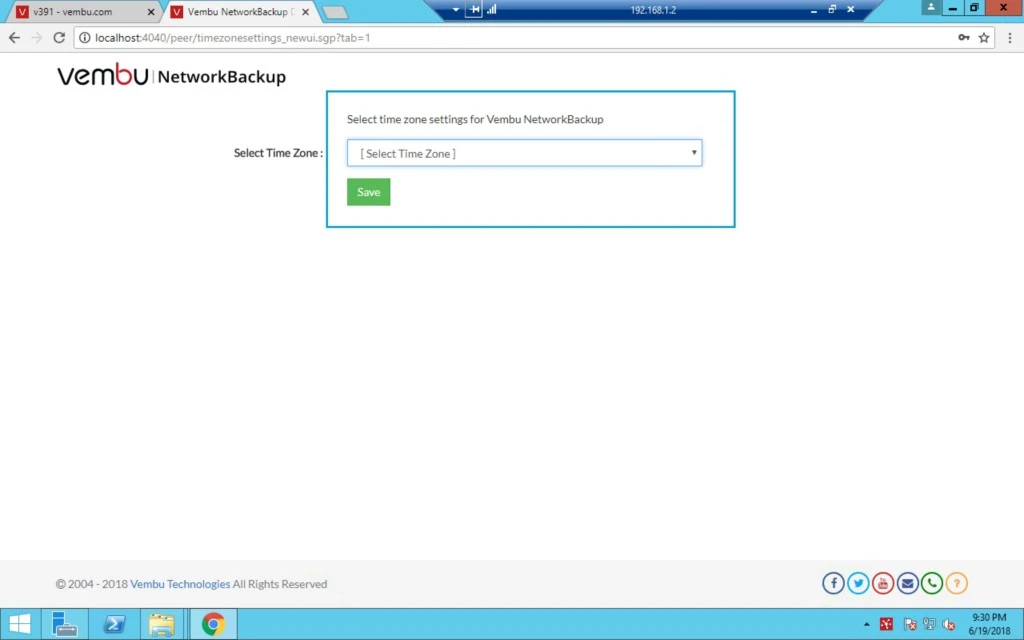
2. Select Time Zone as per your region.


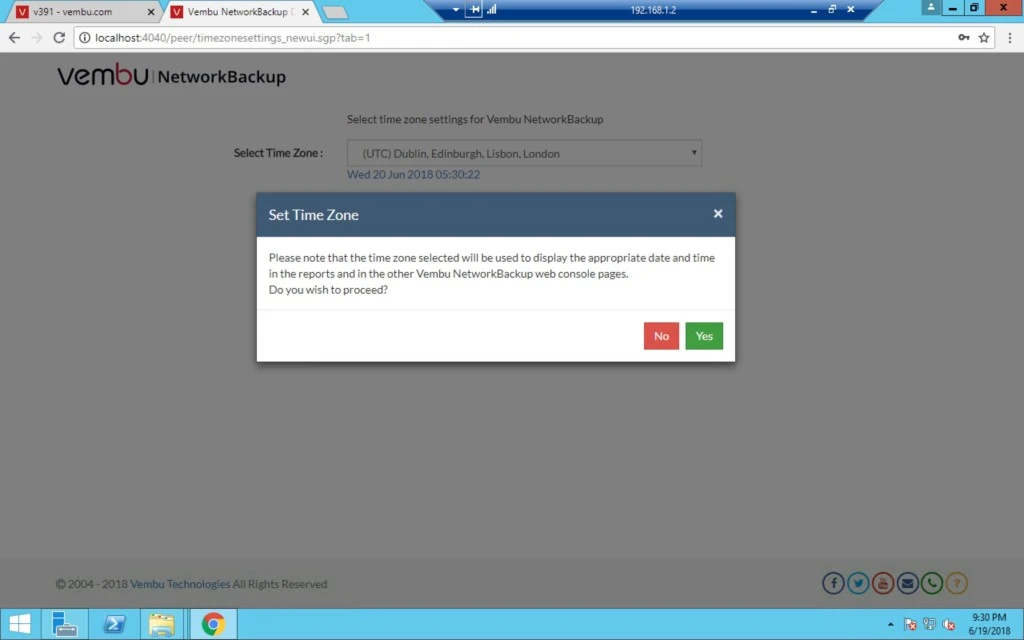
3. Click on Yes.


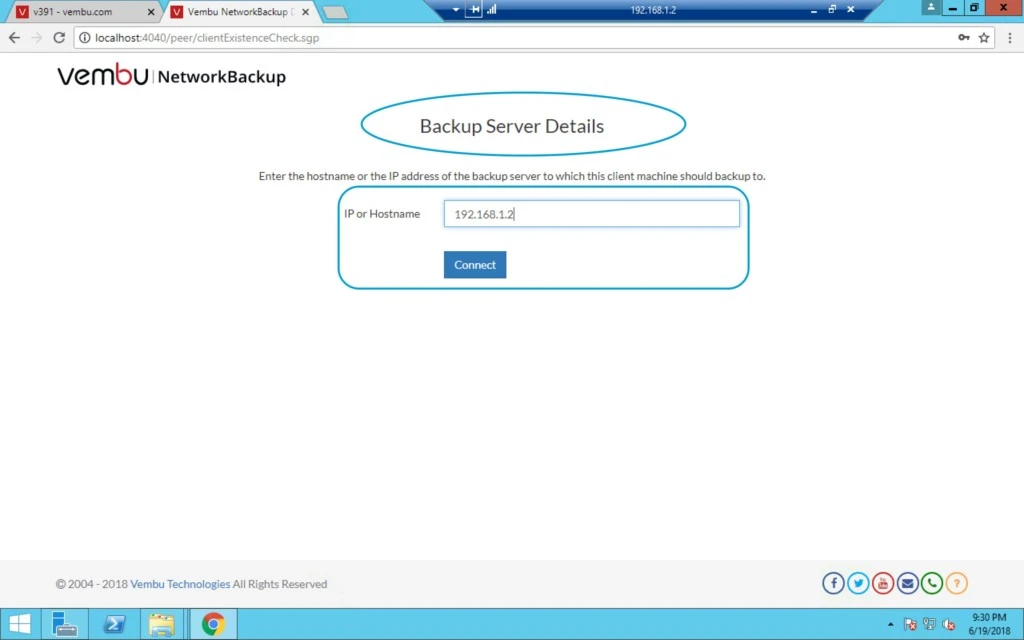
4. Here you have to provide your Vembu BDR server IP.


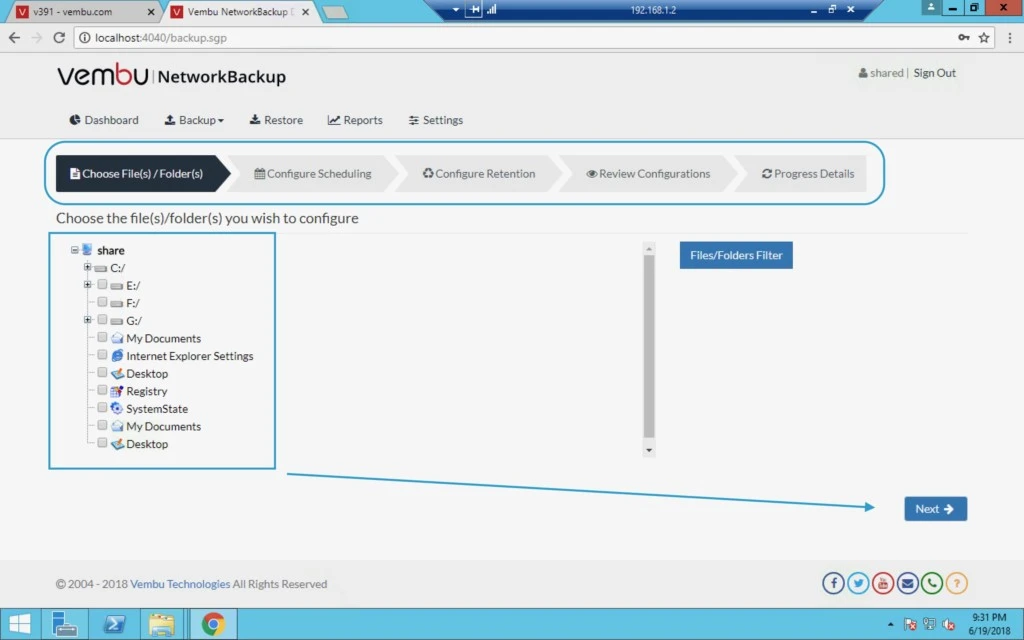
5. Now at this point on the left-hand side, you can see local machine drives and other folders for which you can configure the backup (File Level Backup).


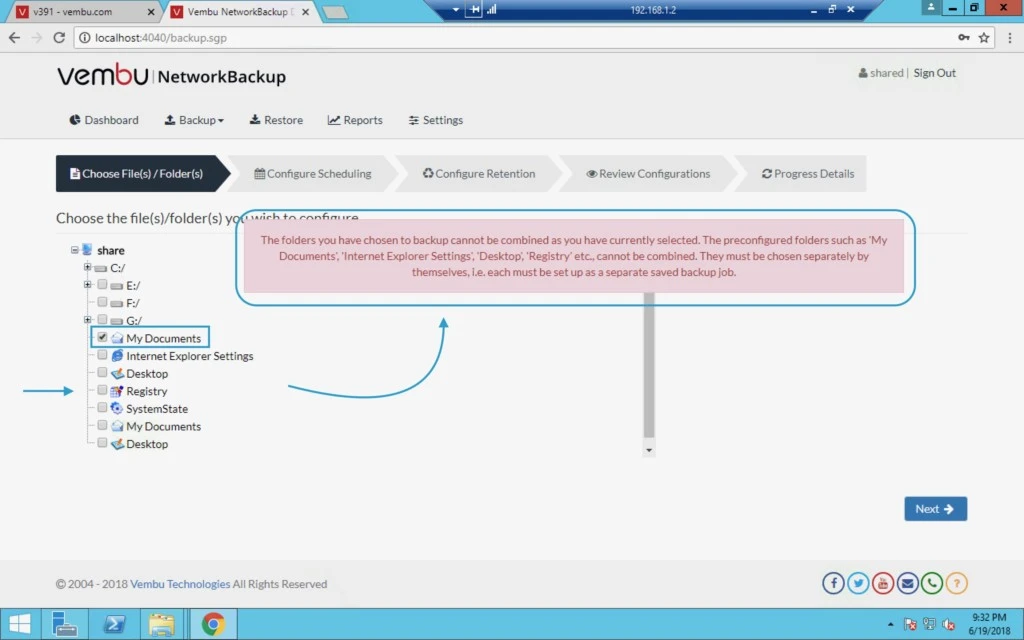
6. On below screen, you can see My Documents, Internet Explorer Settings, Desktop etc when you select “My Documents” and trying to select other files it will show you an error that selected items could not be combined so you have to configure backup separately for these.


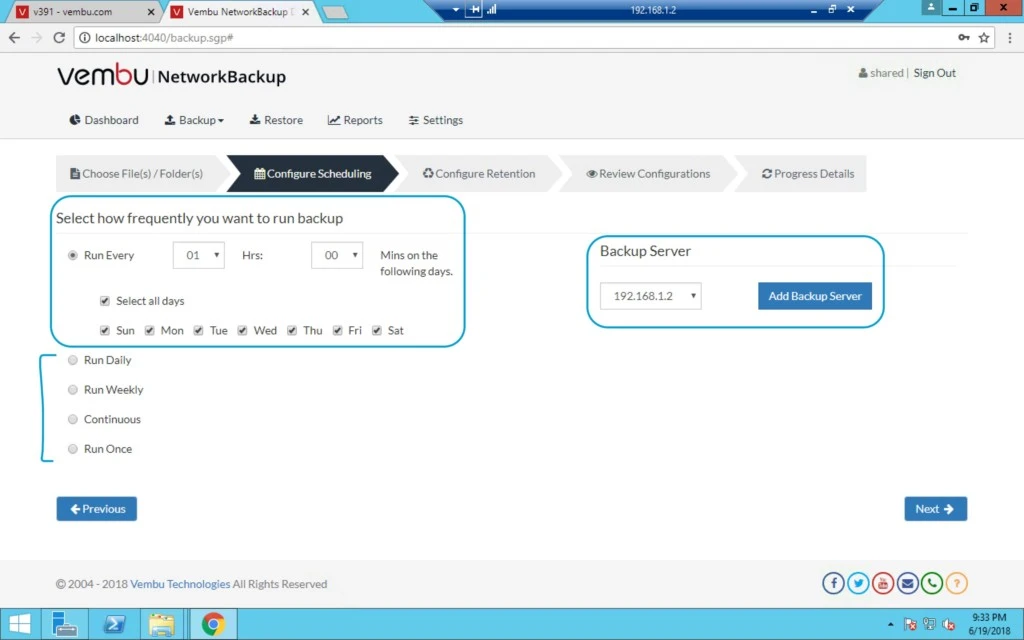
7. After that, you can configure or schedule timing for backup like hourly or define the time as per your requirement along with days like Sunday or Monday.

There are few more options available like you can run this backup Daily, Weekly, Continuous or Just Once.


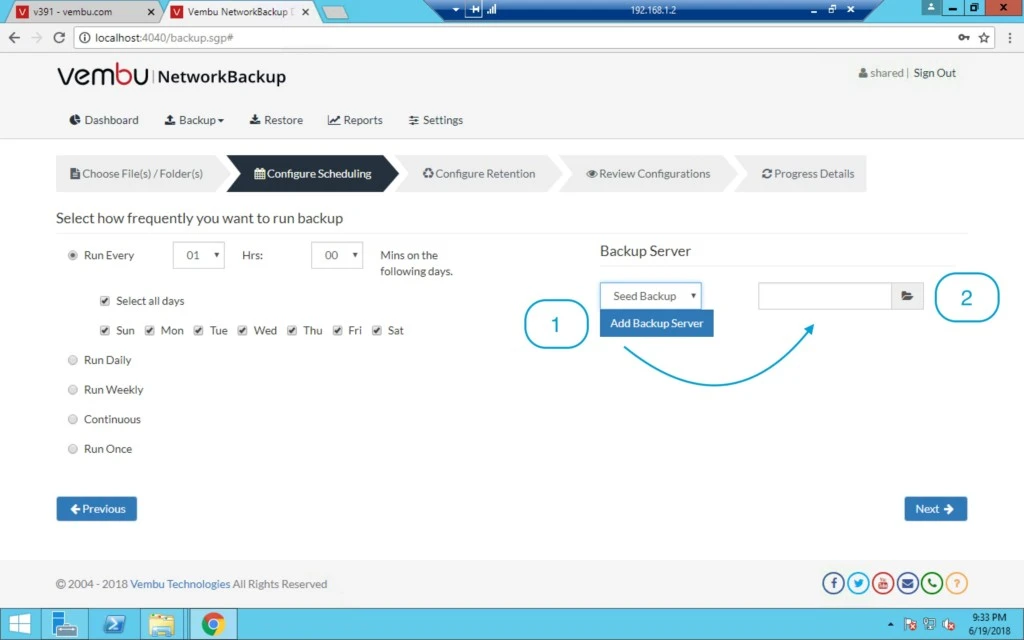
8. On the right-hand side, you can select Vembu BDR server if you have more than one then select from a drop-down list.


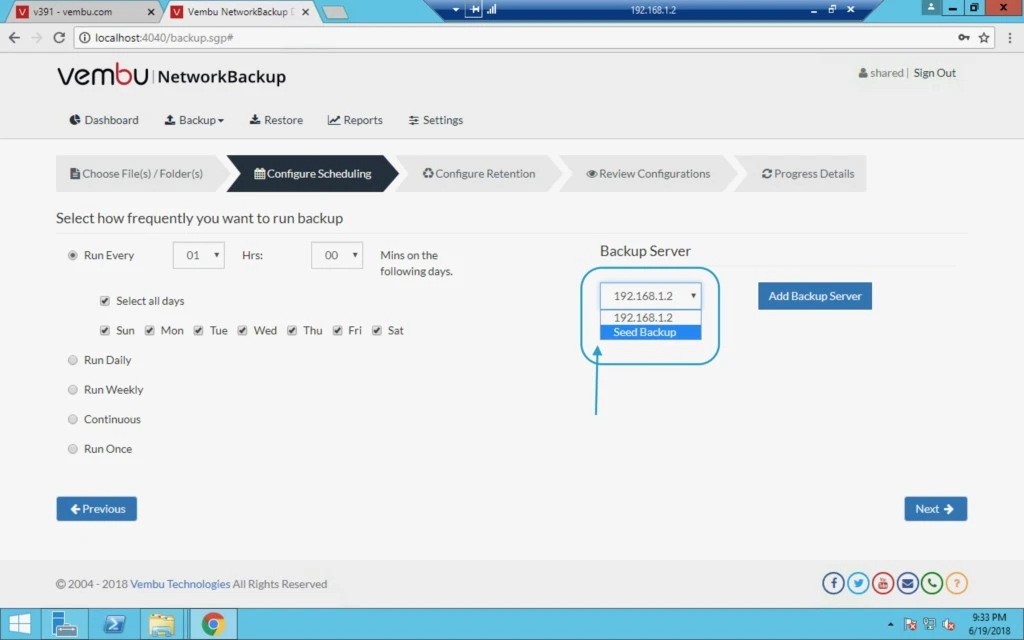
9. We can also schedule the backup for seed backup and click on the second option for Seed backup server.

Seed Backup migration is very efficient feature when it comes to copying a large backup initial data from a client machine to a backup server which helps in fastening the backup process and this can be taken in an external local drive connected to the client machine and then this drive can be easily moved to the remote backup server’s environment to migrate the data into the backup server. After performing the client side Seed Backup Migration steps, data migration and incremental backups can run directly from the client to the remote backup Server. (Reference storgrid.com)


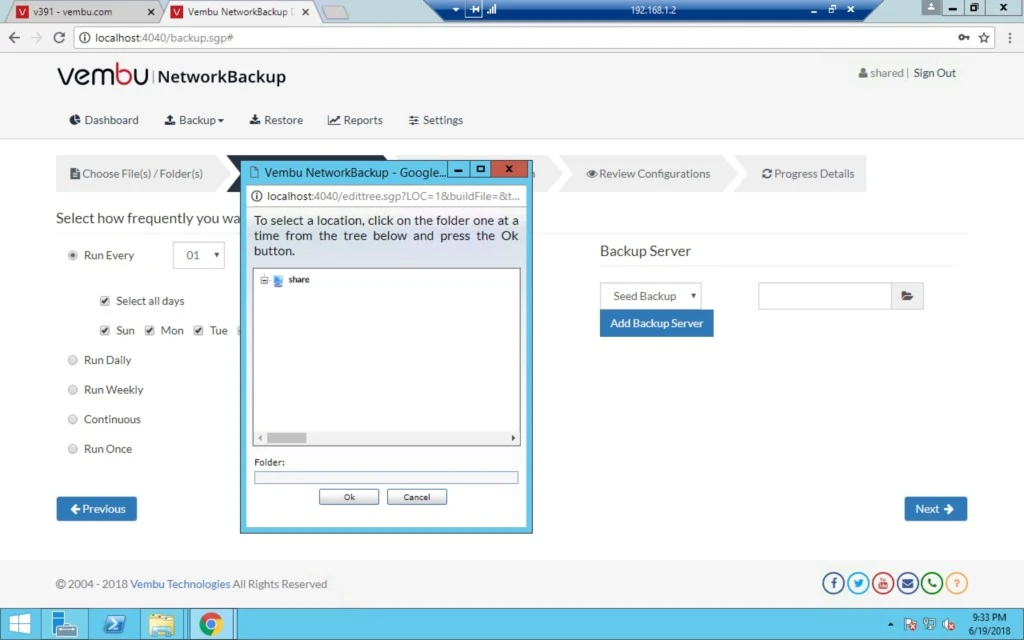
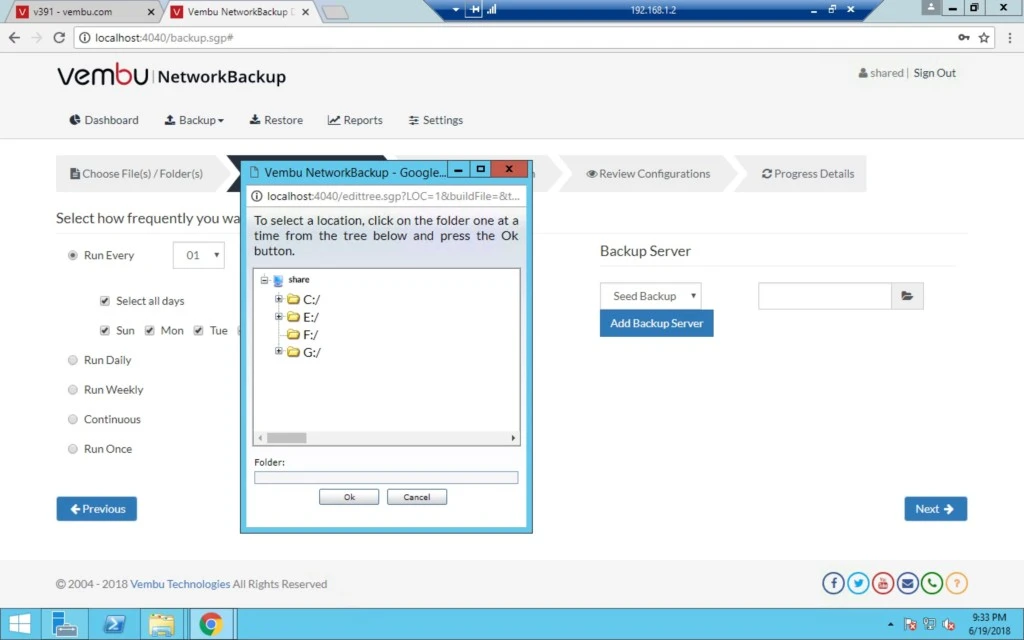
10. Here you can select the drive where you will keep this backup.

Seed backup migration is one of the key features in the Vembu BDR suite, where a user can get the initial full backup data stored locally and get it transferred over a storage medium (HDD/USB) to a backup server.

Advantages:

  • This will be helpful for users with low bandwidth network and large backup size.
  • At most times, reduce bandwidth and time consumed.


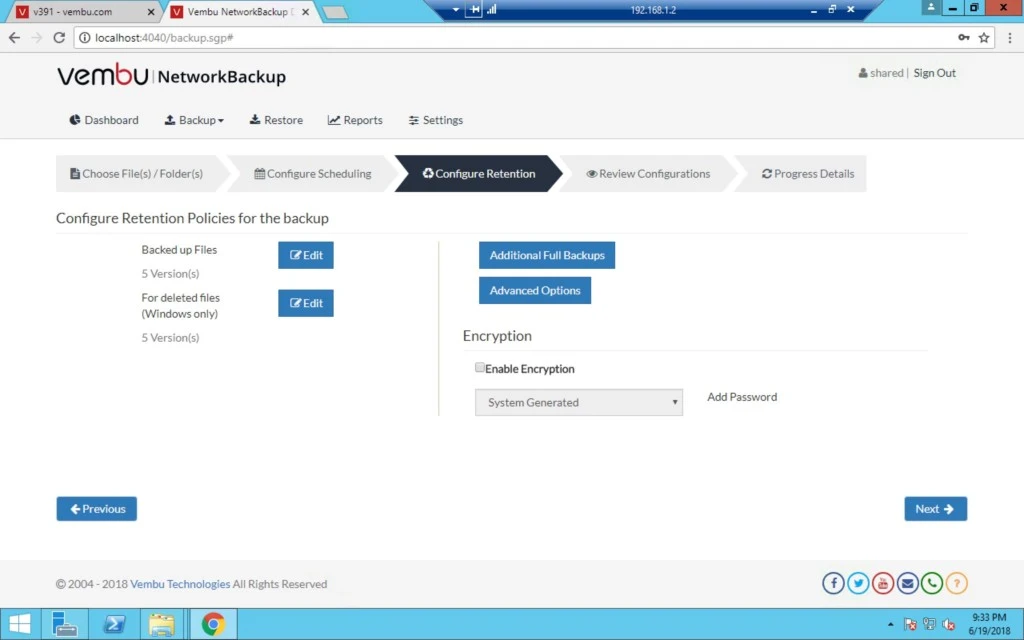
11. Now we have two options on the left-hand side.

A) Backed up files

B) For deleted files


12) Backed up files -> under this you have two options.

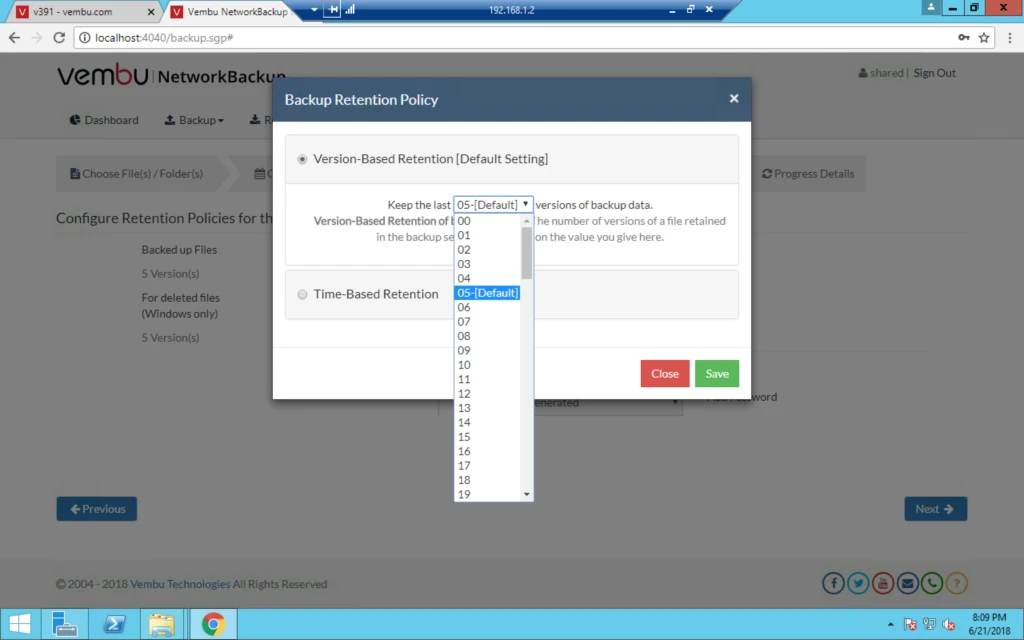
i) Version Based retention: here you can keep up to 99 versions and default is 5.


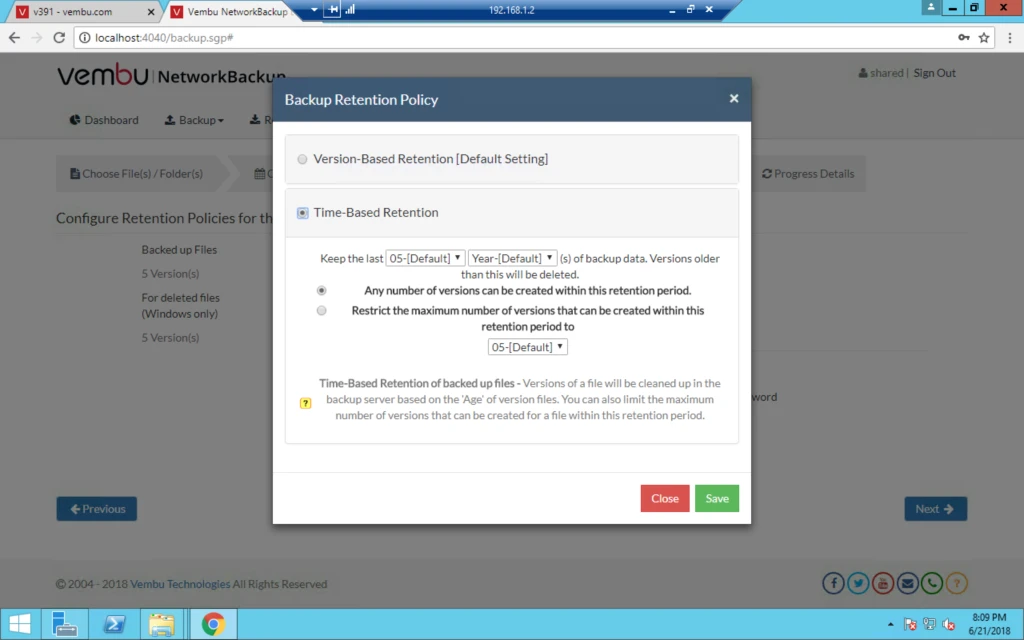
ii) Time-based retention: Maximum up to 10 and default is 5 with Days, Weeks, Months and Year.

Restrict the maximum number of versions that can be created within this retention period to Default 5 and Max 99.


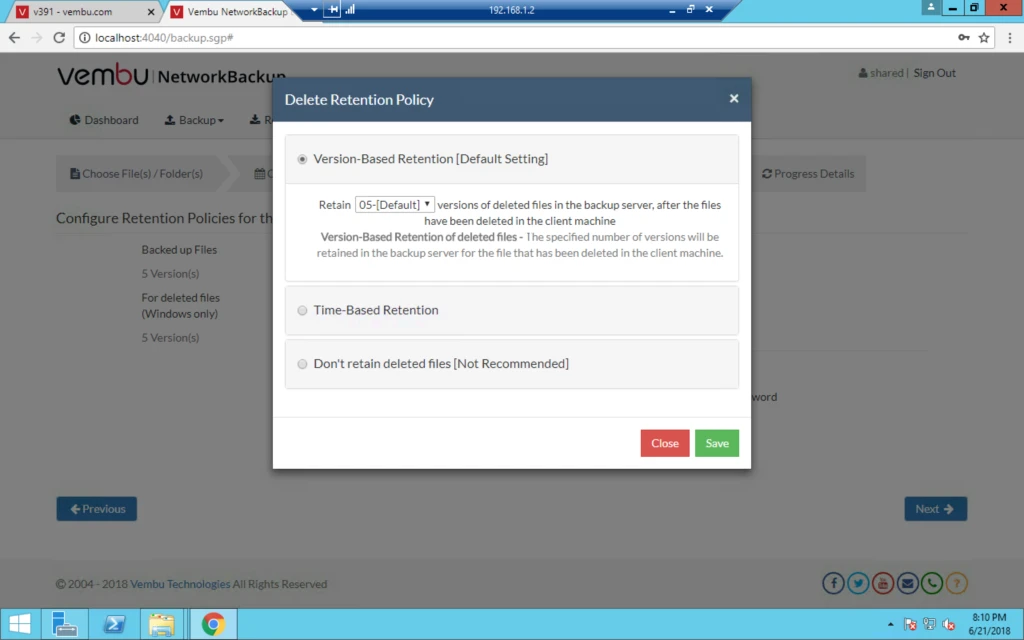
13) Now Deletion Policy :

  1. Version-Based Retention.
  2. Time-Based Retention.
  3. Don’t retain deleted files.


i) Time-Based Retention of deleted files – The versions of a file will be retained for the specified time period after the file has been deleted in the client machine.

ii) Don’t retain deleted files – If files are deleted in the client machine, ALL versions of these files will be deleted from the server as well.

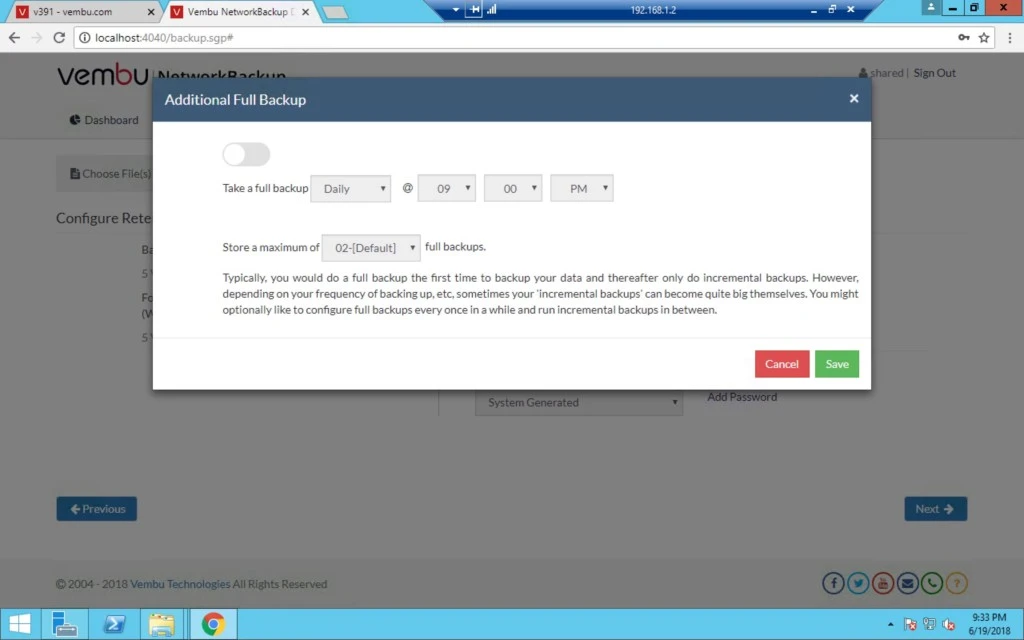
iii) If you click on Additional full backup then you can see below screen.


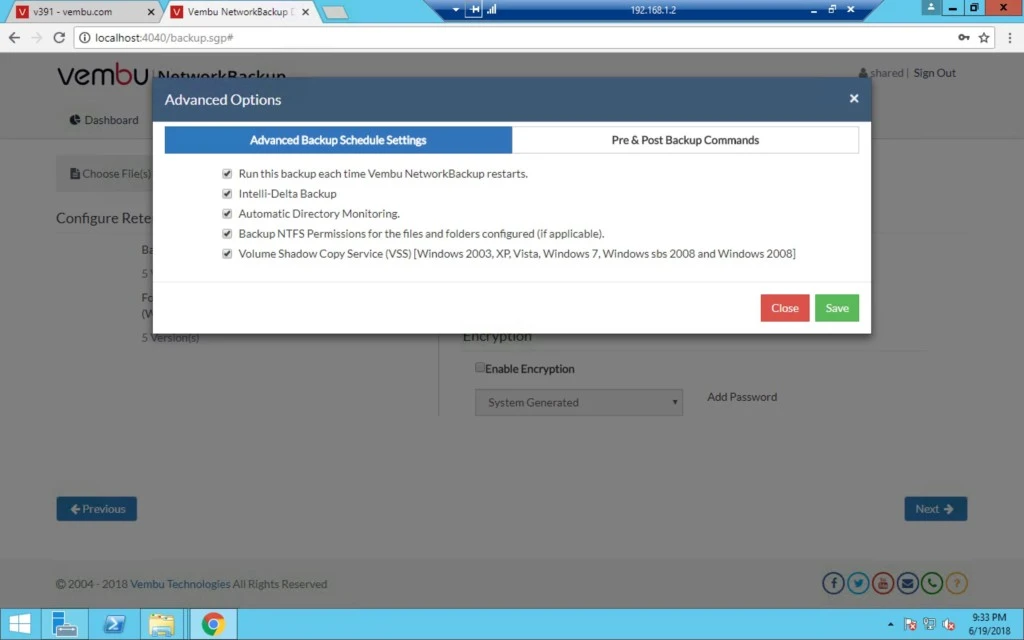
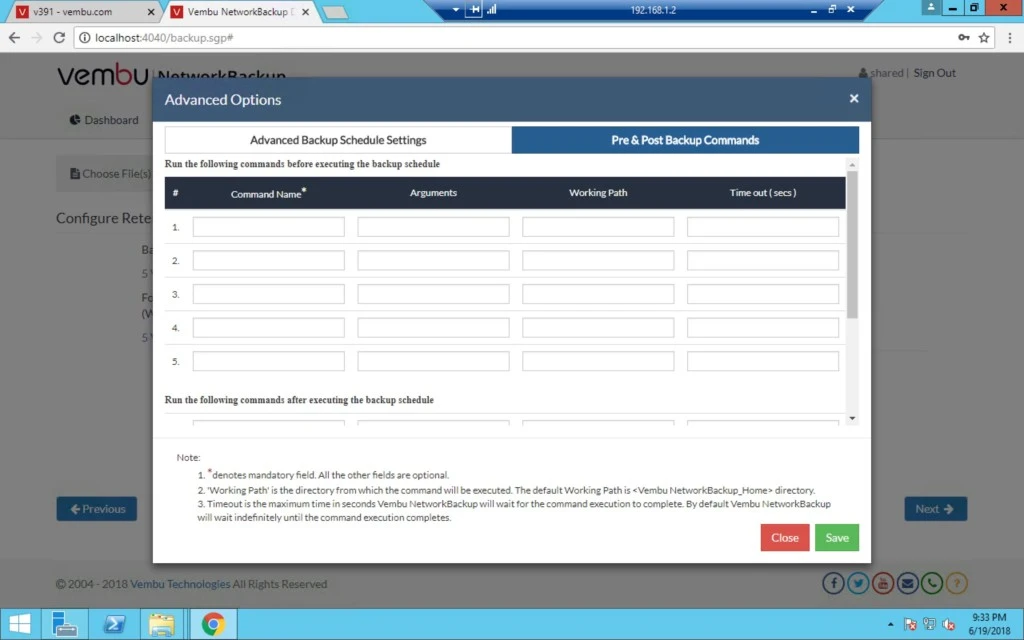
14. In Advanced option, you have two choices :

a) Advanced backup schedule settings

b) Pre & Post backup commands


15. If you have any script or command which you want to run before and after backup then configure here.


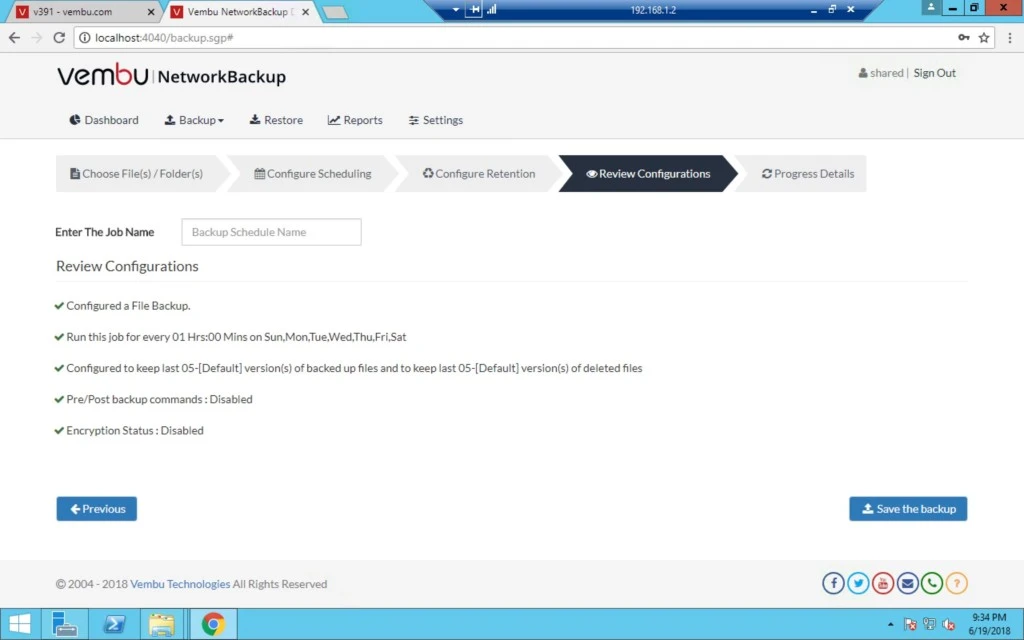
16. Now Type Job name is a mandatory field and after that Save this job.

0

How to install Vembu Network Backup client

Enterprise data is anything but uniform. Which is why your data protection, backup and recovery solution needs to cover the full range of data sources, file types, storage media and backup modes — from snapshots to streaming.

With all that diversity, the last thing you want is to maintain a separate point solution for each distinct backup and recovery requirement.

Vembu File Backup is very convinient,  simple to use and a powerful tool to backup of all your files and folders from your servers and workstations. It eliminates the manual administration overhead for backup and recovery of your files and data from almost all the versions of Windows, Linux and Mac operating systems. Vembu helps in implementing a better policy to manage and protect your data, with flexible scheduling options, you can eliminate unnecessary backups and the inbuilt compression and deduplication which will reduce your storage space consumption of the backup data, that efficiently improves the storage space utilisation.
With the unique incremental backup technology, only the modified data will be alone backed up in the successive backup schedule and the backed up data can be stored in both onsite or cloud location.


Topic outline:

 Download Vembu Network Backup MSI.

 For which OS MSI supported.
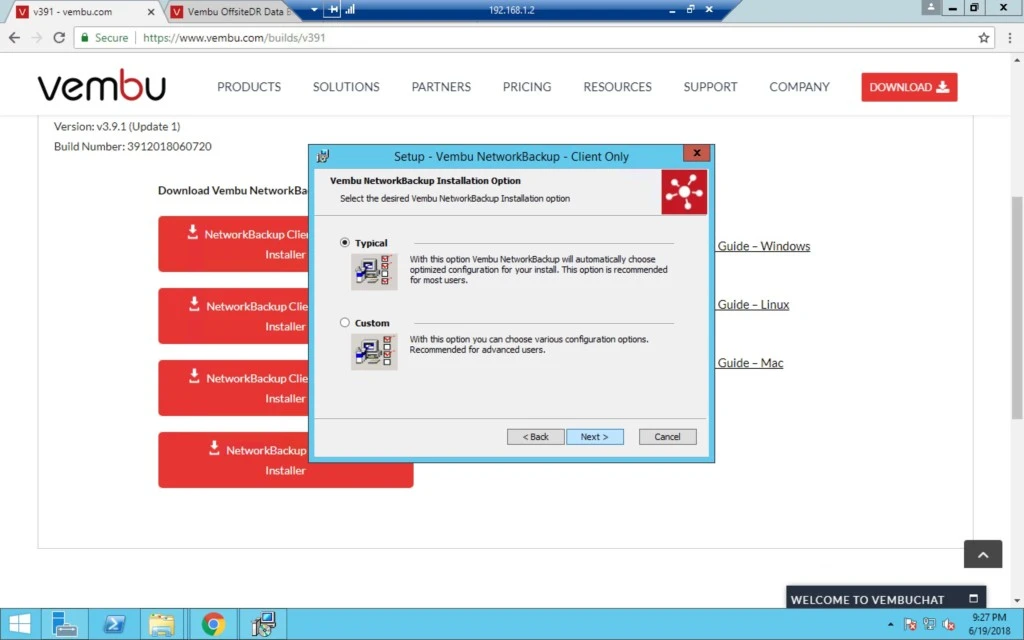
 Installation Options

 Custom Options


1. Login into Windows box and install Network Backup client MSI into that for which you want to protect files.

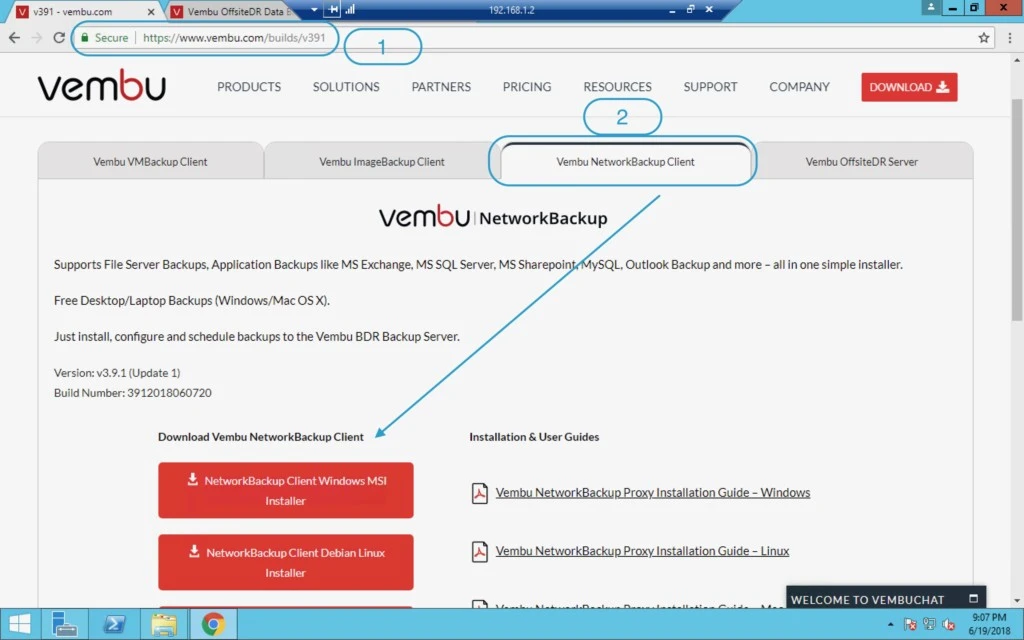
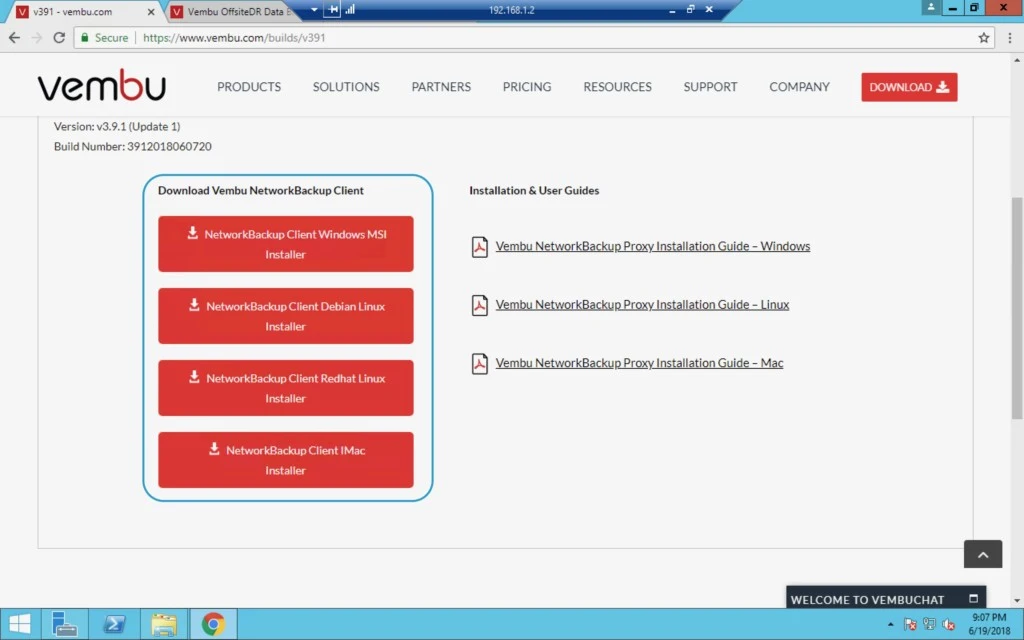
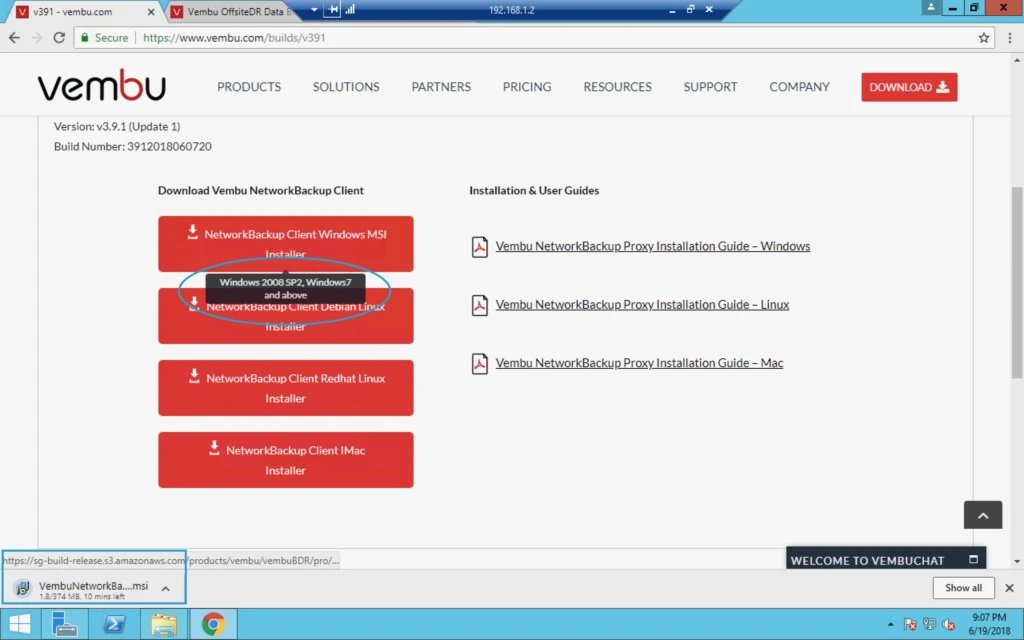
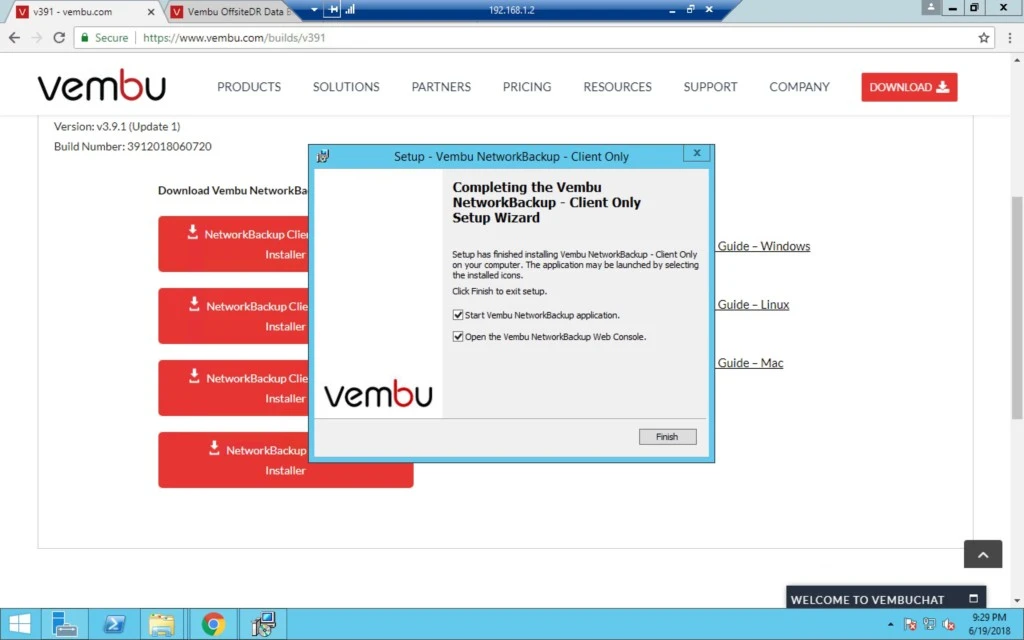
2. Now Go to https://www.vembu.com/builds/v391 and under the third option, you can see all the supported OS MSI.


3. I am downloading the Windows MSI and will install on destination server which i want to protect.


4. When you are downloading MSI please check the supported OS for the same.


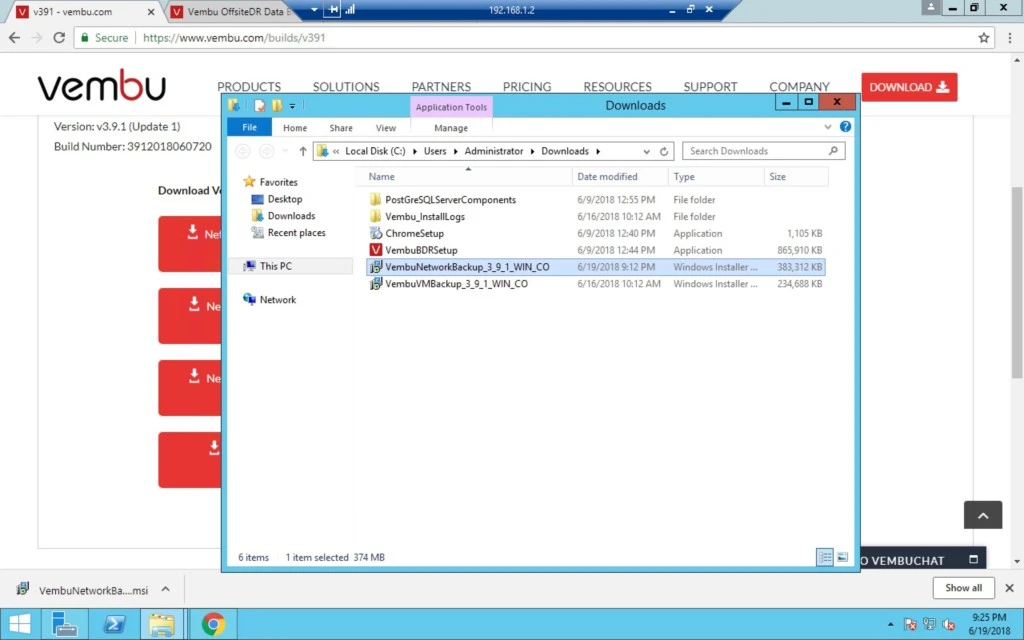
5. Once it’s downloaded then double click and follow the instruction.


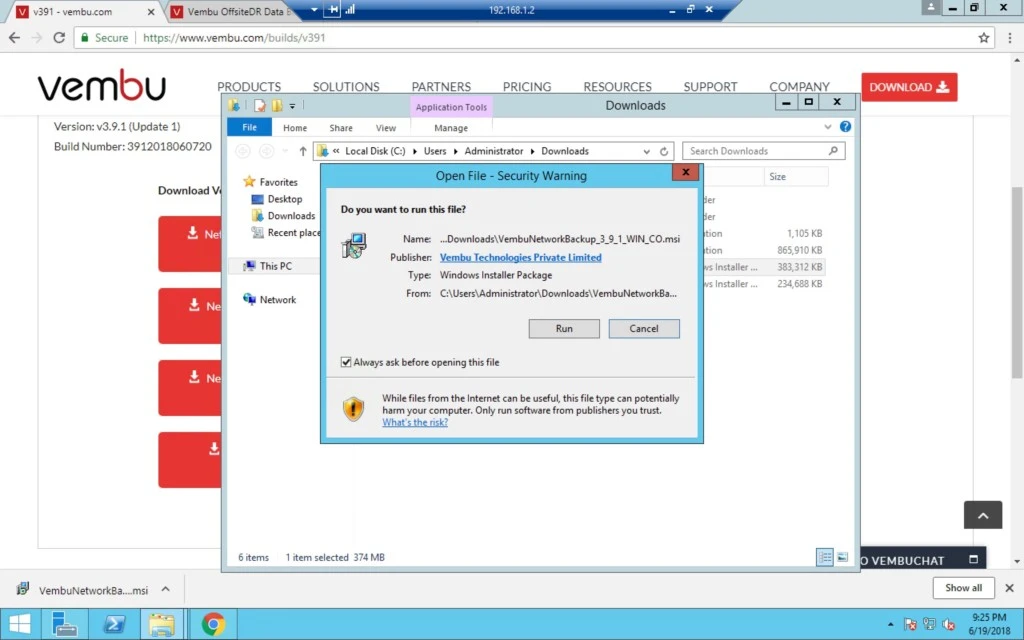
6. Click on Run.


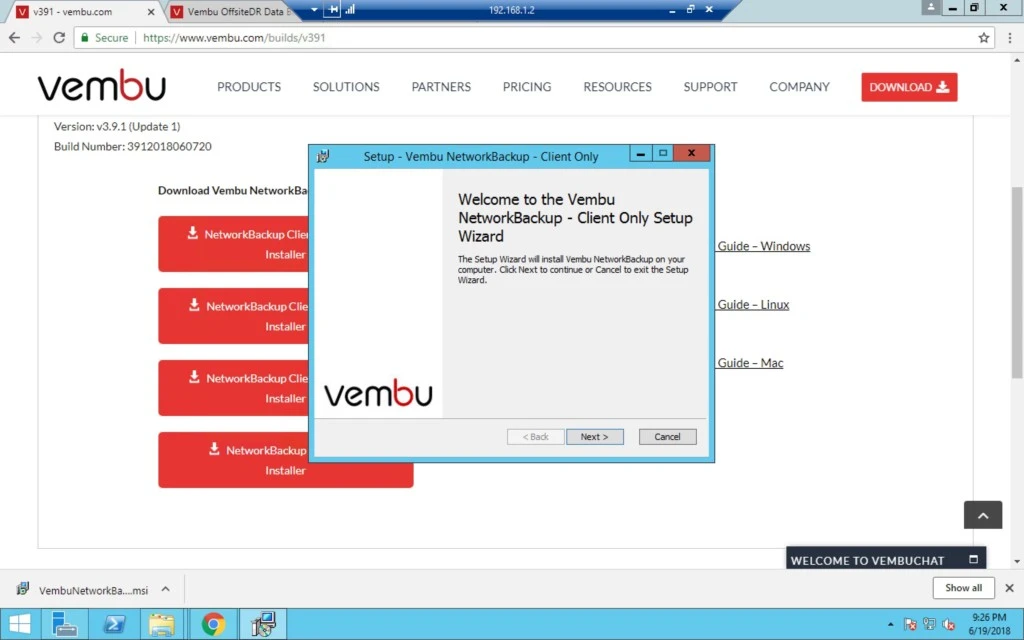
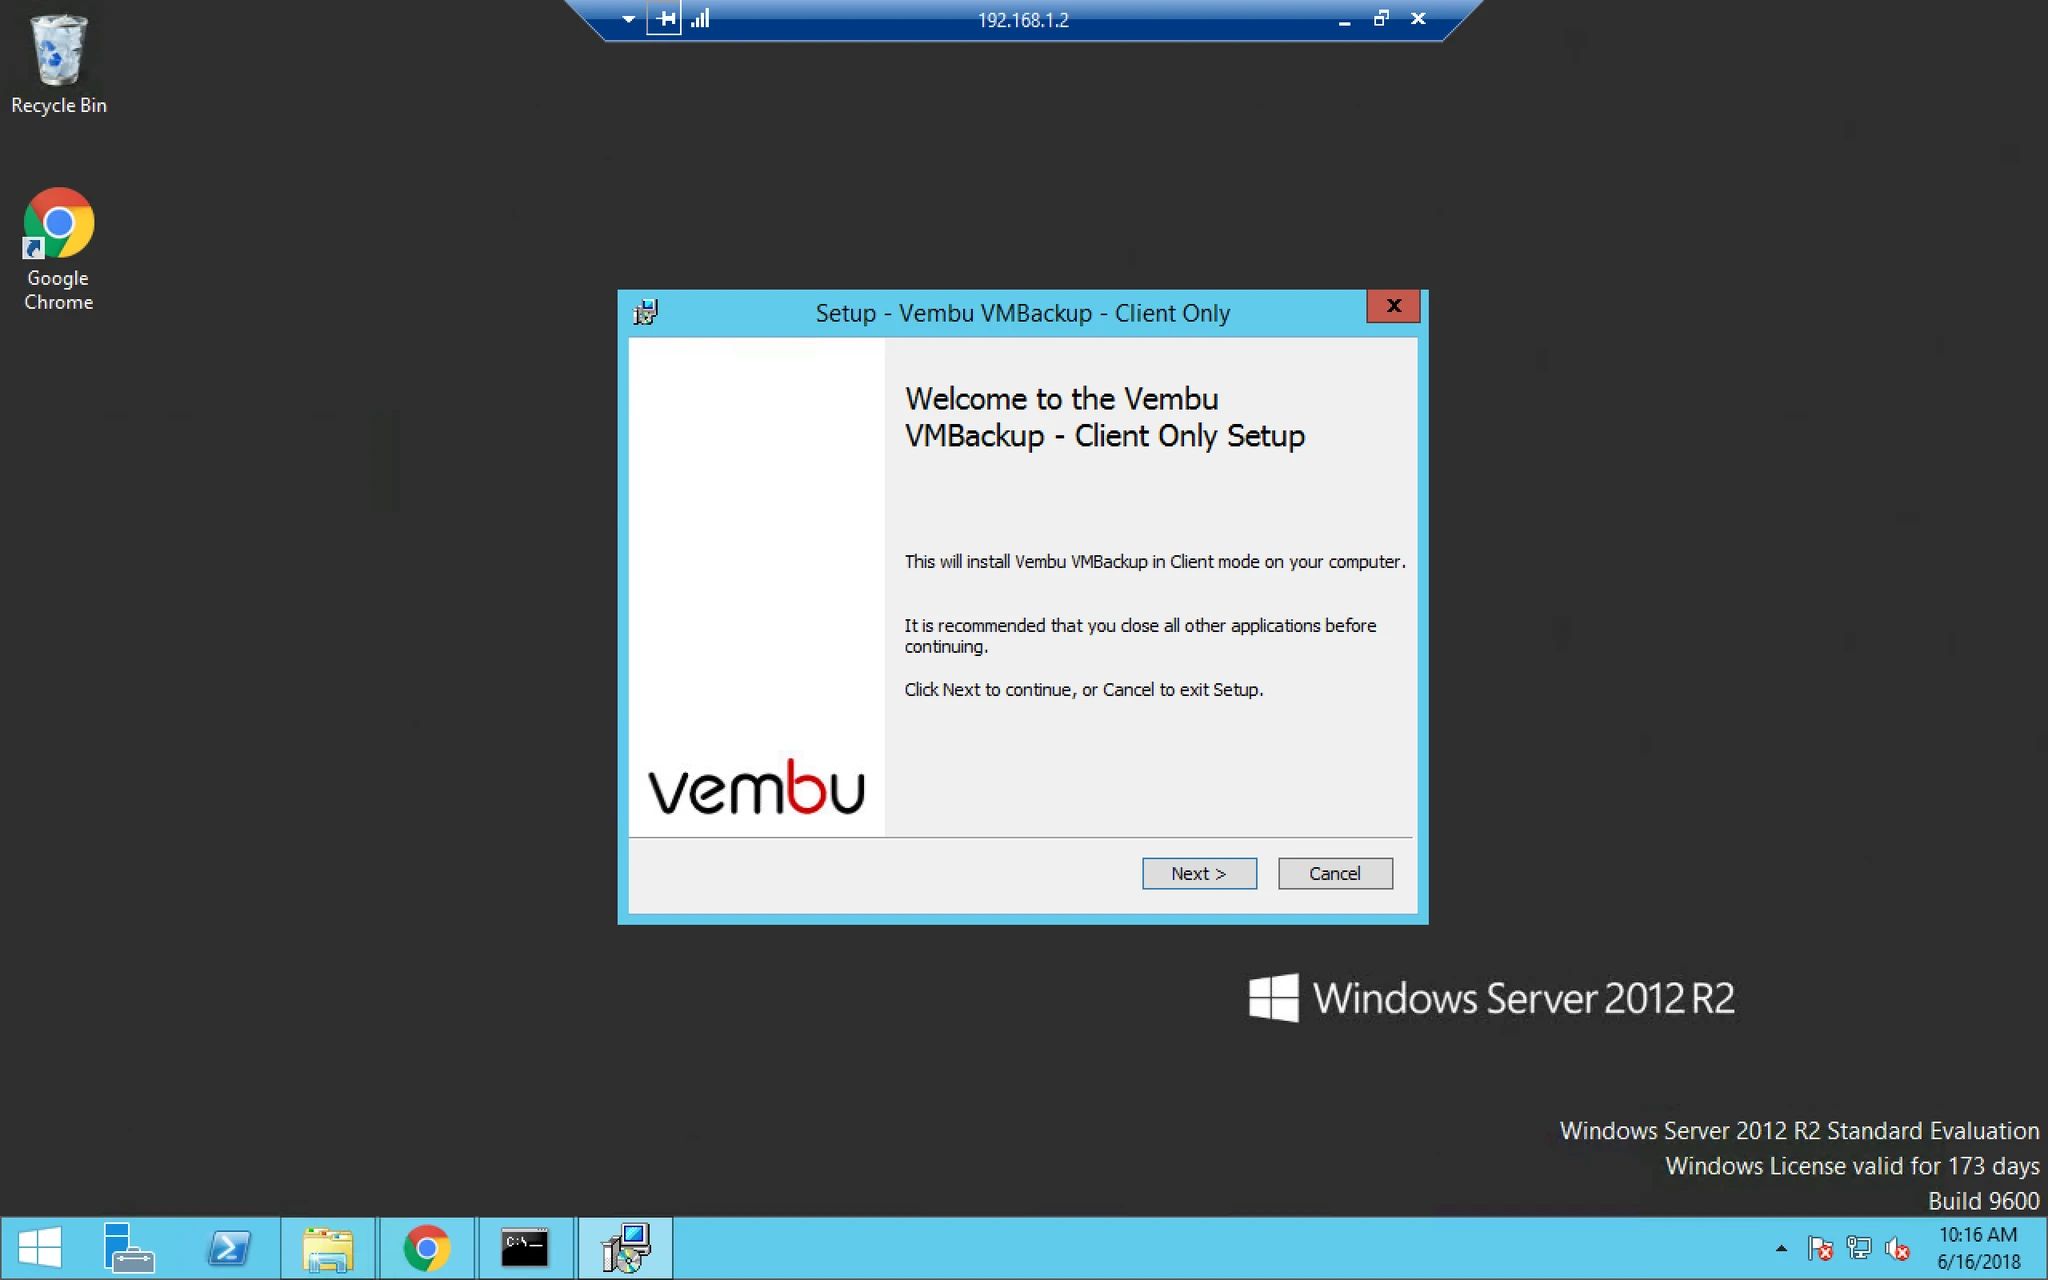
7. Click on Next.

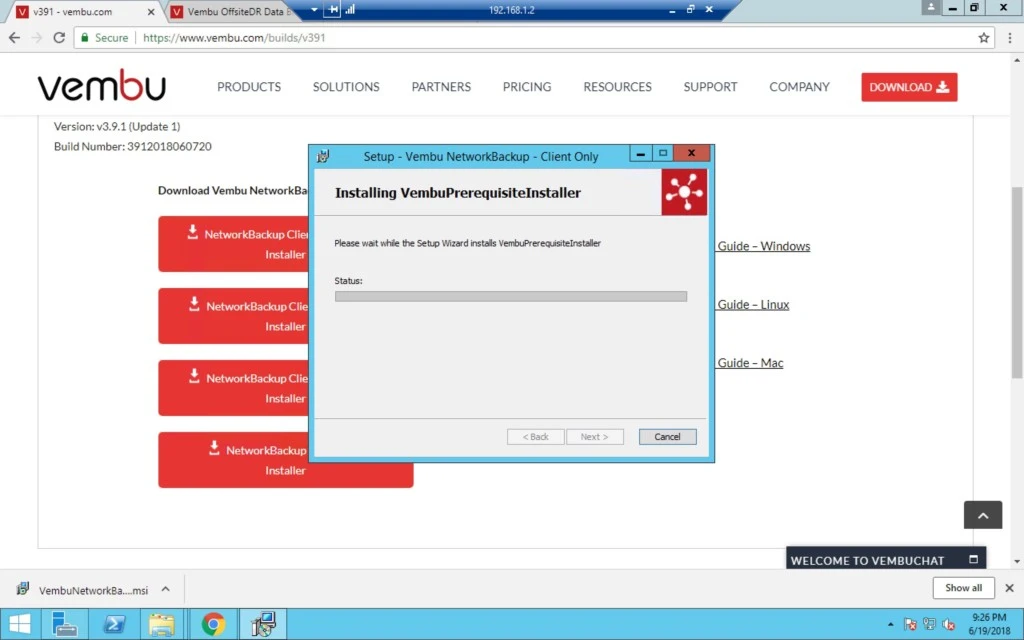
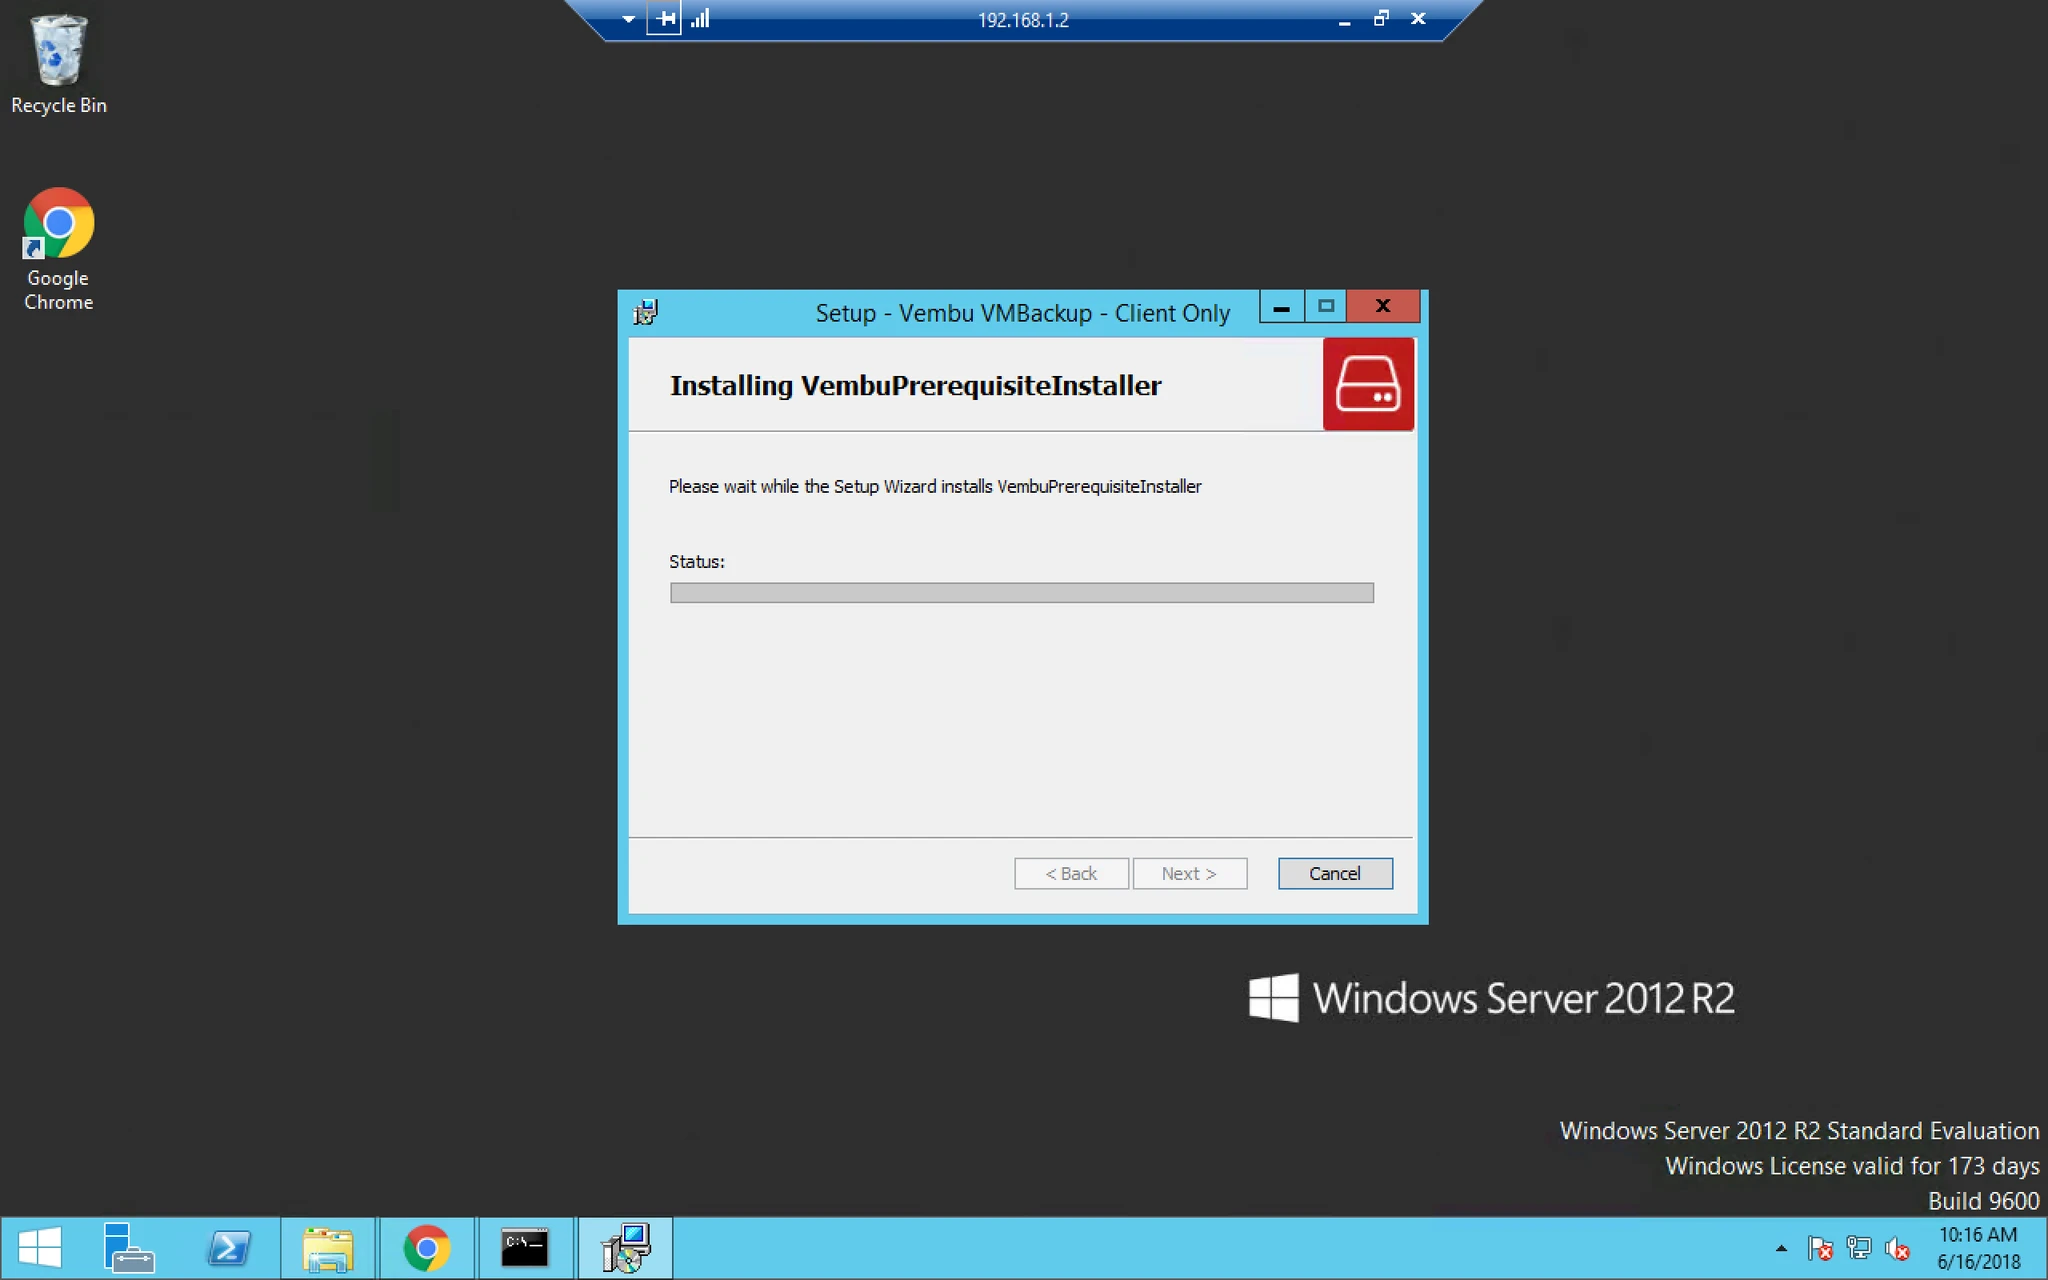
8. Now it started installing the installer.


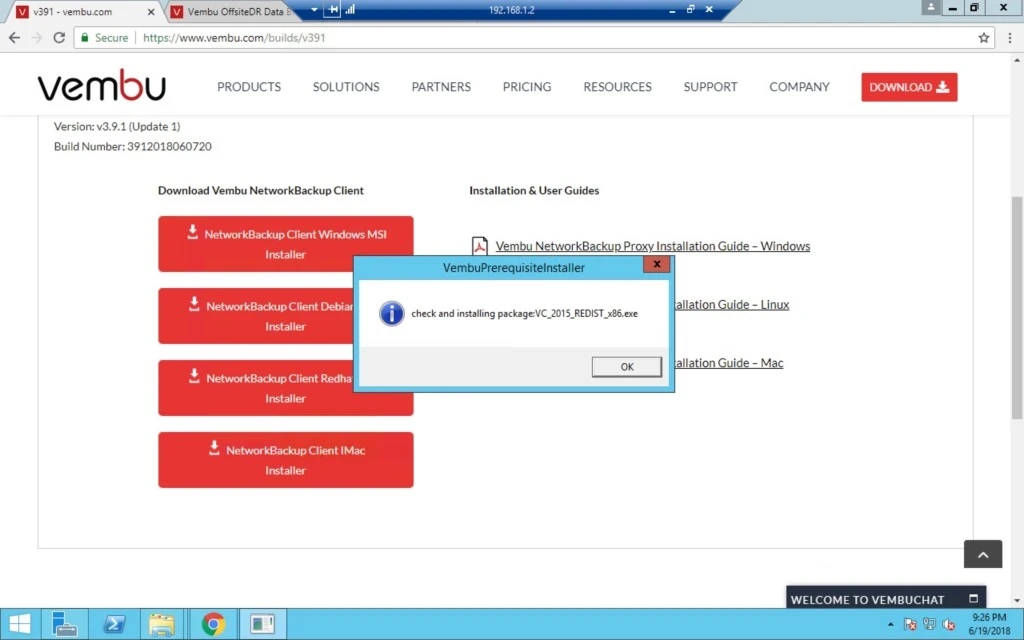
9. It will first check the pre-requisites package and Click Ok.


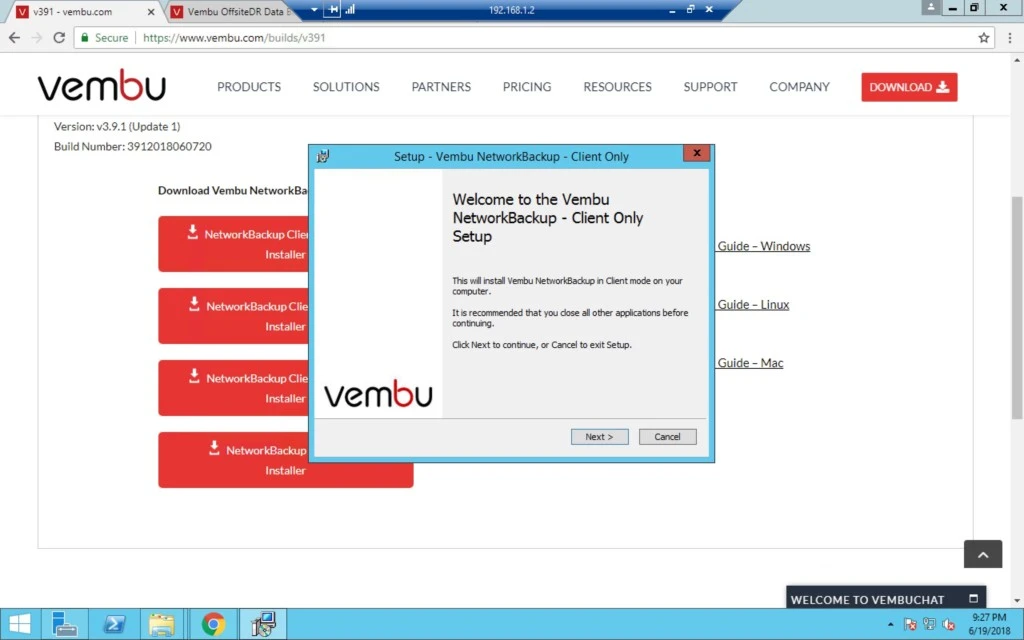
10. Click on Next.


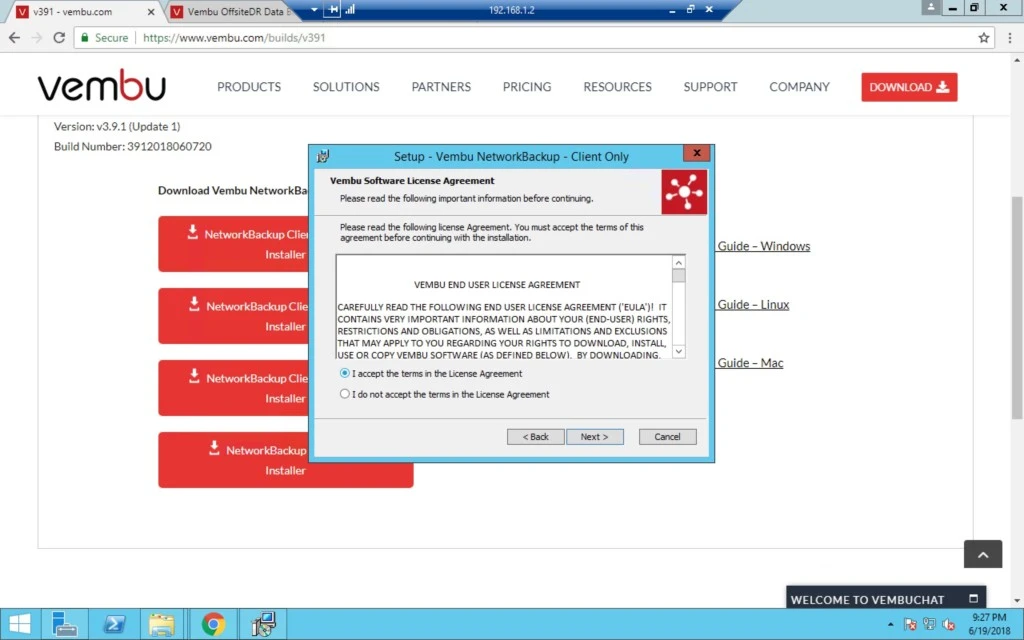
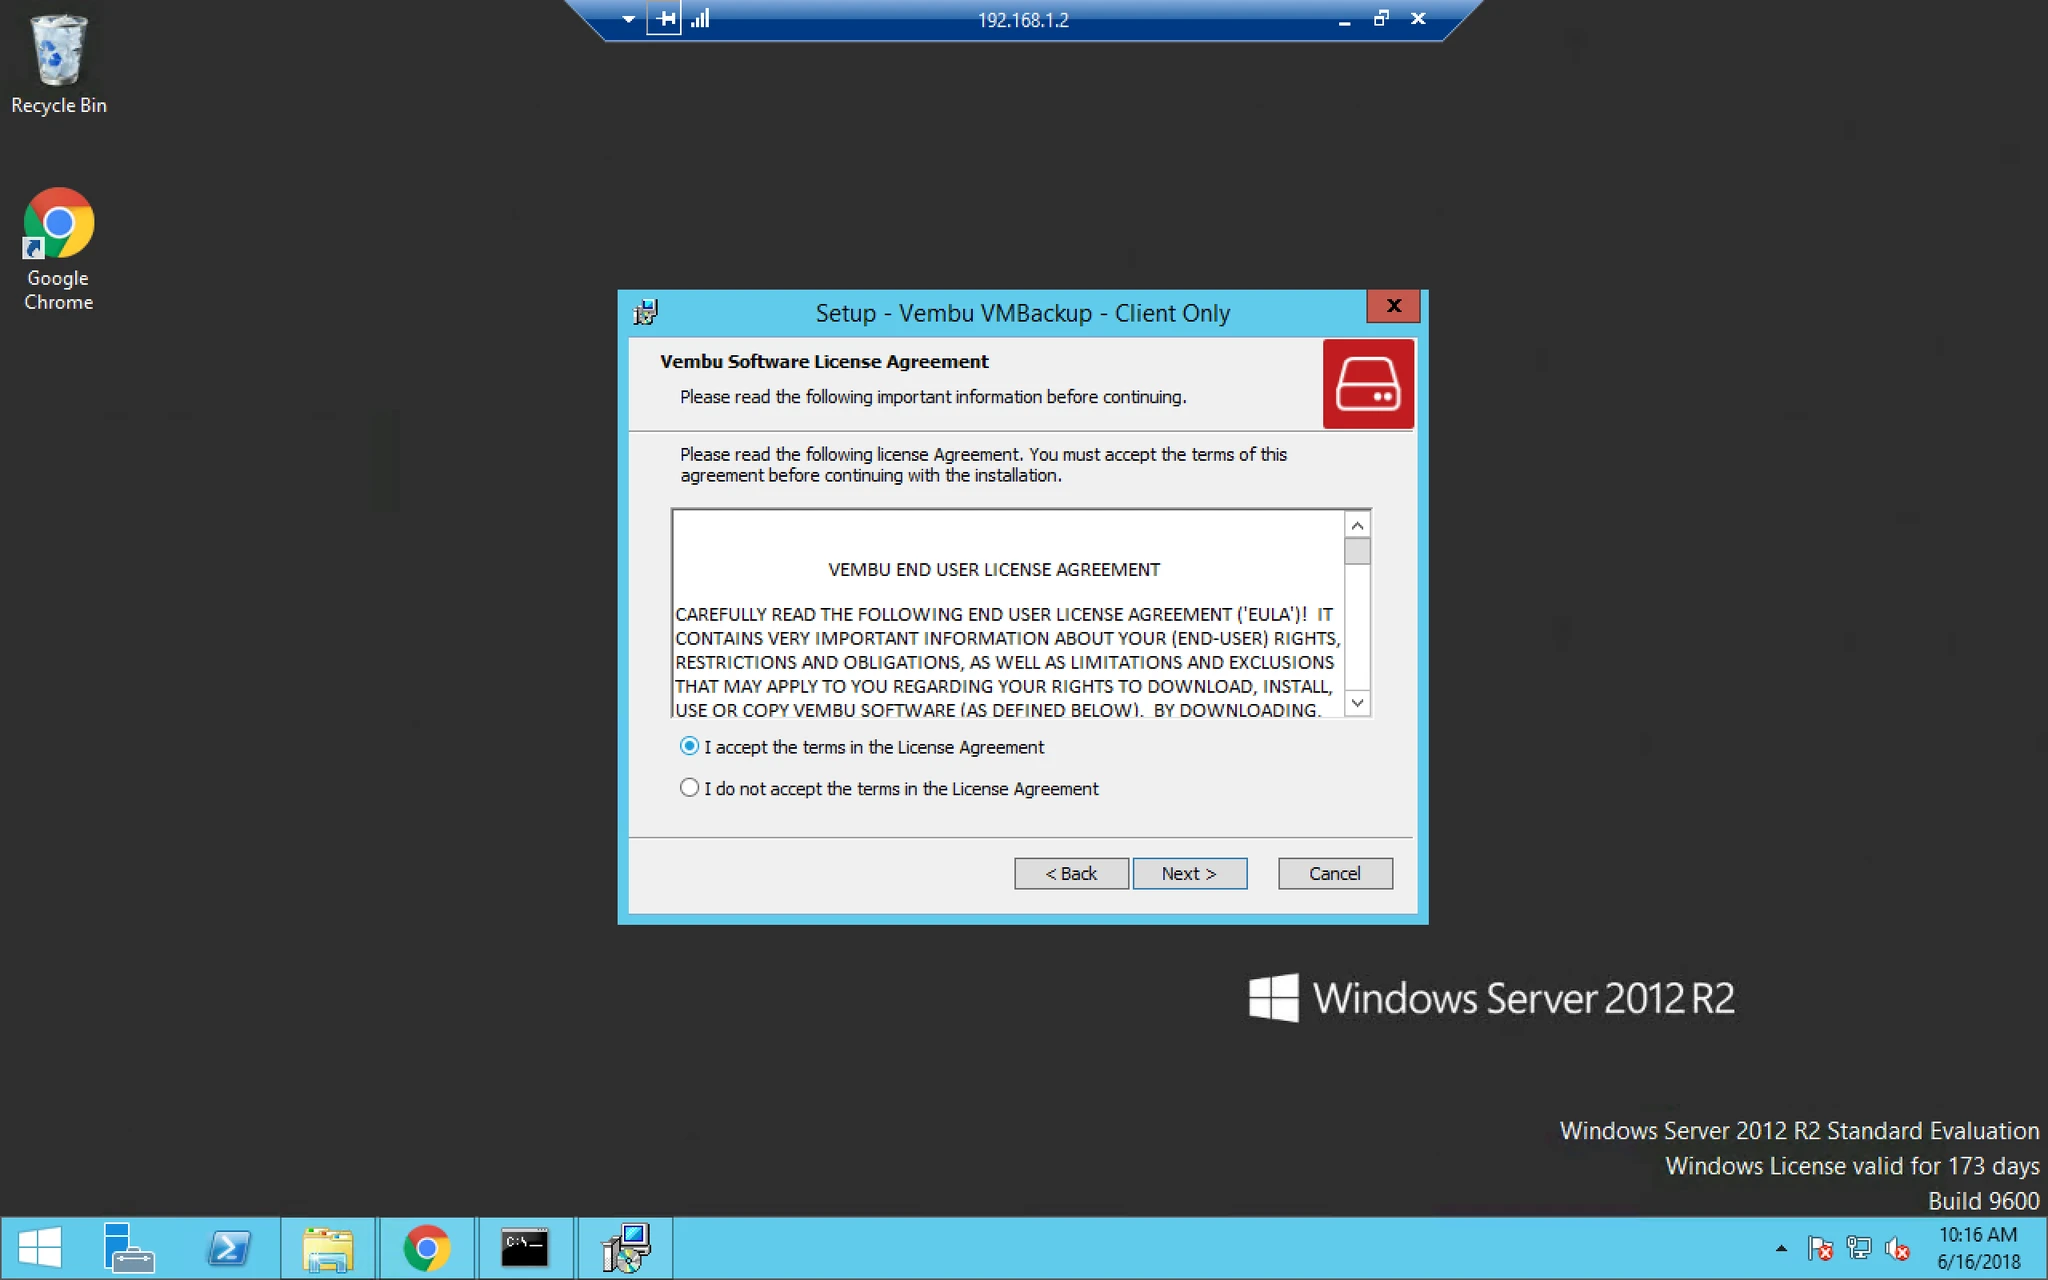
11. Accept End User License Agreement > click Next.


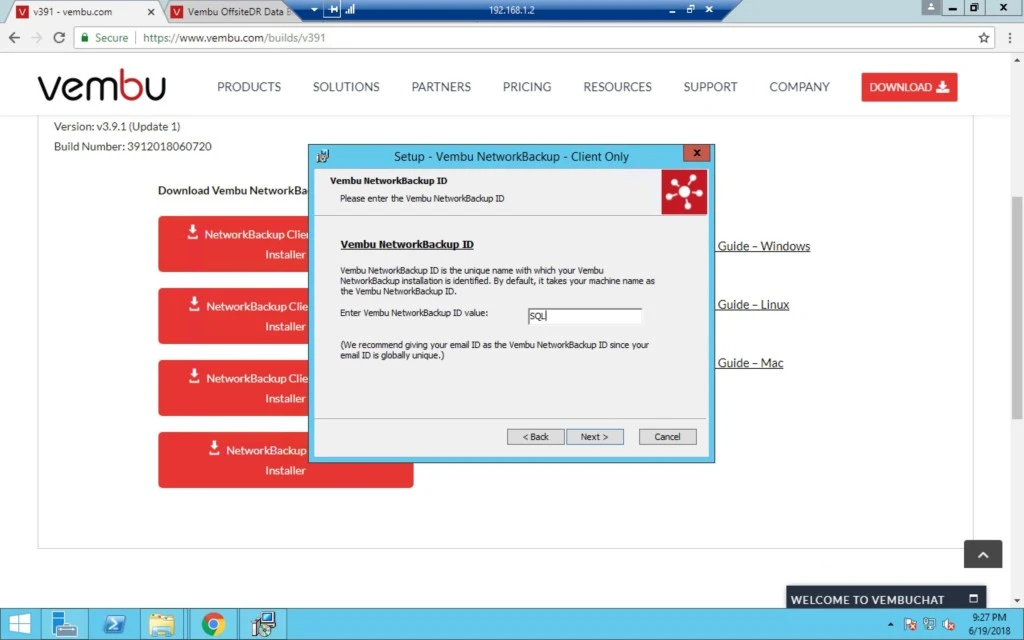
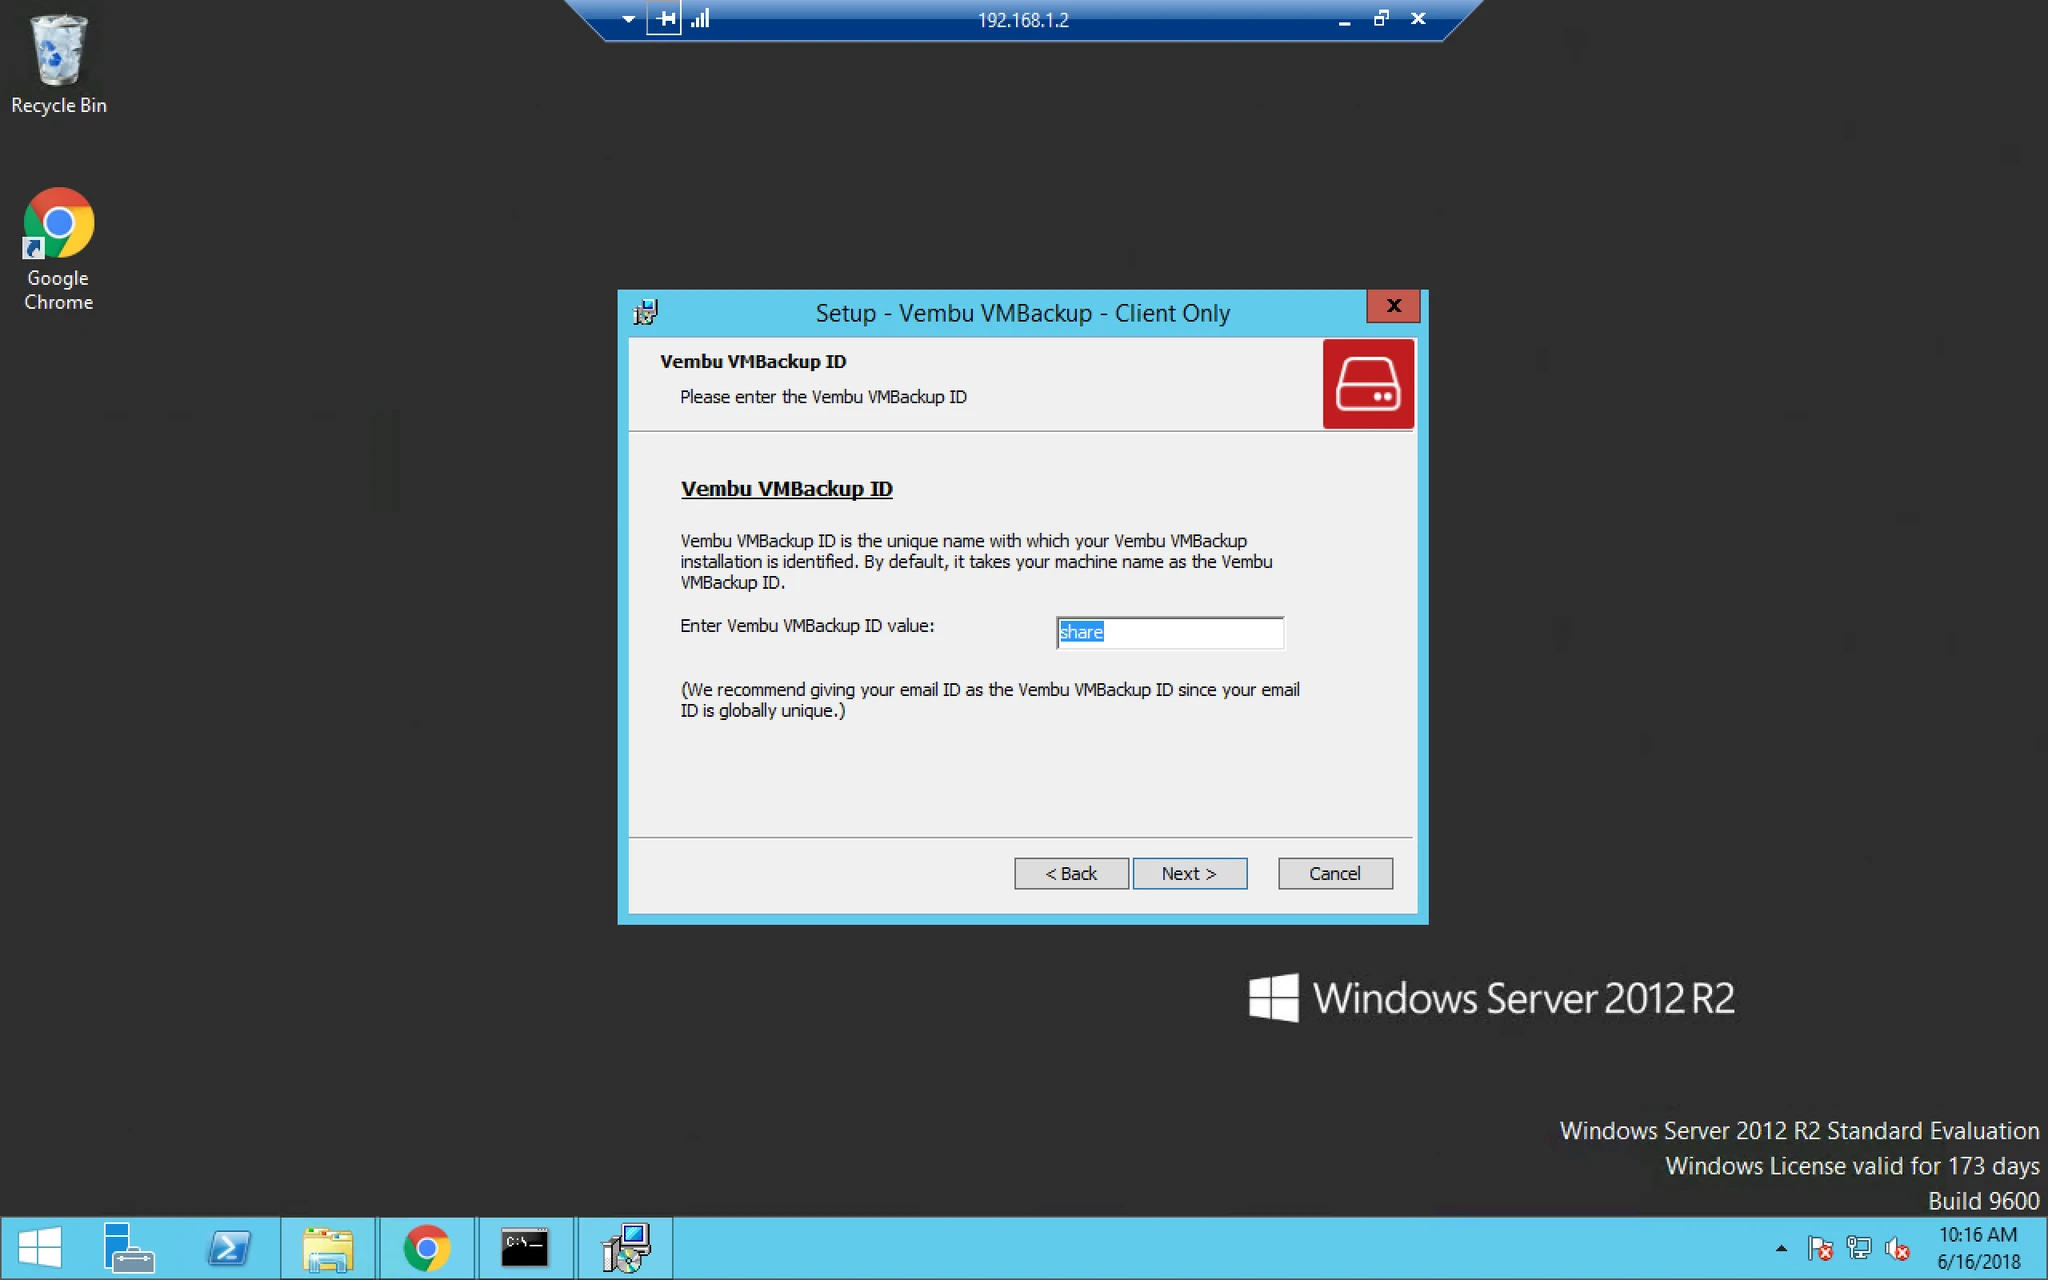
12. Here you can choose the default value for computer name or can provide IP address too.


13. Here you have two options:

a) Typical with default settings.

b) Custom where you can change username or password as per your requirement.


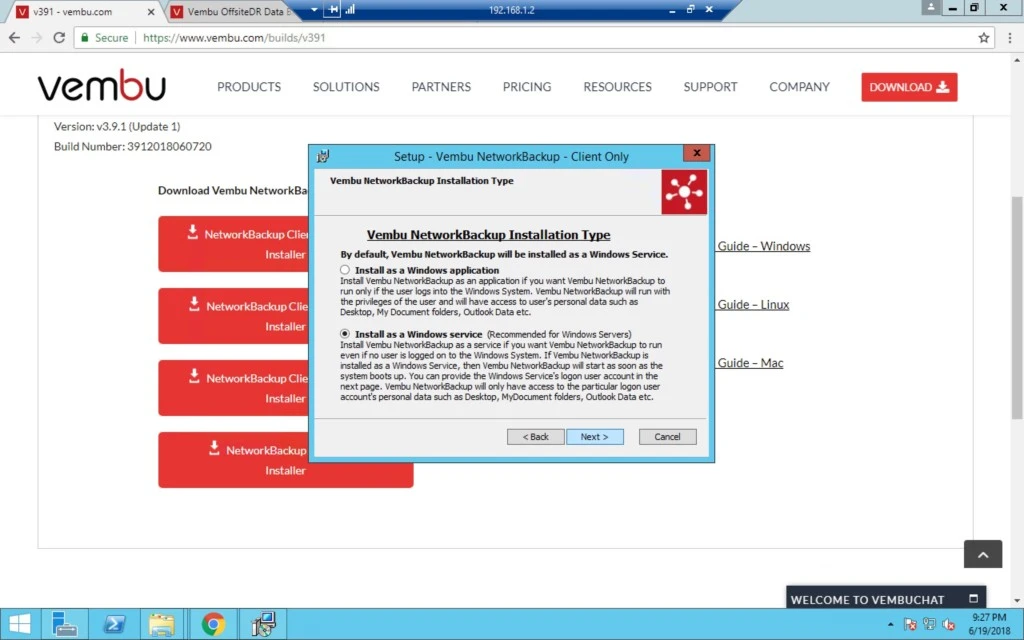
14. When you select Custom it will give you two options given below:

a) Install as a Windows application.

b) Install as a Windows service (this is recommended for windows server).


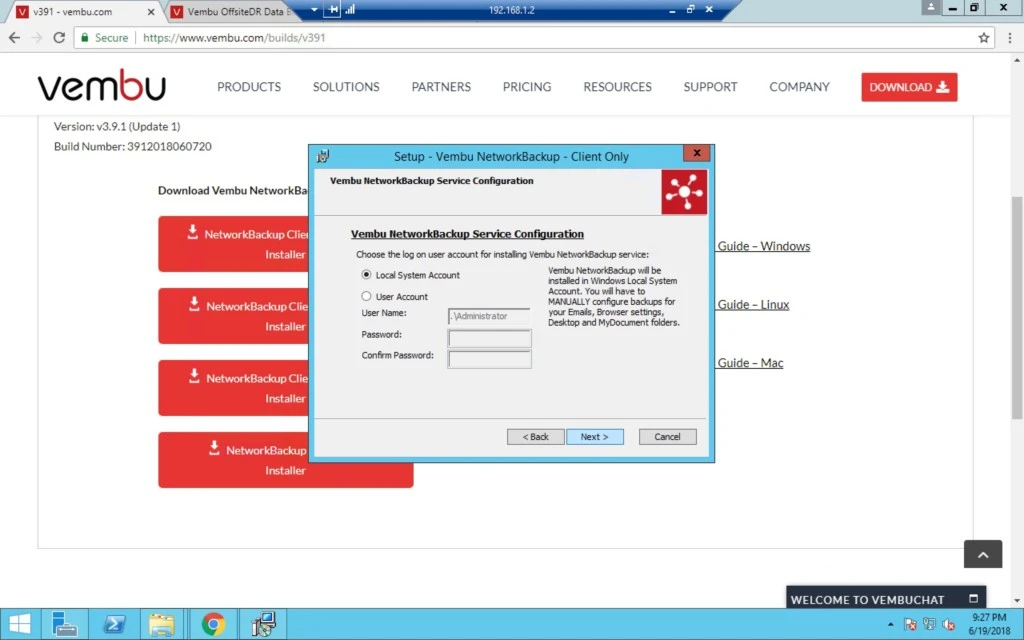
15. Here you can either use a local user or  you can create you own account.


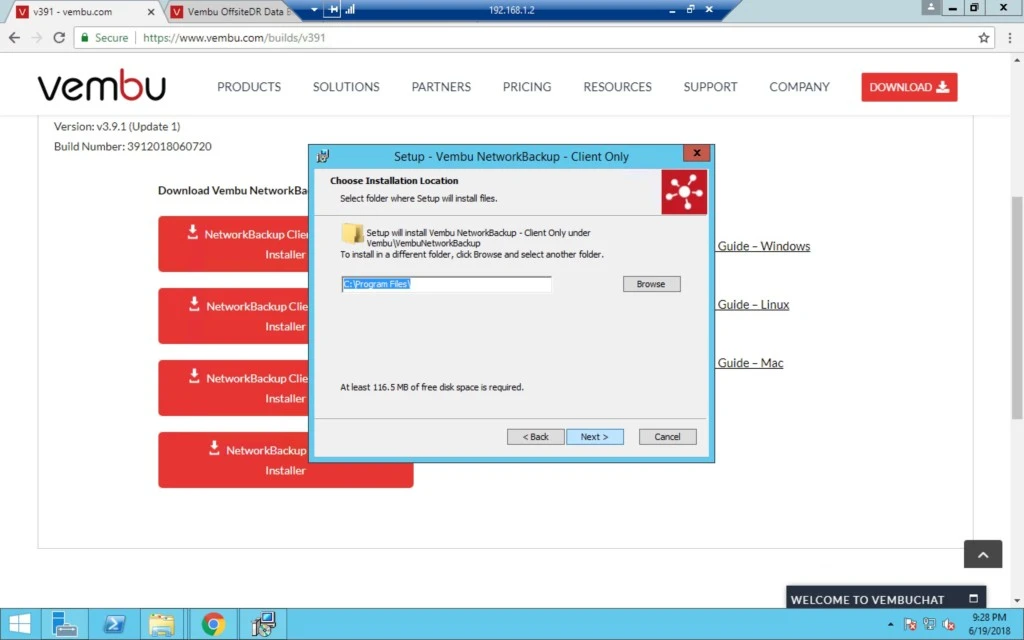
16. If you want to install in default directory then click next otherwise click on browse and select different directory but Create a folder with Program Files before that in the selected drive.


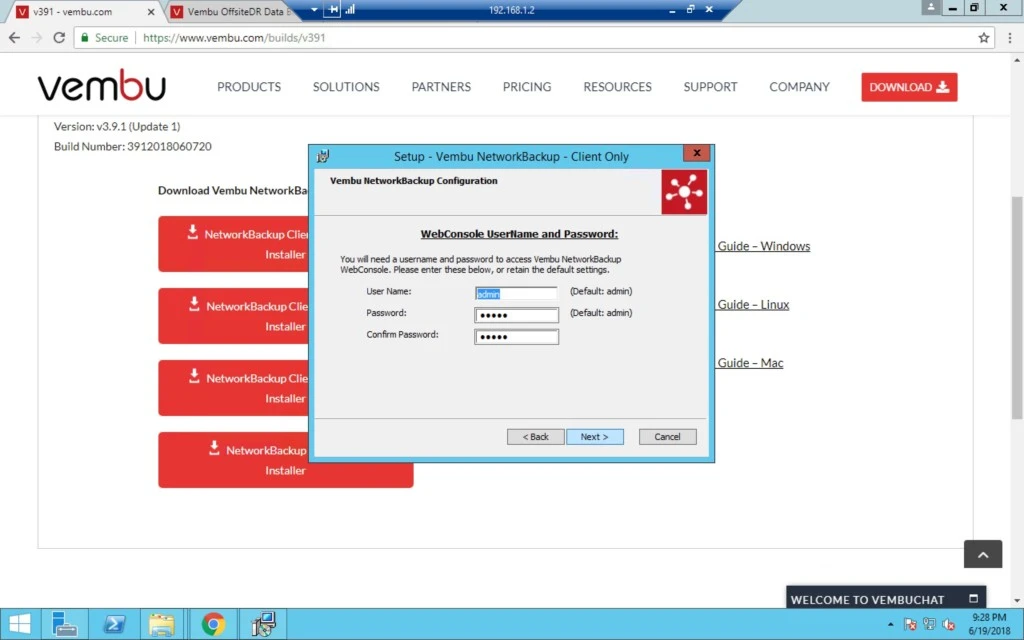
17. For WebConsole you can set the user name and password.


18. Click on Next.


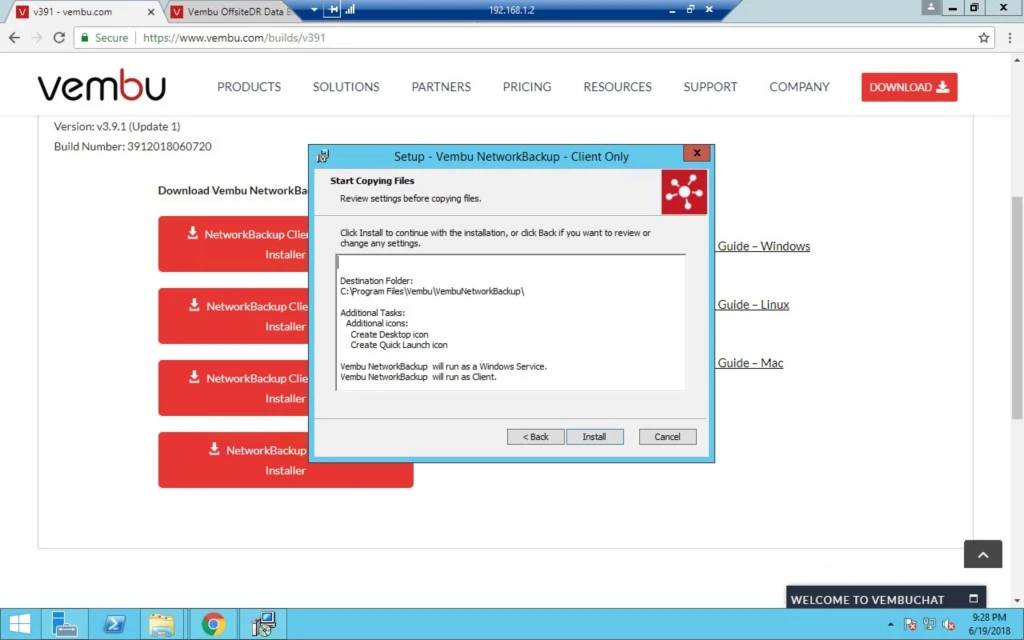
19. Now Review the summary and if everything is ok then click install otherwise click back and change the settings.


20. Click Finish and it will open up a web browser with Vembu Network backup console.

0

How to set Vembu BDR Reports Options

In this article we will be discussing about reporting, email options. if anything goes wrong like Failed jobs or other information.

It’s very important that in backup, every job must complete successfully because when you are looking to restore in case of any disaster failure or testing purpose, that time you can not give any excuse for backup job not been completed successfully.

Reporting or getting an email notification for a backup job of being successfully completed is the best option here to identify whether everything is working fine or if there any problem in any backup job. So likewise if the backup job is not completed due to any failure or error, you will get notified and instantly you can take action to rectify that error or at least you can inform client about the error.

Lets see what all options do we have in the respect of reporting and backup jobs:

Topic Outlines:

Reporting.

Backup job status.

Schedule email status of a job.

Filters


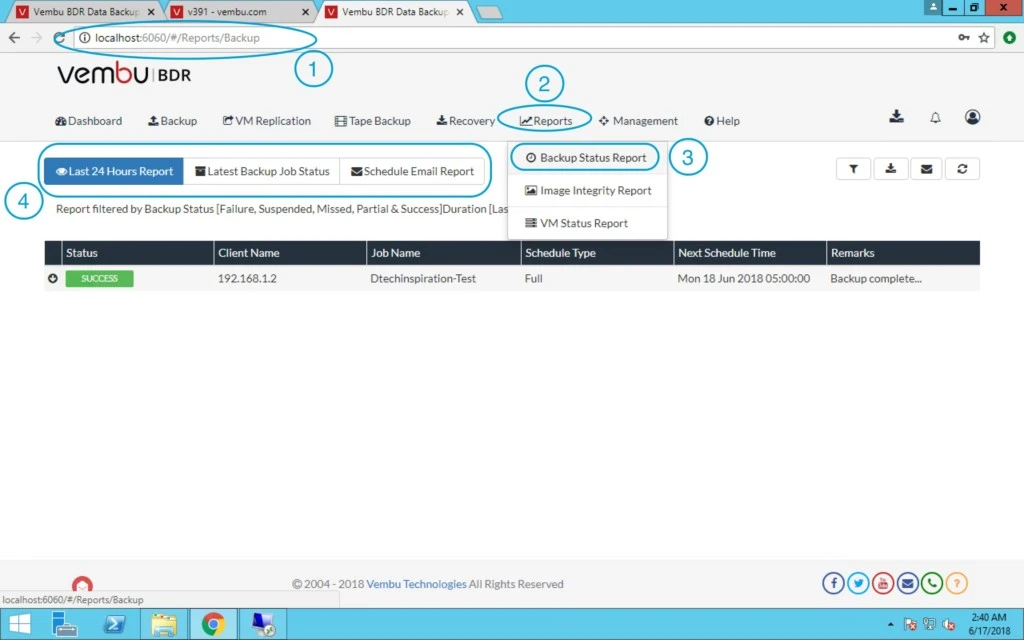
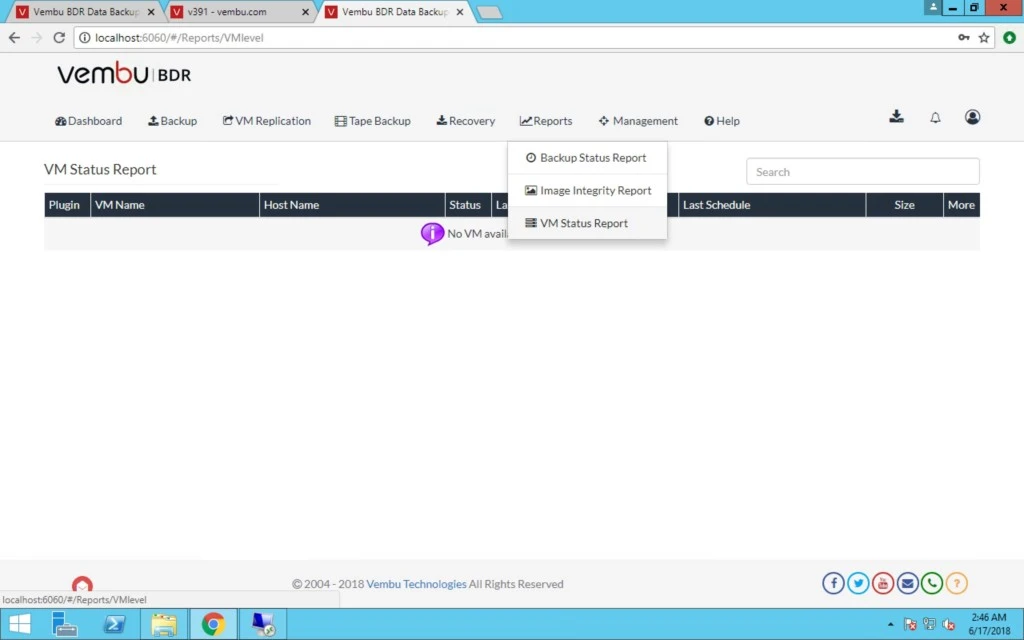
Now Login into Vembu BDR server and go to > Reports tab > Backup Status Report.

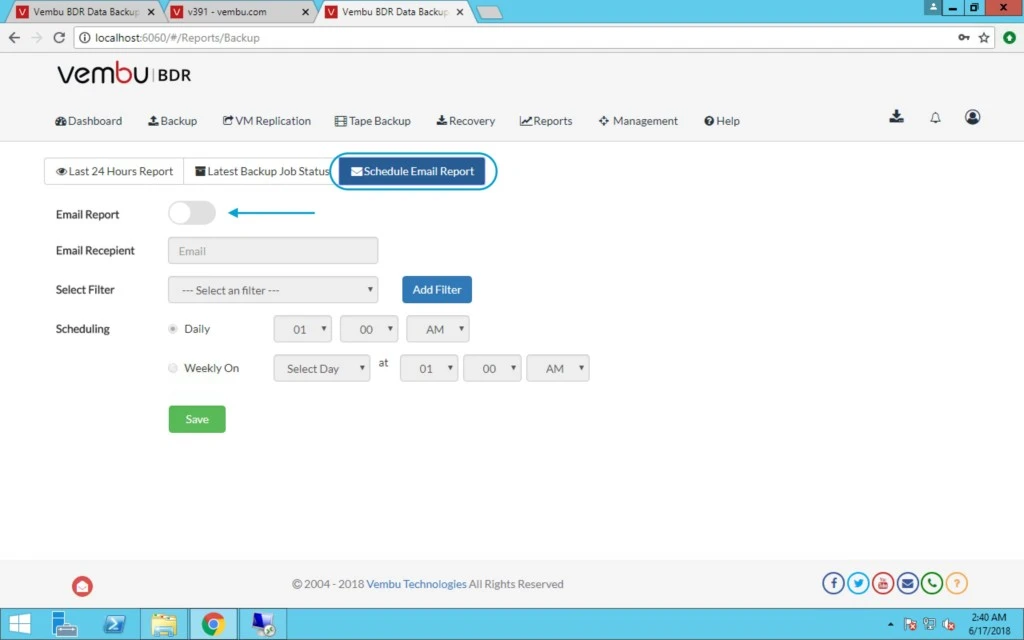
Here you will get three tabs > 1. Last 24 Hours Report 2. Latest Backup Job Status 3. Schedule Email Report.

Under First tab you can see last 24 hours job status whether that was a Failure, suspended, Missed, Partial & Success. This more efficient because if you are taking backups of any server then you need to know the job status.

There is an option also available for downloading this report which is in “csv” format.


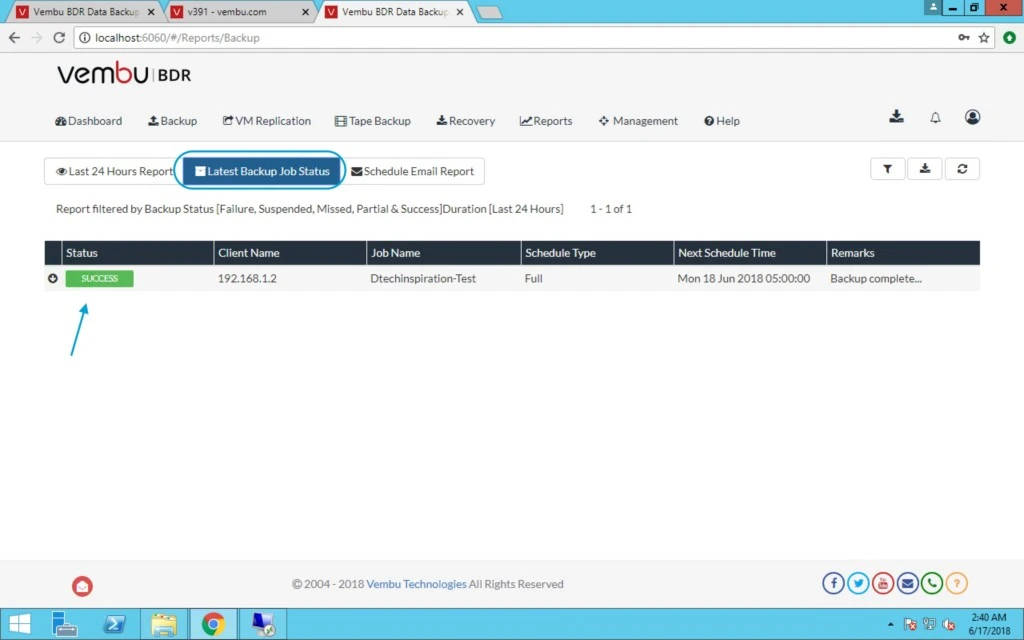
Now Under Second Tab > Latest Backup Job Status where we can check recent job finished.
 

You can also use filter option for a quick search of a Failure, suspended, Missed, Partial & Success Job status.


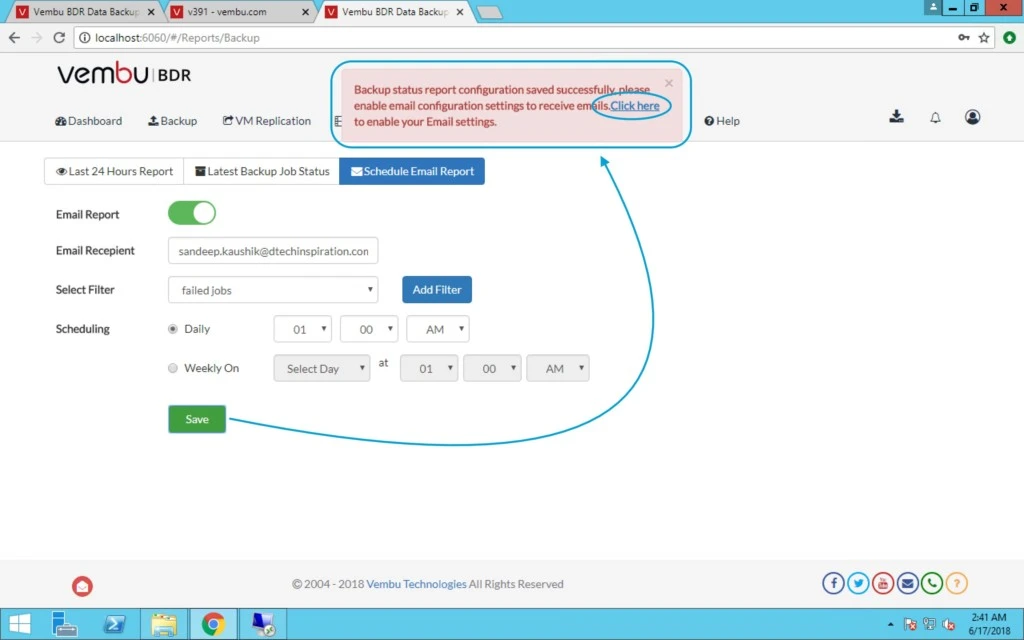
You can also use Email report option where you can receive this report via email for that you have to enable SMTP (see below) and need to enable this option.


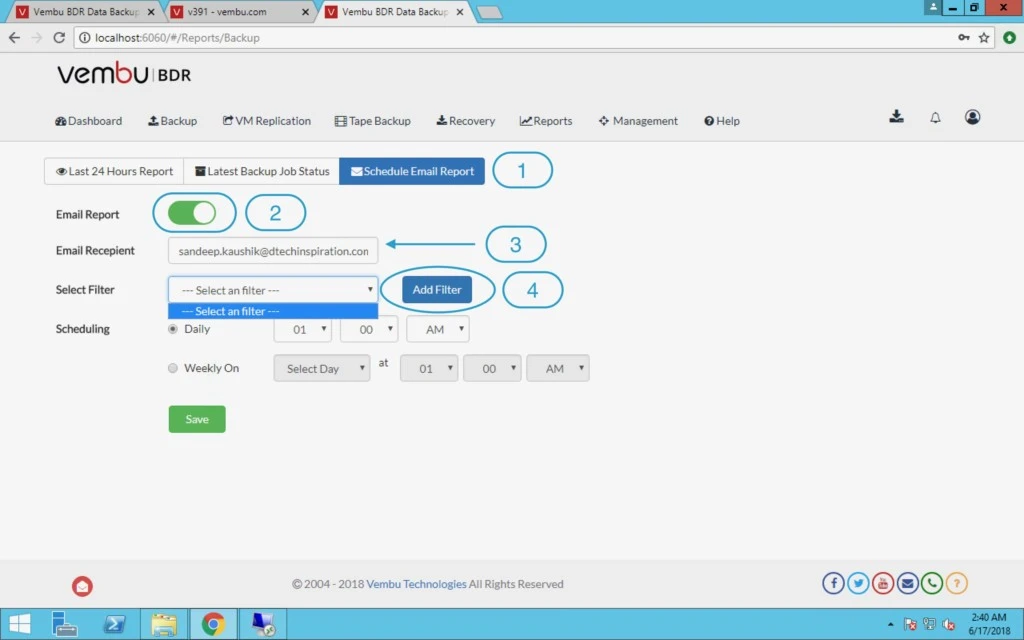
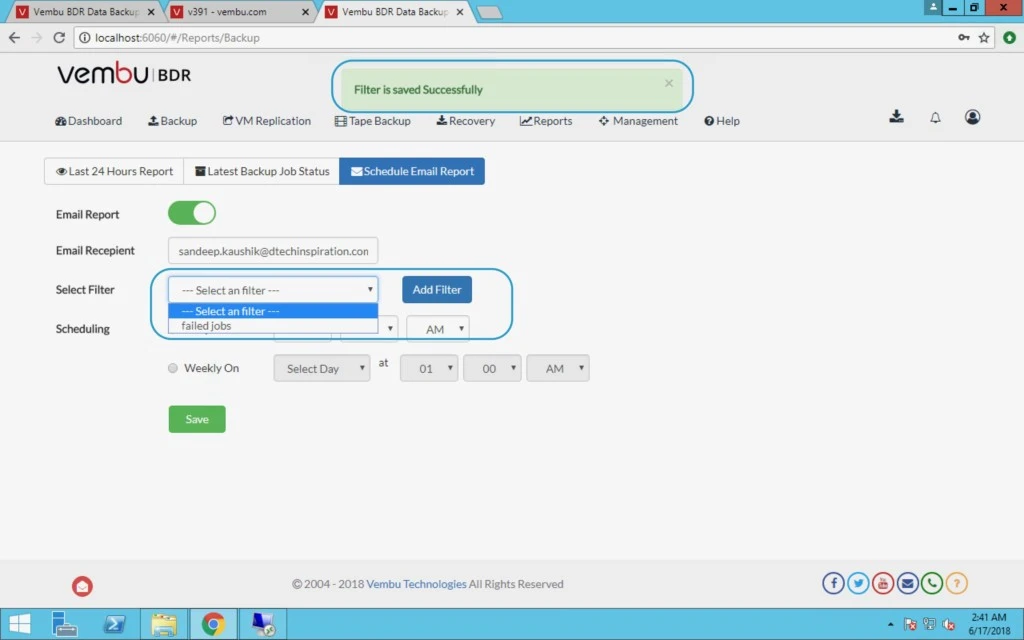
First you need to enable this Email report option and after that provide recipient email address. Here you can also use Filter which depends on parameter as mentioned below

Parameters are: Failure, suspended, Missed, Partial & Success

Report will be emailed on the basis of parameters.

We can also schedule the email notification on daily basis or weekly basis.


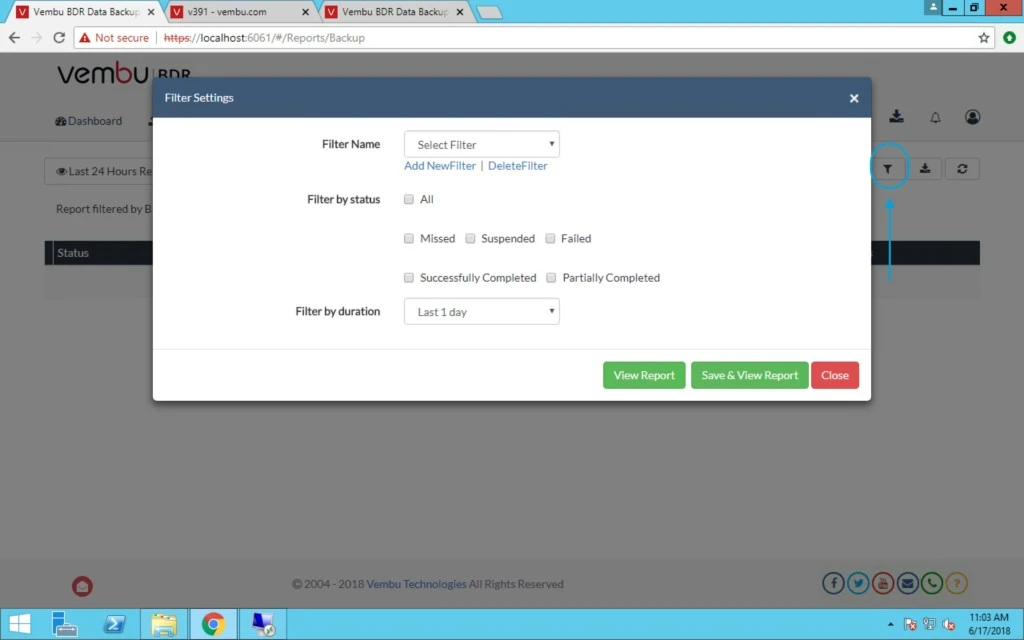
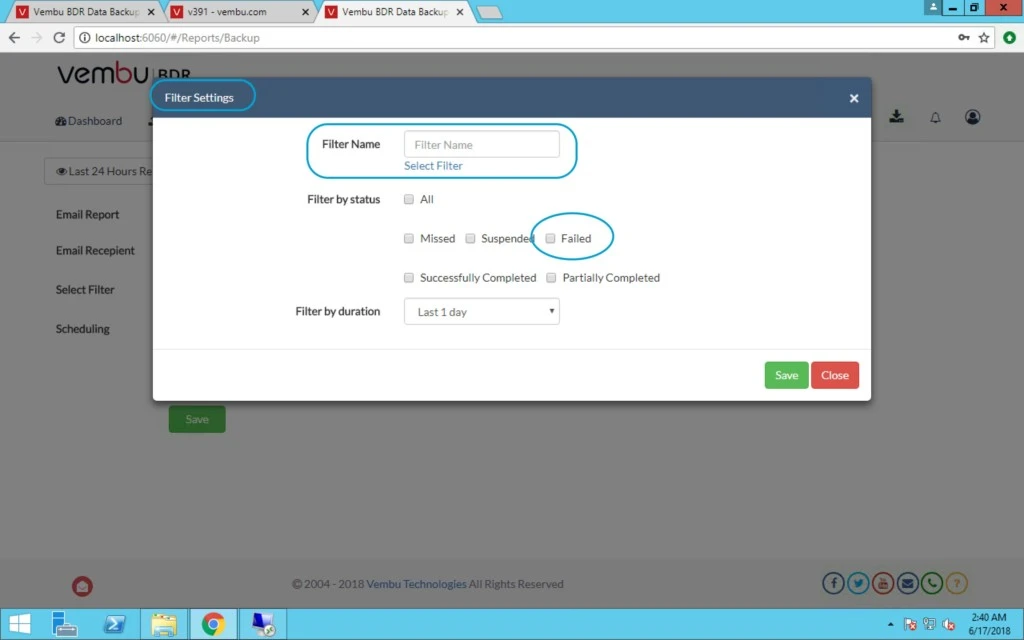
When you click on Add filter you can see below screen and you can create filter for different categories.

  • Filter option let users add custom filters where they can apply filter of their own choice for ease of view.
  • Backup filter includes following status to choose from: Missed, suspended, failed, successfully completed, partially completed and all.
  • Filters can also be applied based on duration where users can provide their custom data range, apart from ranging between last 1-30 days.


Once you click on save it will show you filter saved successful message.


But before using this option you have to configure SMTP which we discussed earlier.


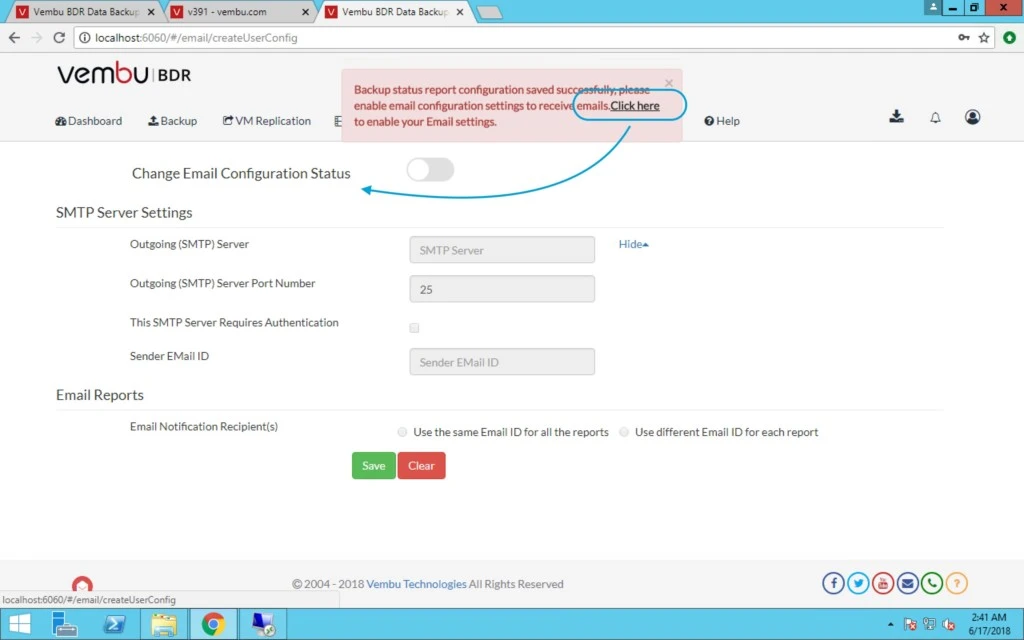
When you click on this hyperlink it will redirect you to this option and you can use slider to enable SMTP option.


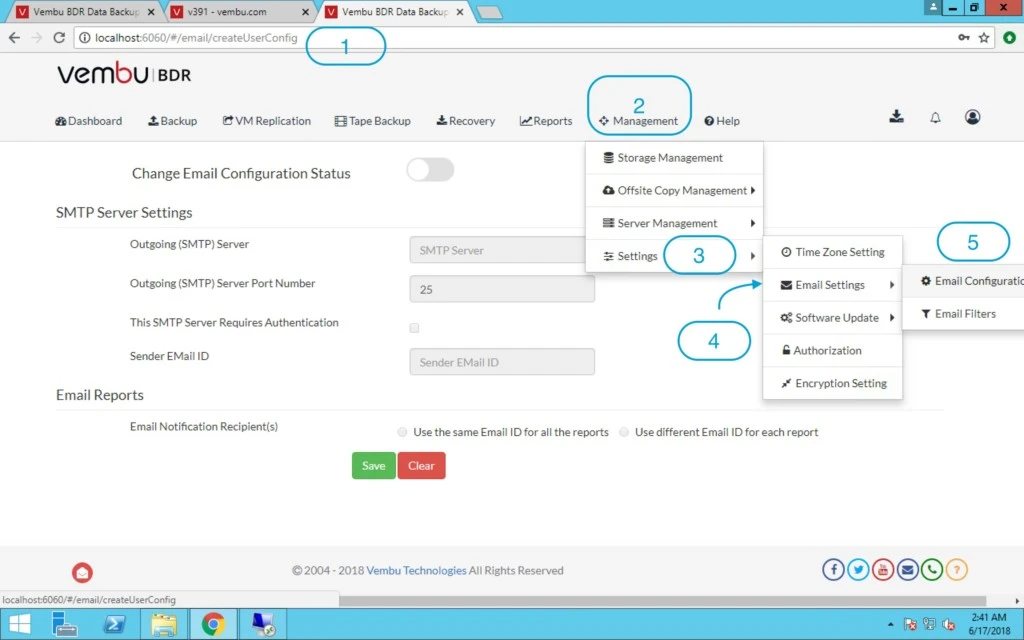
If you want to enable before using reporting options then you can go to Vembu BDR server home page > Management > Under settings > Email settings > and Email configuration option.


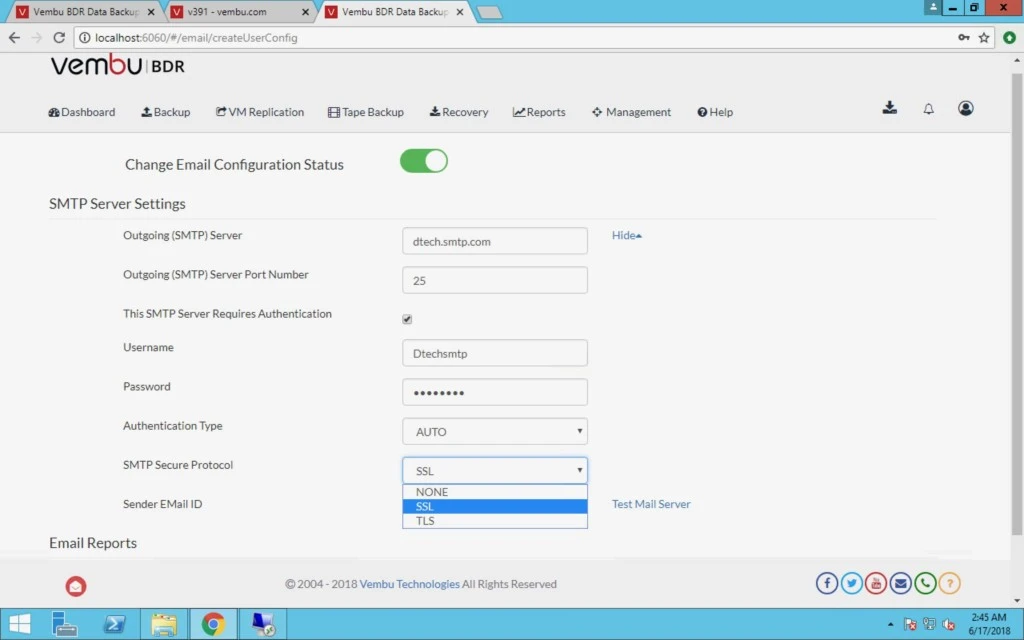
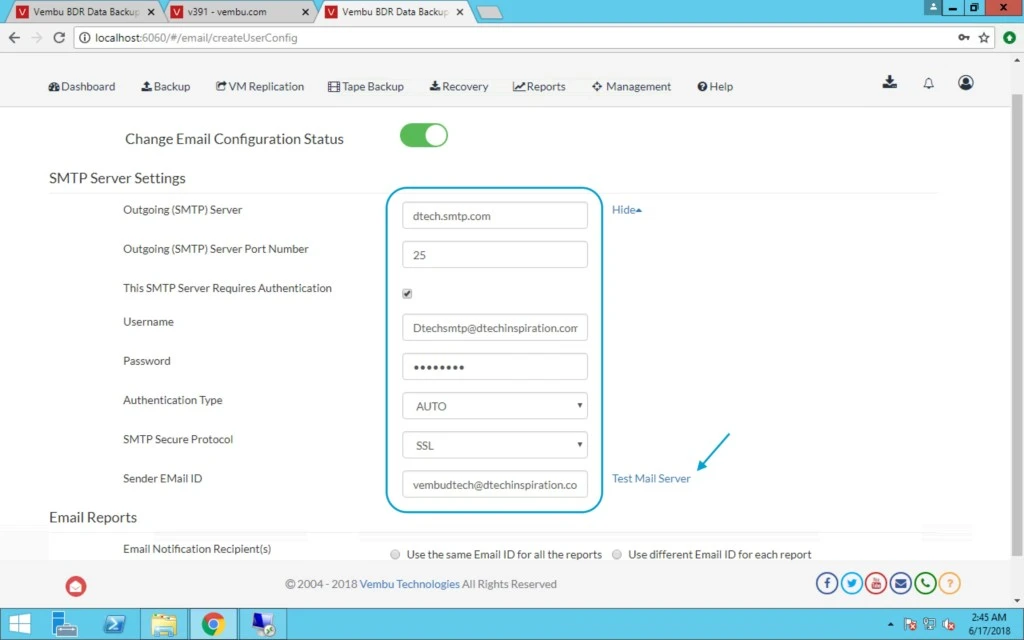
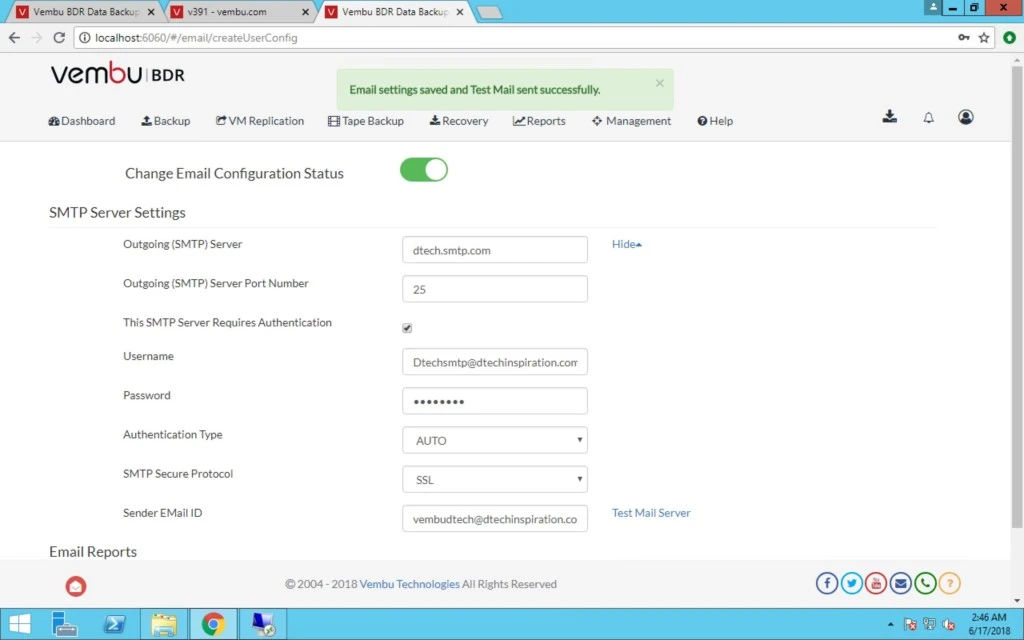
Here you have to provide SMTP server details which you are using in your organisation.


Here you have to provide Outgoing SMTP server, Port, Username and password for the same if SMTP server required authentication.


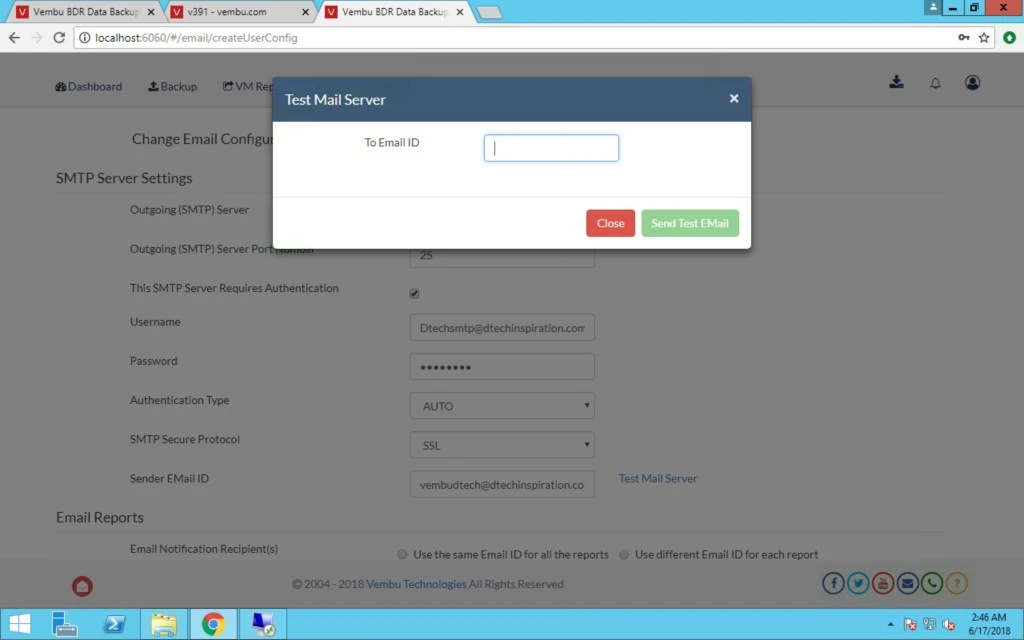
For SMTP secure protocol you have two options: SSL and TLS. You then test the email notification by putting the email address.


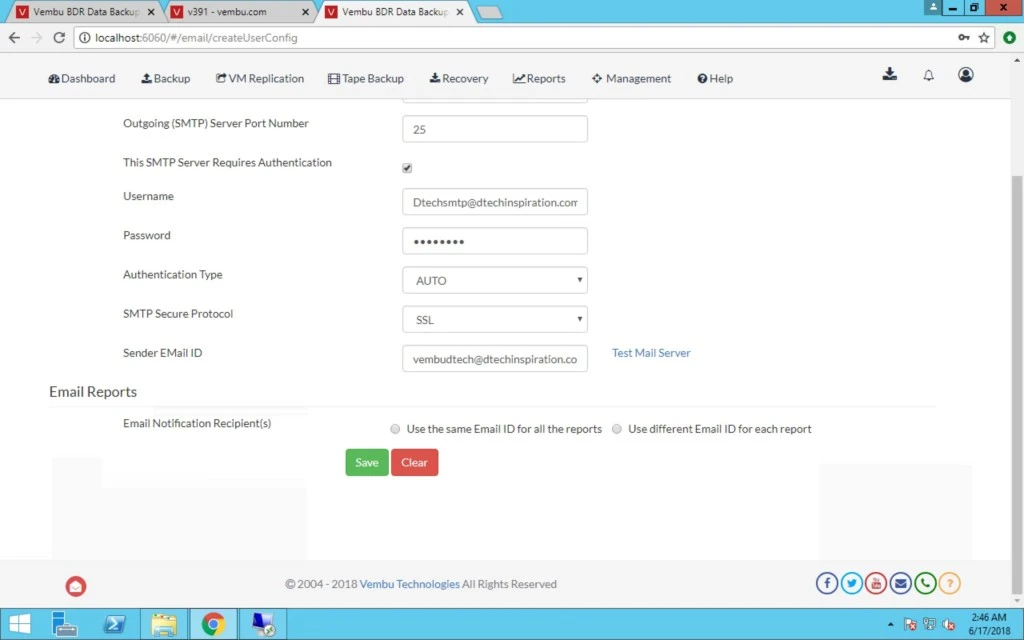
You can also configure whether you want all the reports notification in the same email address or in different email addresses. Then save it.


After configuring the SMTP server to get the email notification for the reports, we must test it by sending a test email notification.


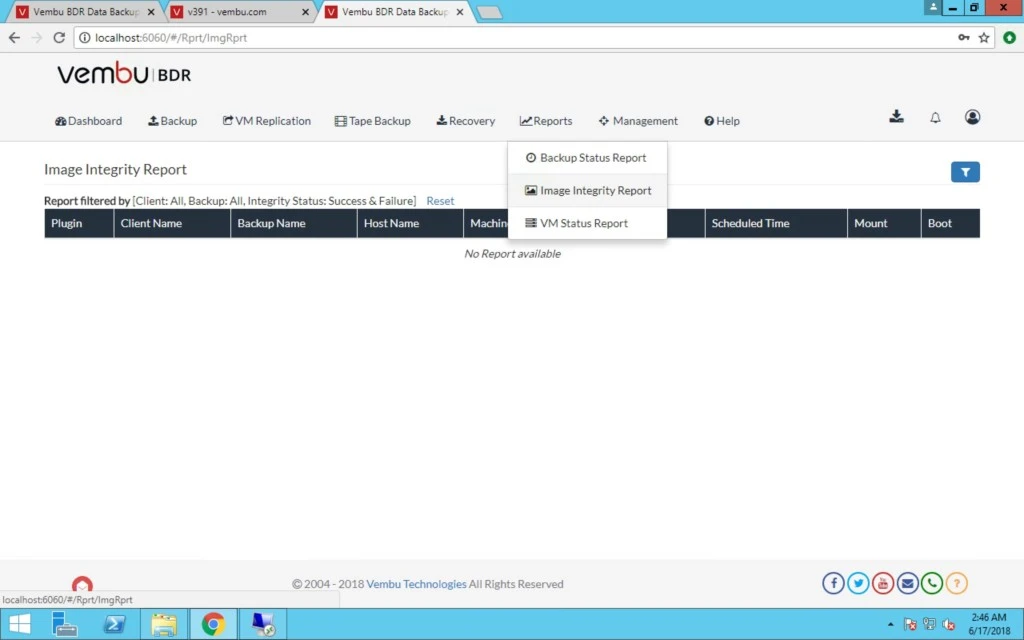
Image integrity Report:

  • This page lists every image backups configured to Vembu BDR server along with the backup details such as: backup name, plugin, client name, host name, machine name, disk name and scheduled time(Most recent backup time).
  • It also confirms if the backup data is mountable and provides boot image of most recent backup (This ensures that the backup is in readily-bootable state).


0

How to Configure Vembu Windows VM backup

Topic Outline:

How to configure Windows VM backup.

How to create backup job.

Options while configuration for Windows VM backup.

Backup schedule.

Retention and backup job options.

Backup encryption options.


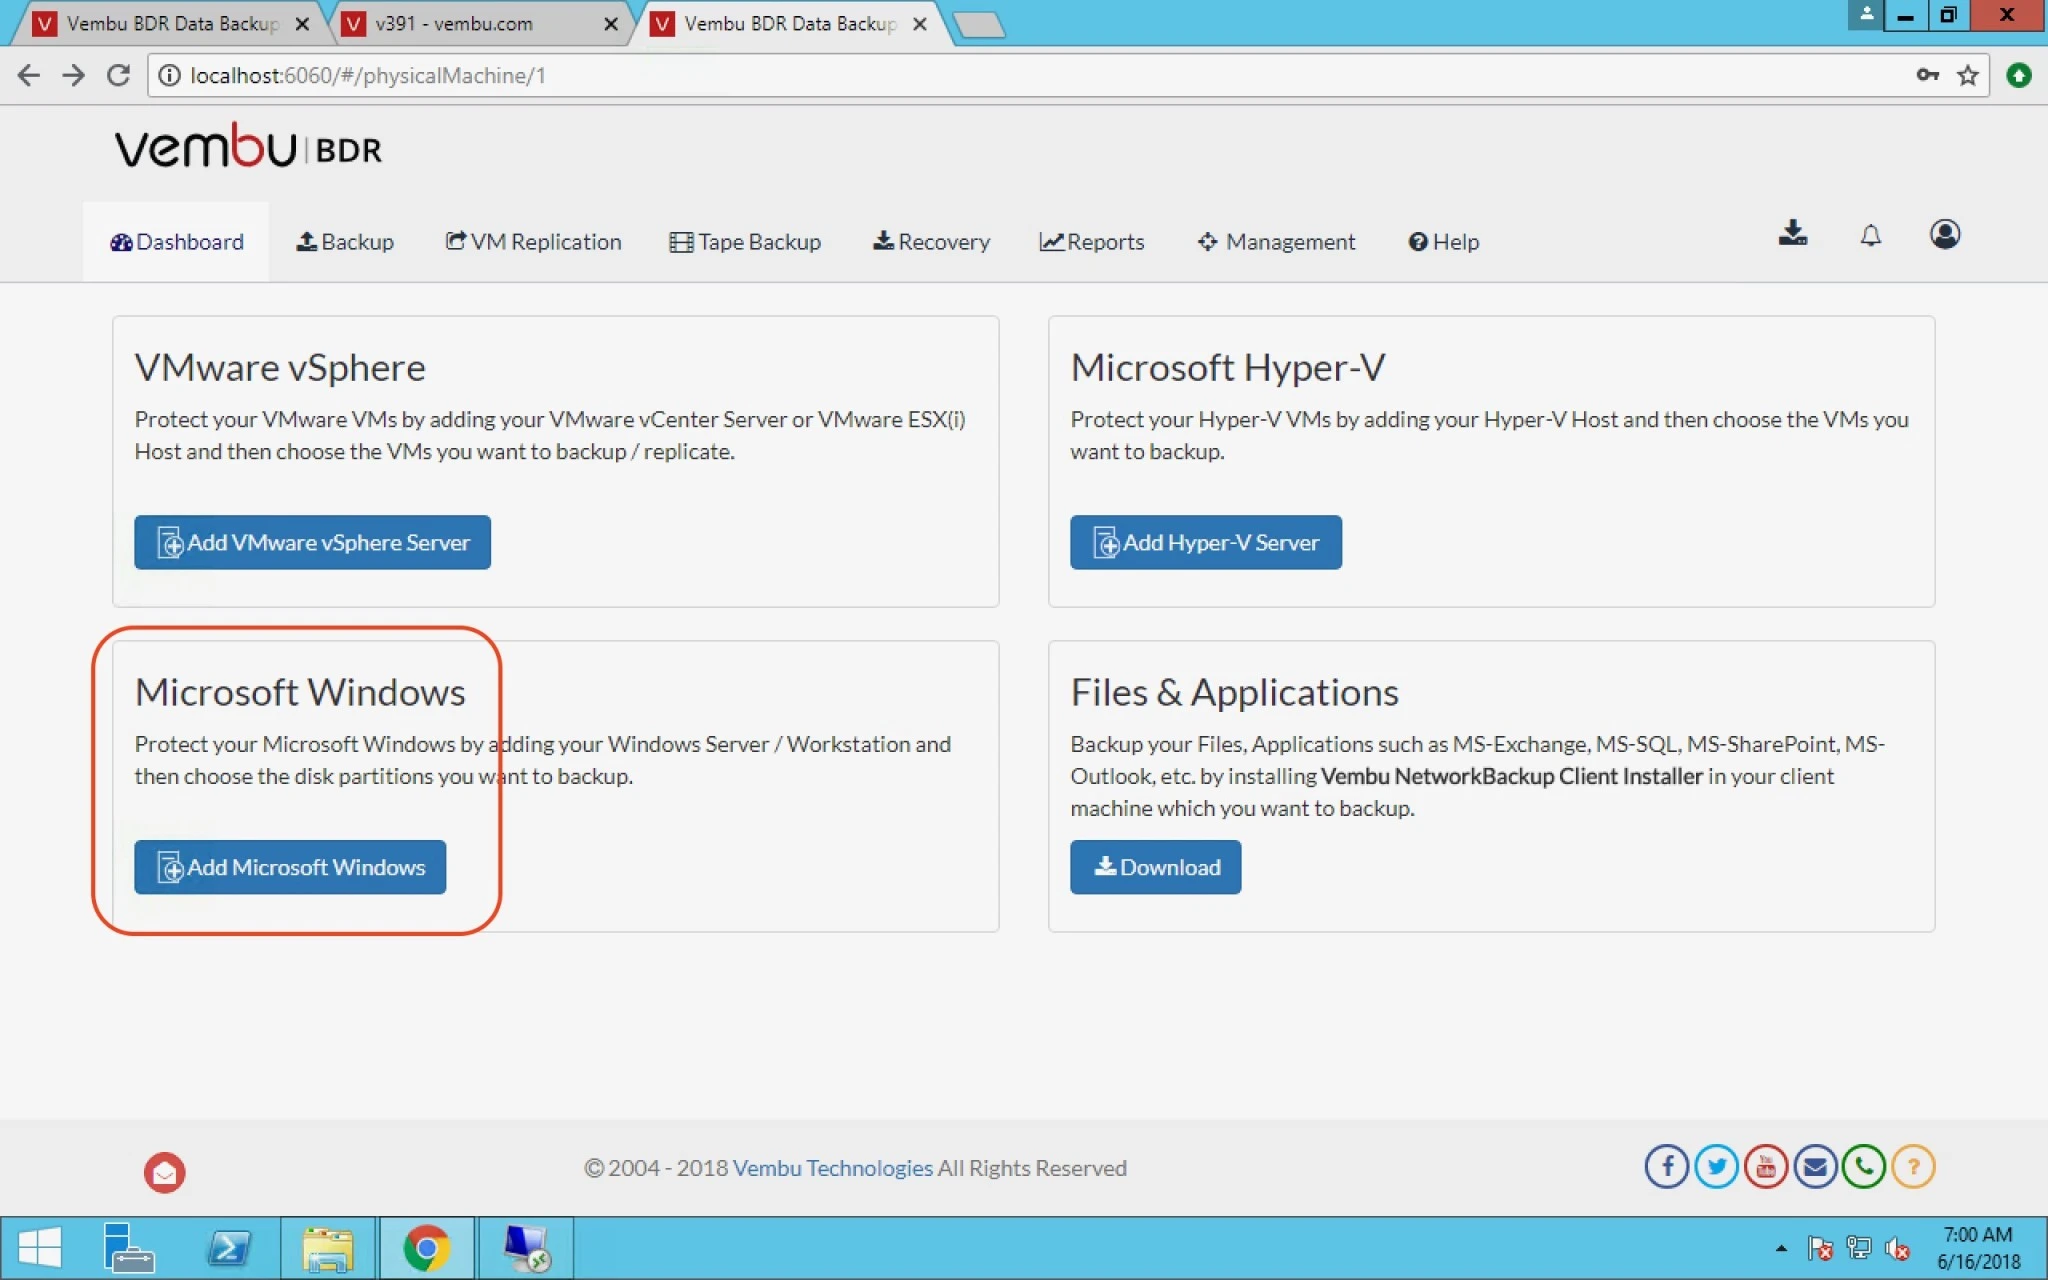
1. Open Windows box where you installed VembuVMBackup. Open browser and type this URL: http://localhost:6060/#/physicalMachine/1

and click on Microsoft Windows Options.


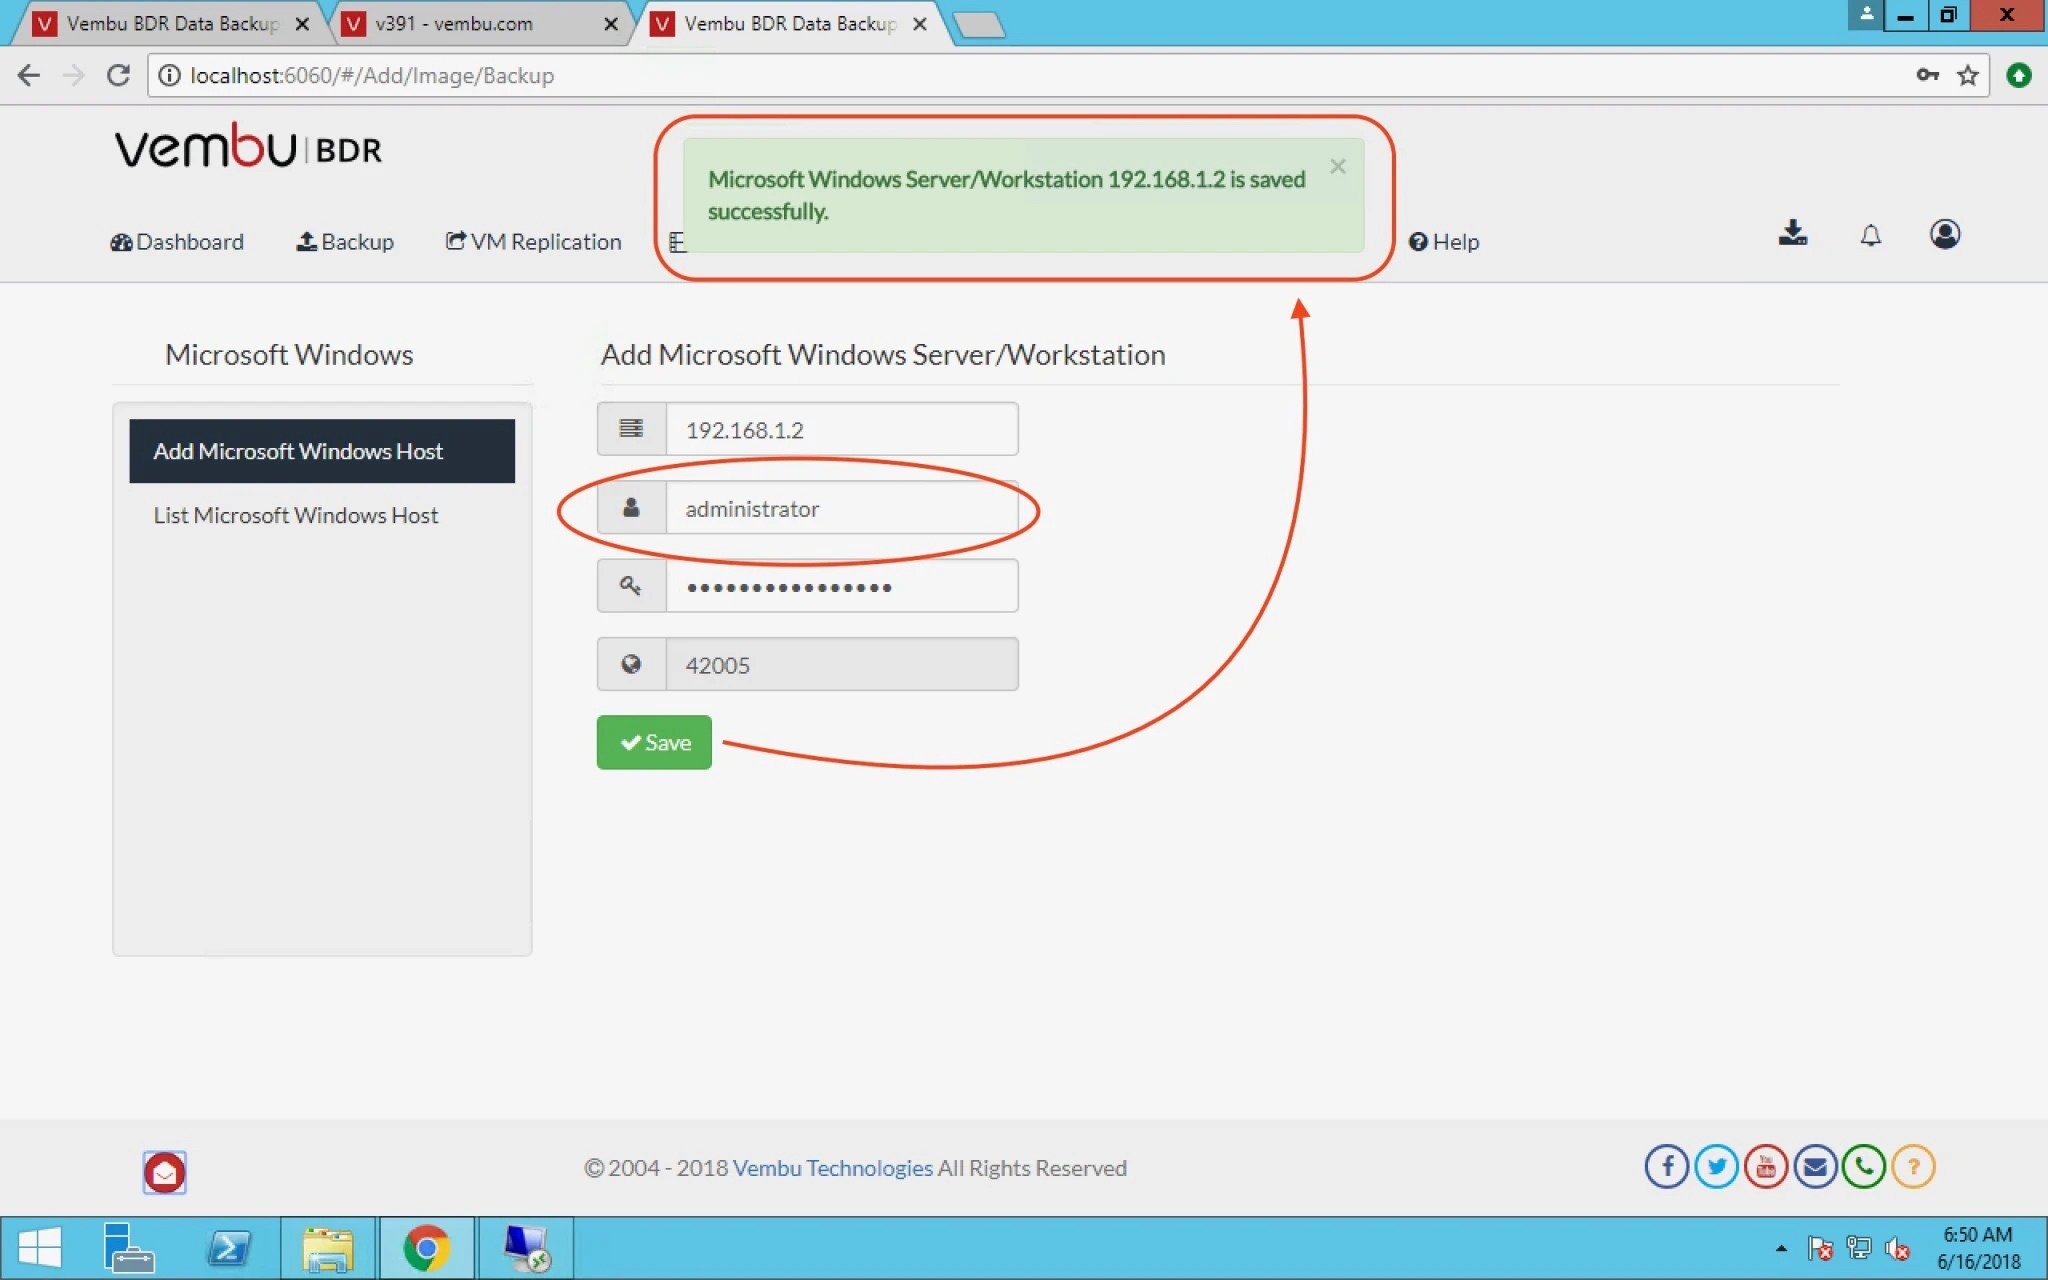
2. Here you have to click on Add Microsoft Windows Host and provide IP address which you want to take backup or partial backup like drive only.

3. Here you have to provide IP and administrator or user who has administrator rights with password but not able to change port.


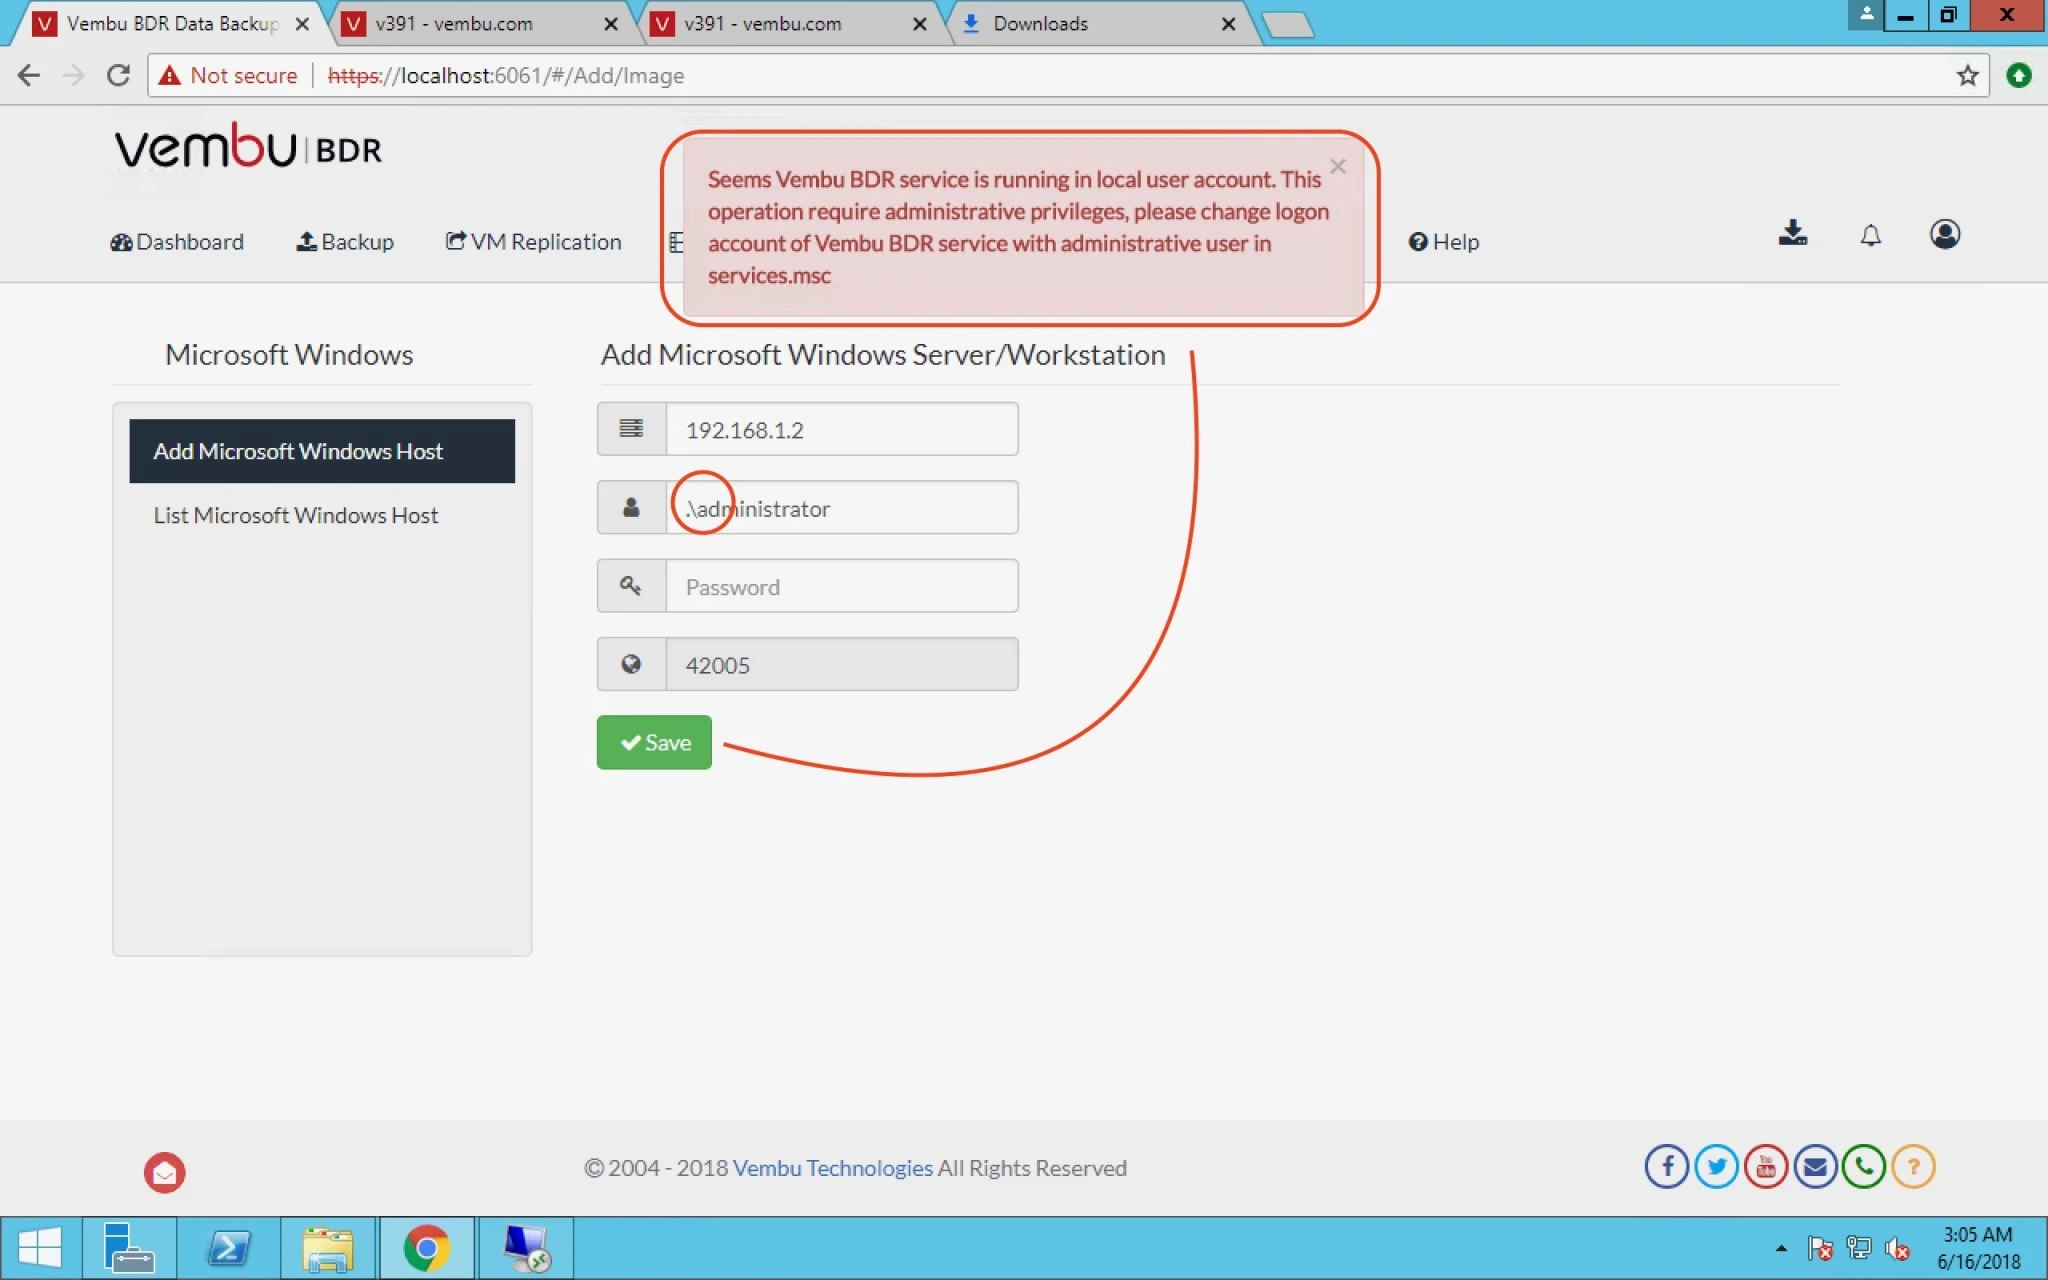
4. While adding i was getting an error so instead of using “.\” parameter use just username.


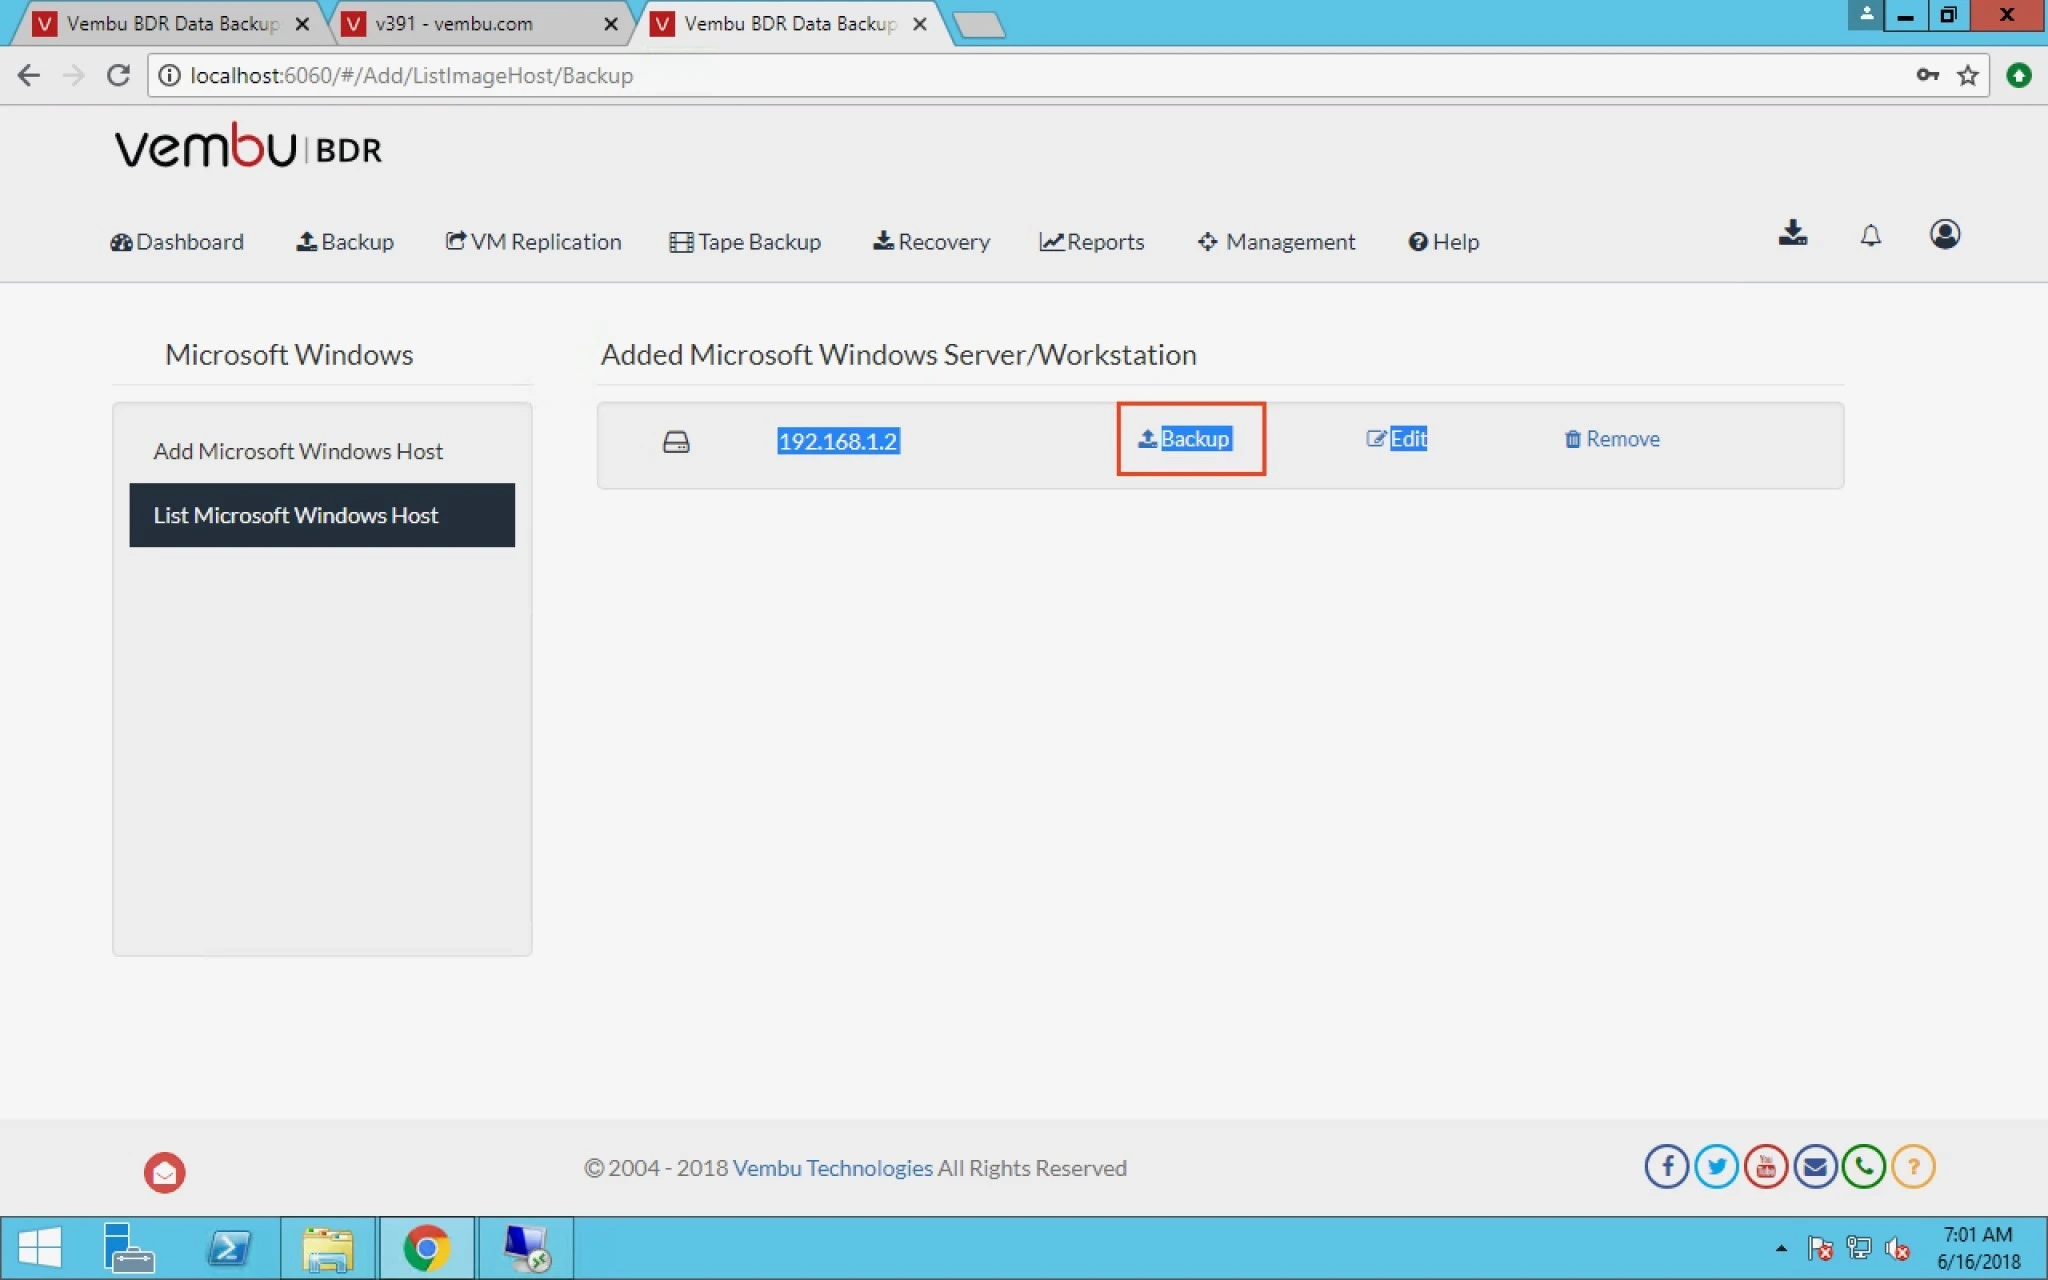
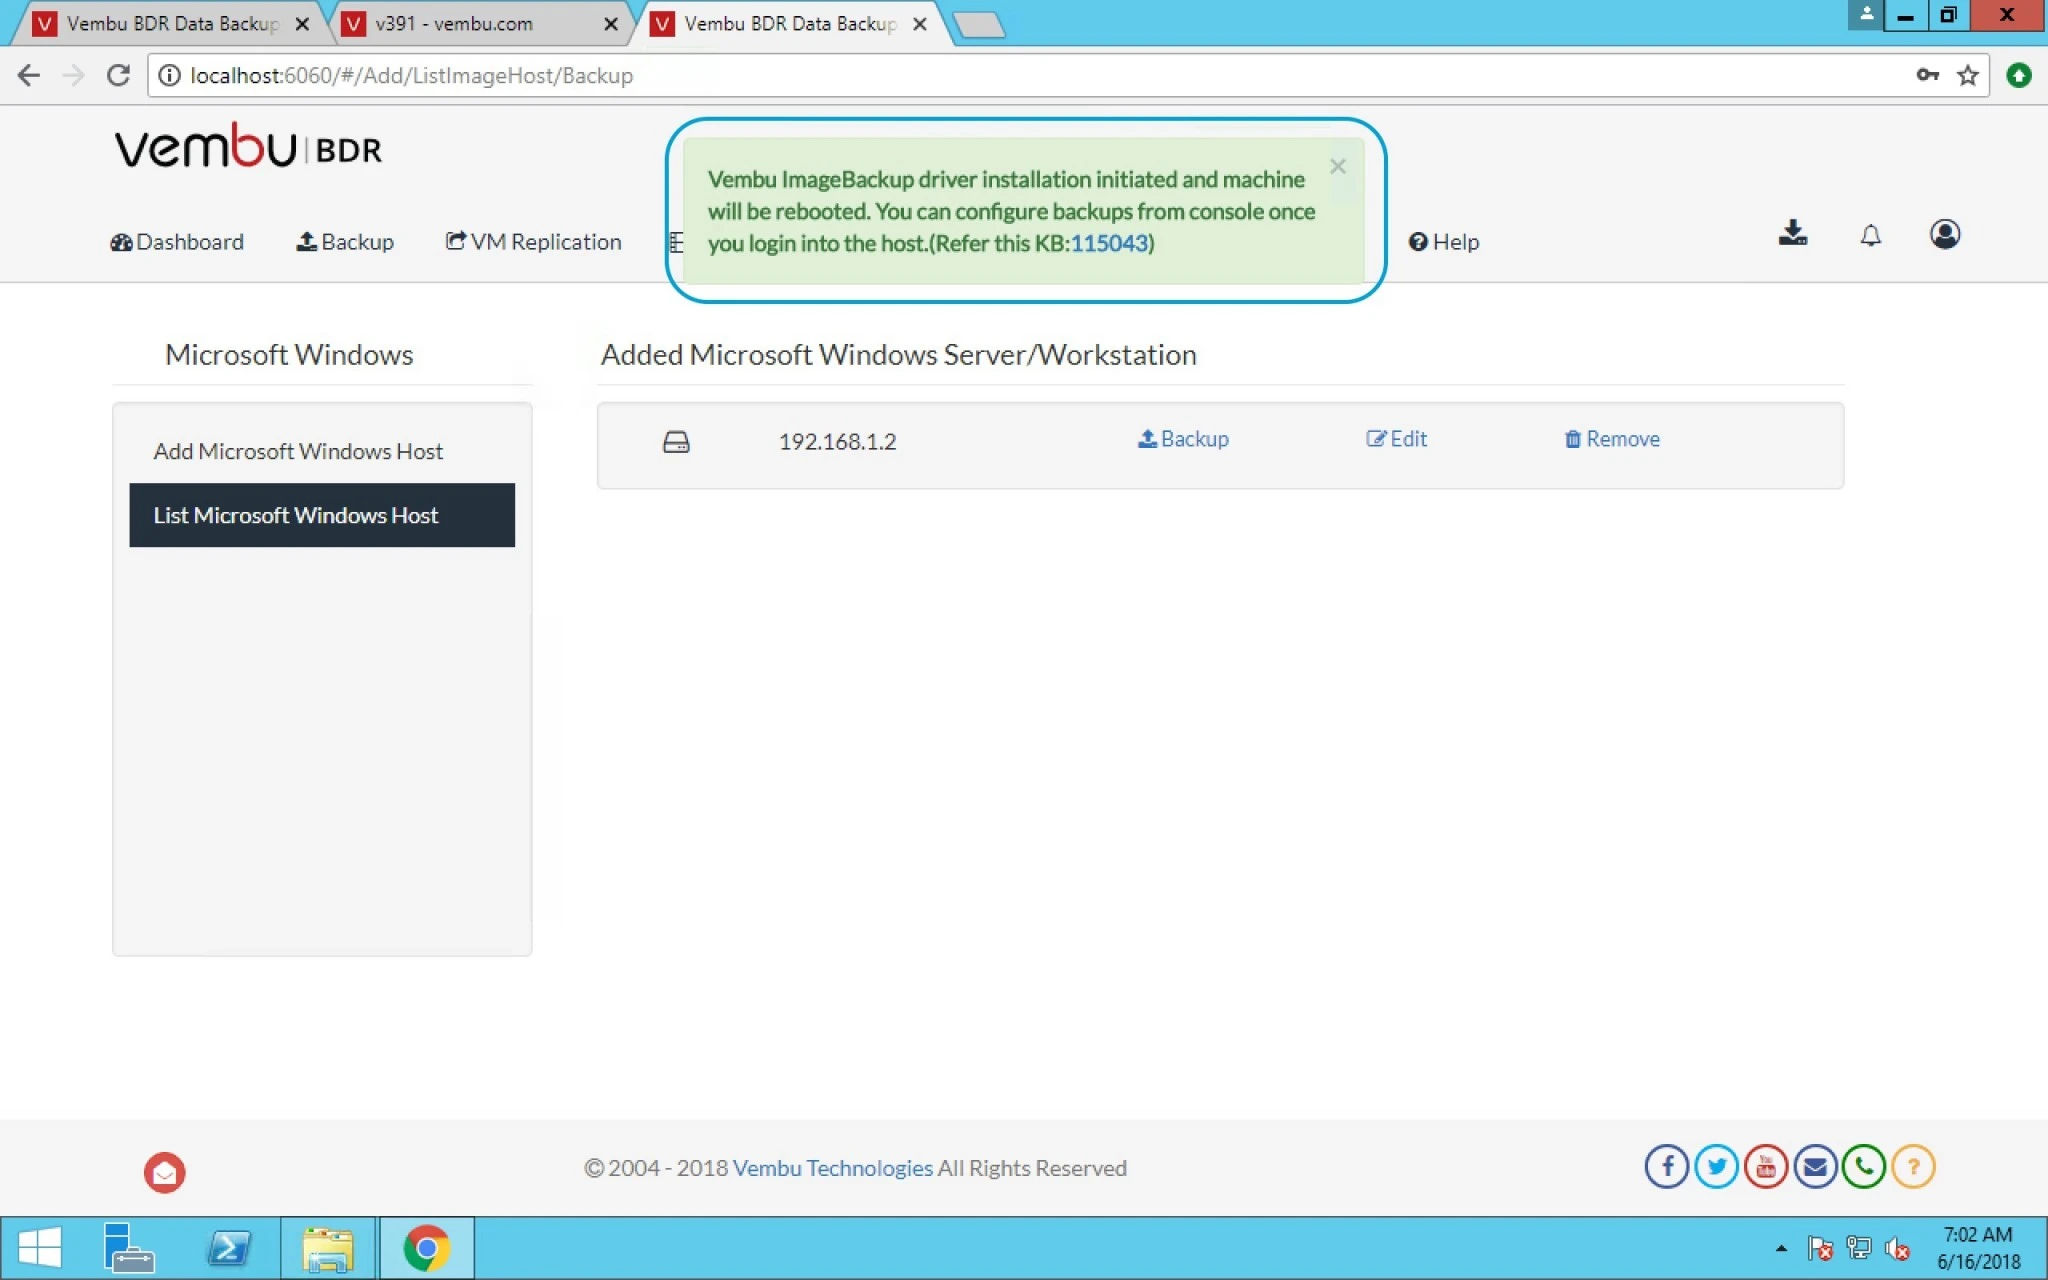
5. When you click save it will create a list of Servers as you can see in below screenshot.

6. Now Click on Backup to configure backup job.


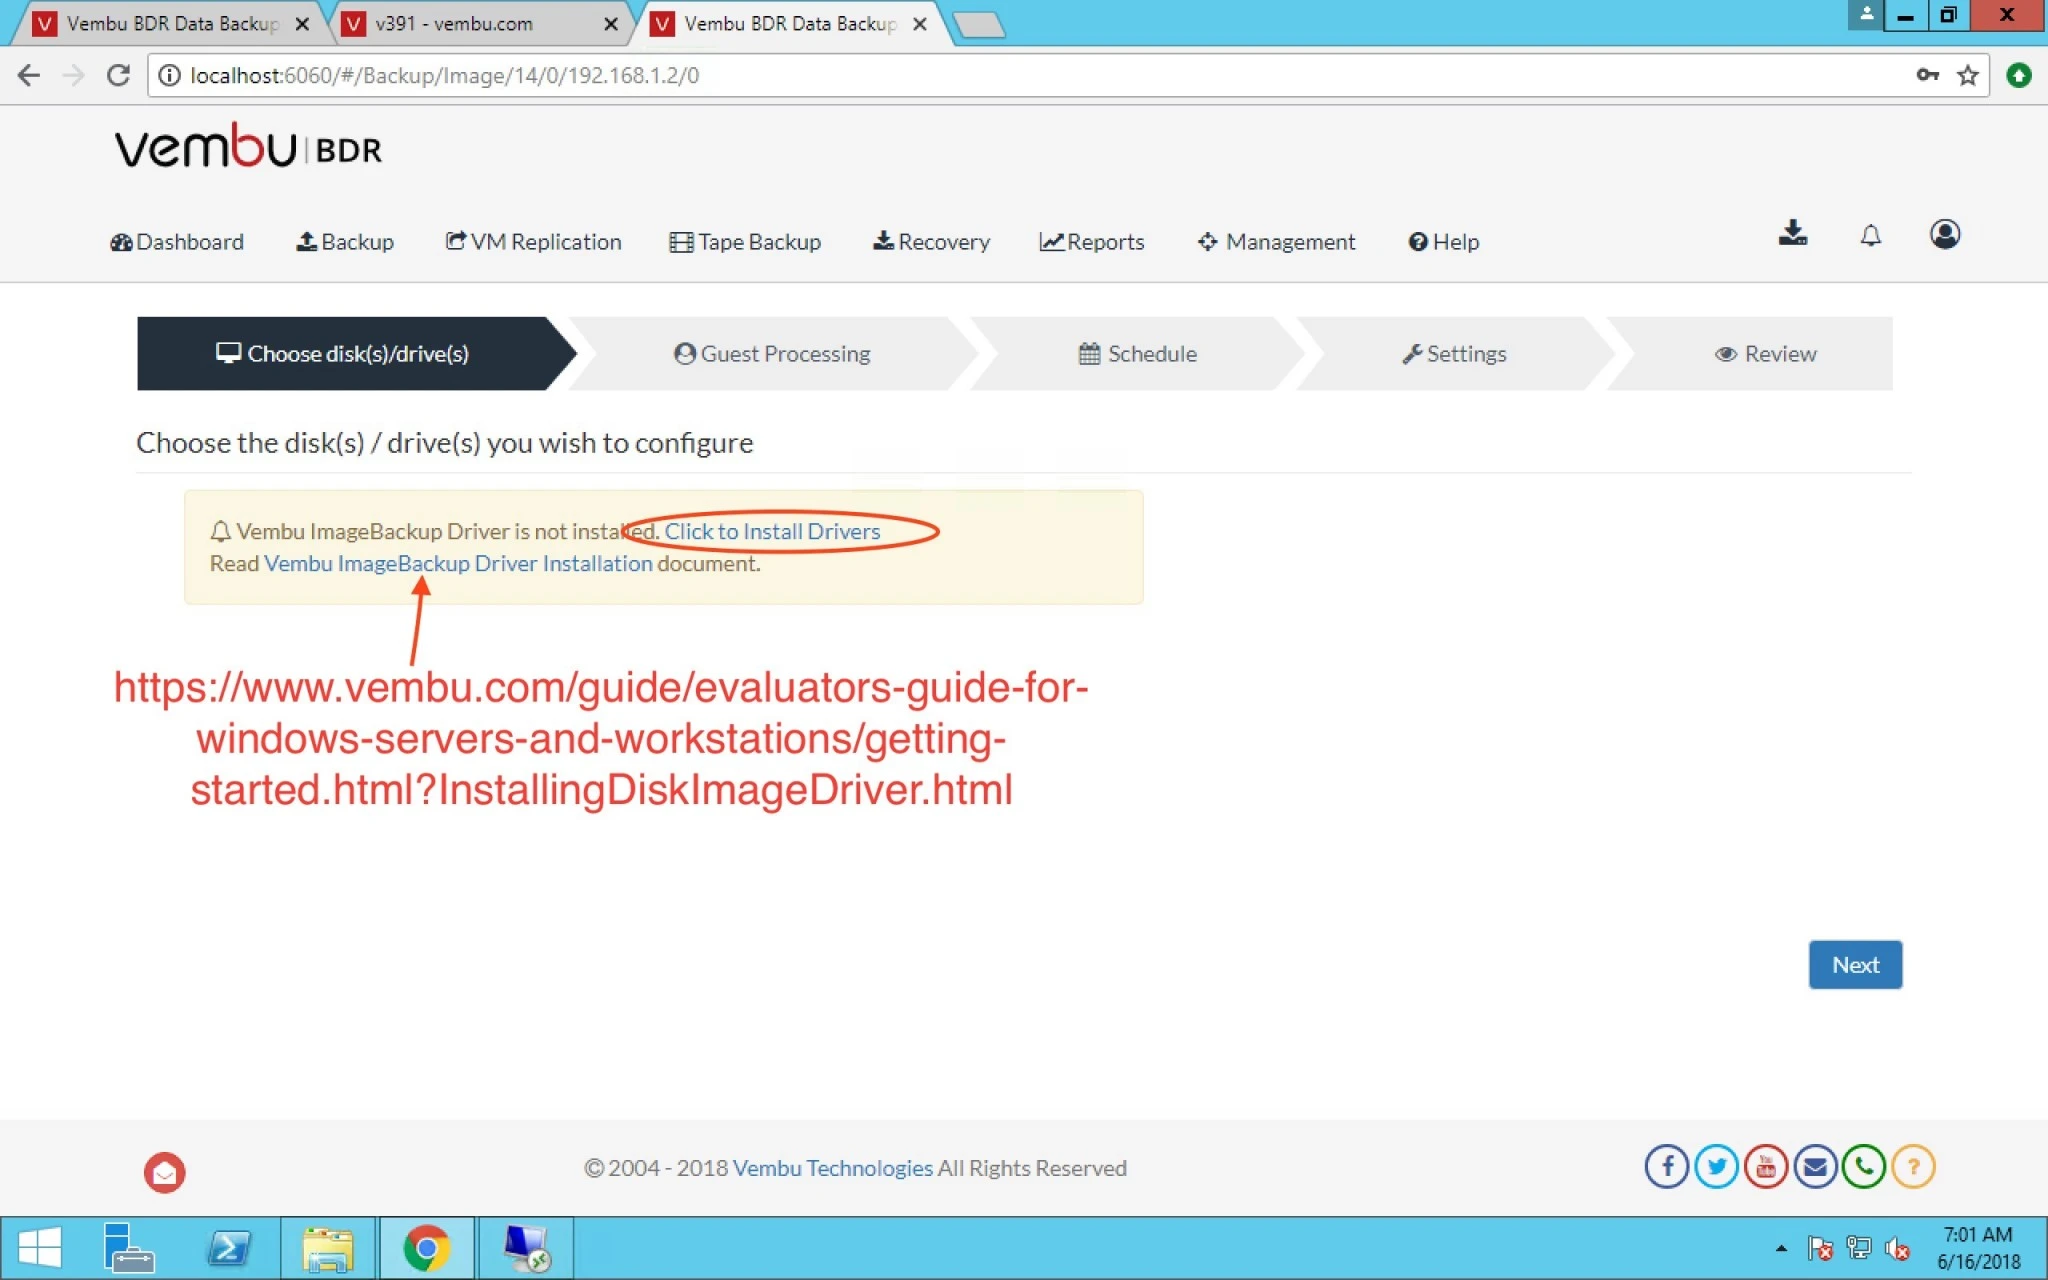
7. When click on backup you may see below options. so you have to click on click to install Drivers hyperlink.


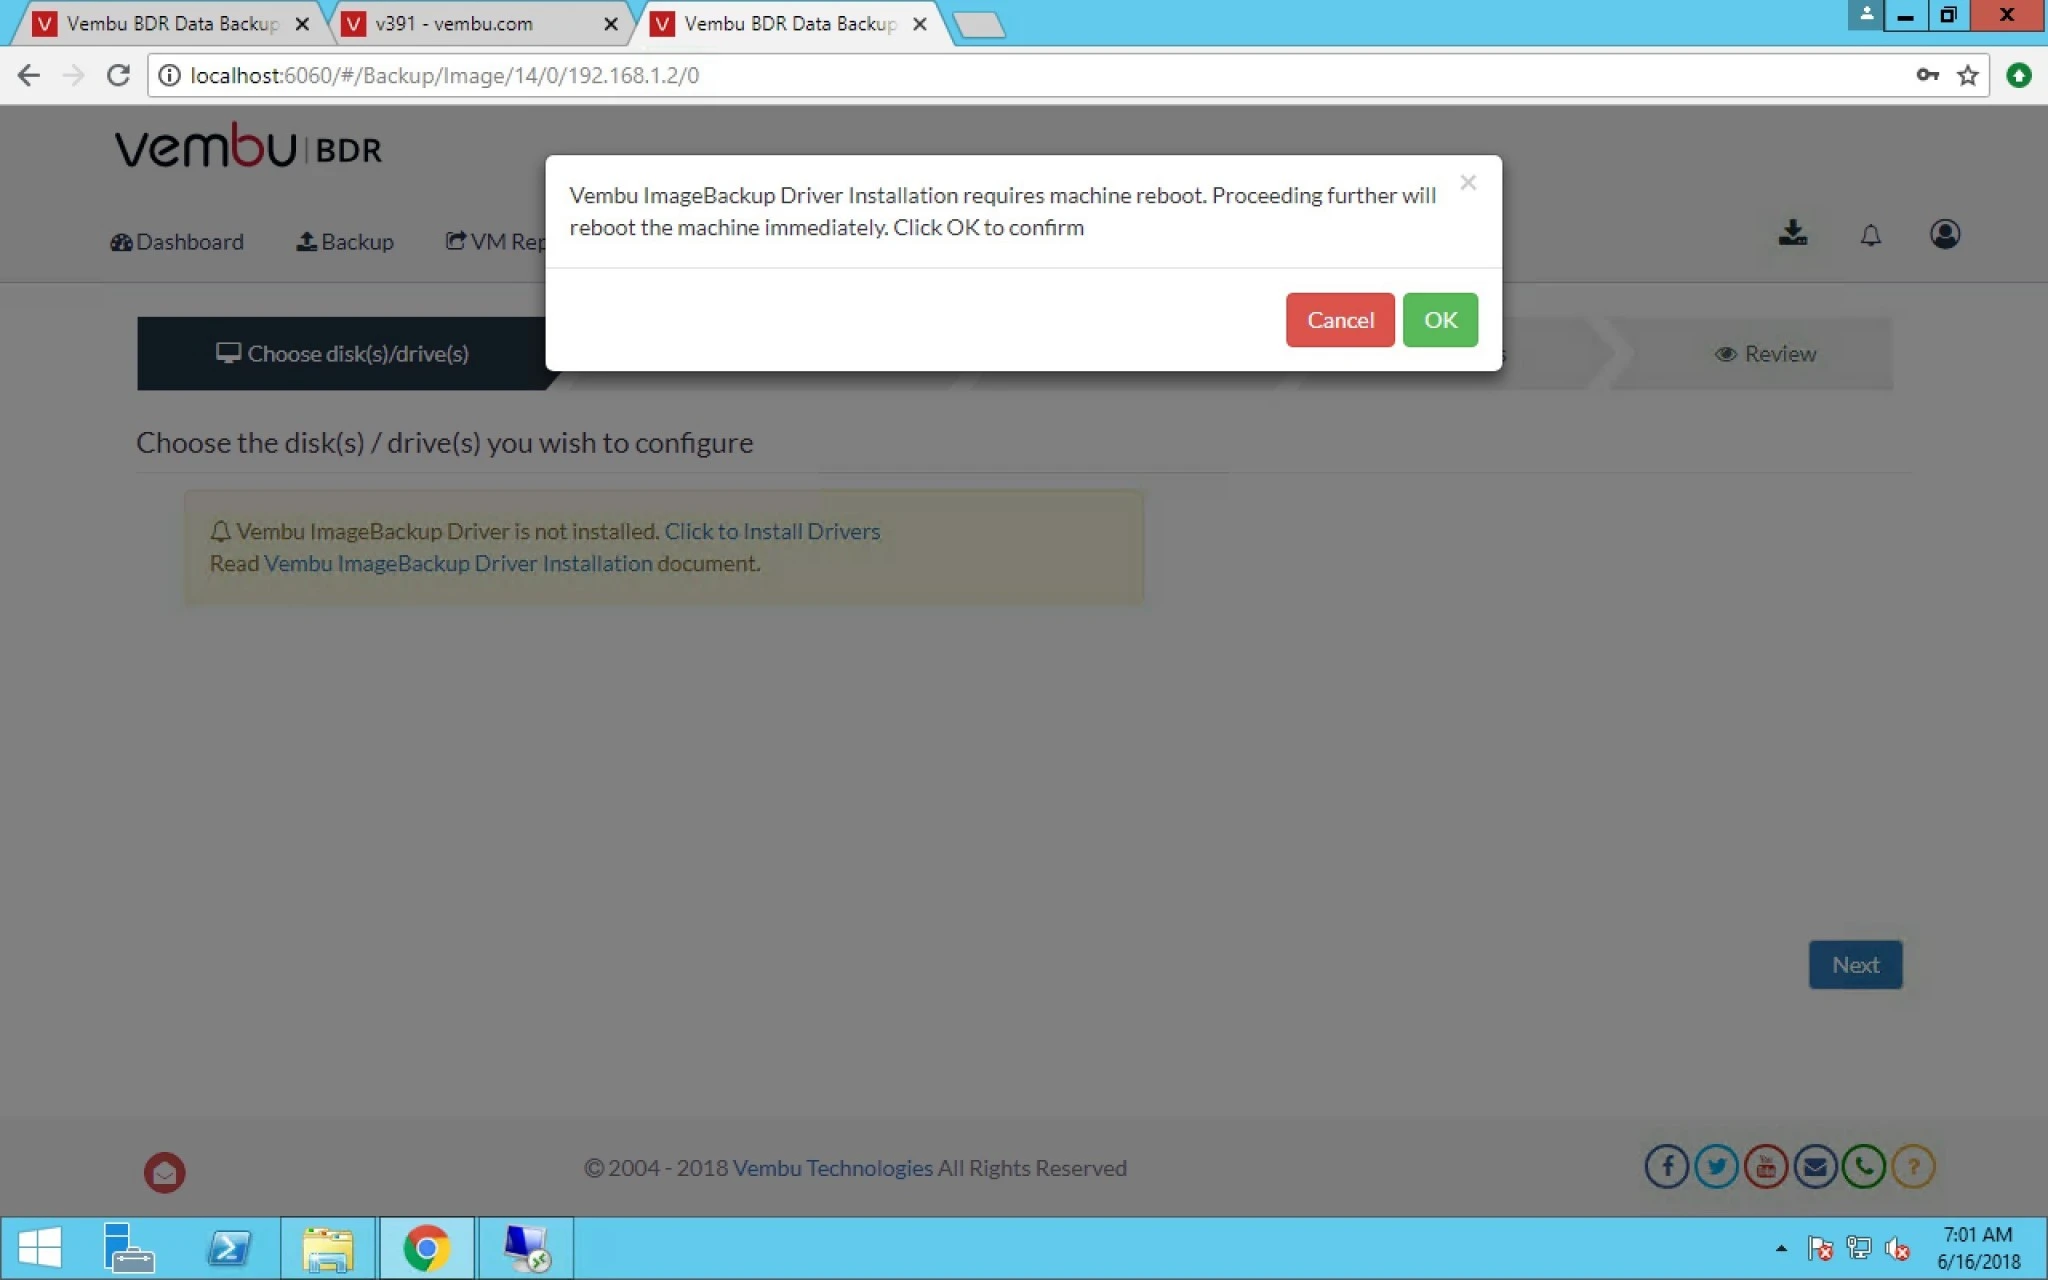
8. When you click on this this it will reboot the Destination/configured VM.

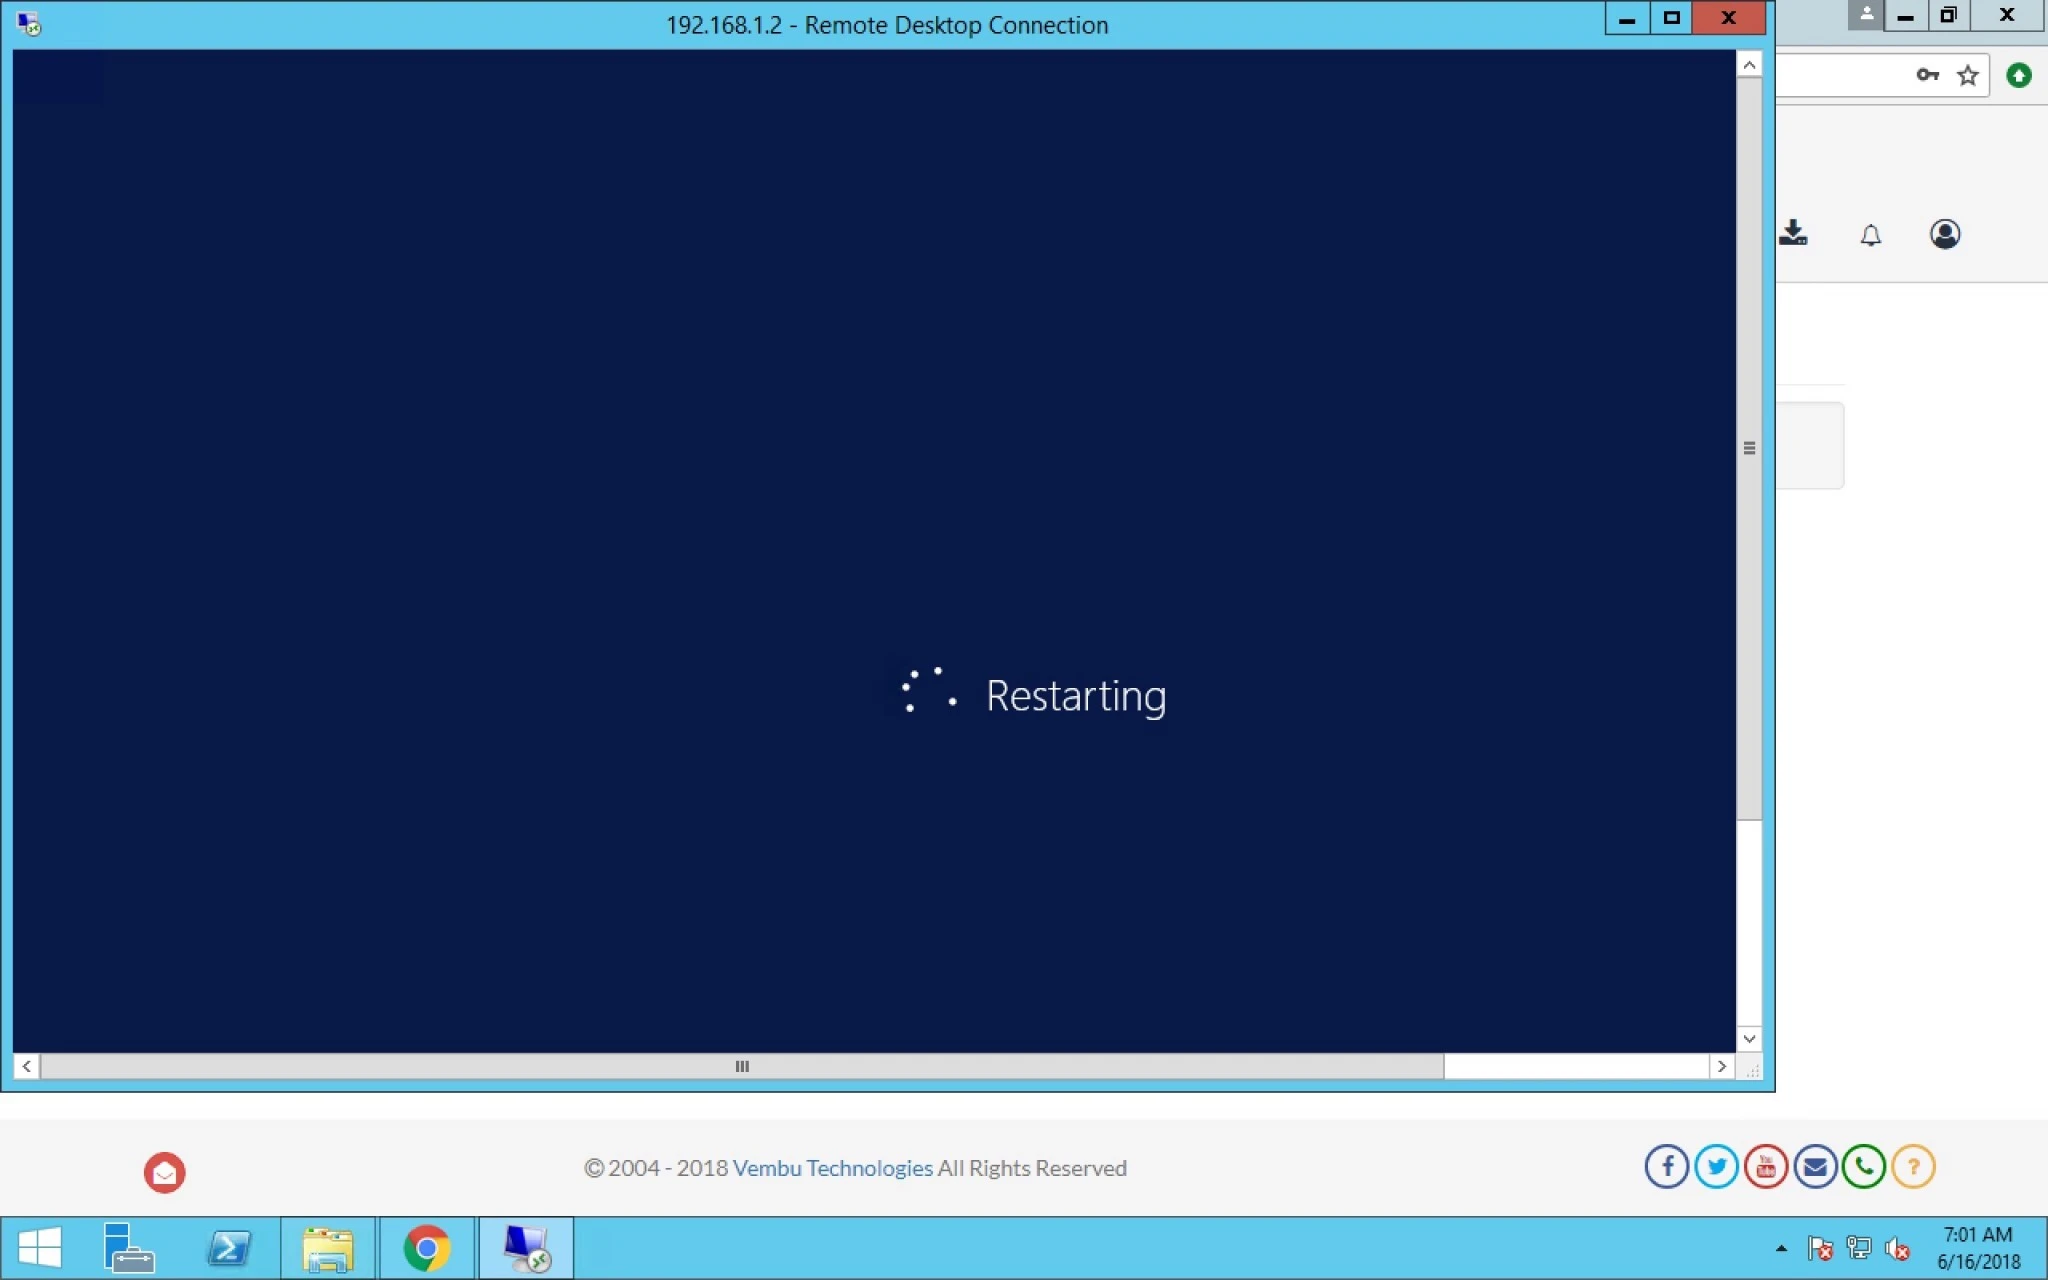
it’s rebooting the destination VM.


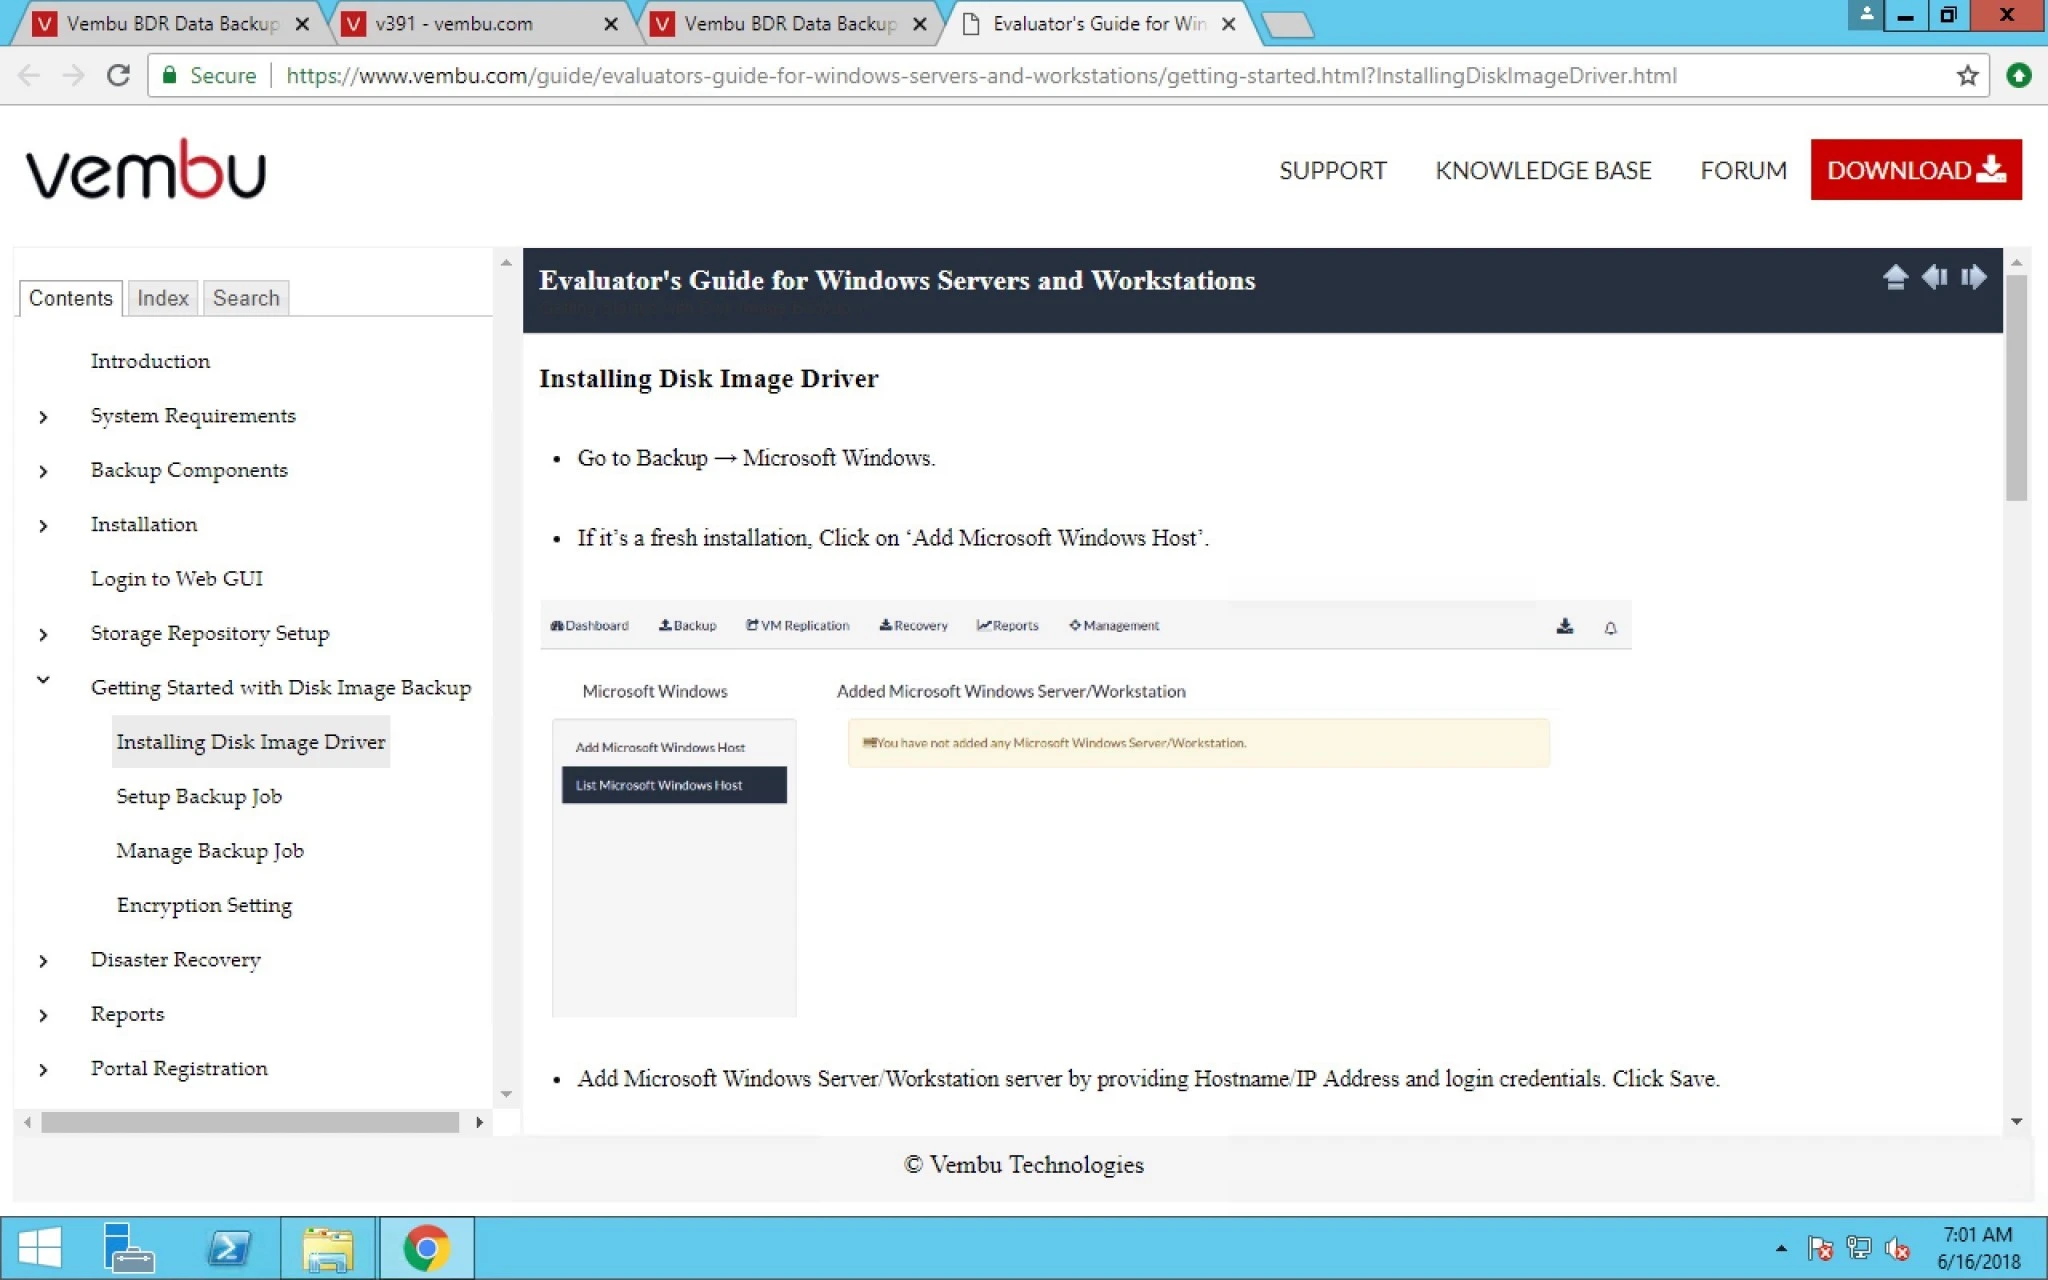
9. when you click on second link it will redirect you to internet where you can see documentation from Vembu.


10. It will show you information about rebooting with KB number.


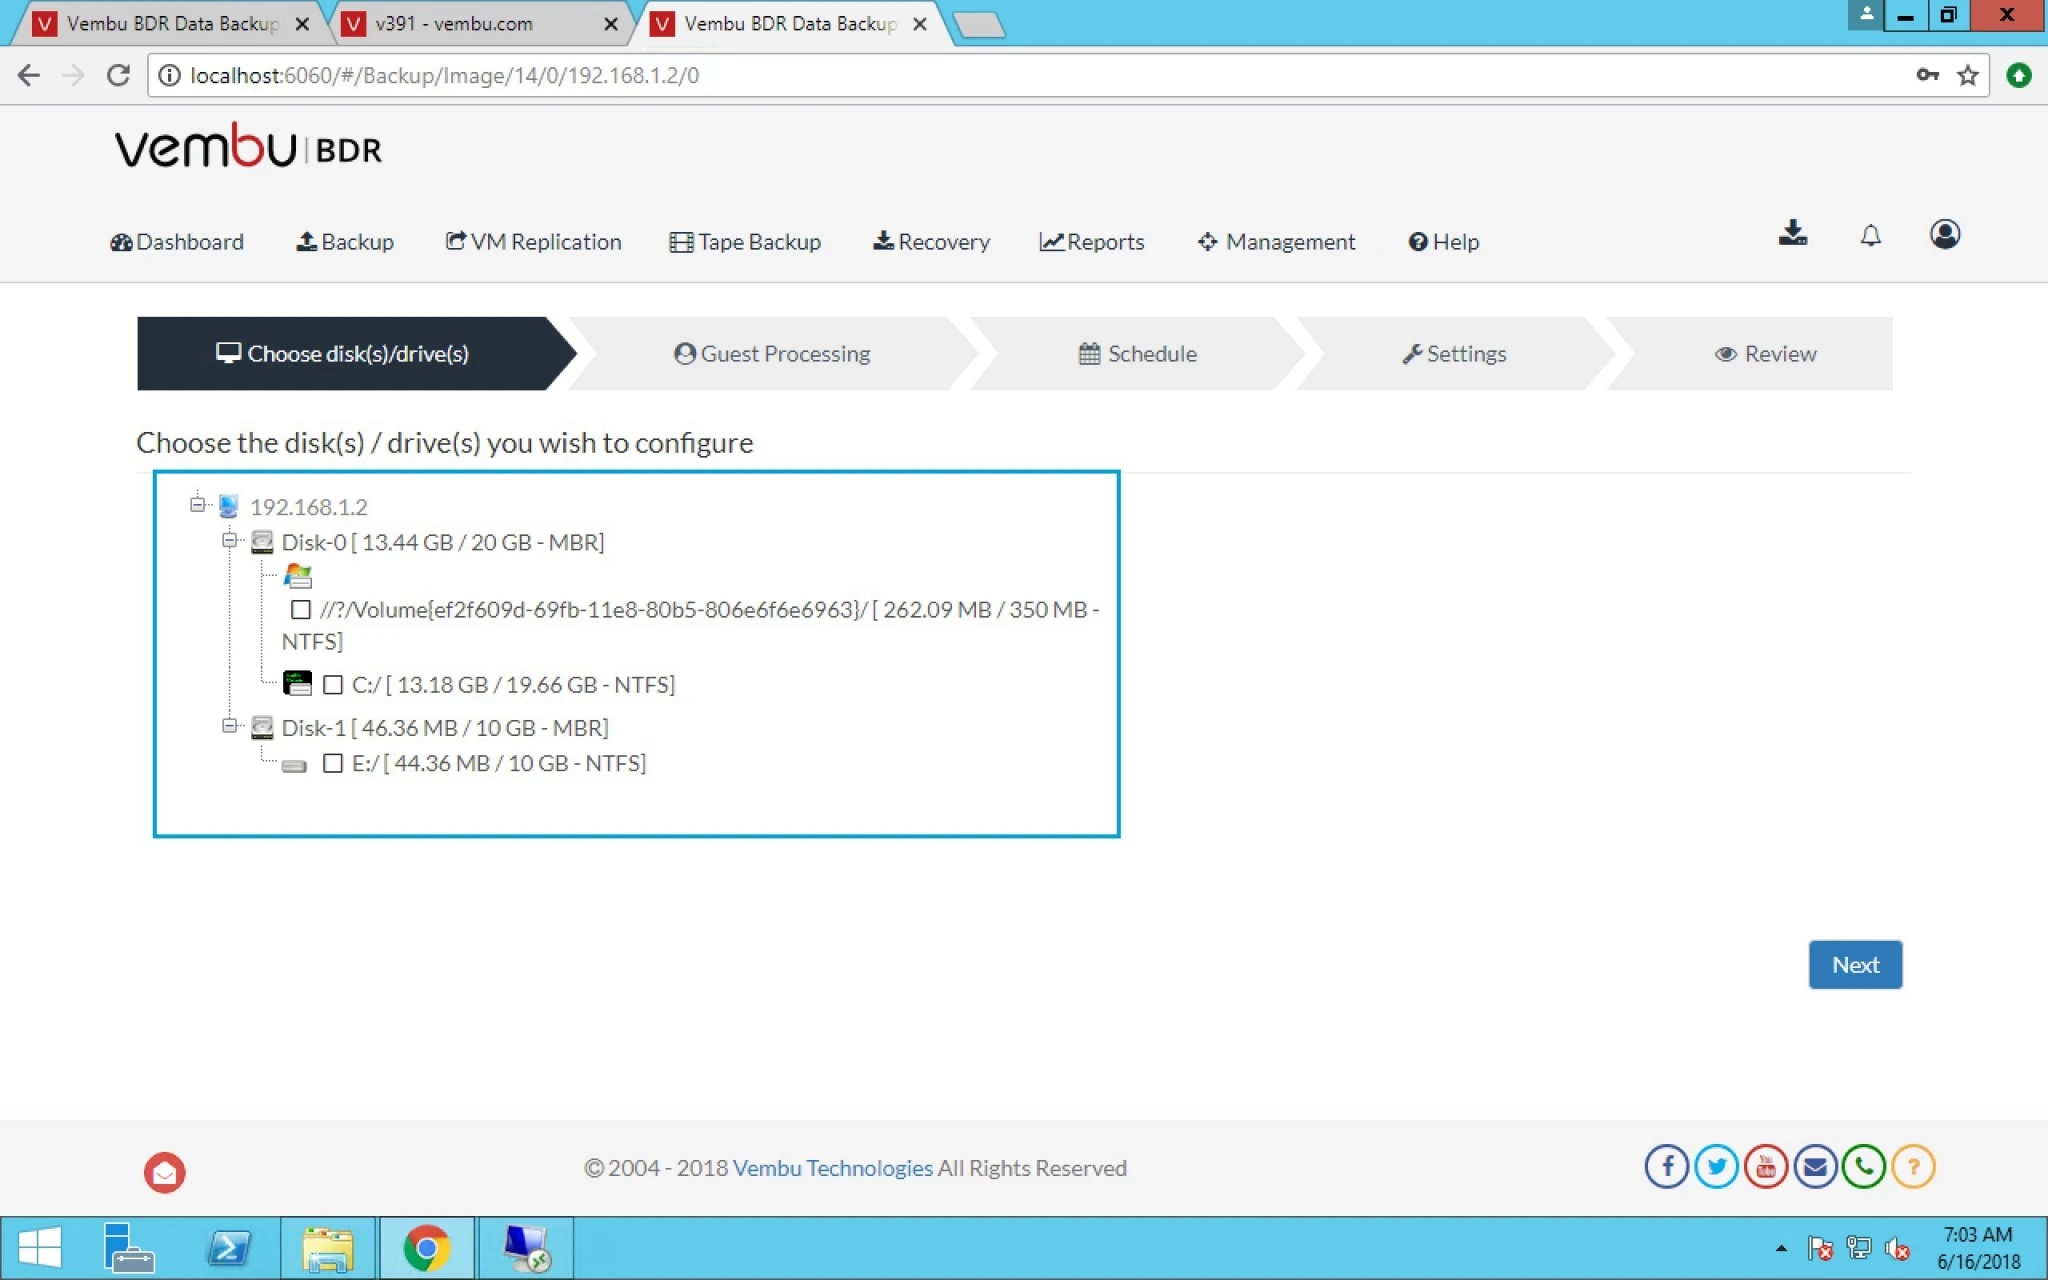
11. Now finally you can see Windows Server IP with all the disk attached with that VM.


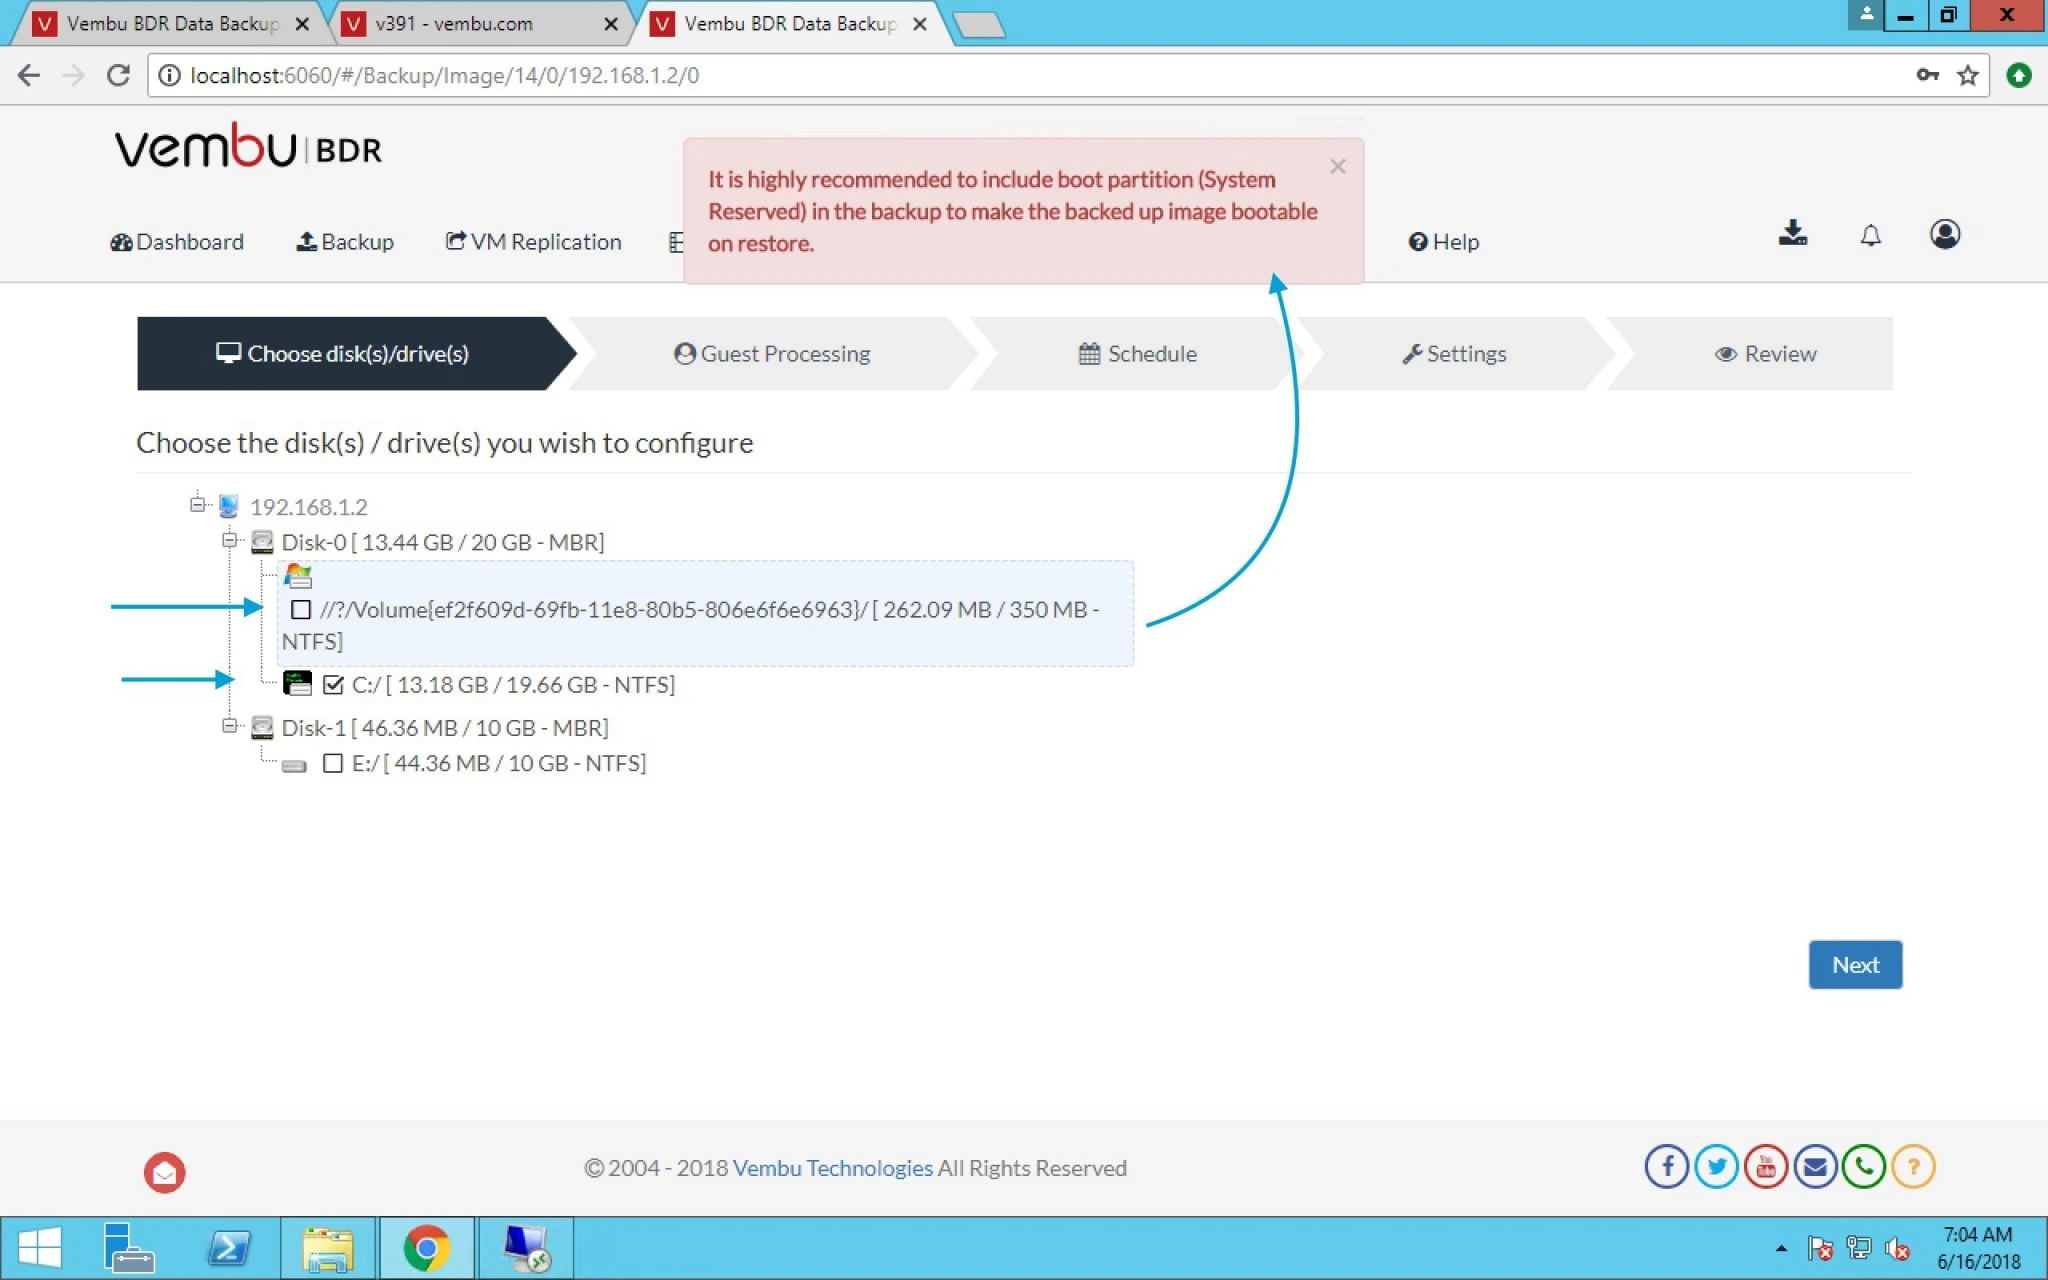
12. Now when you select C: drive as for backing up it will also let you know that select boot partition as well.


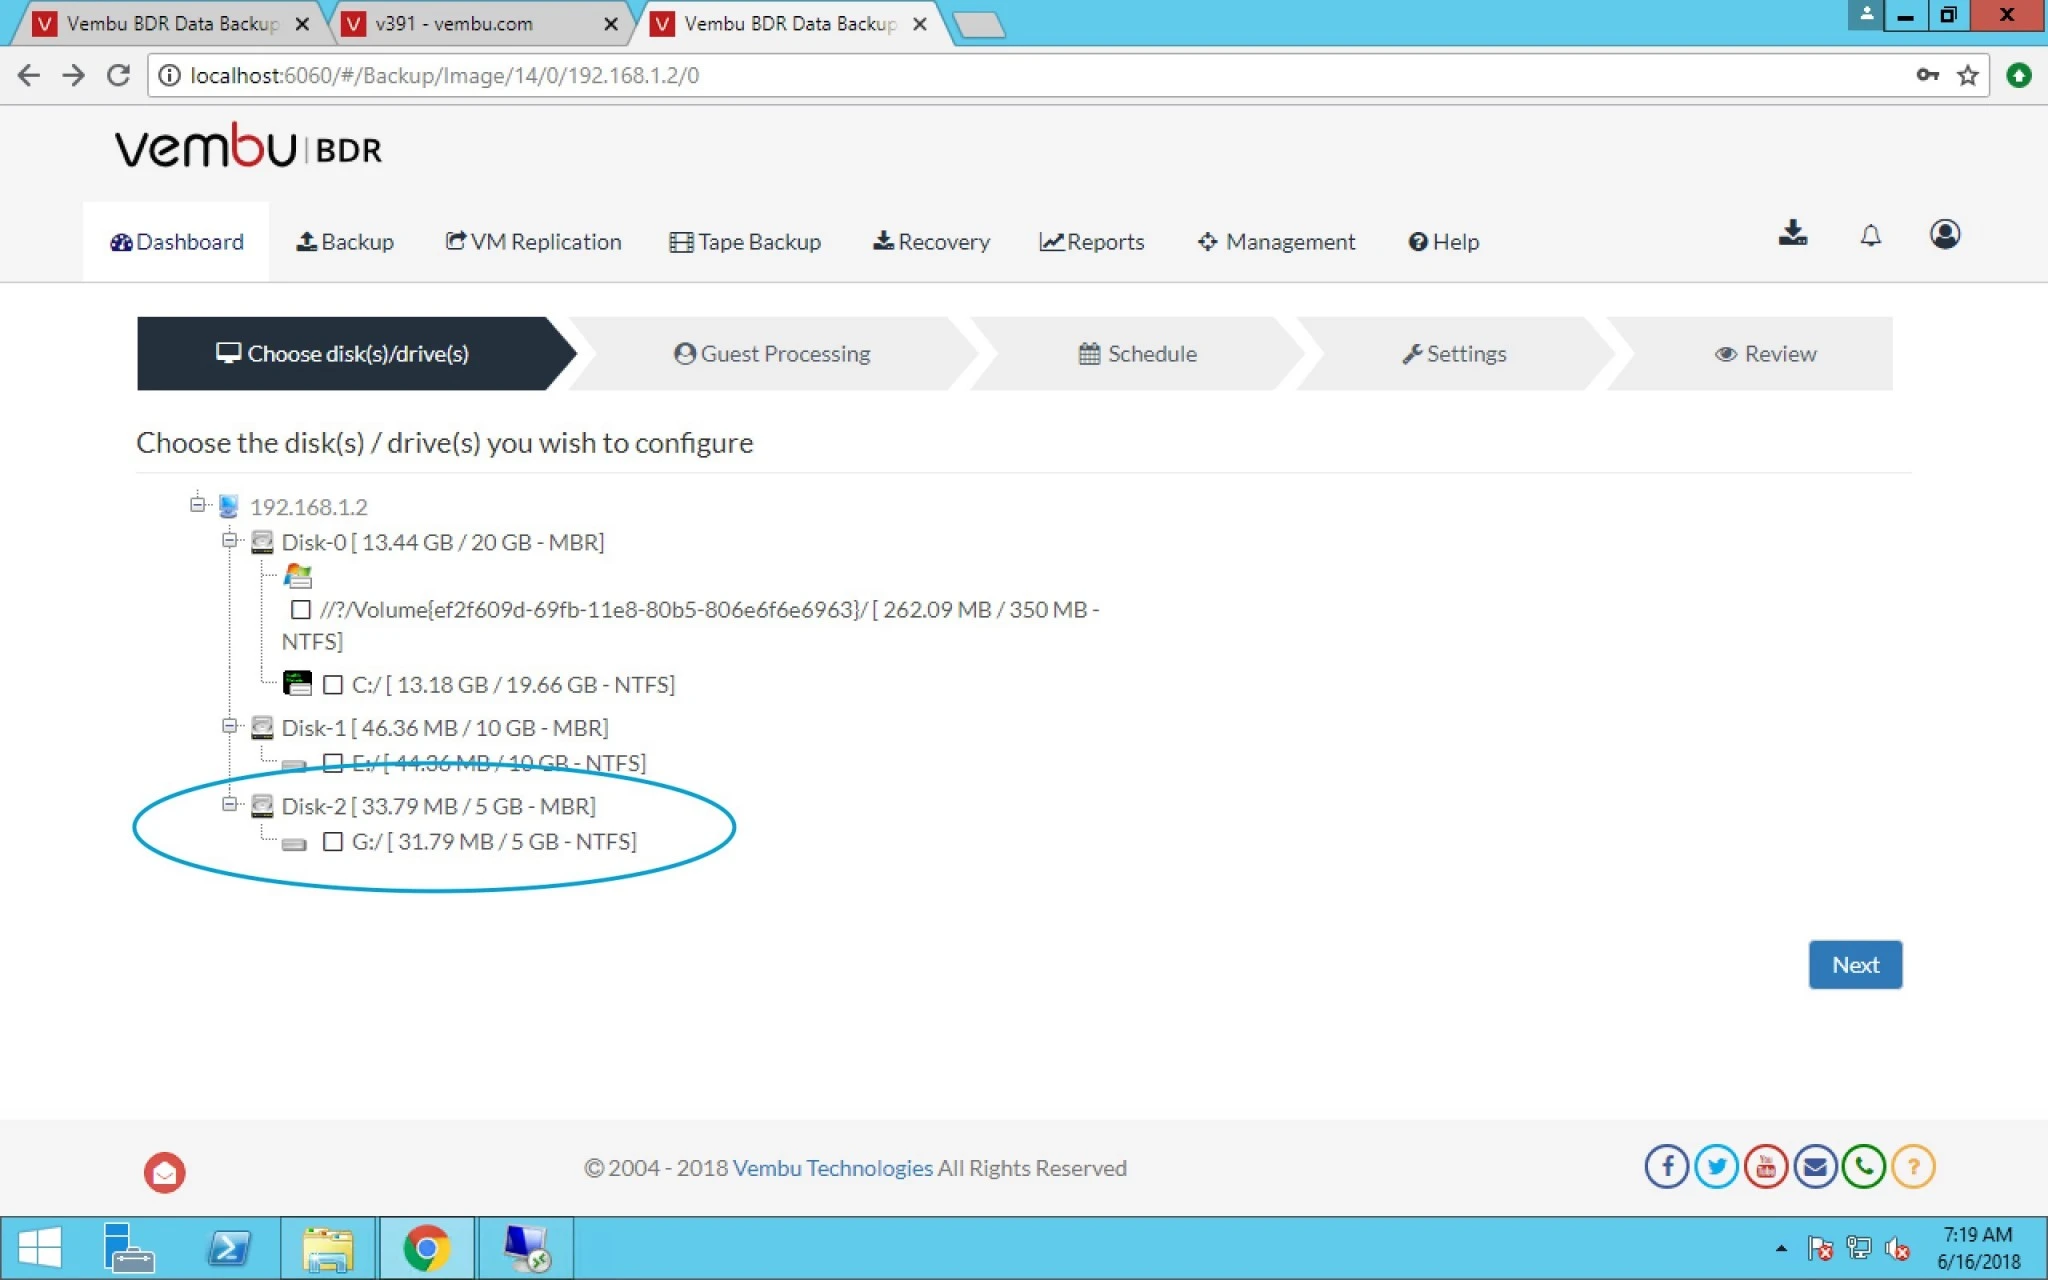
13. Here i added one more drive in Windows server to check how quickly Vembu can identify this new drive and it’s quick.


14. Now if you want to select Application aware settings then they will not hurt VM or backup keep in mind it’s optional.


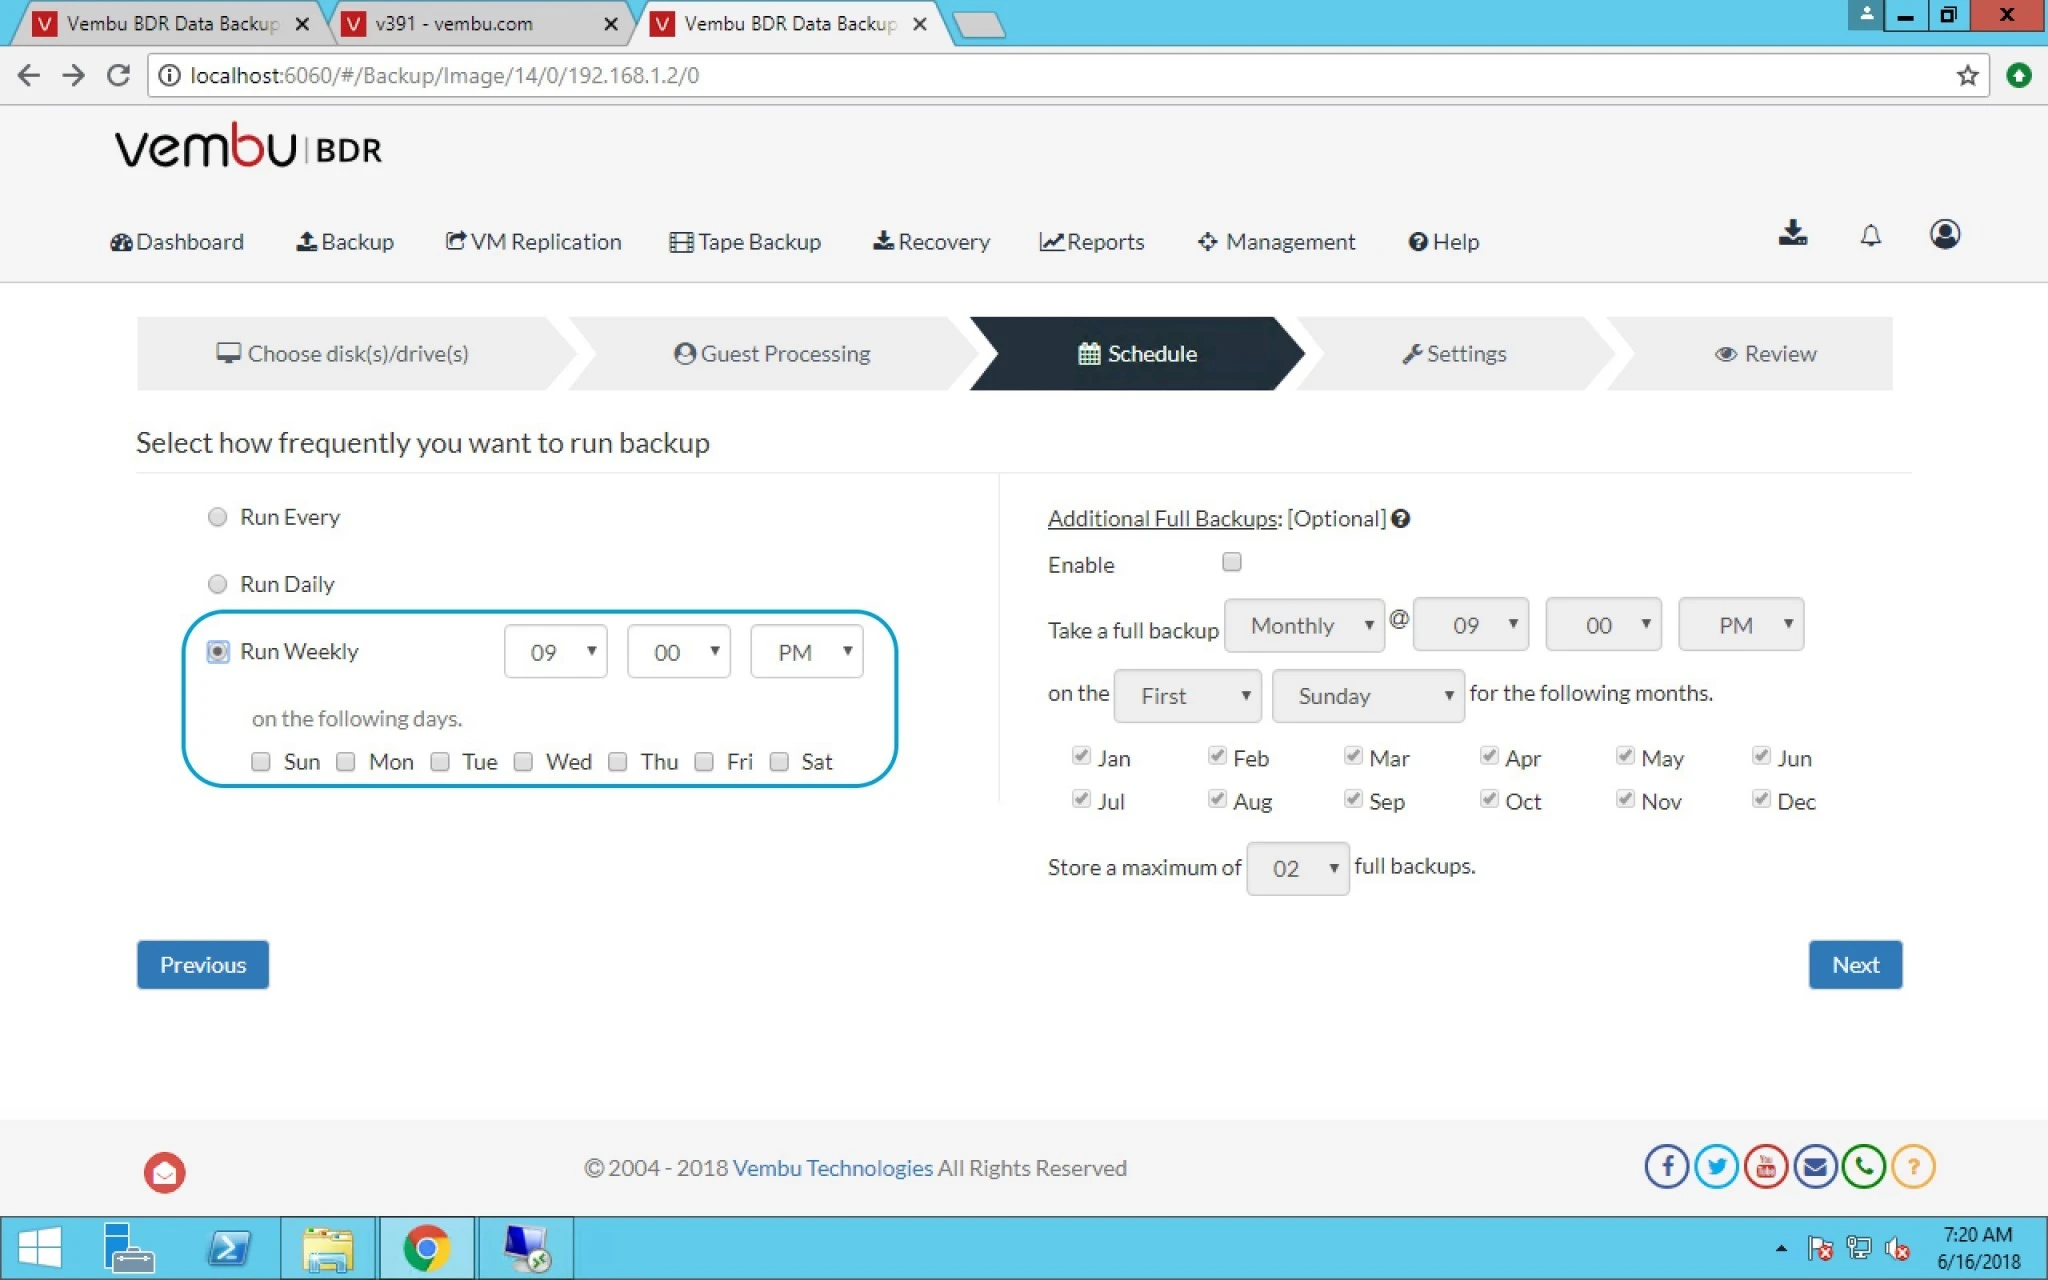
15. Here you can select how frequently you want to run backup.

a) Run Every Hour on specific days.


b) Run Daily at given time.


c) Run Weekly at time and weekdays you can select.


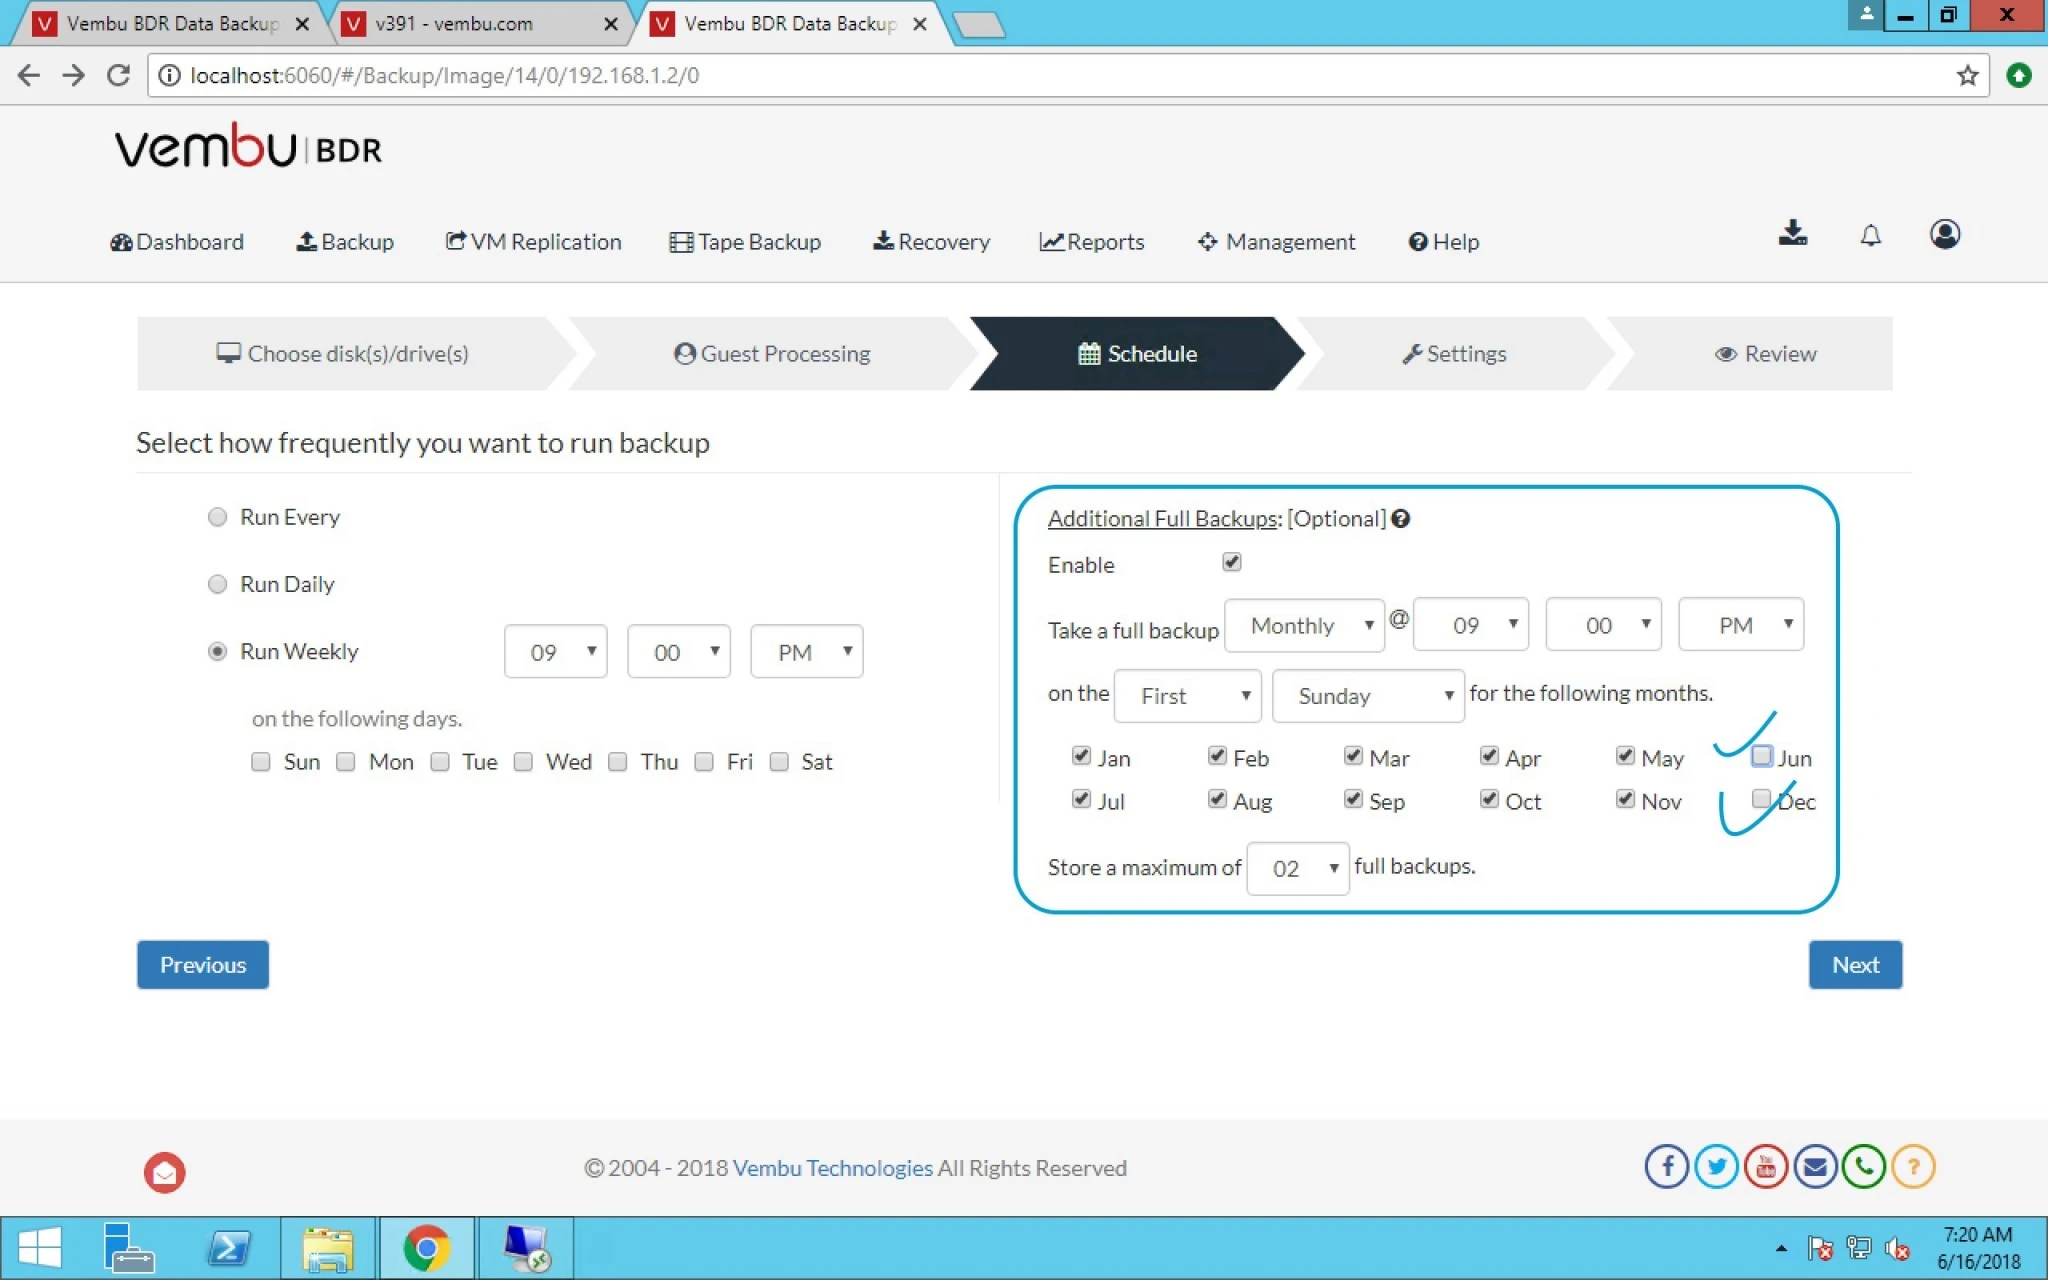
16. You can also select Additional Options like

Full backup on Monthly basis with Month selection


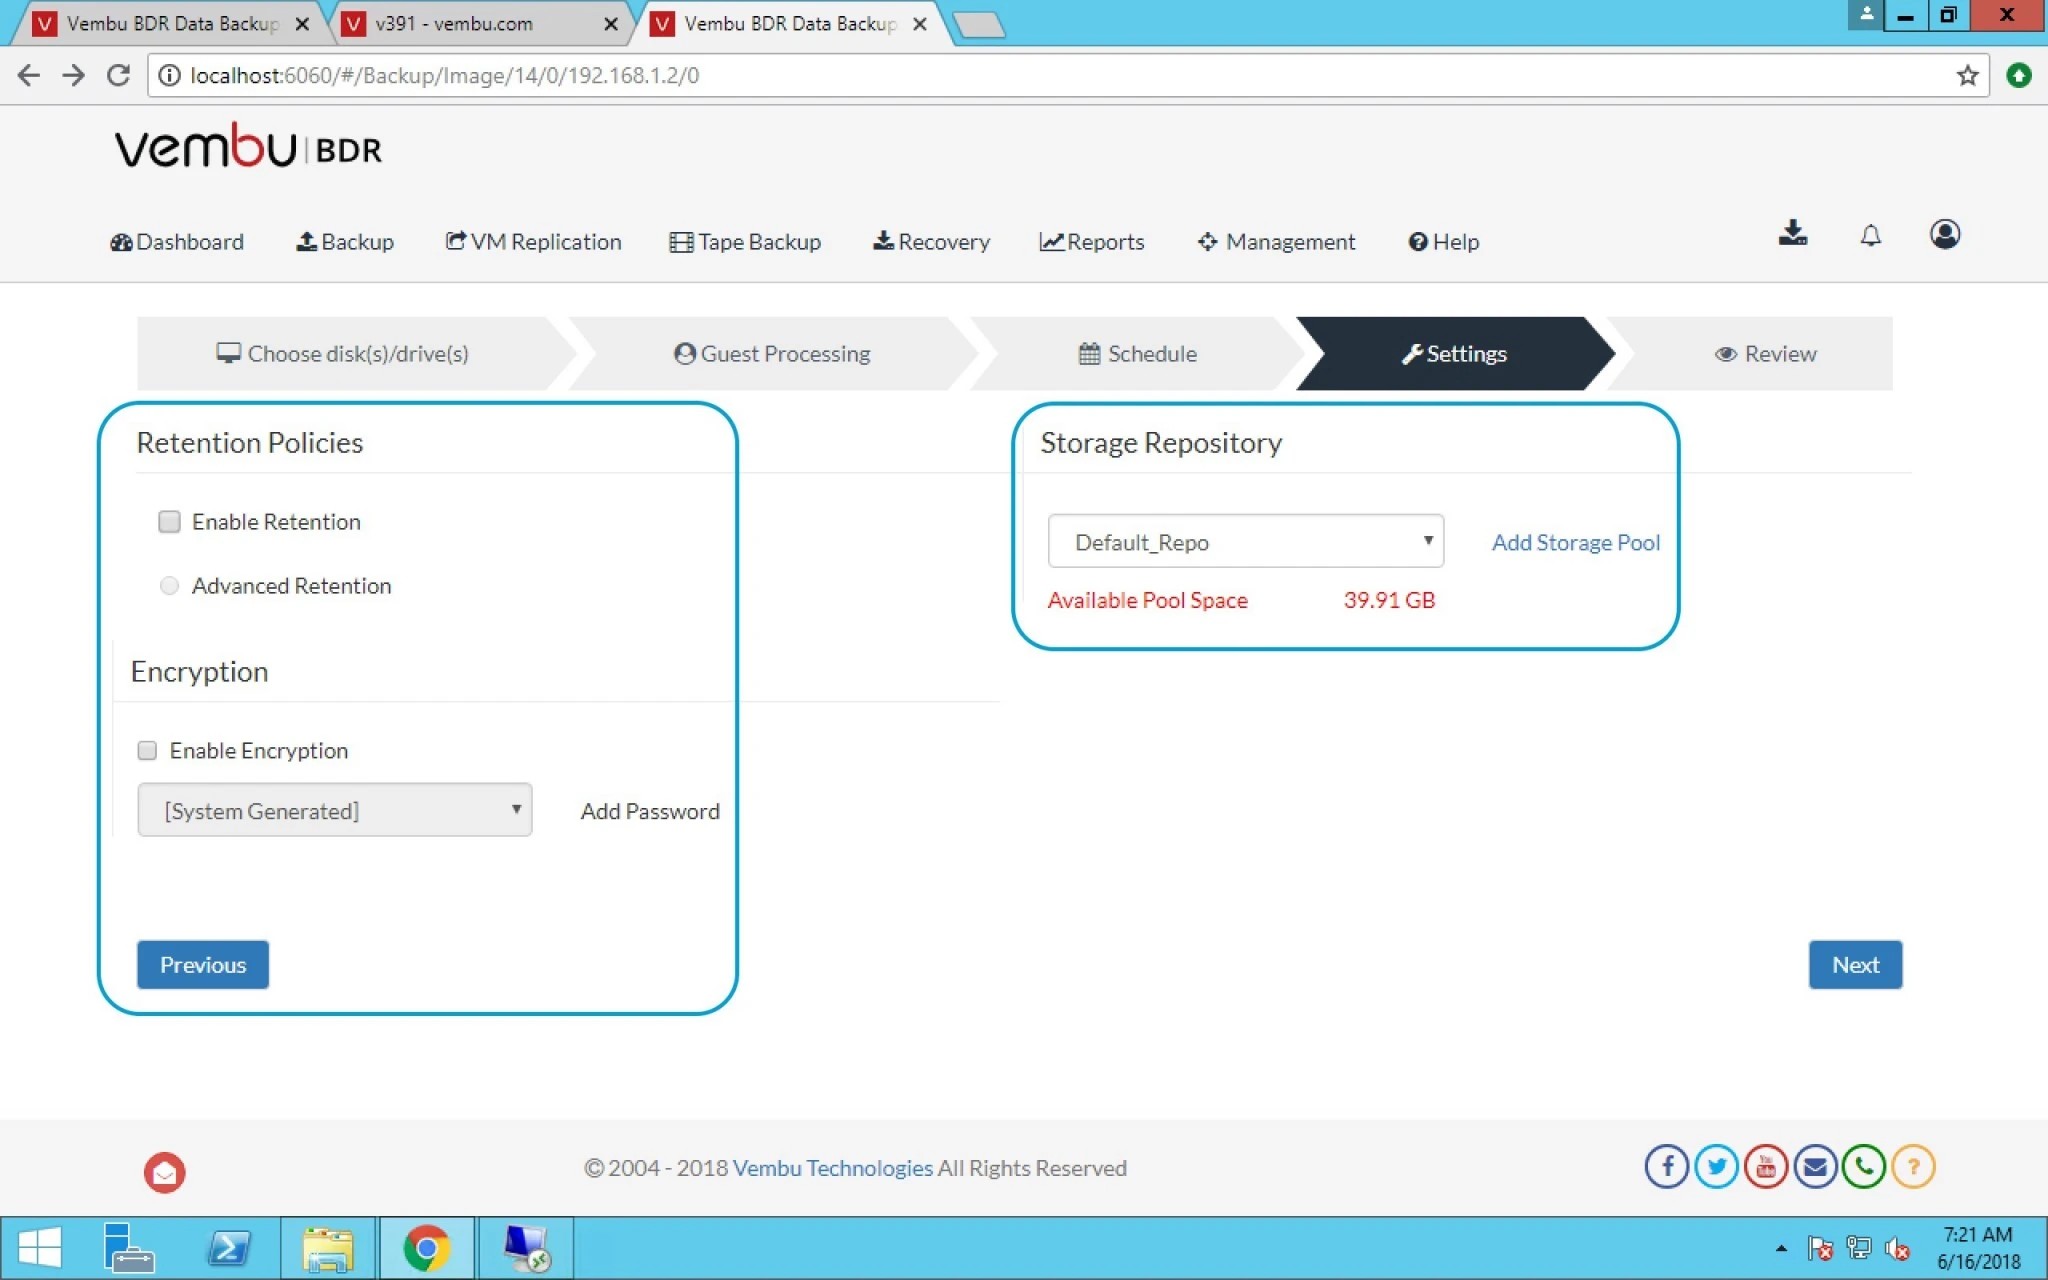
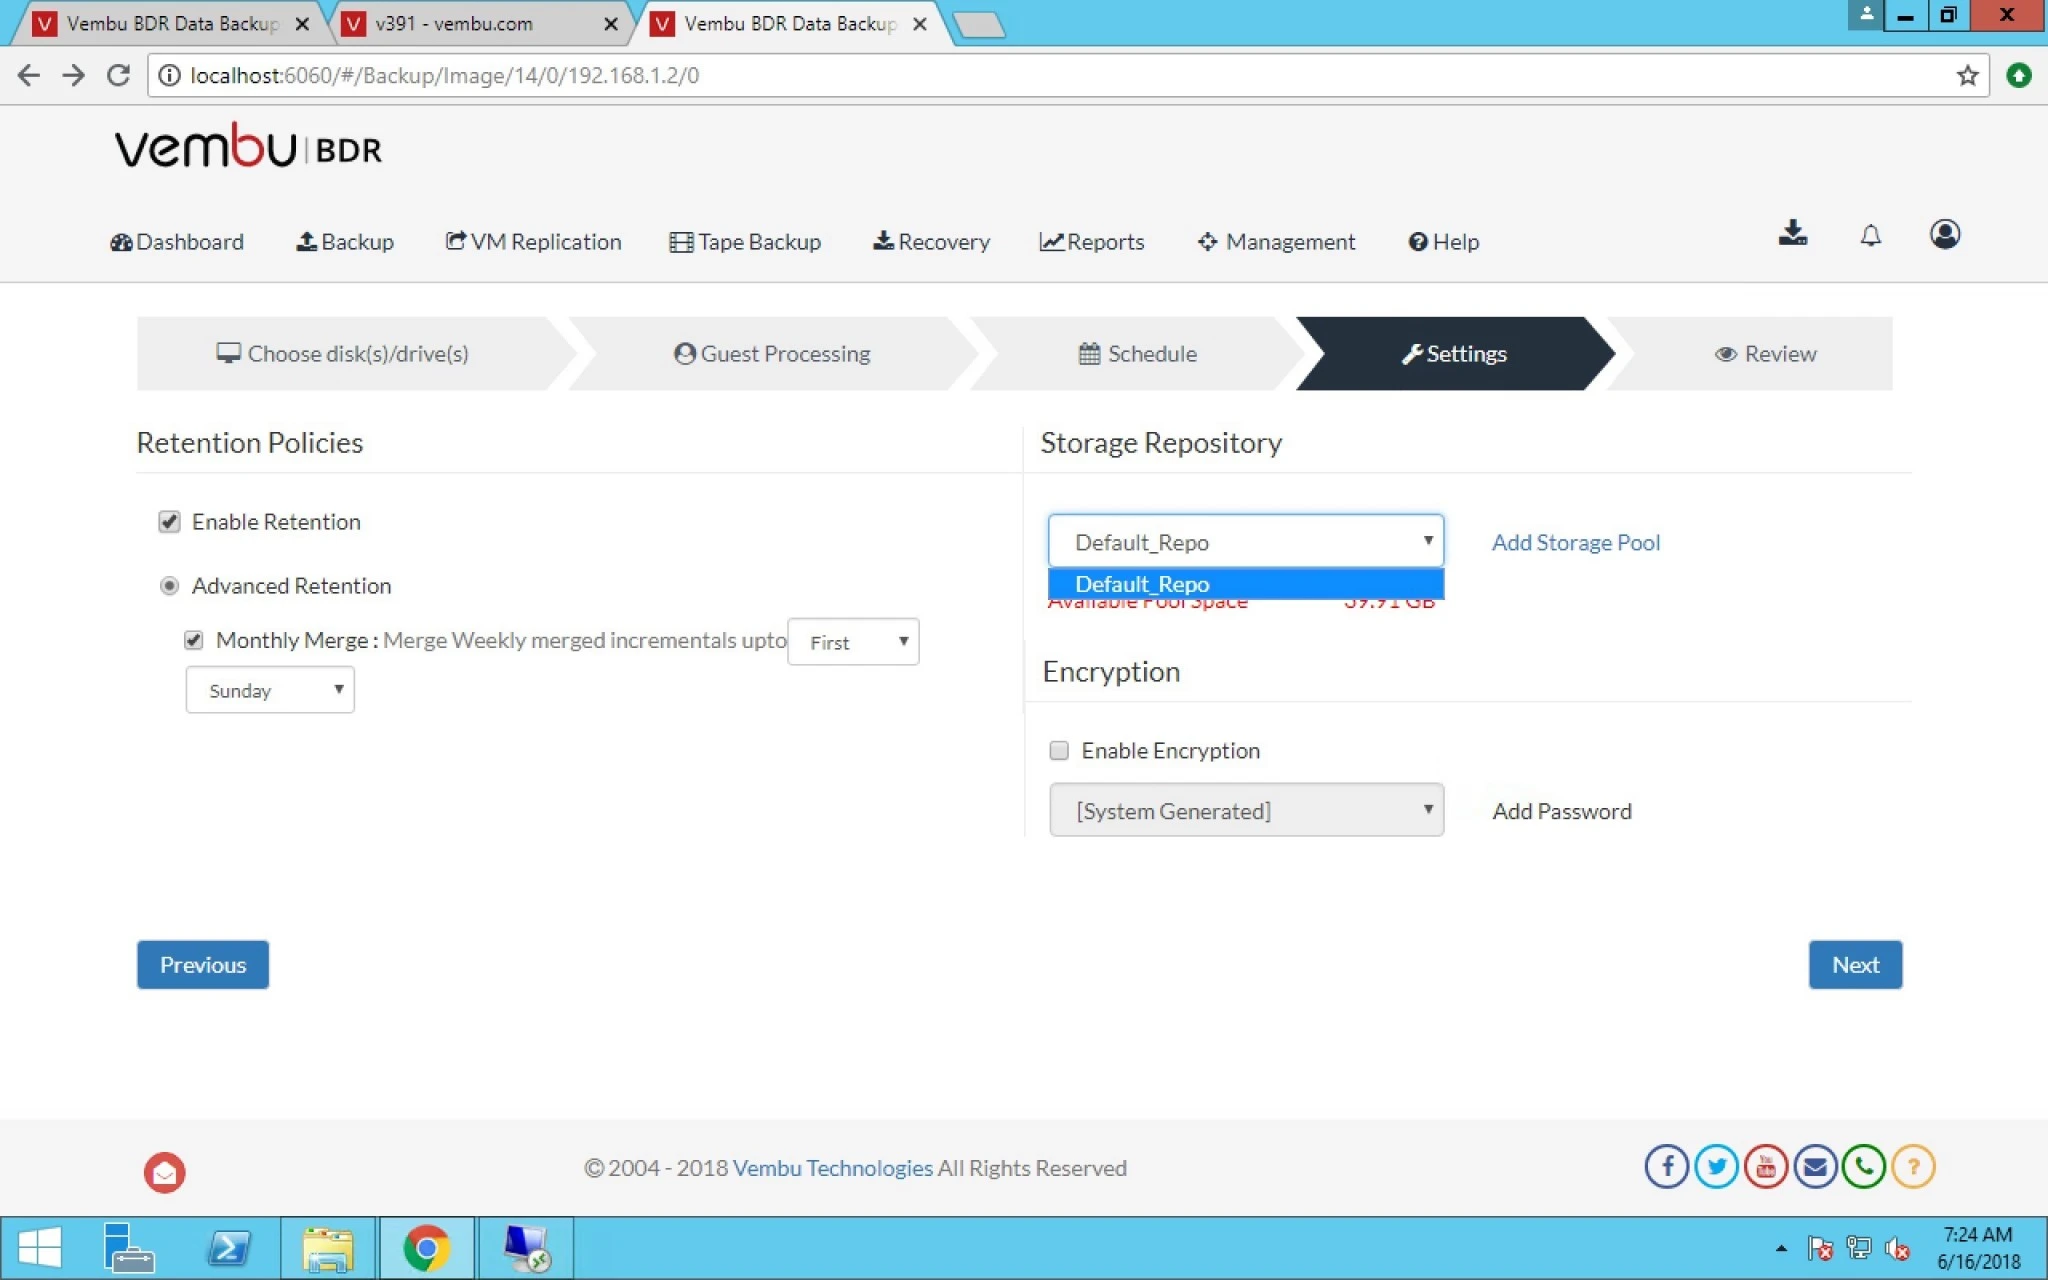
17. In Settings tab you can select Retention Policies with Encryption.


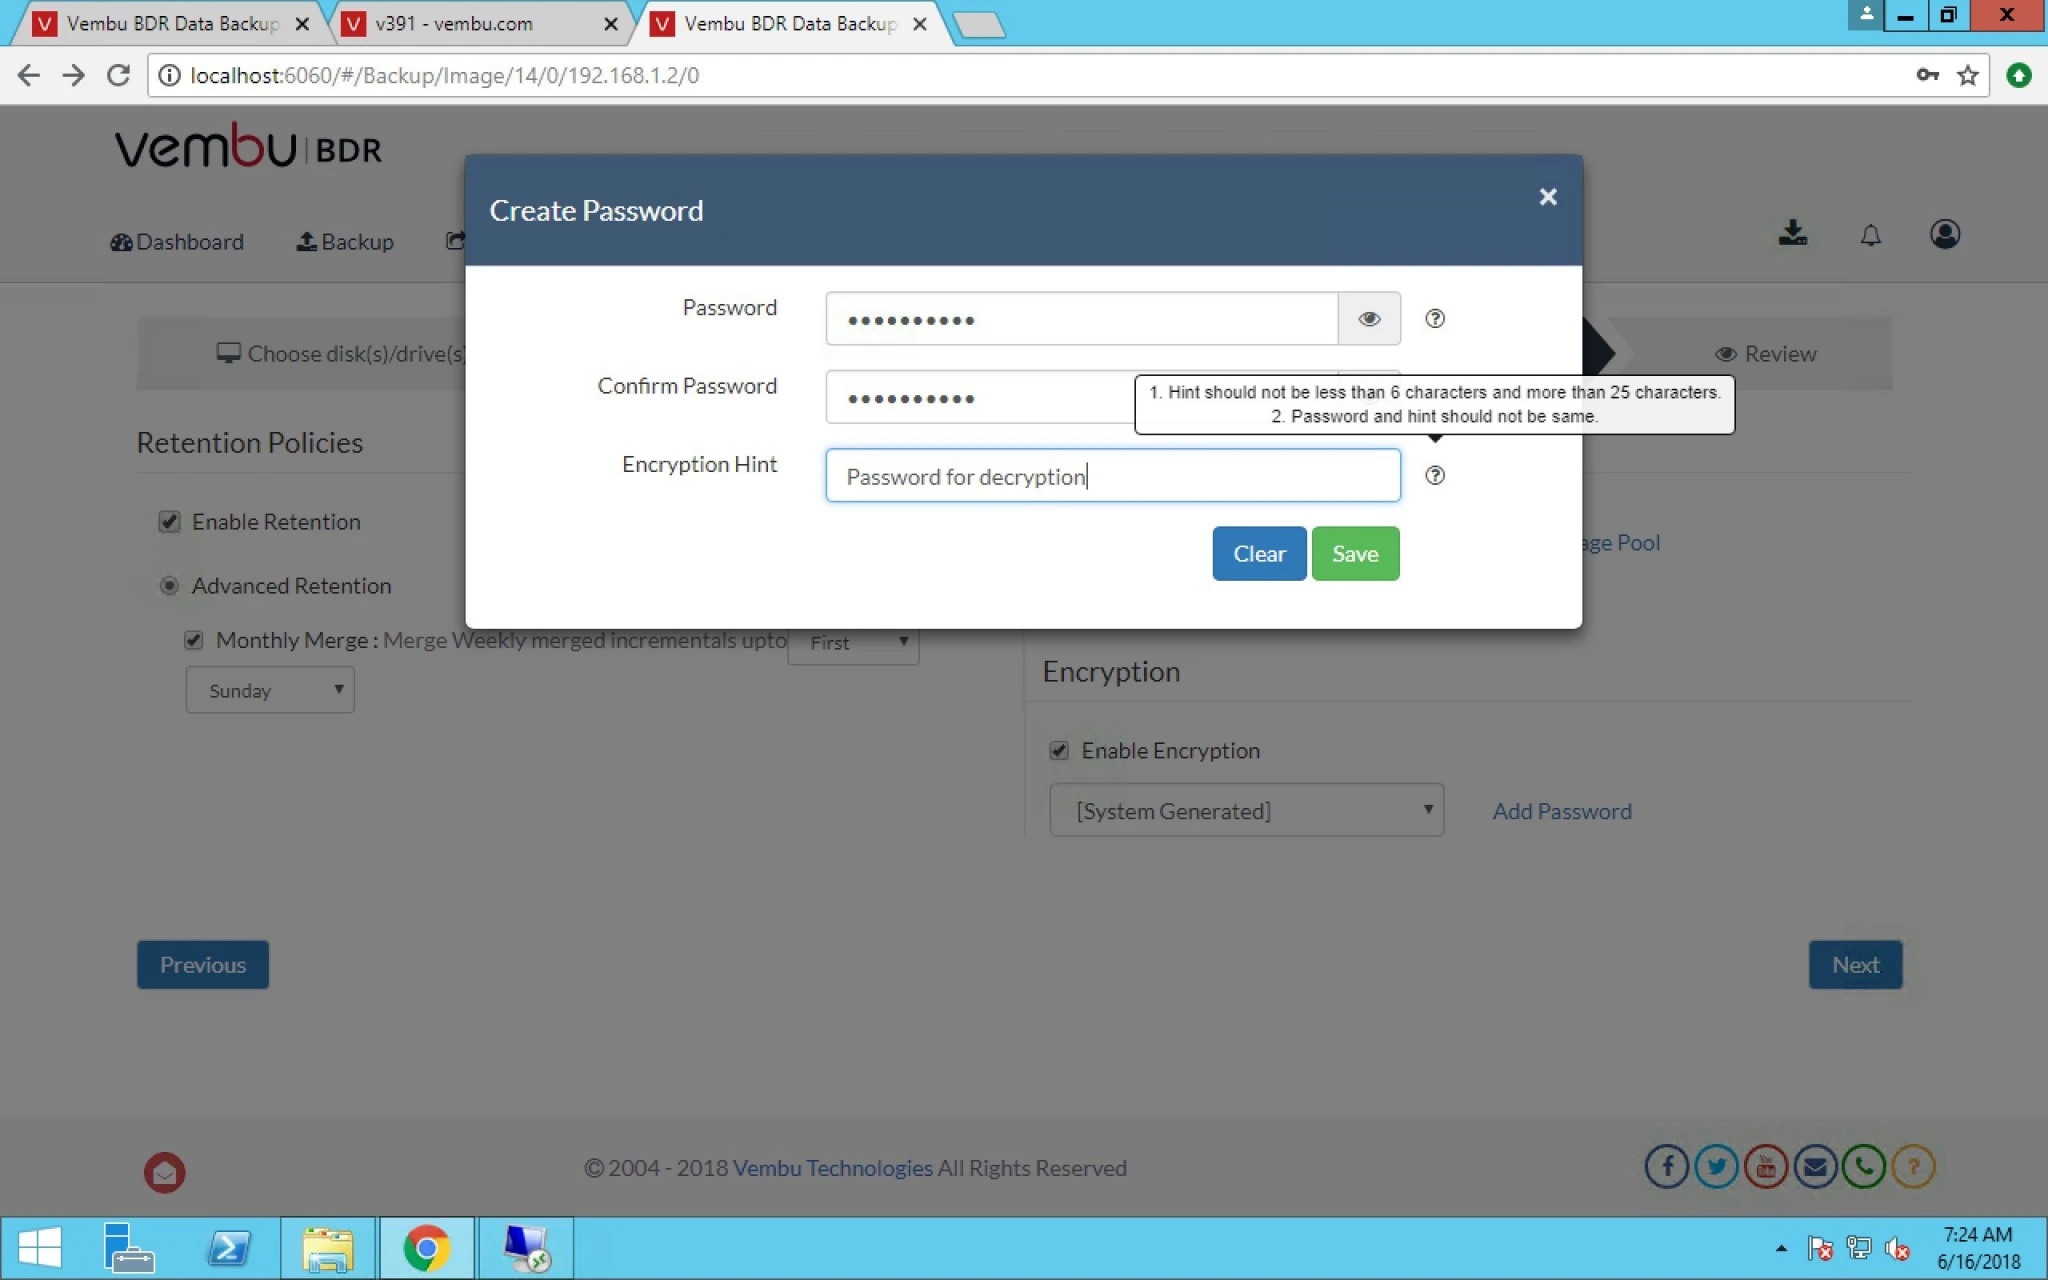
18. Here you can select Encryption and use password to protect the same.


19. Password and Hint is must field here.


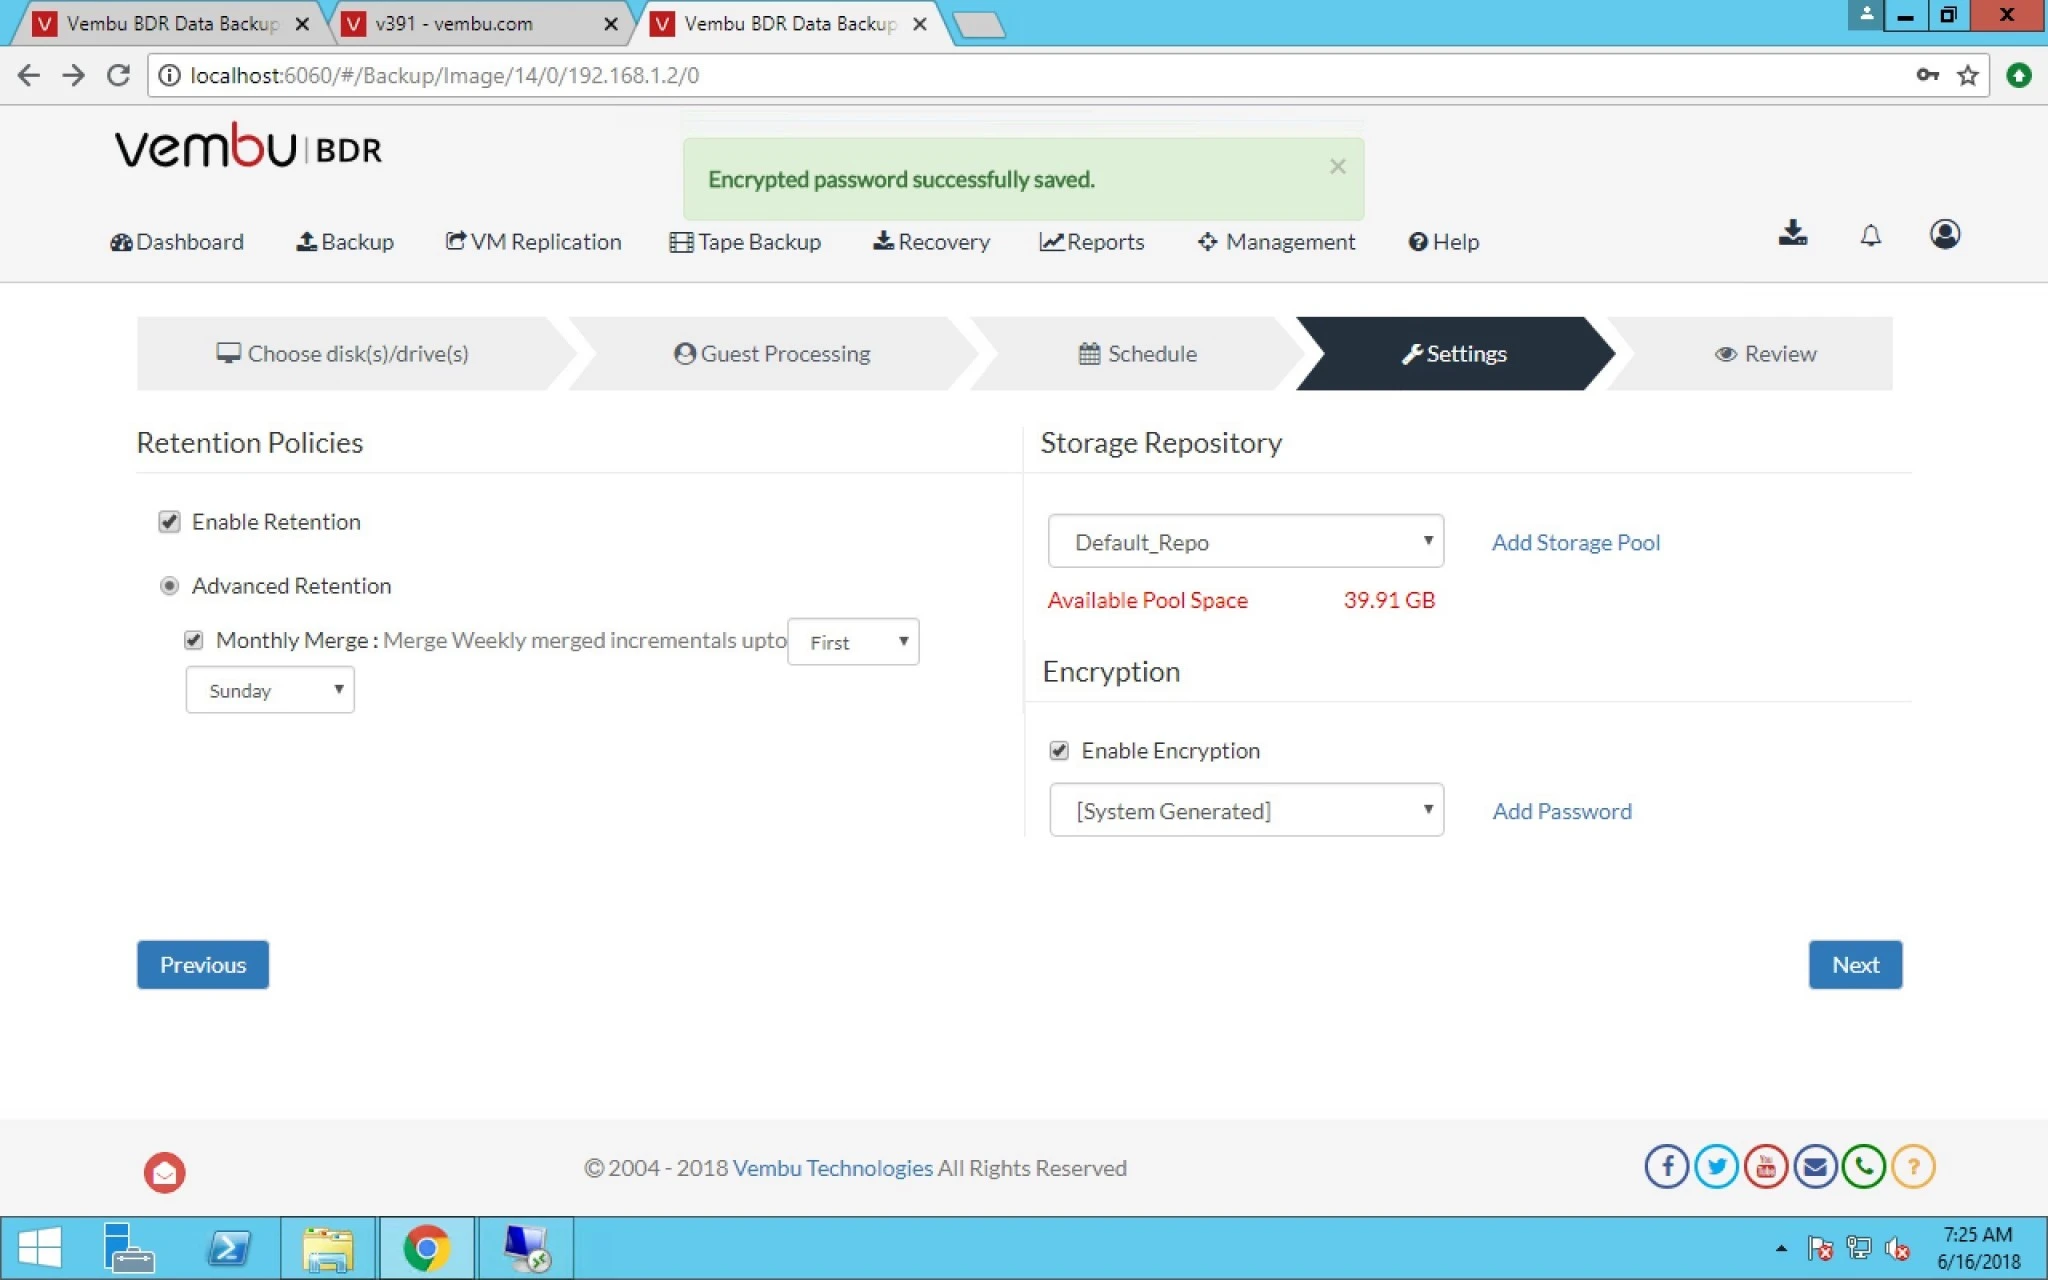
20. Click on Save and it will save this setting.


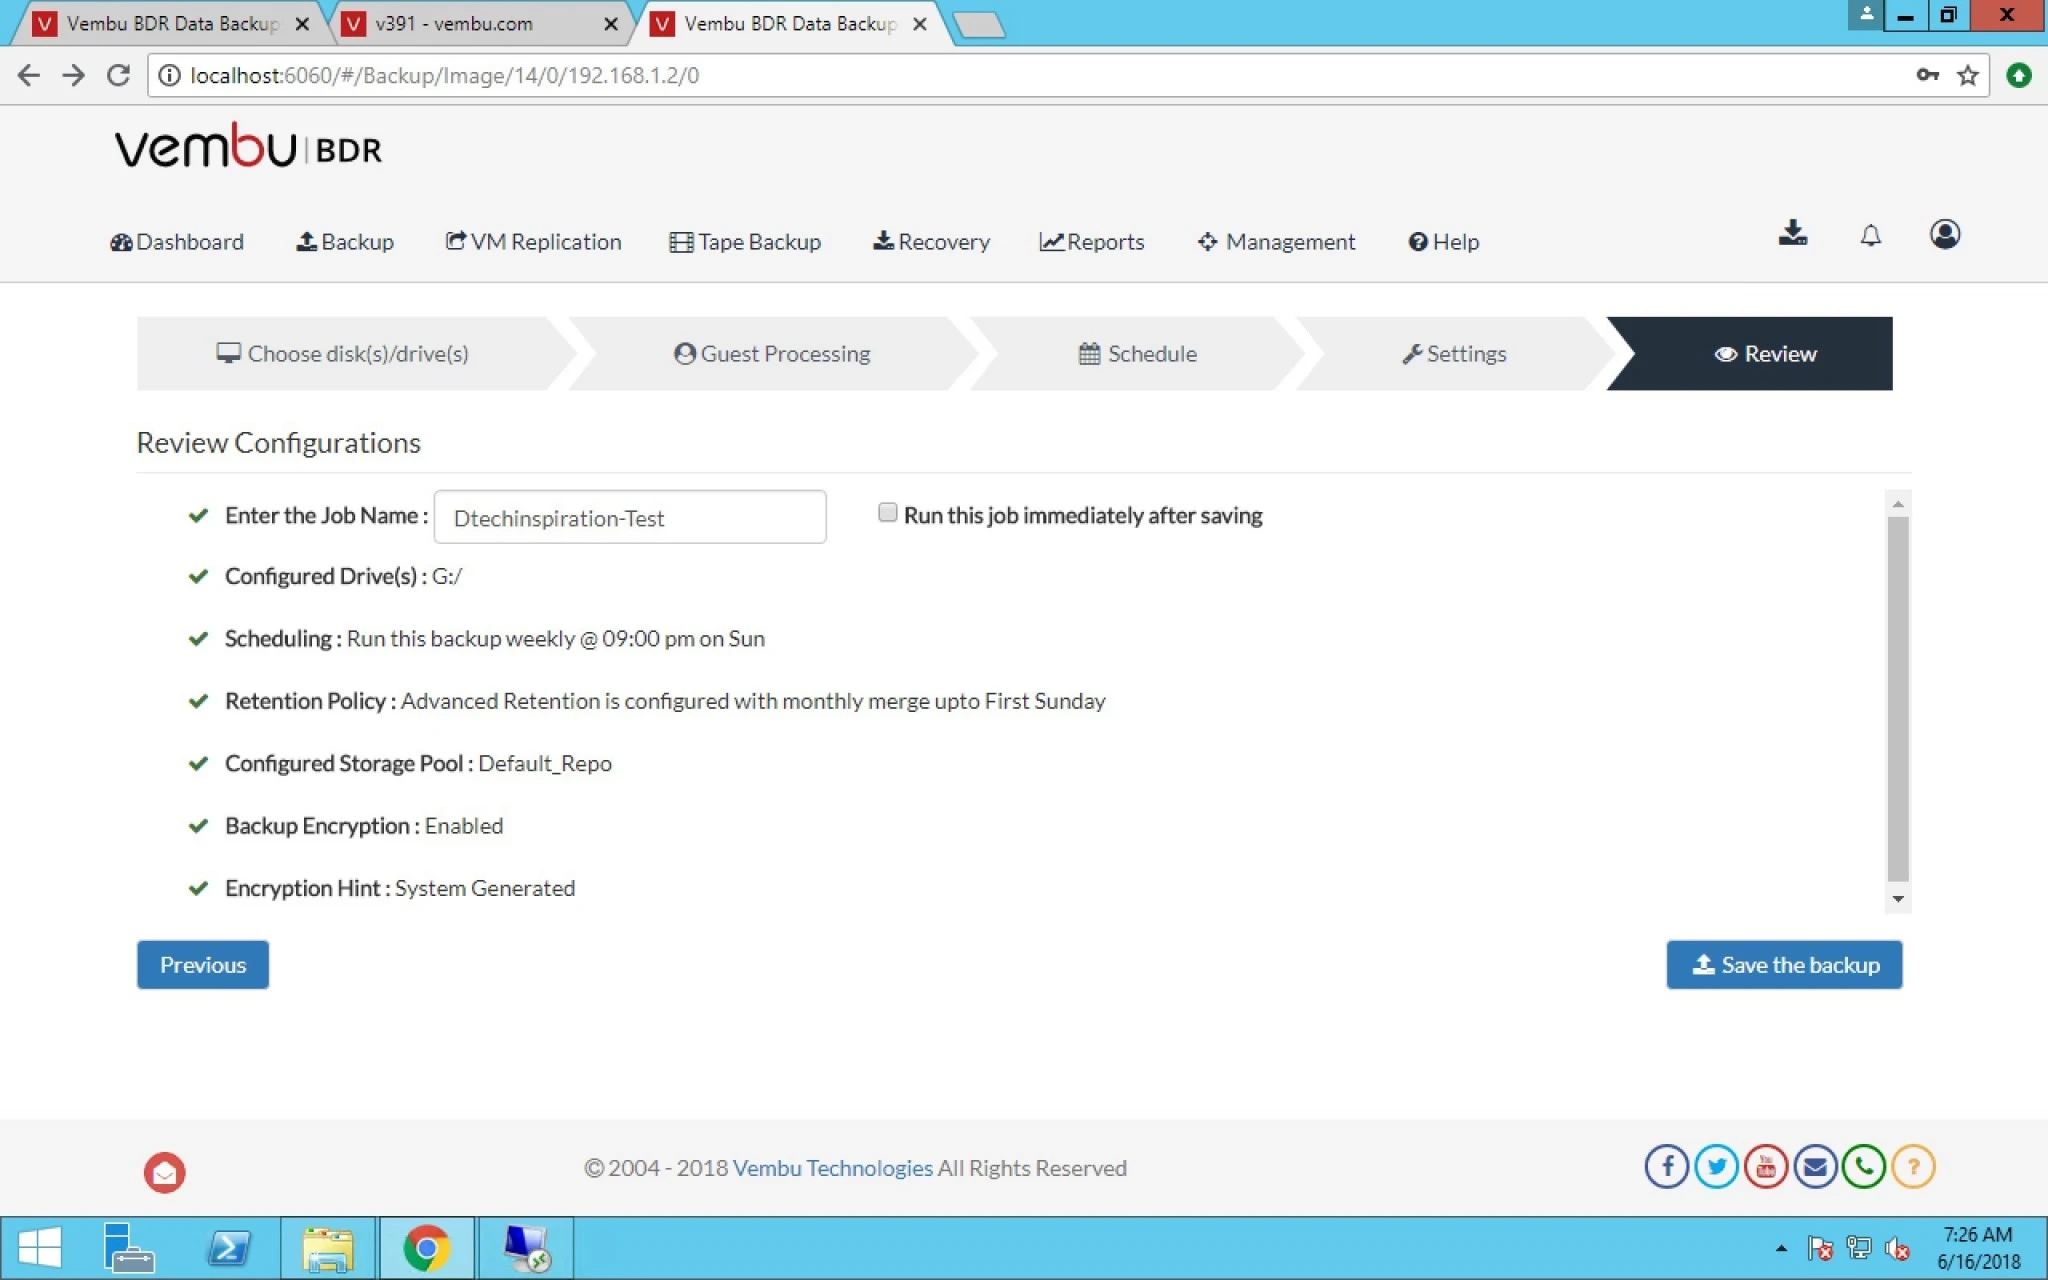
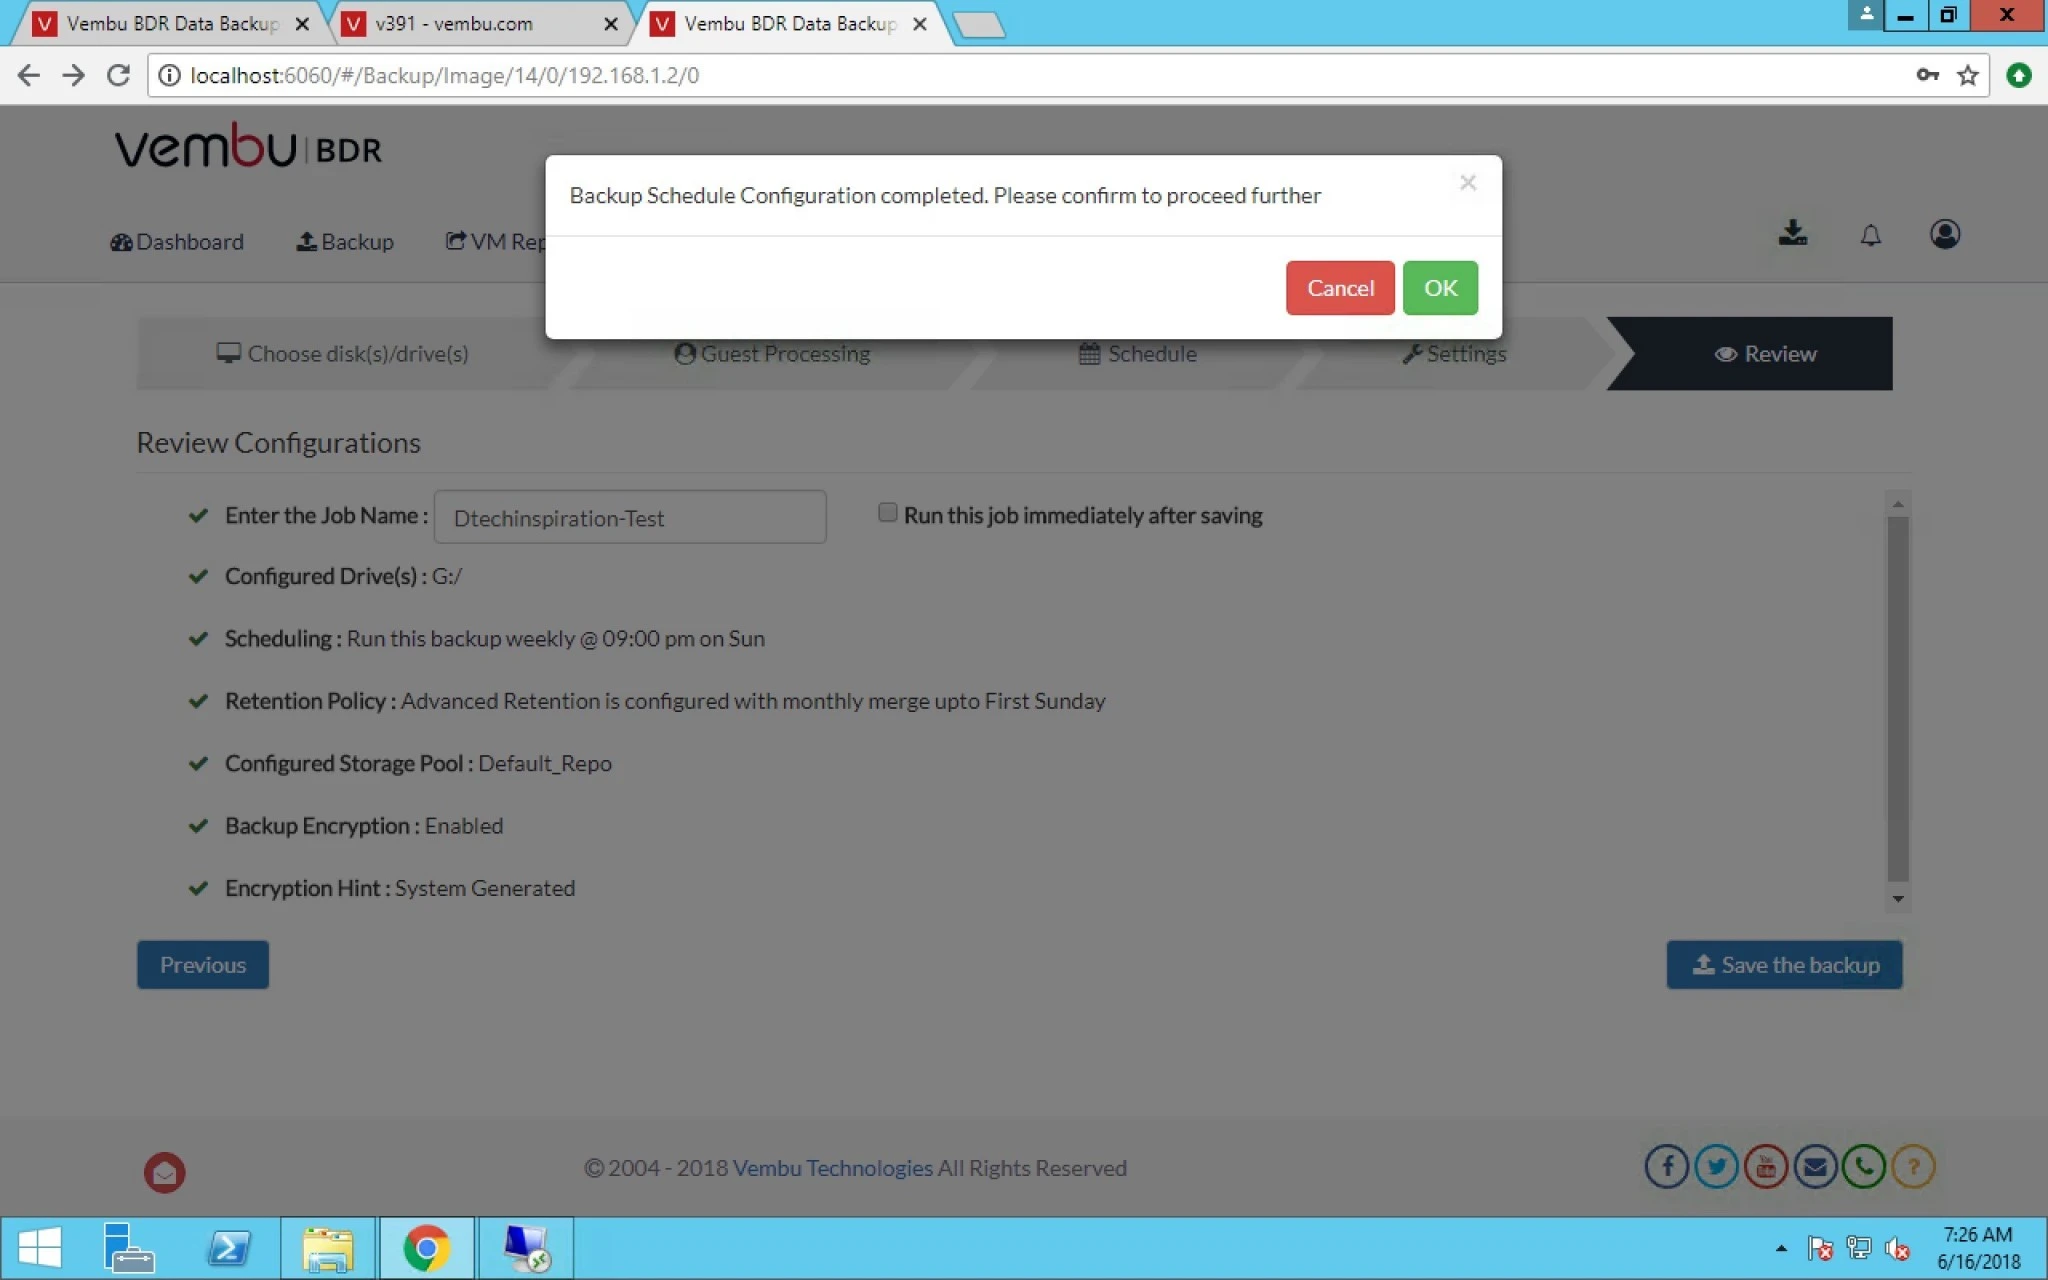
21. Final page Review all the settings and if you want to change then click on Previous and do the editing otherwise click on save the backup option.


22. When you click on save the backup it will ask you final confirmation.


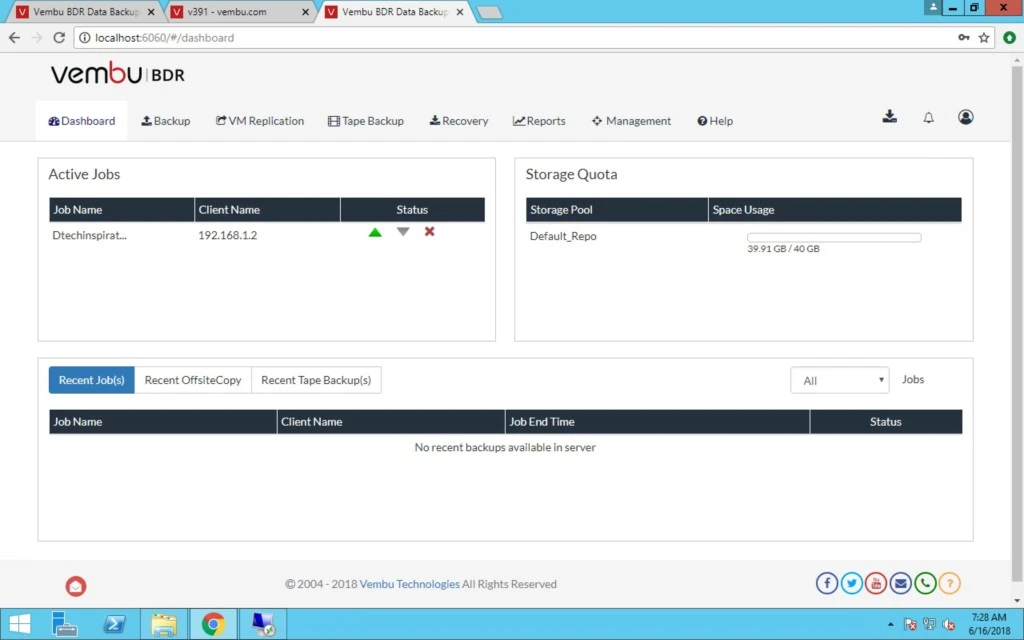
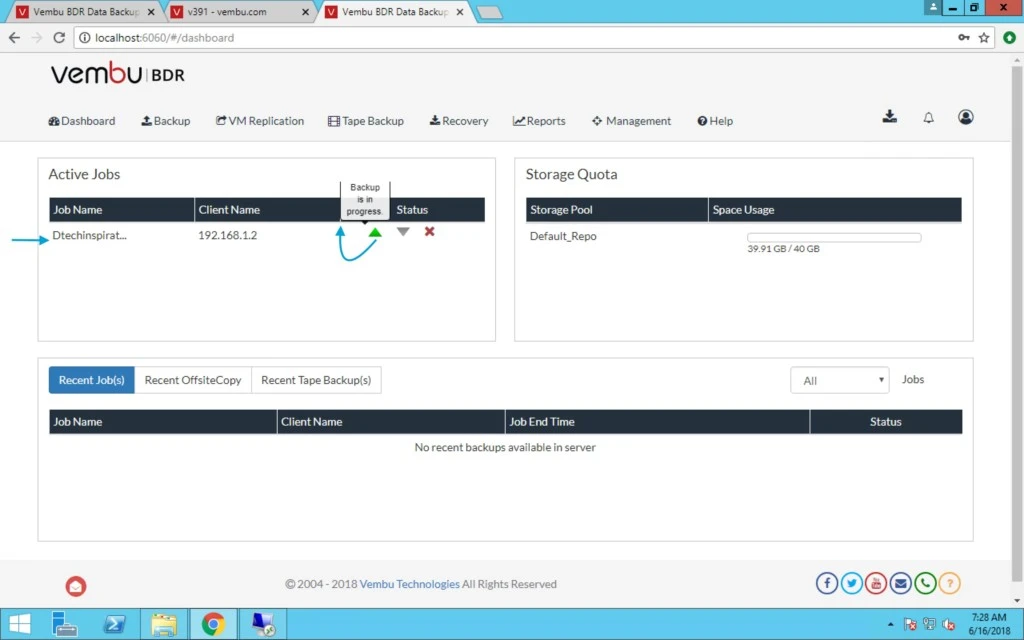
23. After creating backup job you can see under Active Jobs and it is also showing you UP and Down arrow.


24. UP Arrow means Backup is in progress.


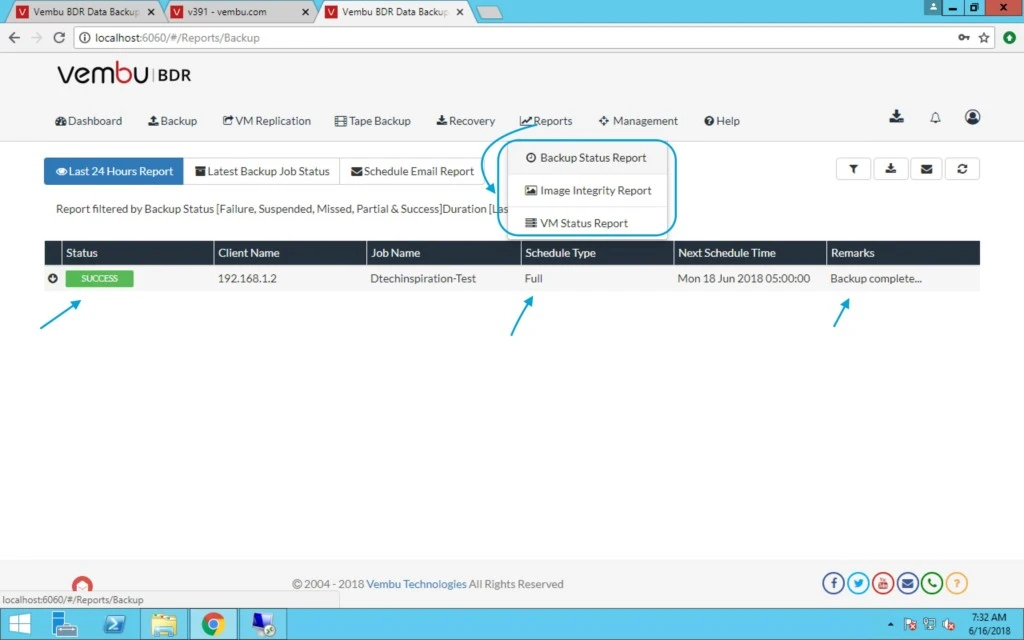
25. If you want to do report or check the status of backup jobs then go to reports tab and under Backup status report option and here you can see which job is completed successfully and which one is failed.
 

0

How to Configure Vembu BDR Offsite Backup

Disaster recovery is a critical element for an industry today.It provides you the offsite disaster recovery site resiliency.Which allows you to recover your entire production site by failing over to the secondary DR location in case of a disaster or failure. In addition to creating “replica” virtual machines of production workloads, it is important that we have offsite DR copies of backup data (Multiple copies of backup).
We always should have multiple copies of production data, including production backup data for more redundancy.

How to configure offsite disaster recovery copy with  Vembu BDR Suite .

Thumb Rule : We should never keep all our copies in a single site and to it redundant that will protect from any failure, we will be using an offsite disaster recovery copy which means we will create copies of production backups in another location in a DR facility. The main reason for doing that is to protect from a situation, where we don’t want to also loose all of our backup data in case of a failure of a main production location/ site.


Topic Outline:

Where to Download Offsite Server Setup.

Install BDR Offsite Server.

Configuration of Offsite Server.


1. First lets see from where you can download this Vembu BDR Offsite Server setup.

2. Open Web browser and type http://localhost:6060 & https://localhost:6061/

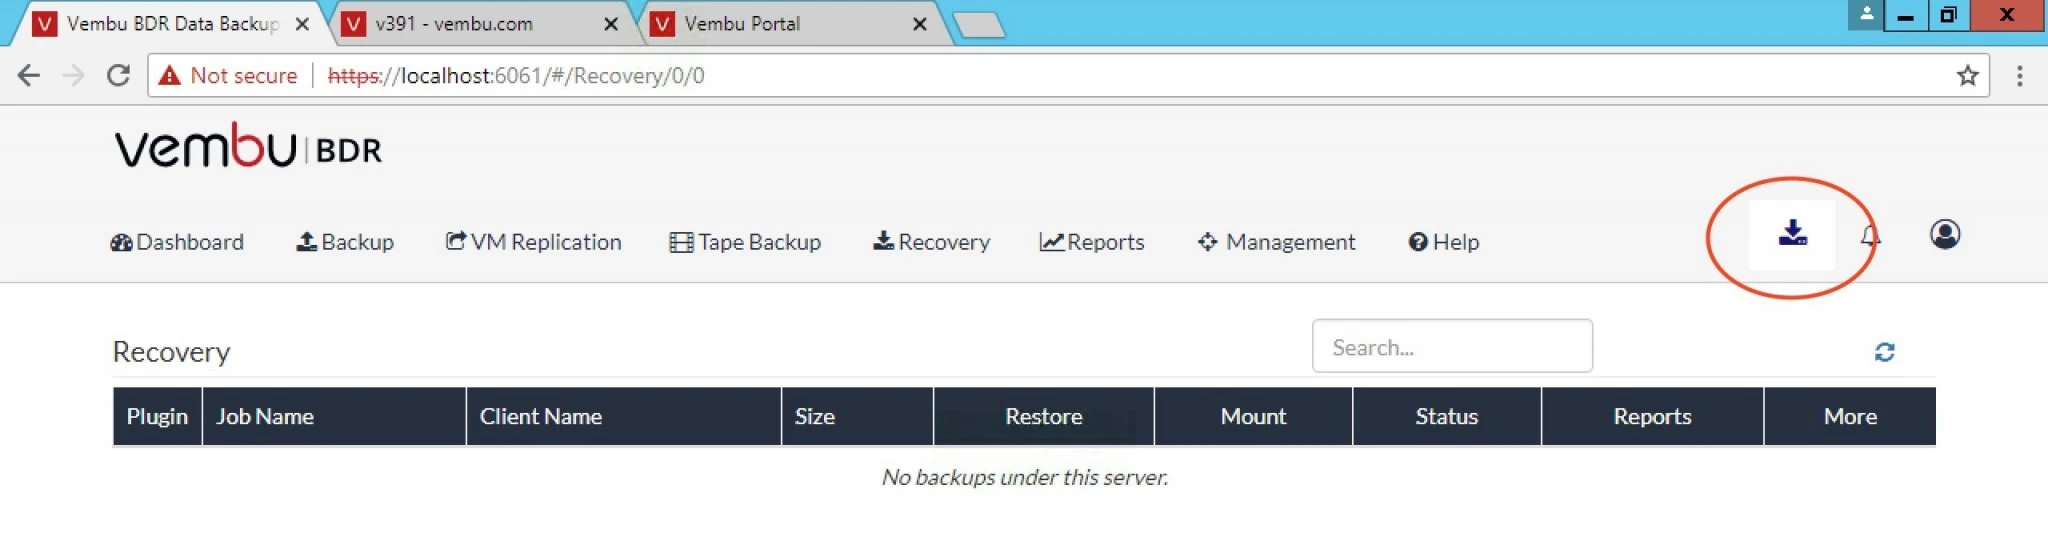
3. Now Click on Download symbol which is on the right hand side of this page and this will open a new tab.


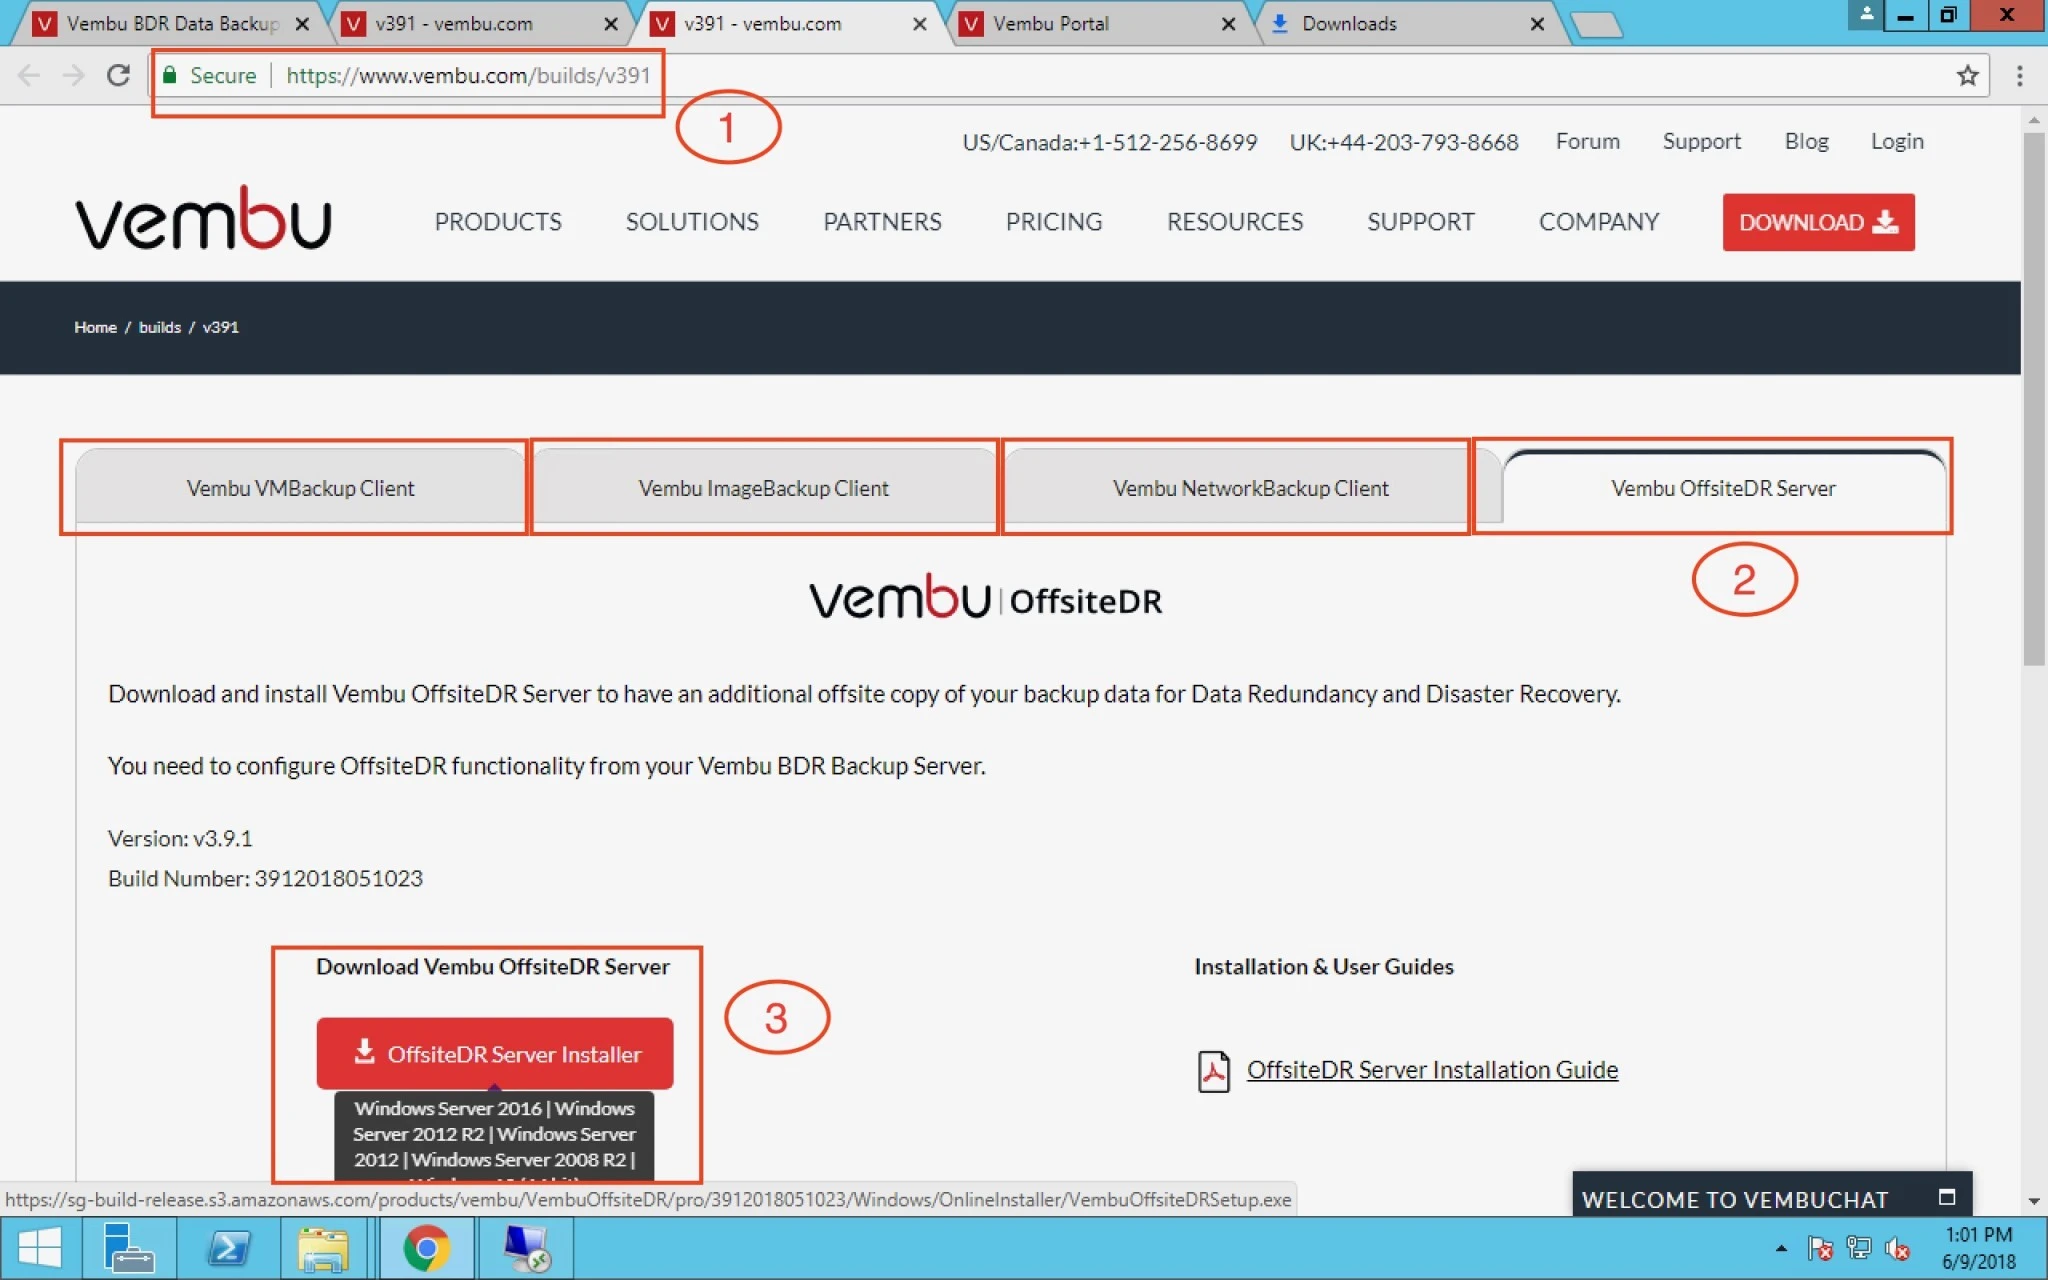
4. Here you can see Four tabs from where you can download setup as per your requirement this time we will select Fourth tab and click on download offsiteDR Server installer.


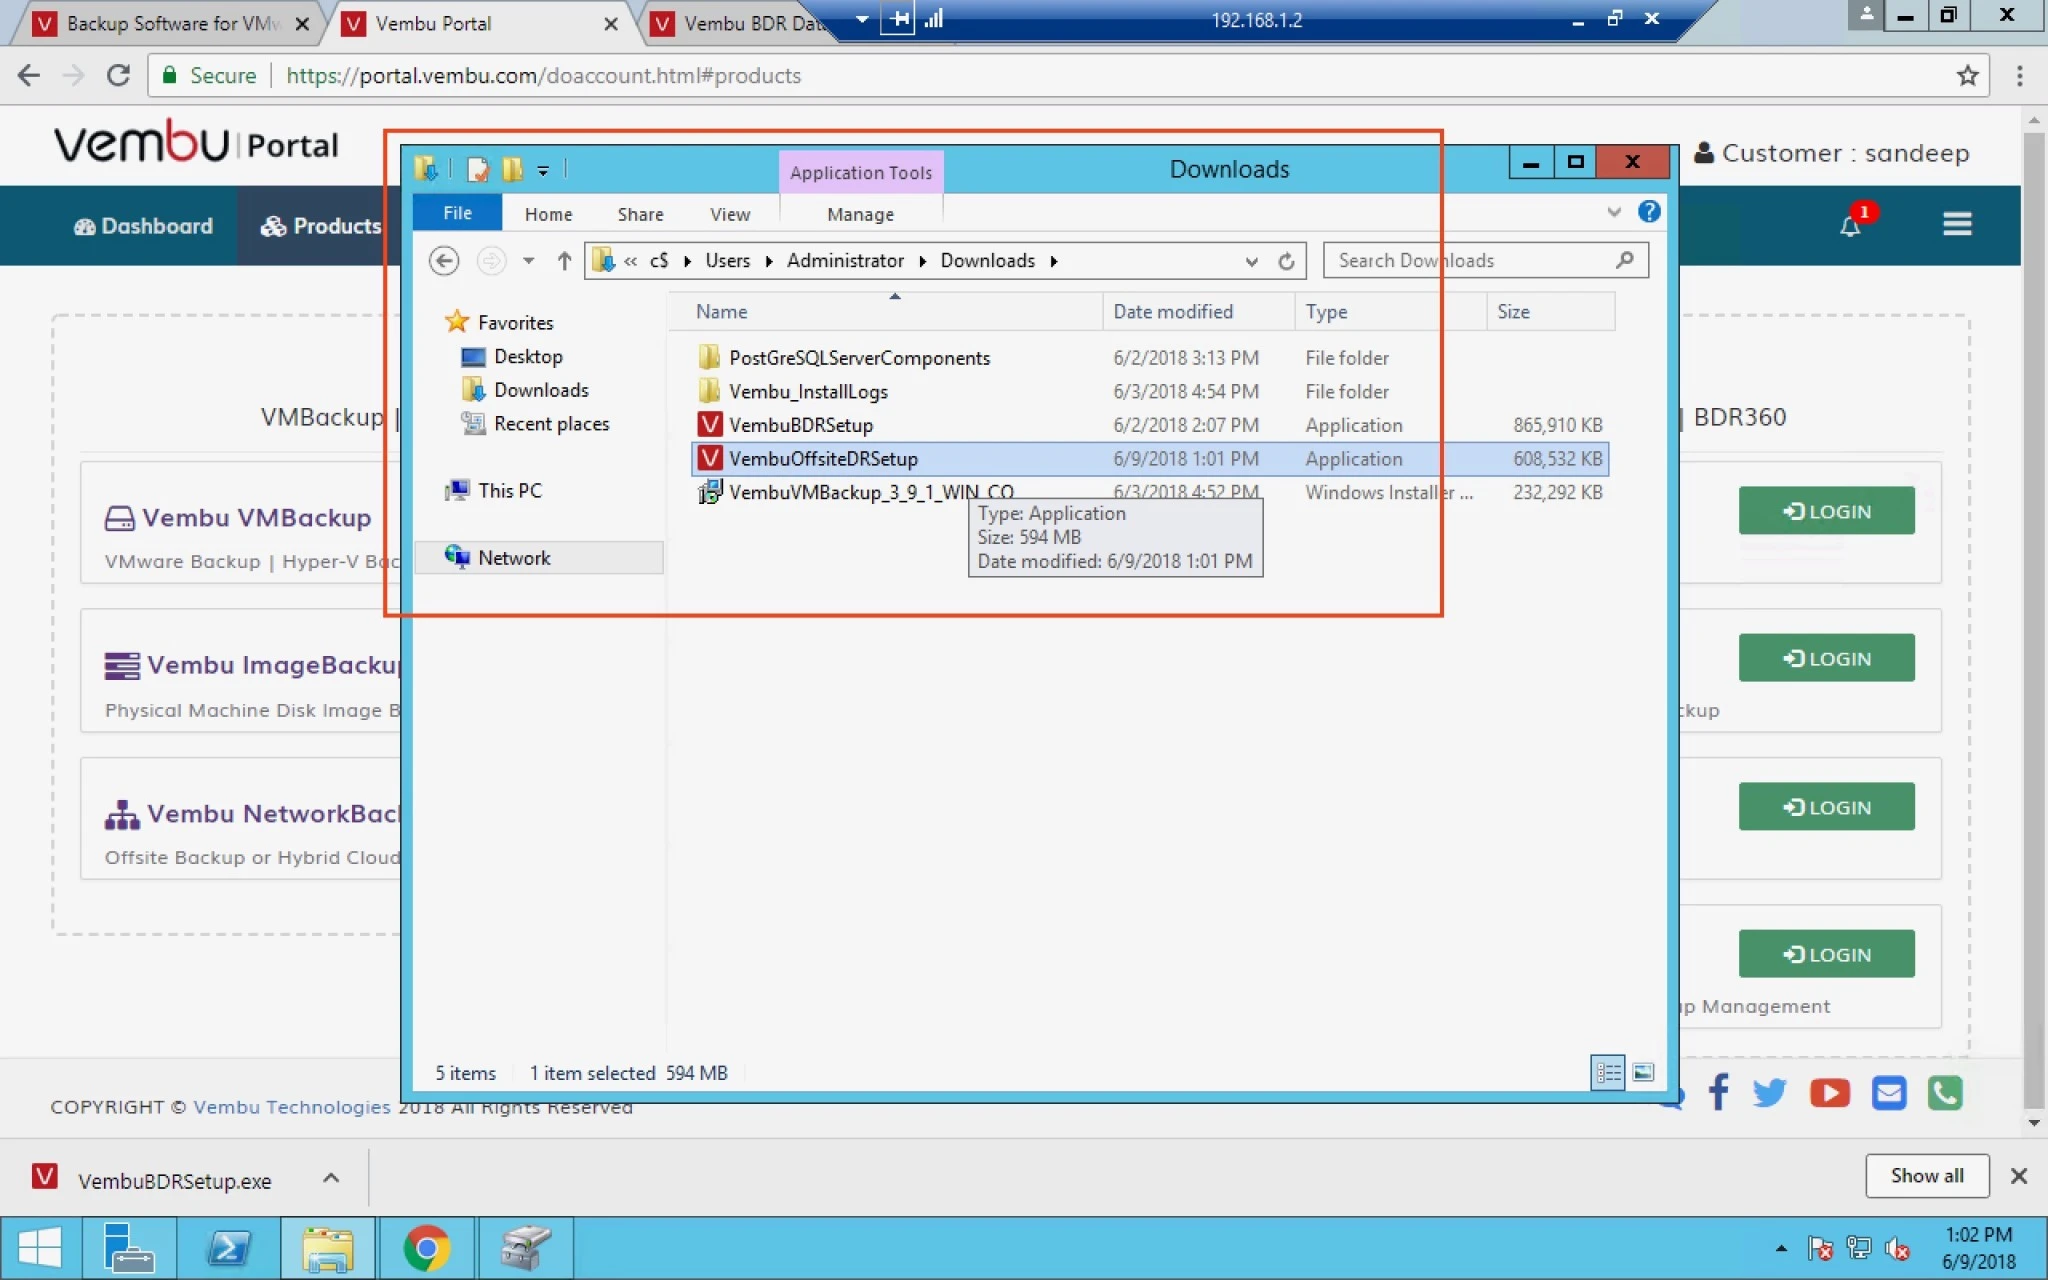
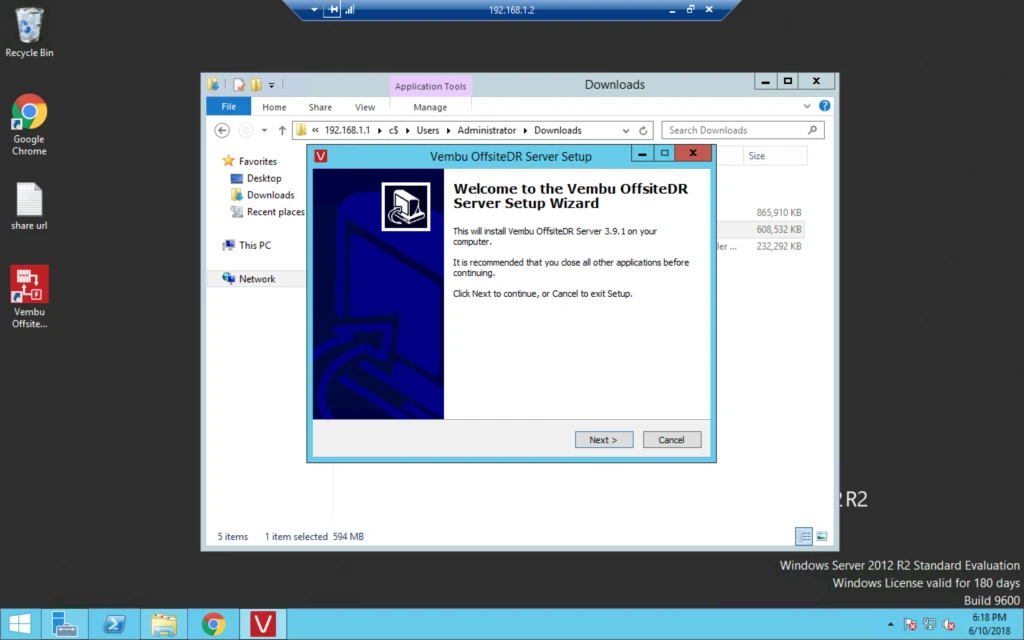
5. After download you can start installing OffsiteDR server by double clicking on it.


6. Click on Next.


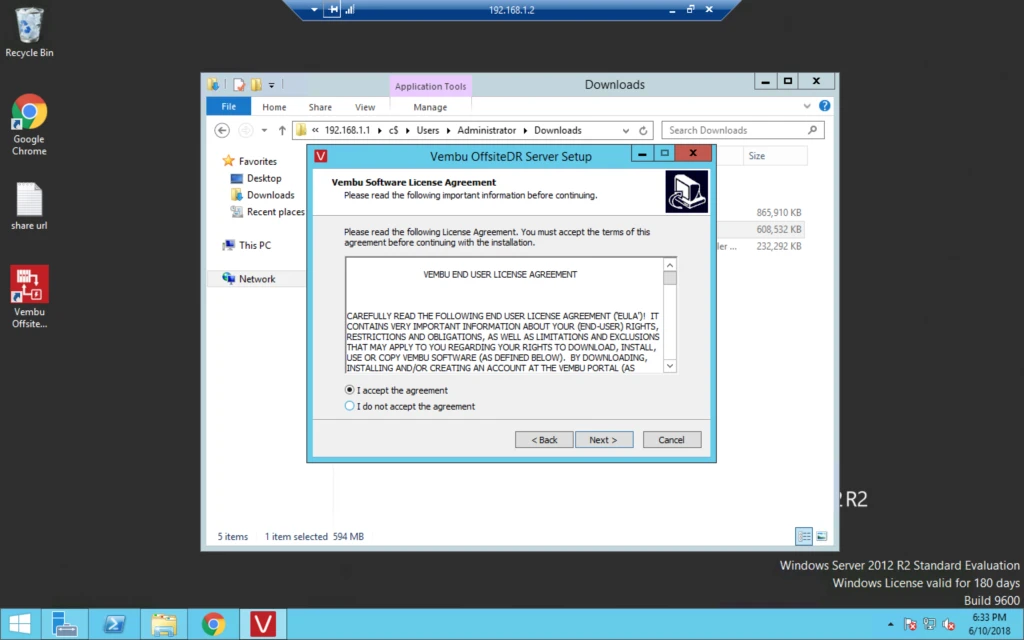
7. Accept Agreement.


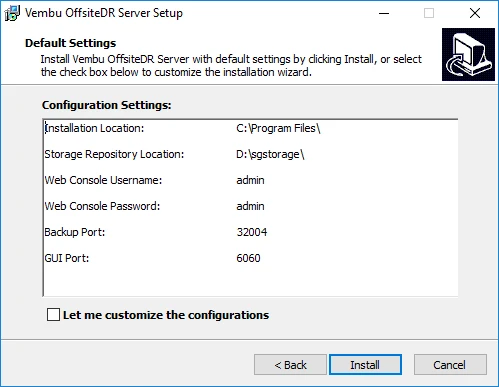
8. If you want to configure Offsite server then click on “Let me customize the configurations” otherwise click on Install.


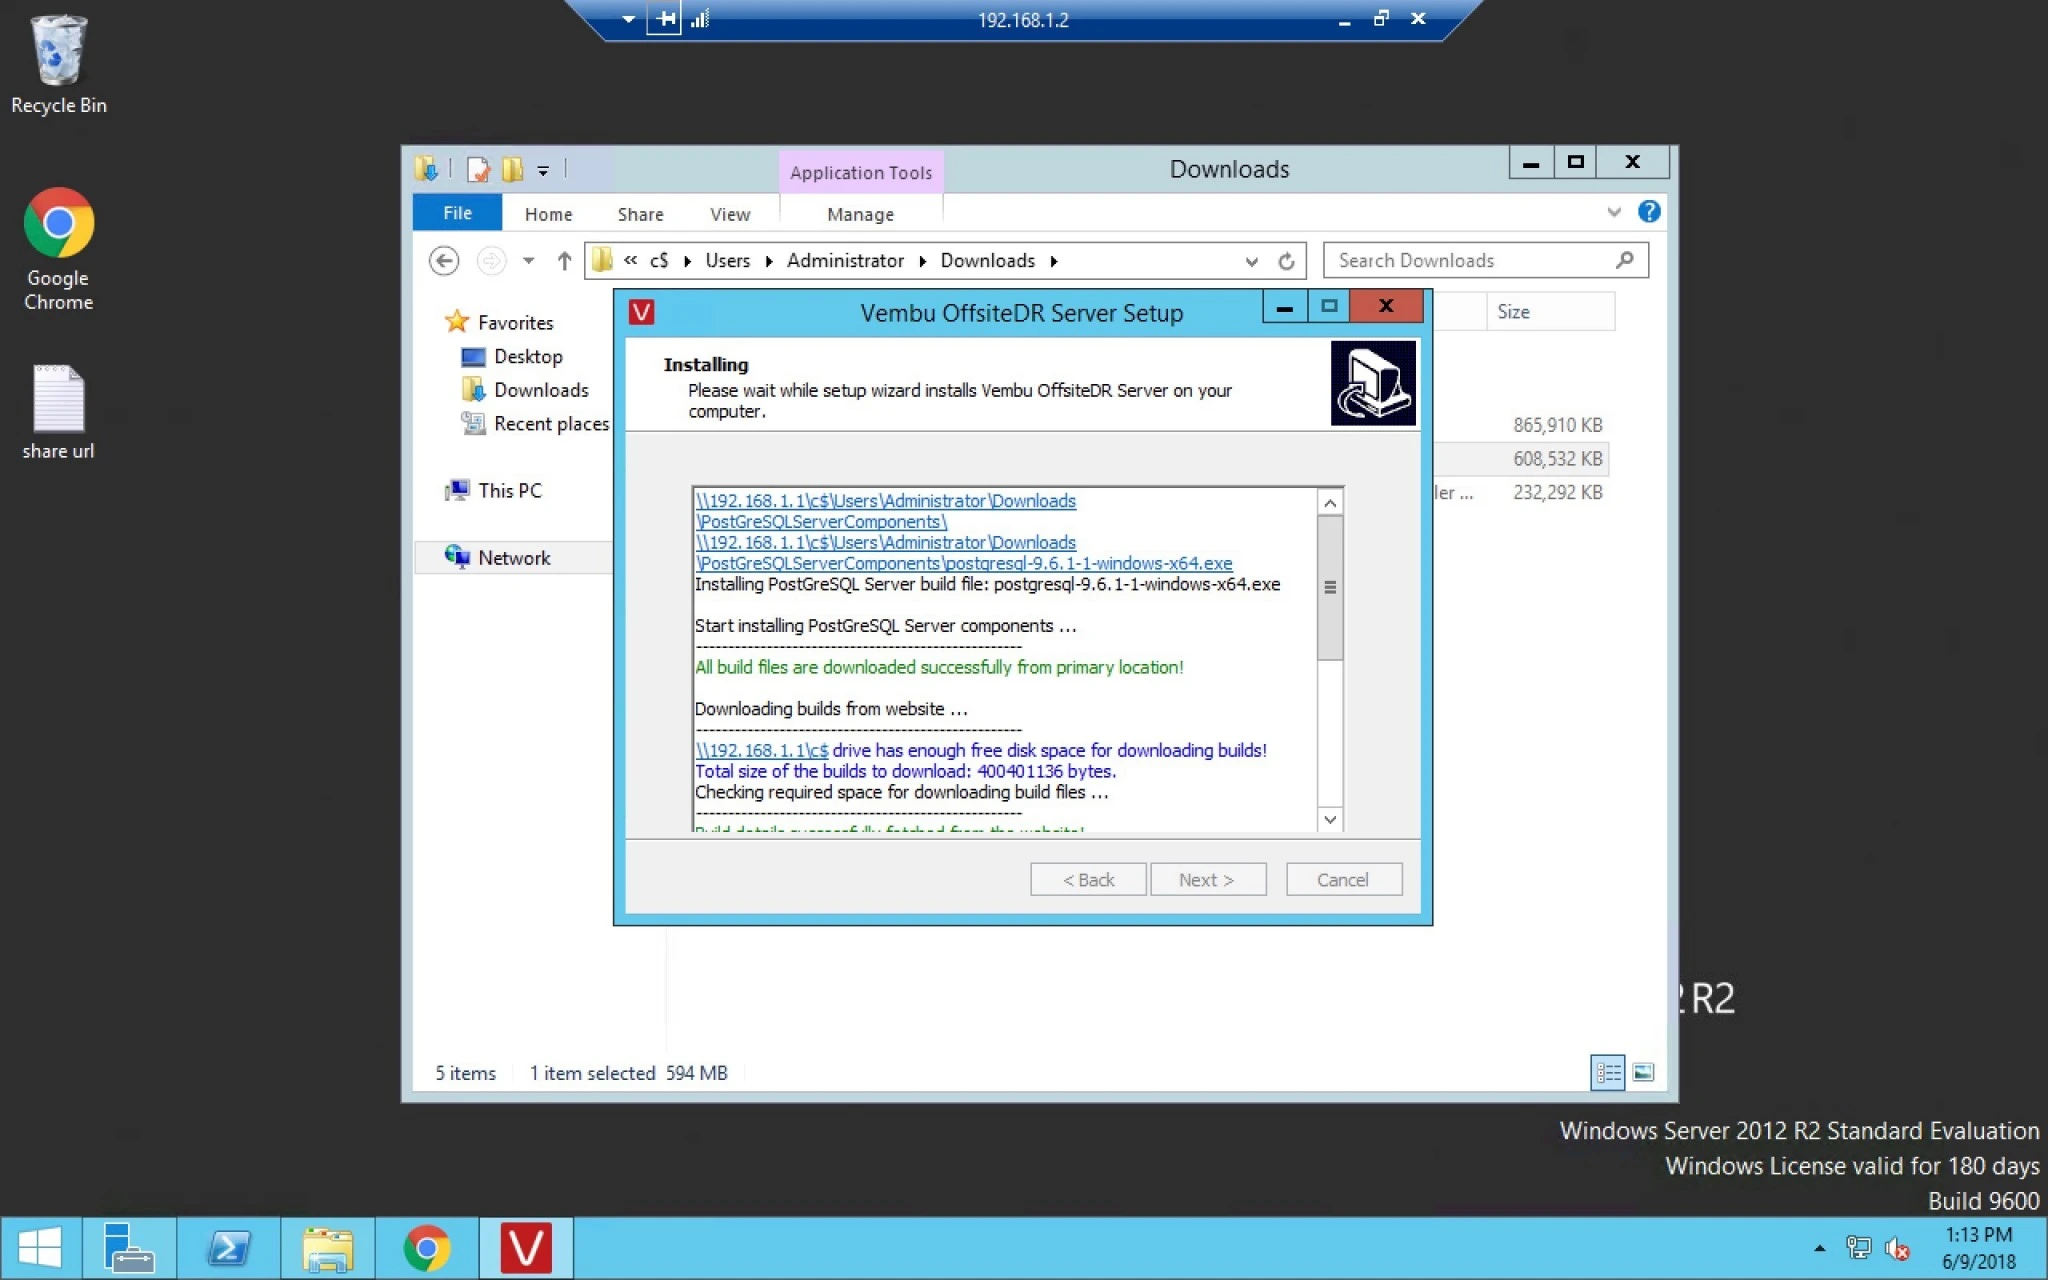
9. Offsite server also install PostGre server for database.


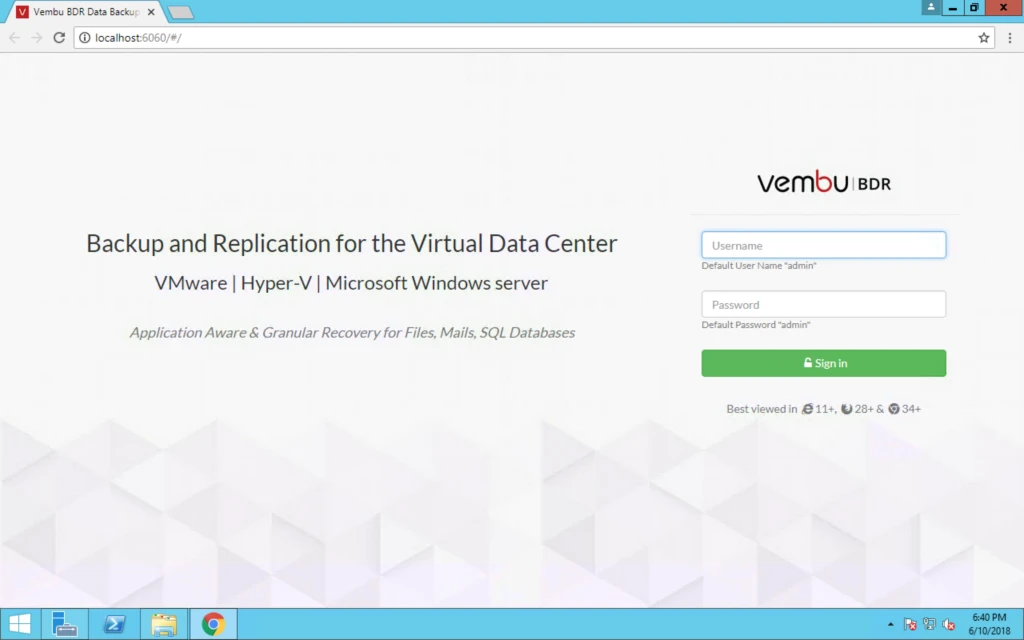
10. Once this is done you can access BDR Offsite server via http://localhost:6060


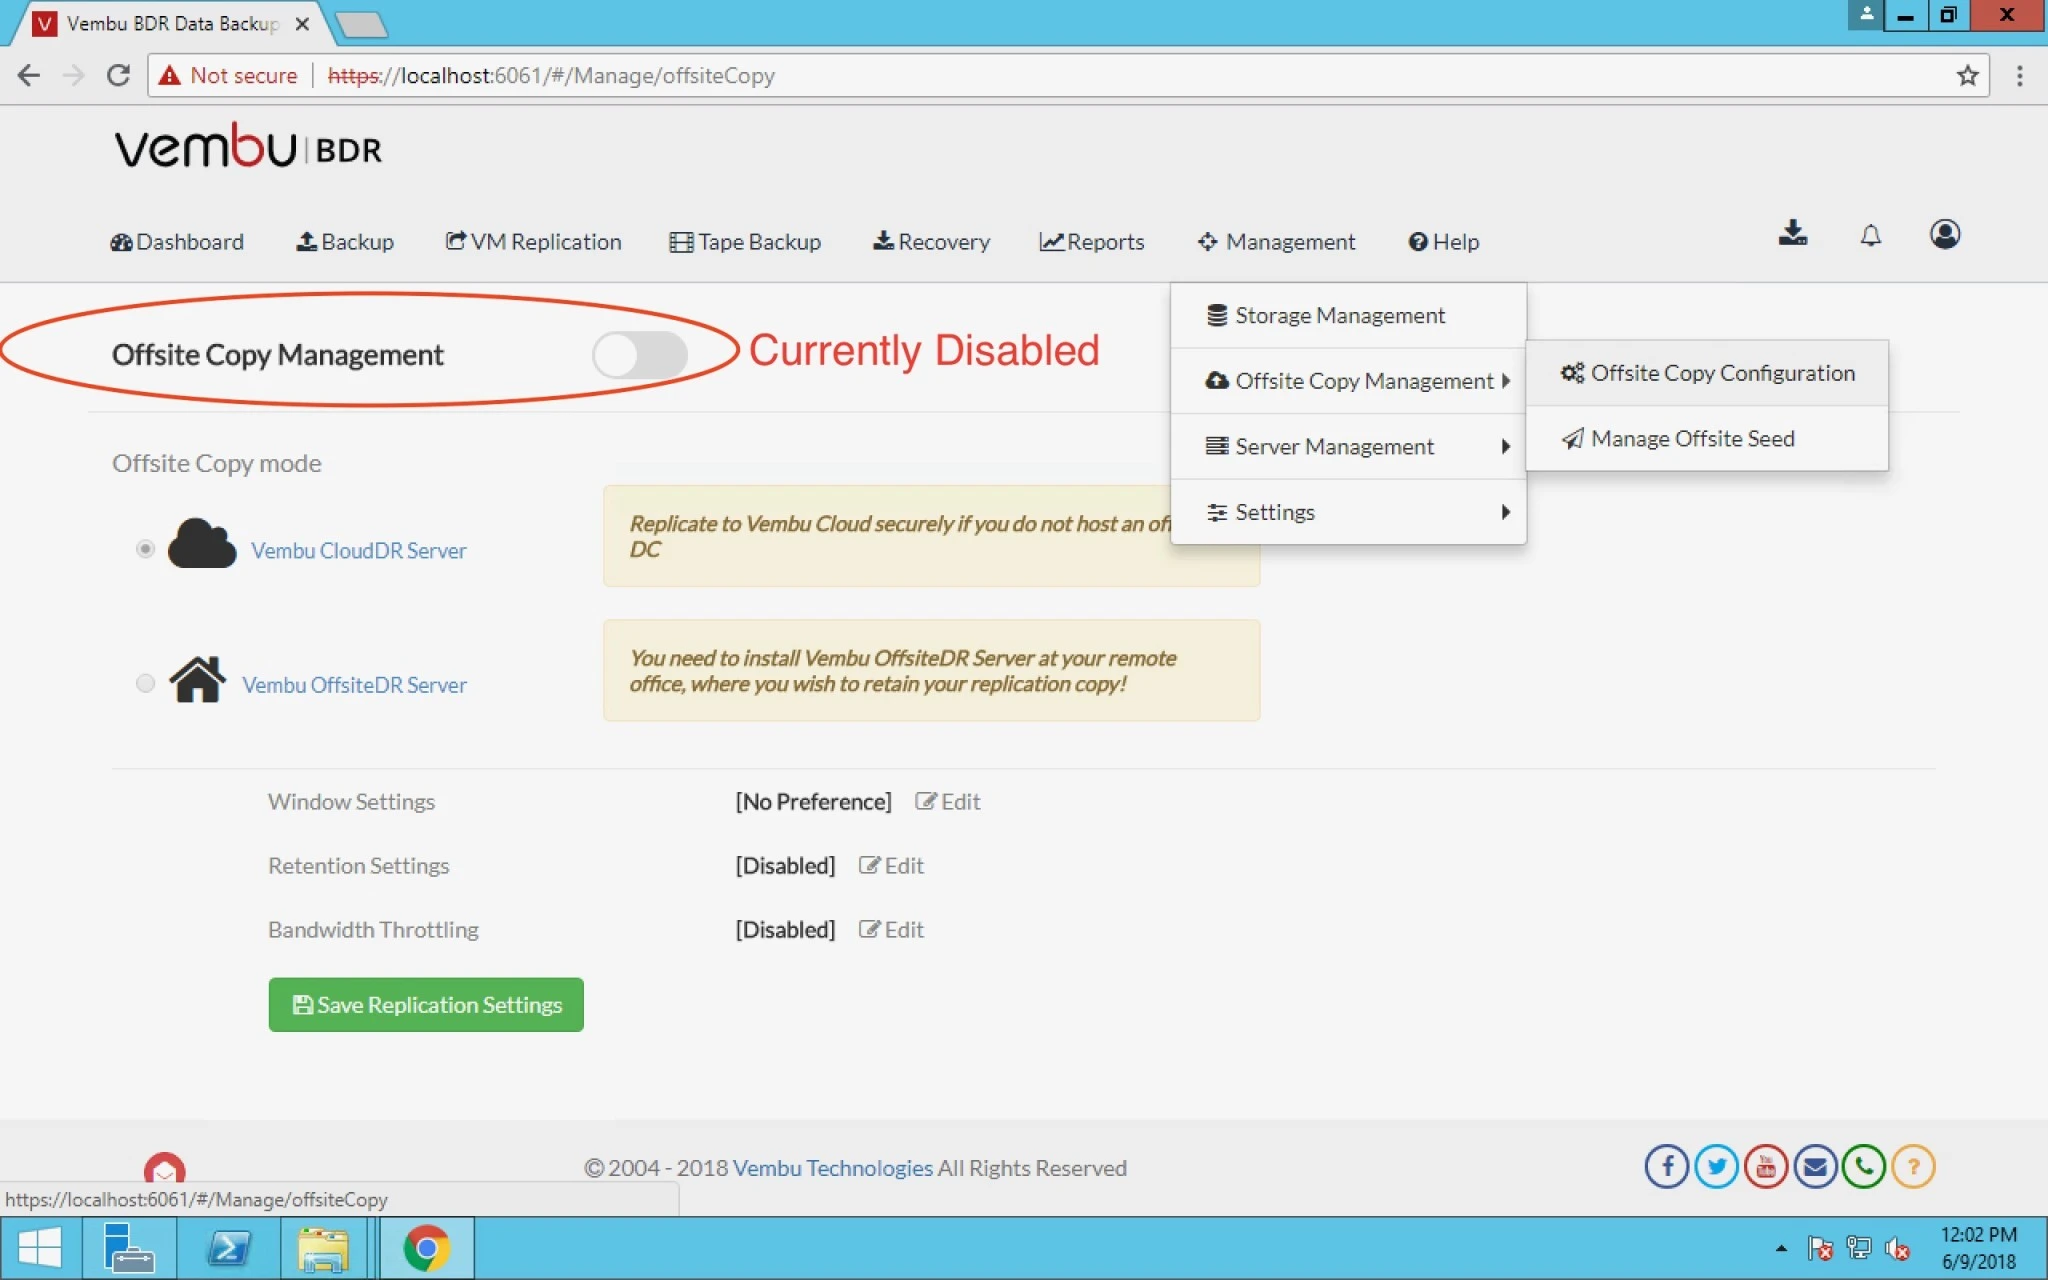
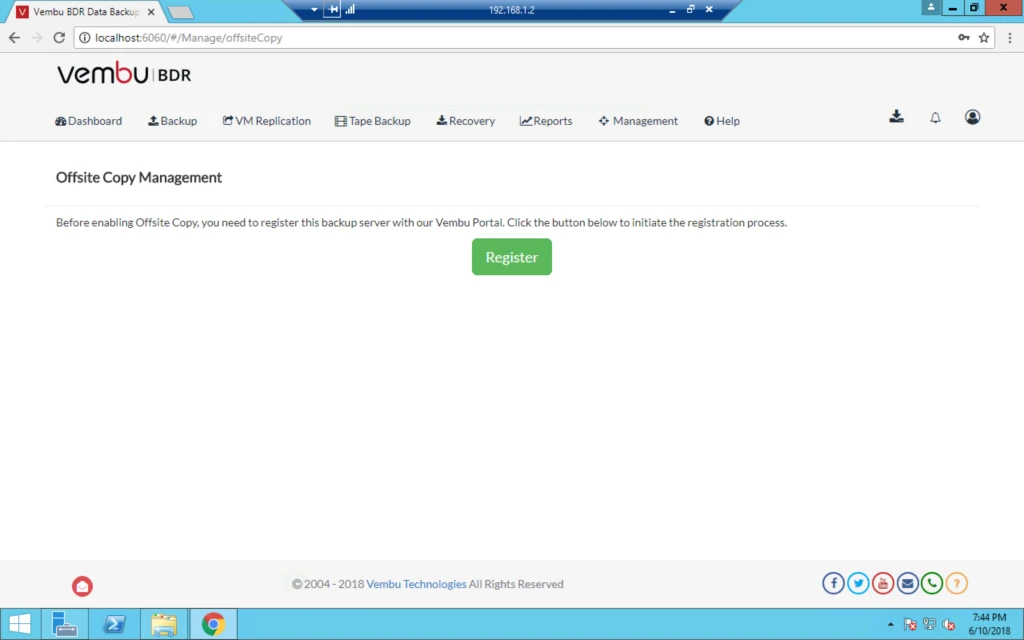
11. Now Go back to Vembu BDR primary Server and click on Management > Offsite Copy Management > Offsite Copy Configuration. (we will discuss Manage Offsite Seed later.)

12. Currently you can see this is by default disabled. click on slider to enable.
 

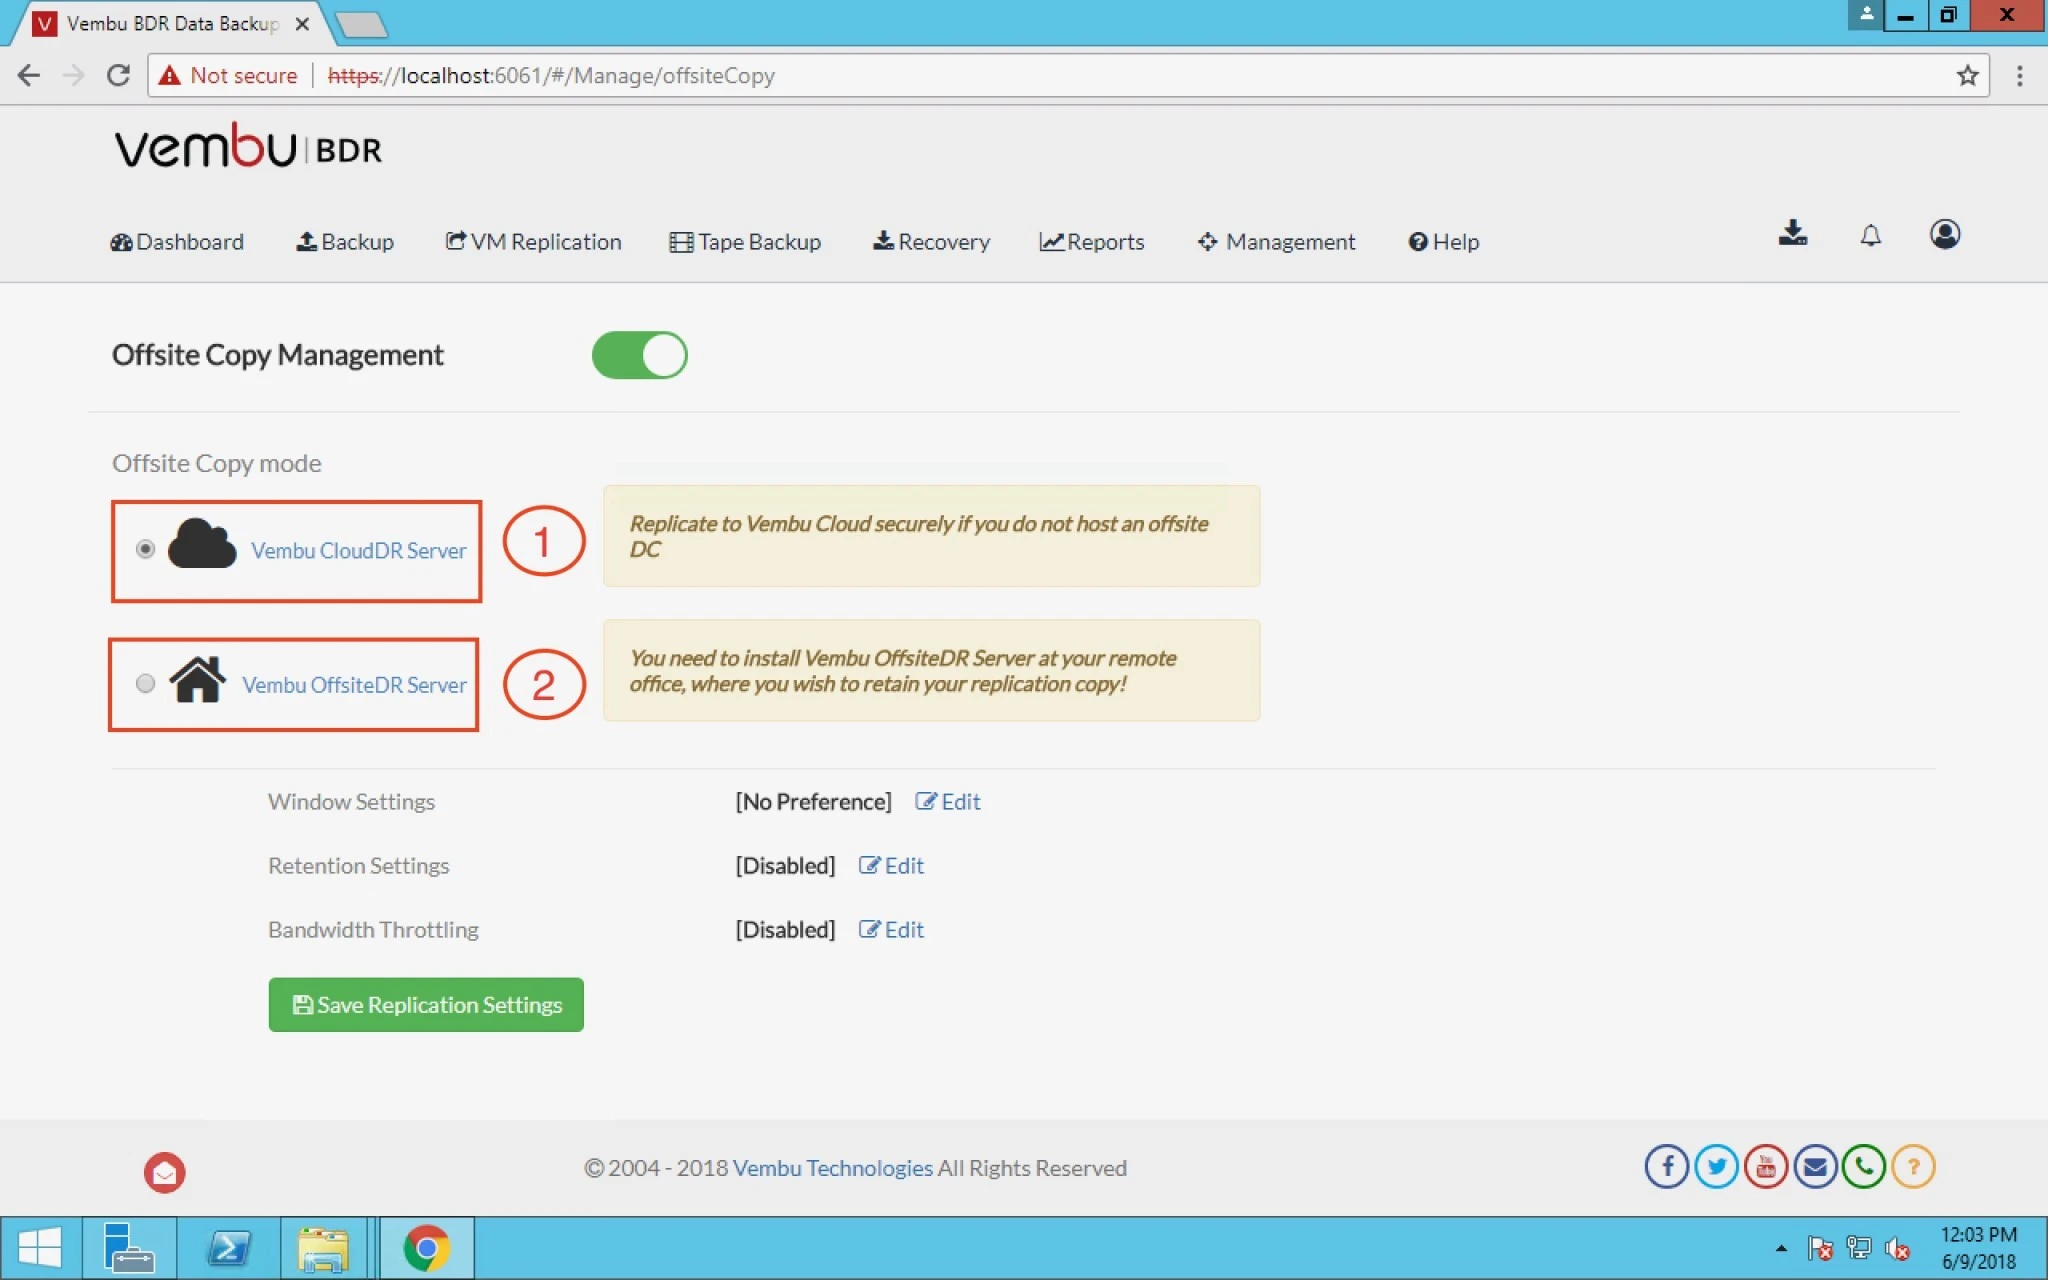
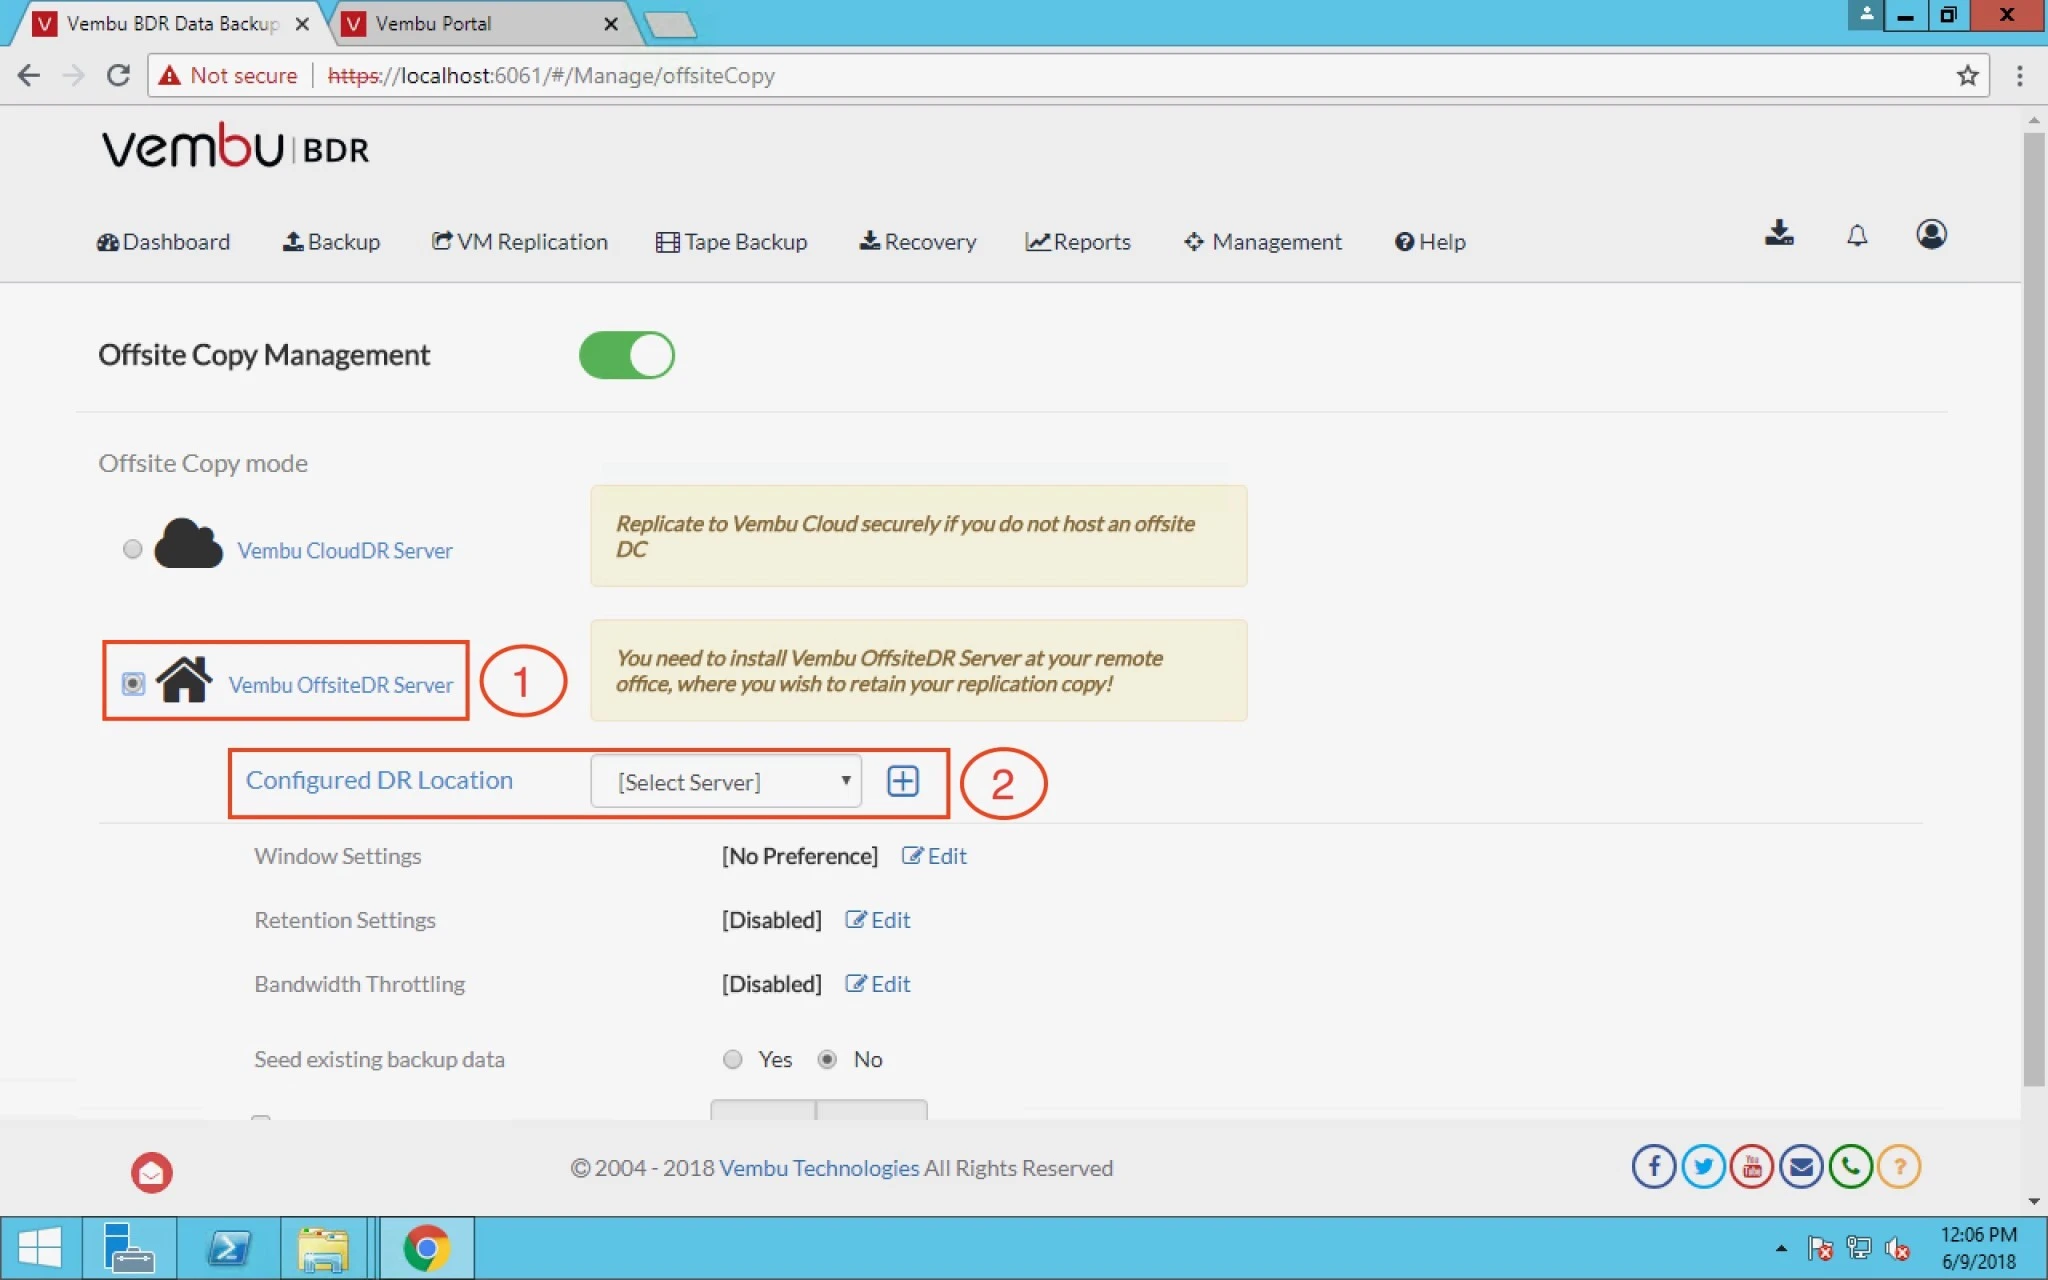
13. Once you enable Offsite Copy Management, you have Two options

1) Vembu CloudDR Server (Need to add/buy storage from Vembu)

2) Vembu OffsiteDR Server (Local Server or Cloud instance where Vembu BDR Offsite server is         installed)


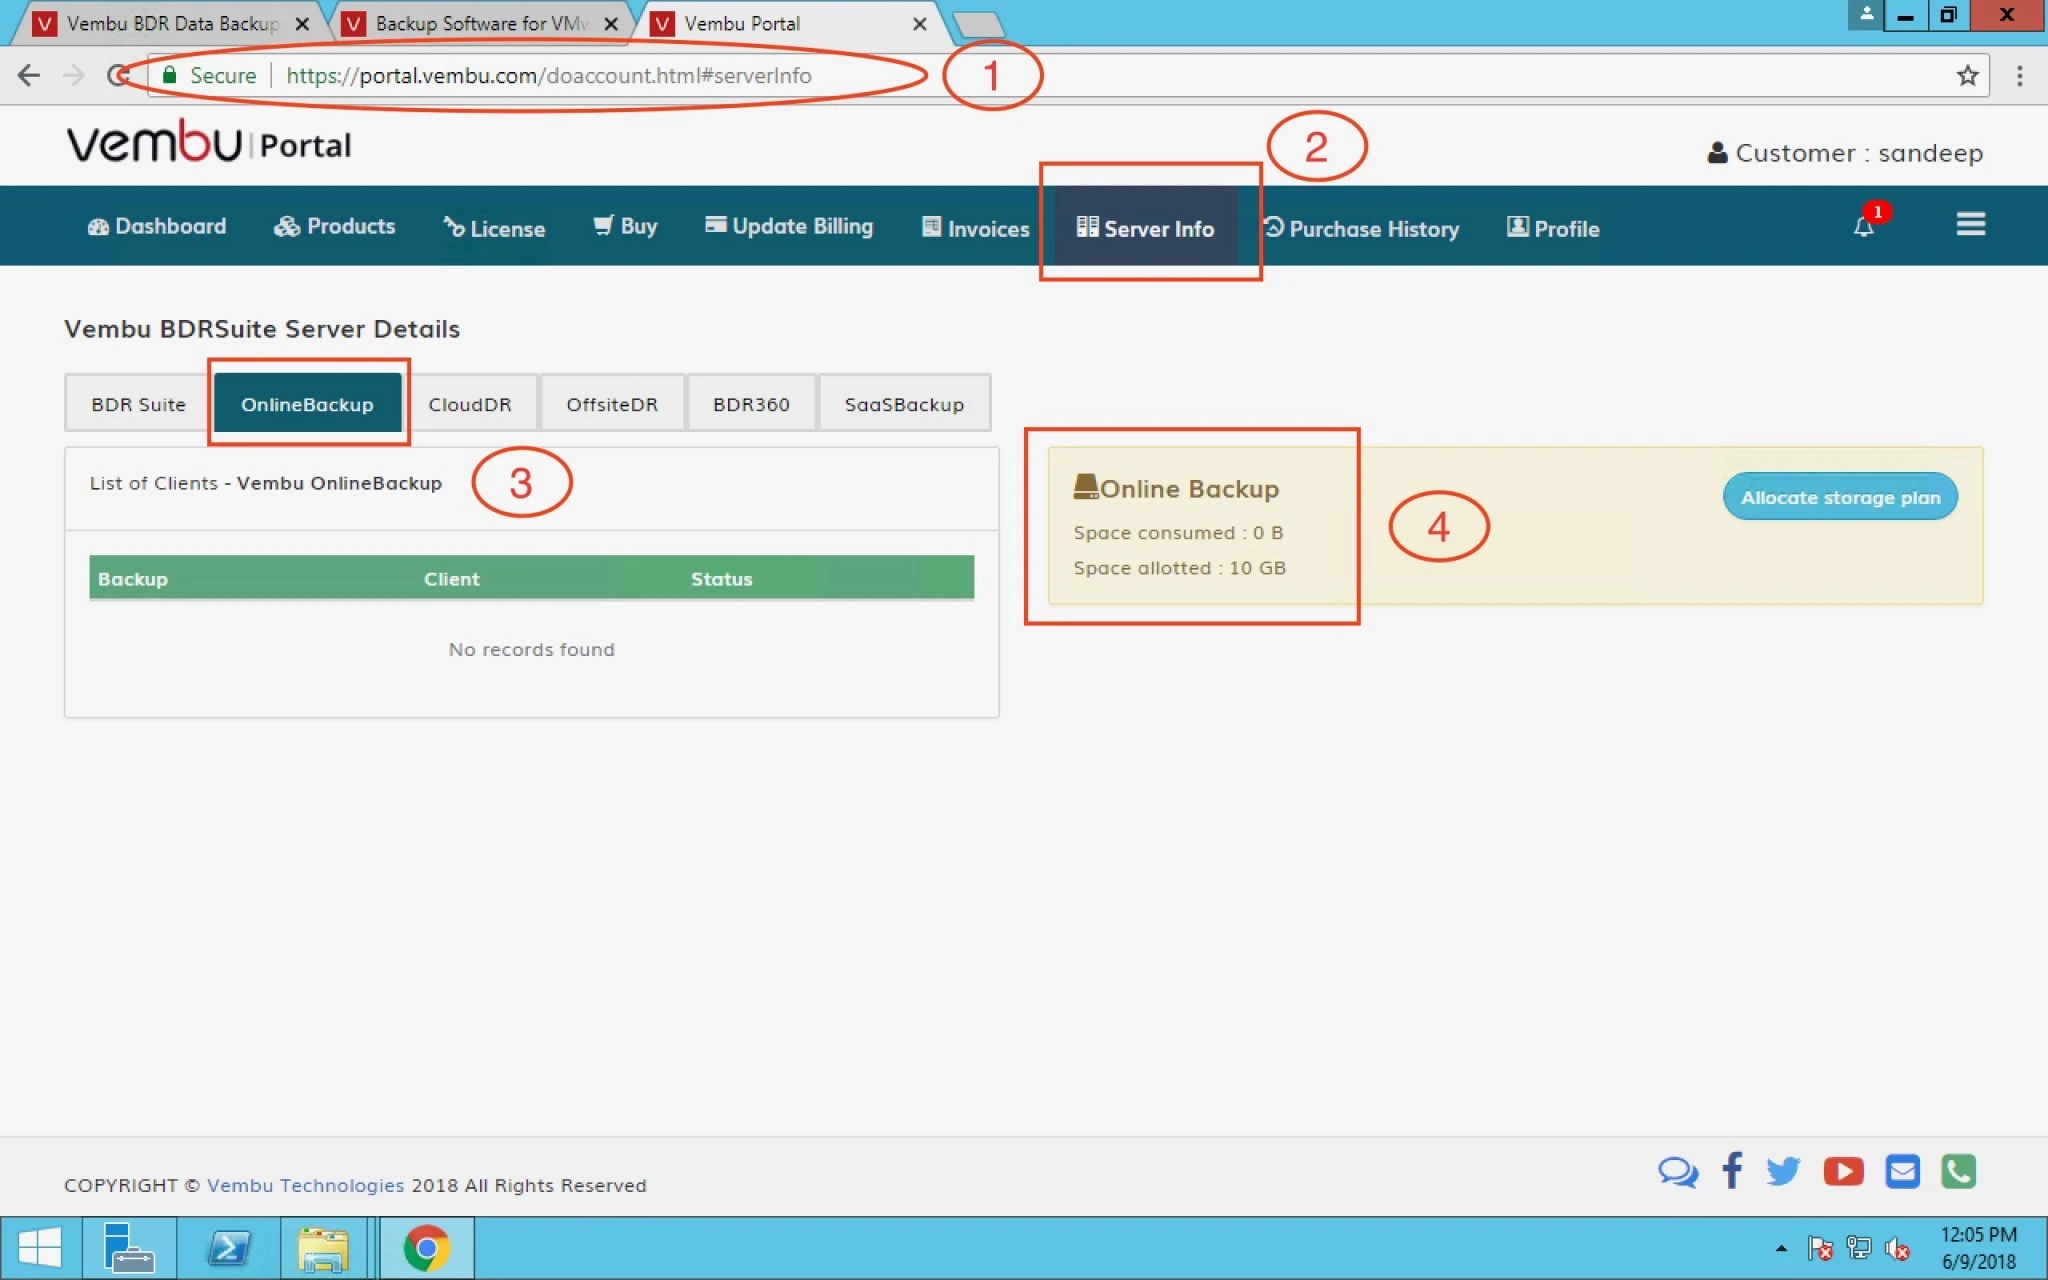
14. This is Vembu portal from where you can check how much storage you have assigned or if you want to allocate more storage then use this portal.

Note: By default 10 GB is free from Vembu. Before allocating storage for CloudDR you need to purchase license for the same. (Contact Vembu for license)


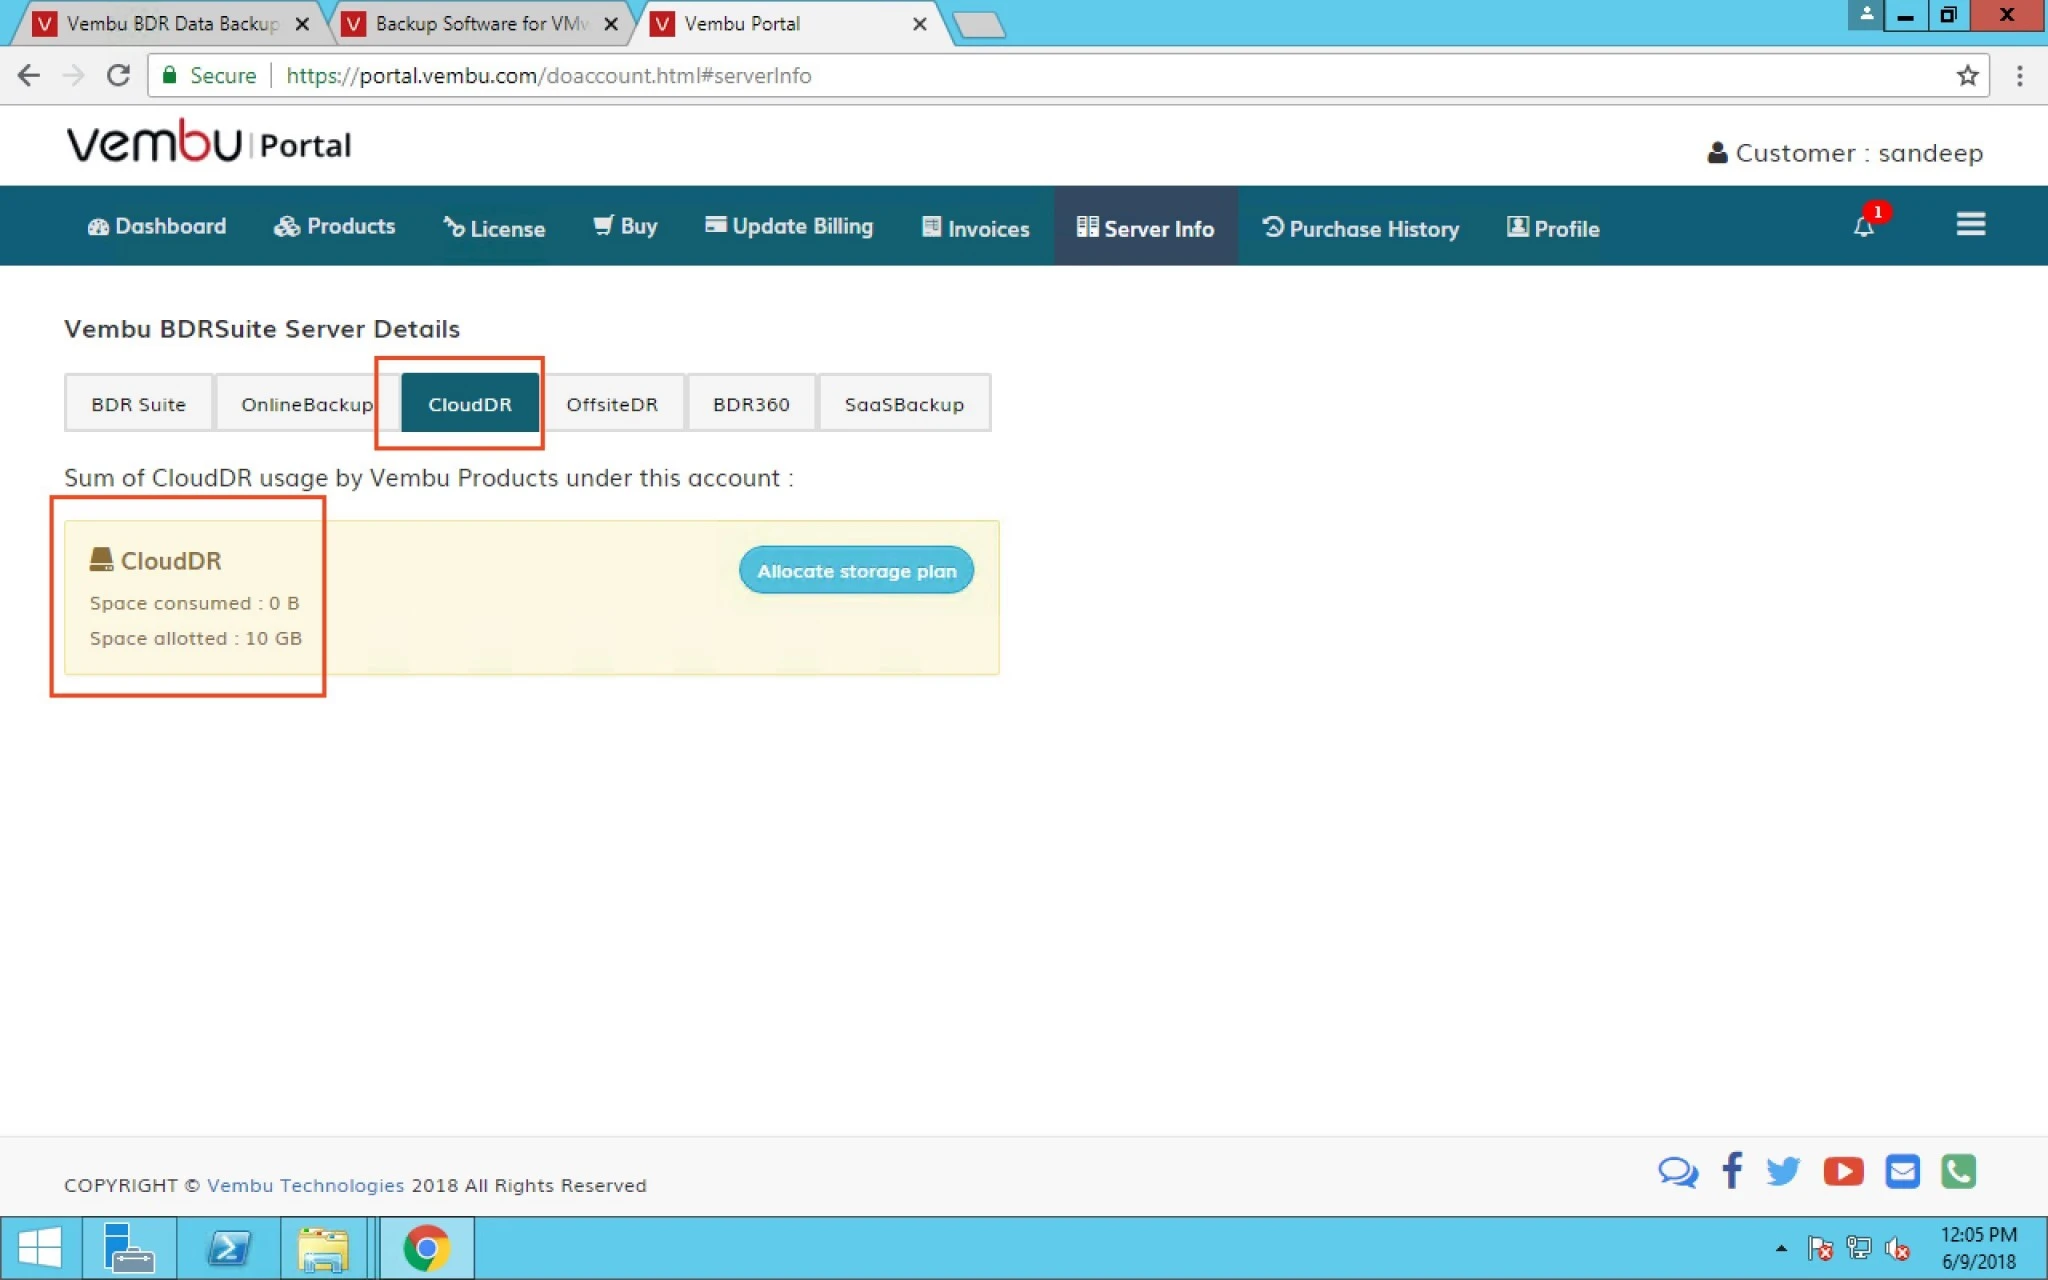
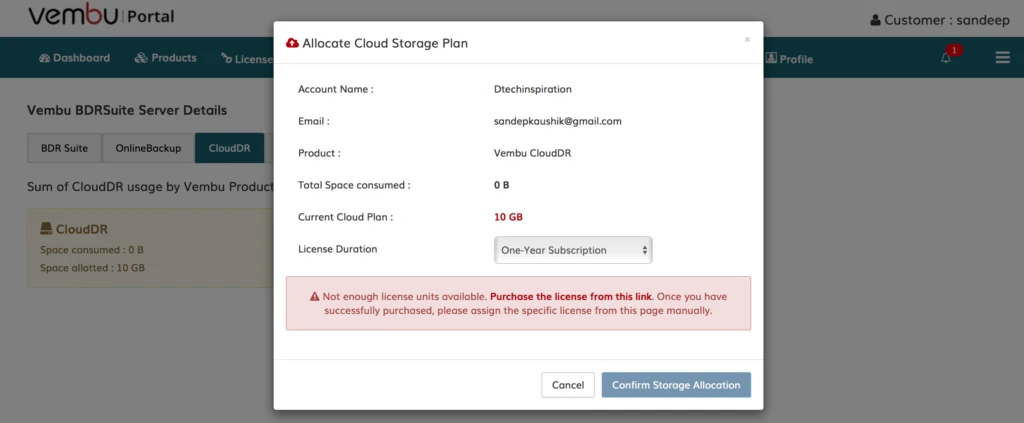
15. This is CloudDR space view, if you want more space then click on Allocate storage plan.

Note: I was getting an error due to license.


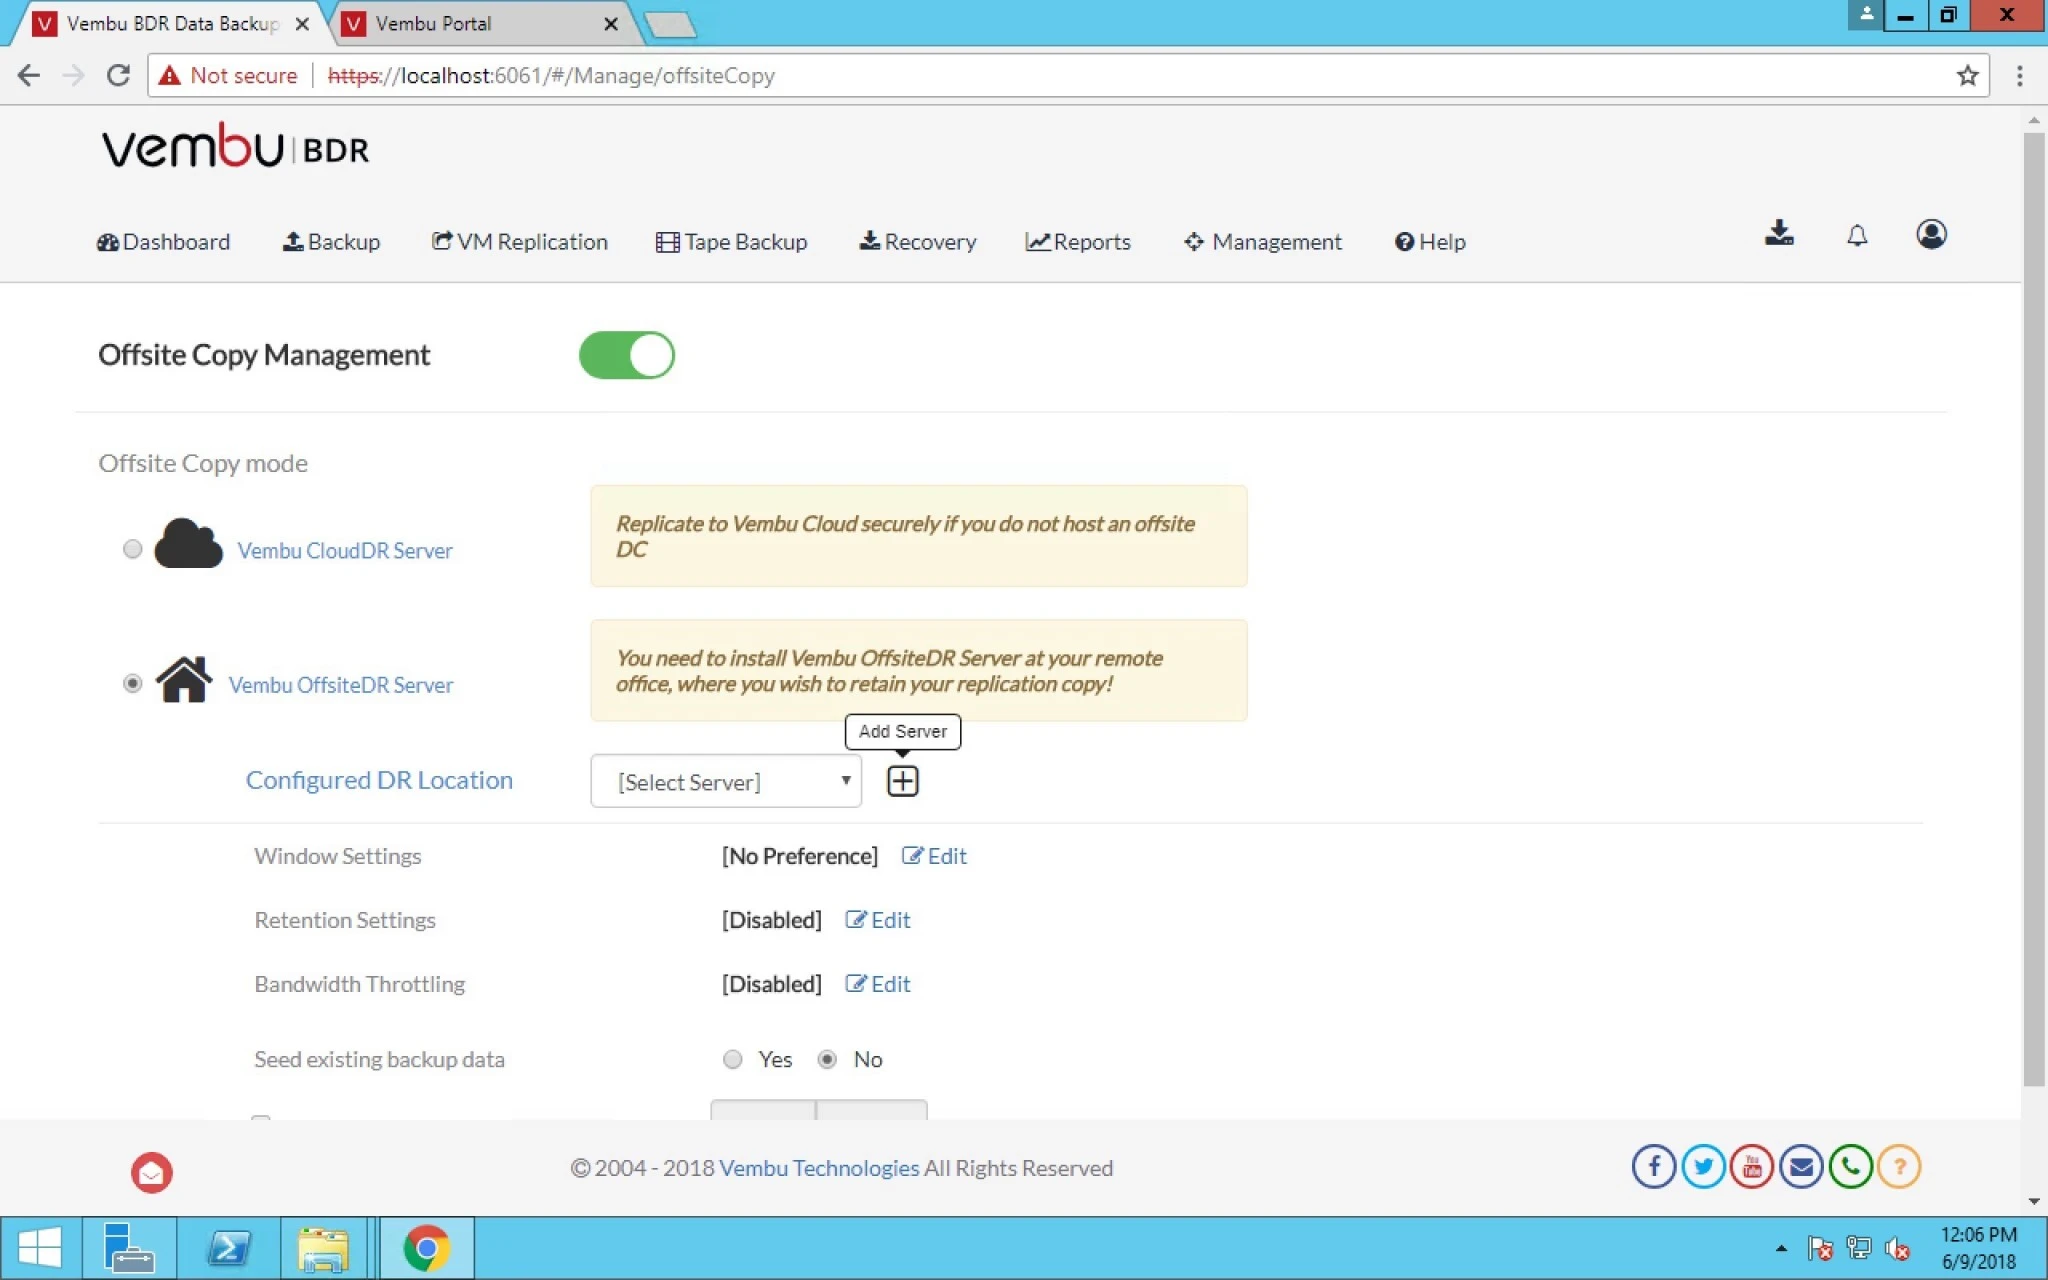
16. Now let’s continue with Offsite Server > Click on Vembu OffsiteDR Server Option > Click on + sign for adding DR server.


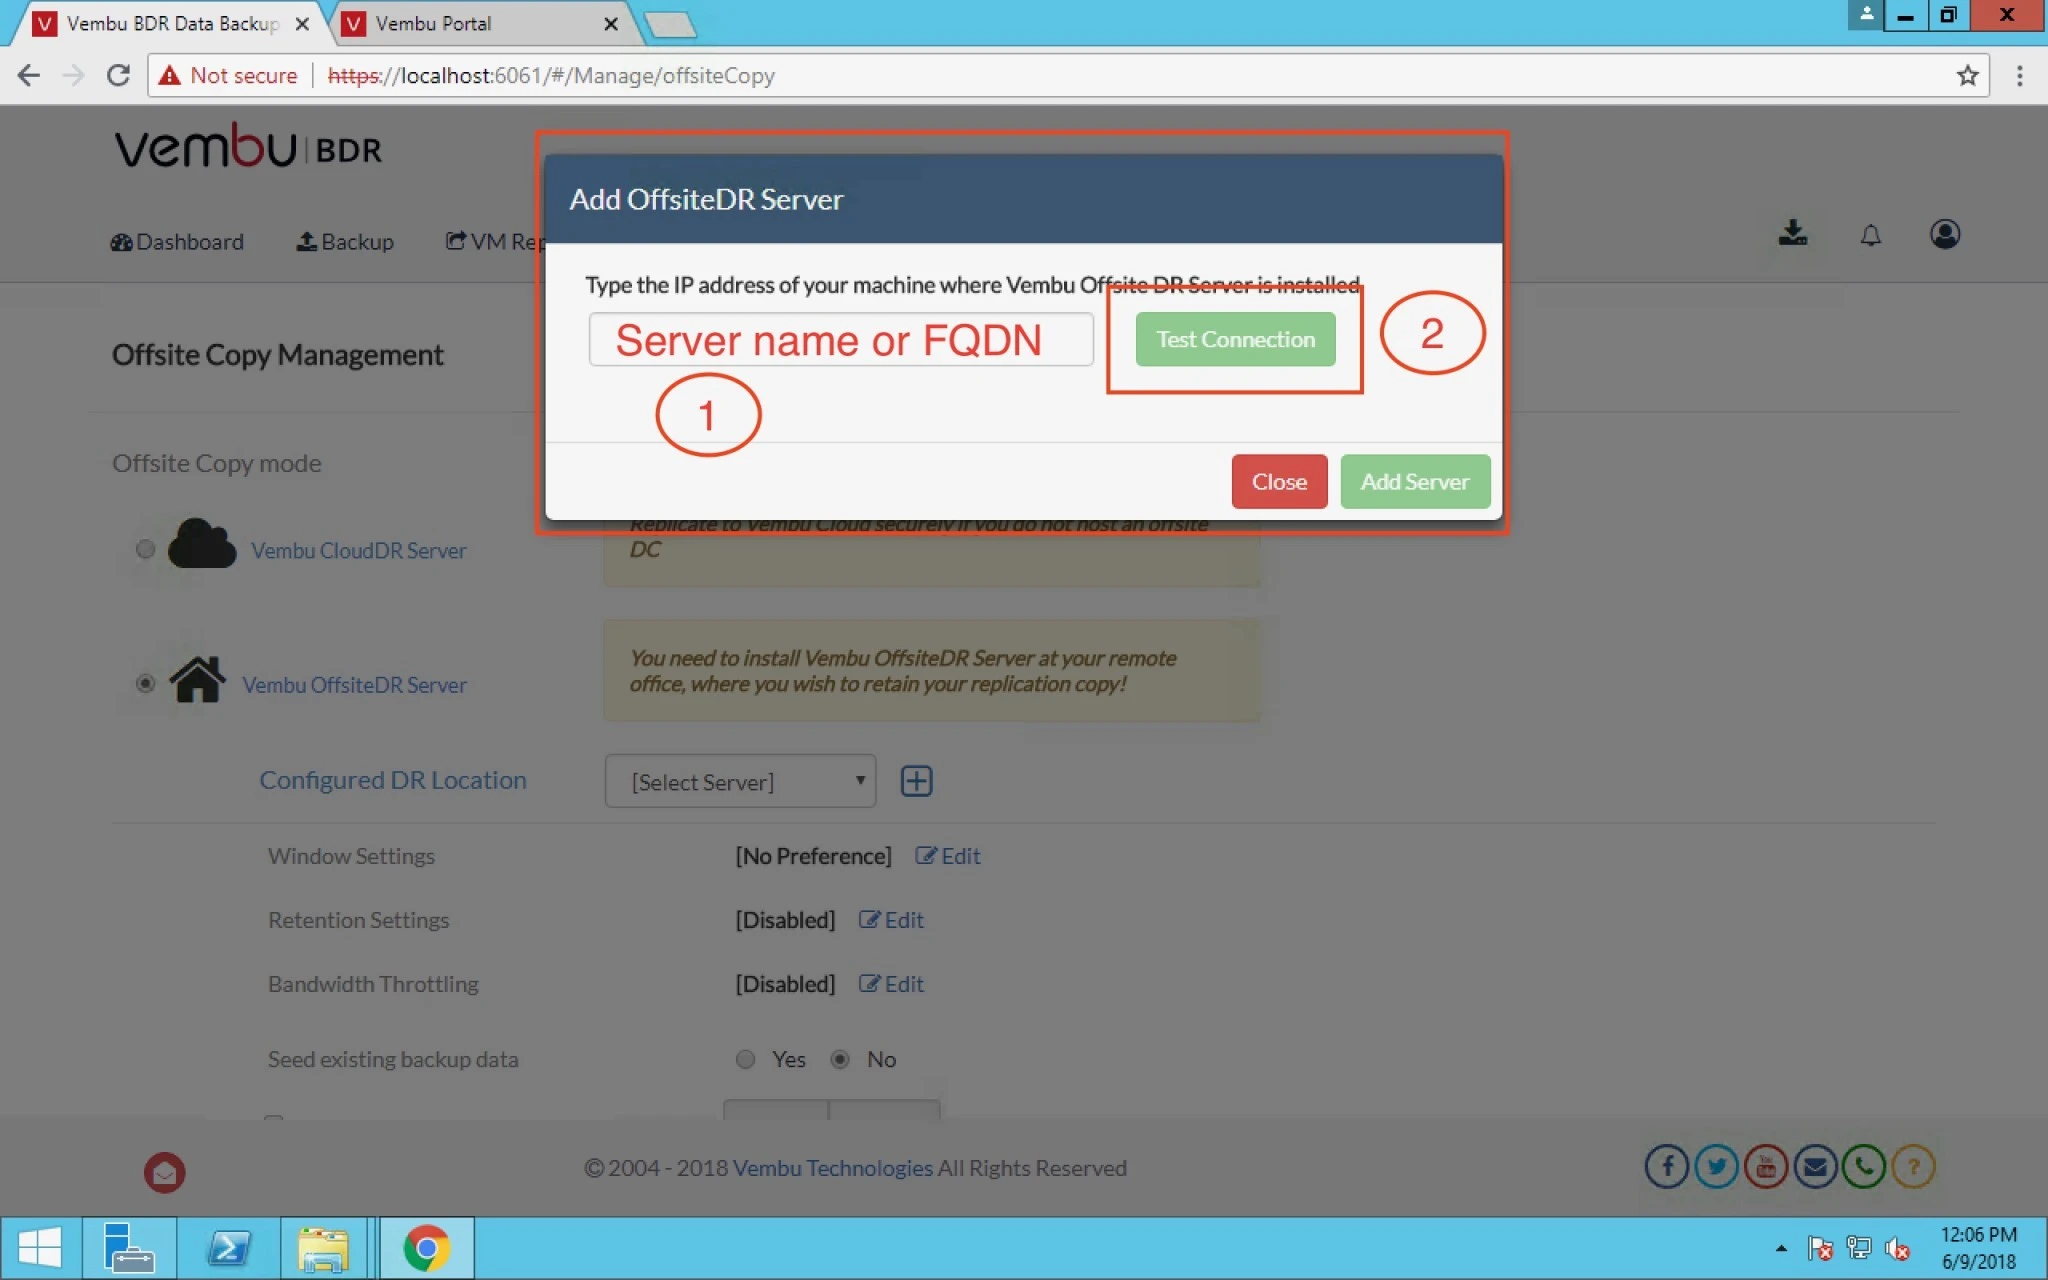
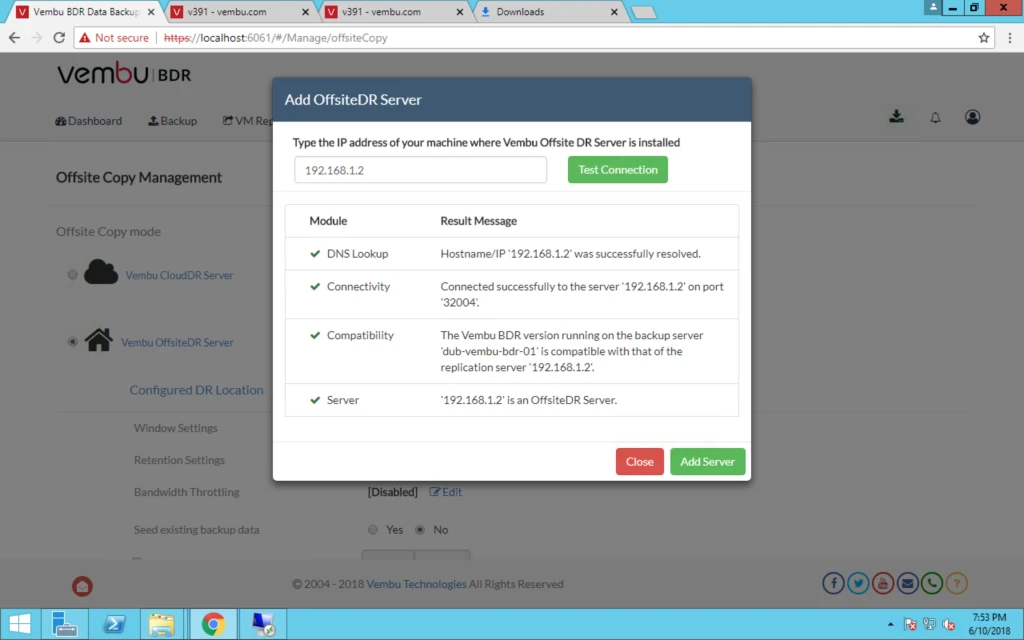
17. Now here you have to provide IP address or FQDN name of DR server > Click on Test Connection.


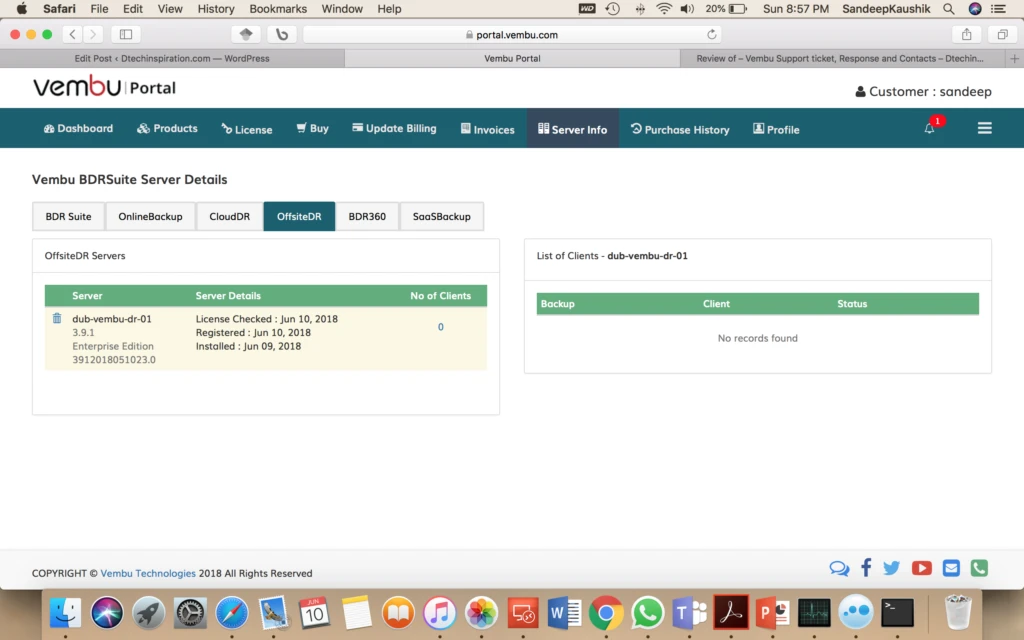
18. But before that you have to register Vembu BDR Offsite Server on Vembu portal.

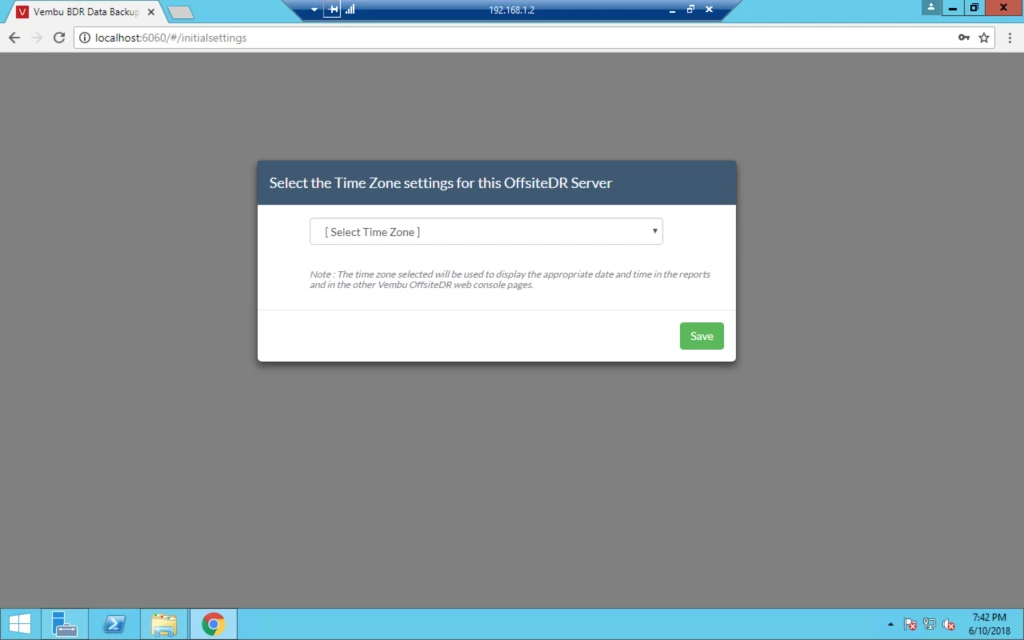
19. Login into Offsite Server.


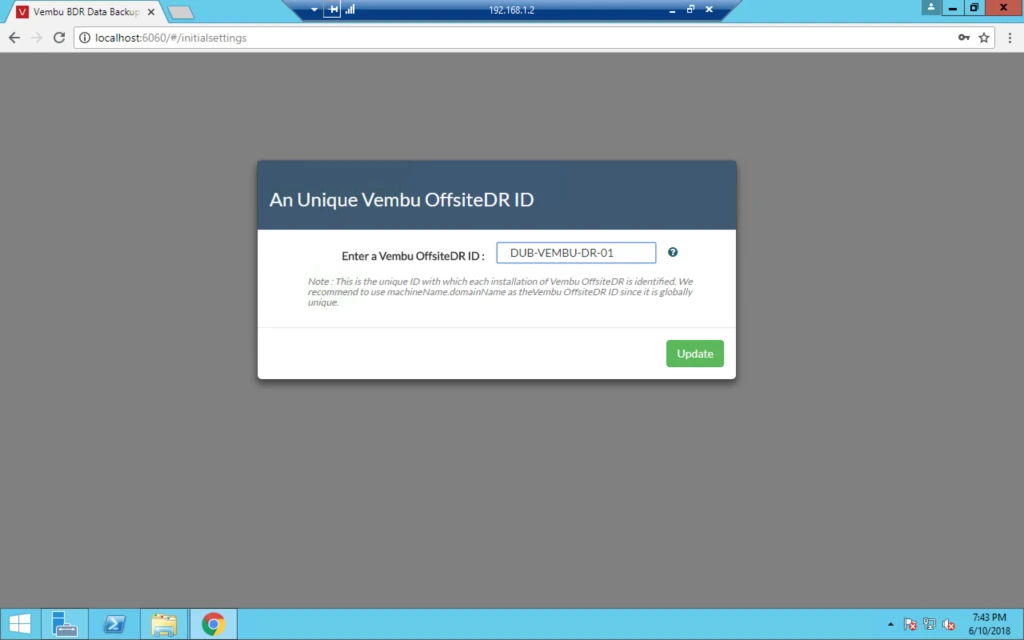
20. Provide OffsiteDR Server name or ID.


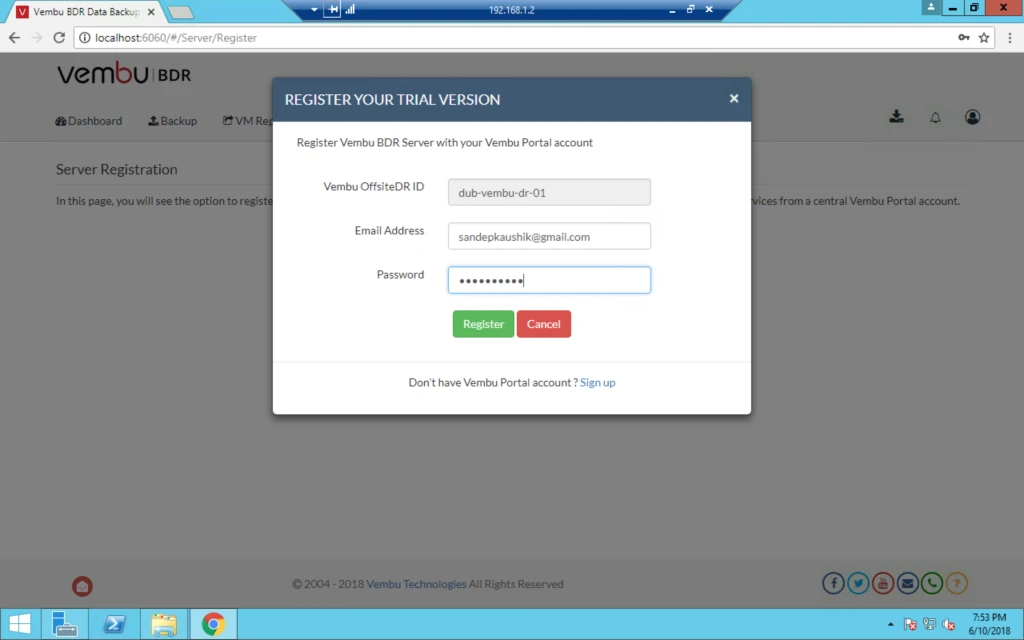
21. Same way you have to register offsiteDR like you did for Prod Vembu BDR server.


22. Here you have to provide your Vembu Login id and password.
 

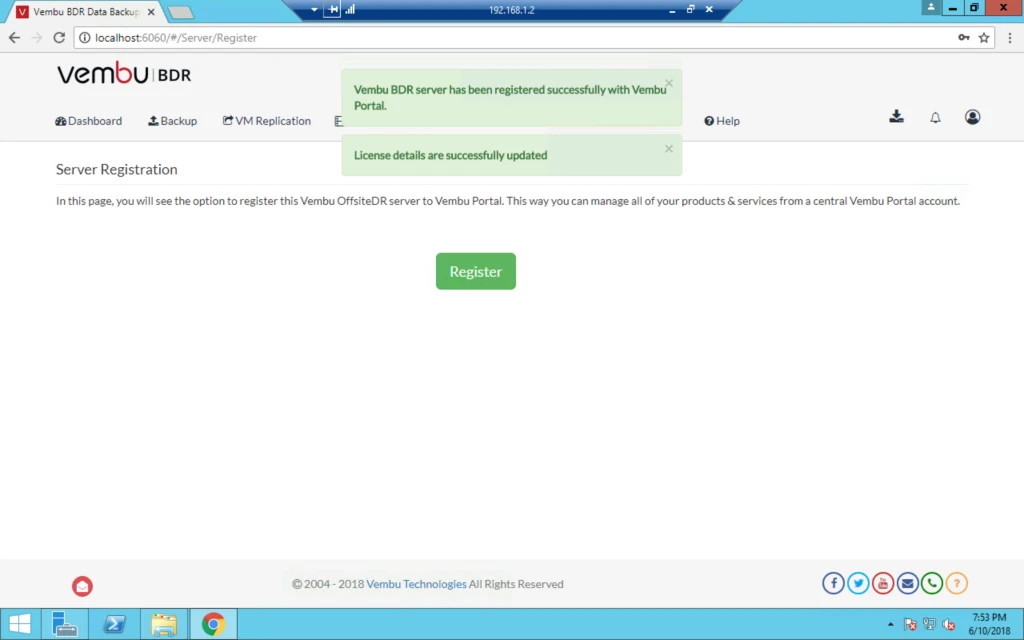
23. Once it’s successfully register then you can see this message.
 

24. Here you can see offsite registered server.

0

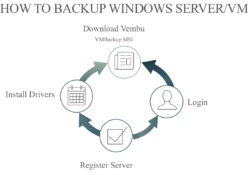
How to backup Windows Server/VM via Vembu BDR

This article is about Vembu BDR suite and we will be discussing on :

“How to backup Windows Server/VM via Vembu BDR”

This supports agentless VMware vSphere Image Backup and Advanced Microsoft Hyper-V Image Backup – all in one simple installer.

Just install, configure and schedule backups to the Vembu BDR Backup Server.

Topic Outline:

Download Vembu VMBackup MSI

Install Drivers

Register Server


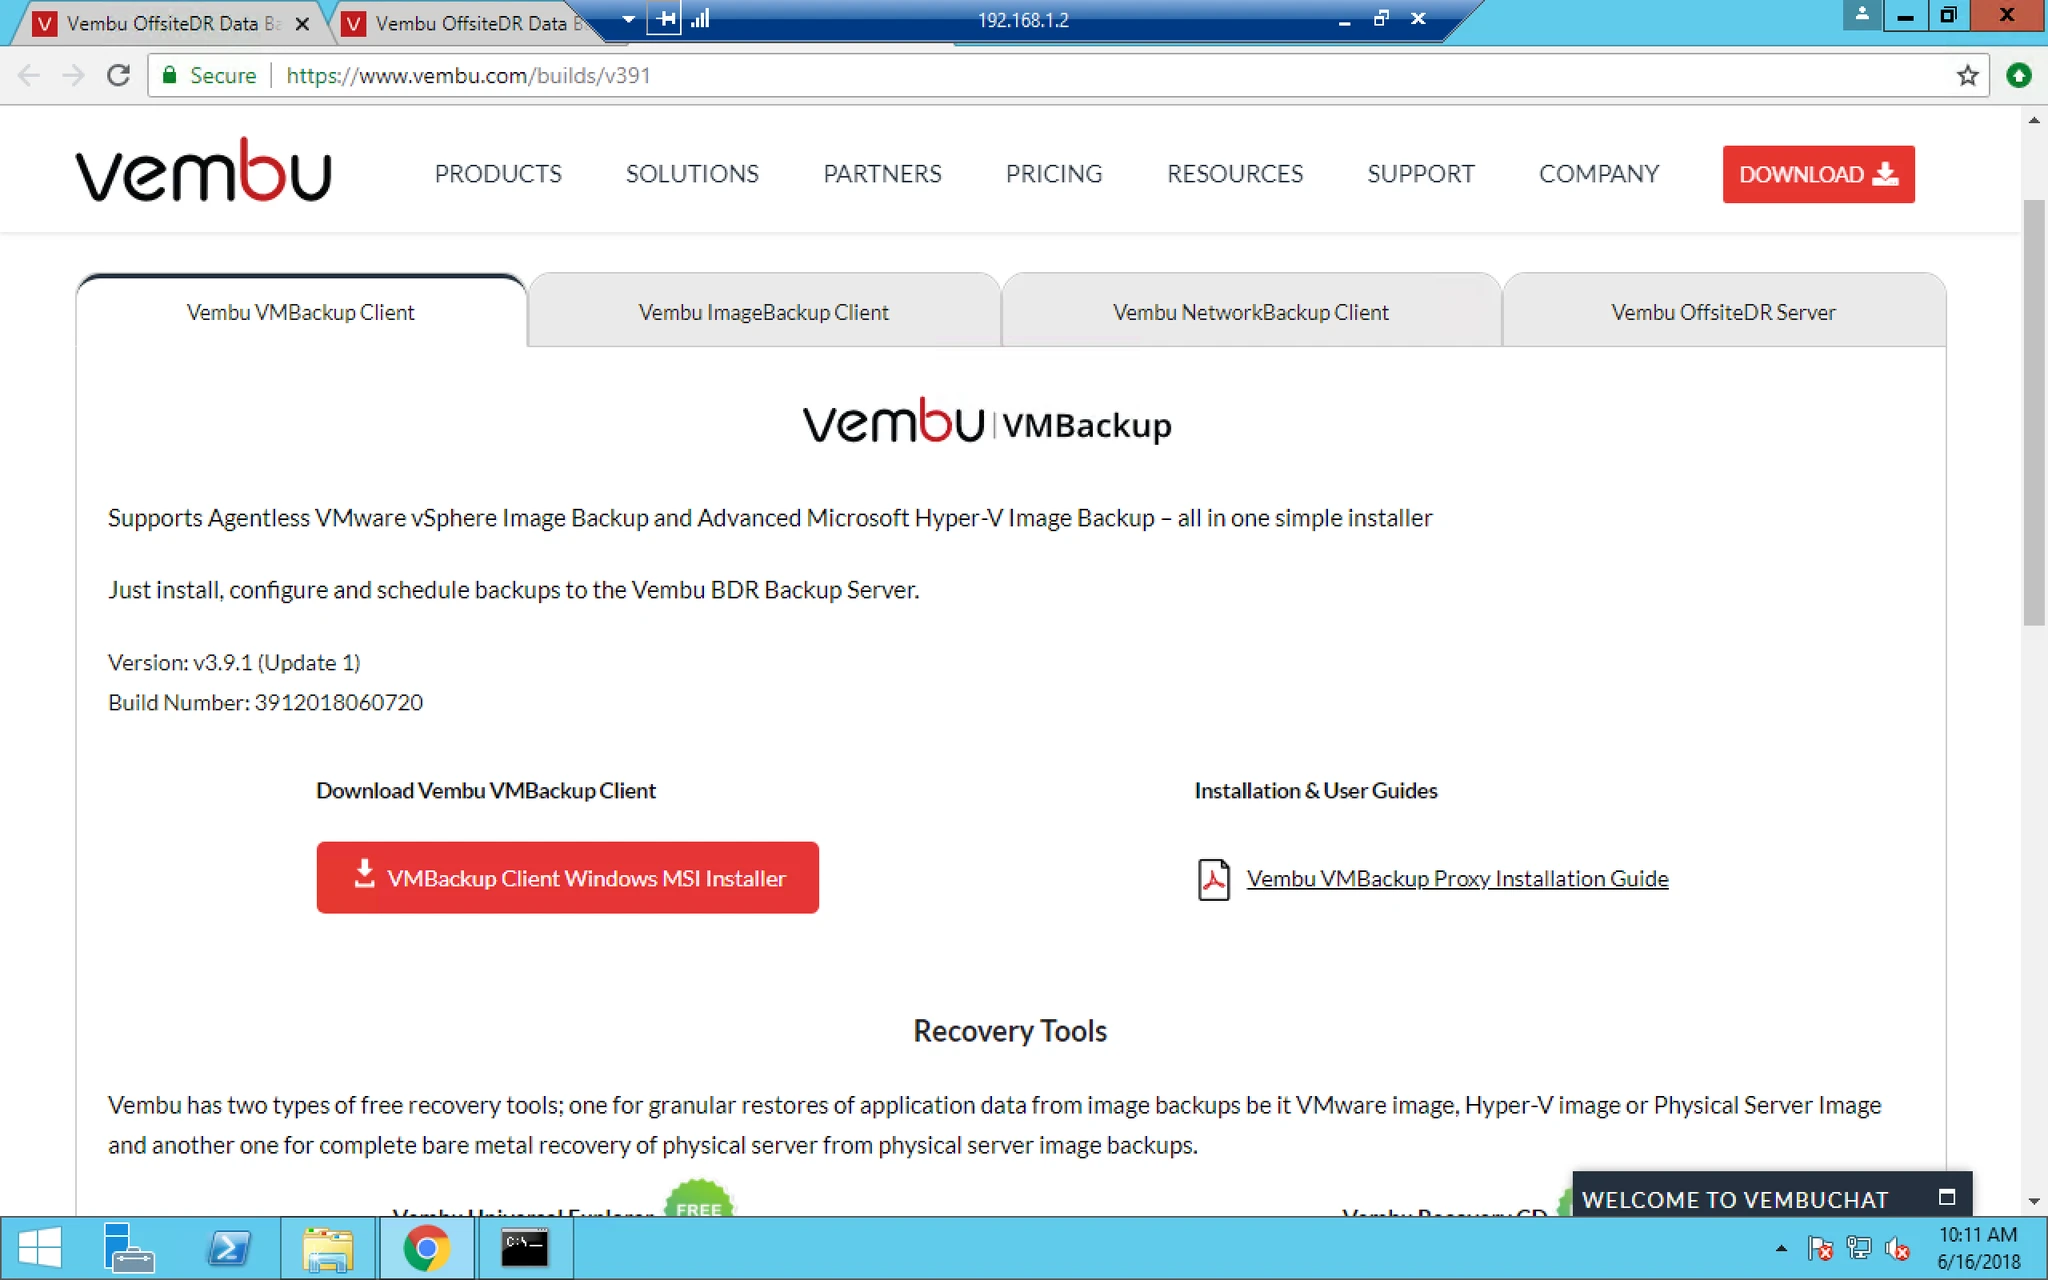
  1. Now Download the MSI from given below link or you can also click on download option on the top right hand-side.

2. The link is https://www.vembu.com/builds/


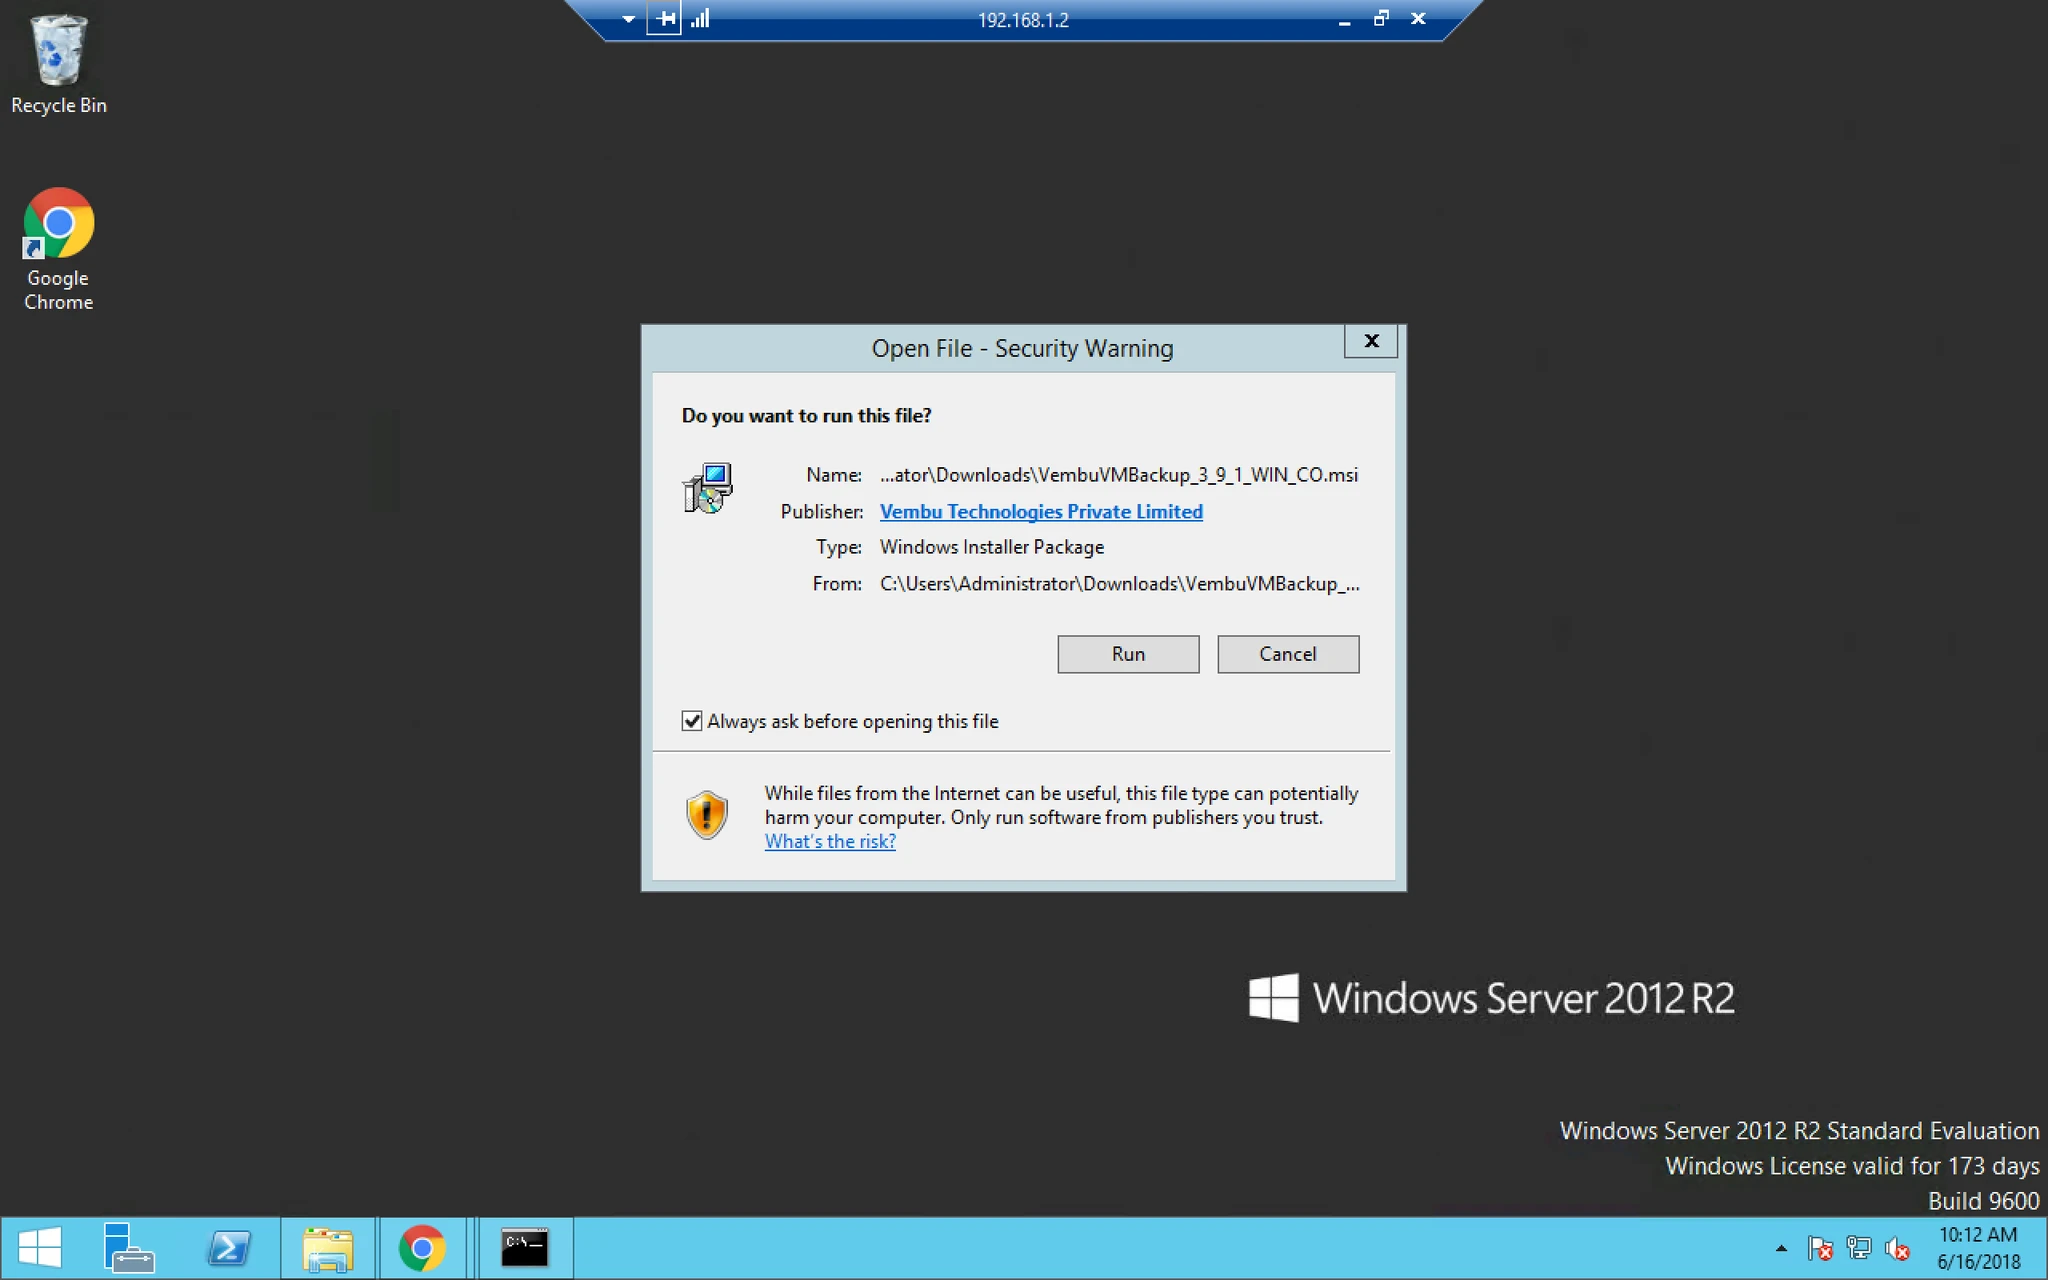
3. After Downloading the software you need to install the software by clicking on Run and follow the installation steps there after.


4. Its pretty straight forward and just need to click on next button and we need not to customize anything here.


5. Now click next to continue further.


6. Accept the EULA (End User License Agreement).


7. We have two options here either use Domain FQDN here if your system is in domain Or if your system is not in a domain then you can choose to use IP address rather.


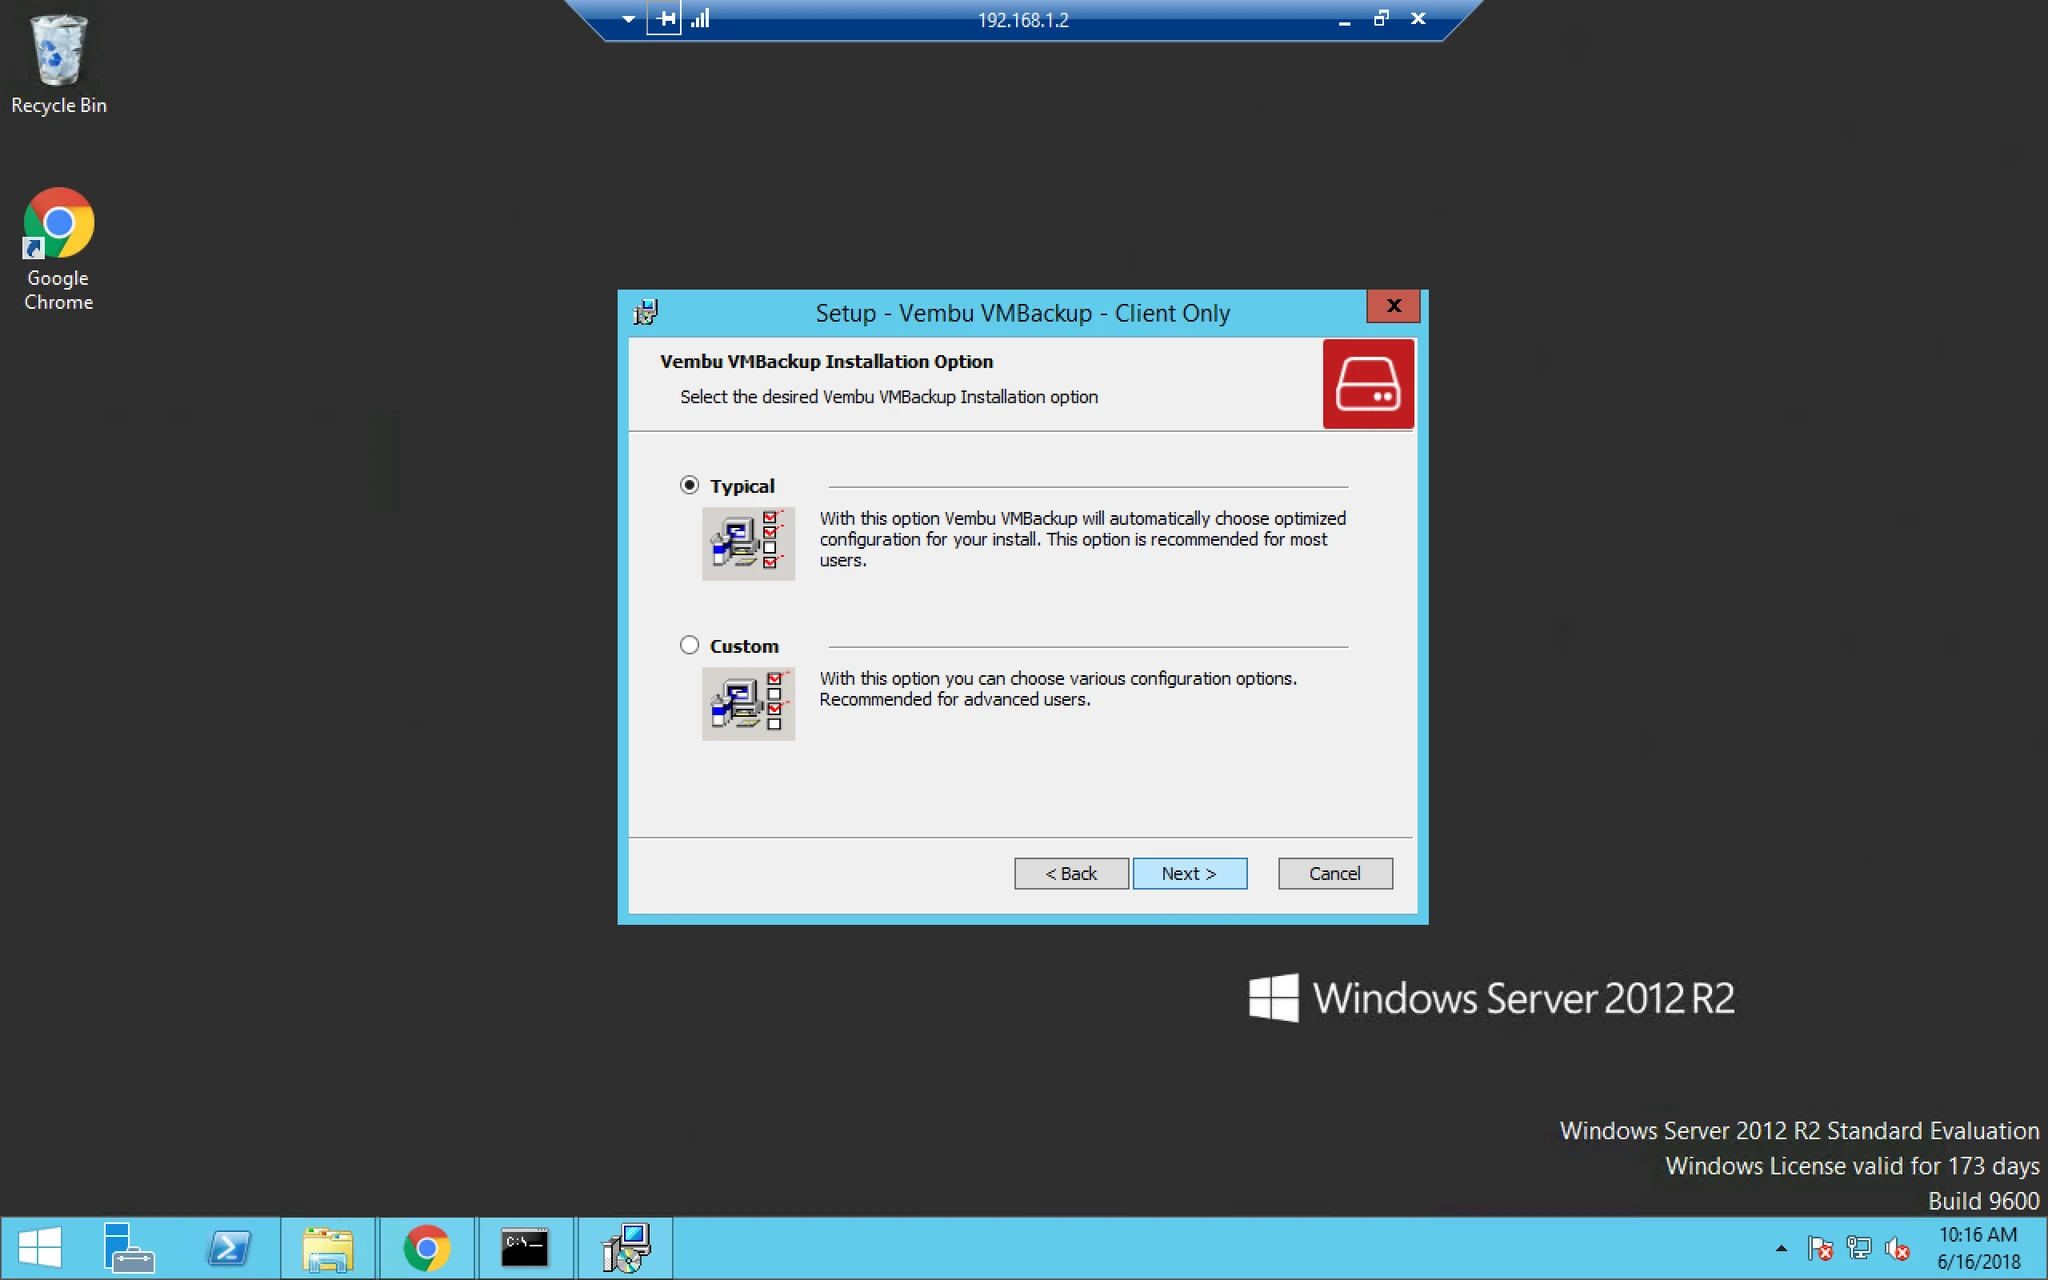
8. You can choose any one of them based upon your requirements either Typical or Custom.


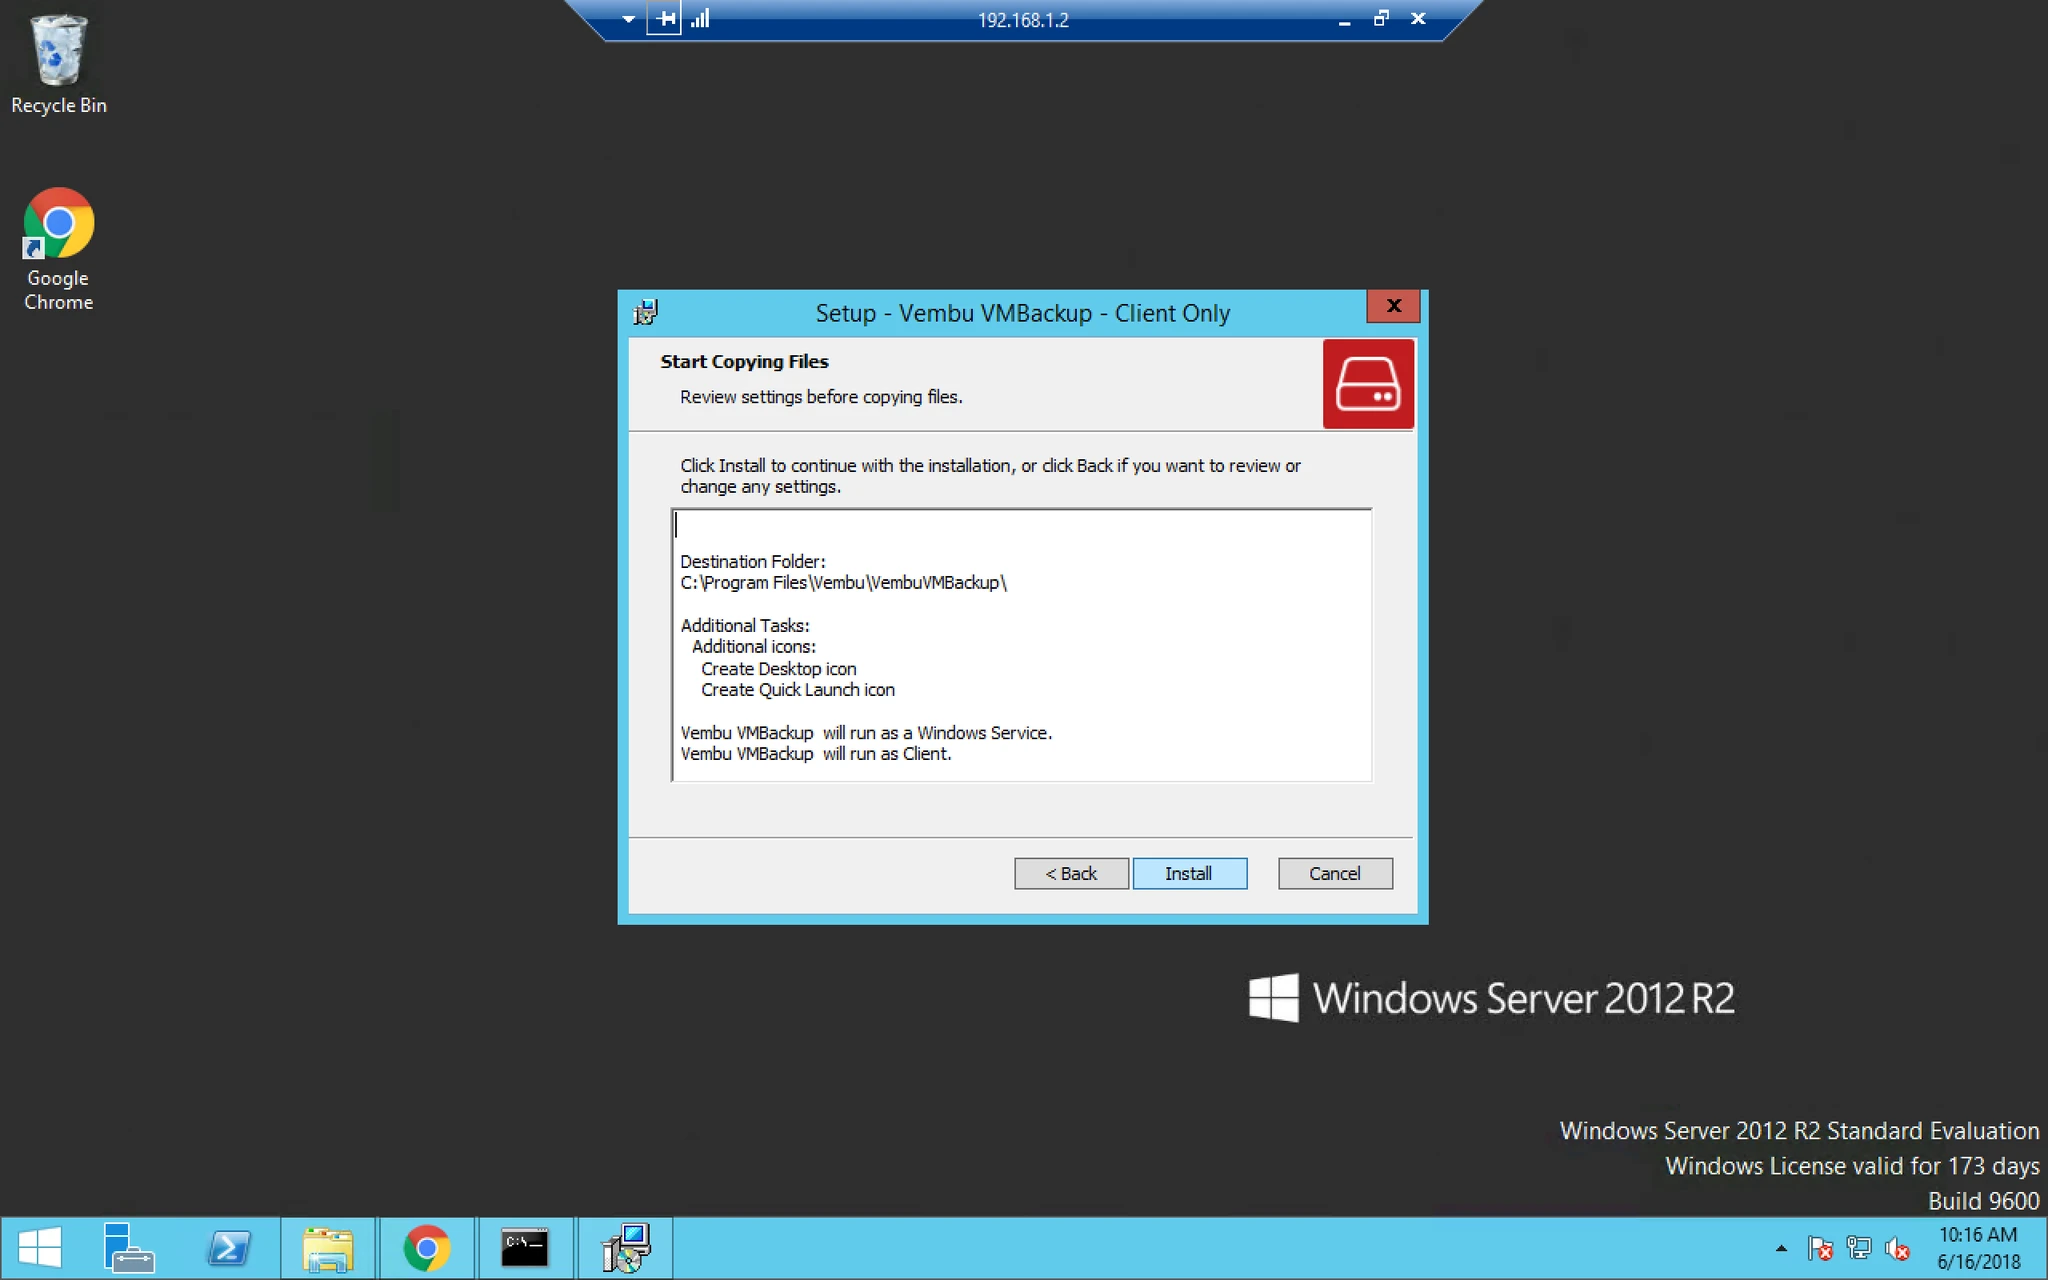
9. Finally click on install.


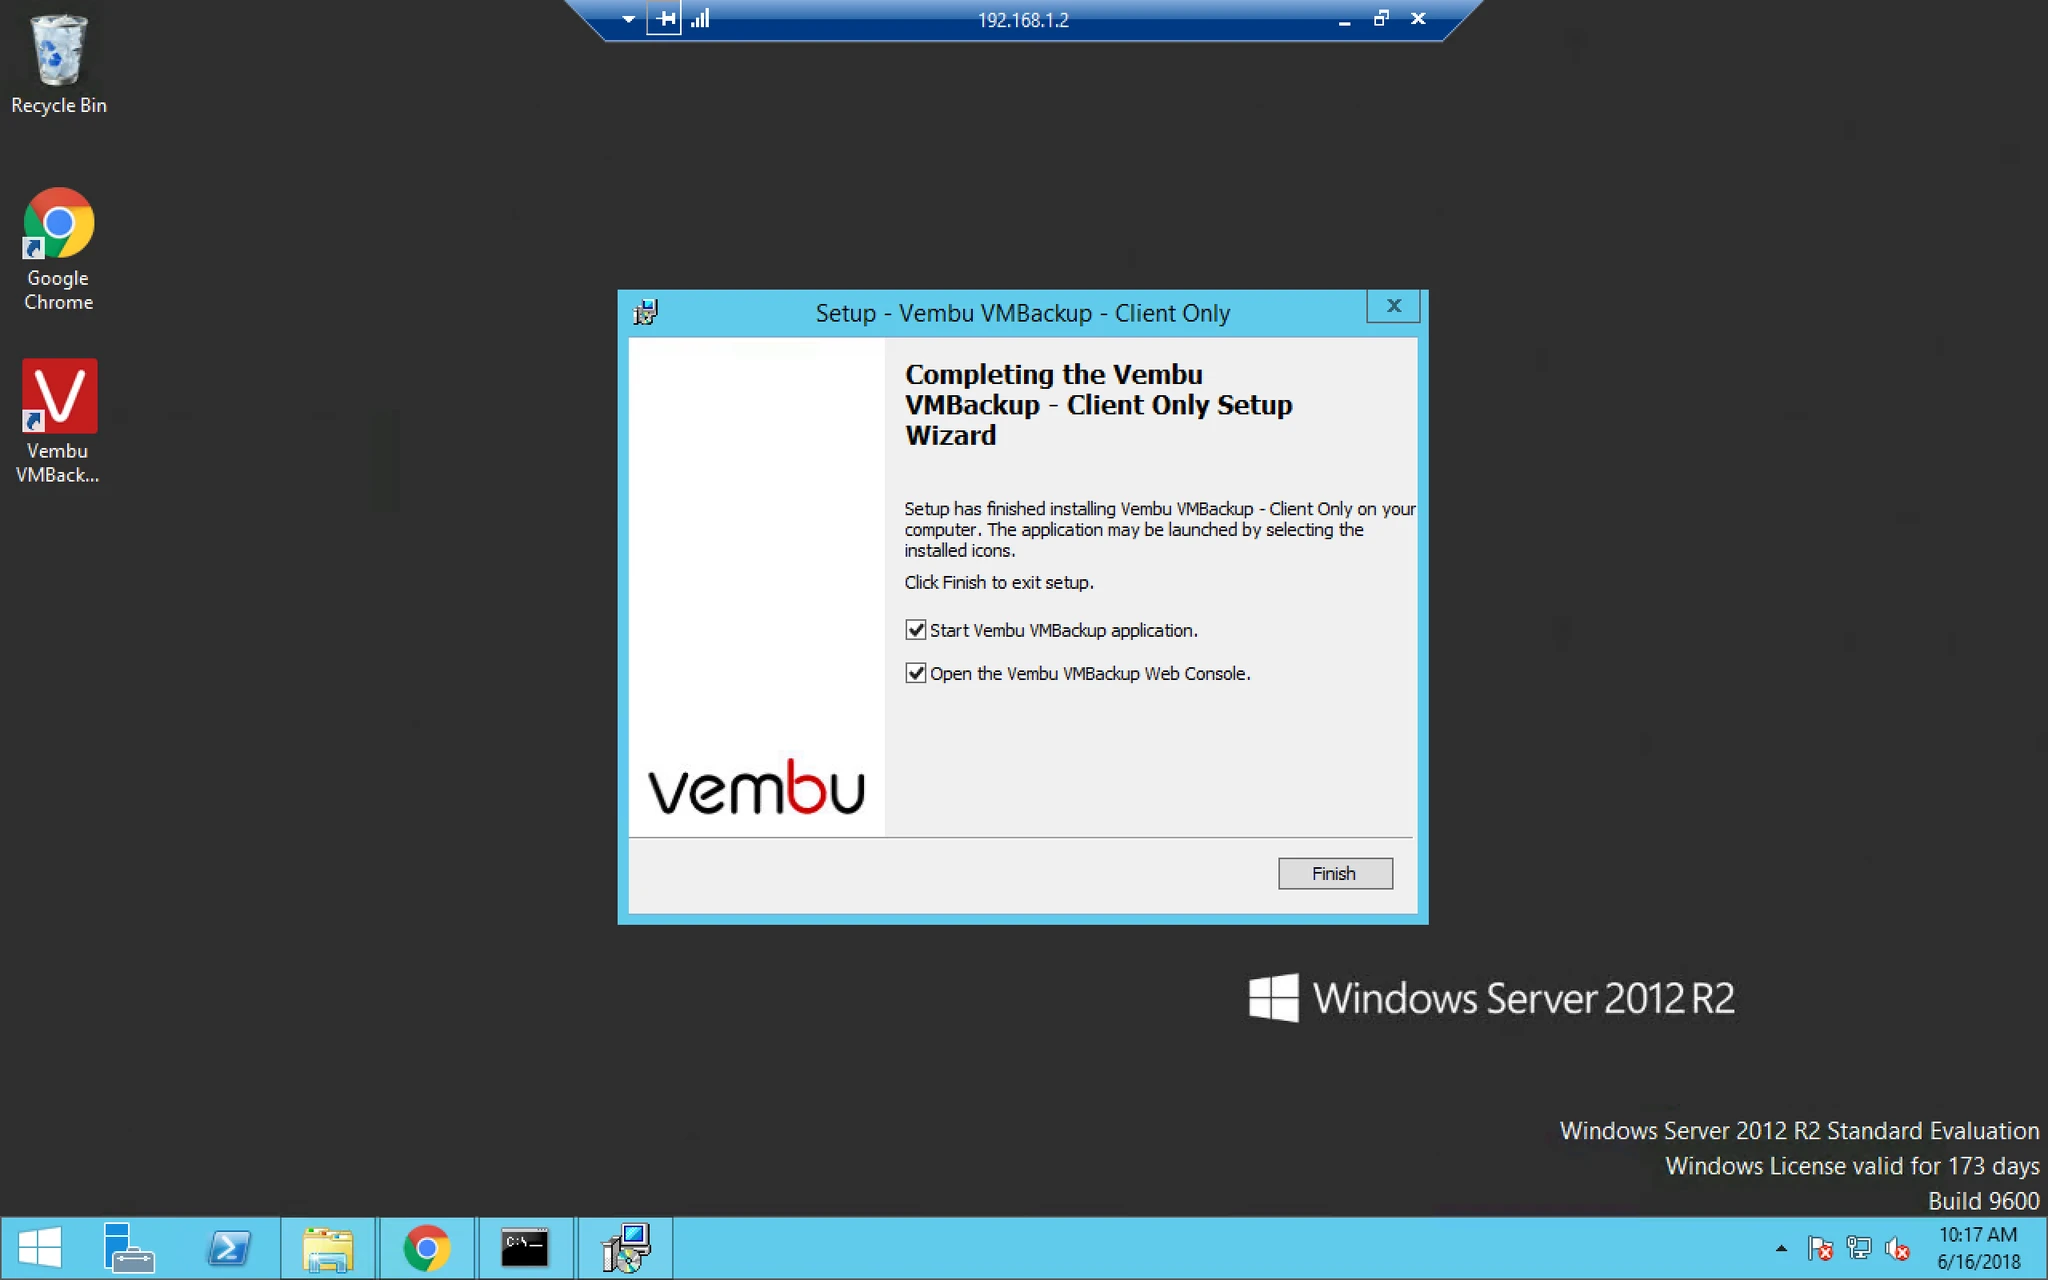
10. Once installation is finished you can select checkbox and click finish. It will open browser with Vembu VMBackup console.


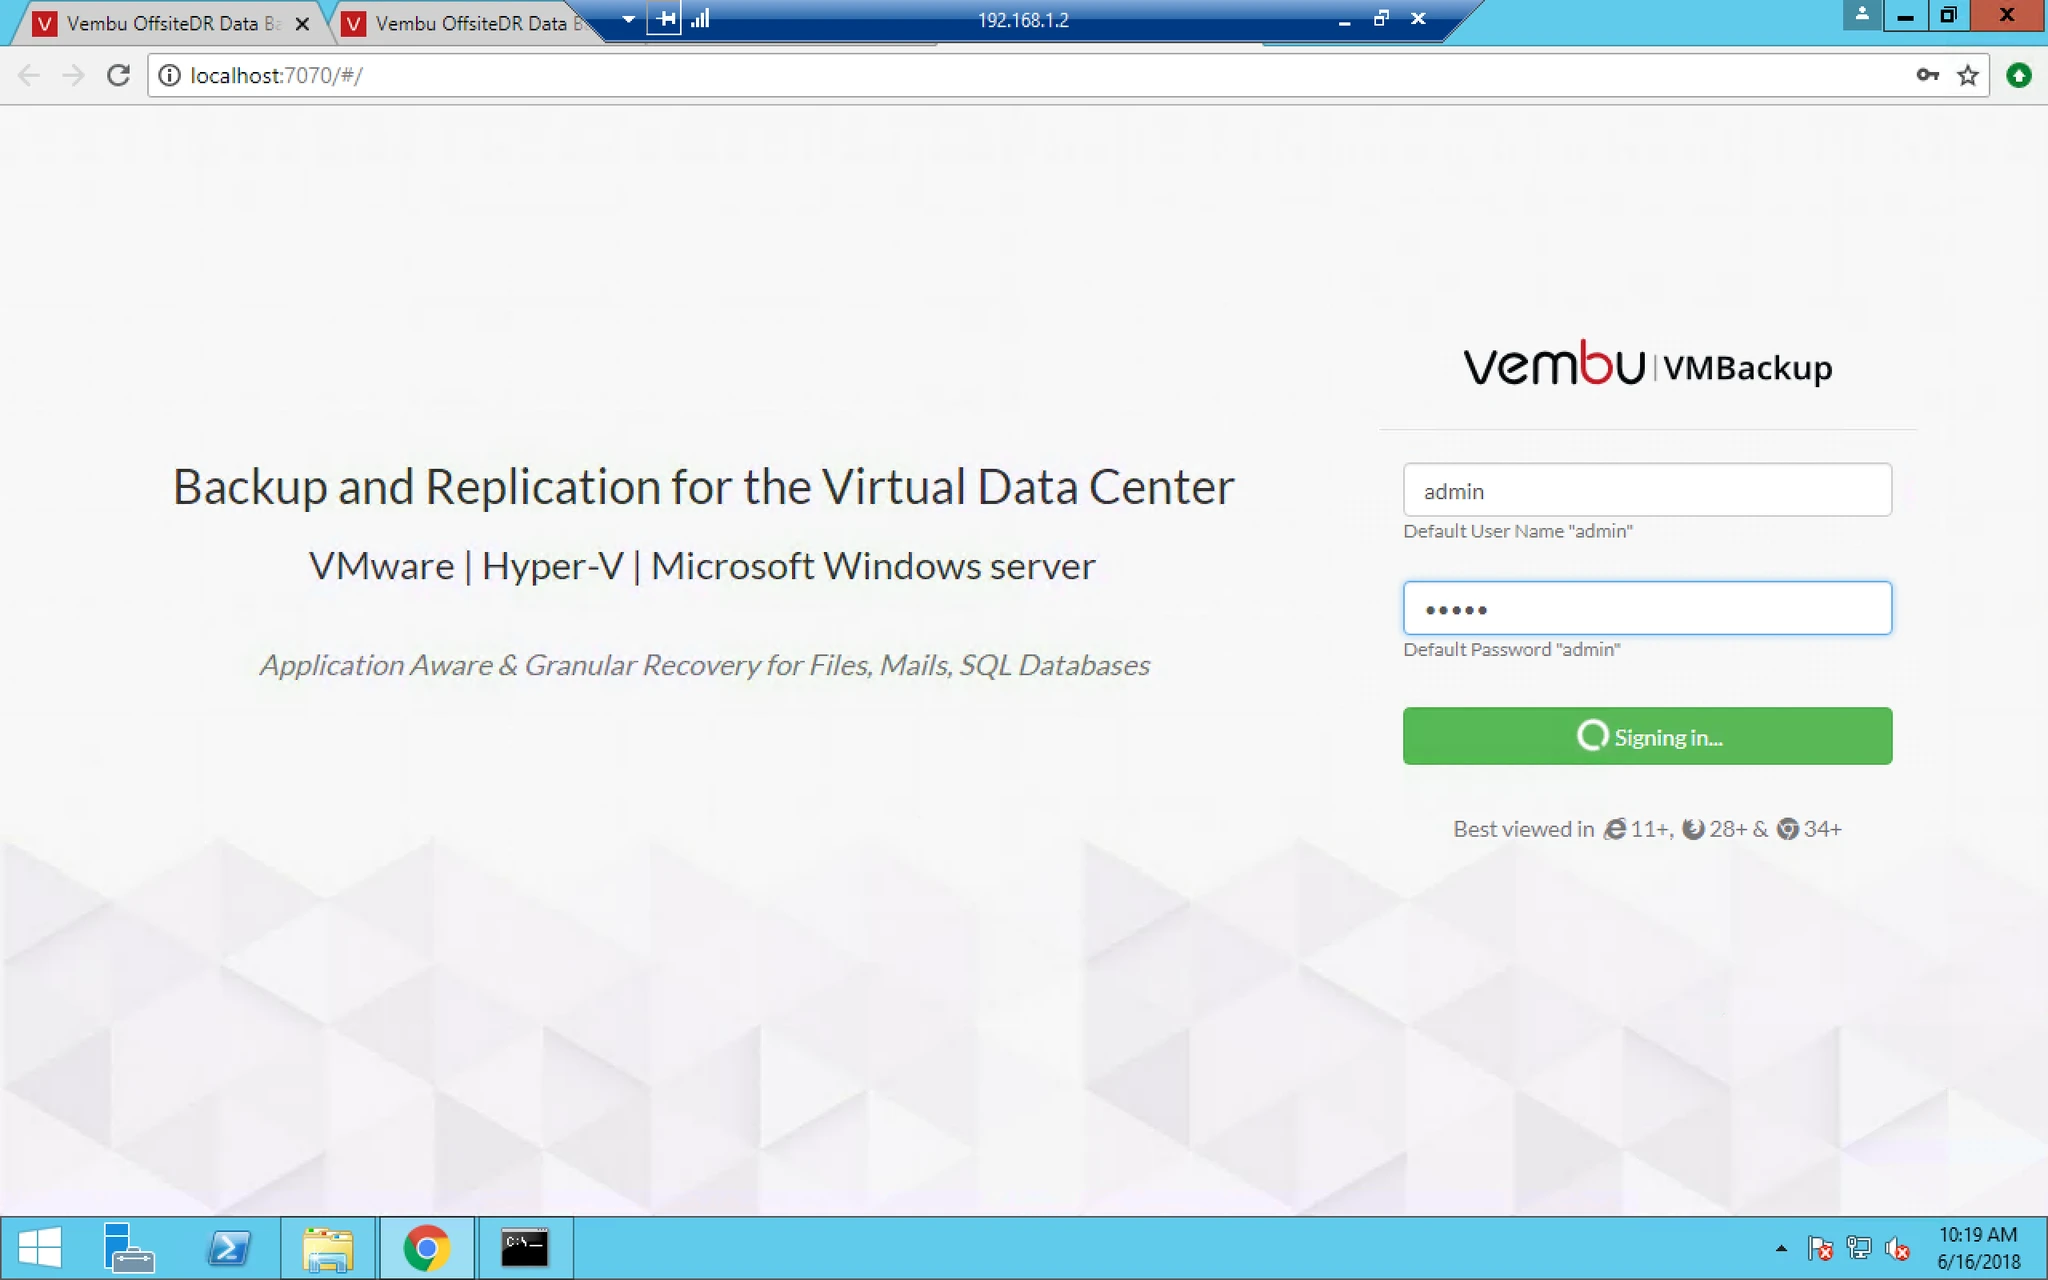
11. Now you can easily login with default username and password that is: admin and admin.


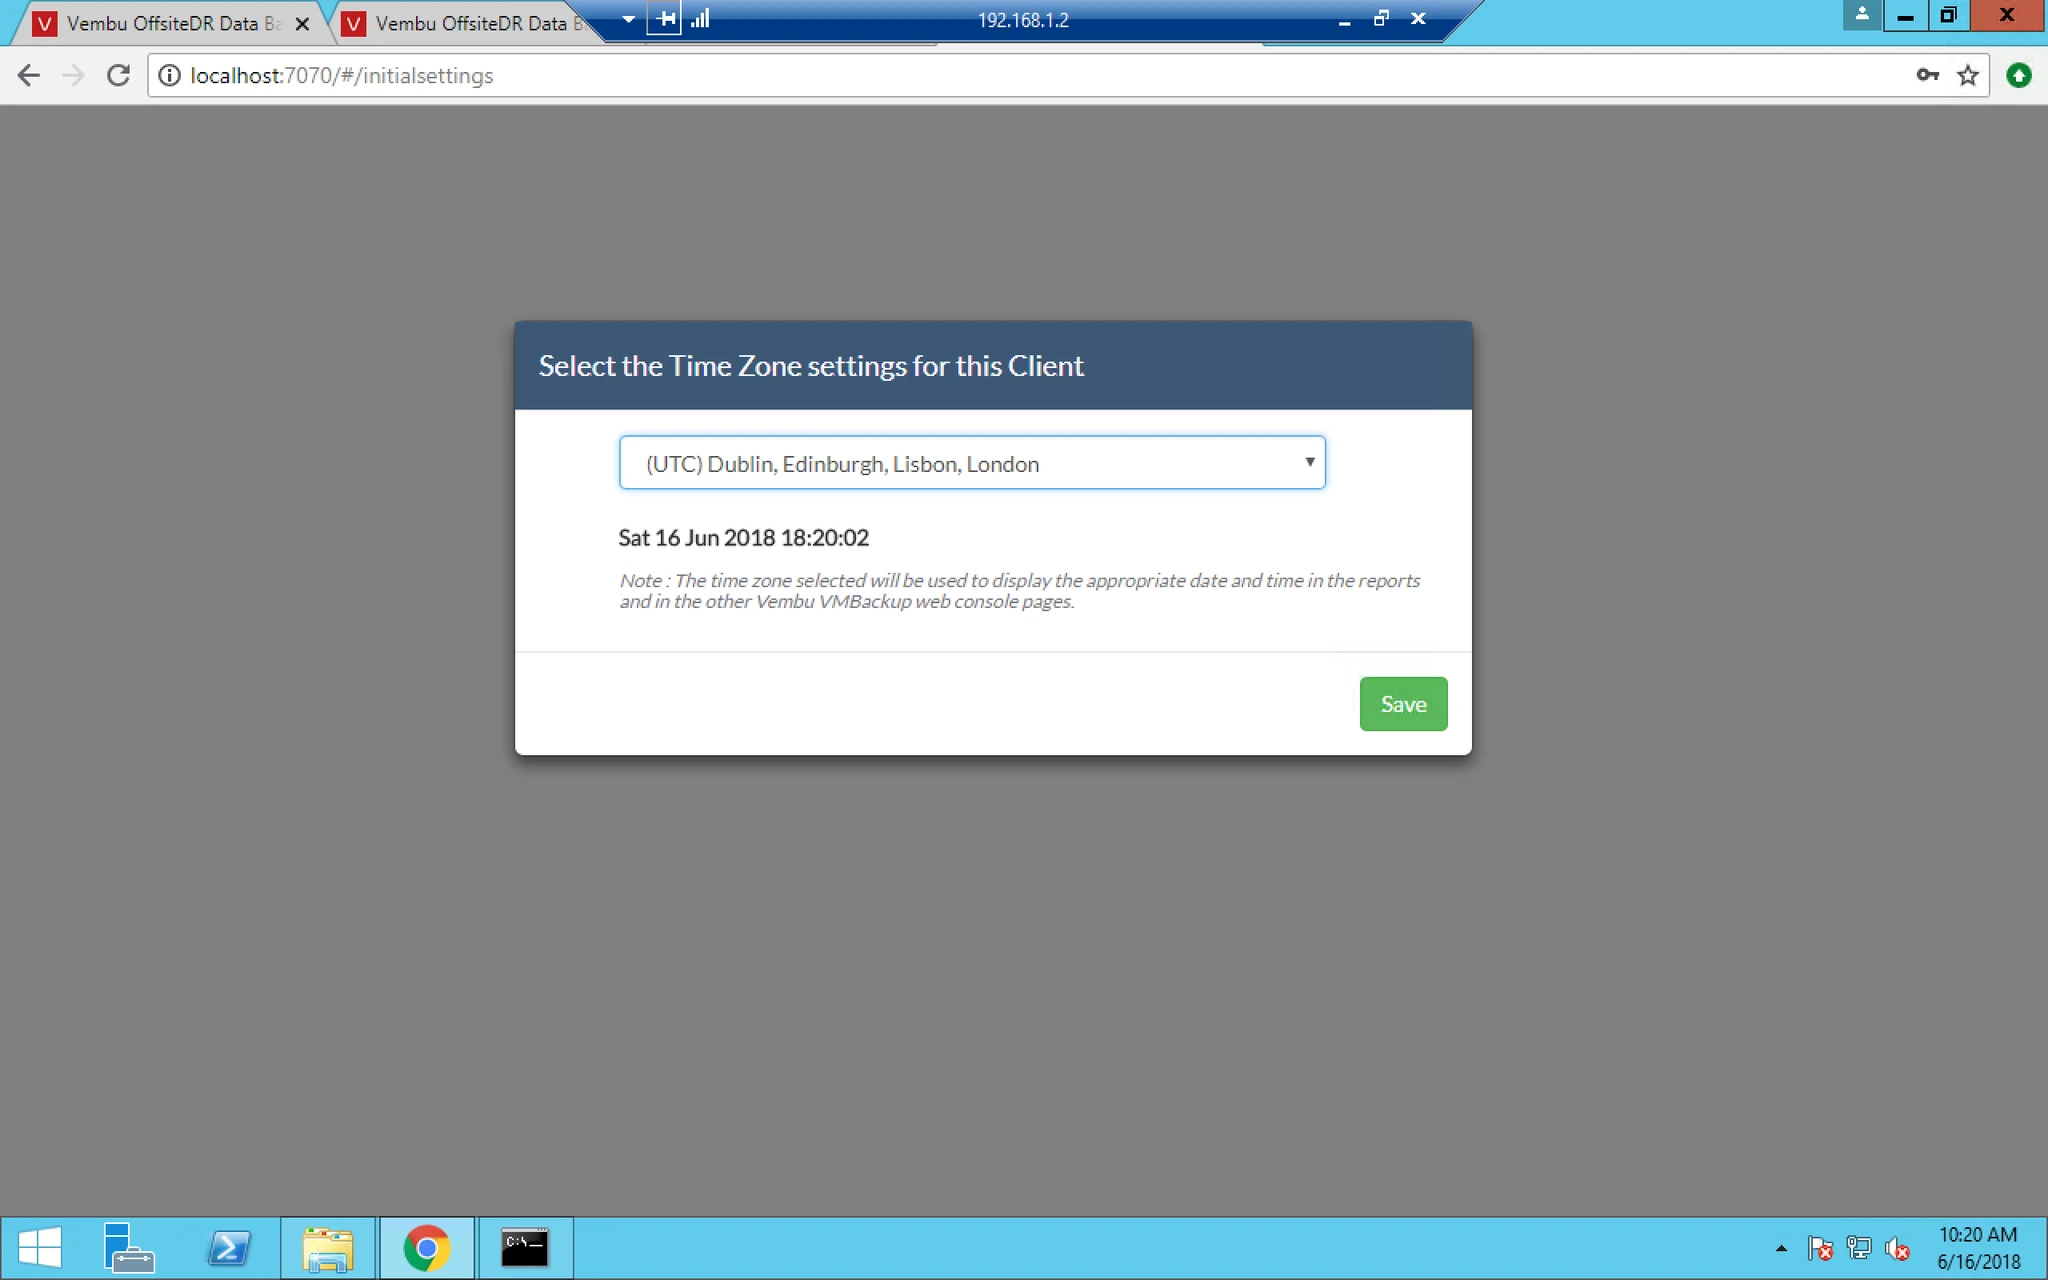
12. Now select Time Zone.


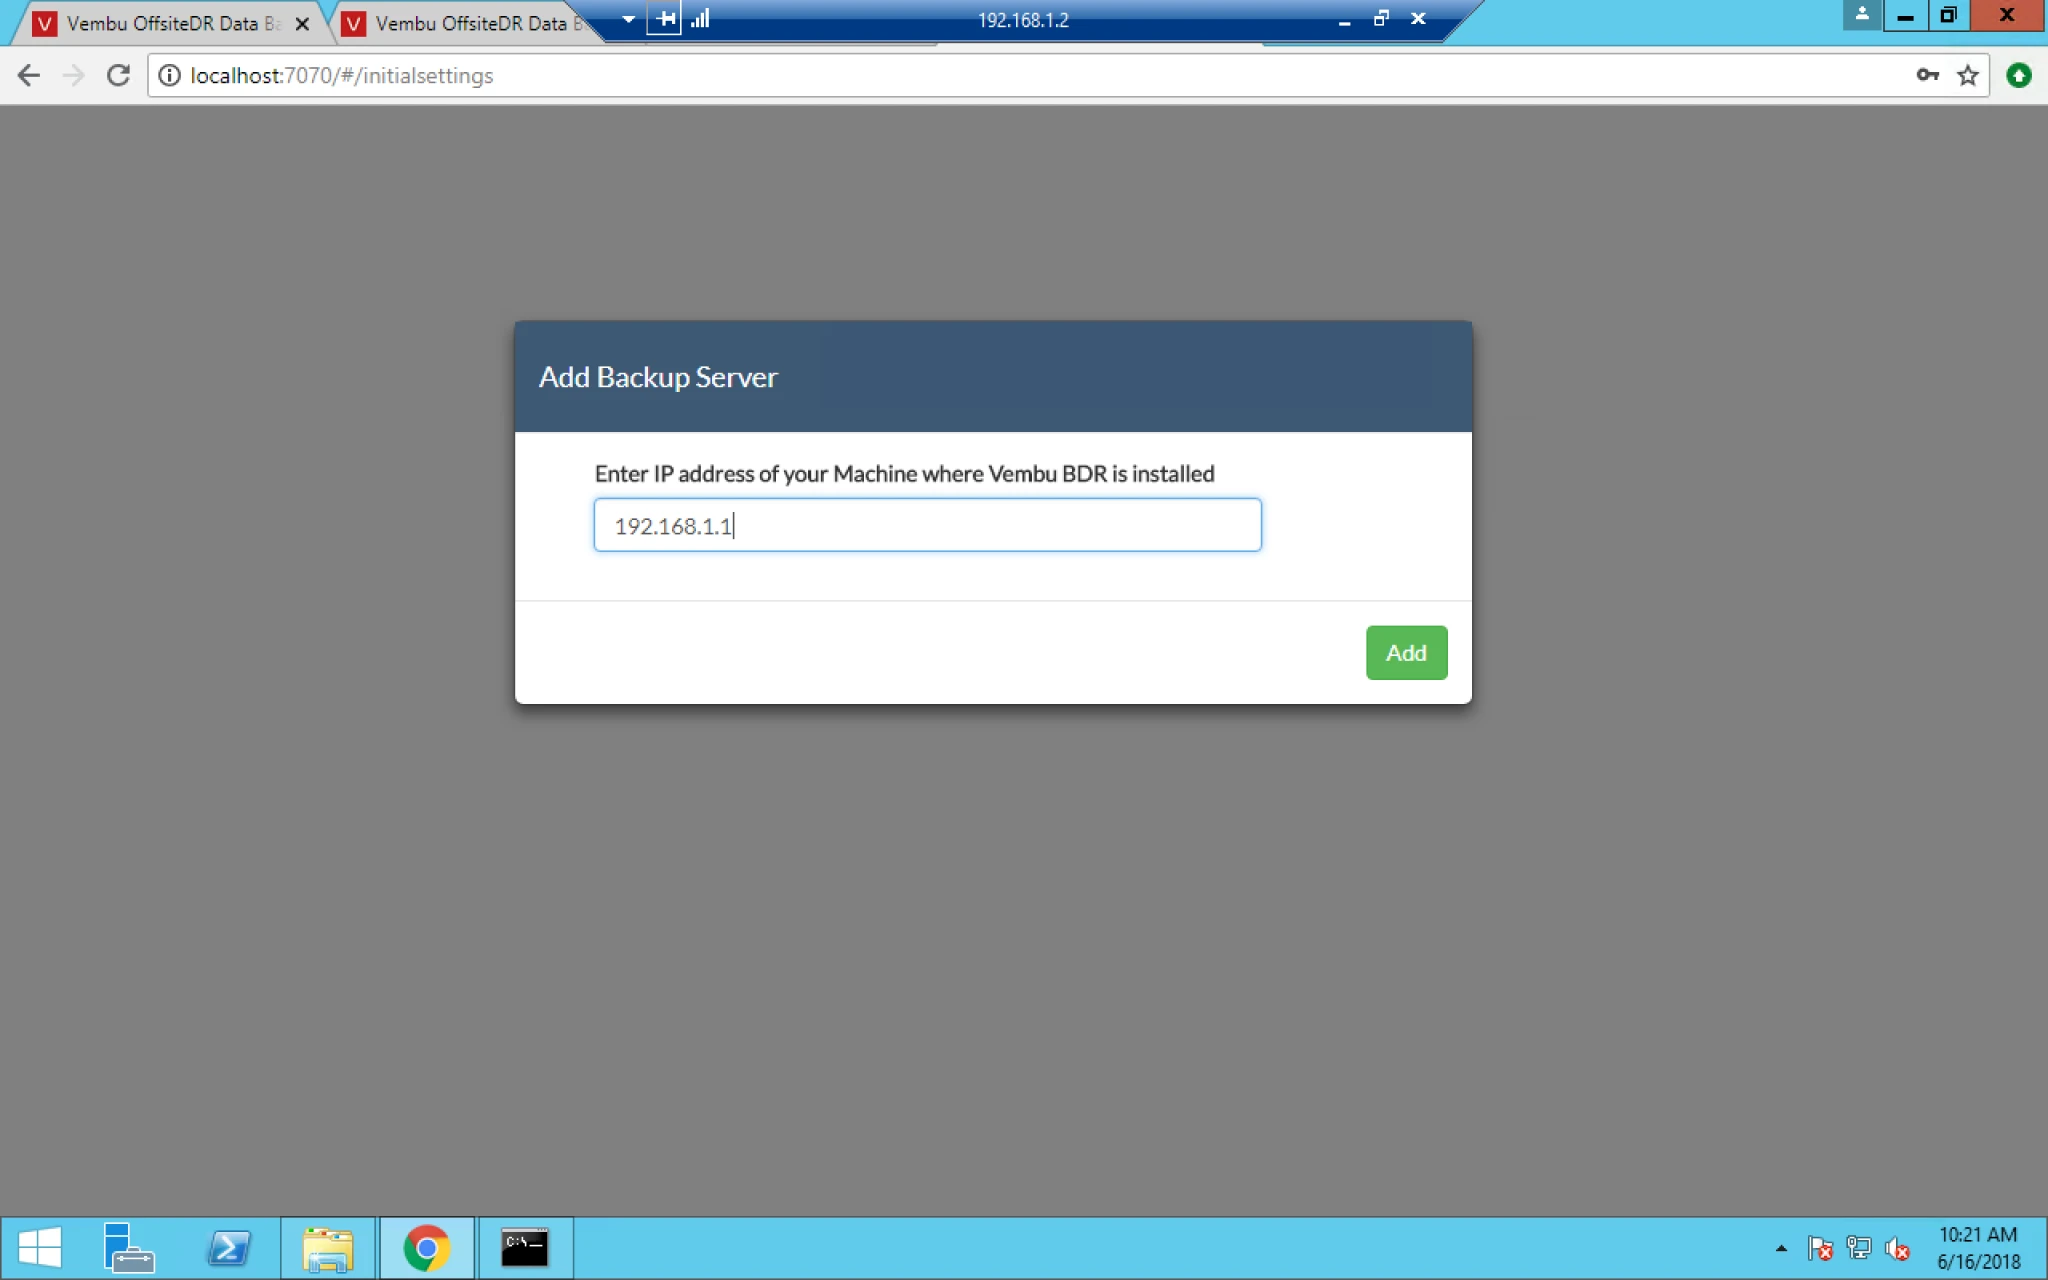
13. Here you now have to provide the Vembu BDR Server IP address and click on Add.


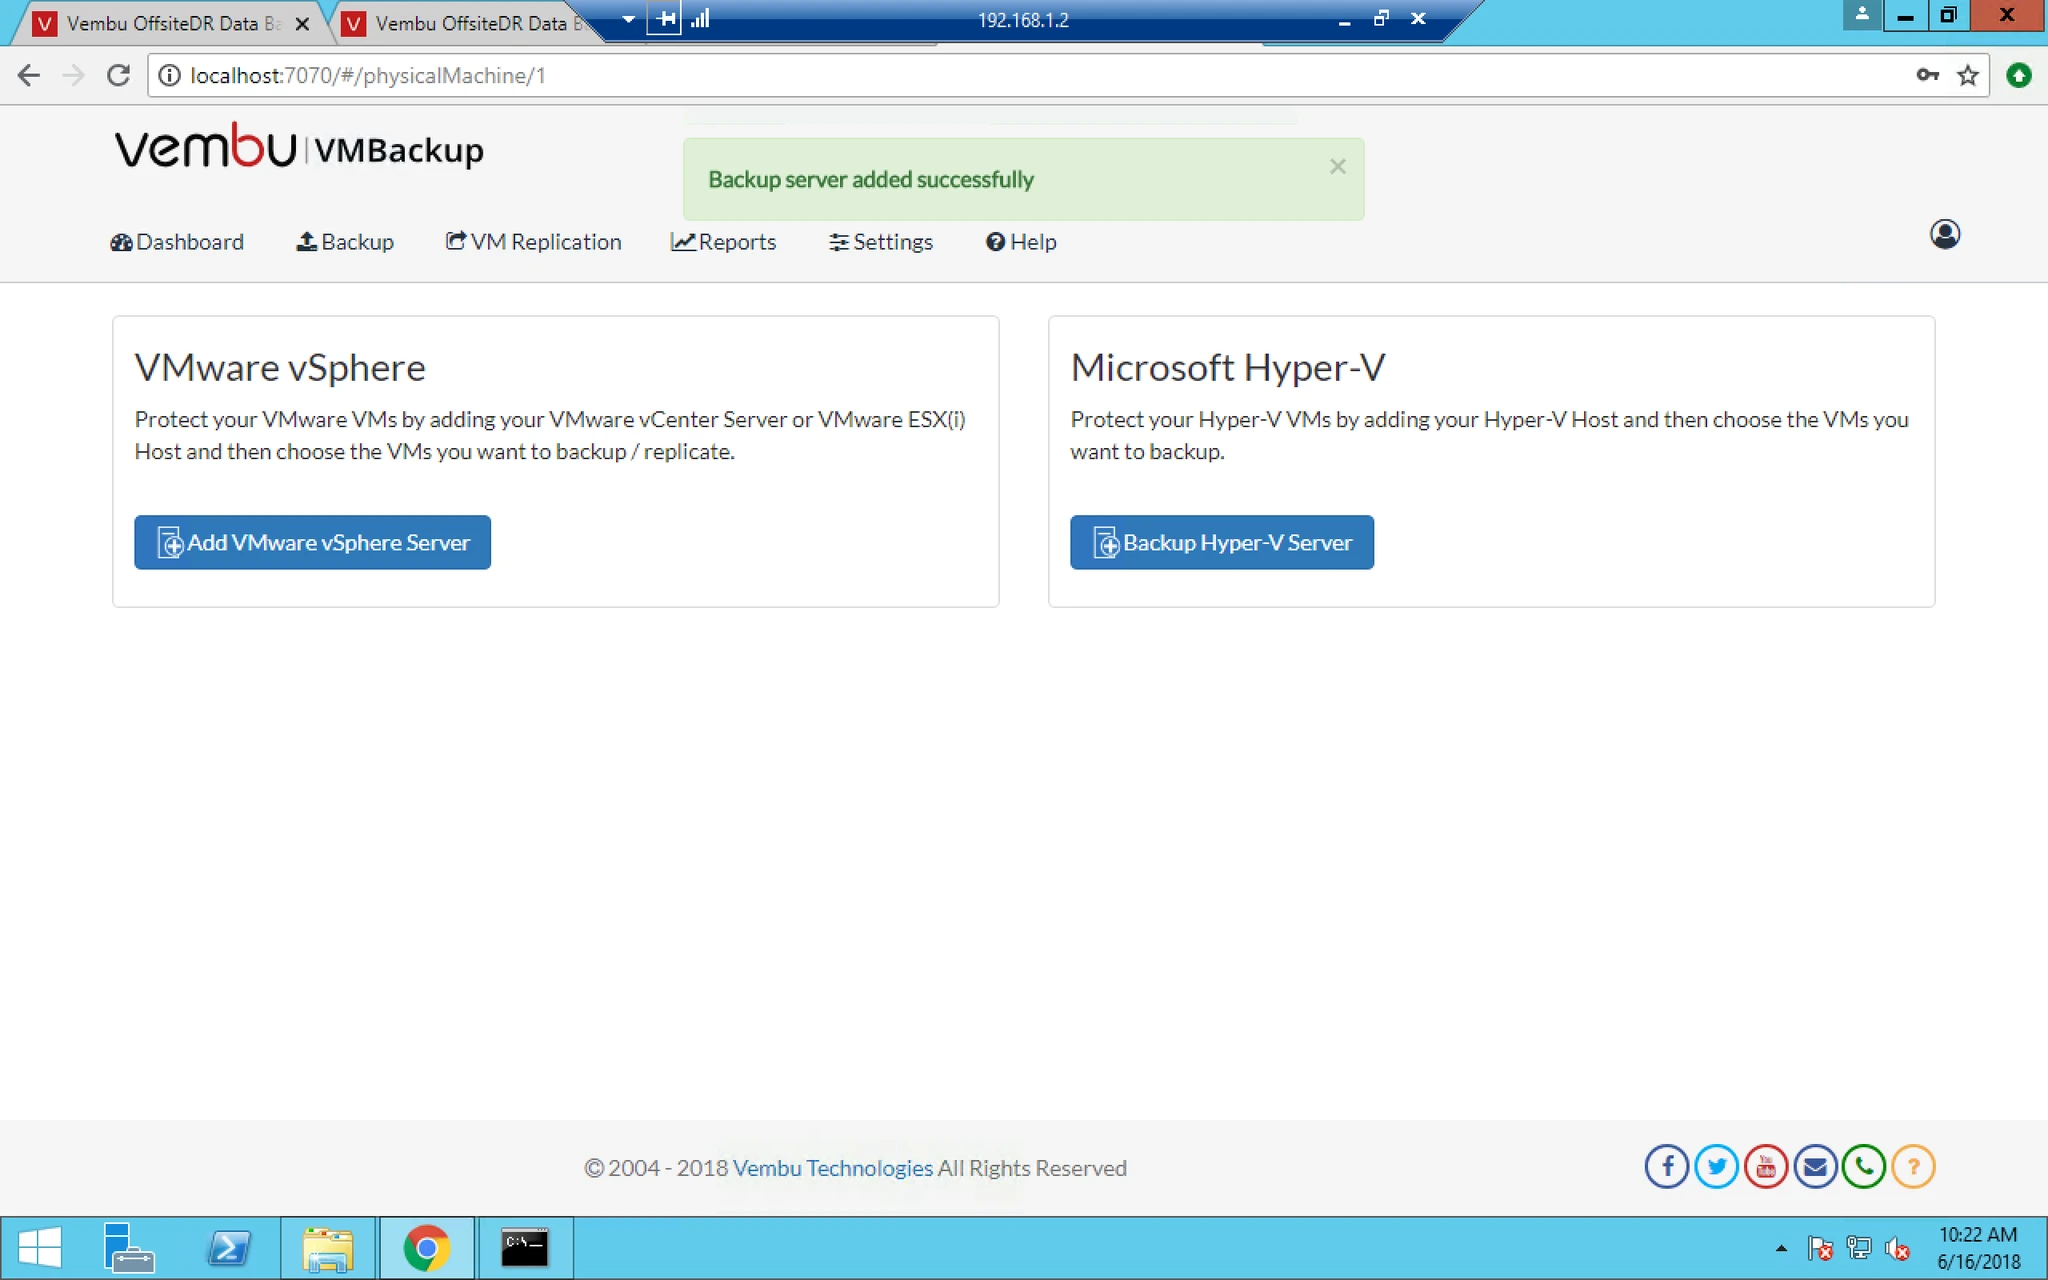
14. Now once the connection get established  with Vembu BDR server, It will prompt you a messege as  Backup server added successfully.

0

NSX, ACI, OSPF, BGP single network easy, right?

NSX, ACI, OSPF, BGP single network easy, right? ..

NSX, ACI, OSPF, BGP single network easy, right?

Two pod VVD design with an underlay built on Cisco ACI and using OSPF adjacencies with a single area with BGP providing adjacencies for the overlay provided by NSX. Problem description: Inconsistent routing of traffic on the overlay.


VMware Social Media Advocacy