0

Introducing vSphere Platinum and vSphere 6.7…

Introducing vSphere Platinum and vSphere 6.7 Update 1!

Introducing vSphere Platinum and vSphere 6.7…

We are excited to share today that VMware is announcing VMware vSphere Platinum – a new edition of vSphere, as well as vSphere 6.7 Update 1 – the latest release of the industry-leading virtualization and cloud platform. With the adoption of digital transformation, individuals and corporations are all leaning more on digital assets, digital The post Introducing vSphere Platinum and vSphere 6.7 Update 1! appeared first on VMware vSphere Blog .


VMware Social Media Advocacy
0

VMworld 2018 Sessions on NSX Networking and…

VMworld 2018 Sessions on NSX Networking and Security in VMware Cloud on AWS

VMworld 2018 Sessions on NSX Networking and…

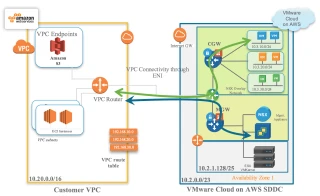
VMworld 2018 is a week away; are you attending? Want to learn more about NSX Networking and Security in VMware Cloud on AWS, how you can easily deploy and secure workloads in the cloud, or how to build hybrid cloud solutions with the familiarity and capabilities of vSphere? Make sure to attend the below sessions The post VMworld 2018 Sessions on NSX Networking and Security in VMware Cloud on AWS appeared first on Network Virtualization .


VMware Social Media Advocacy
0

New Release: PowerCLI 10.2.0

New Release: PowerCLI 10.2.0

New Release: PowerCLI 10.2.0

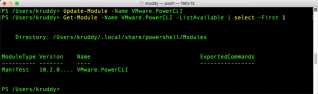
It’s new release day! Even though we’re counting down the days to VMworld, we still have a fresh version for you with PowerCLI 10.2.0! Speaking of counting, this marks the 4th release of PowerCLI this year. I remember when getting 2 updates in a single year was a major event, much less four! A big […] The post New Release: PowerCLI 10.2.0 appeared first on VMware PowerCLI Blog .


VMware Social Media Advocacy
0

vExpert NSX 2018 Award Announcement

vExpert NSX 2018 Award Announcement

vExpert NSX 2018 Award Announcement

Thank you to everyone who applied for vExpert NSX. I’m pleased to announce the list of 2018 vExperts who received the NSX award. Each of these vExperts has demonstrated significant contributions to the community and a willingness to share their expertise with others. Contributing is not always blogging or Twitter as there are many


VMware Social Media Advocacy
0

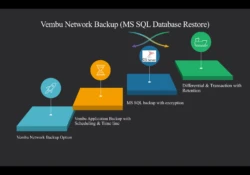
How to Restore MS SQL database via Vembu

Topic outline:

MS SQL Restore

Previously Restored Data

Restore Data from Backup  

Time Stamp

Type of Restore

Recovery State


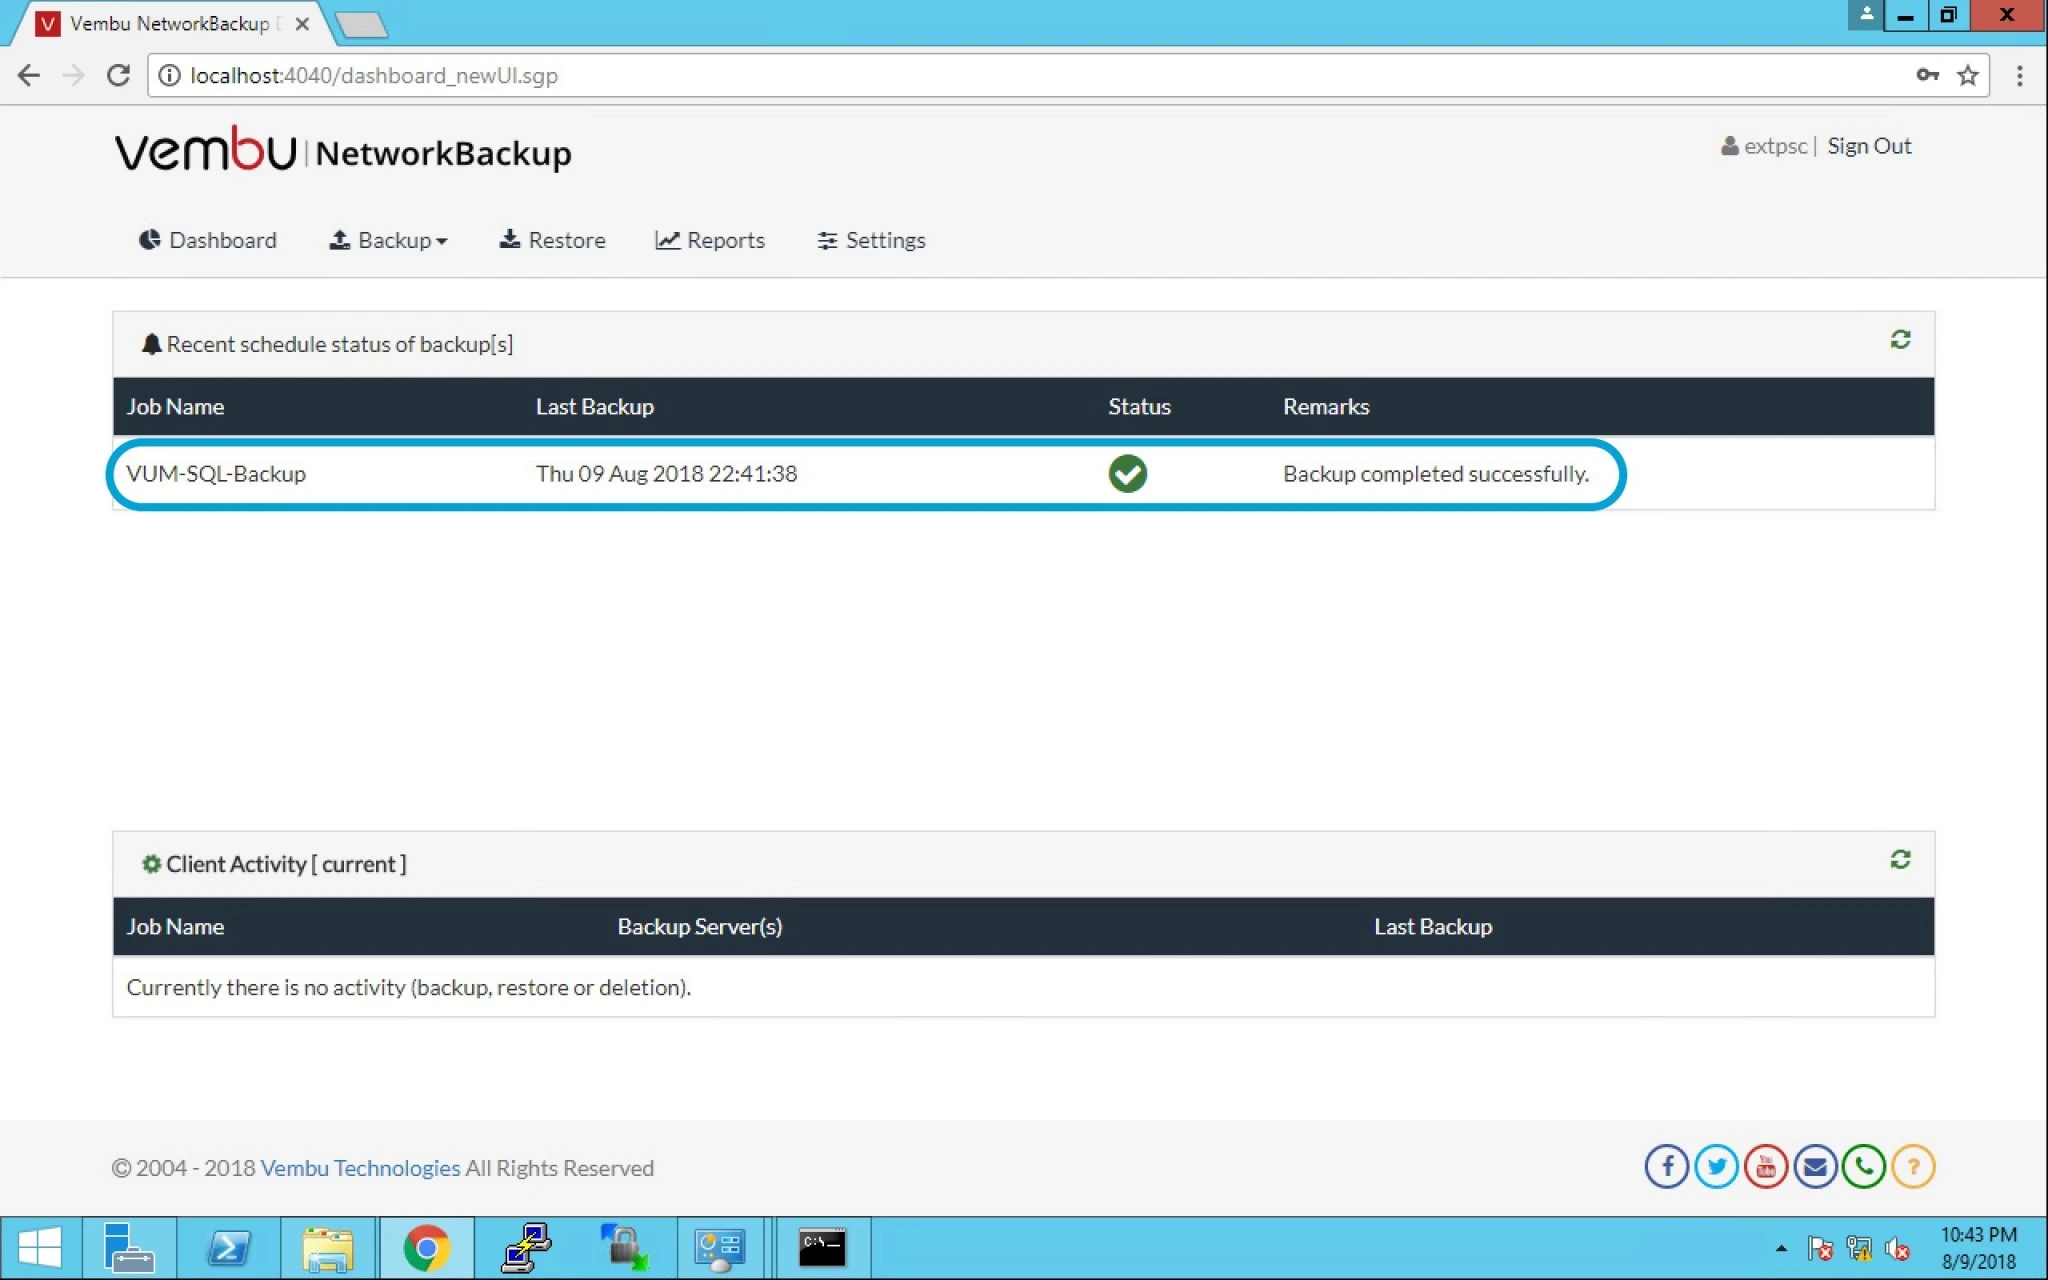
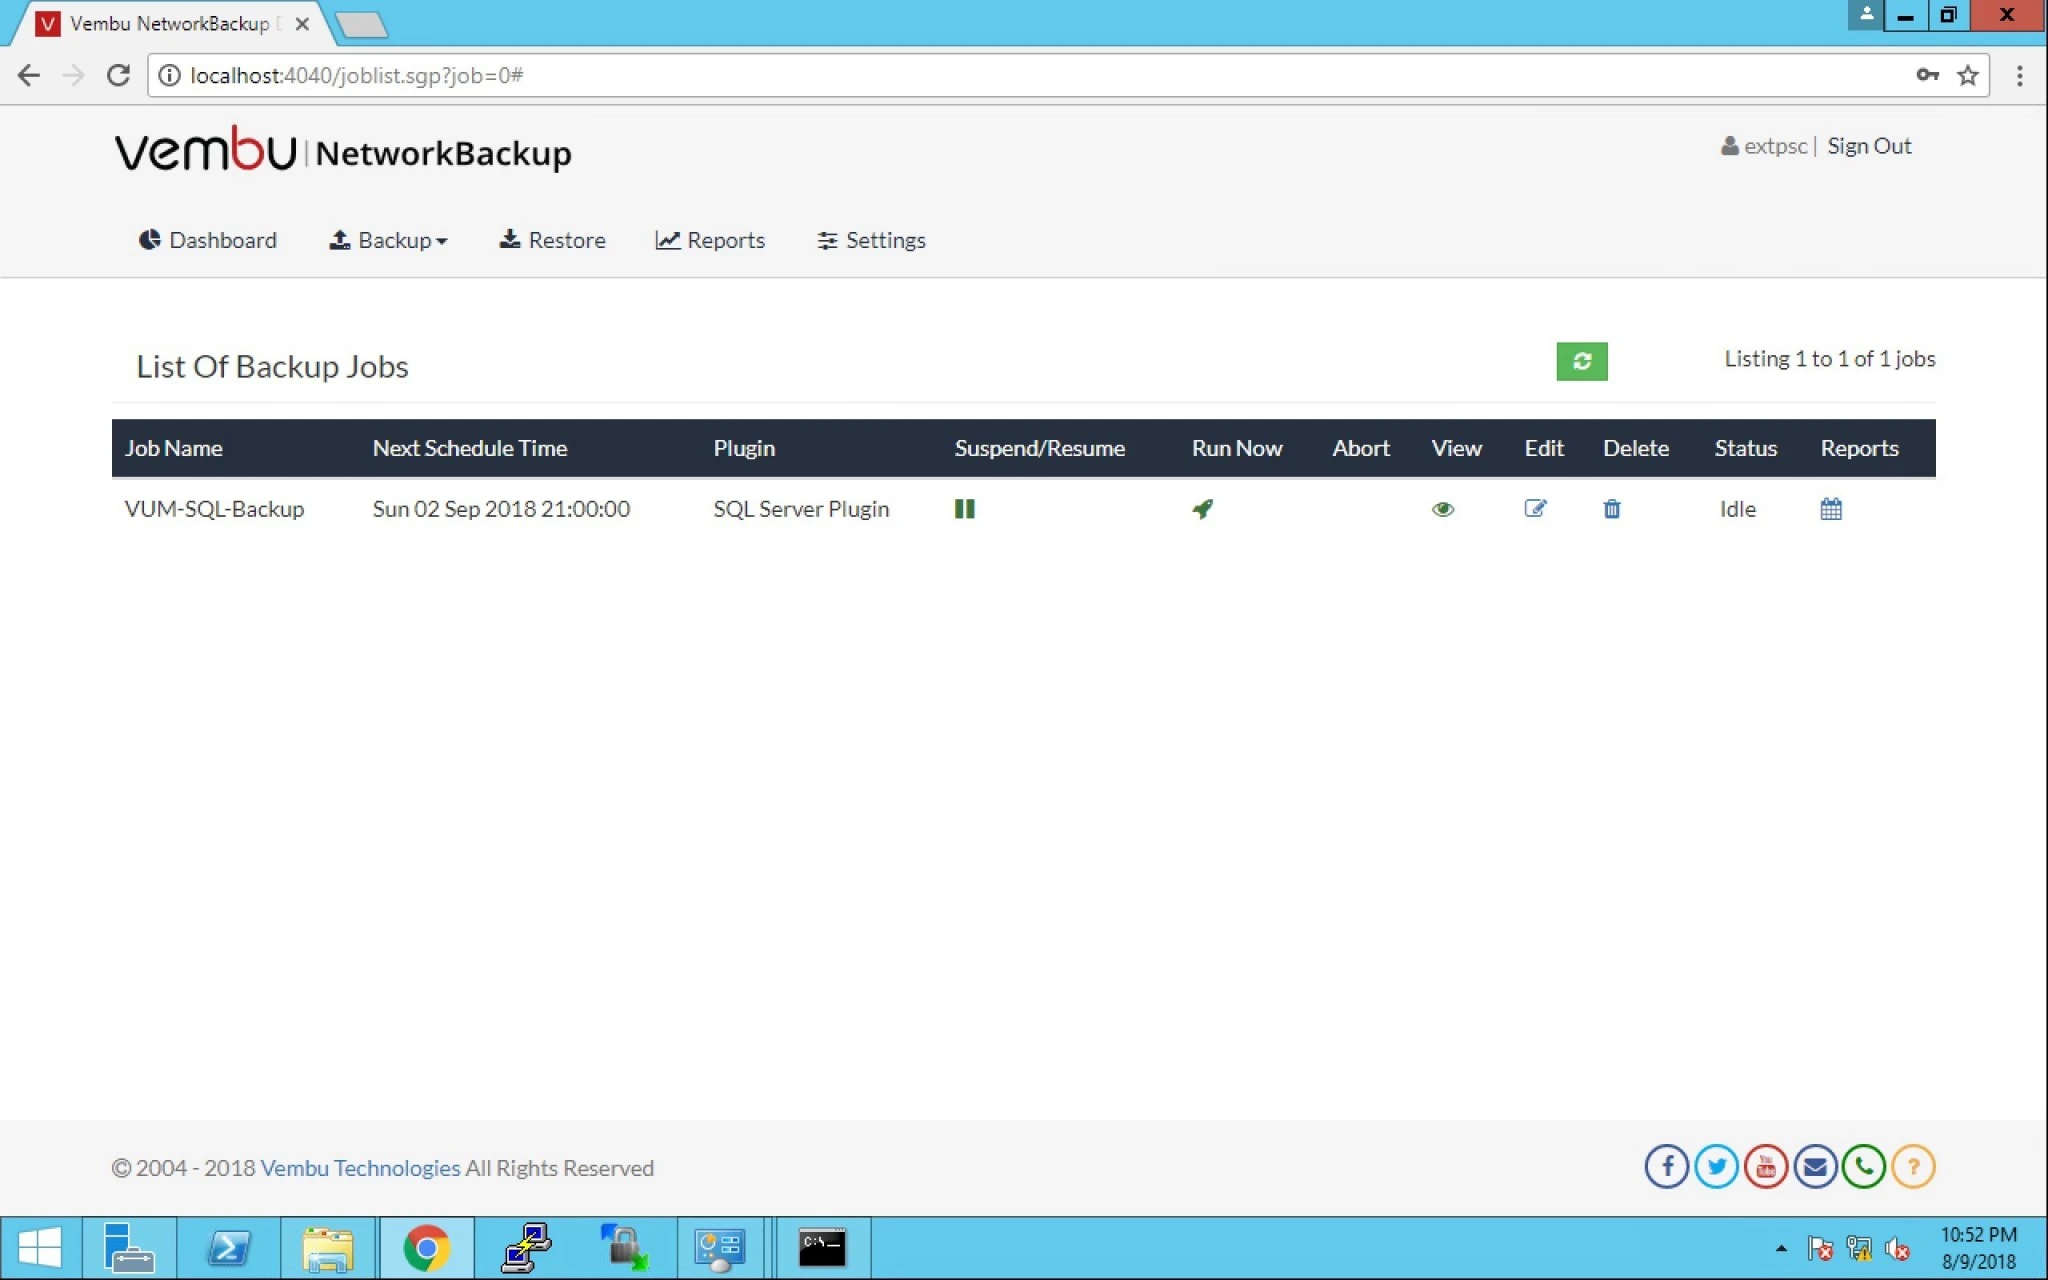
  1. Login into Vembu Network Backup page and check the last successfully completed backup.


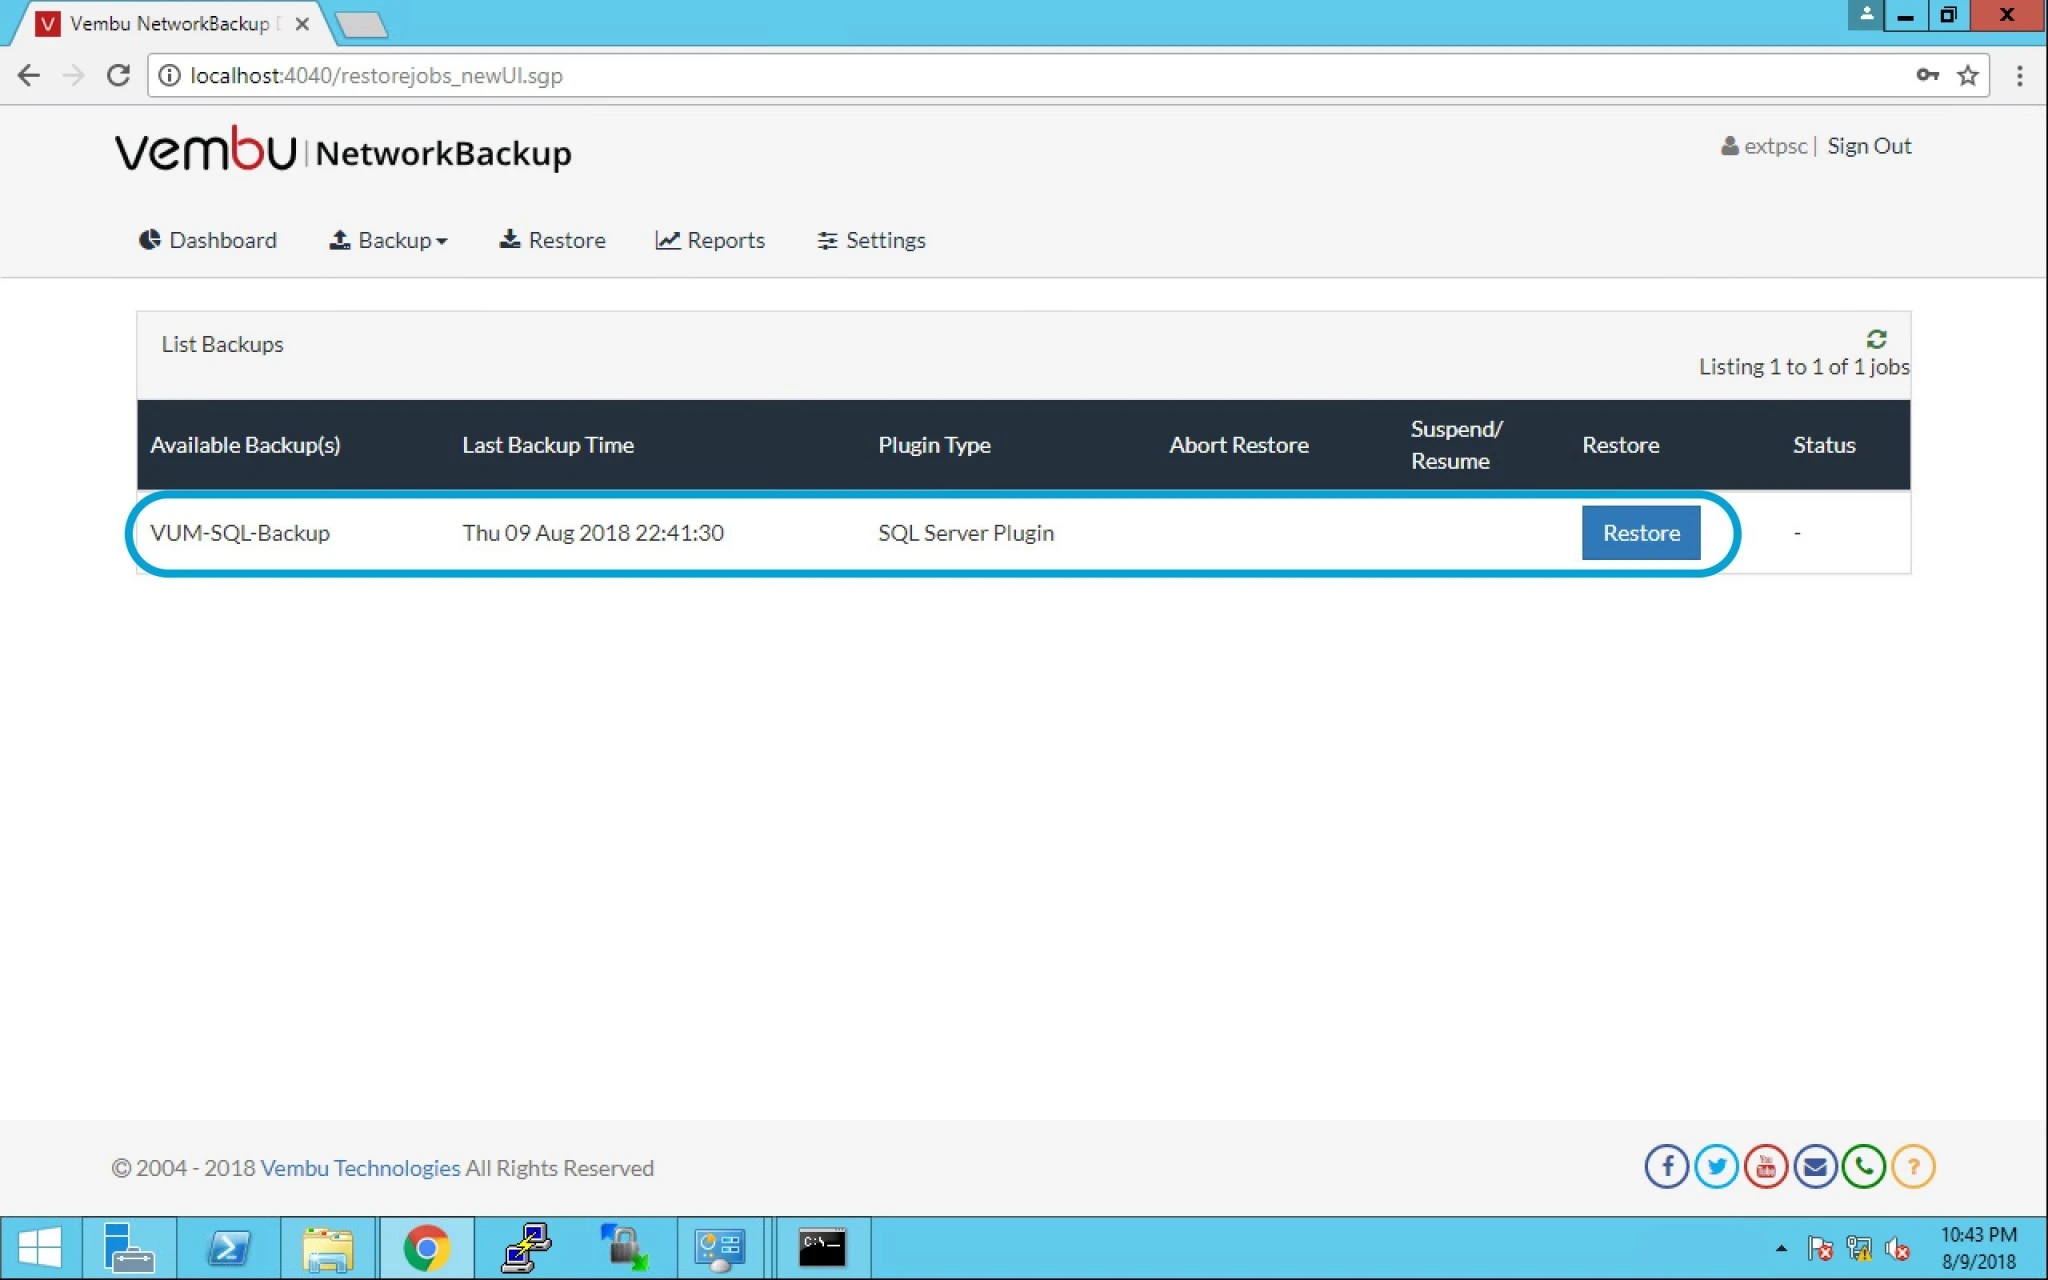
2. Now Click on Restore option and you can see available backup to restore.


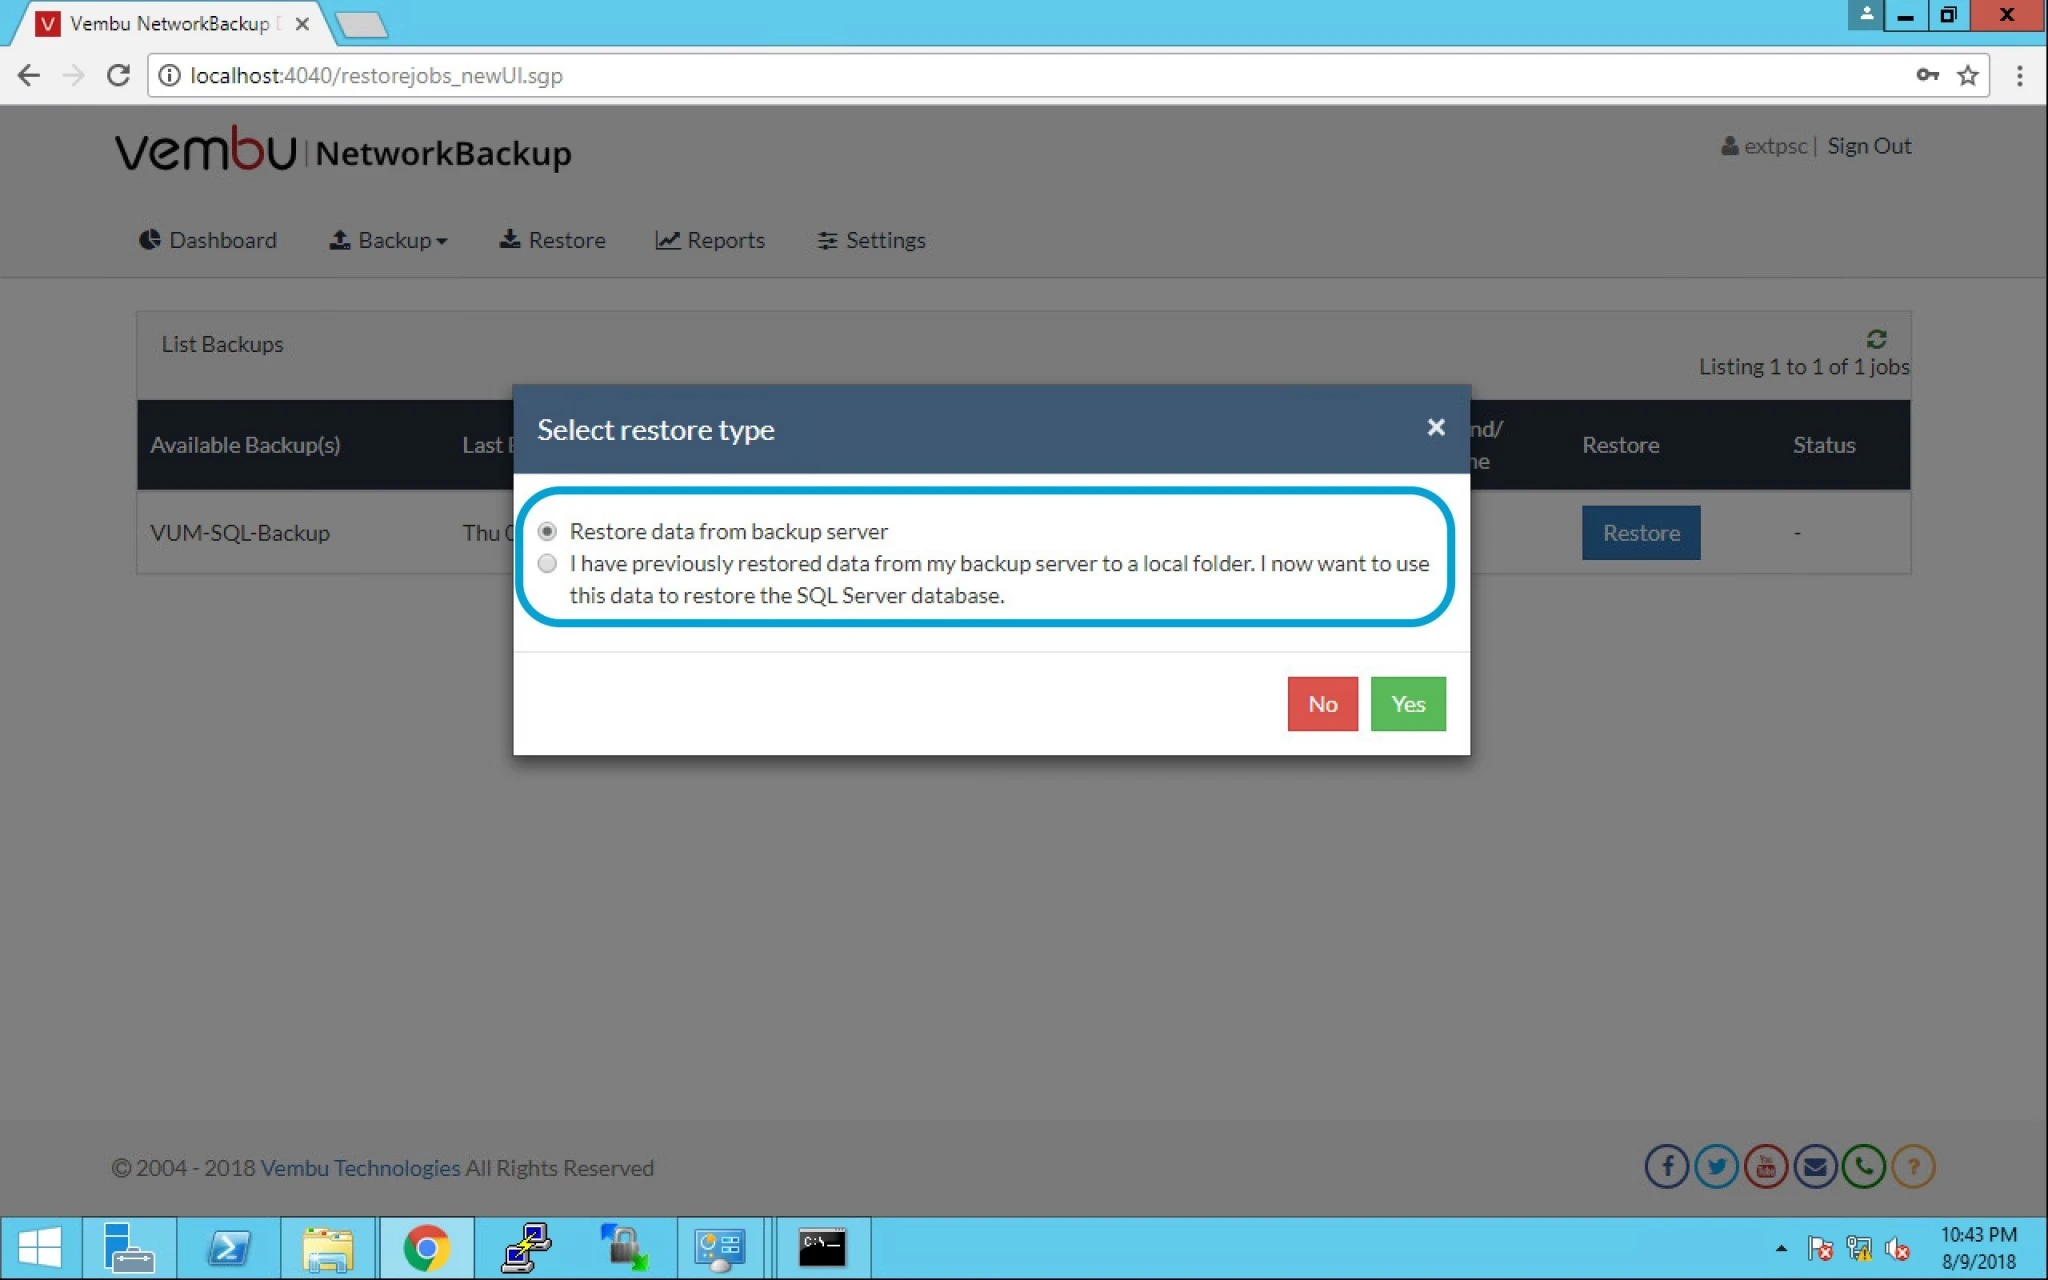
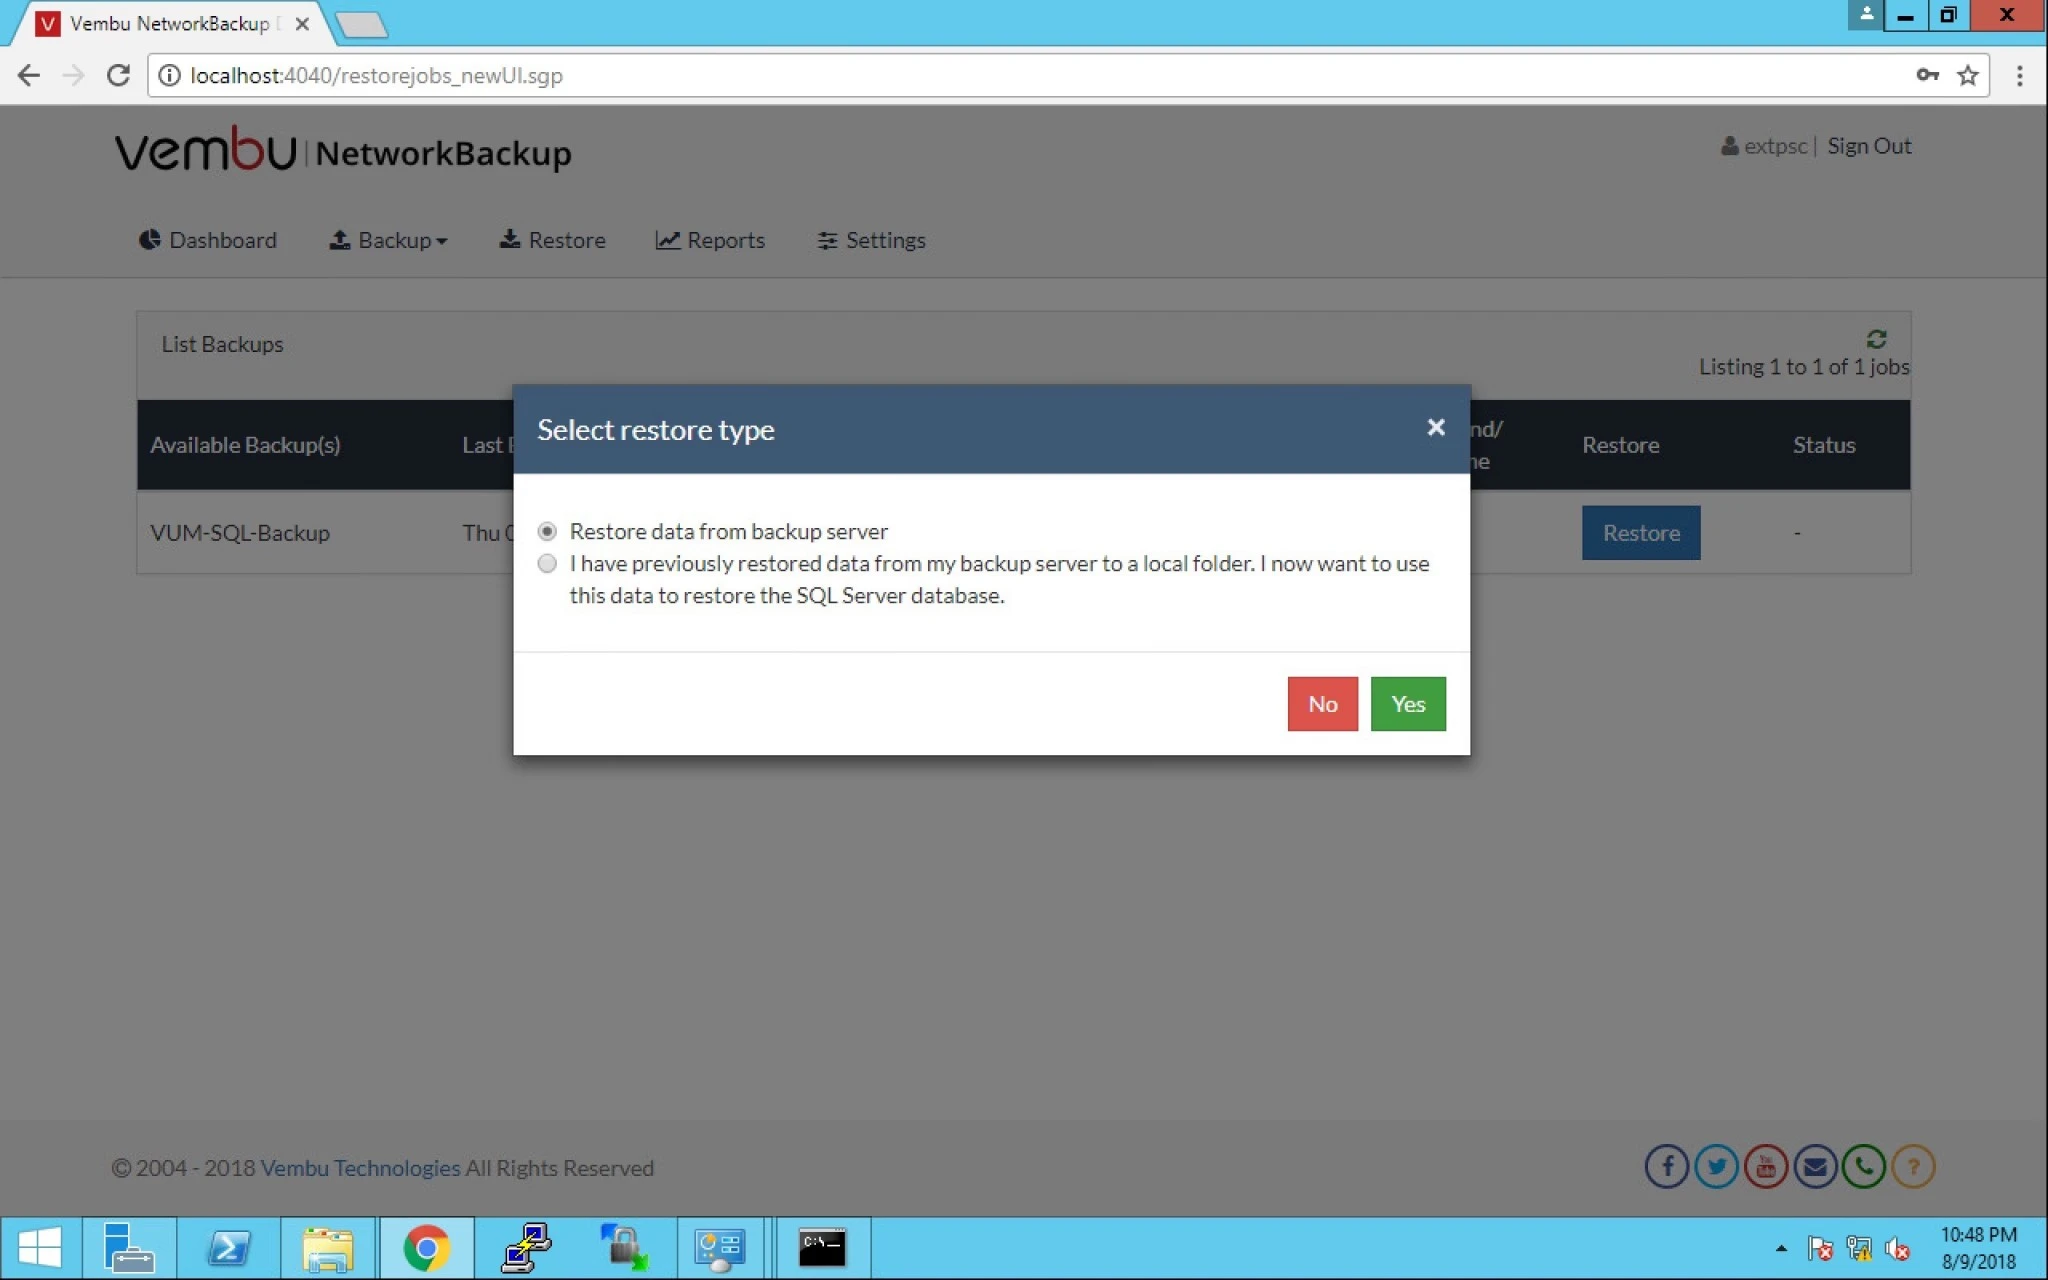
3. Now there are two options given below:

a) Restore Data from backup server. And

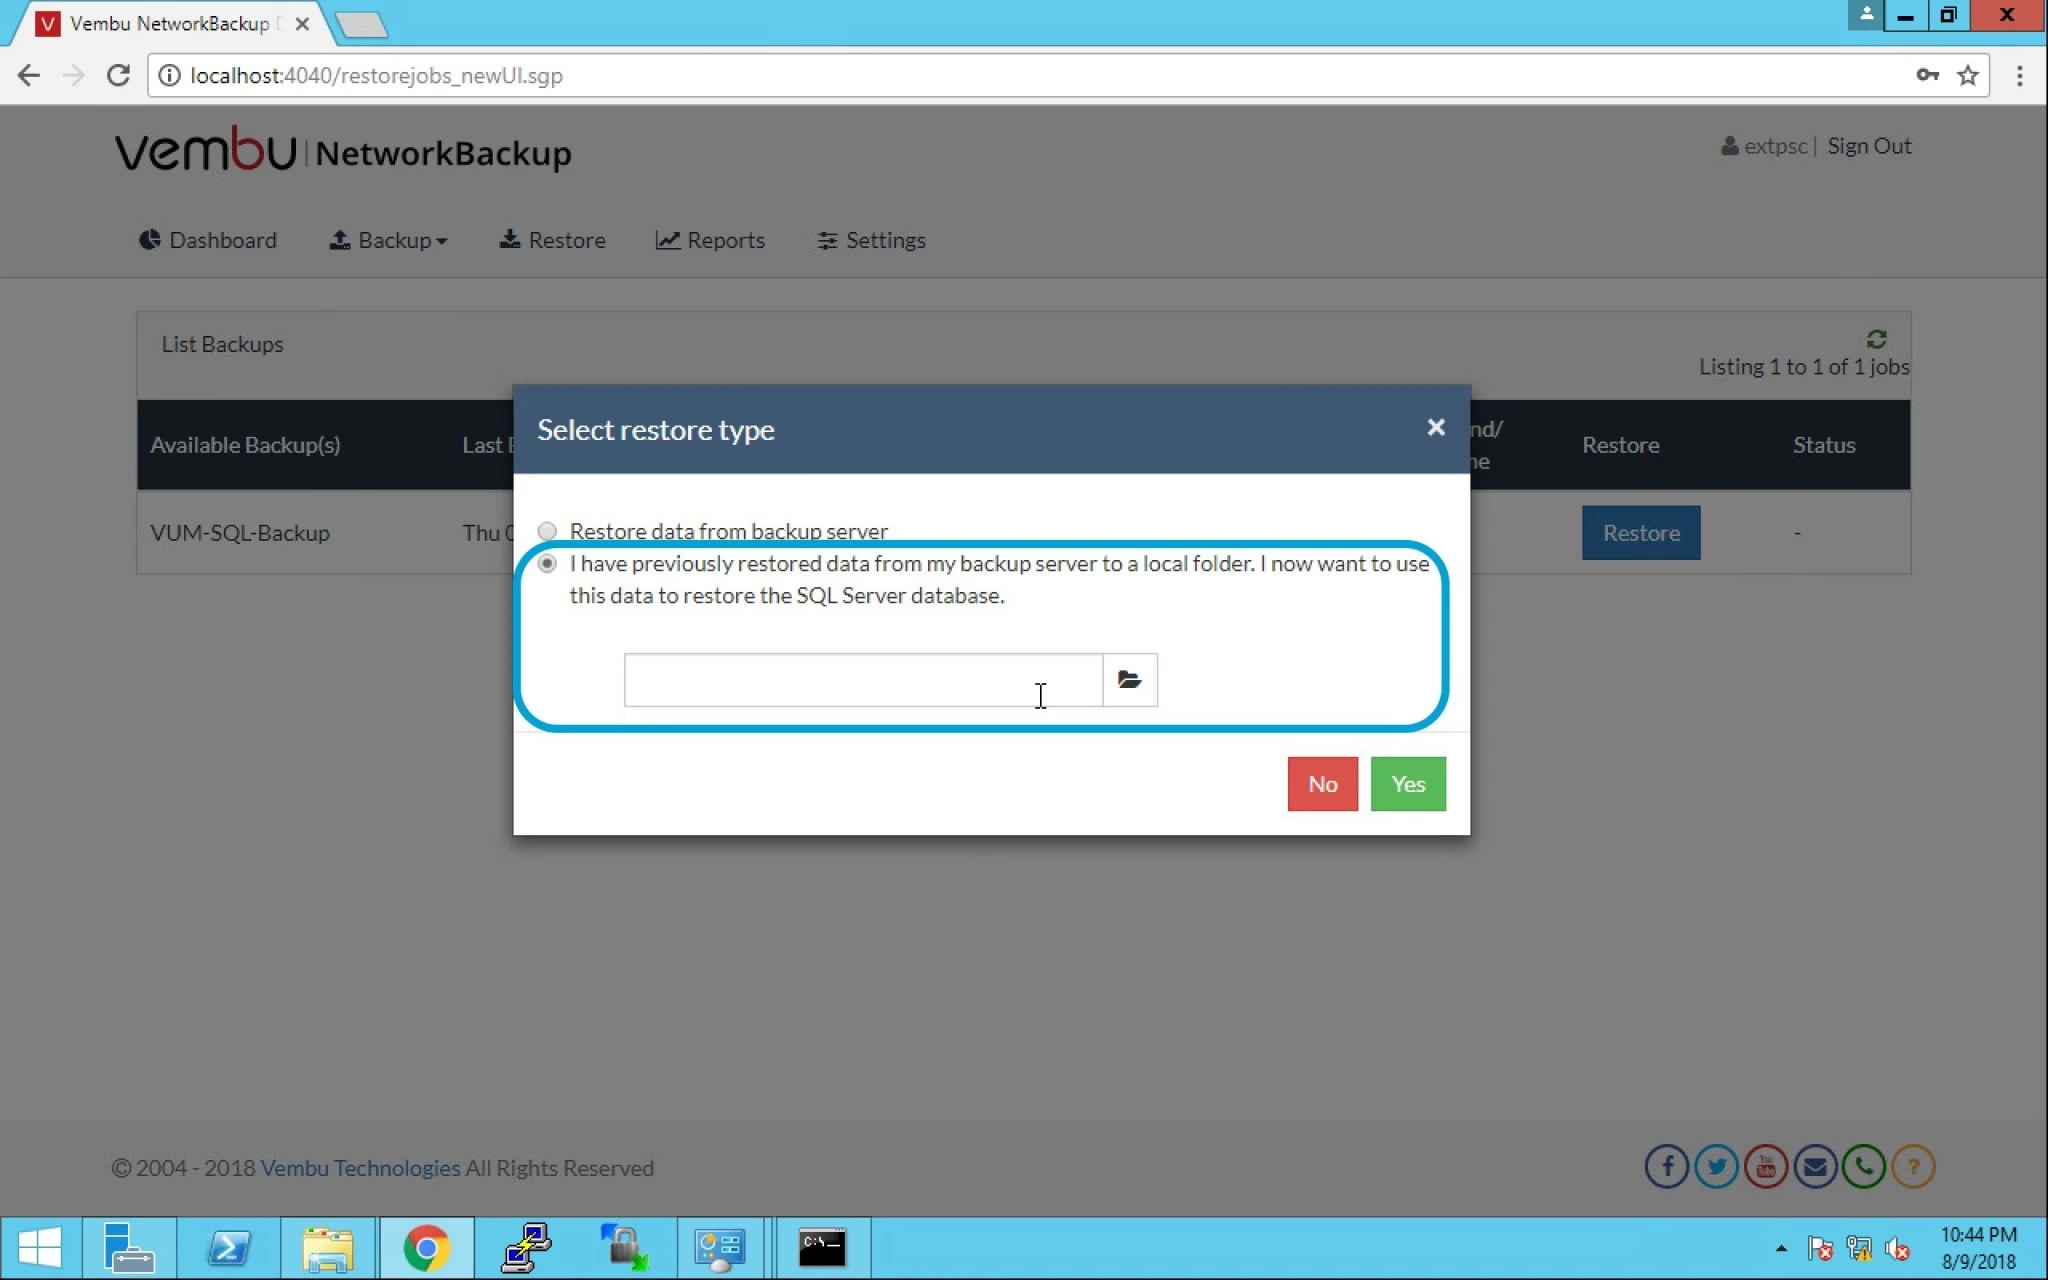
b) I have previously restored data from my backup server to a local folder. I now want to use this data to restore the MS SQL Server. 


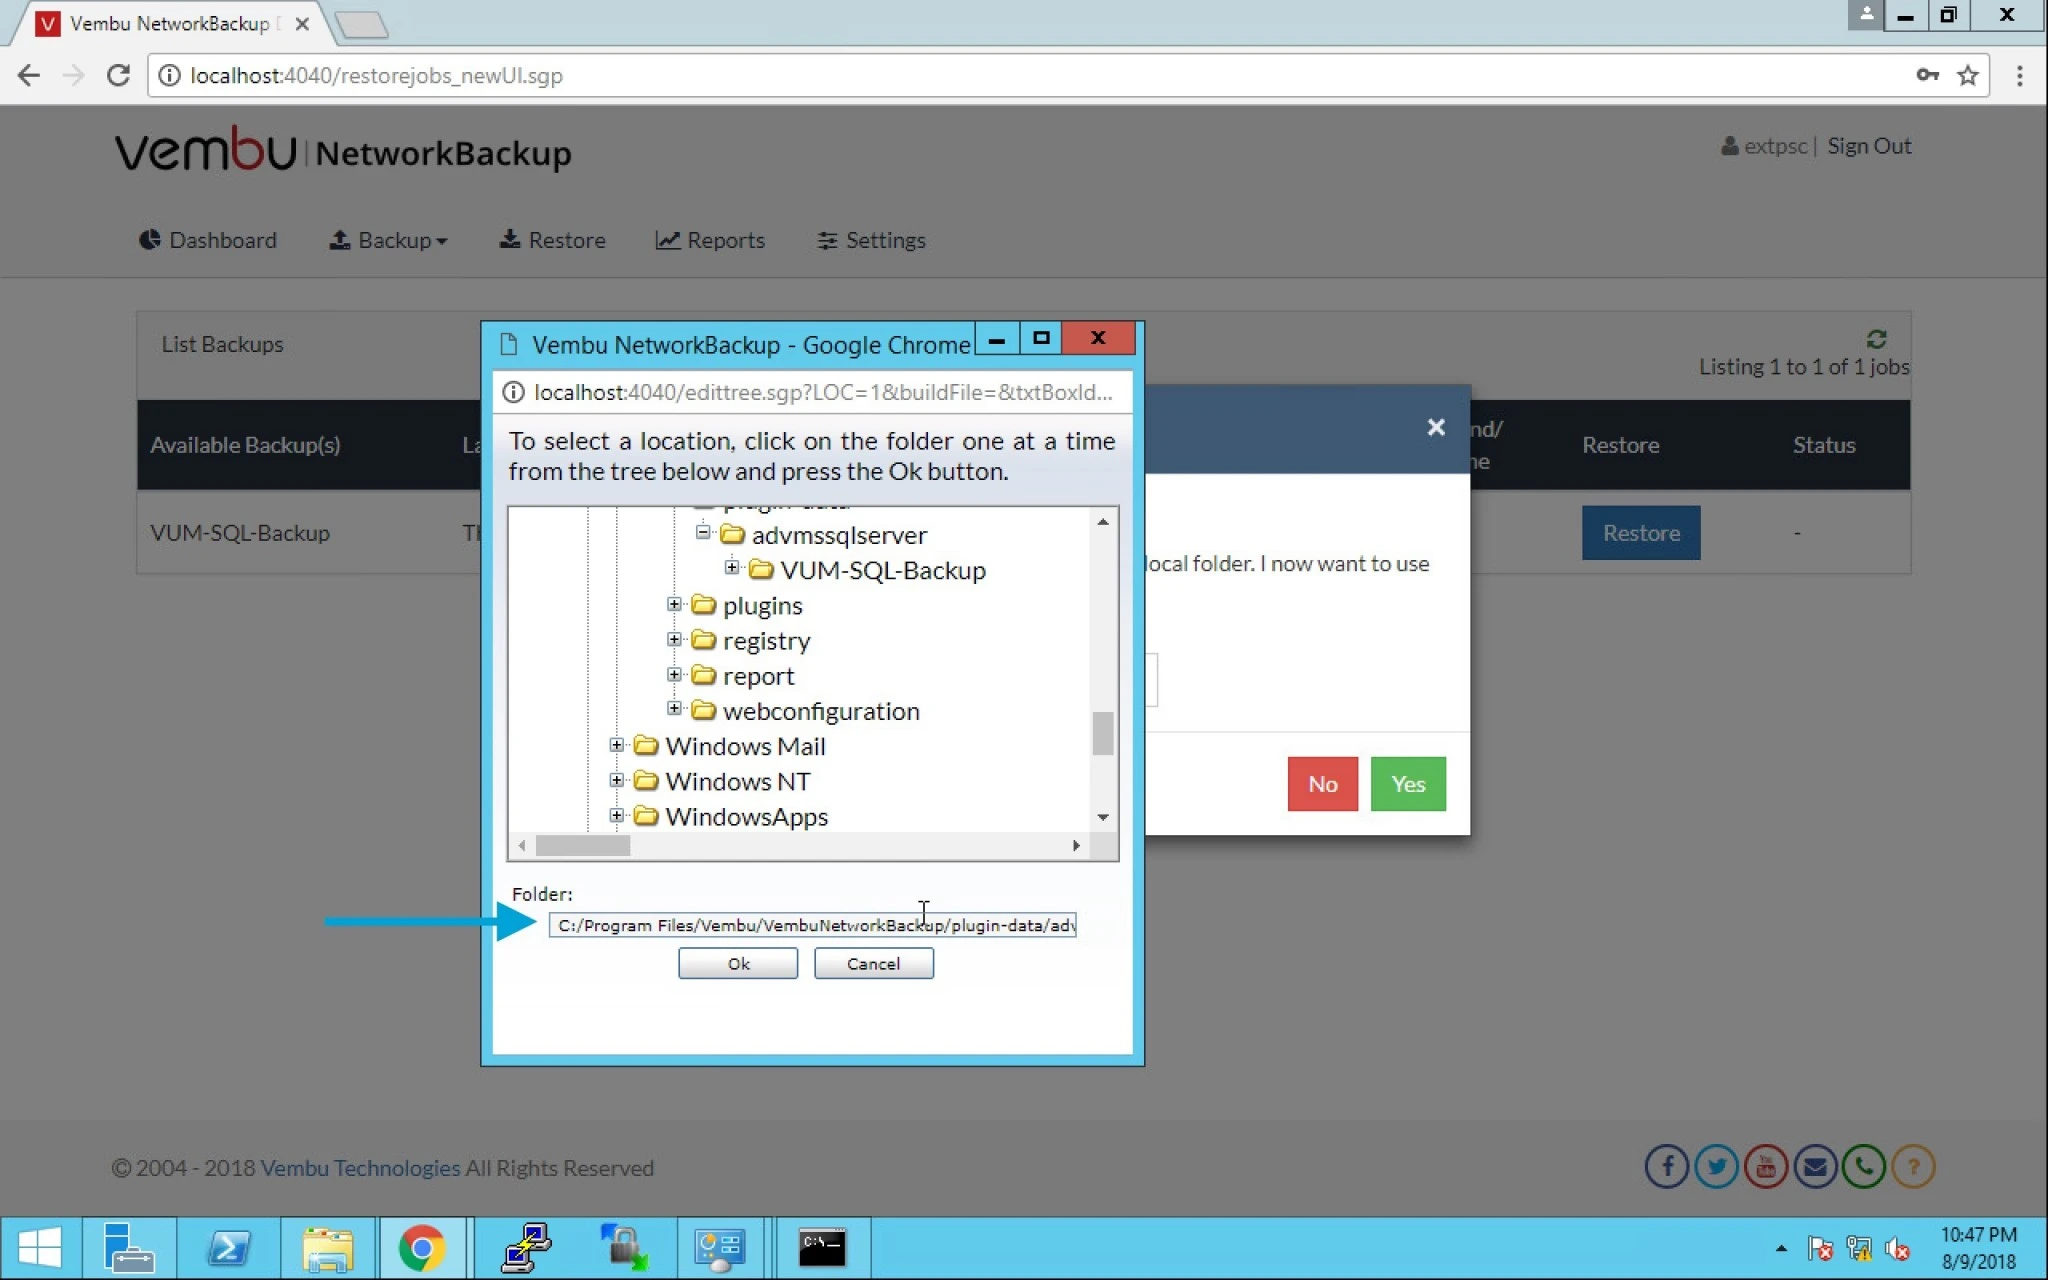
4. Browse the previously restored data from the backup server to a local folder.


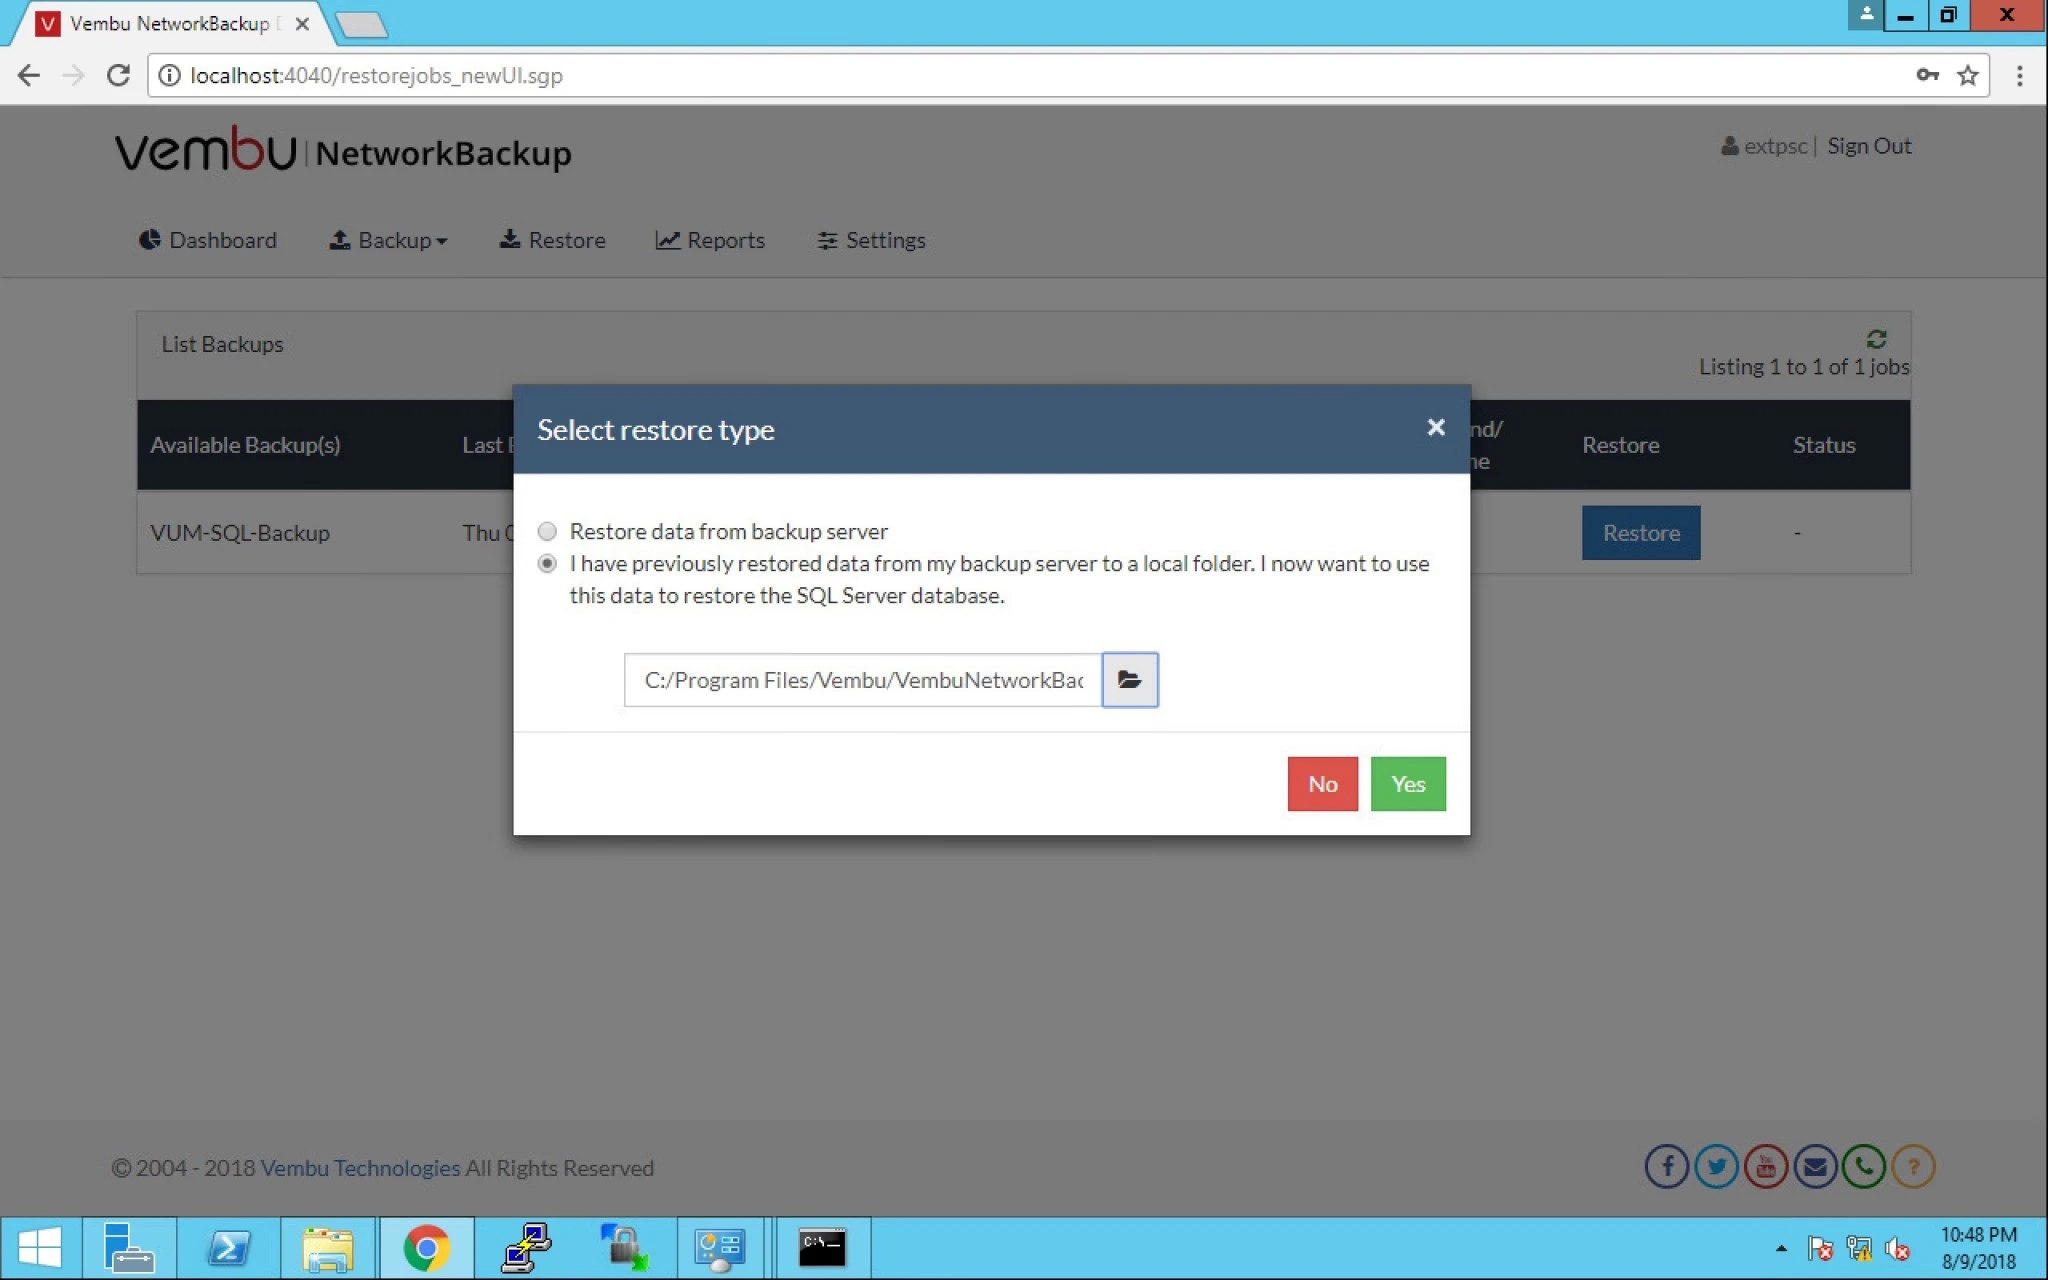
5. Select the data location of the folder or path to the folder . Click Ok.


6. Click on Yes.


7. Let’s select the first one to get an overview of this option “Restore data from backup server”.


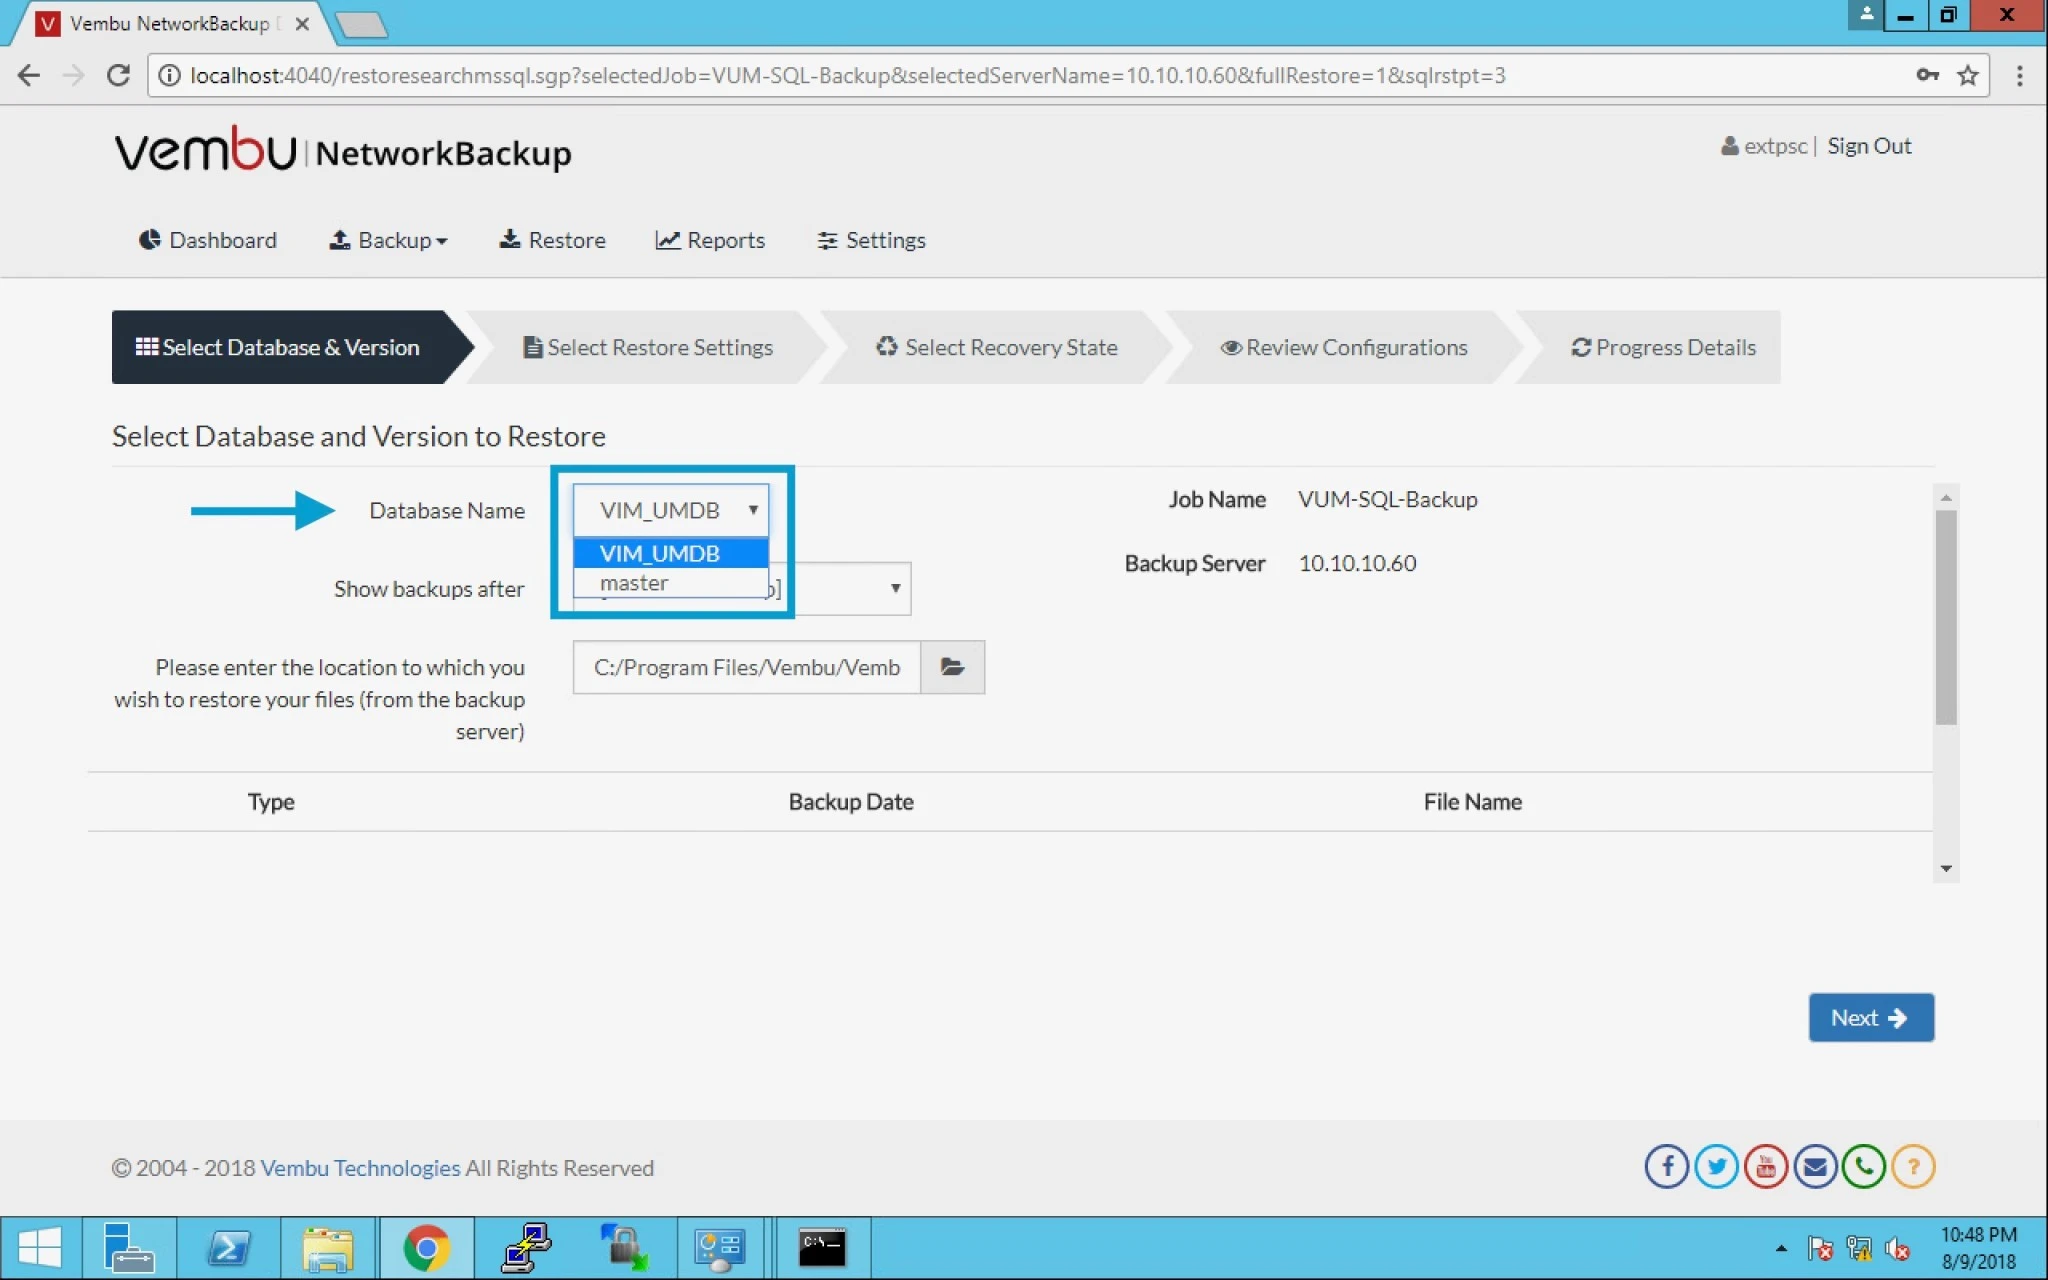
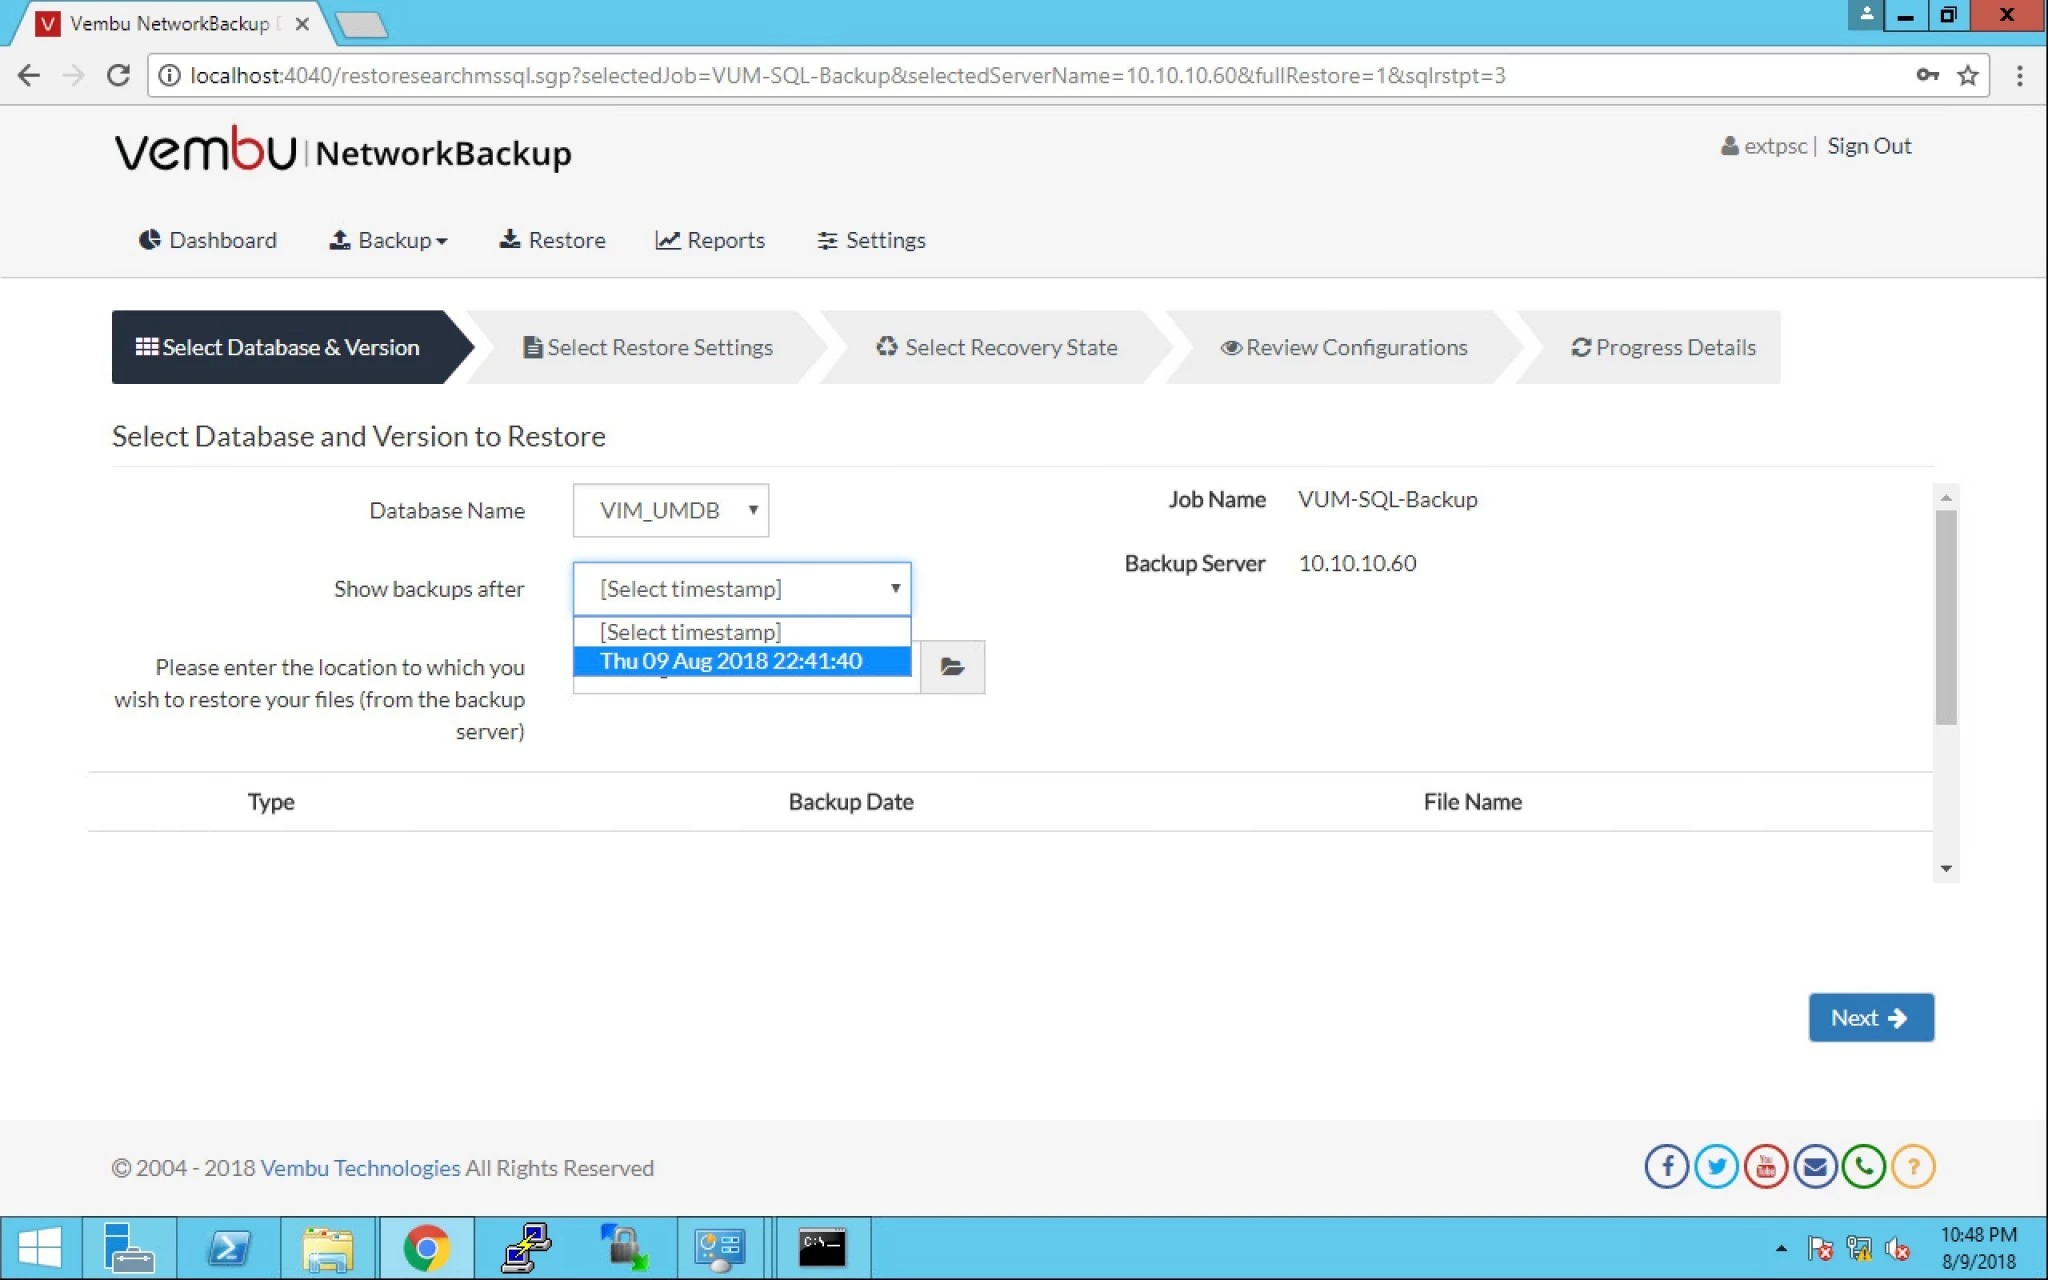
8. Now select the below information:

a) Database Name.

b) Select Time Stamp.

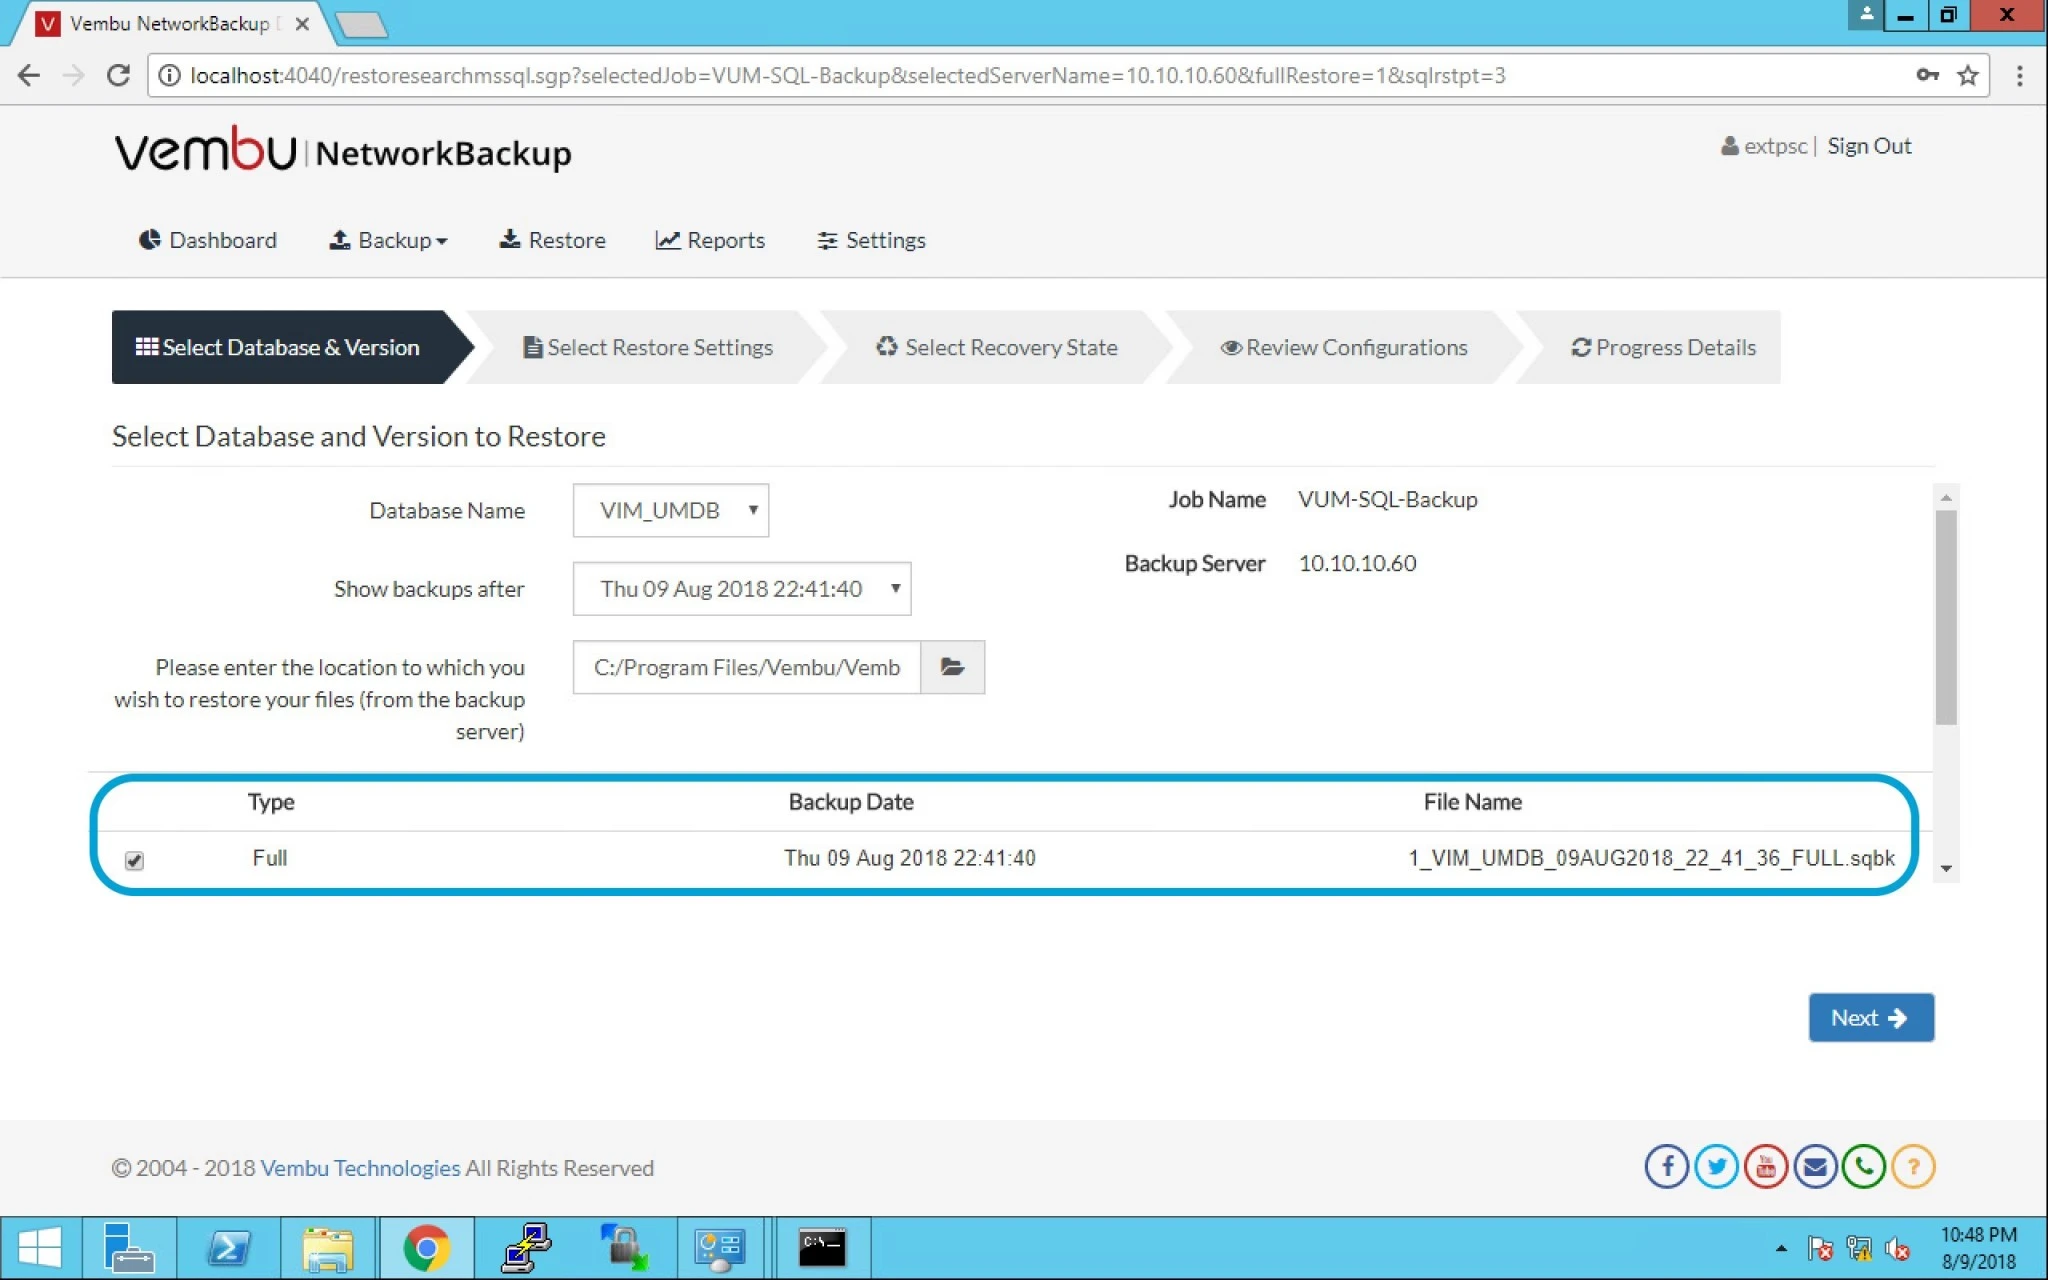
c) Location of file.


9. We have selected the VIM_UMDB as the database name.


10. We have selected the the Time Stamp of the backup for restore.


11. We have the prompt with the Full Backup to be restored option. Select Full and click next.


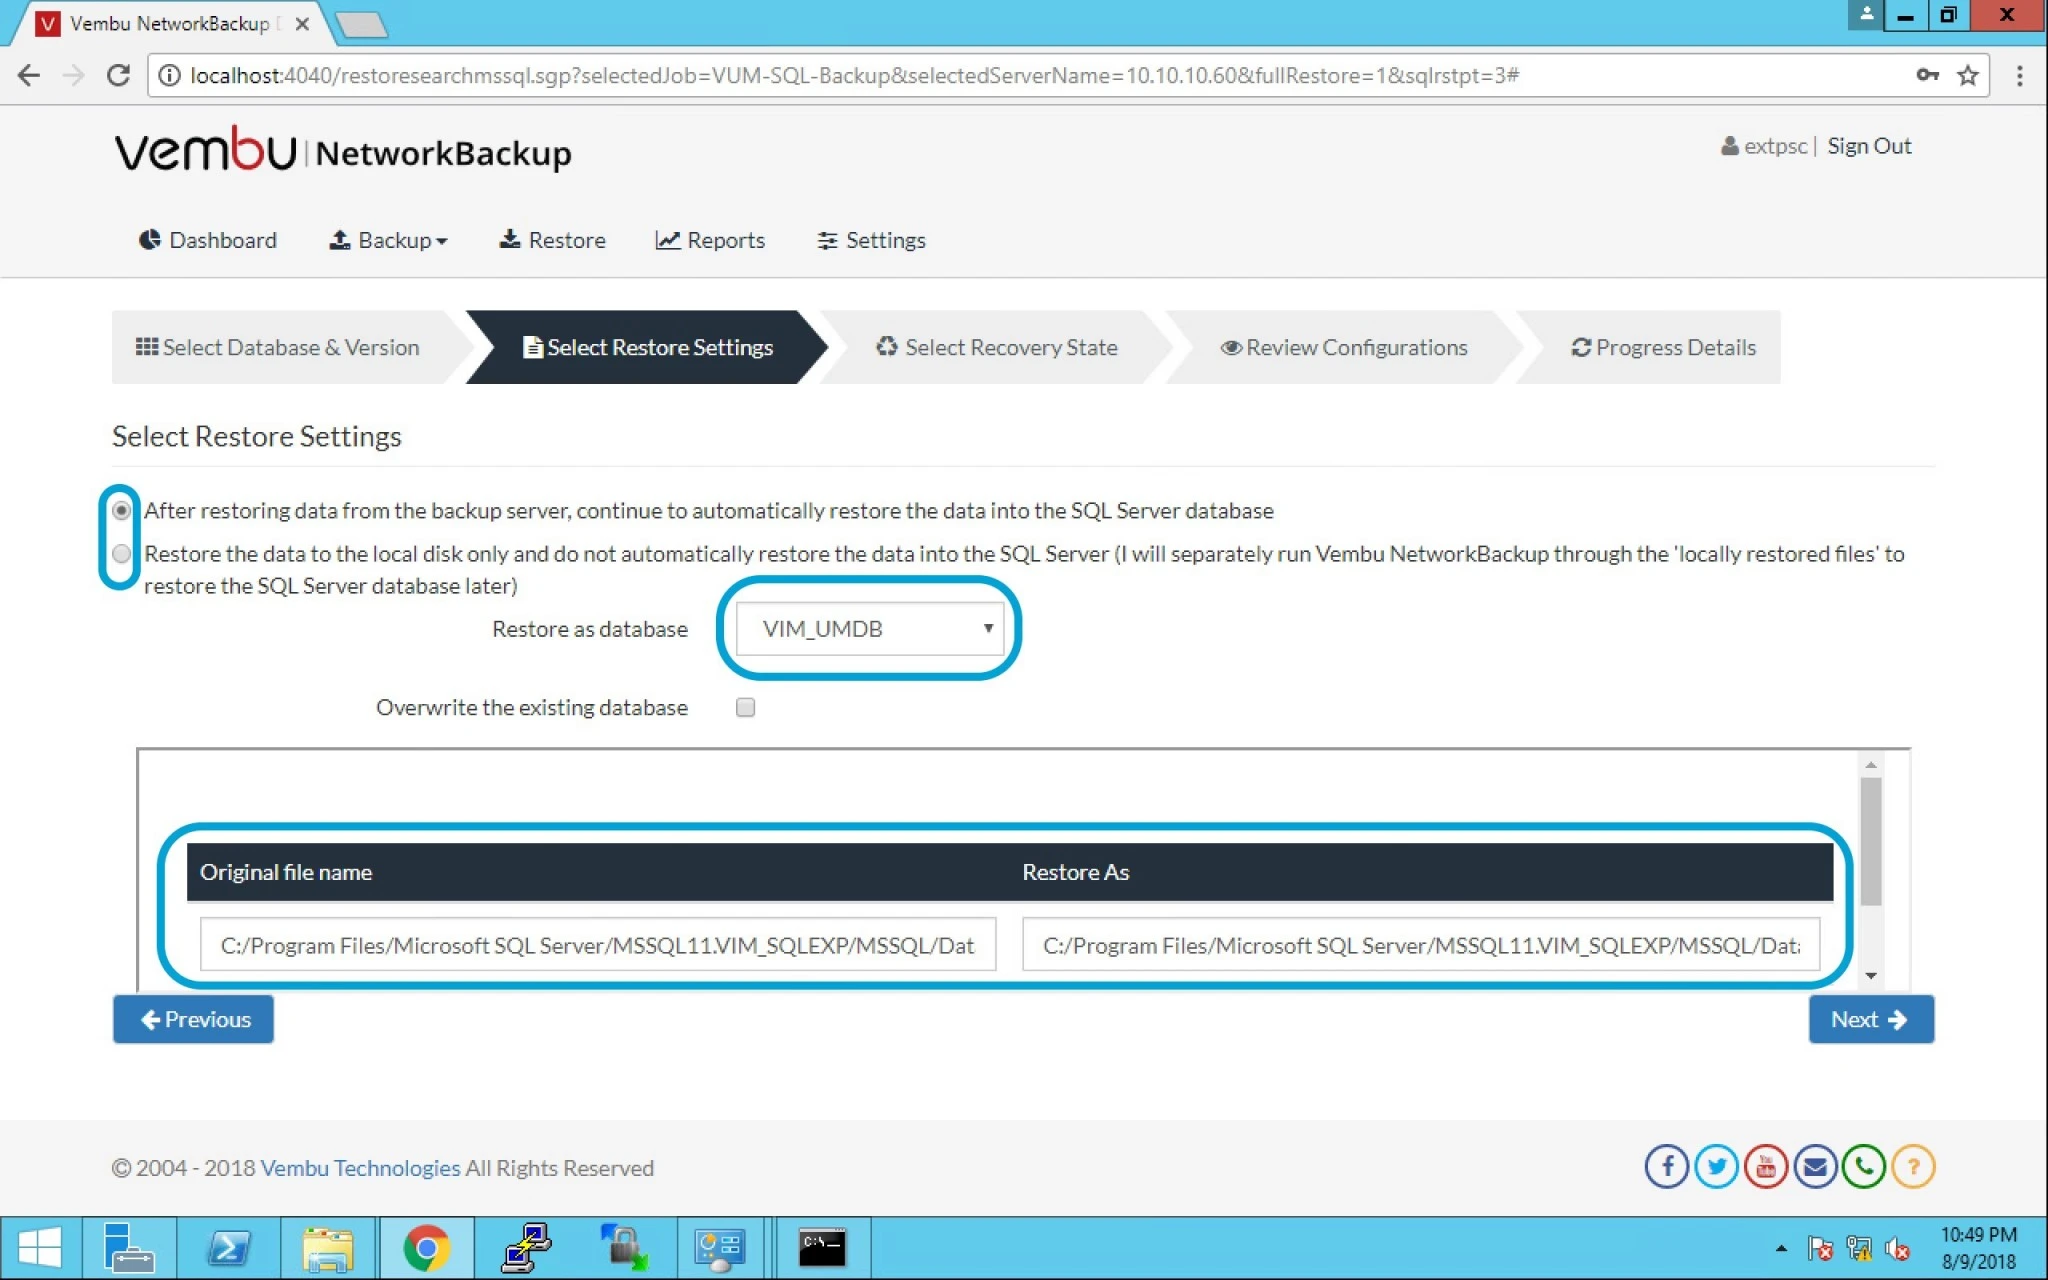
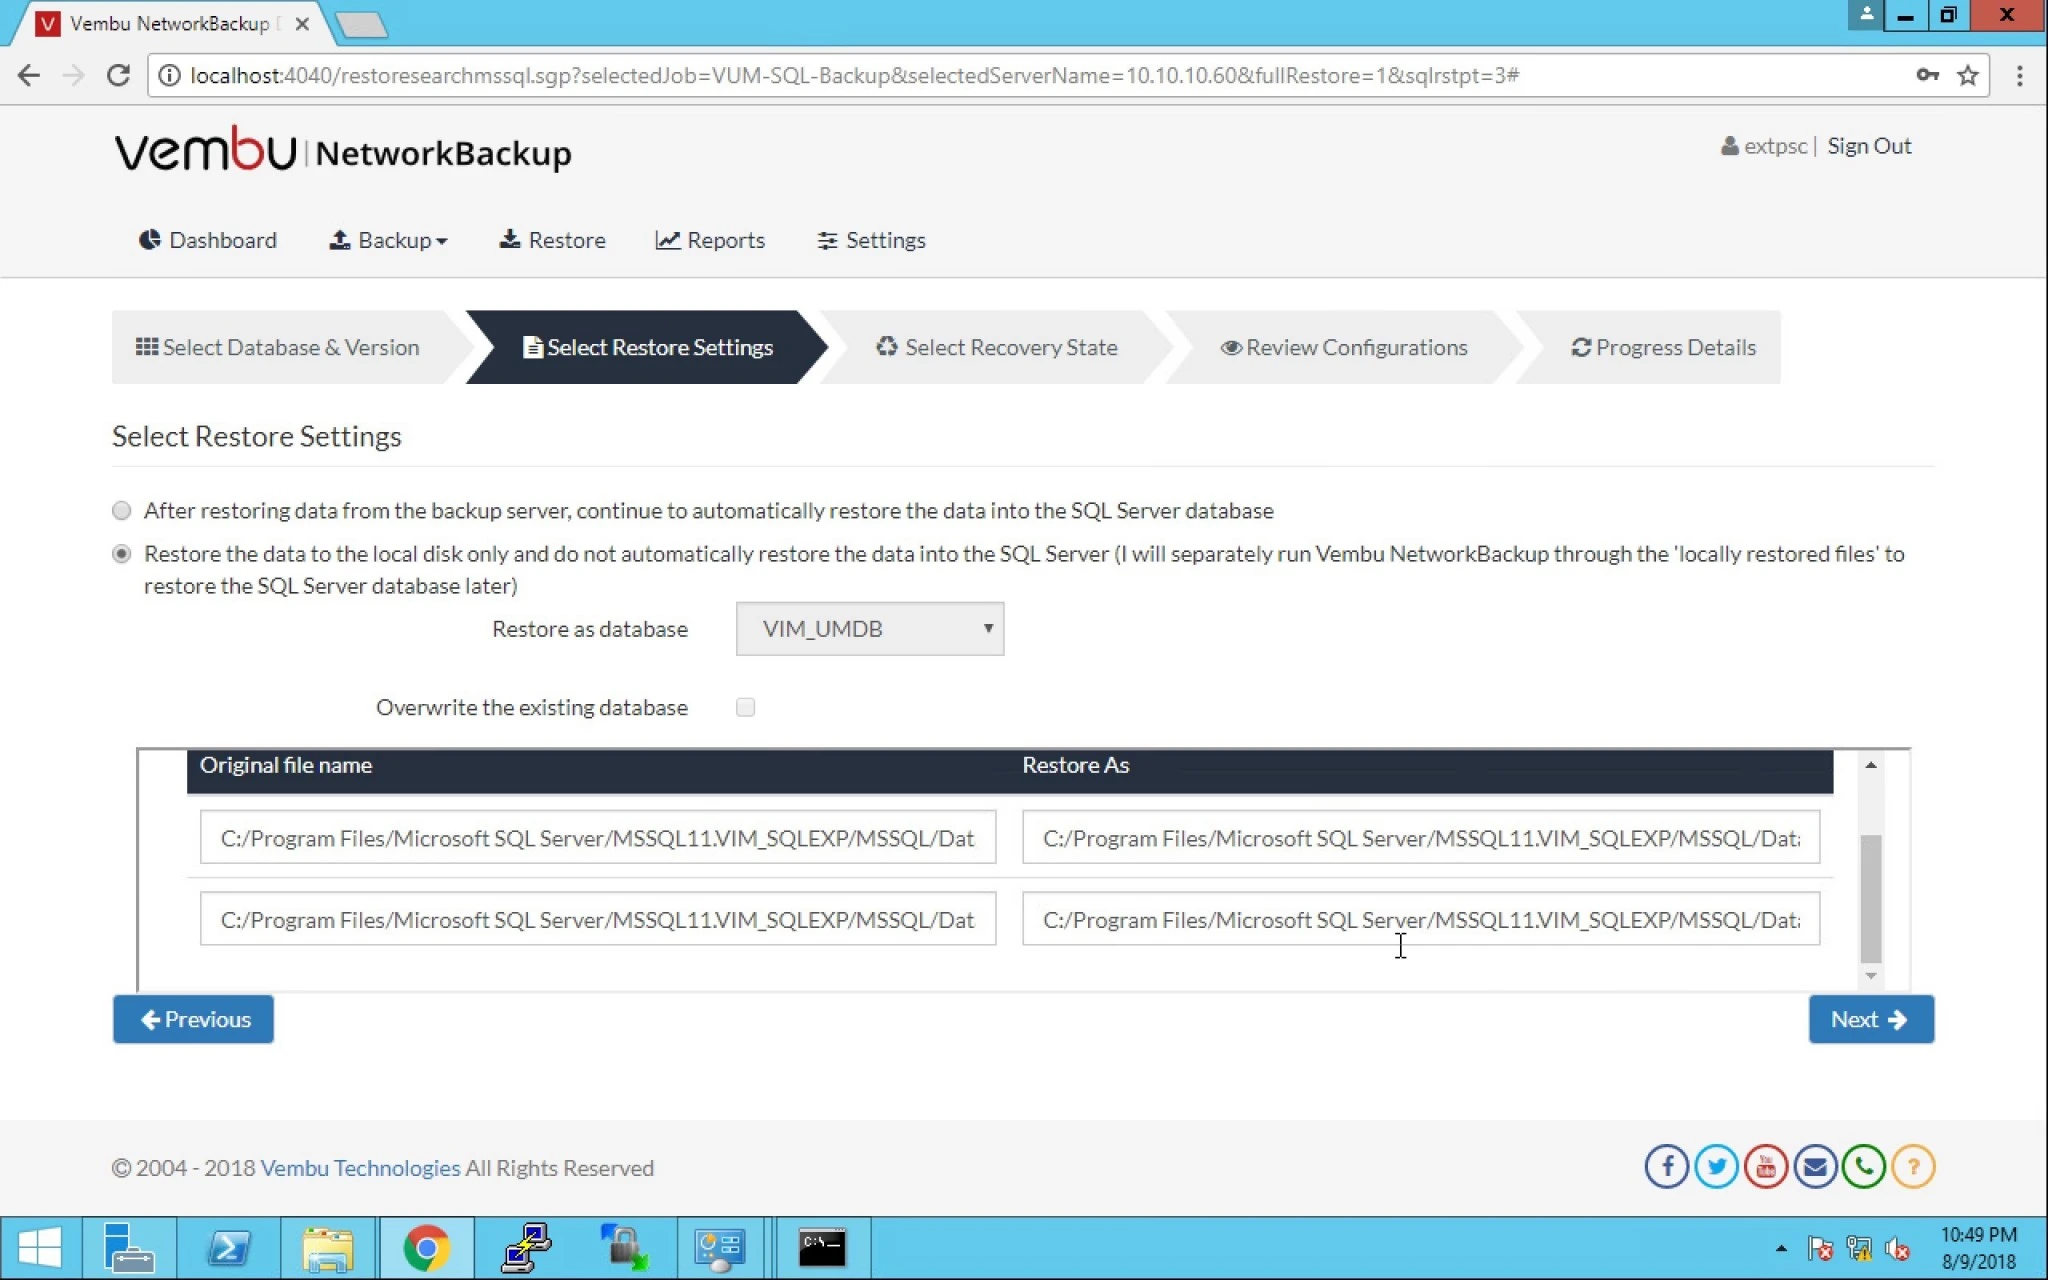
12. After restoring data from backup server, continue to auto restore data into SQL Server Database.

  • Choosing this option will let user restore data into SQL Server database, where user have the option to either overwrite an existing database or restore as separate database.


13. Restore data from backup server only (we will separately run Vembu NetworkBackup through the ‘locally restored files’ to restore the SQL Server database later).

  • Choosing this option will restore data in a separate user defined location instead restoring data into SQL Server.


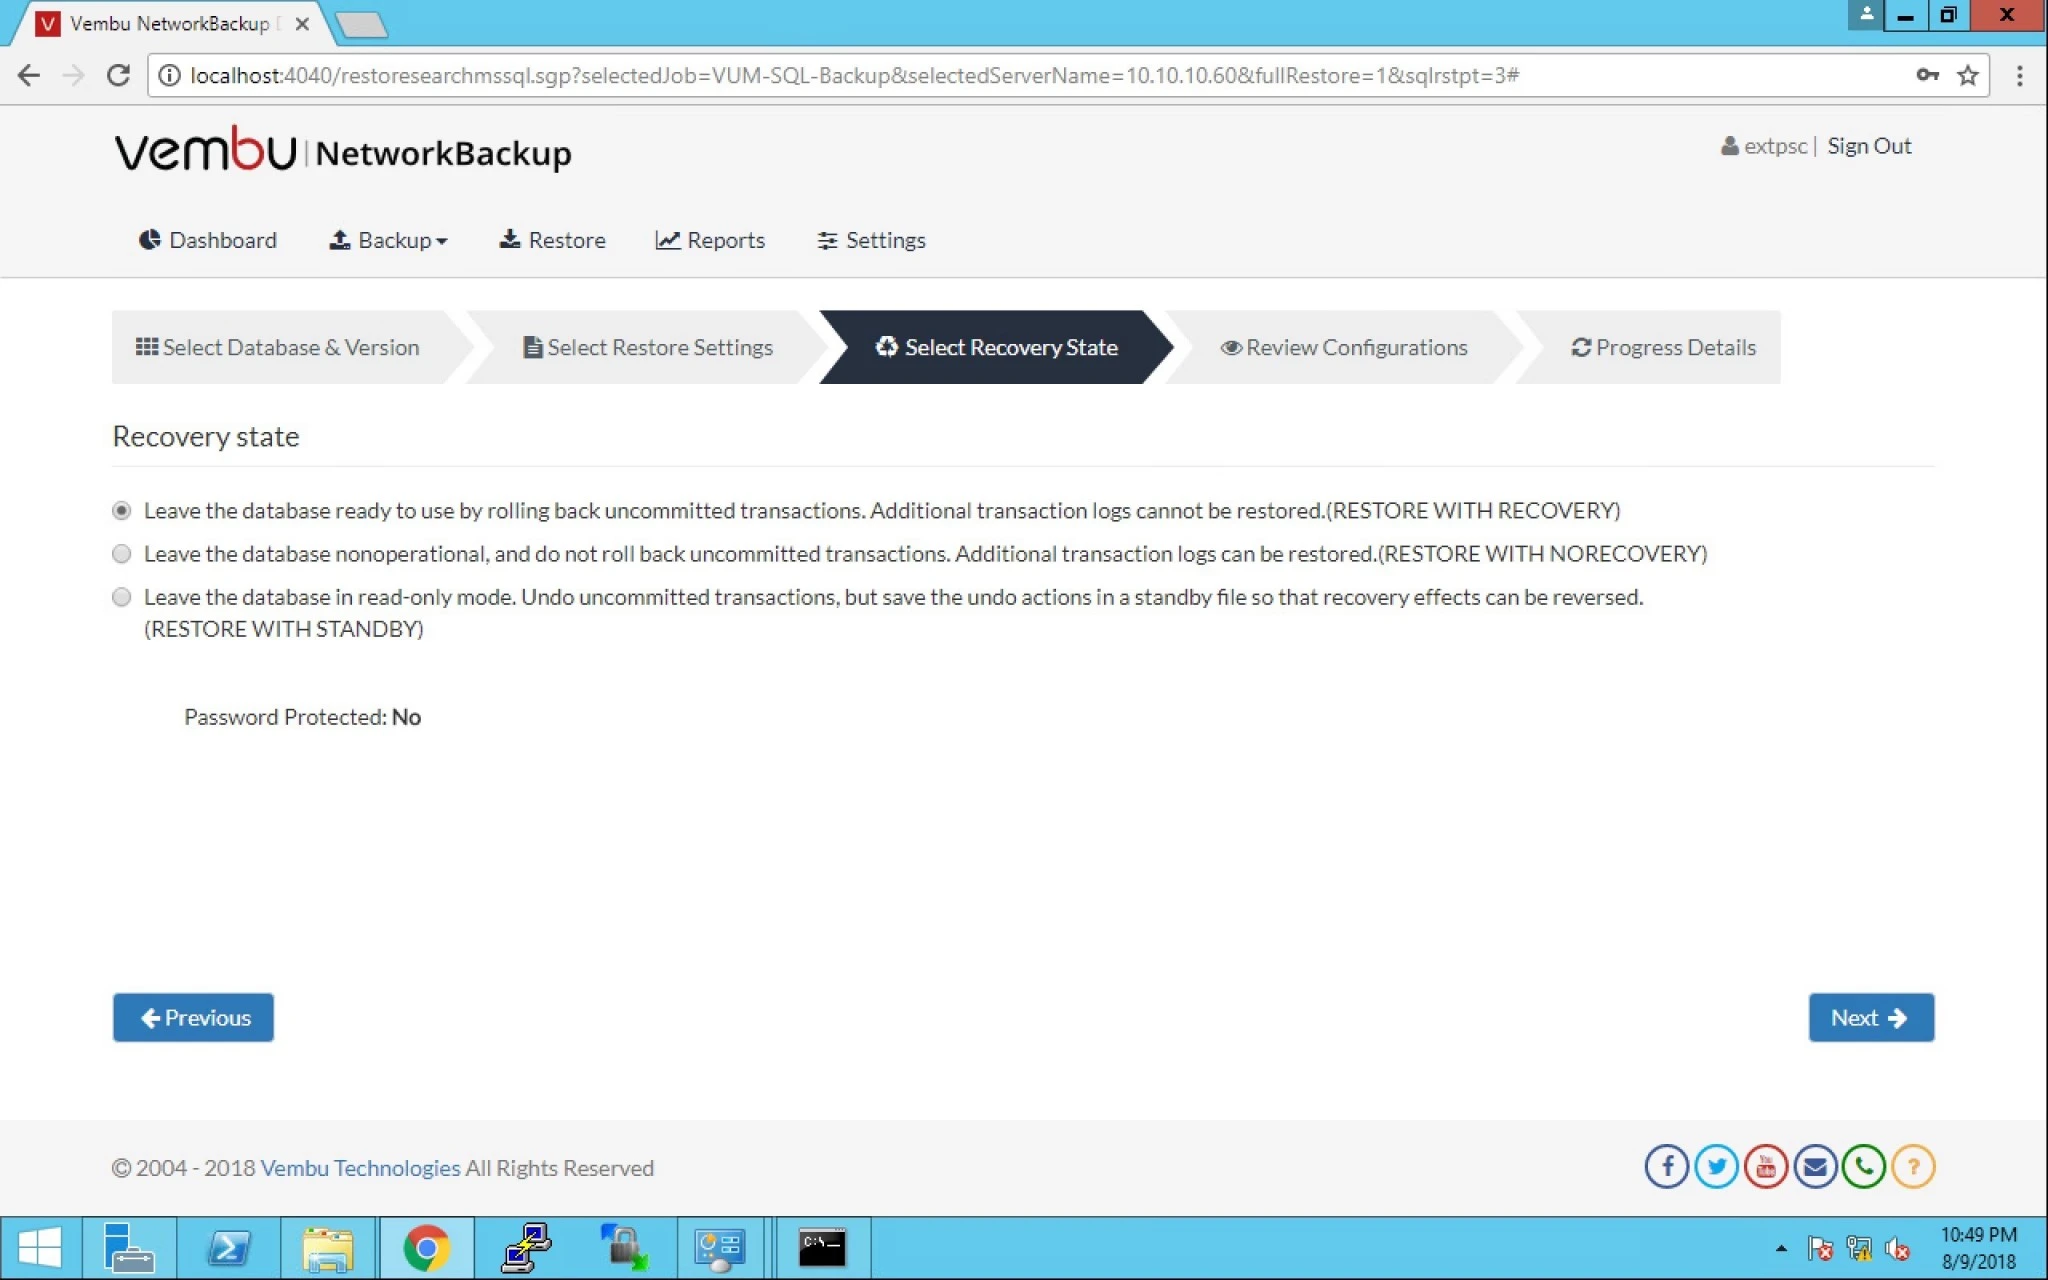
14.  We have got these three options given below:

  • Leave database in ready-to-use state by rolling back uncommitted transactions. Additional transaction logs cannot be restored (Restore with recovery).
  • Leave database non-operational, and do not rollback uncommitted transactions. Additional transaction logs can be restored (Restore with Non-Recovery).
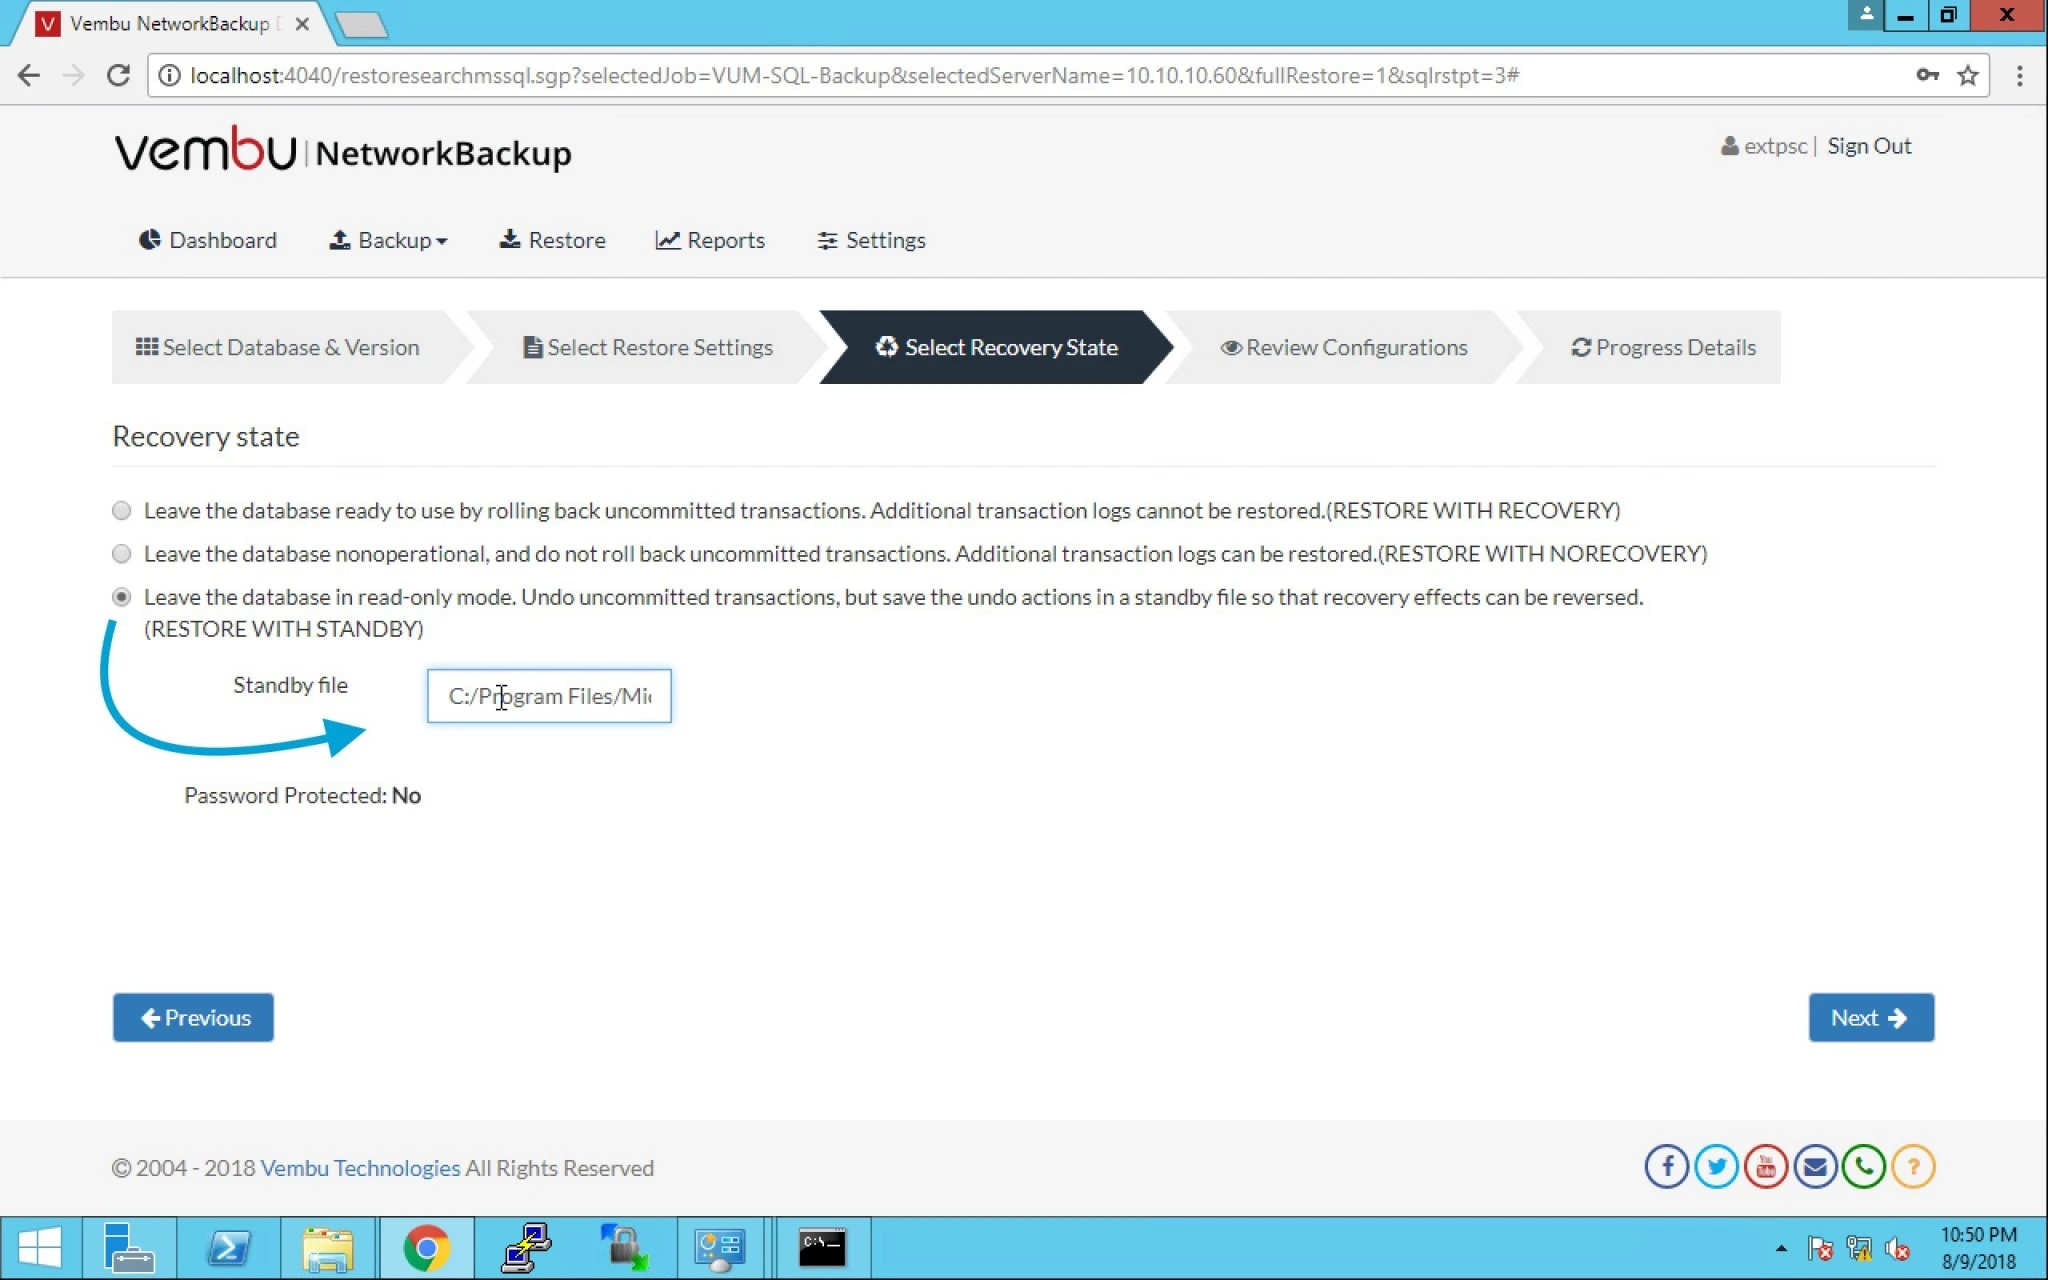
  • Leave database in read-only mode. Undo uncommitted transactions, but save undo action in a standby file so that recovery effects can be reversed (Restore with Standby).


15. Lets choose the third option here and provide the Standby file location. Click Next.


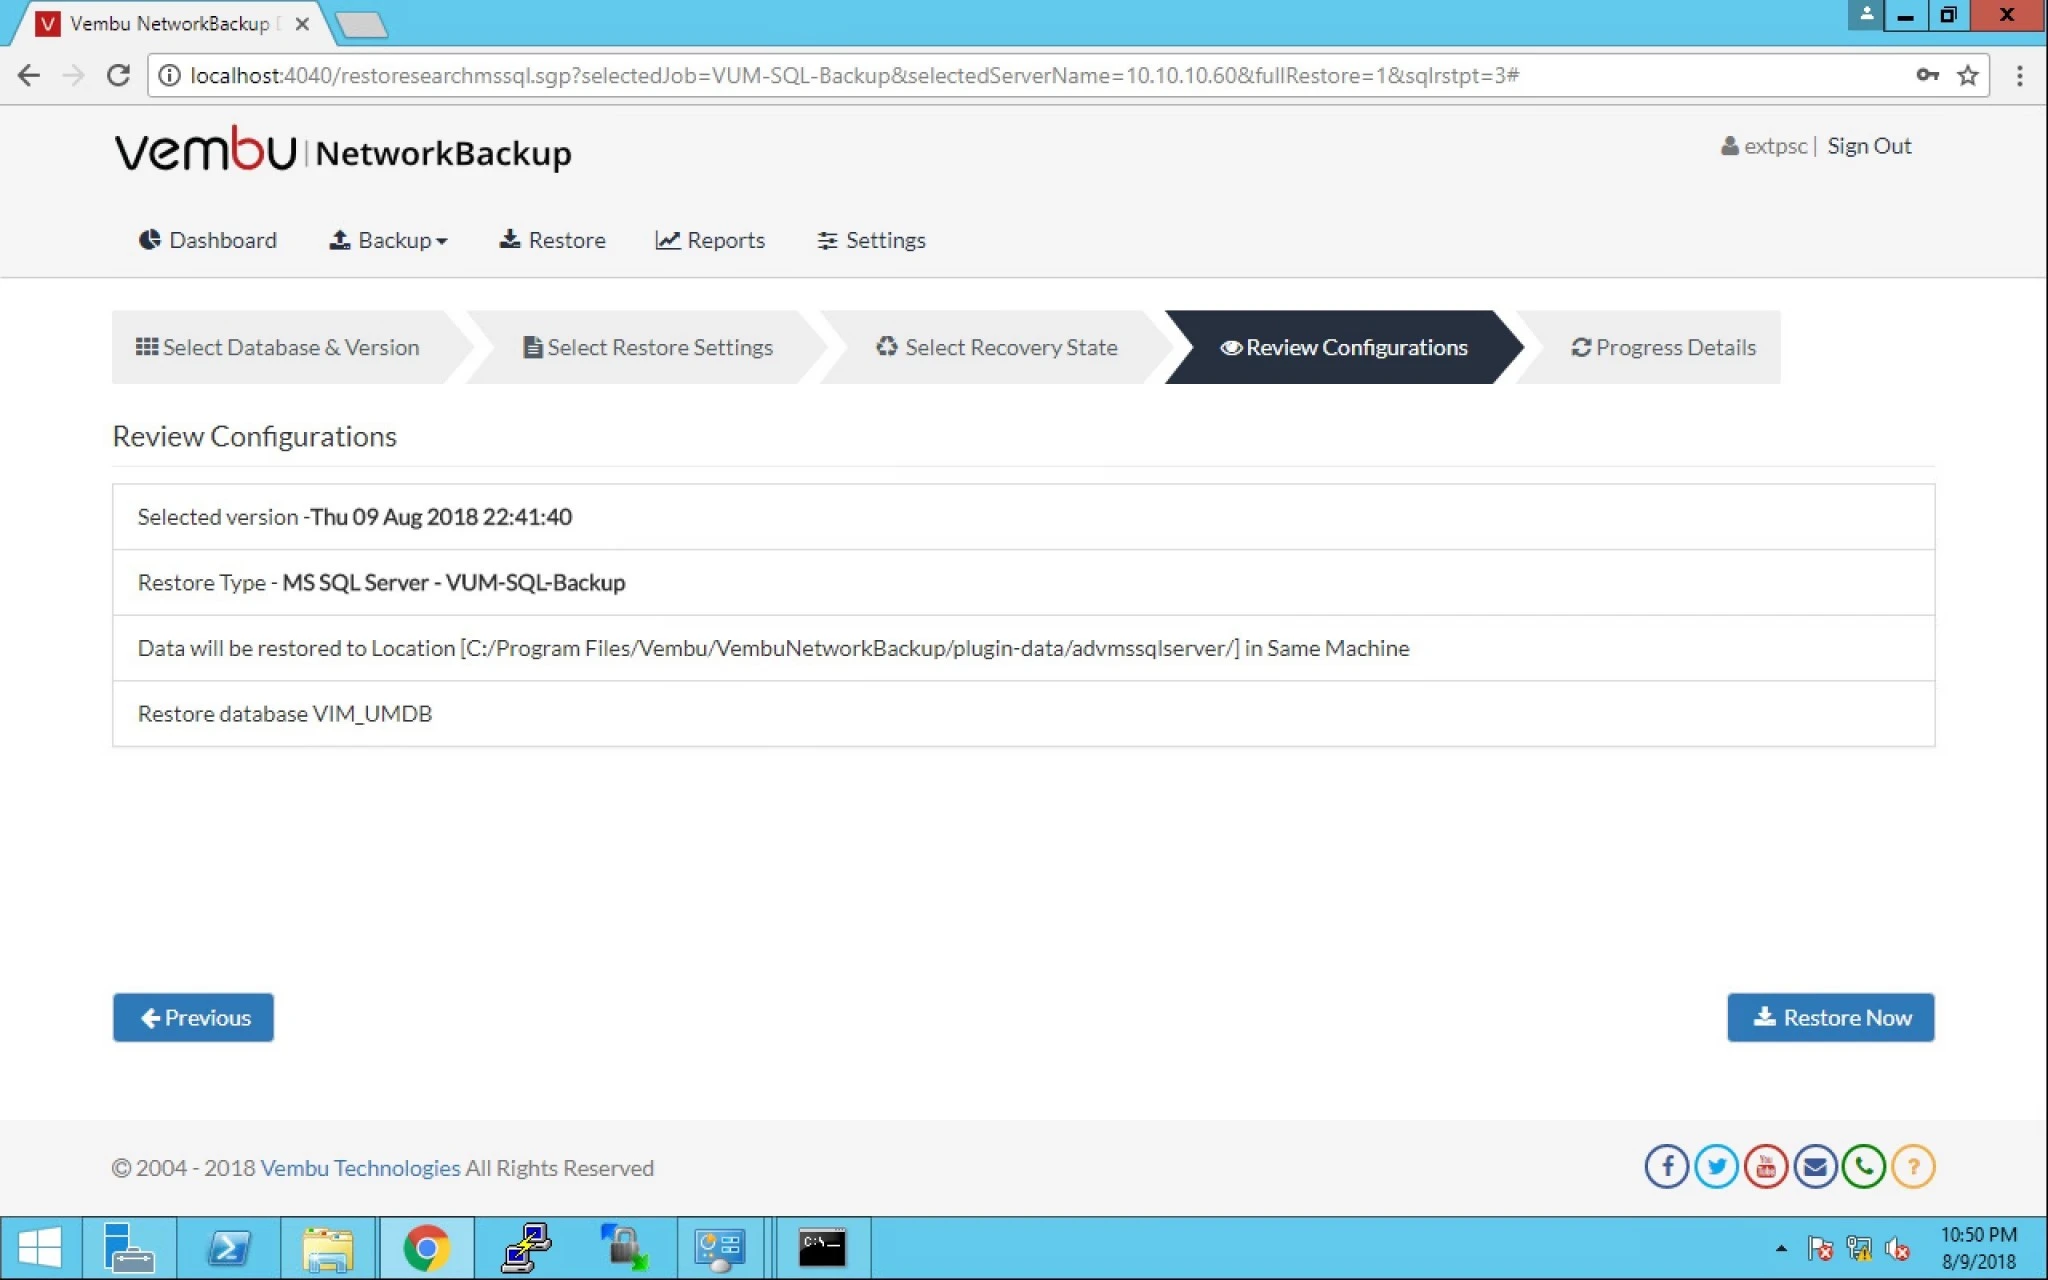
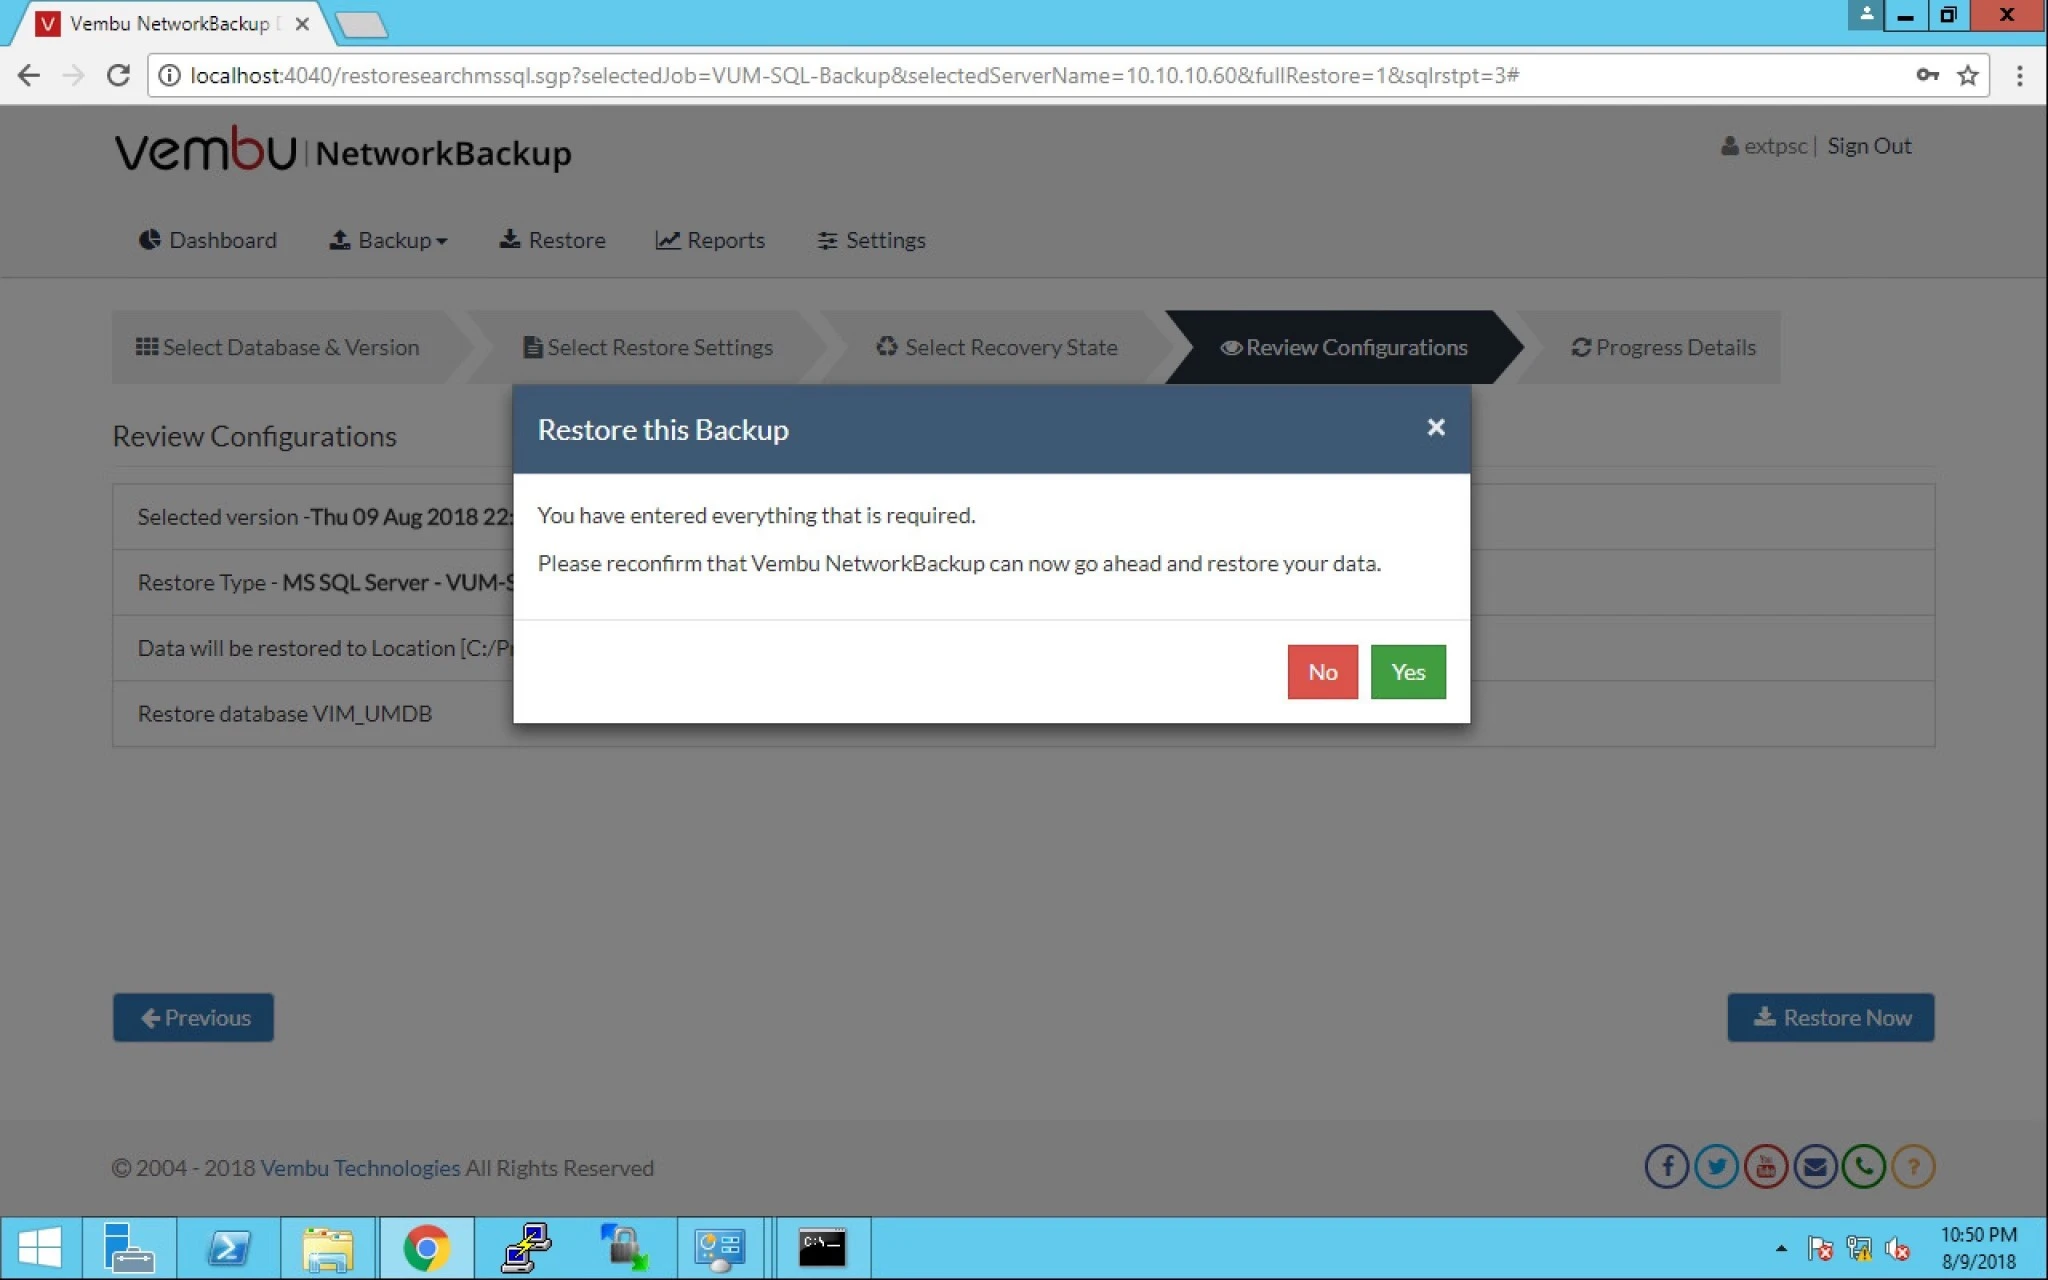
16. Now you can review the configuration and click on Restore Now.


17. It will prompt you to confirm the restore operation to be executed. Click yes.


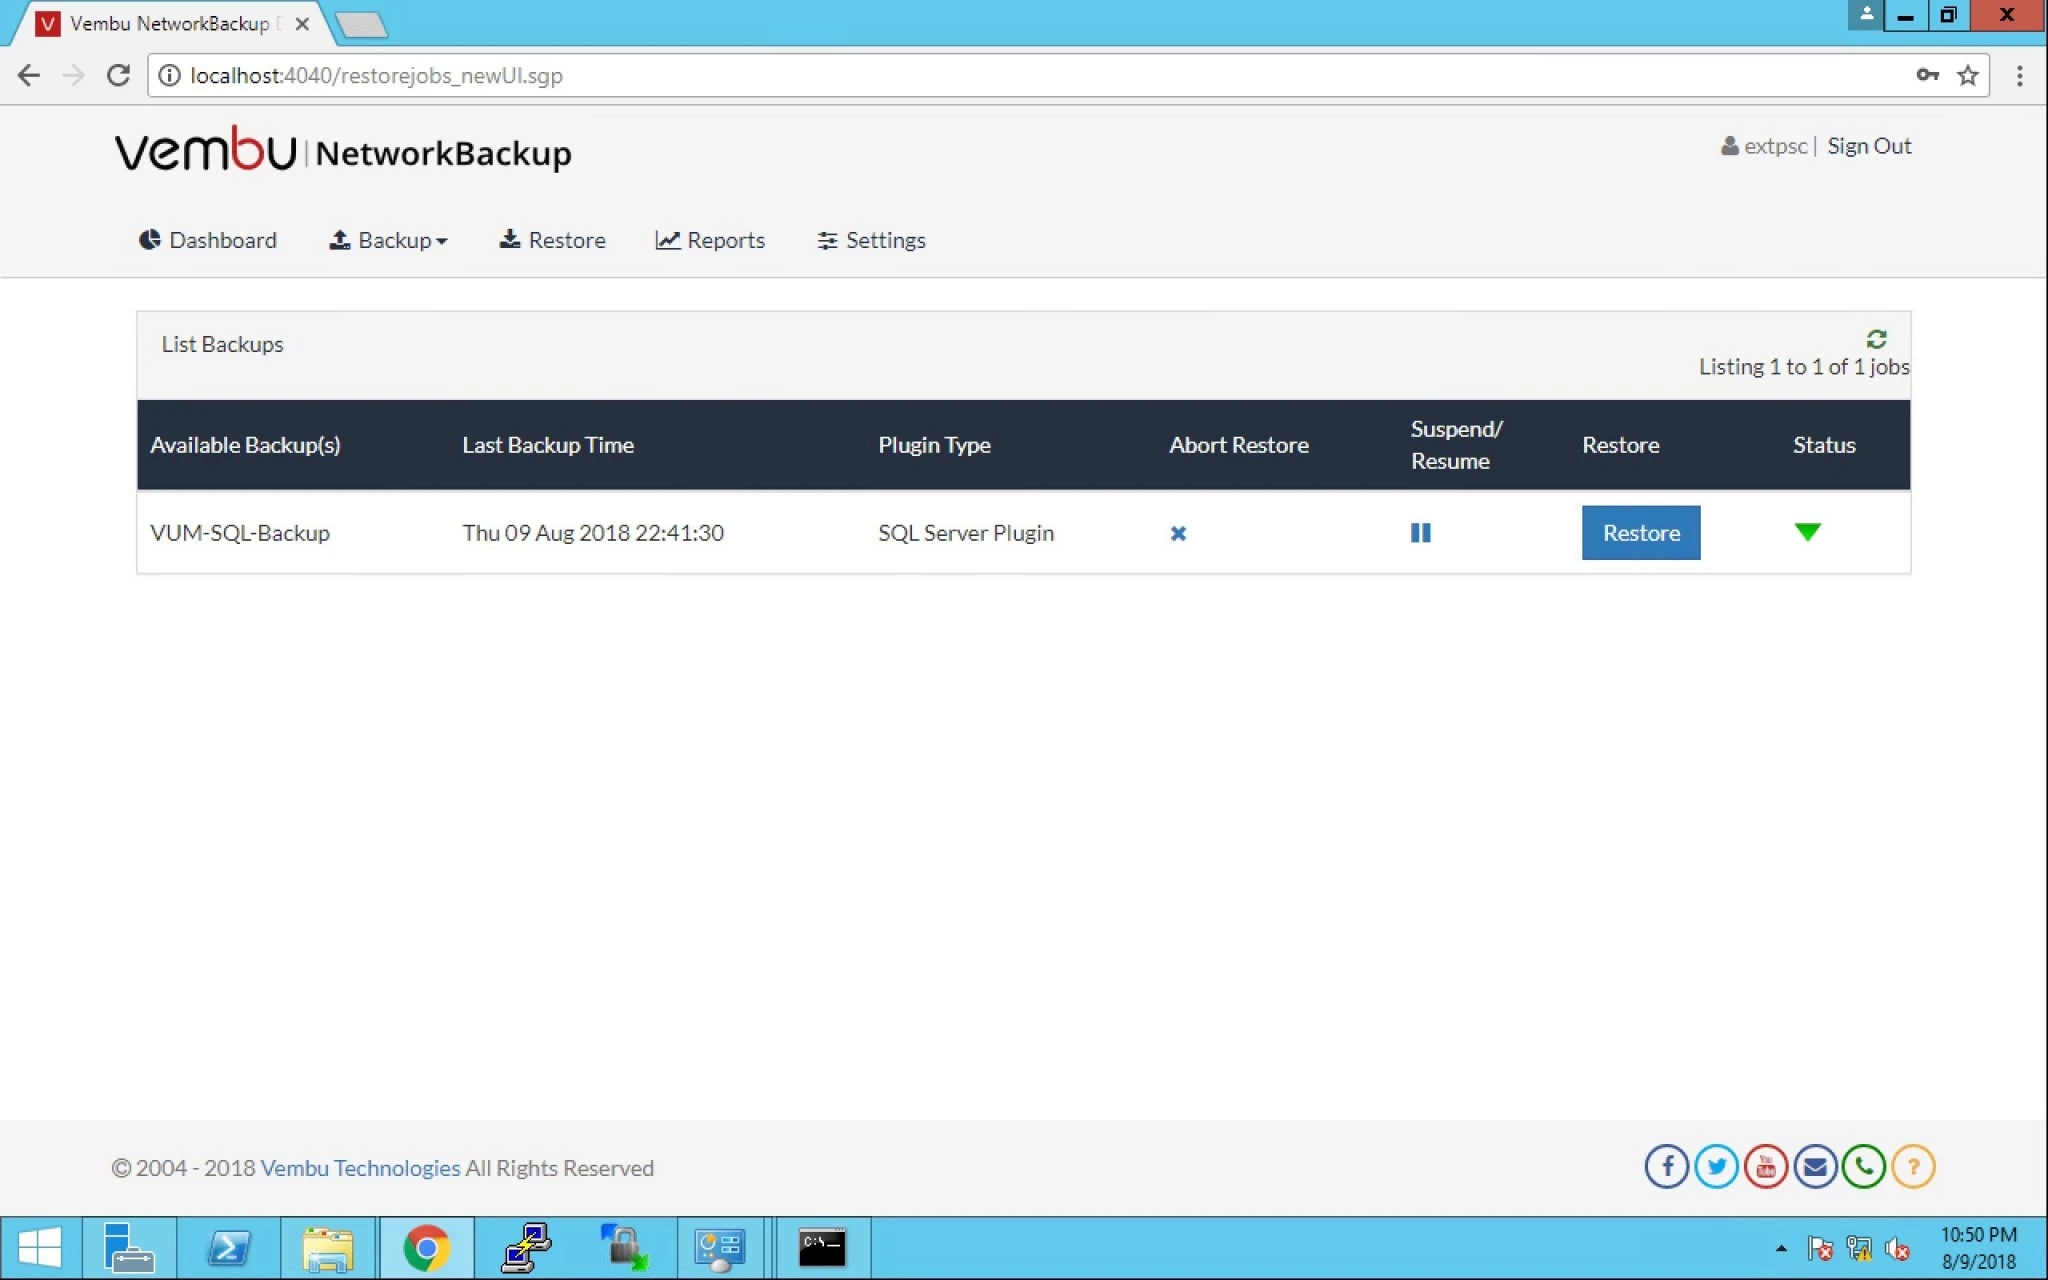
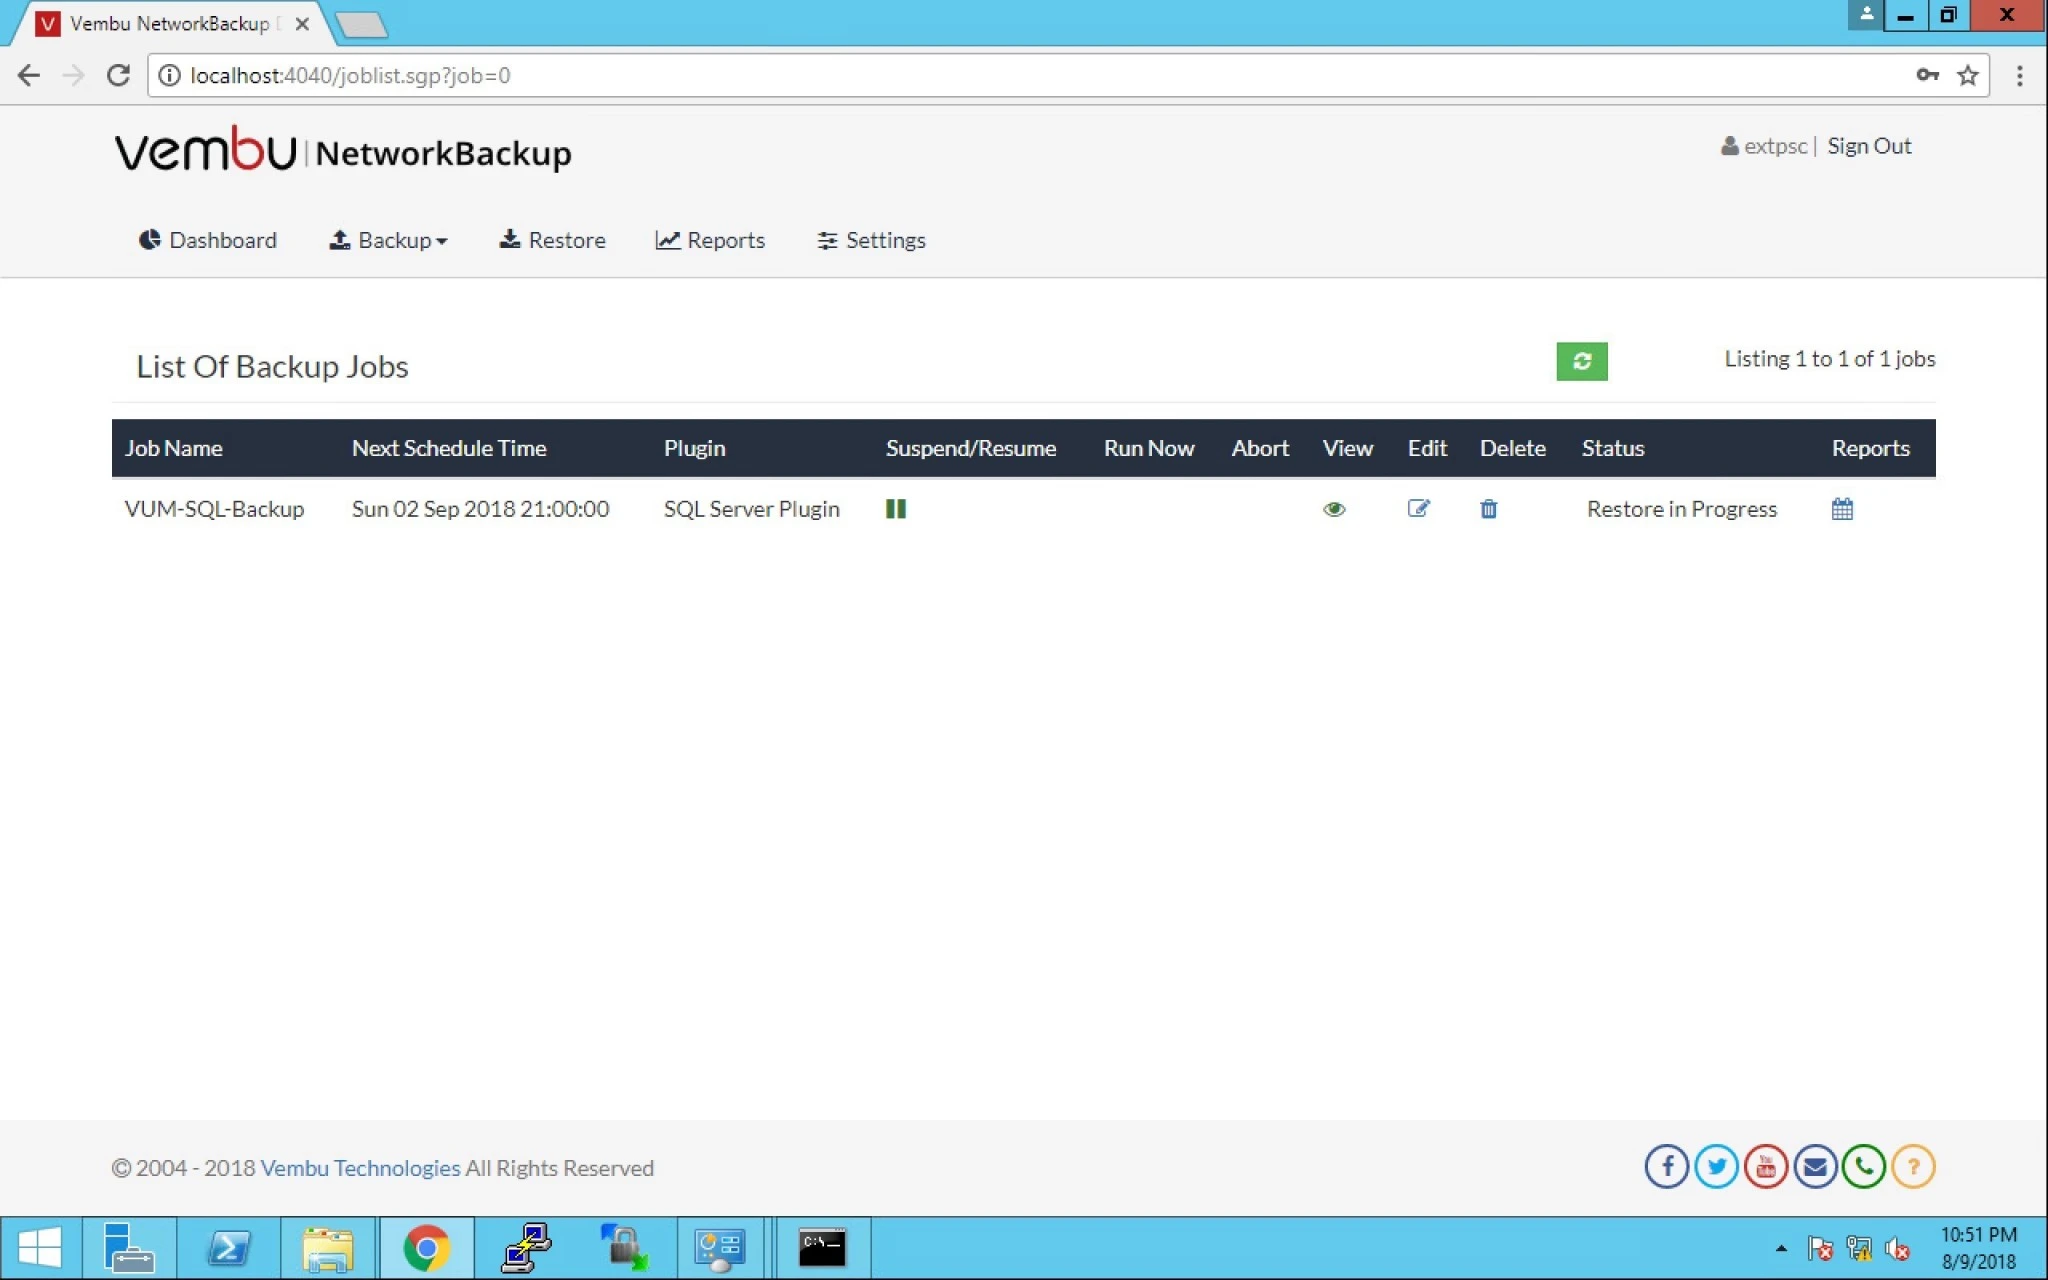
18. You can see the status for successful completion of the restore job.


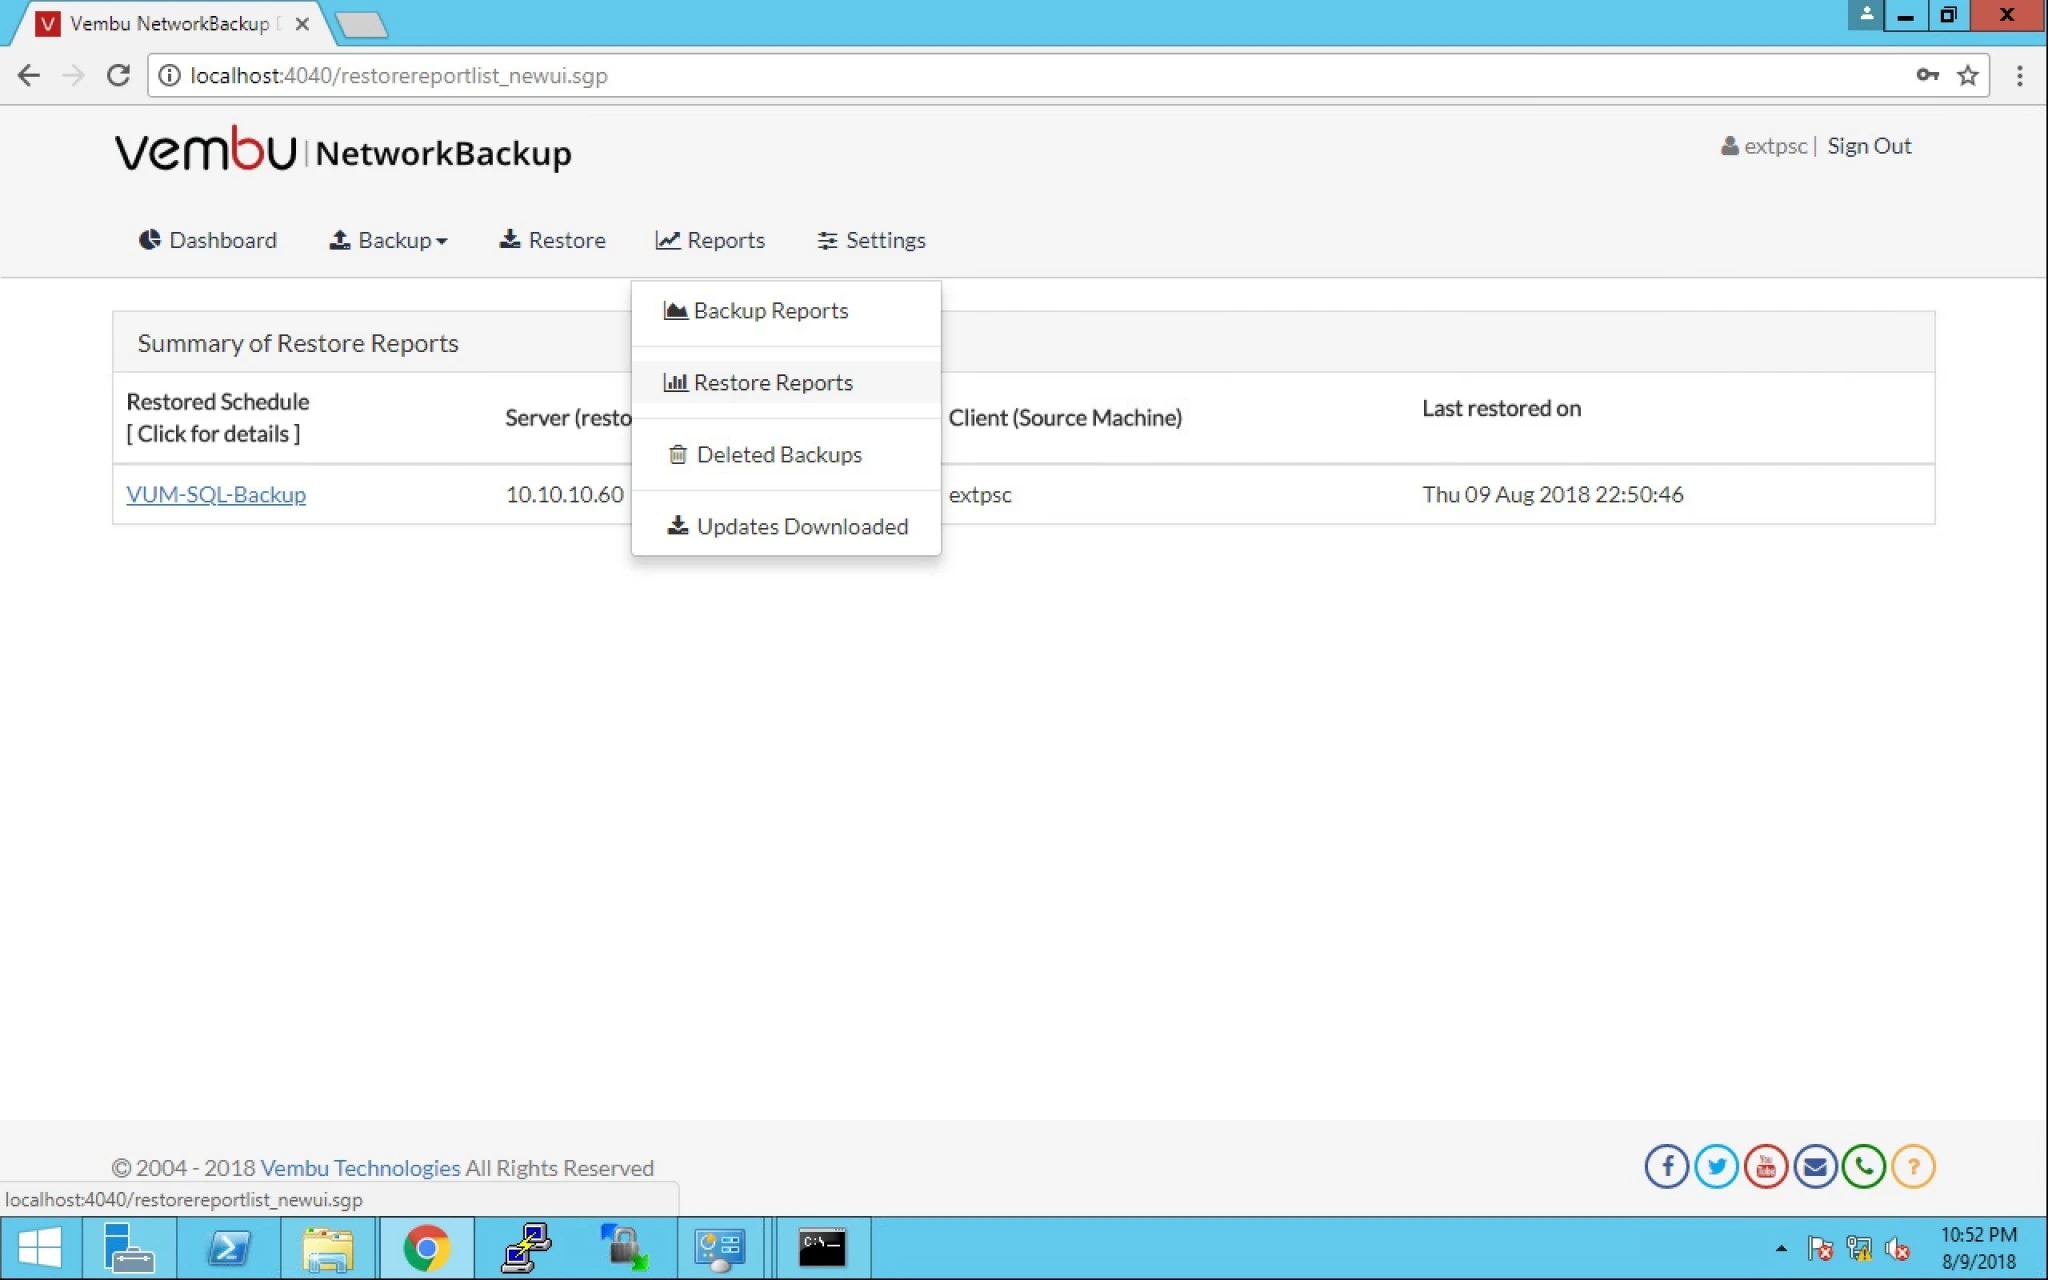
19. You can also check the report by clicking on Reports > Restore Reports.


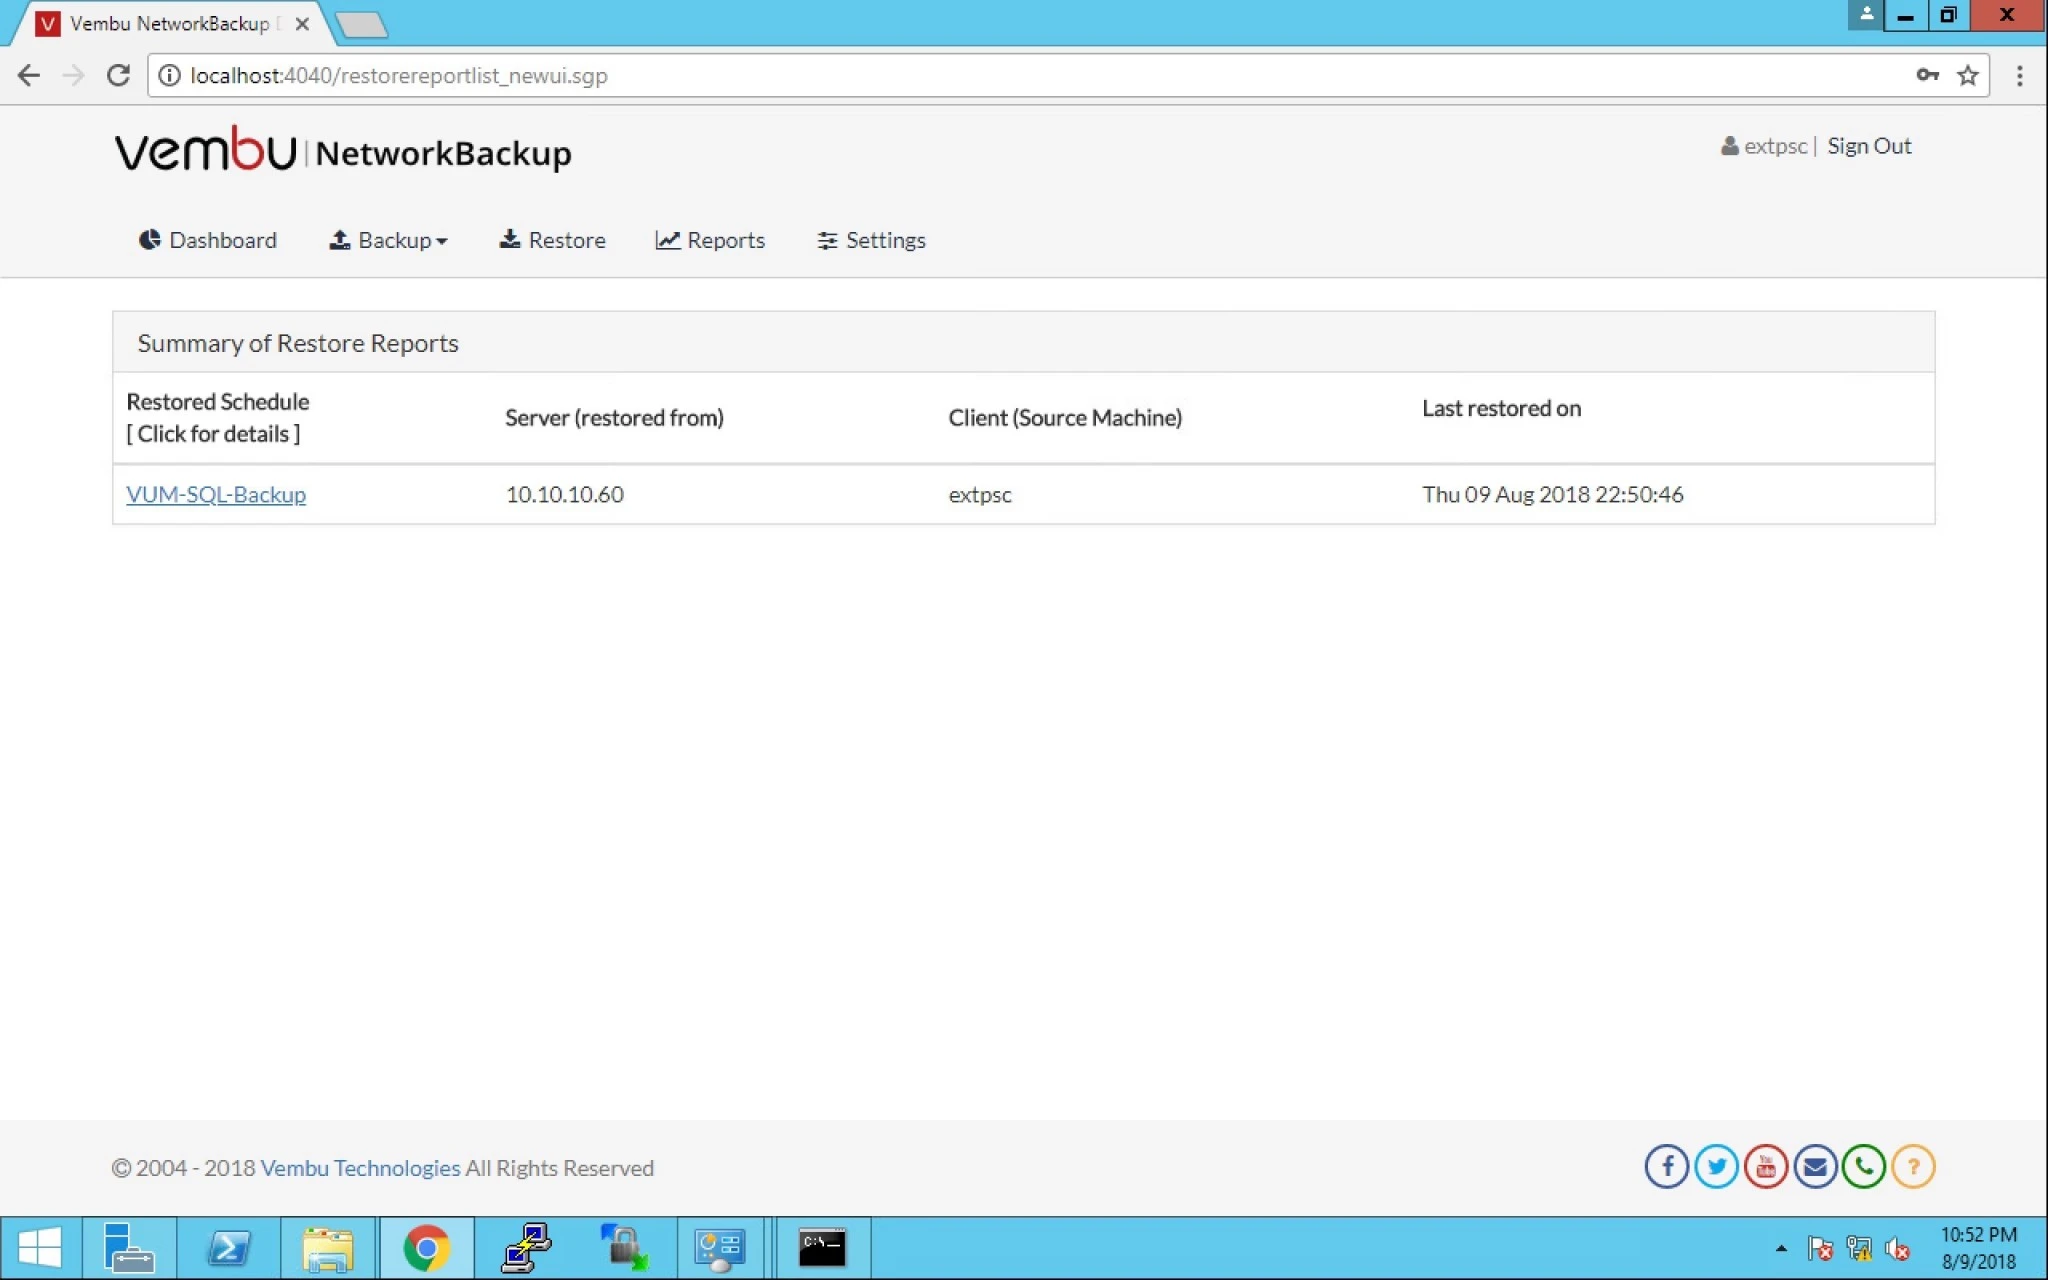
20. Click on Summary option and on VM hyperlink for report.


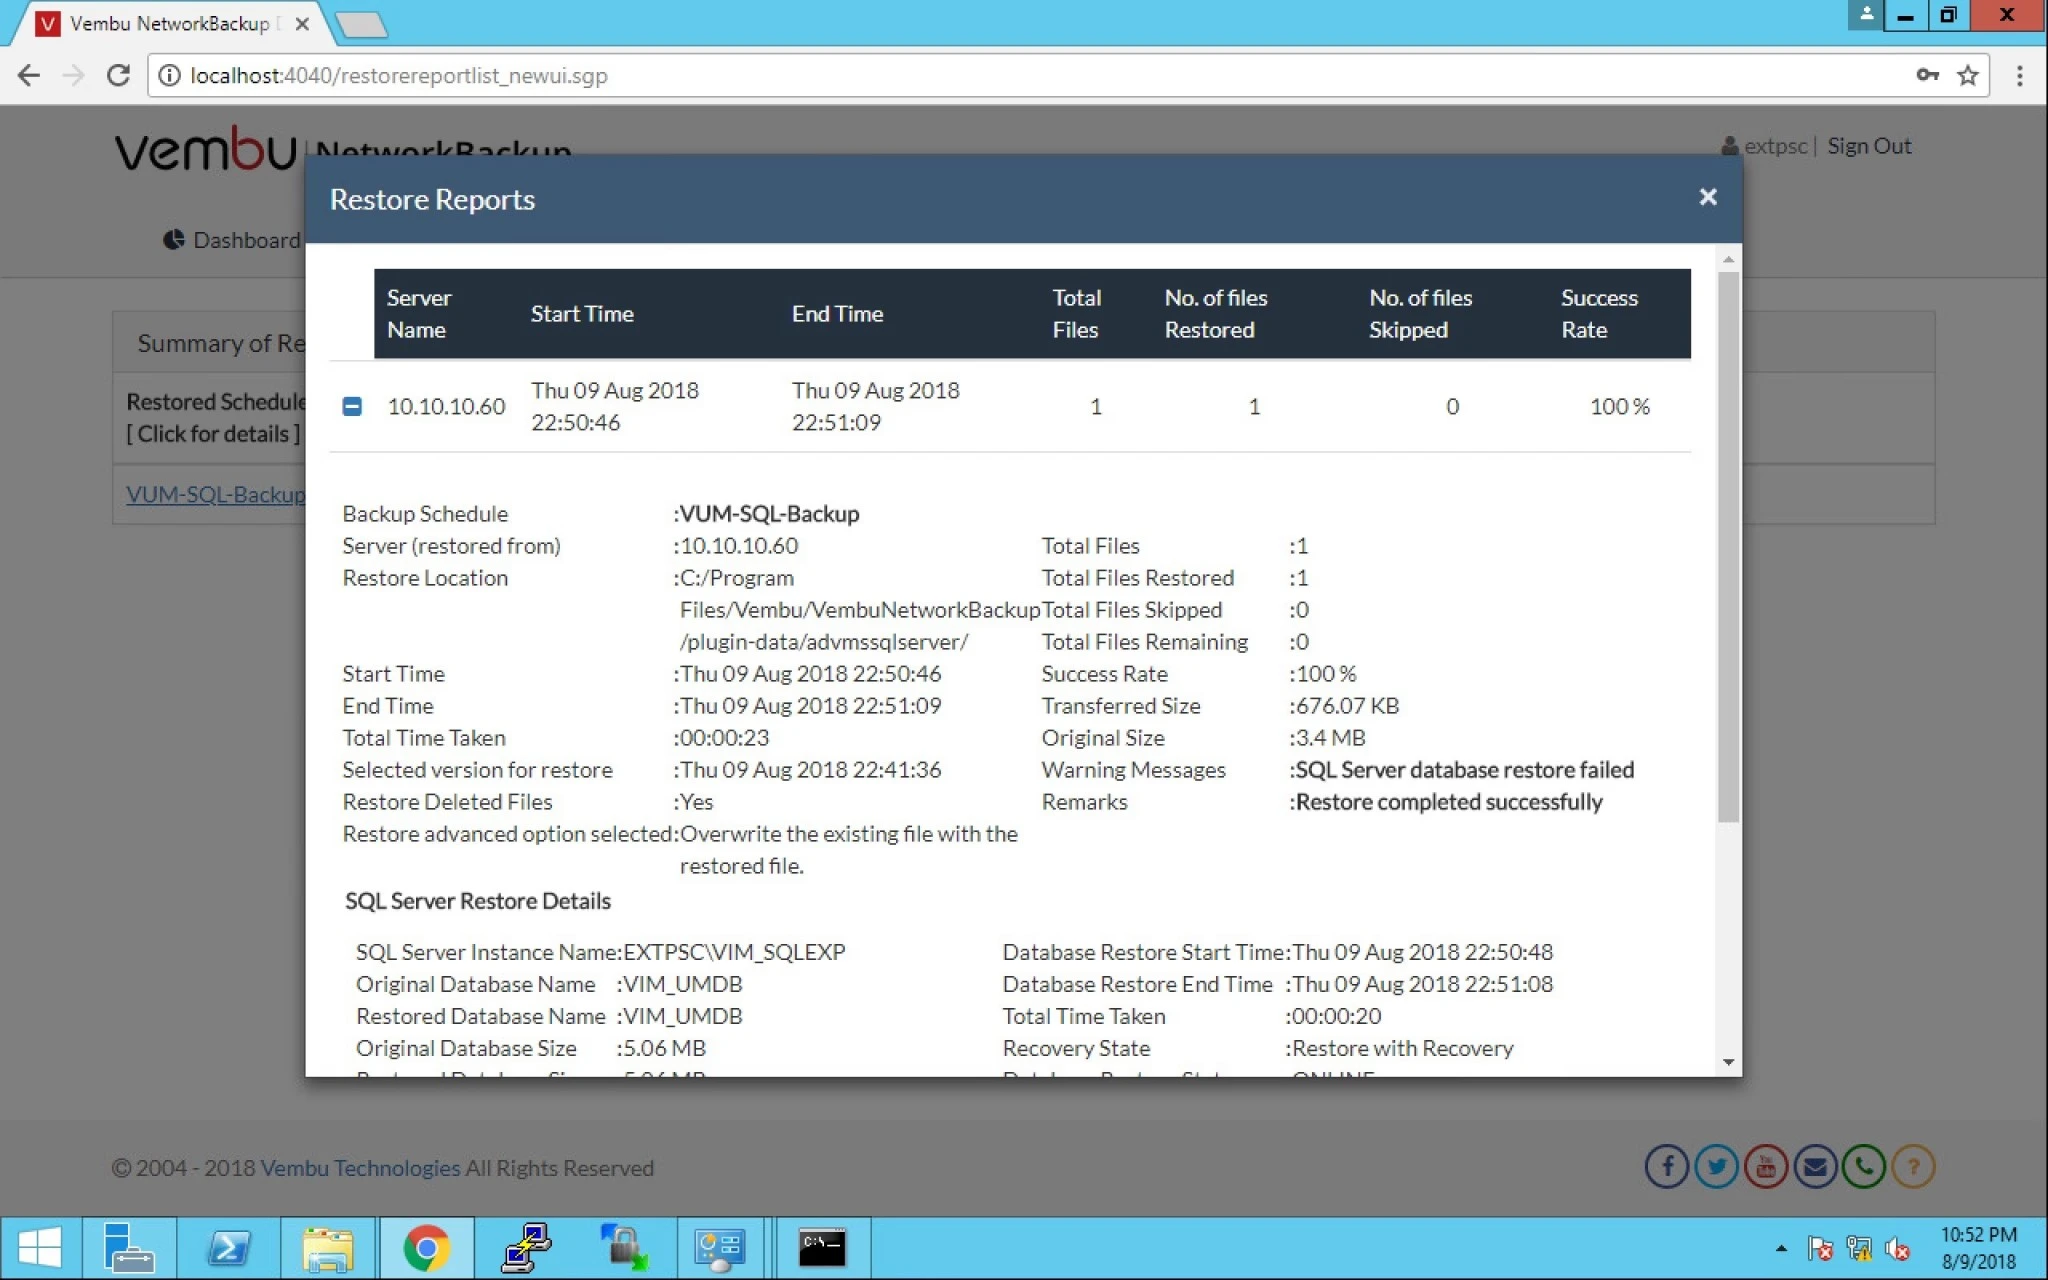
21. This is the restore report with all the details.


0

How to Backup MS SQL via Vembu

Topic Outline:

Backup MS SQL Database

Database Options

Scheduling

Differential & Transaction

Encryption 


If you are using Vembu BDR suits then you have a application backup option also. we will take MS SQL backup via Vembu Network Backup.

  1. First download the Vembu Network Backup (Click here).

2.  After that install on the server where you are running MS SQL.

3.  Open the console by typing URL : http://IP of server:4040 where the port is 4040.

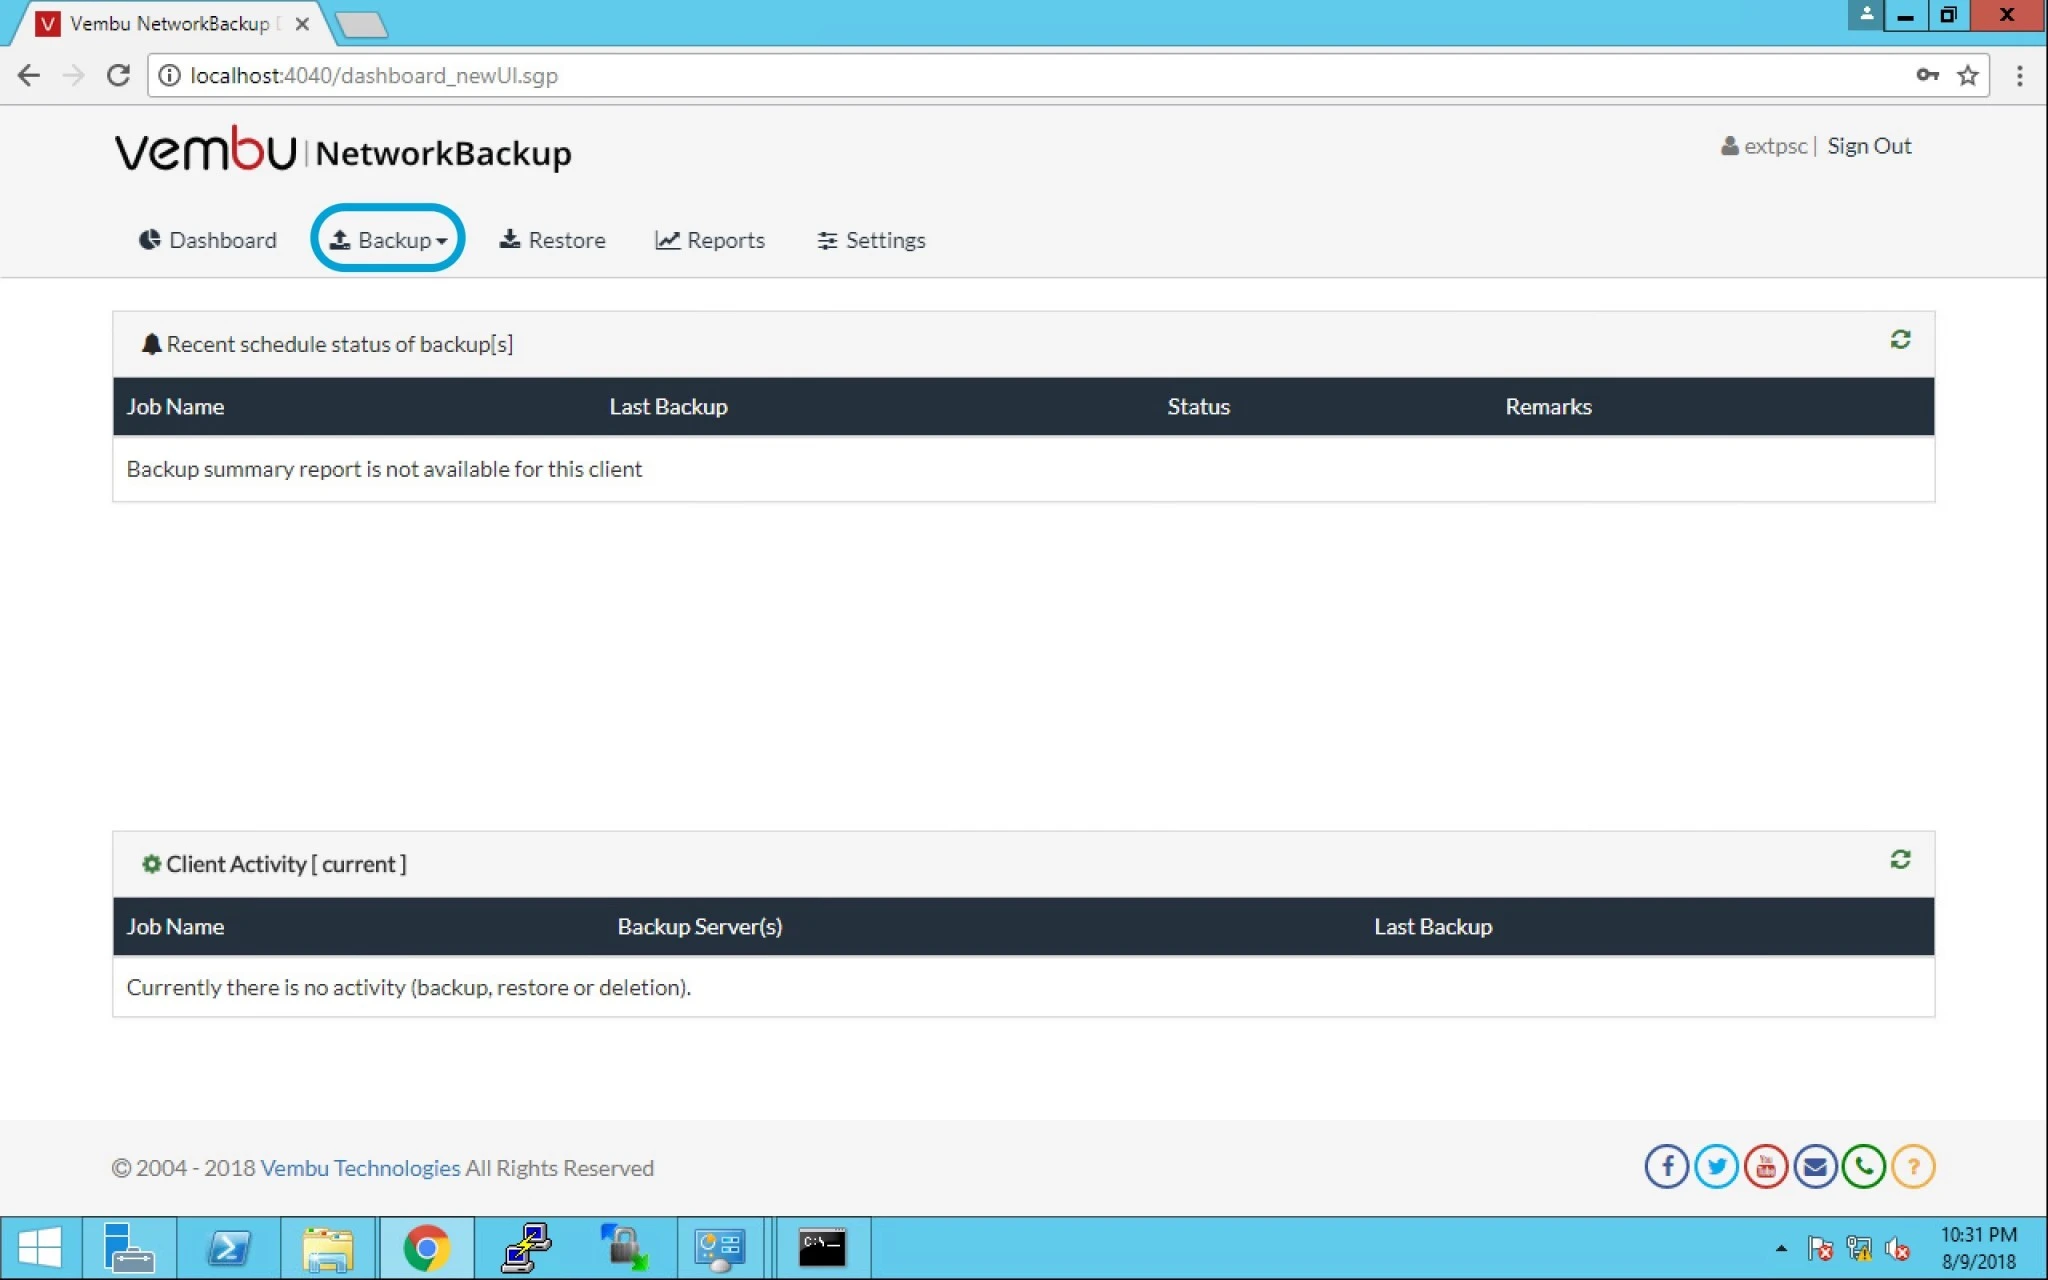
4.  Go to Backup tab as seen in the below image.
 

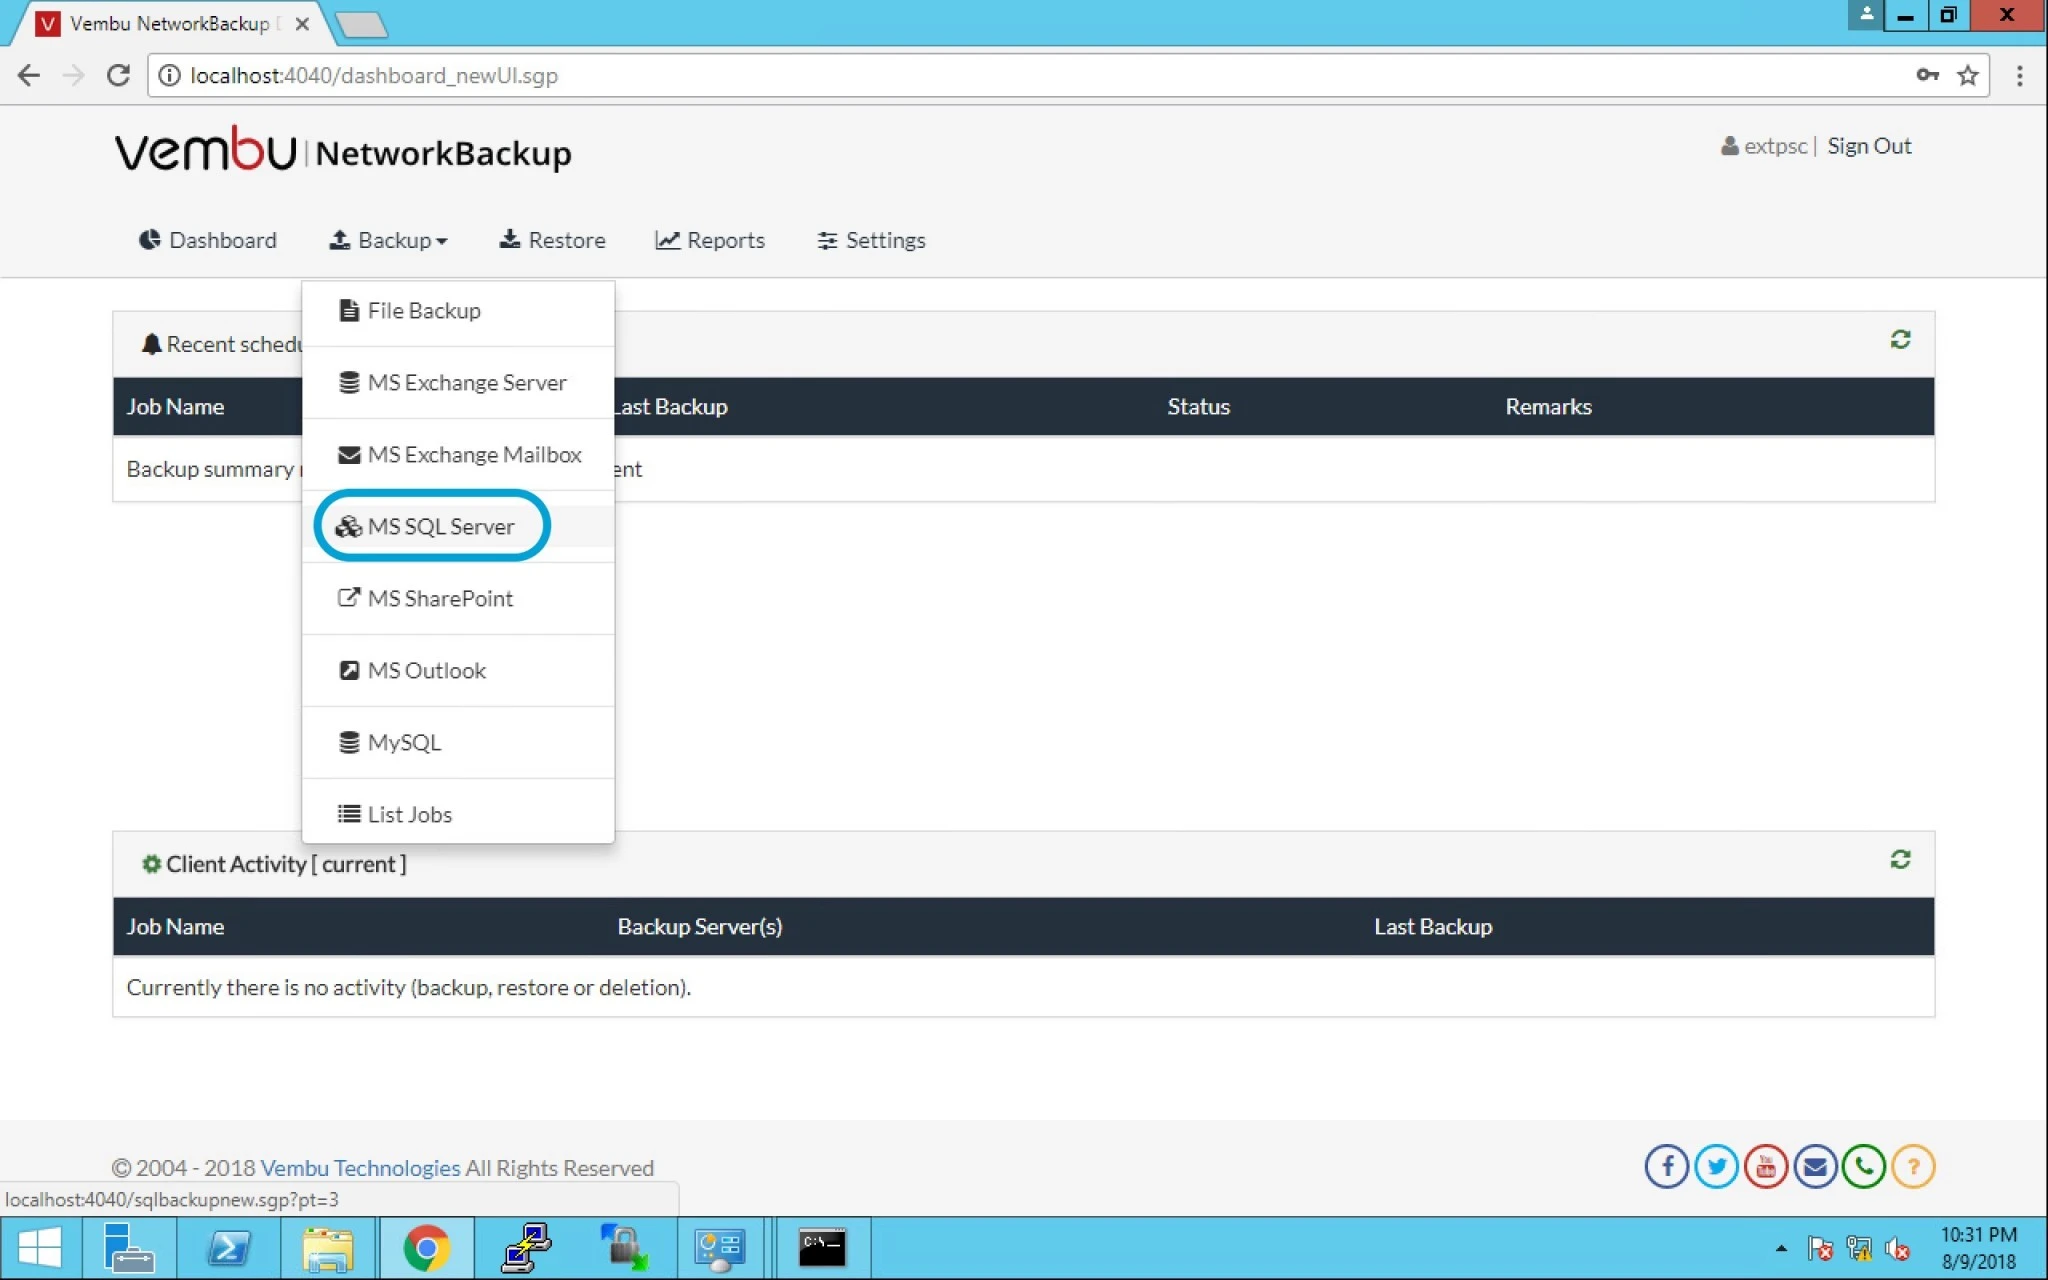
5. Now Click on the MS SQL Server option.


6. After this you can see below options:

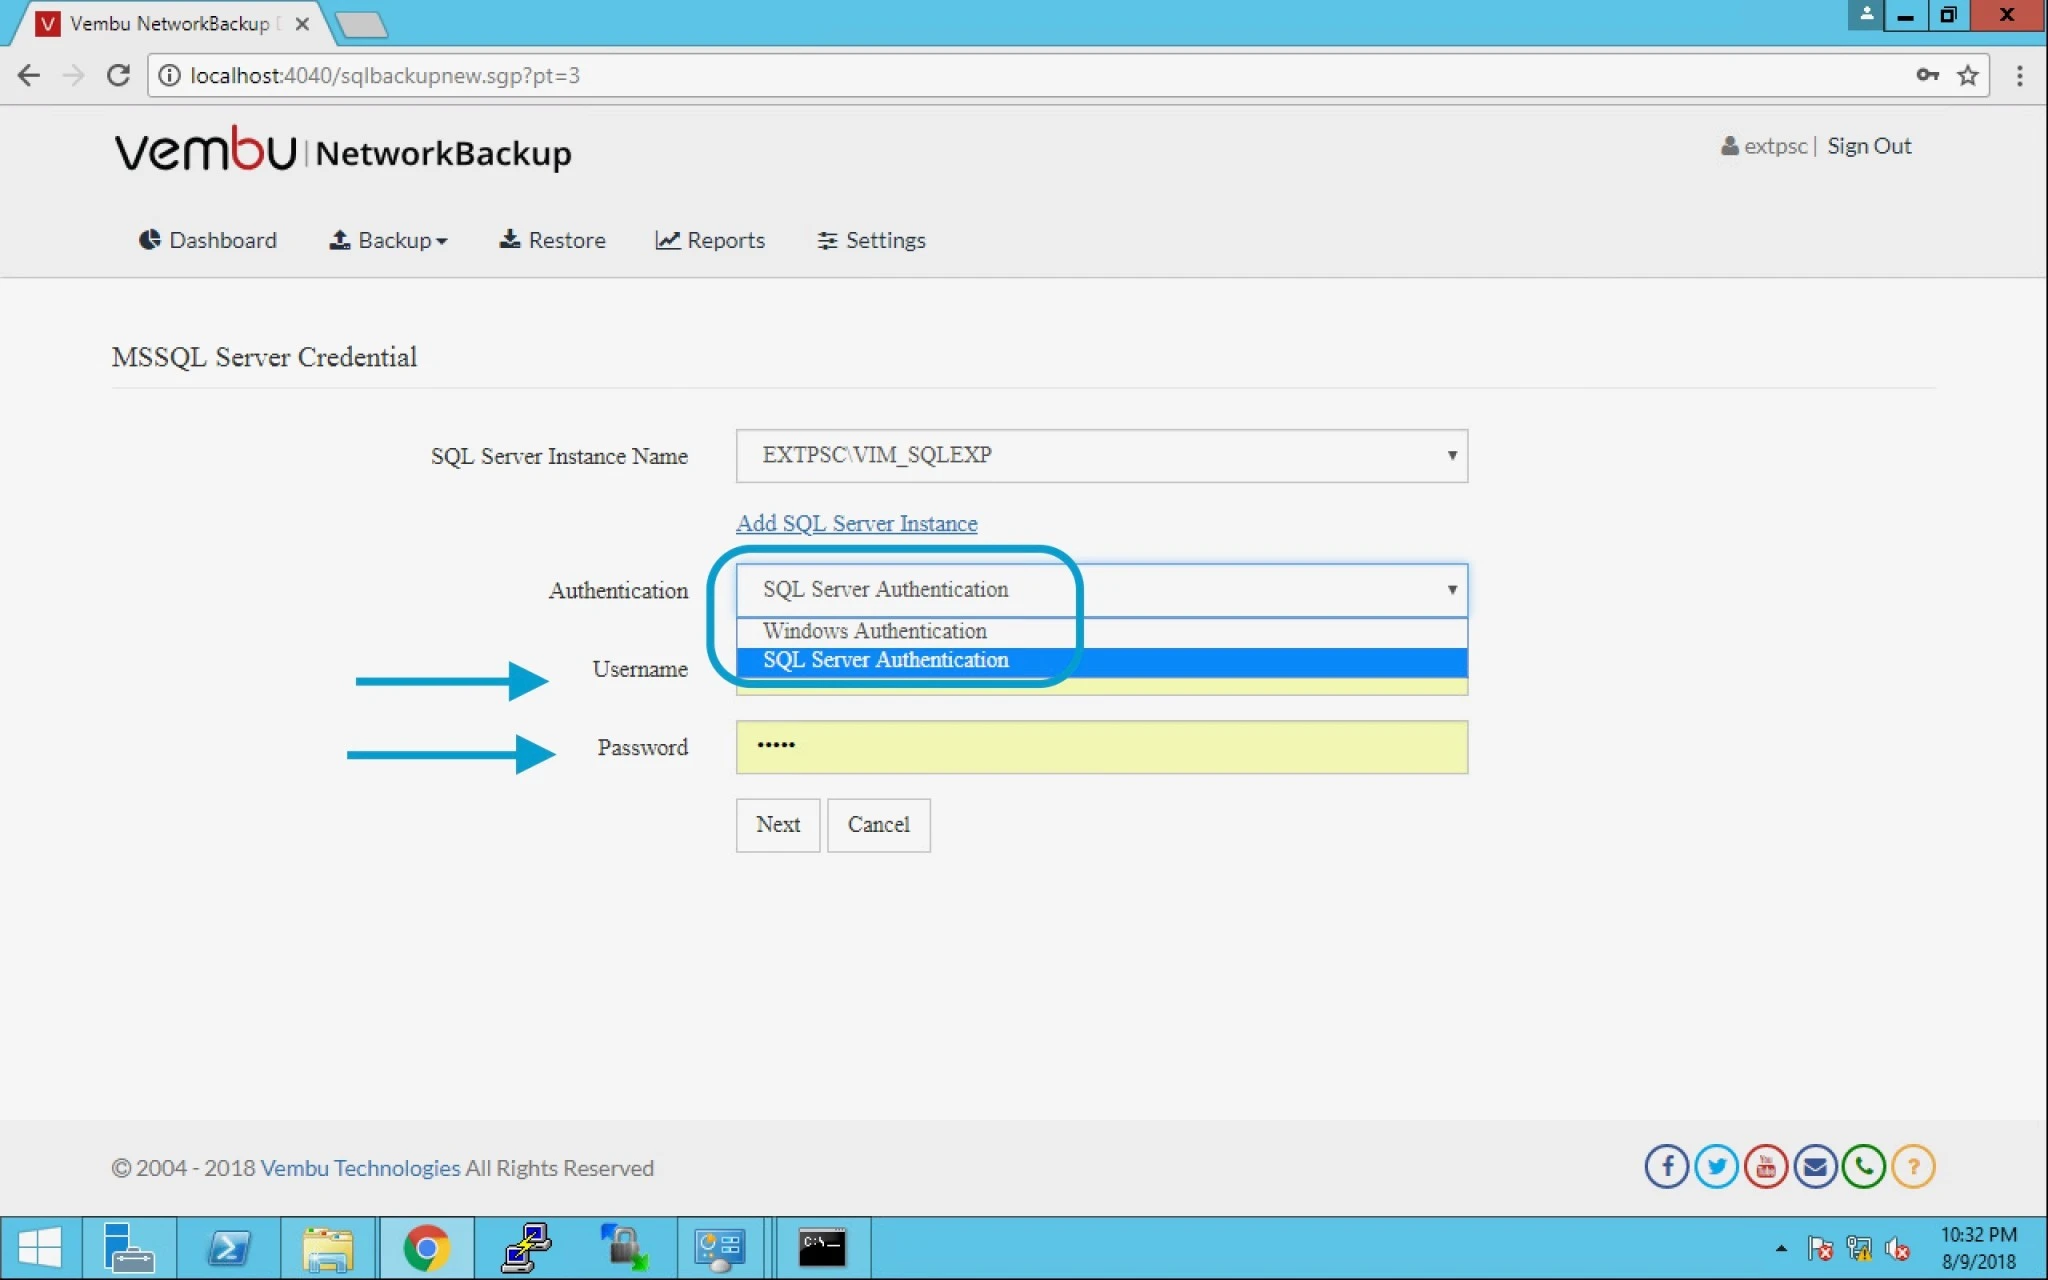
SQL Server Instance name – you can select the database as per your requirement.
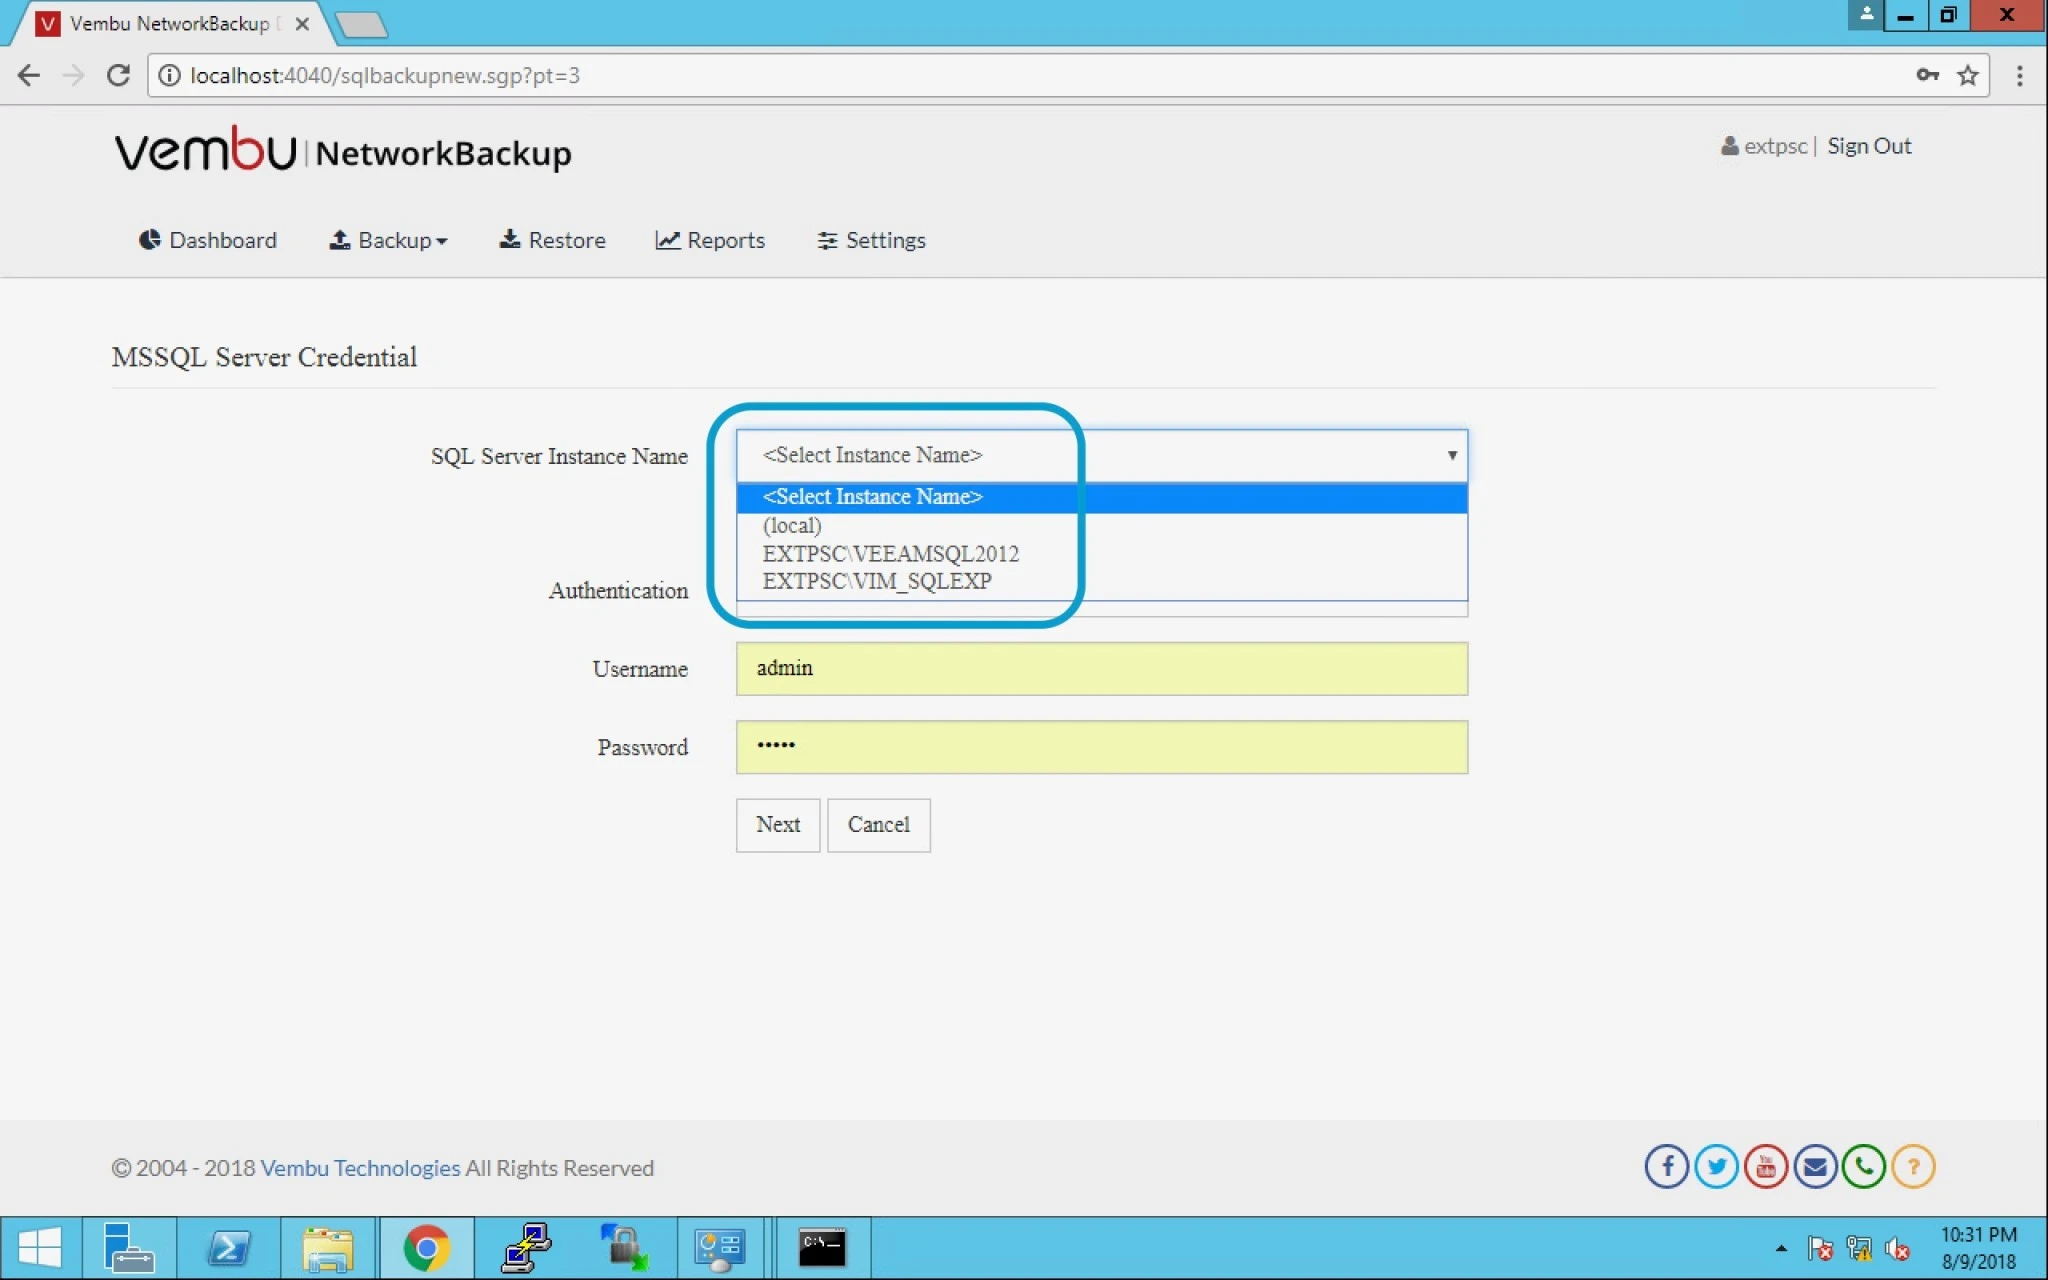


7.  Authentication – use Windows or SQL Server Authentication.

Provide username and Password. Click next.


8. After choosing database, you can now select from the given below options to backup SQL instance.
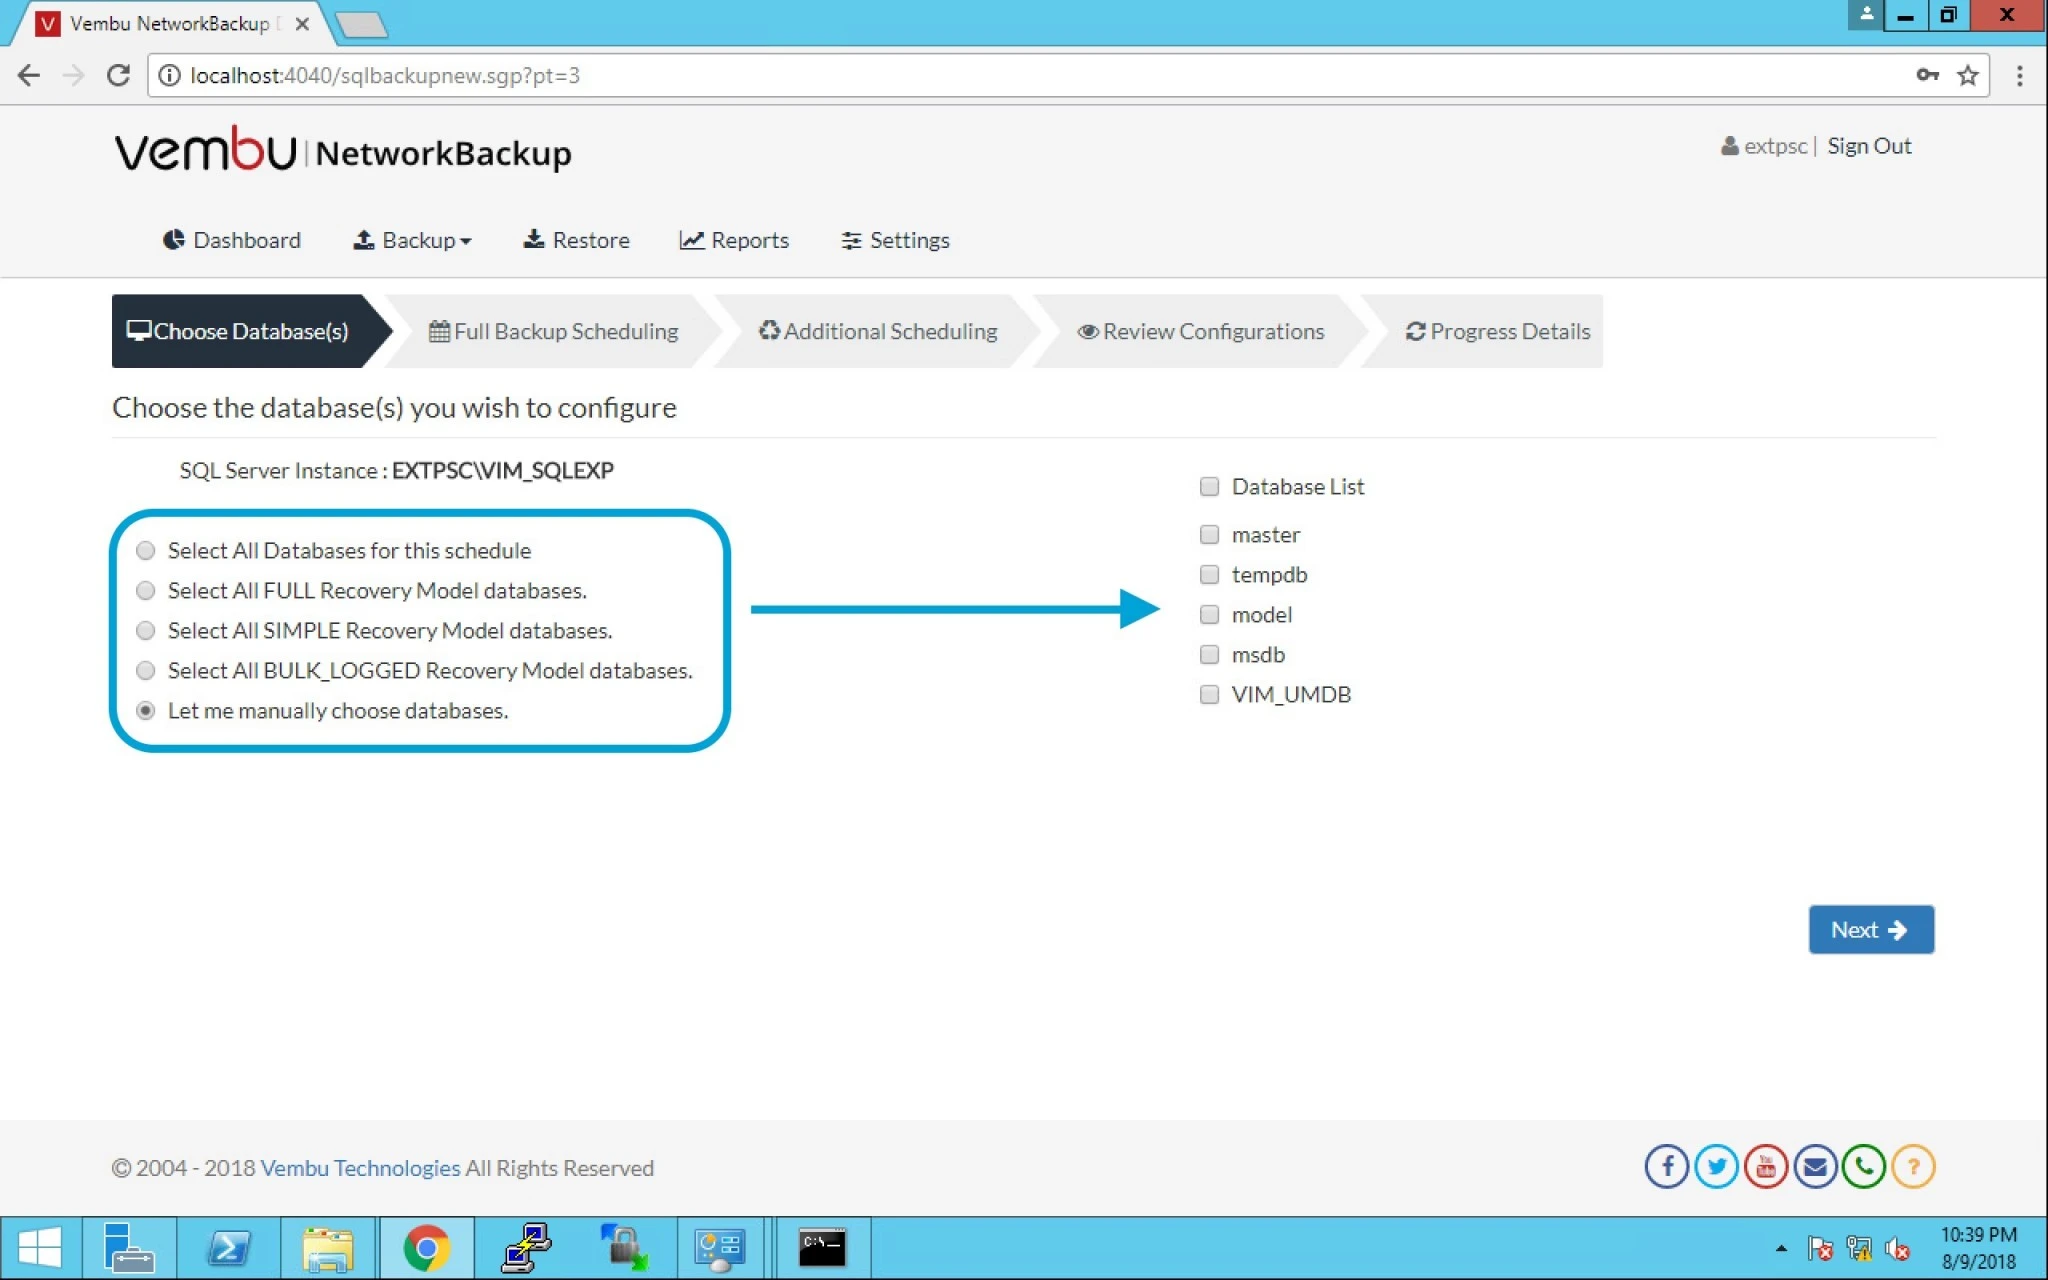


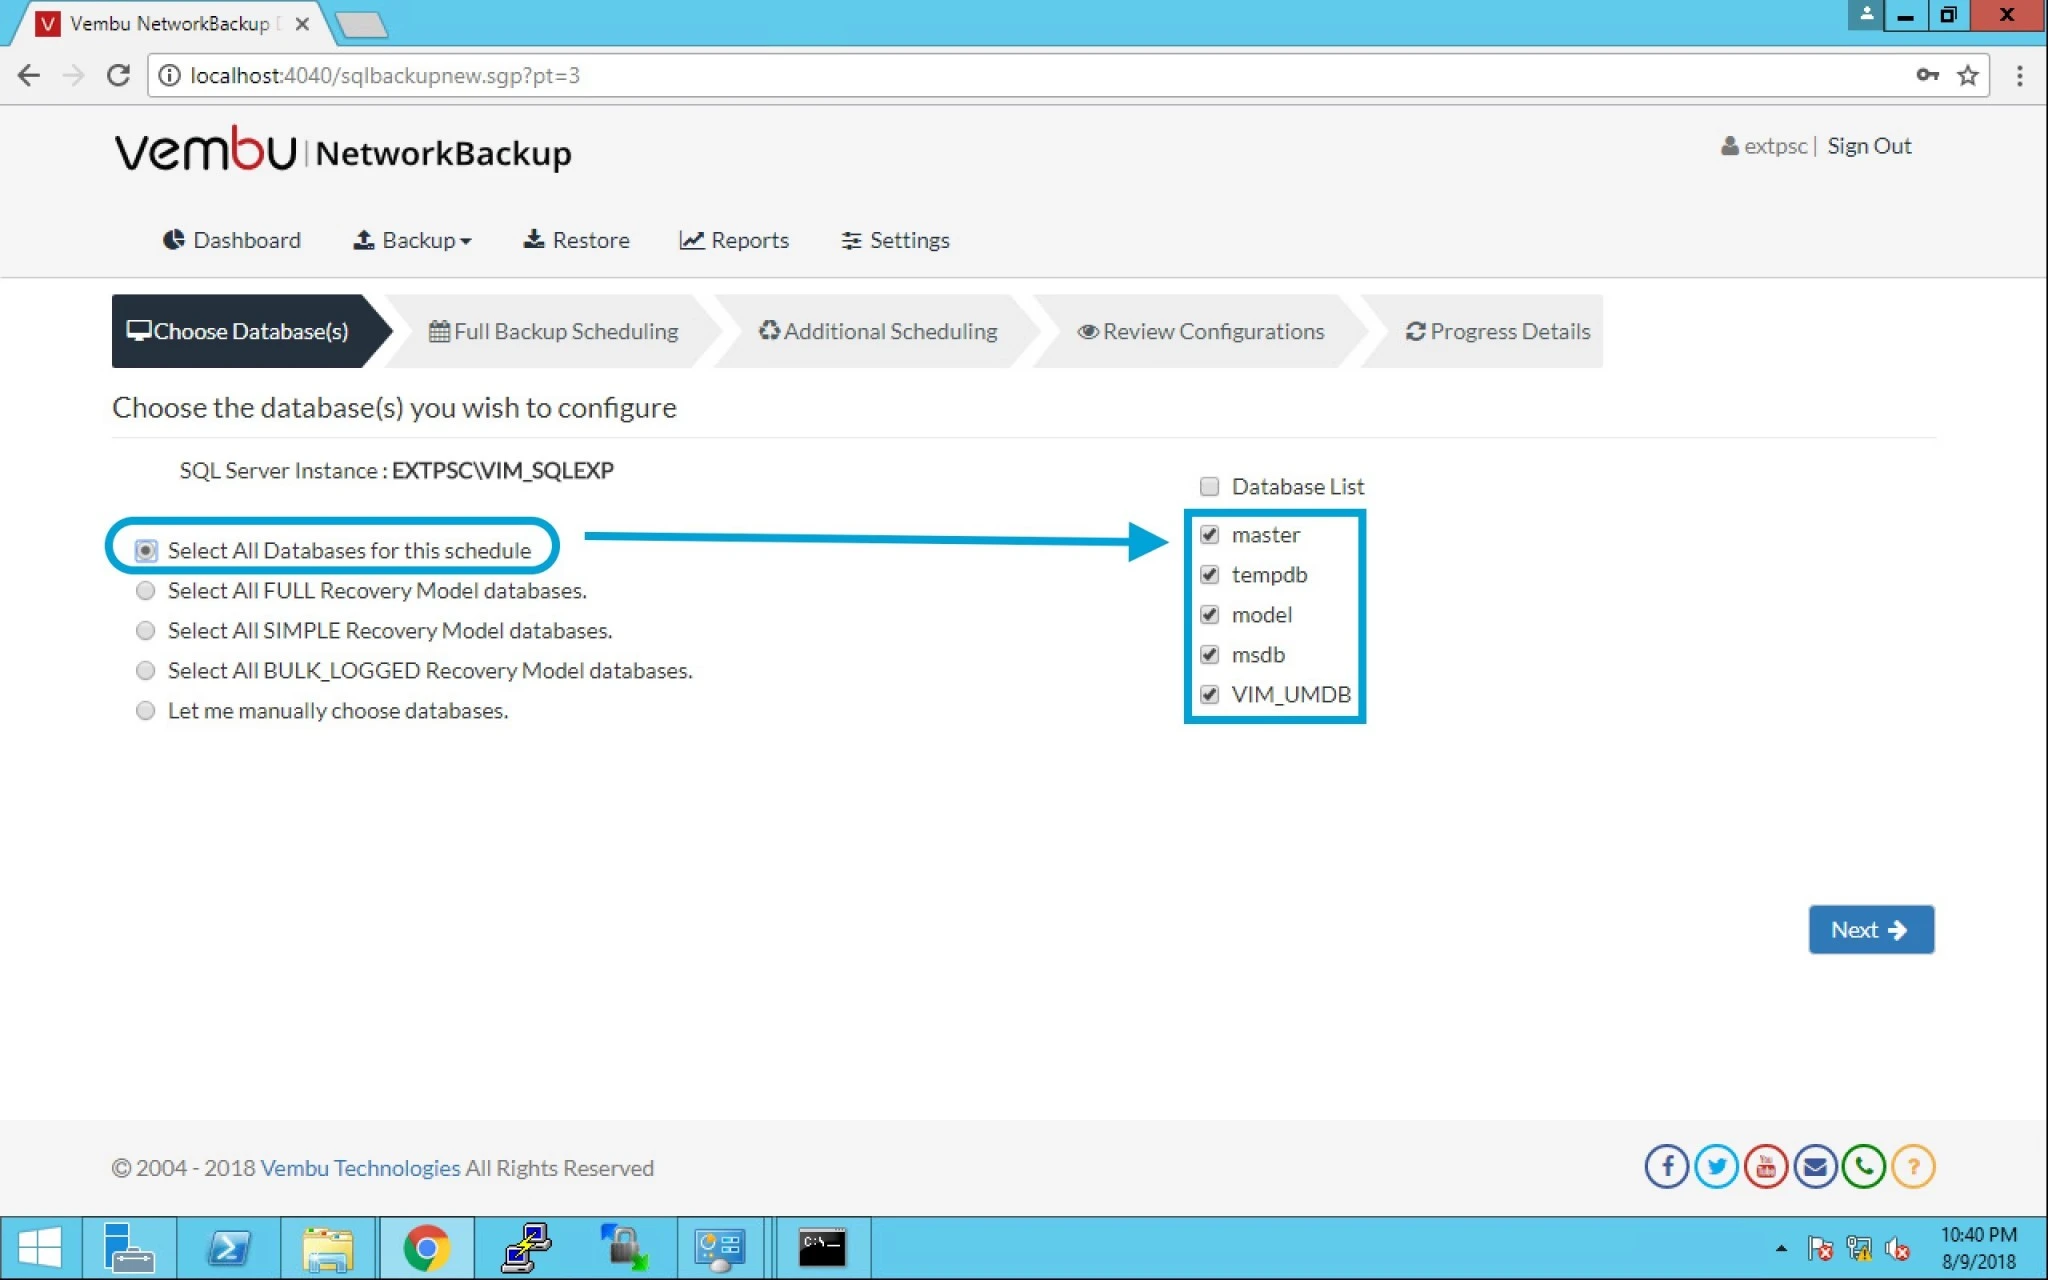
9. Lets assume we choose the first option then it will automatically select the table given on right hand side.


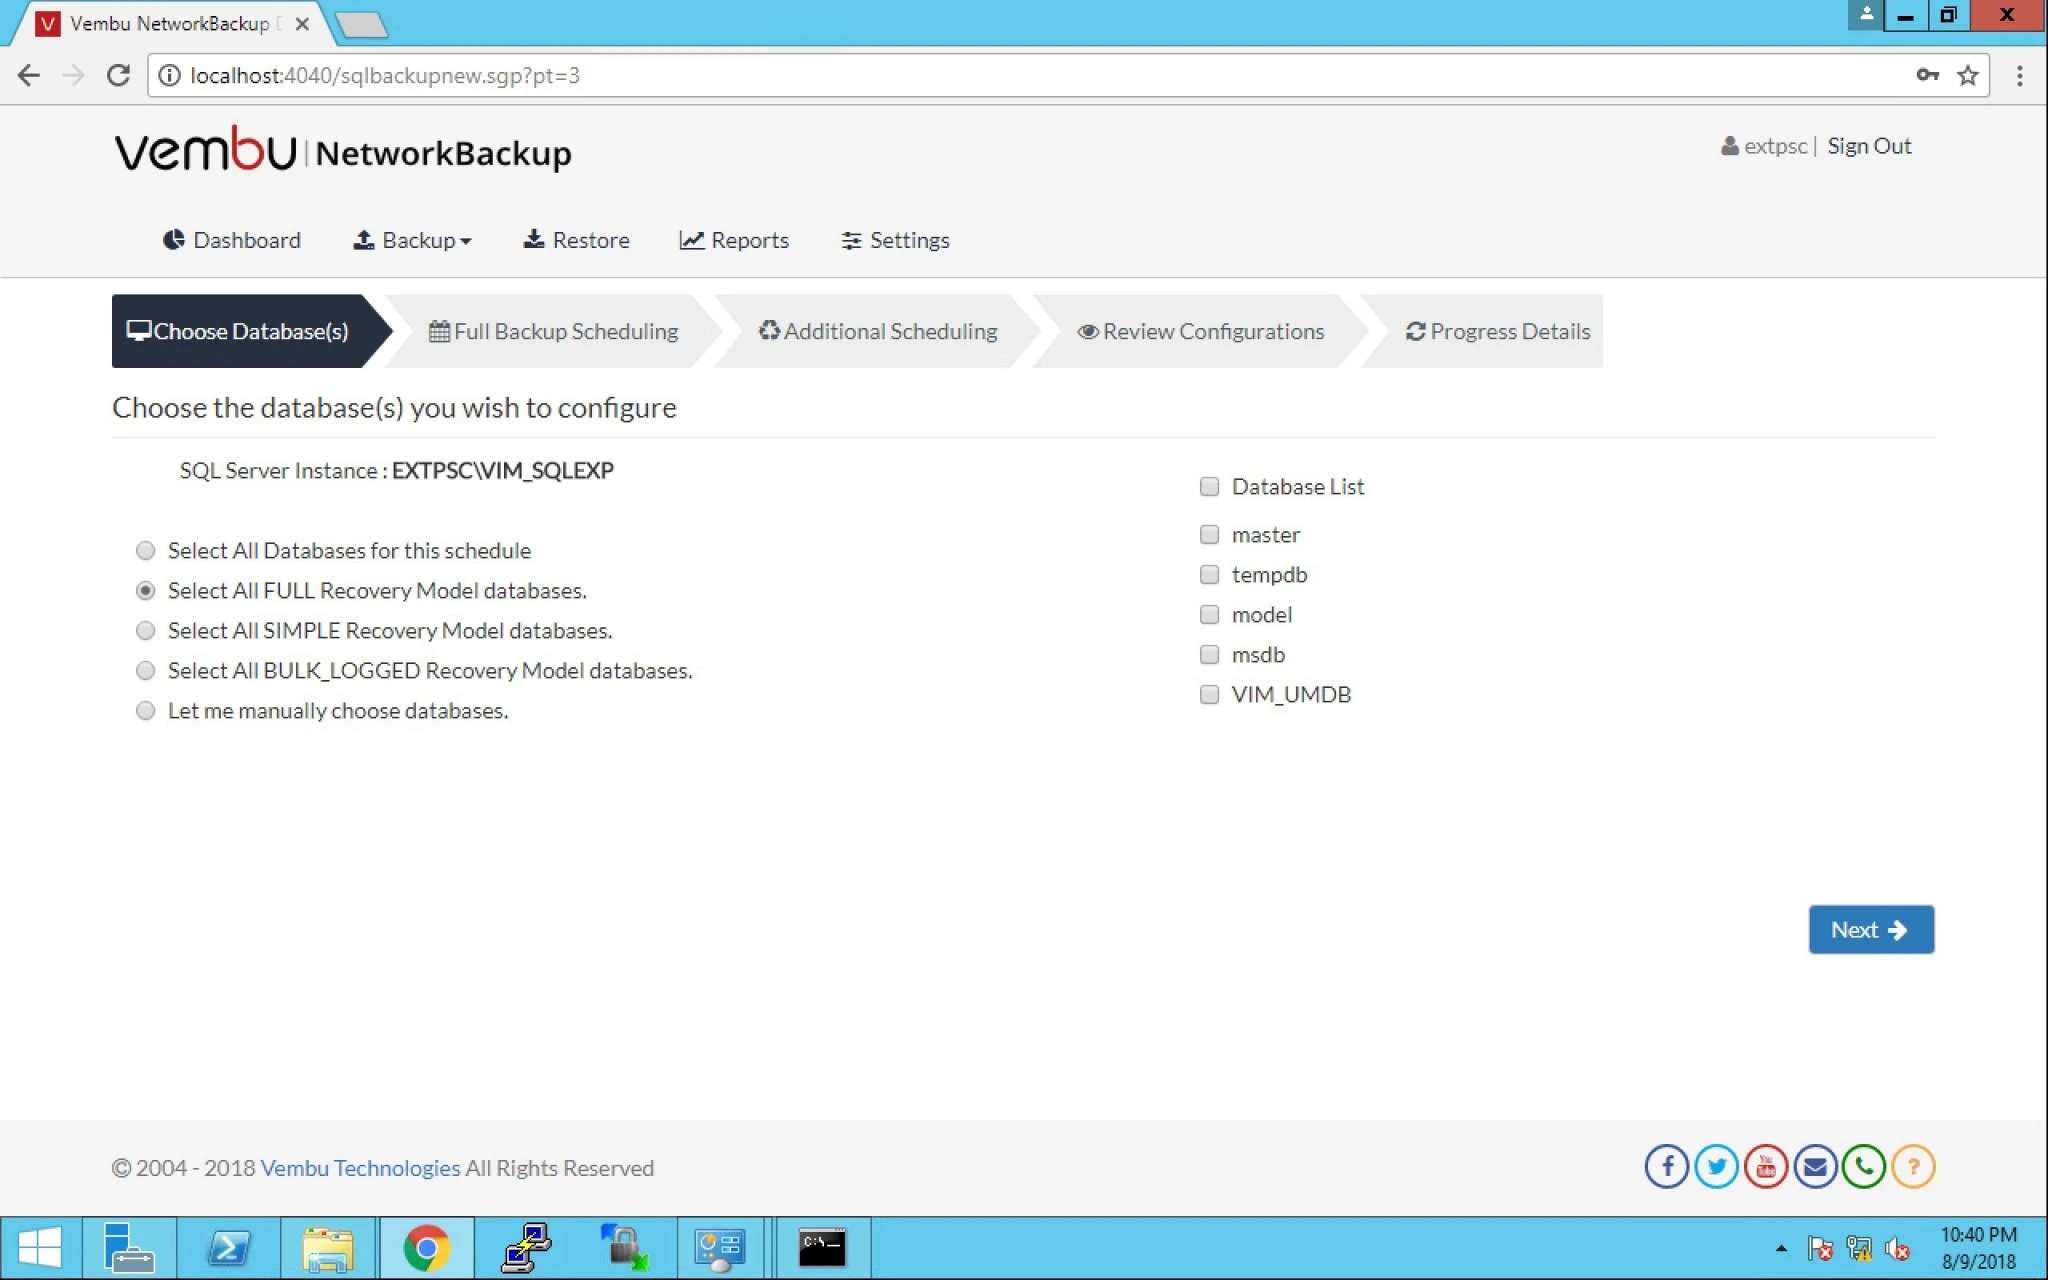
10. Similarly when we choose the second option “All FULL Recovery Model databases”, the R.H.S table isn’t selected automatically.


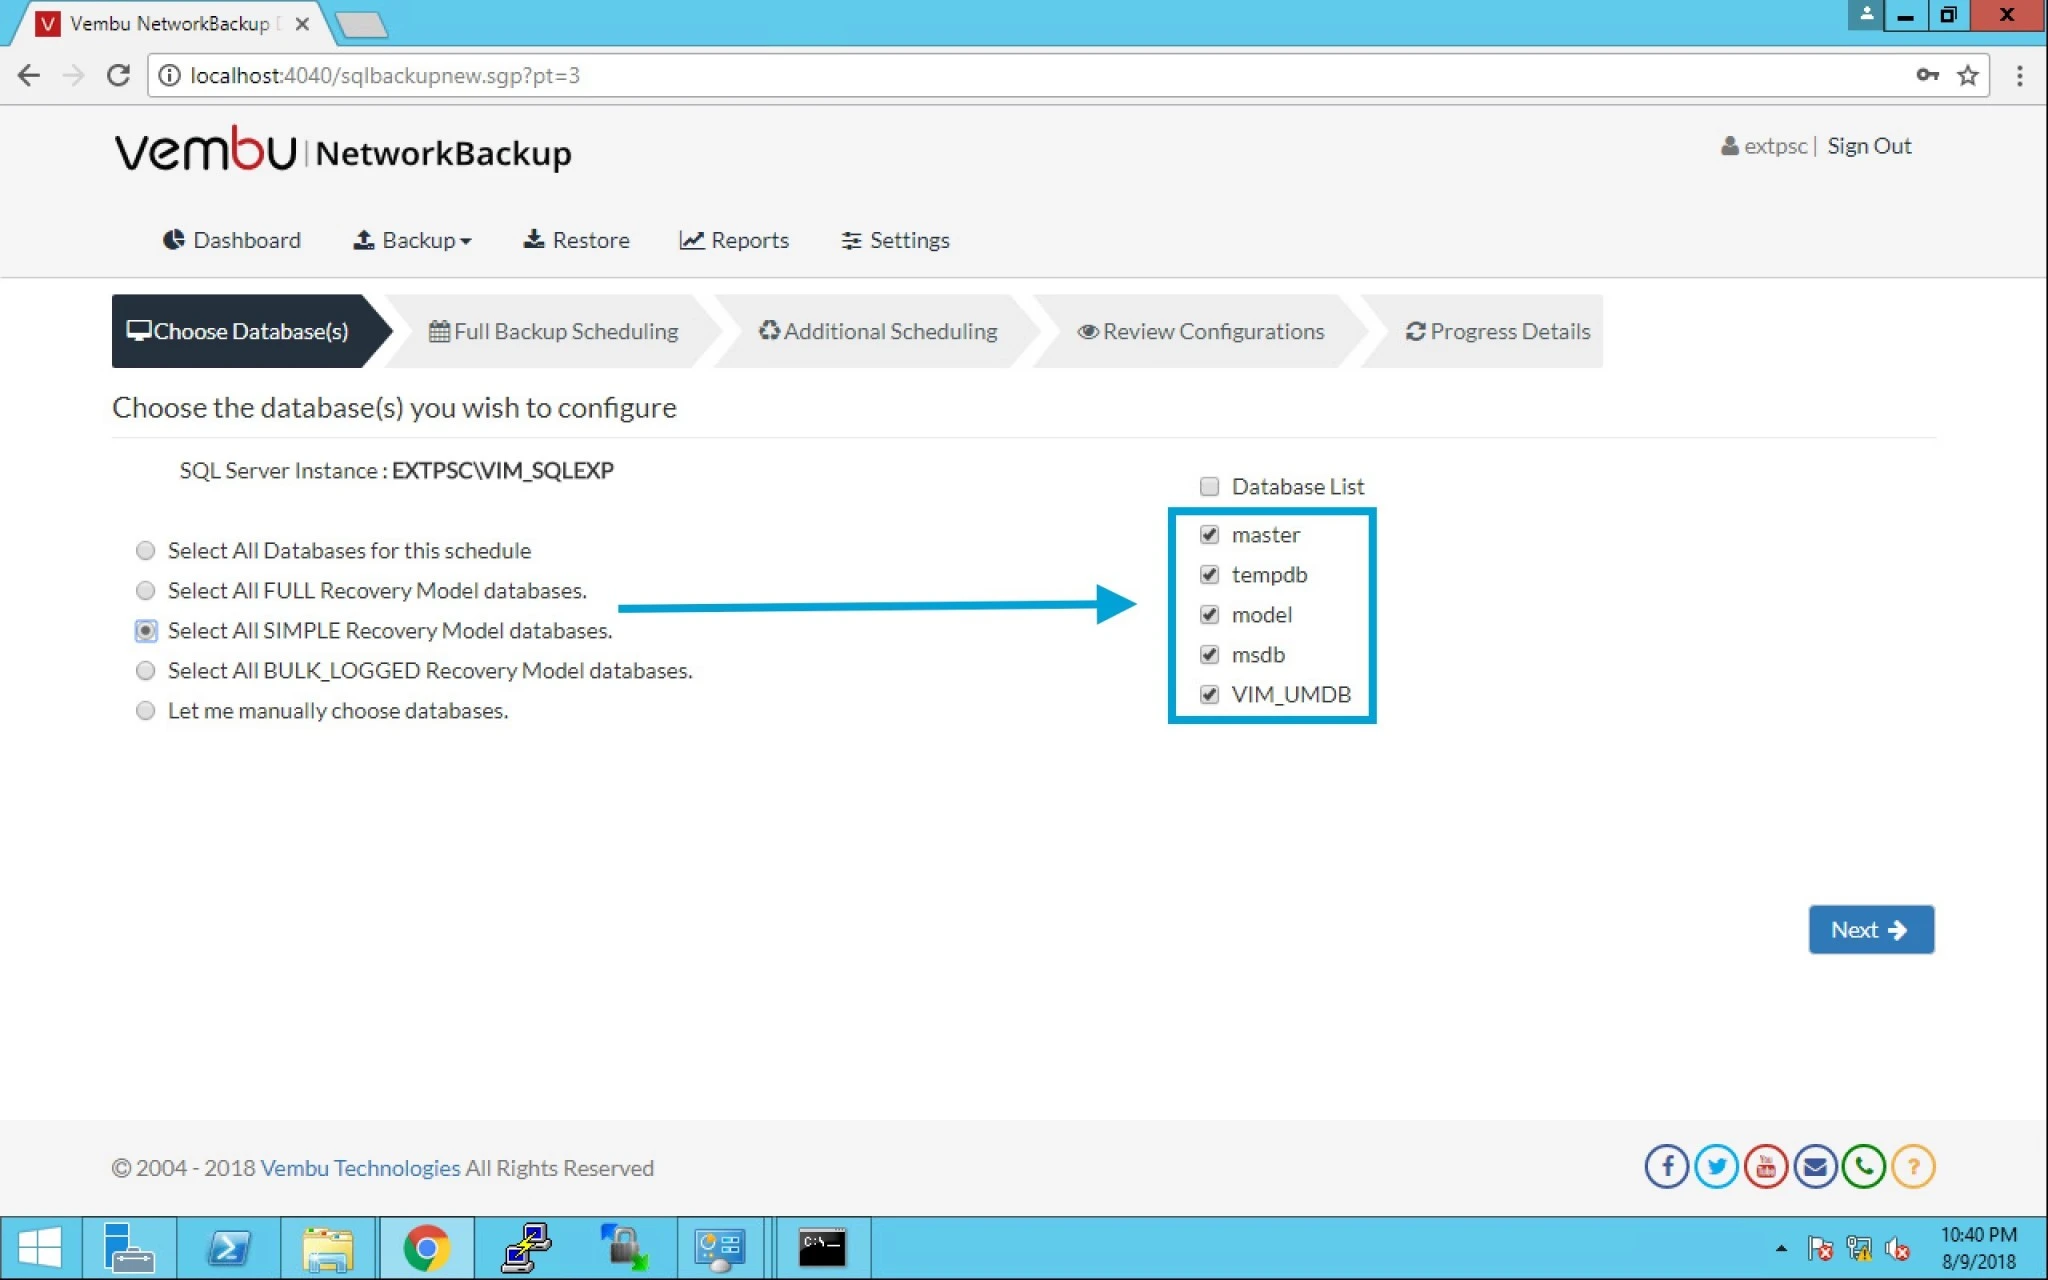
11.  When we go ahead and select the third option “All SIMPLE Recovery Model databases”, the R.H.S table is selected by default.


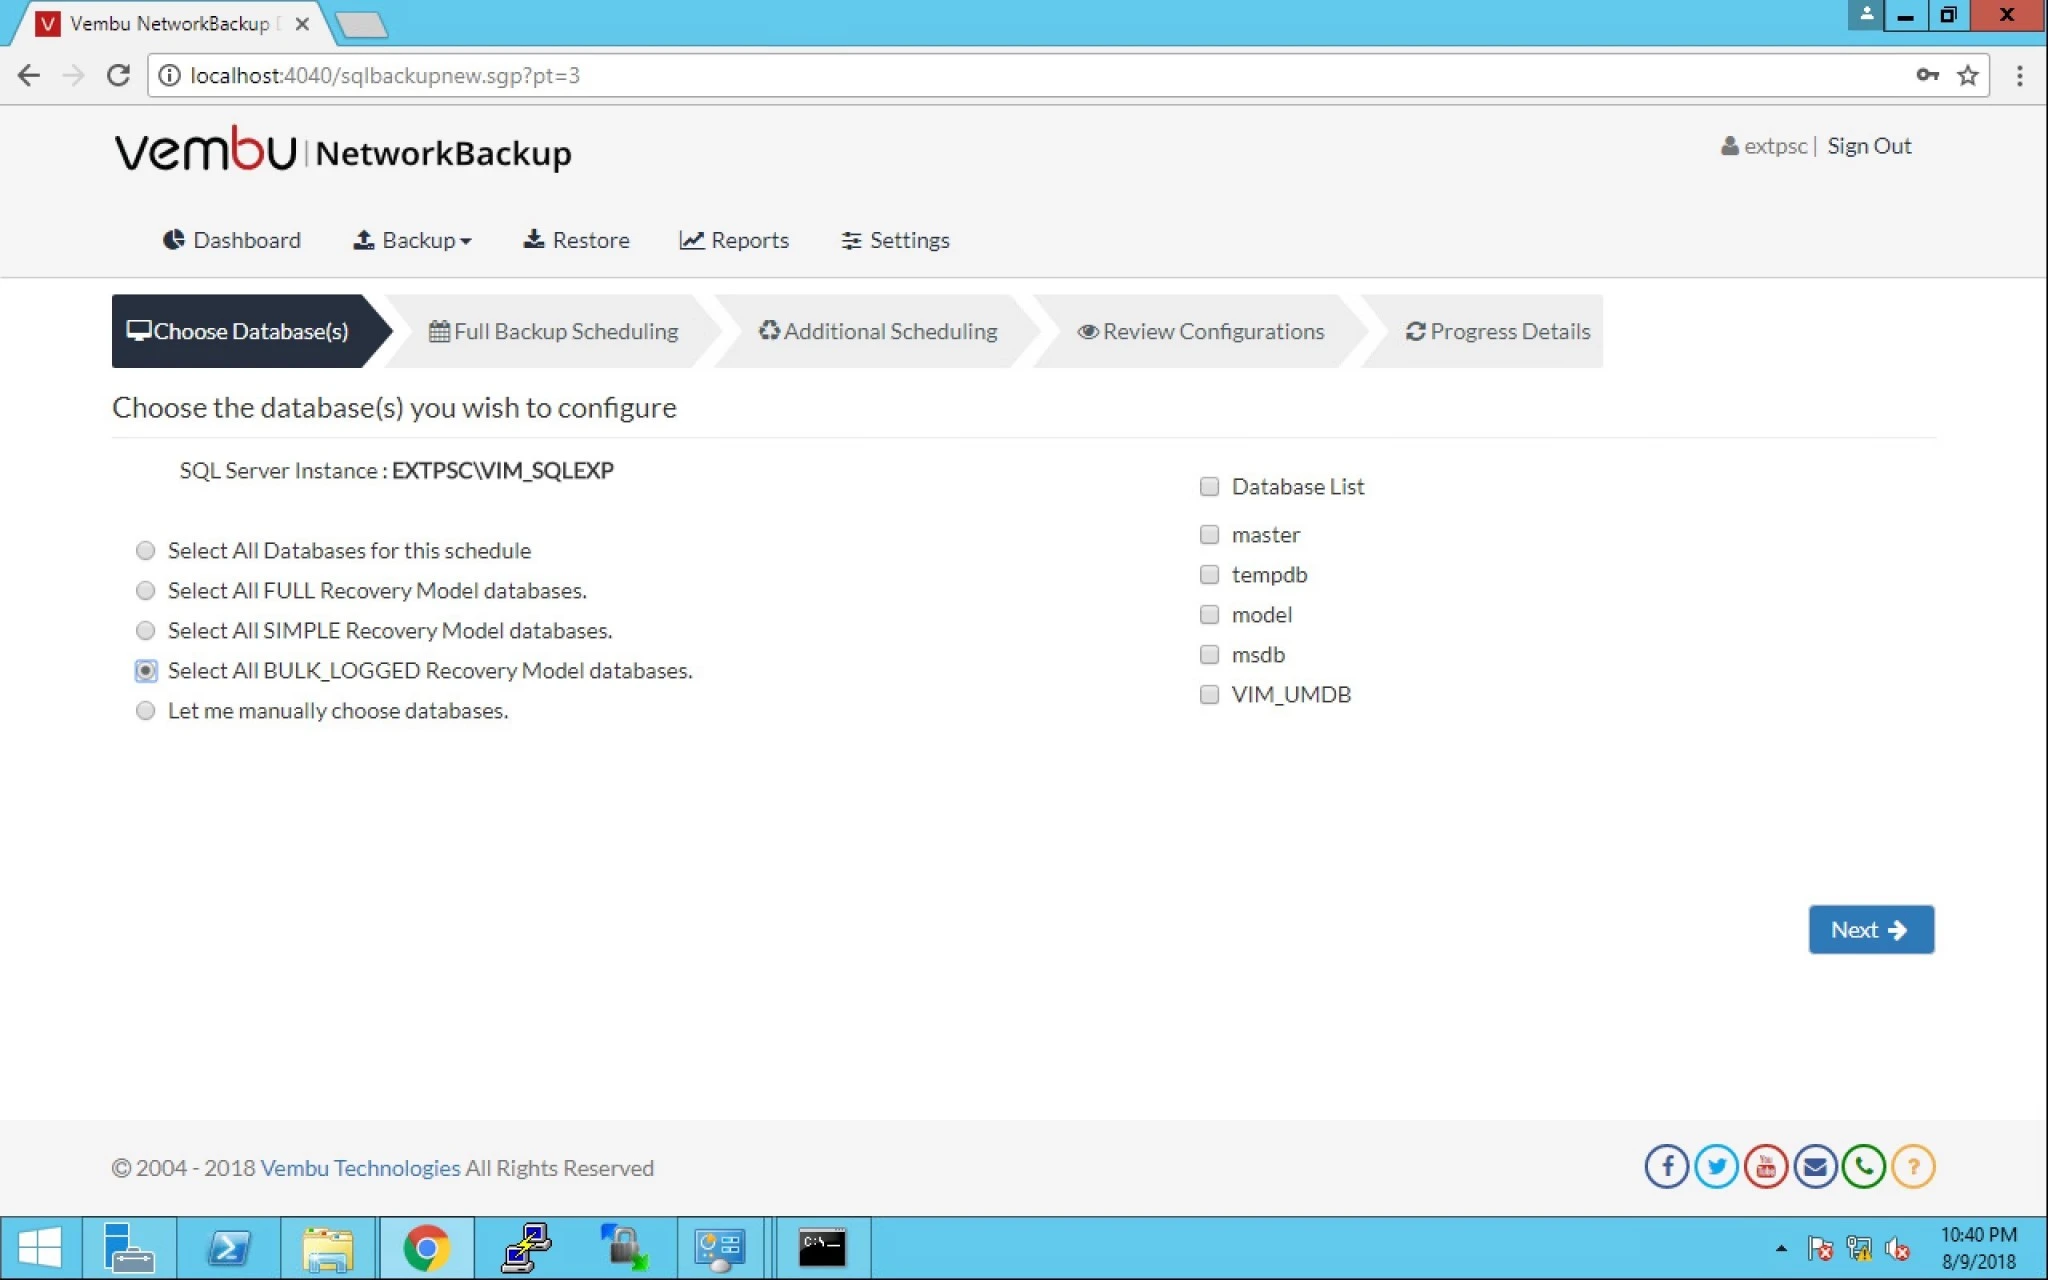
12. Select “All BULK_LOGGED Recovery Model databases” will not automatically select the R.H.S table.


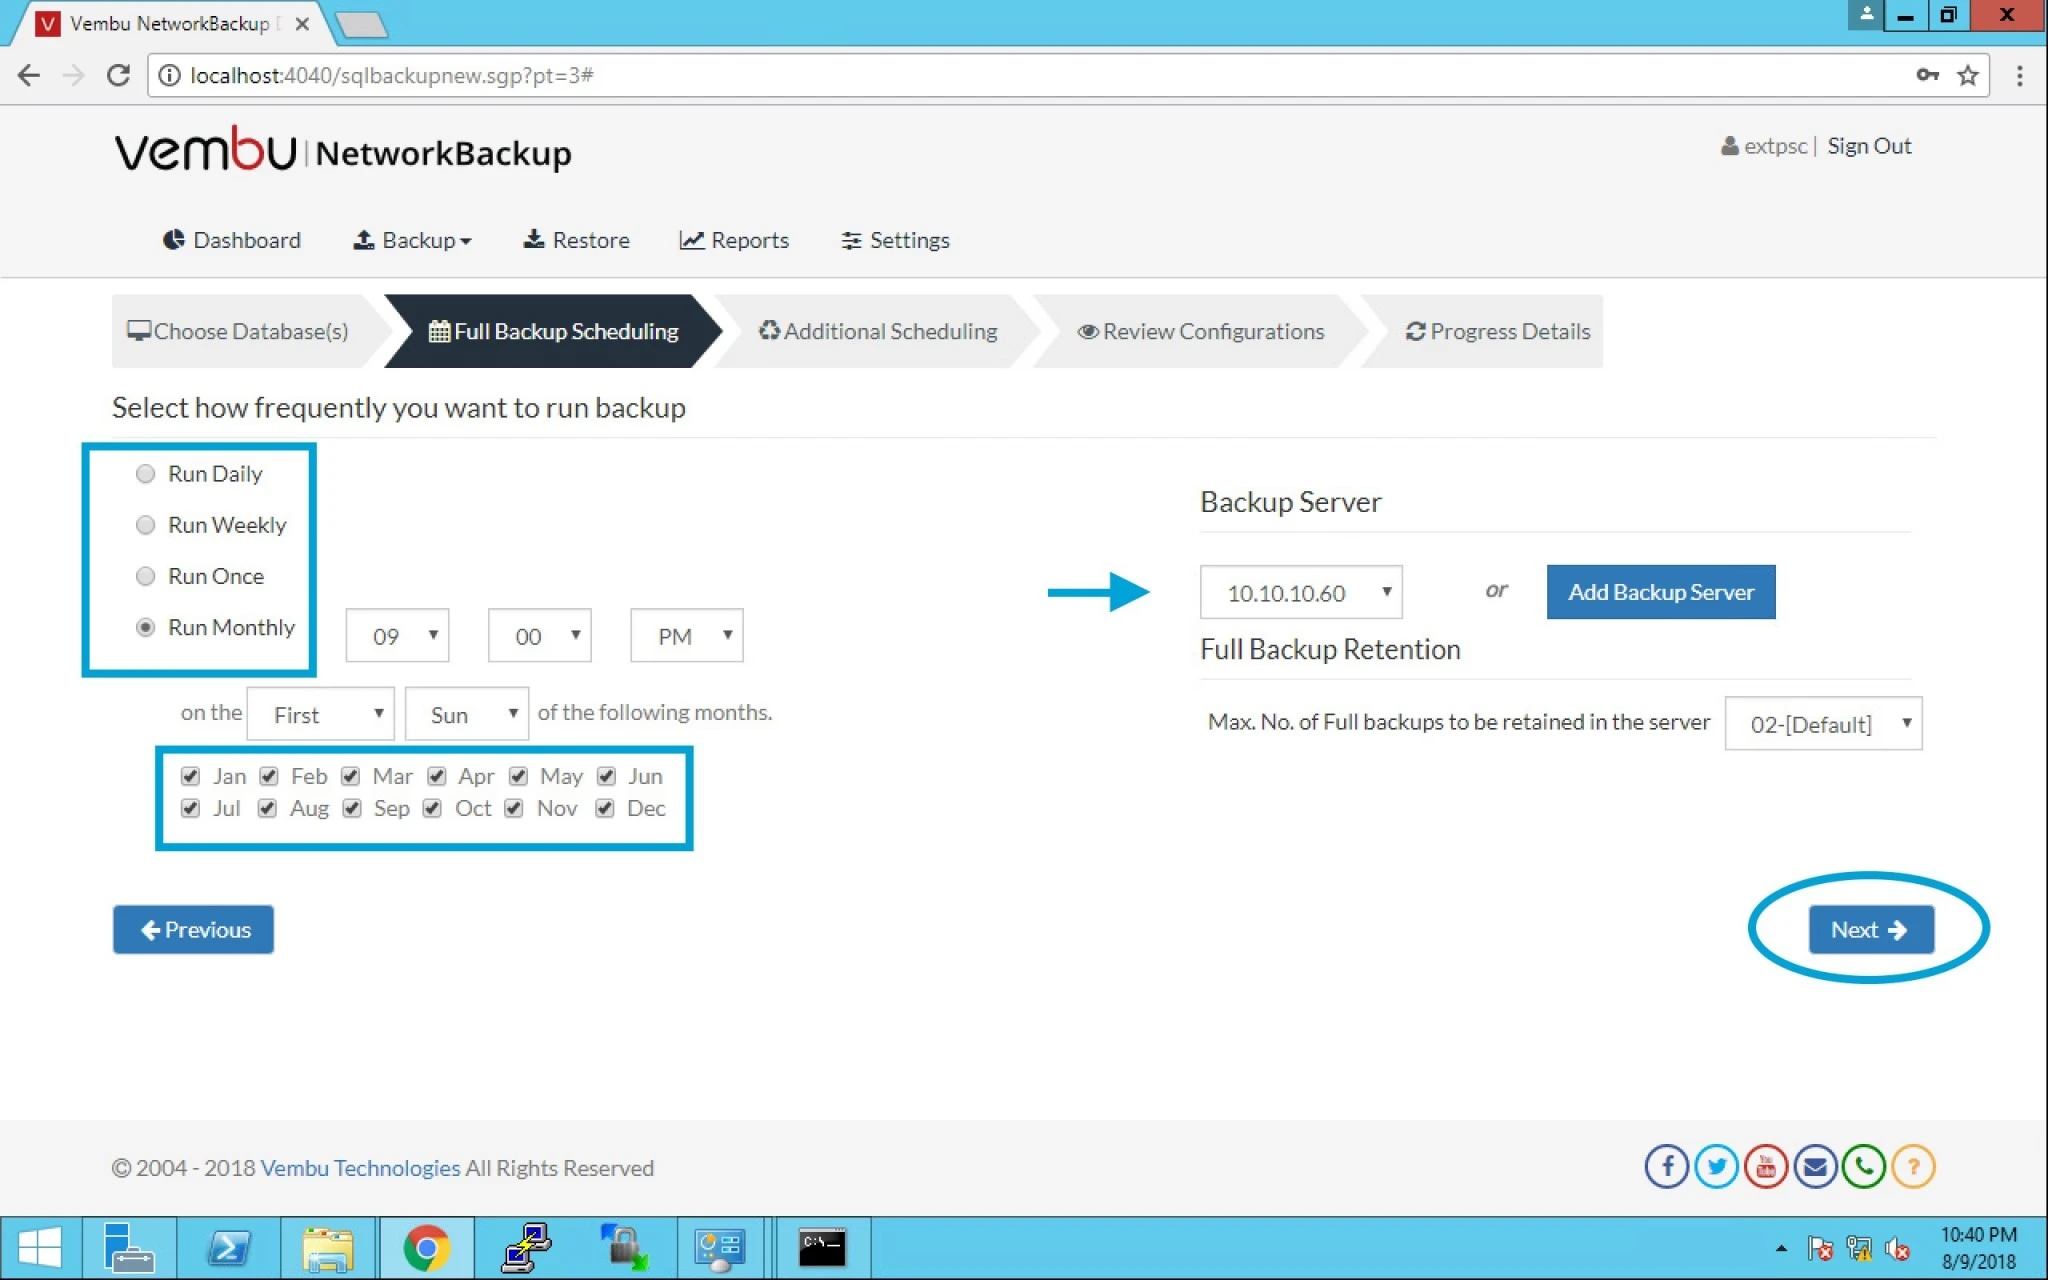
13.  In this option you can select the Frequency or when it will take backup like as given below:

a) Run Daily

b) Run Weekly

c) Run Once

d) Run Monthly

You can specify the time as well.


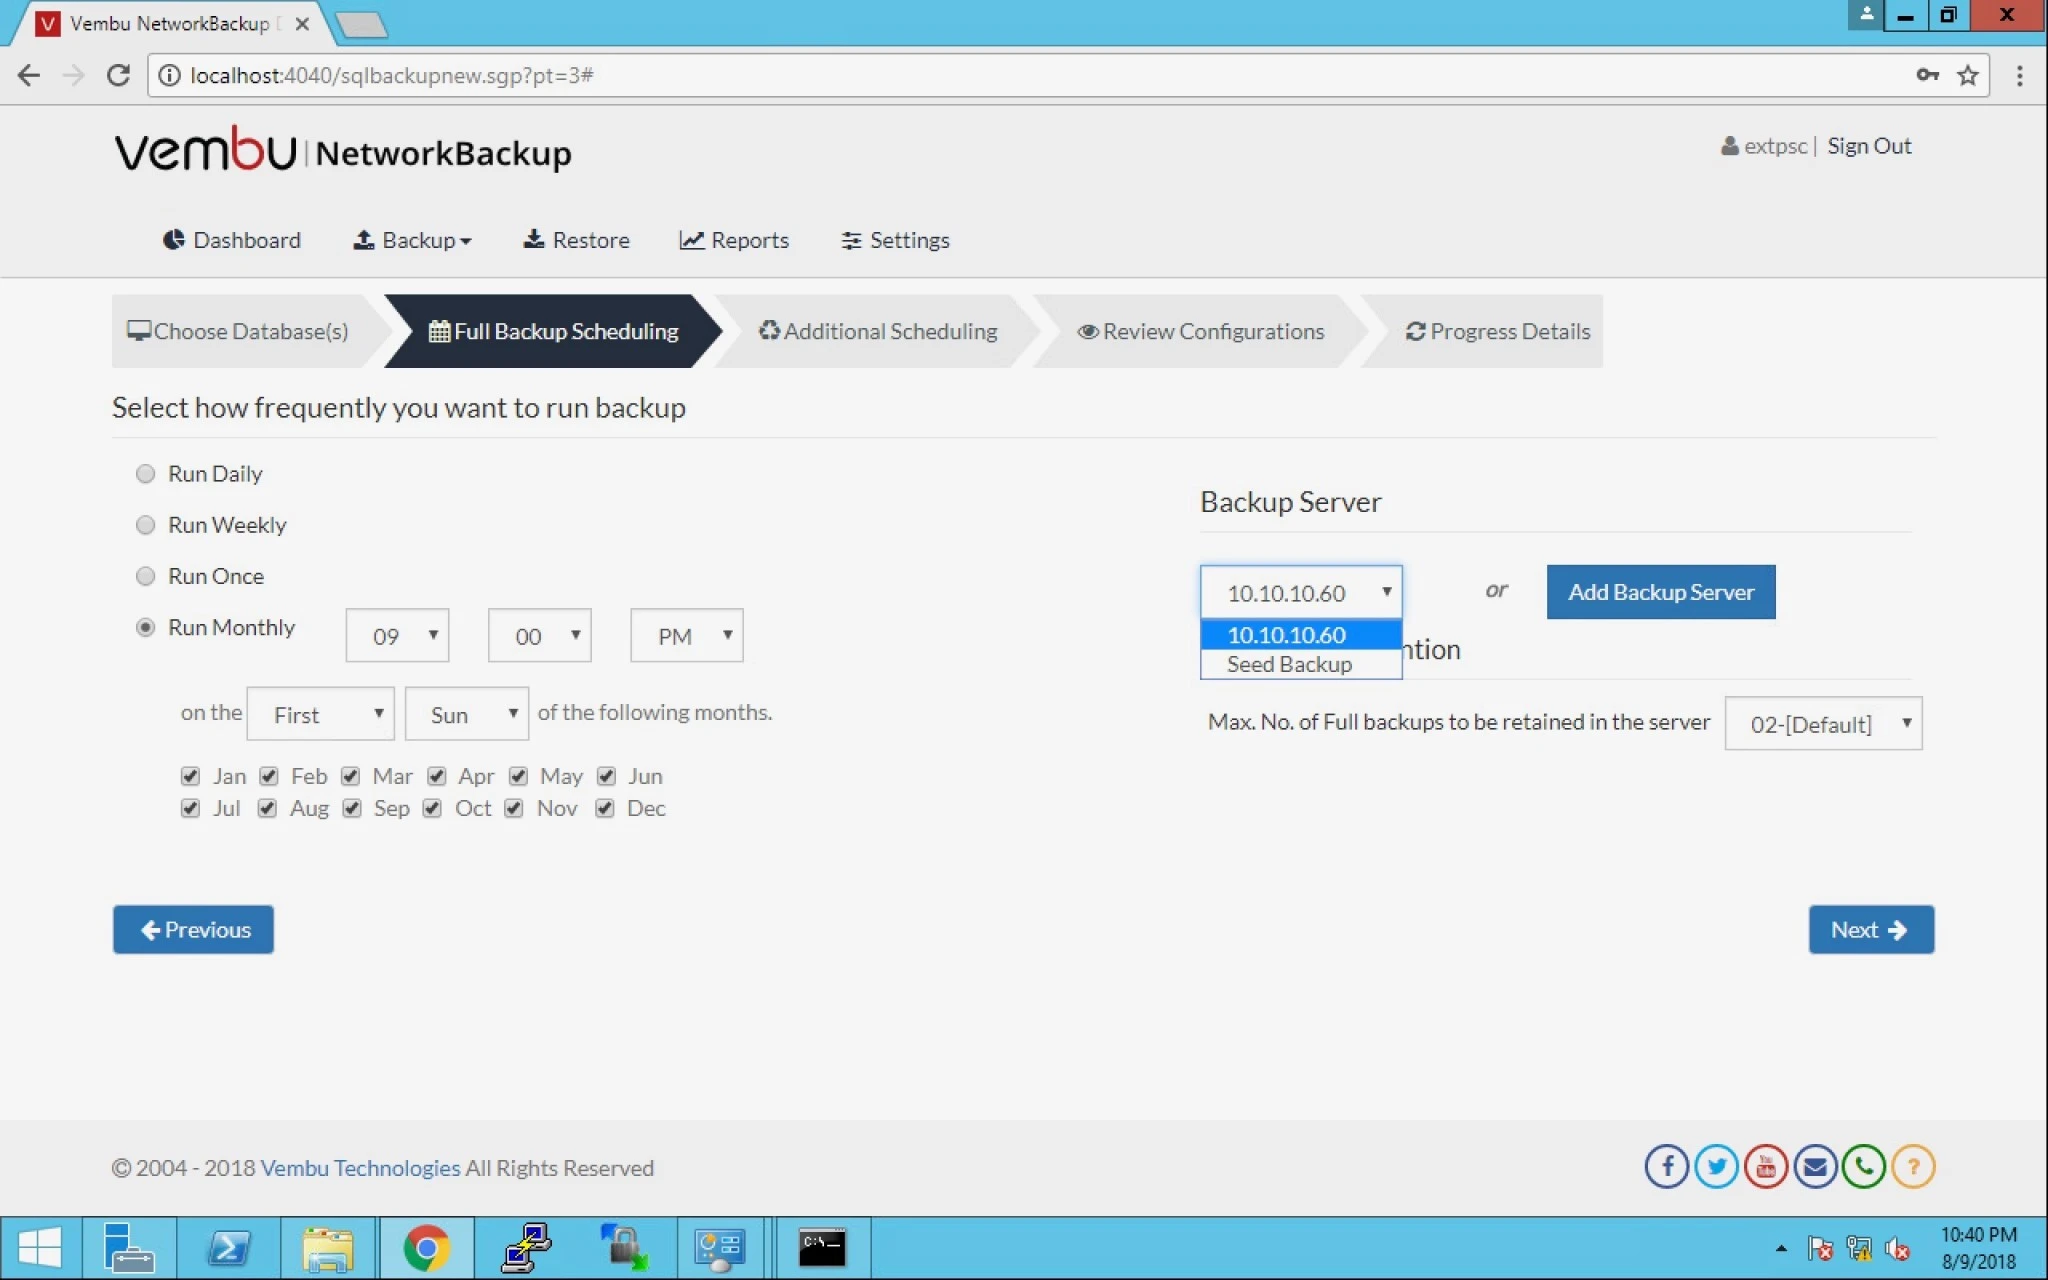
14. On the right hand side you can select Backup server or you have the option to add a backup server right here.


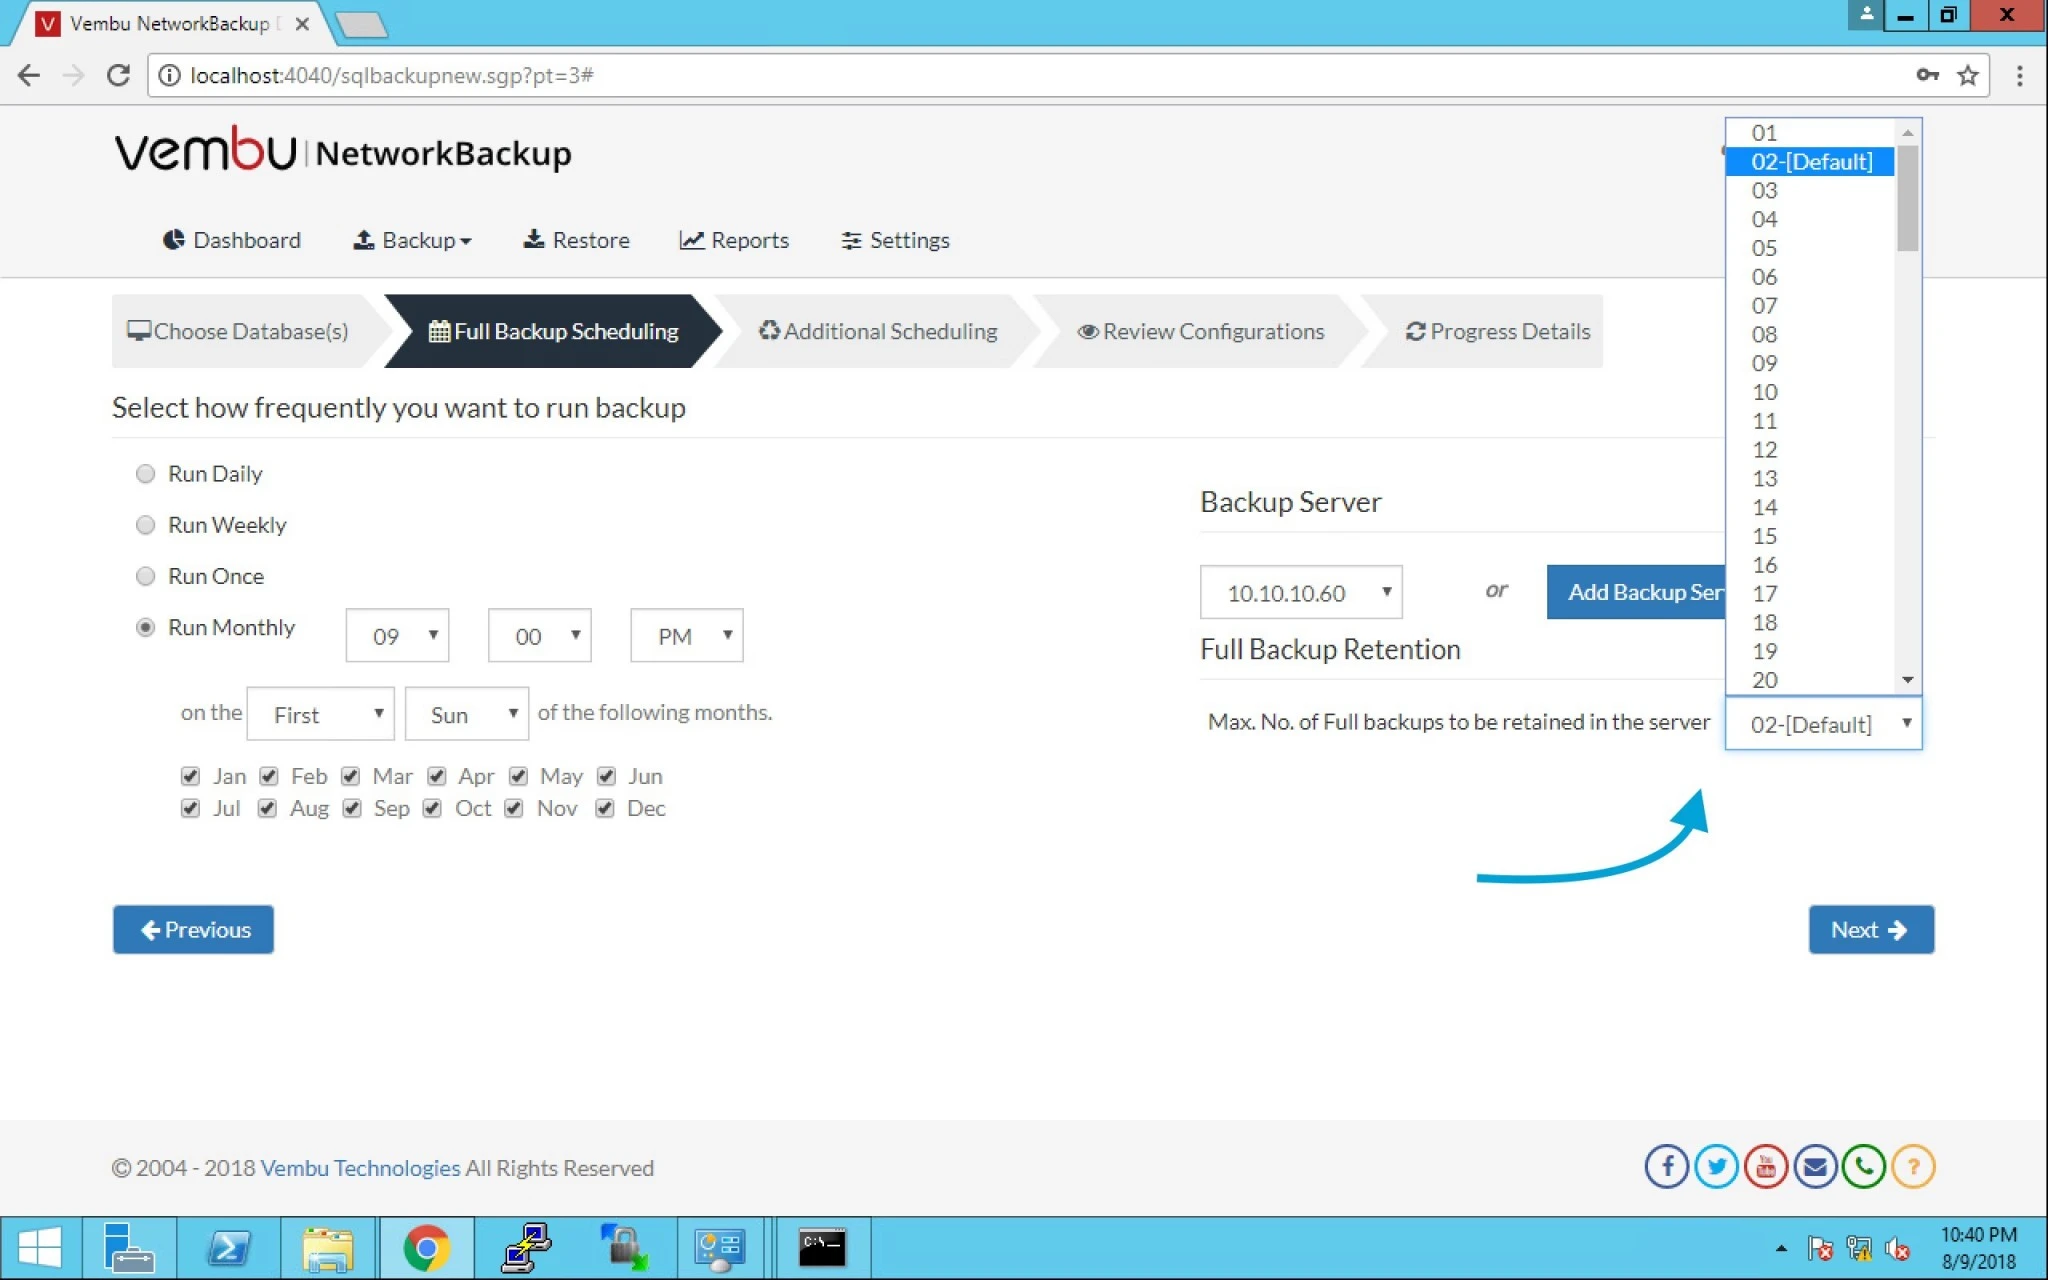
15. Here you can select Retention for this backup and click next.


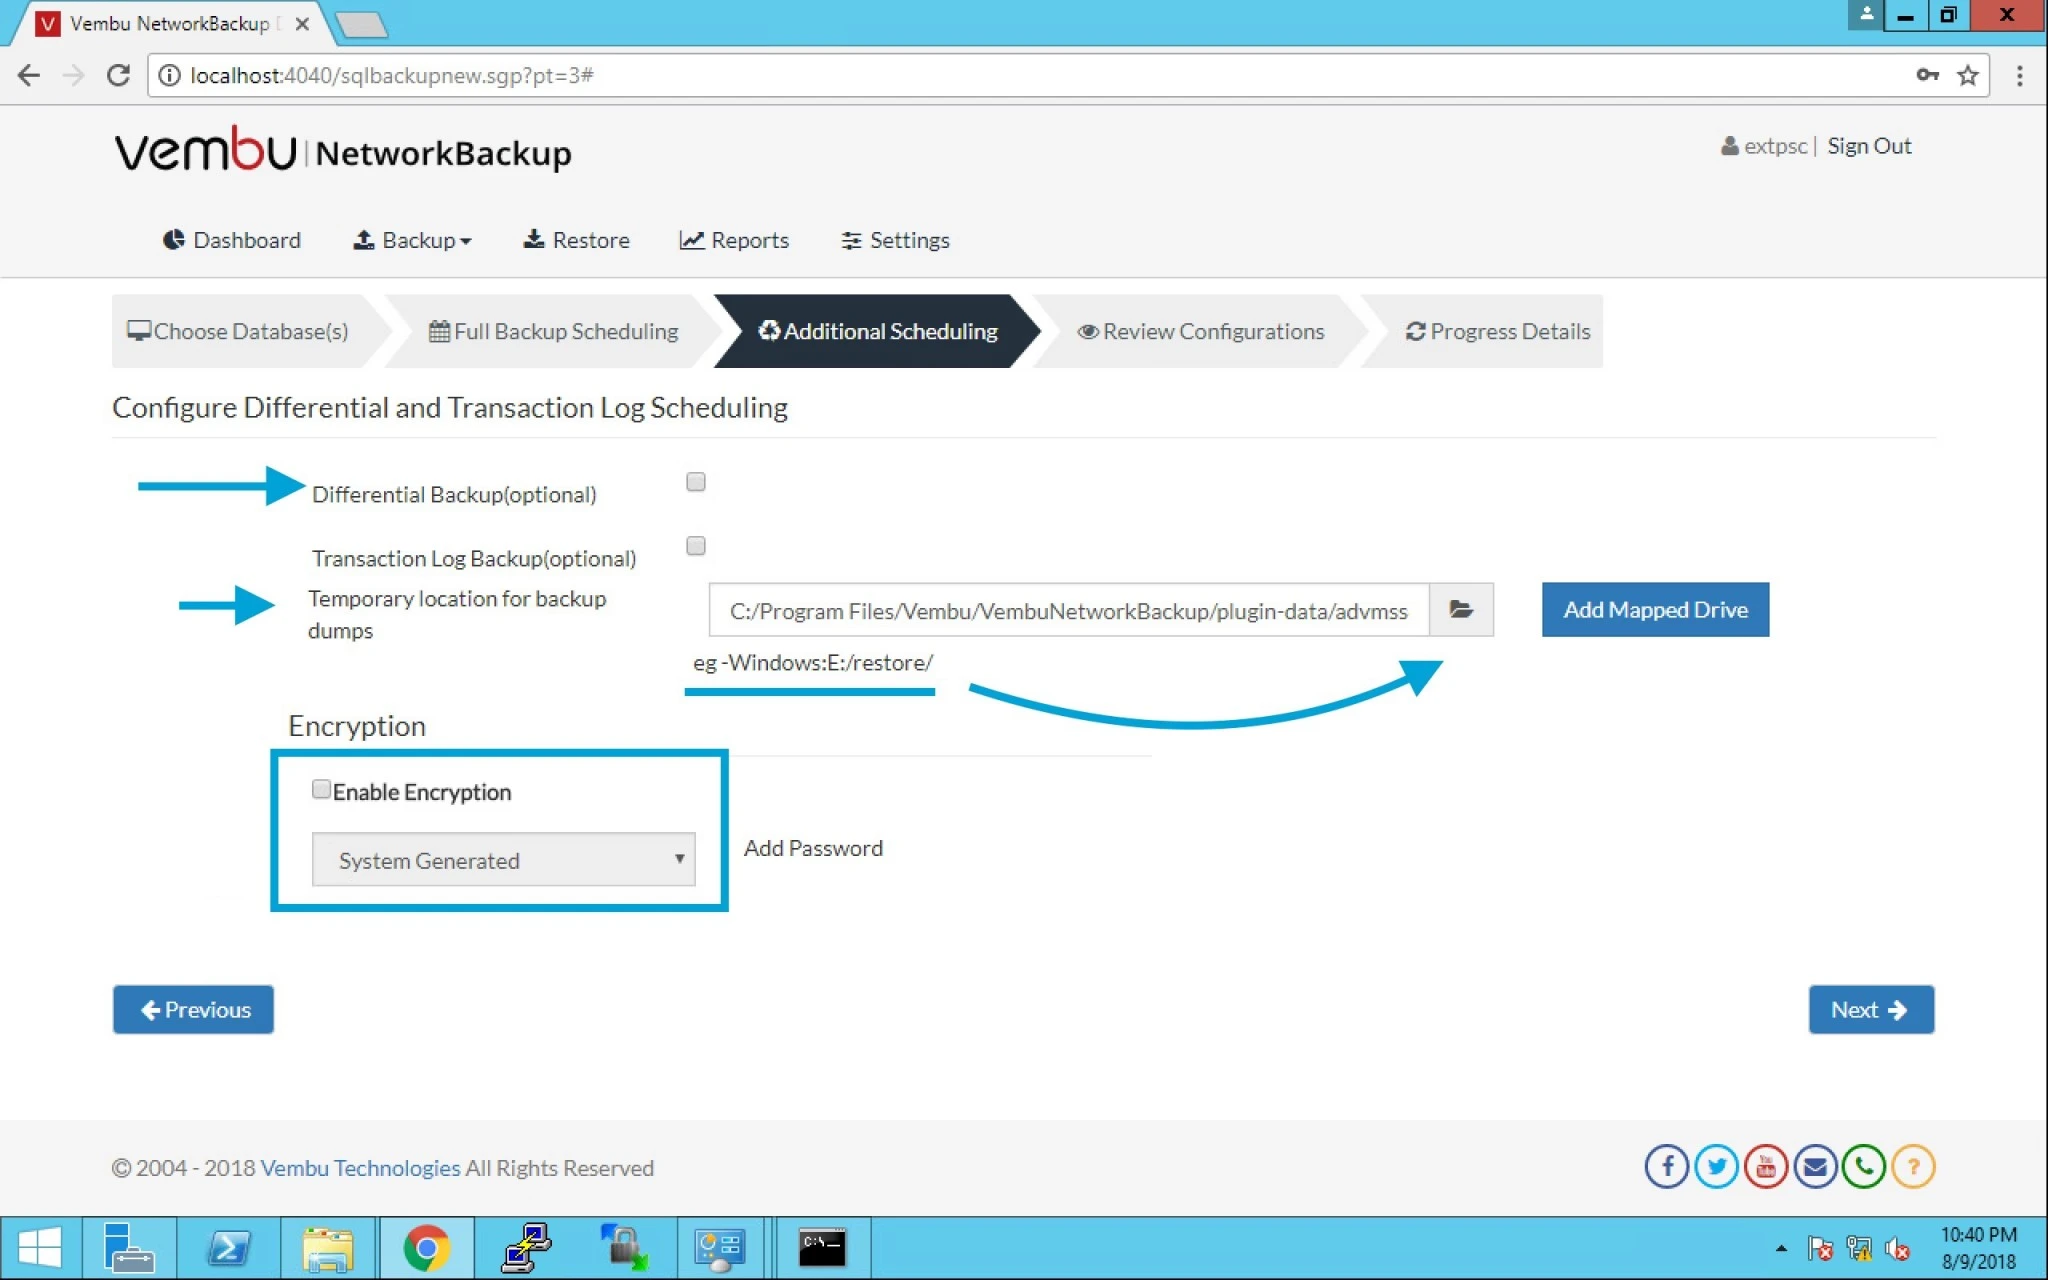
16. Here you have the options like Differential backup or Transaction Log Backup or even you can keep this in Temporary location.

Note: you can also select Encryption as per company policy or customer requirement.


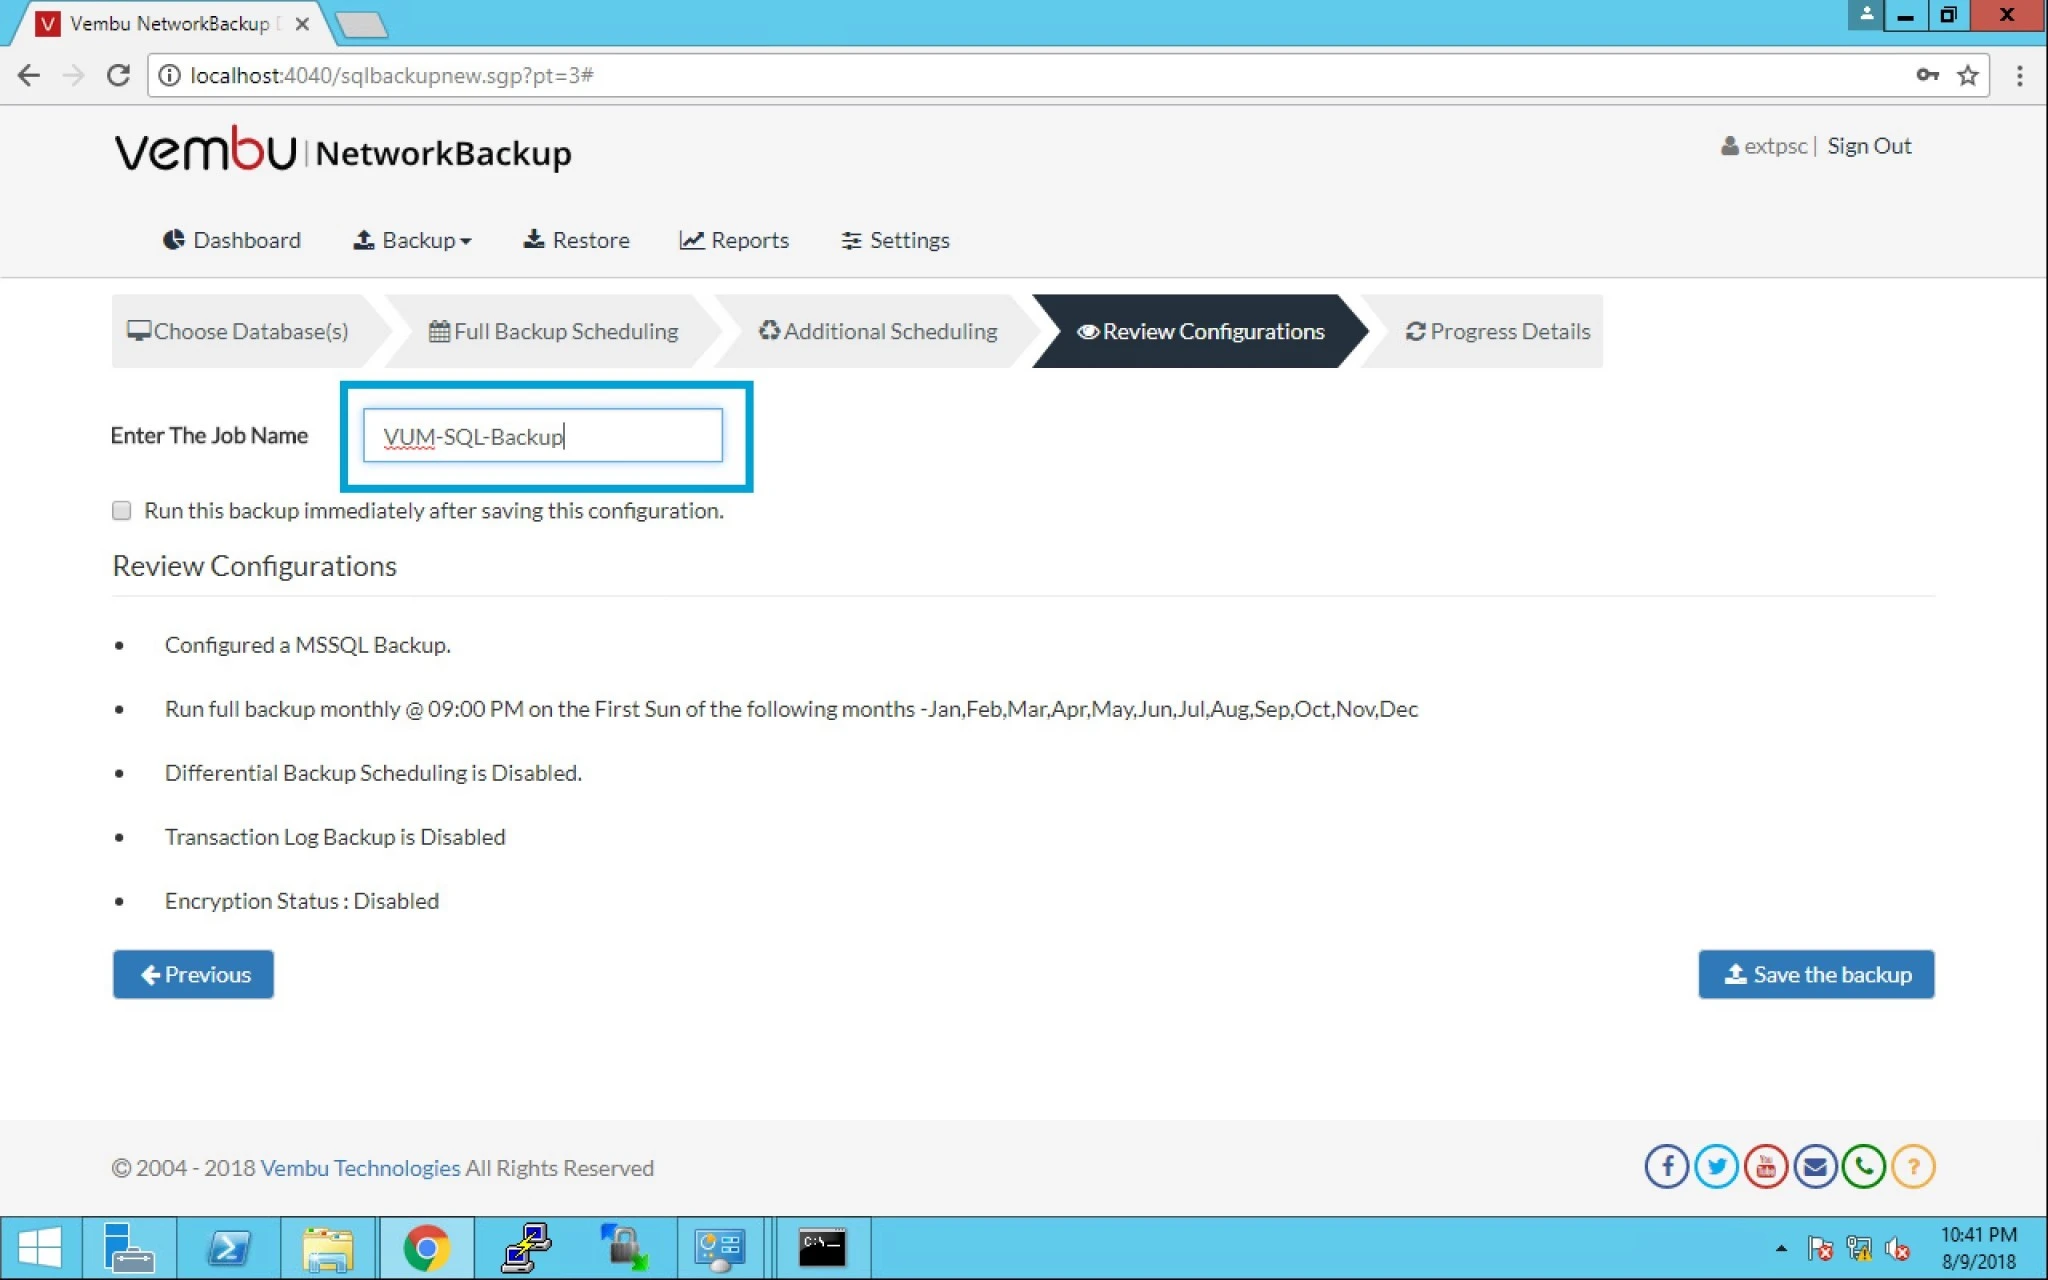
17. Enter your Job name and save the backup. Click next.


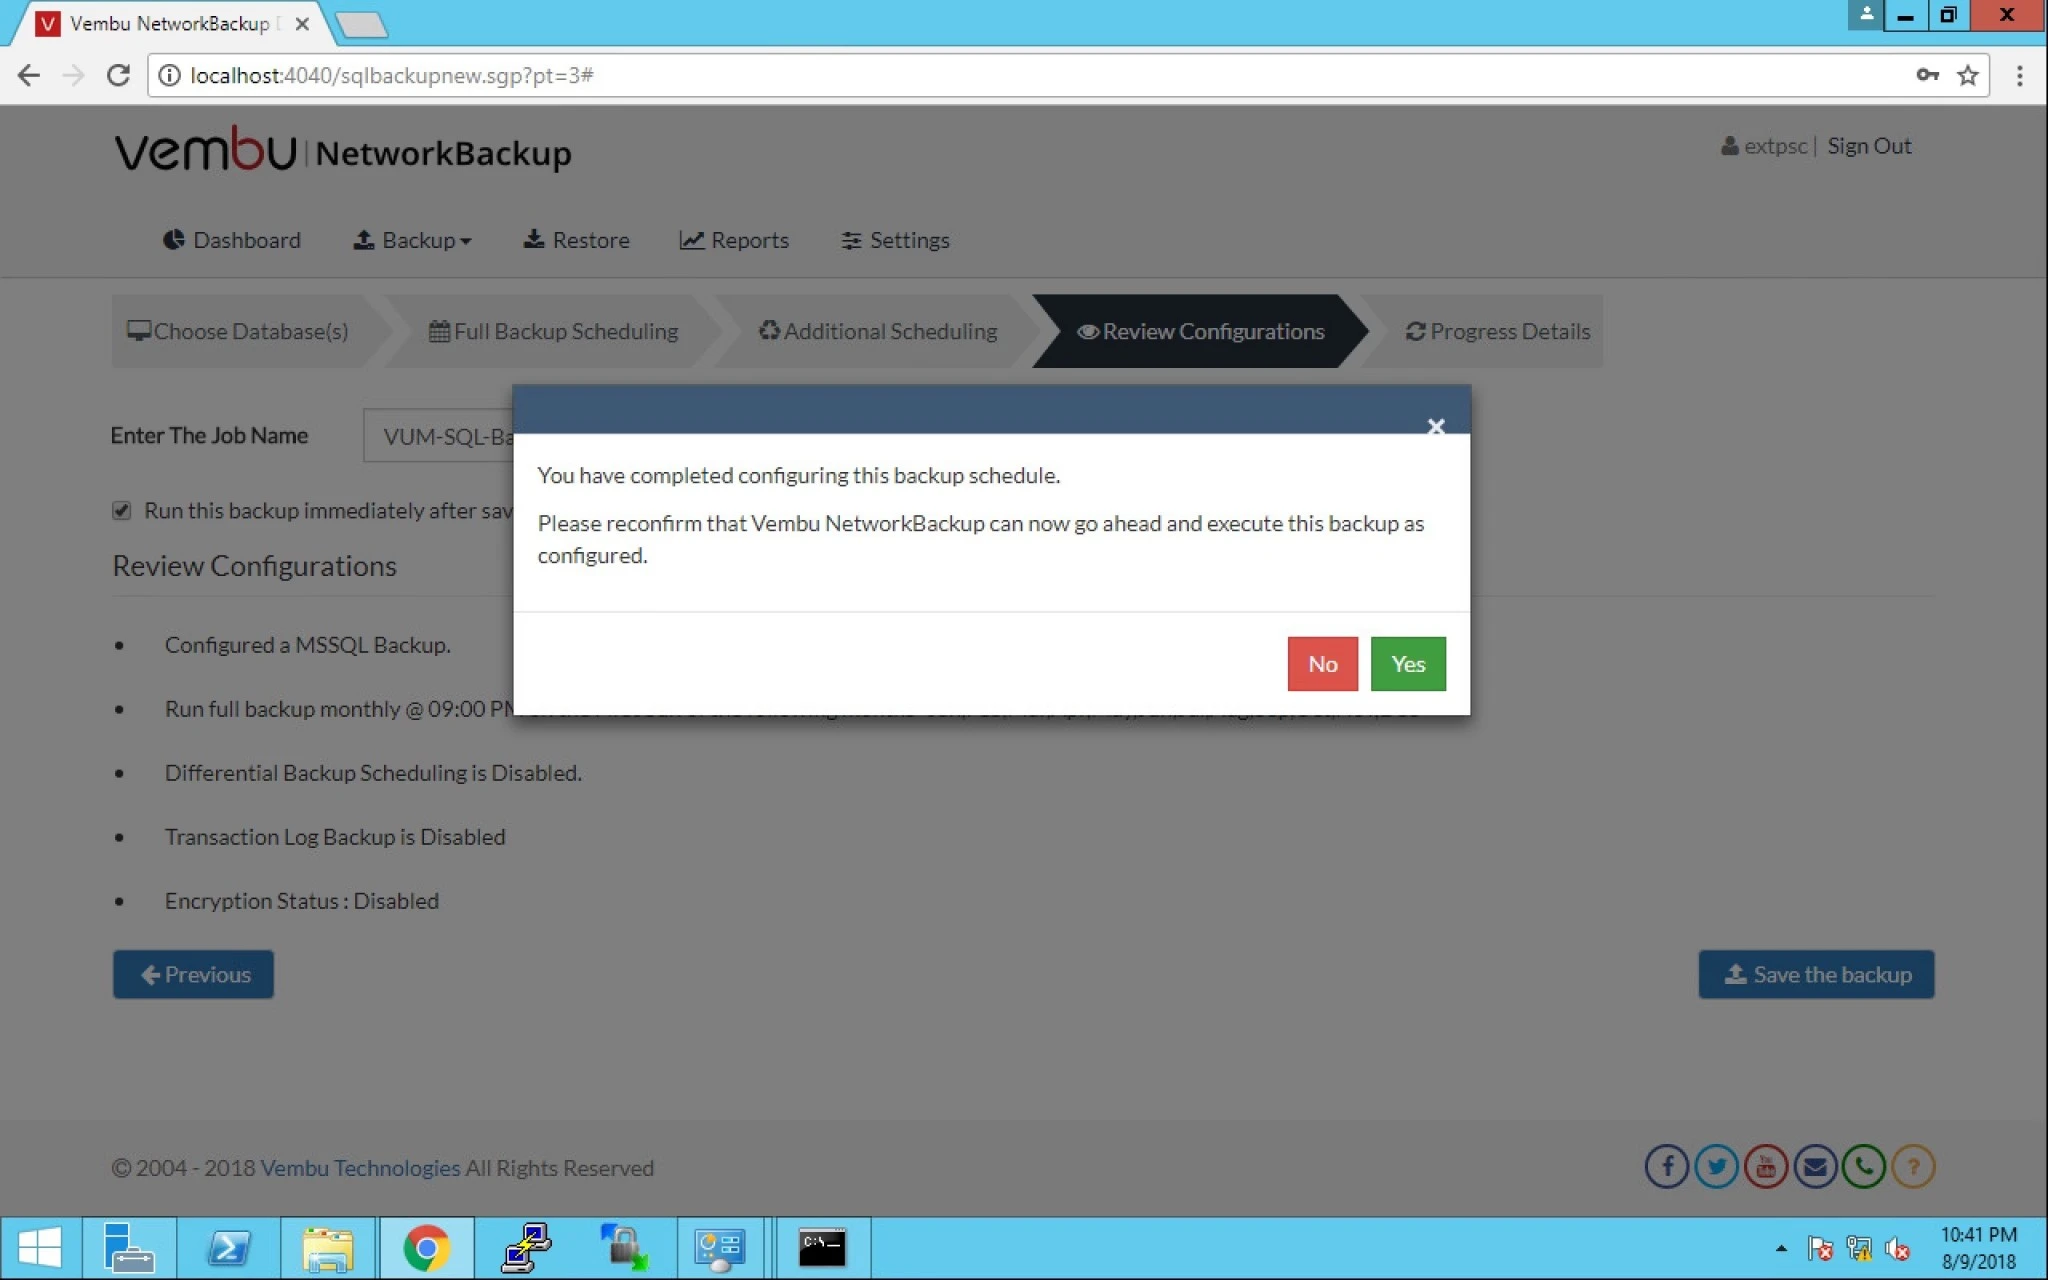
18. It will prompt you to reconfirm to go ahead and execute the backup configured.


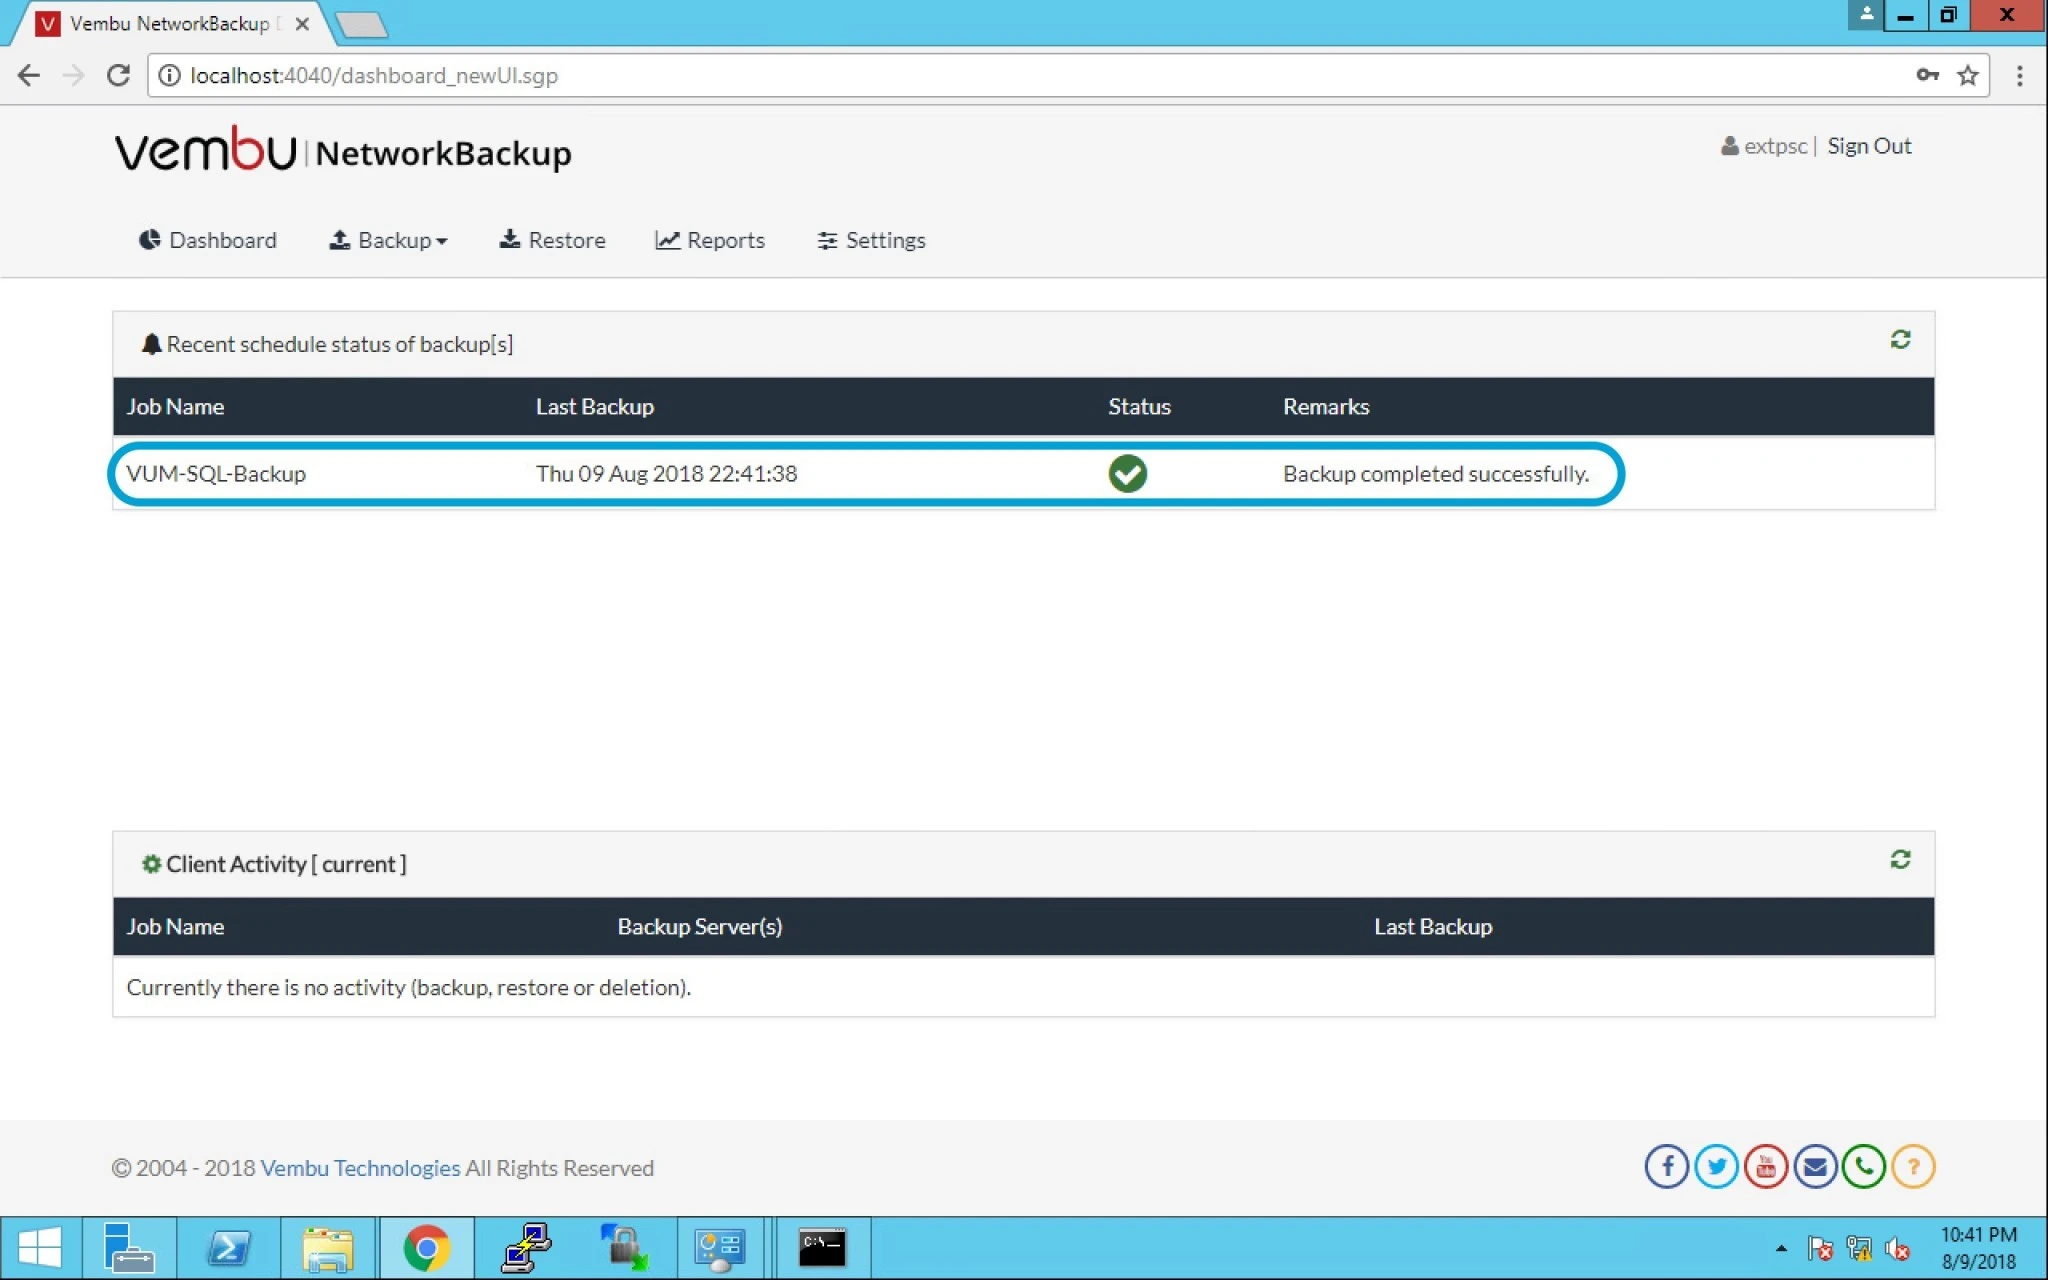
19. You can check the status under dashboard option for the backup executed successfully.
 

0

Vembu BDR Disaster Recovery Option

Topic Outline:

Disaster Recovery

Restore Options

Restore Time

Restore Report


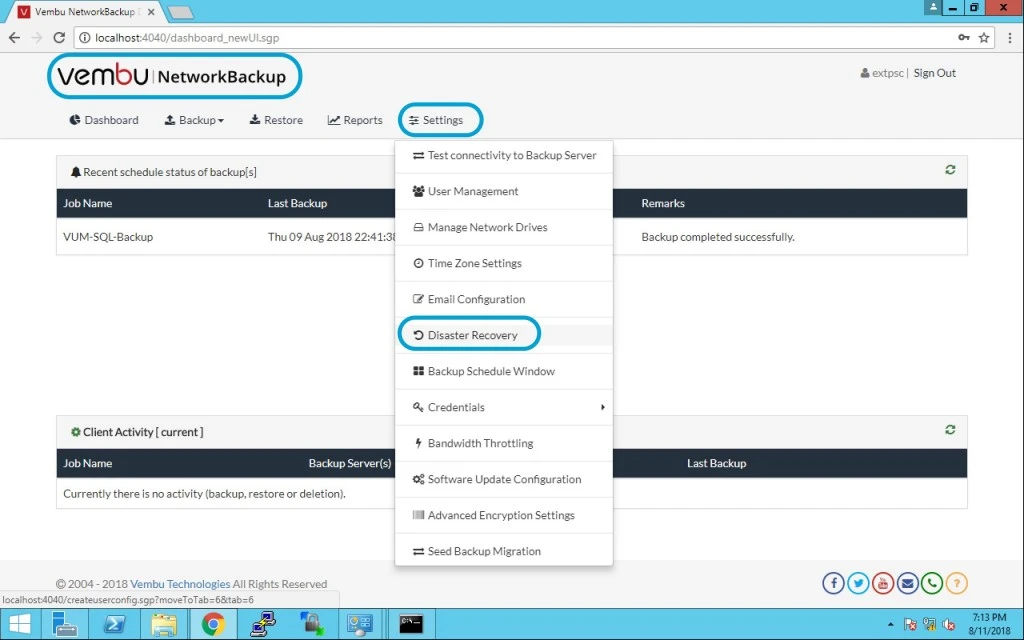
When there is a requirement for a client machine to reinstall a fresh Vembu NetworkBackup, in a case you loose all the configured backup jobs. In such a situation the Disaster recovery solutions is a life saving solution and that allows you to restore client configuration from backup servers.

Lets assume you have a client data which is relocated to another machine where resuming backup jobs will be required.

Note: If the backup job is encrypted or password protected, then the user will be required to provide the secured key or password by editing the backup job before resuming it.


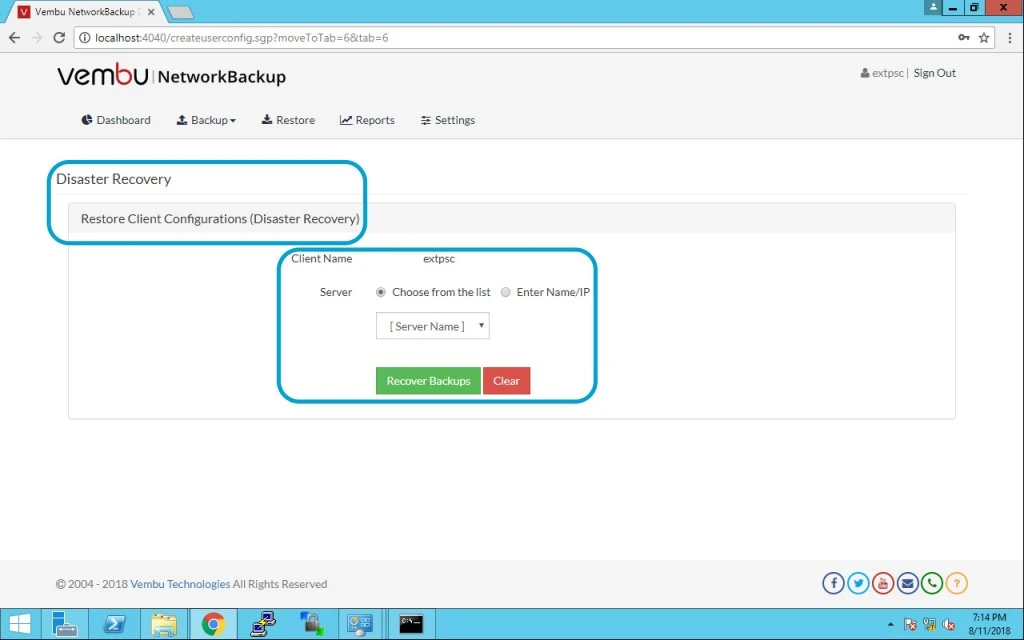
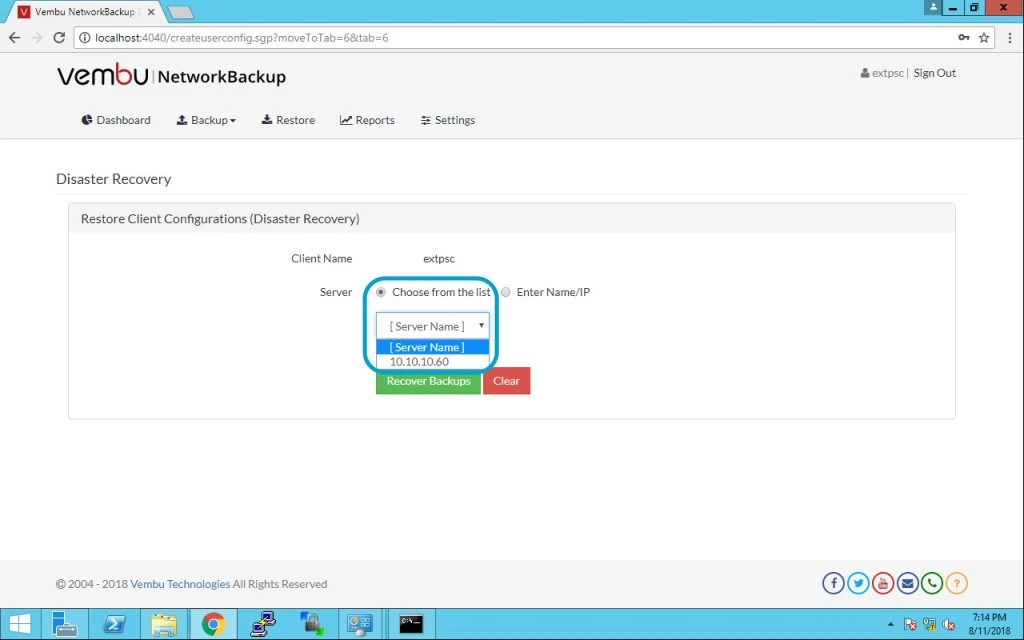
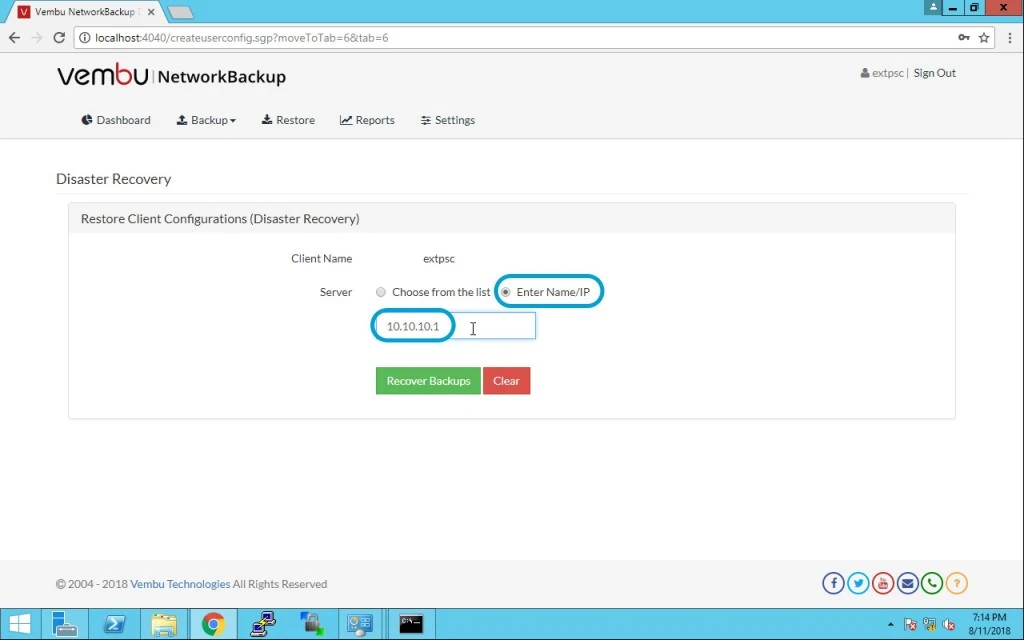
Choose servers

  • User can either choose servers from the list of added servers or provide a server IP


  • Note: Before doing this disaster recovery task it should be well tested and functioning perfectly via test connectivity.


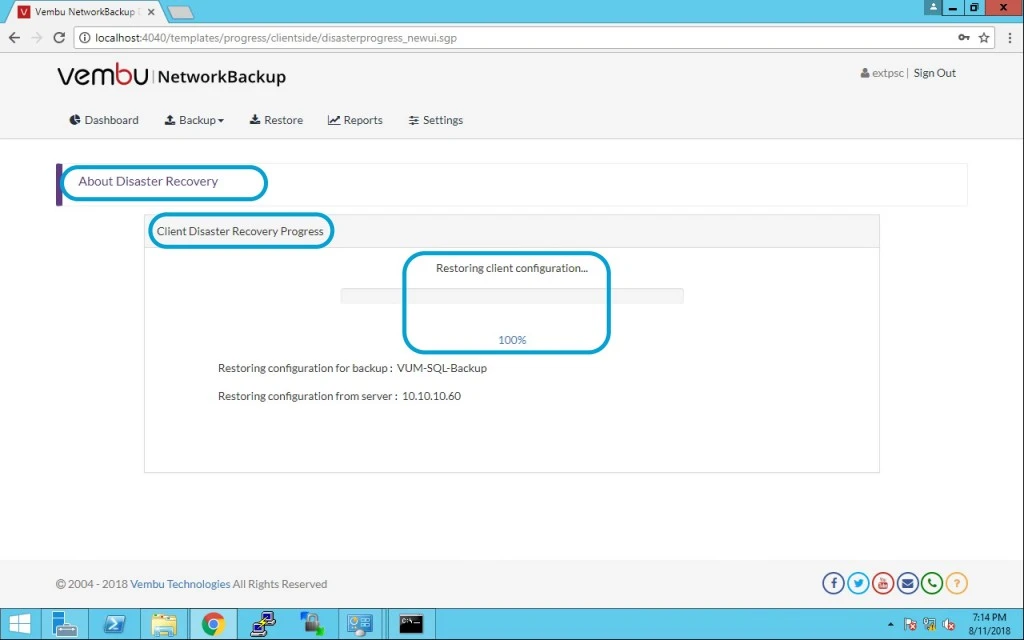
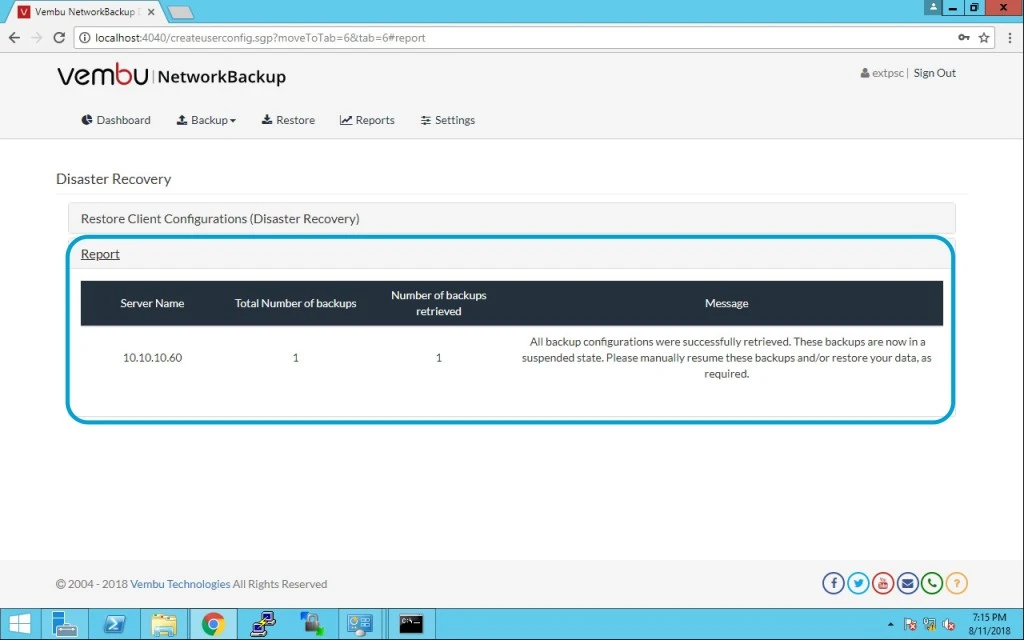
Here you can see the progress and percentage for completion.(Note: In my case this is fast and done in seconds)


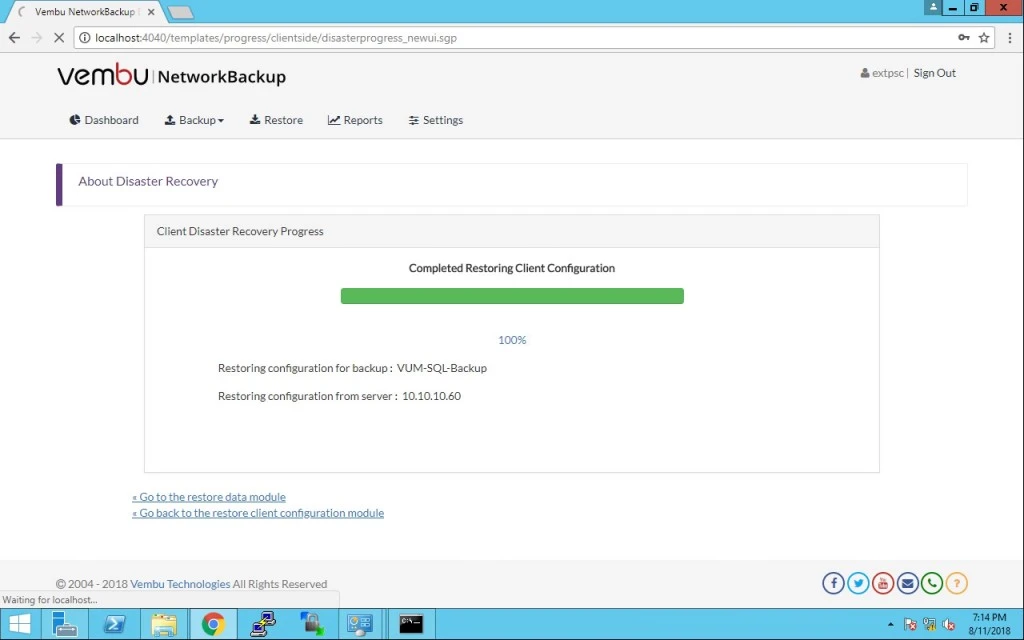
After completion of this restore job you can see below status.


Once restore completes successfully, you will be redirected to reports page with the report for successful restore completion. Here you can see all the reports for disaster recovery.