0

How to Restore MS SQL database via Vembu

Topic outline:

MS SQL Restore

Previously Restored Data

Restore Data from Backup  

Time Stamp

Type of Restore

Recovery State


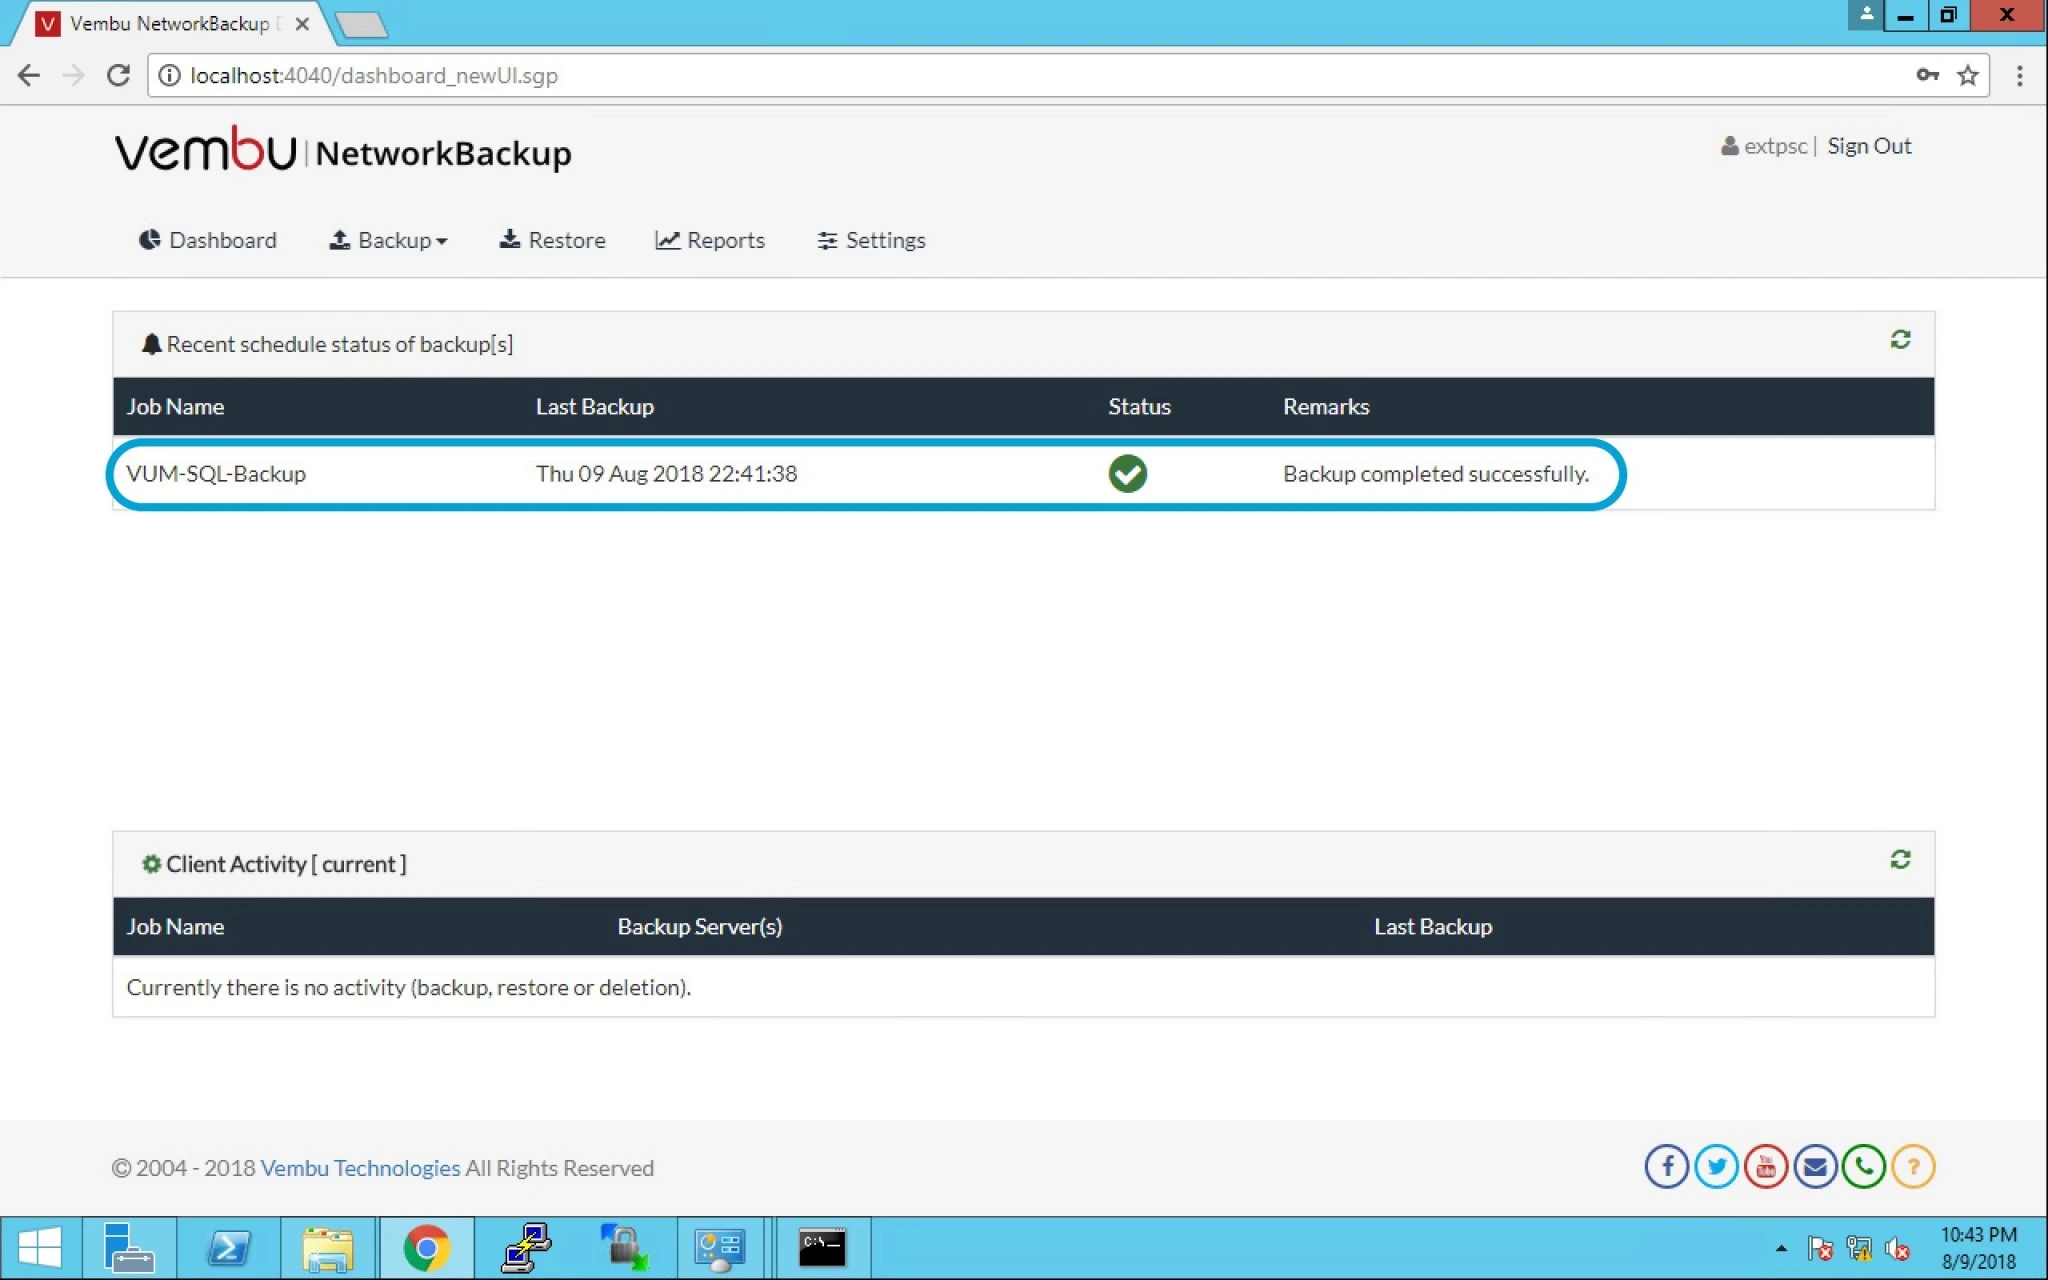
  1. Login into Vembu Network Backup page and check the last successfully completed backup.
 

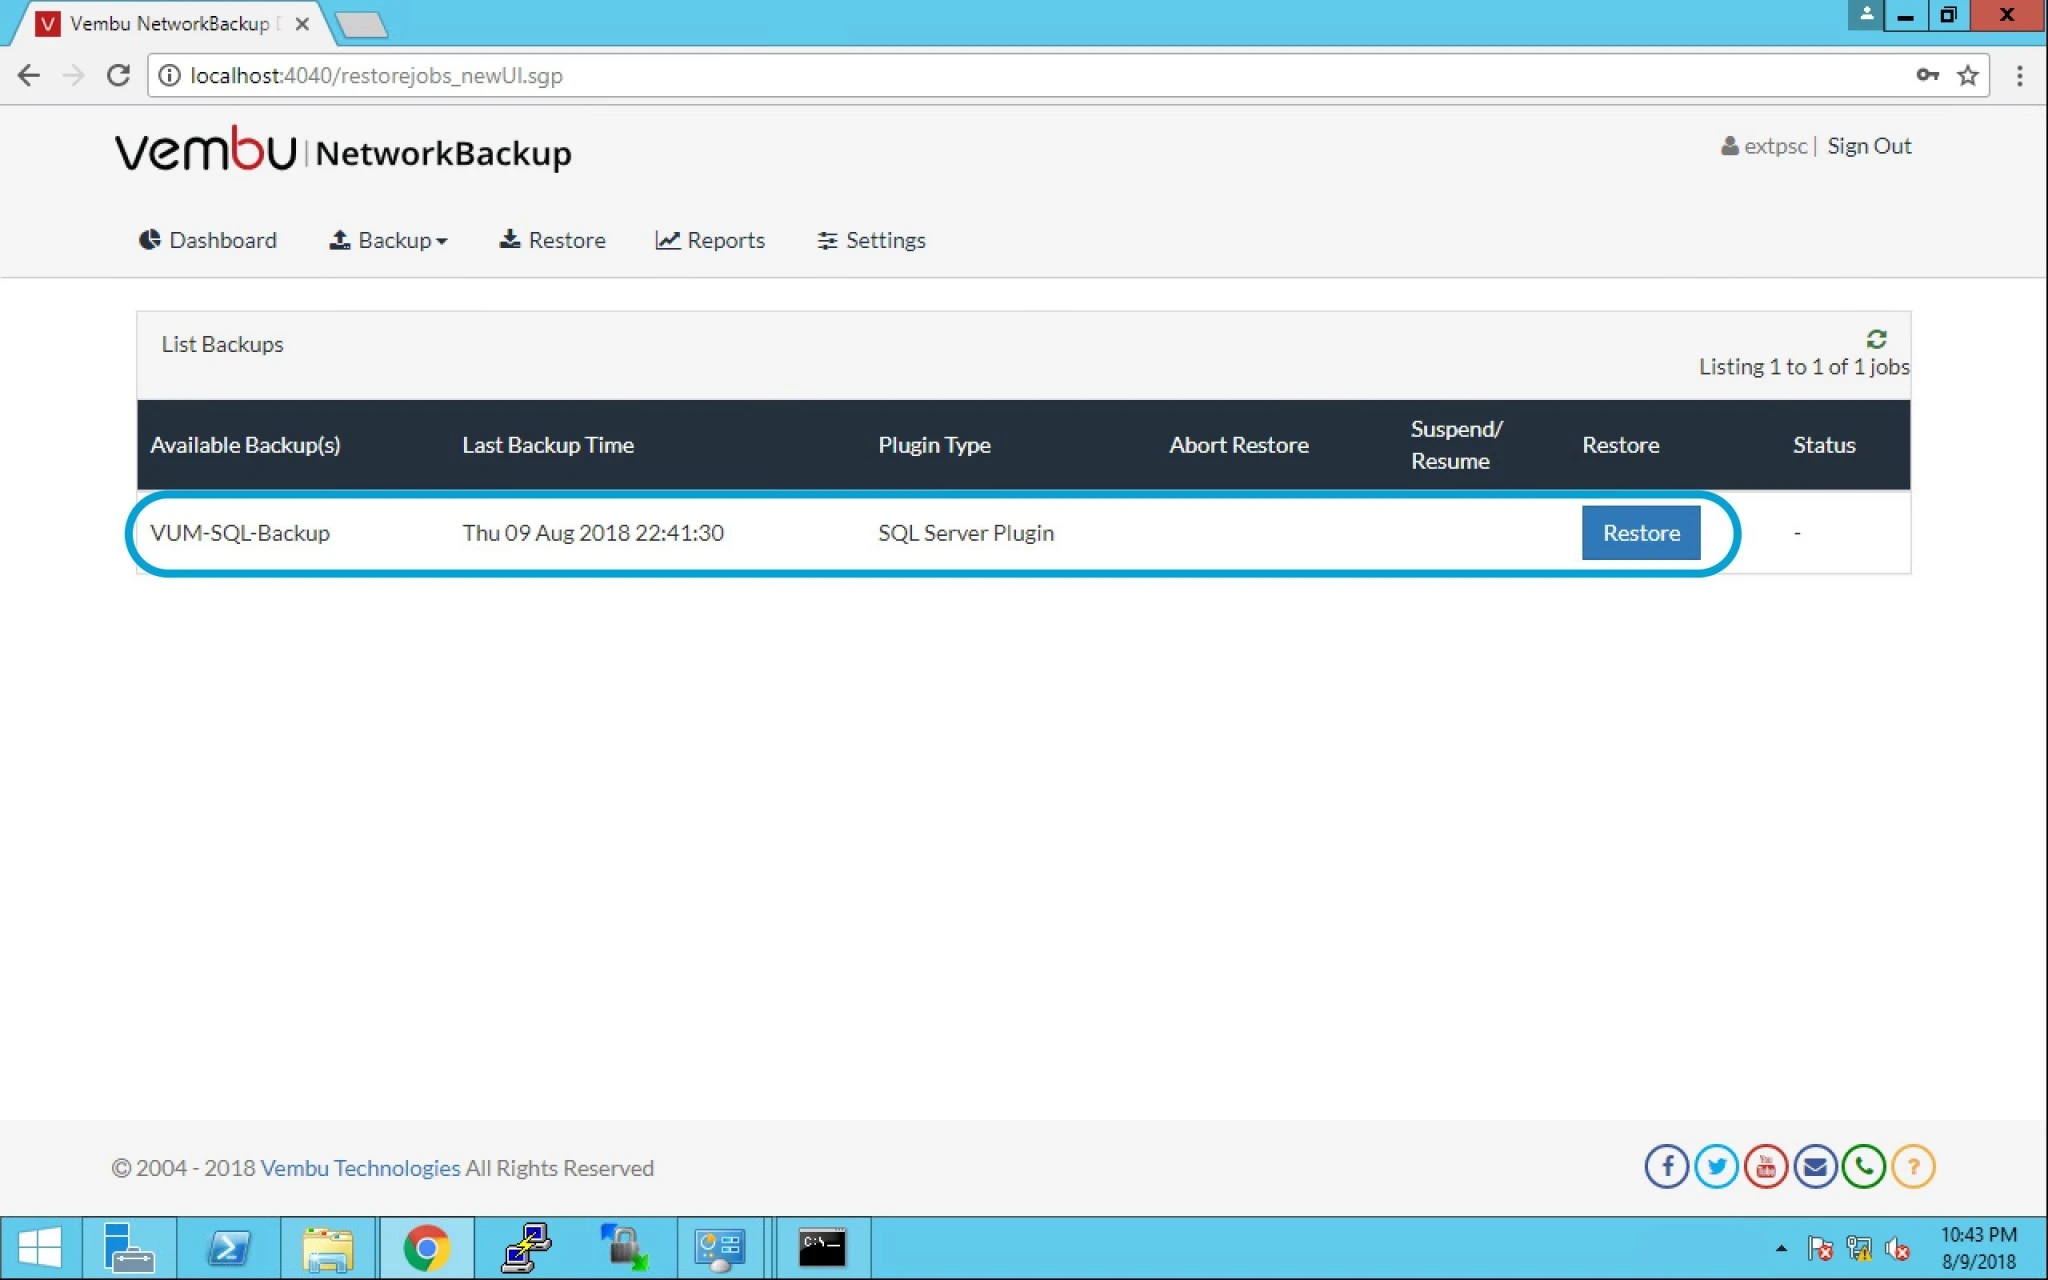
2. Now Click on Restore option and you can see available backup to restore.


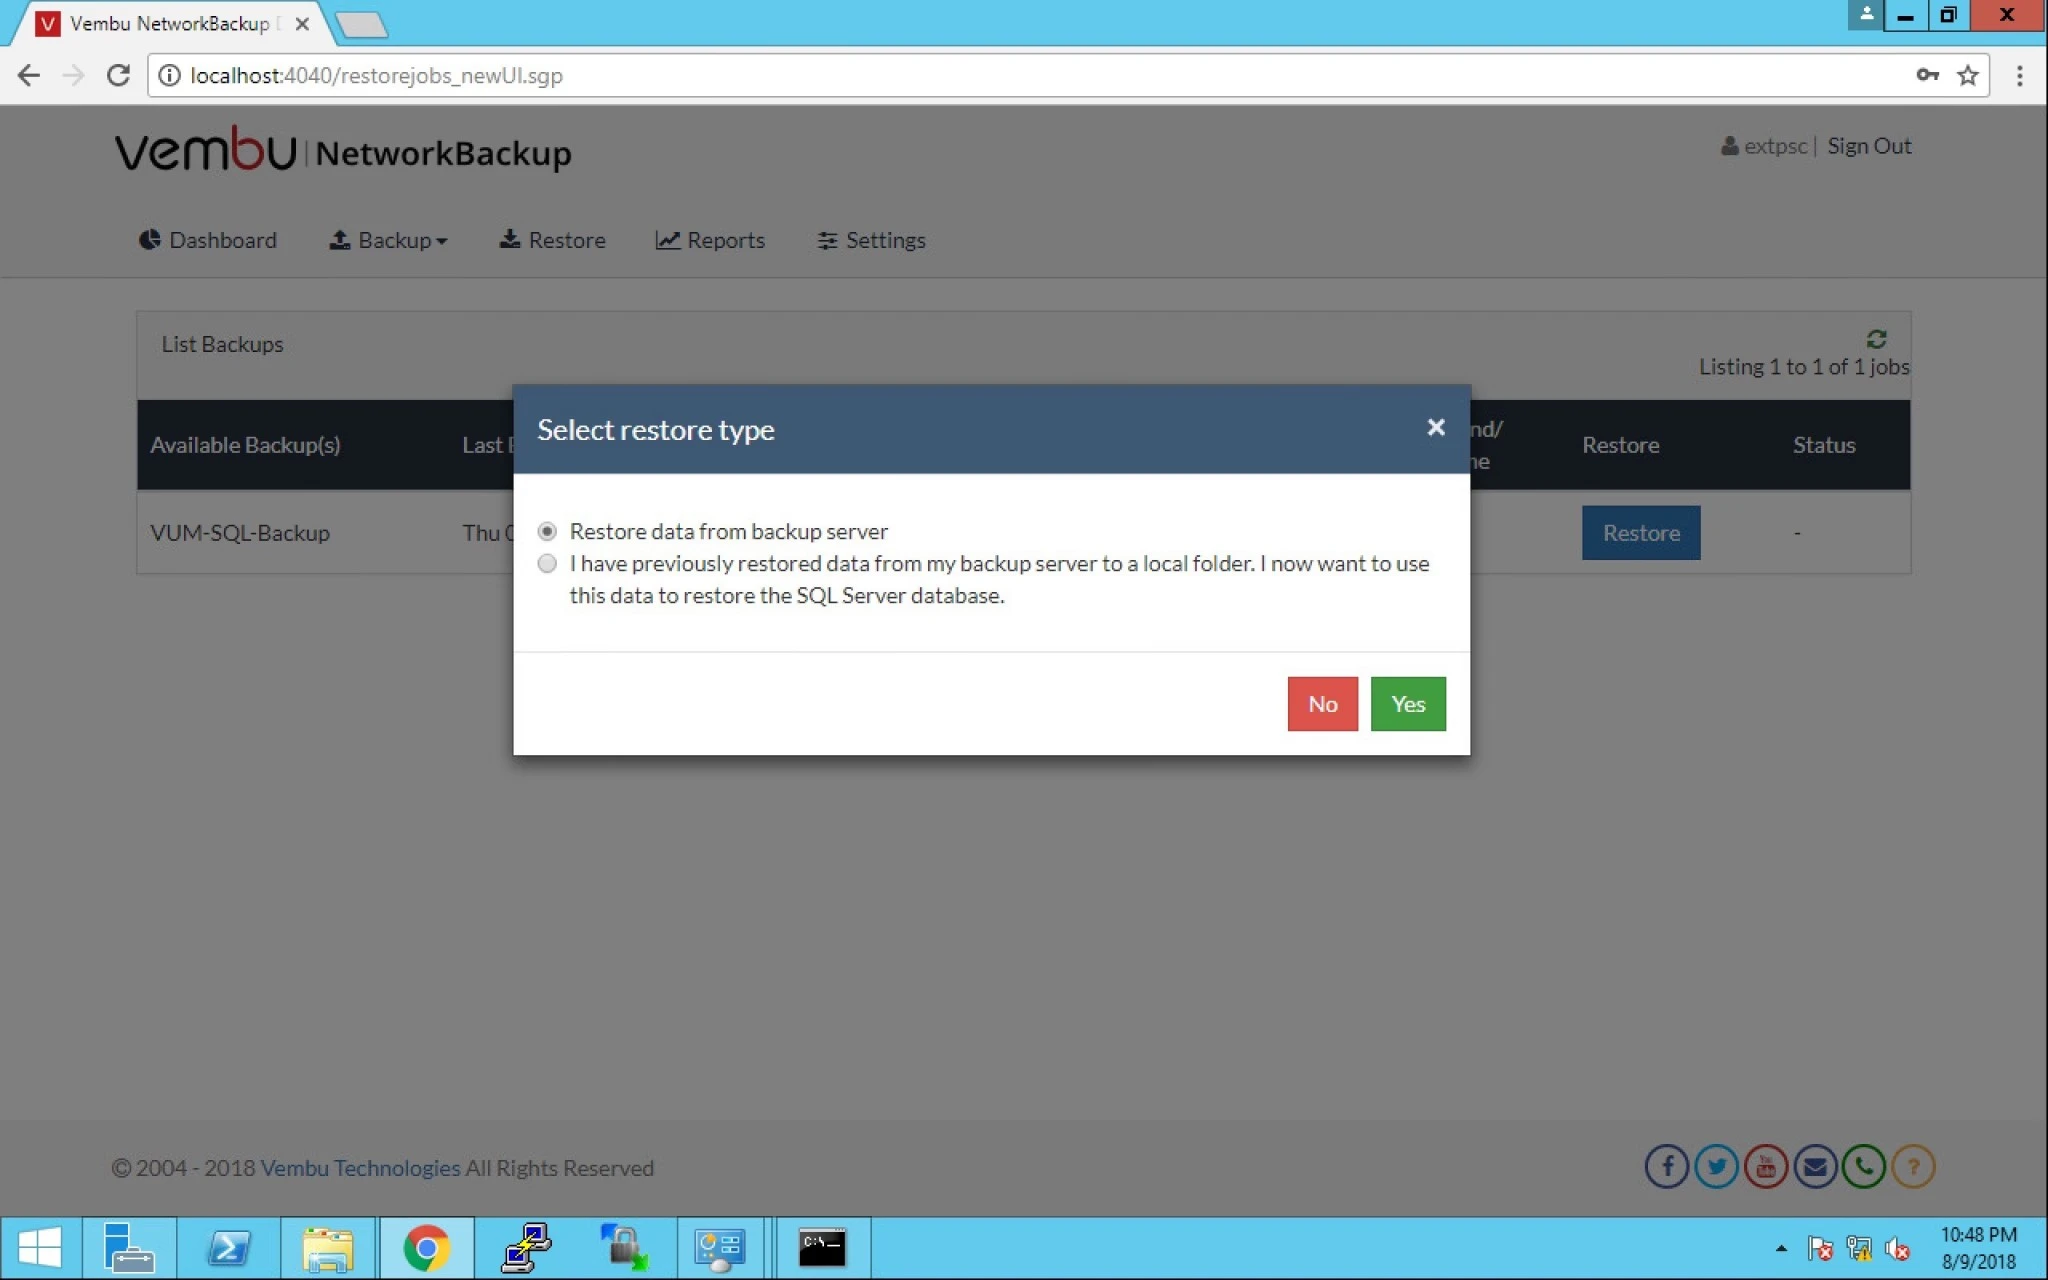
3. Now there are two options given below:

a) Restore Data from backup server. And

b) I have previously restored data from my backup server to a local folder. I now want to use this data to restore the MS SQL Server. 
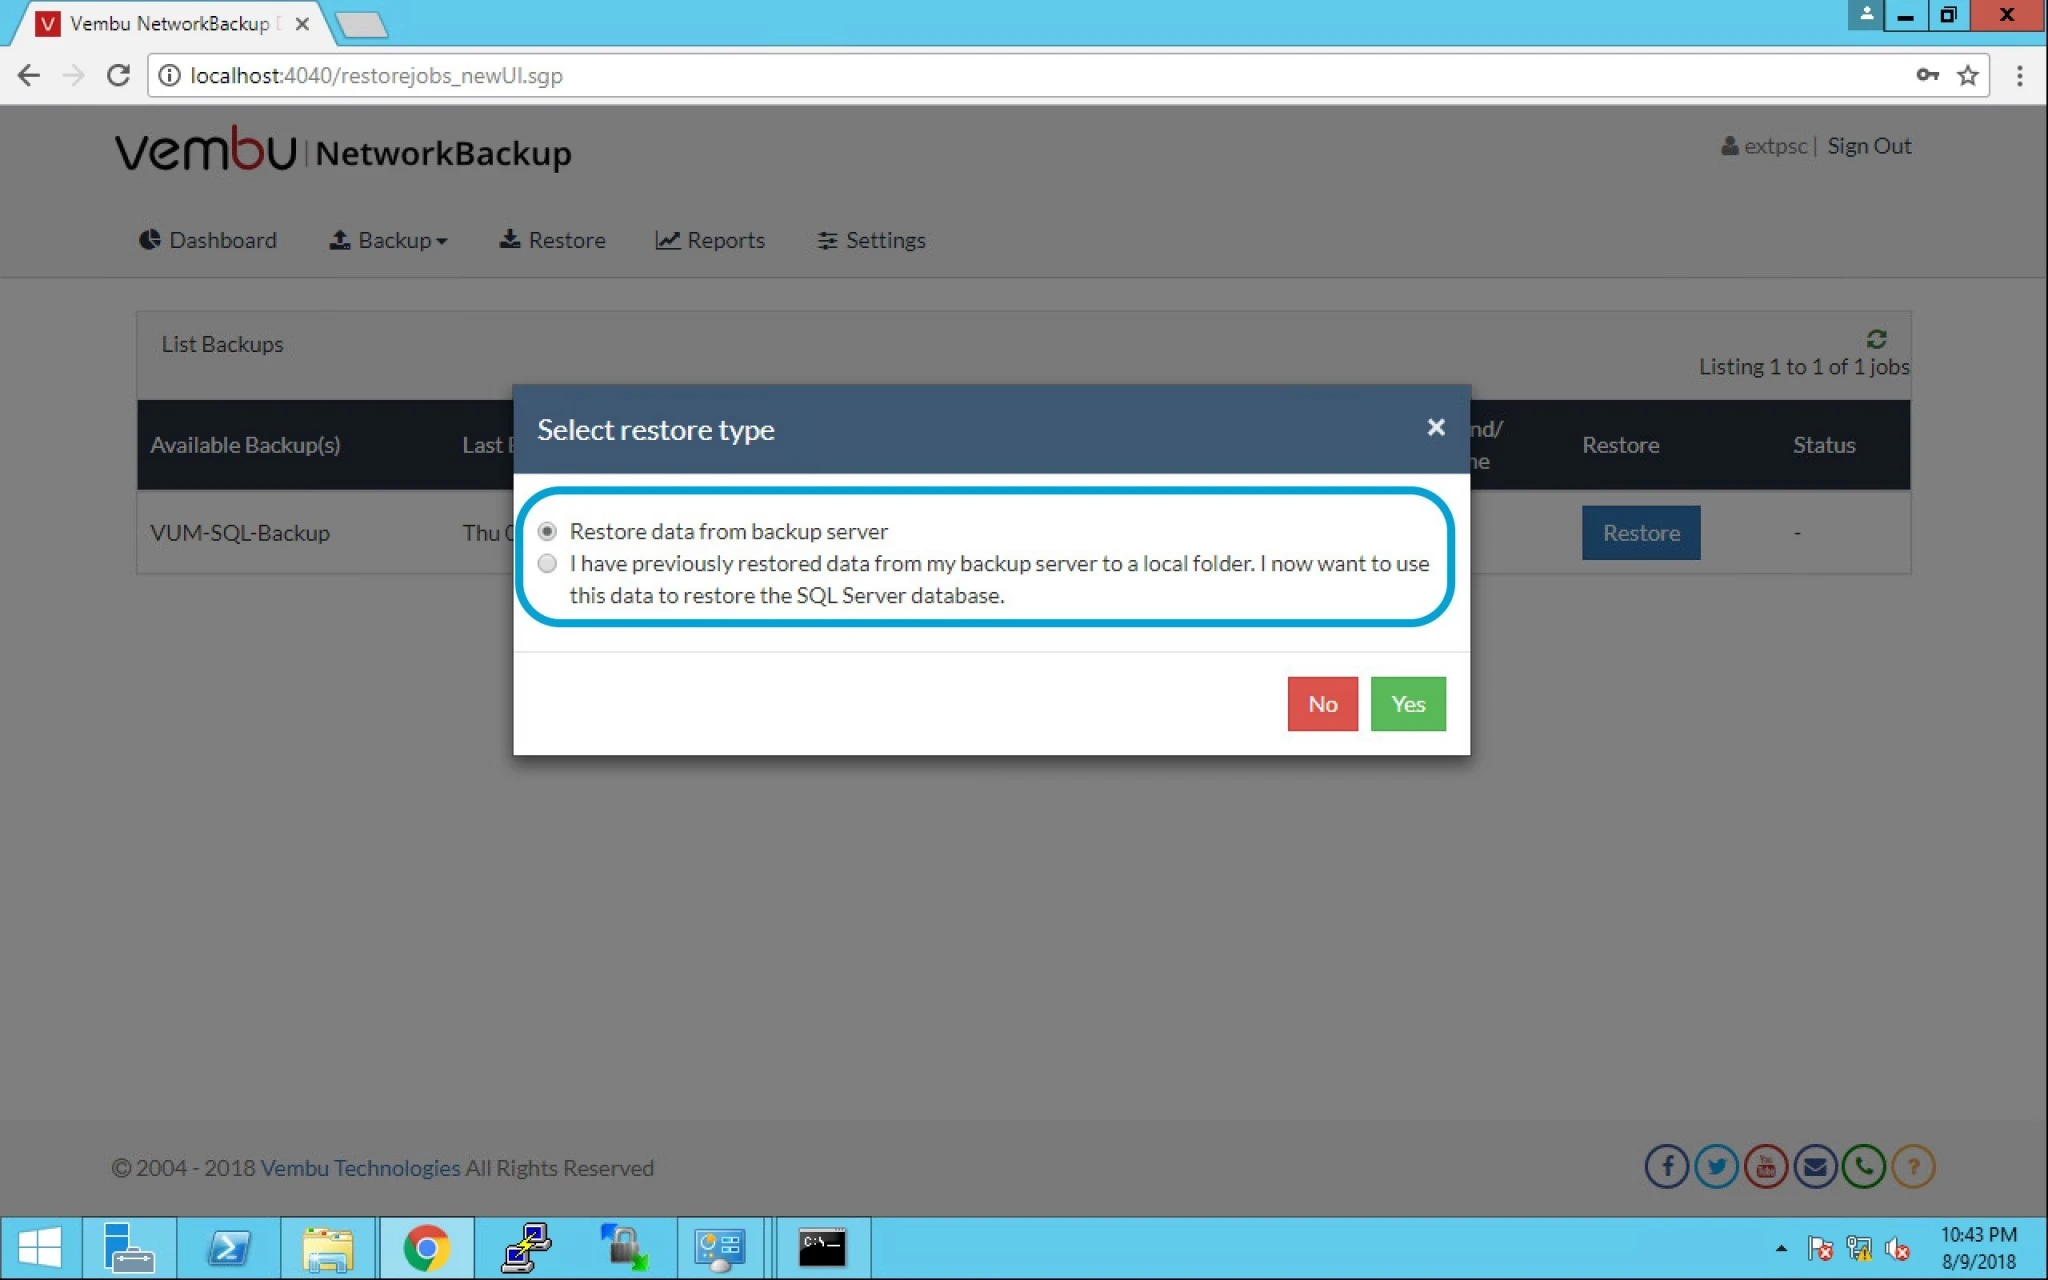


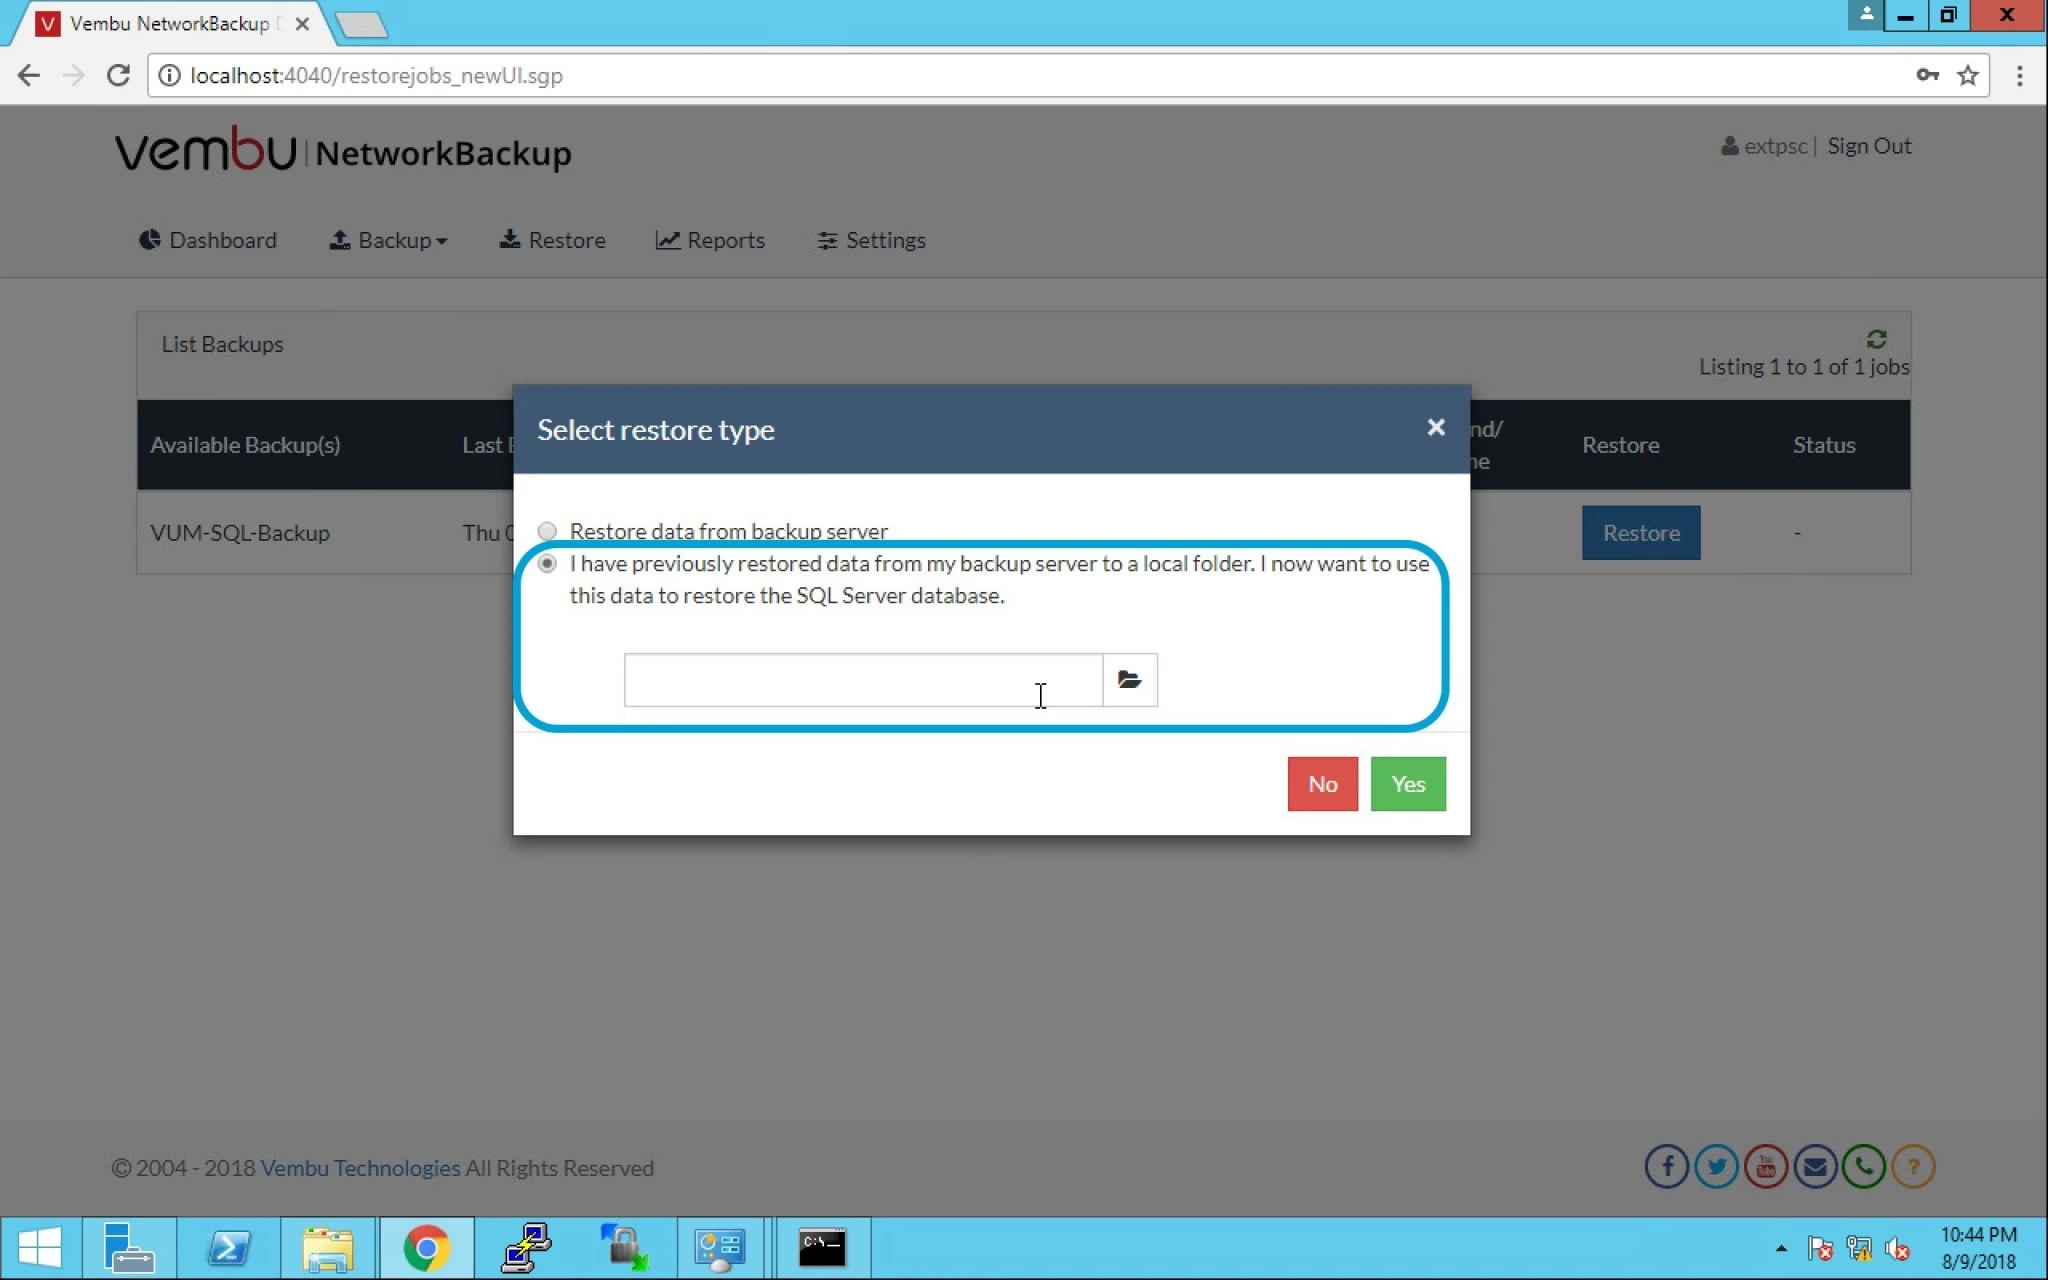
4. Browse the previously restored data from the backup server to a local folder.


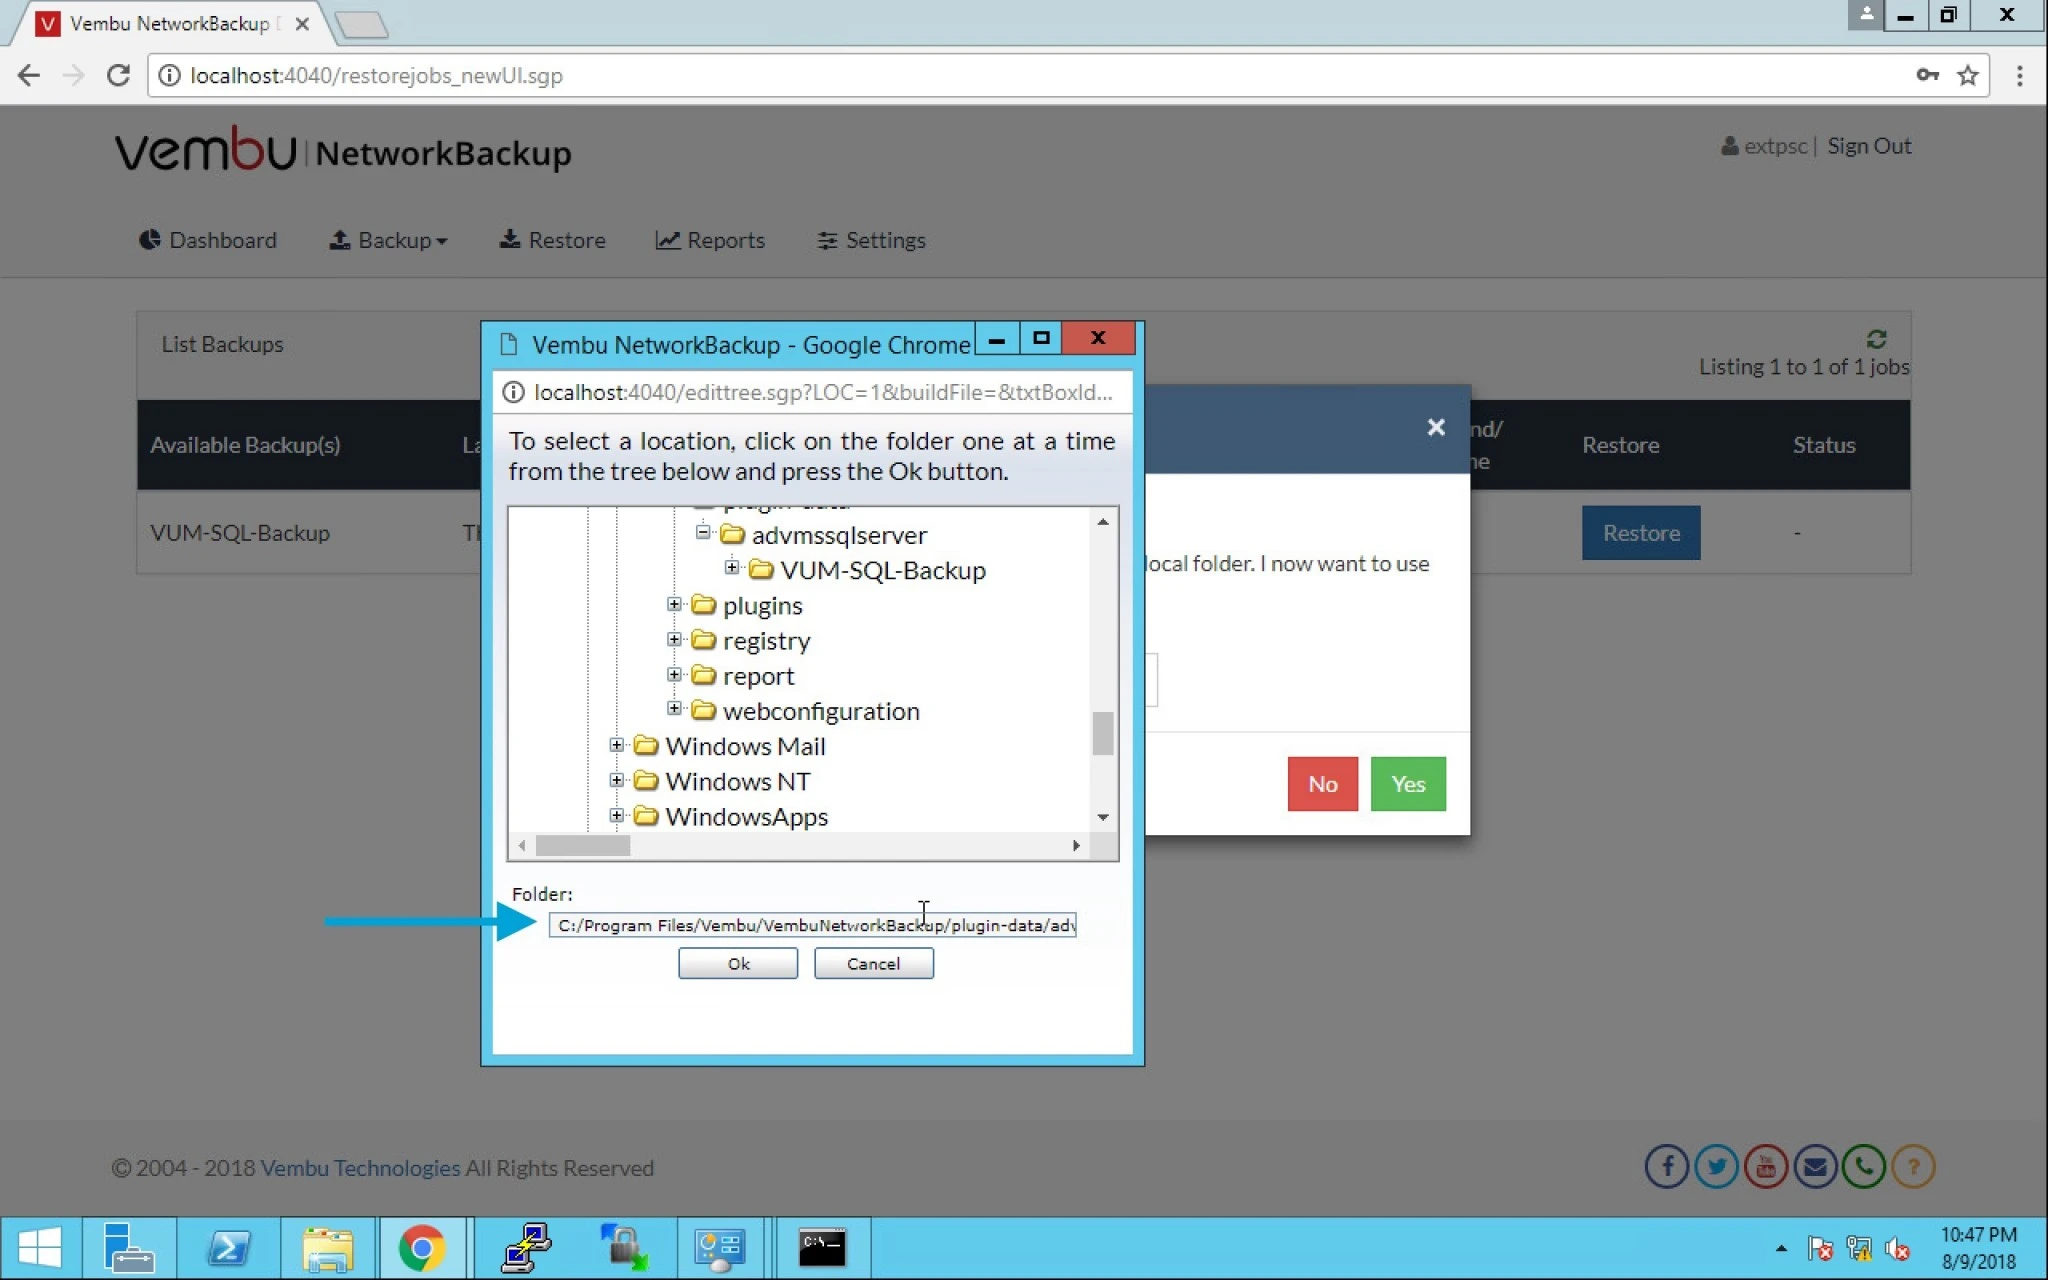
5. Select the data location of the folder or path to the folder . Click Ok.


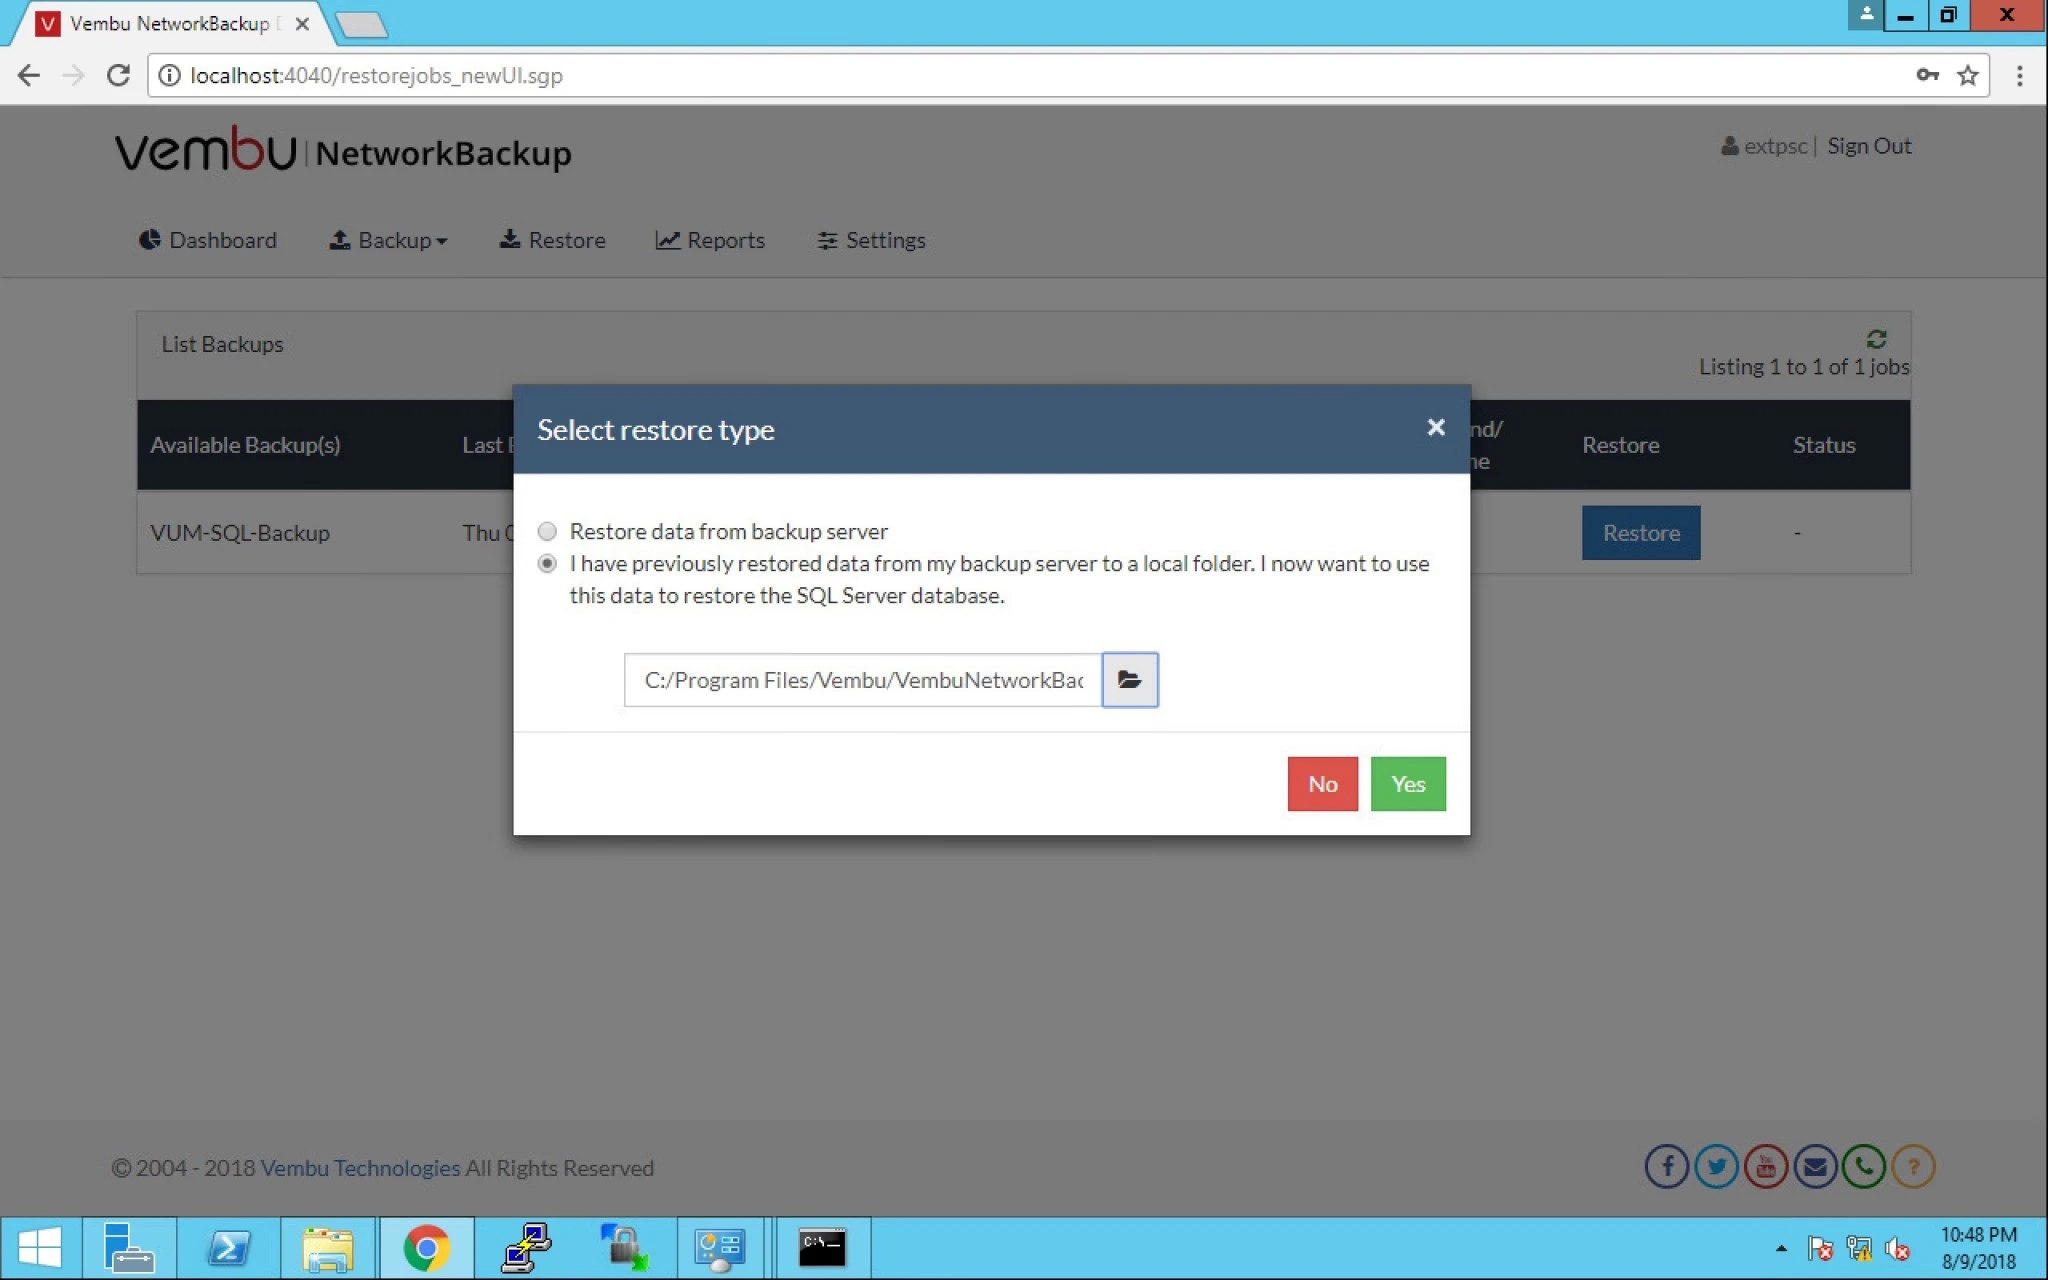
6. Click on Yes.
 

7. Let’s select the first one to get an overview of this option “Restore data from backup server”.


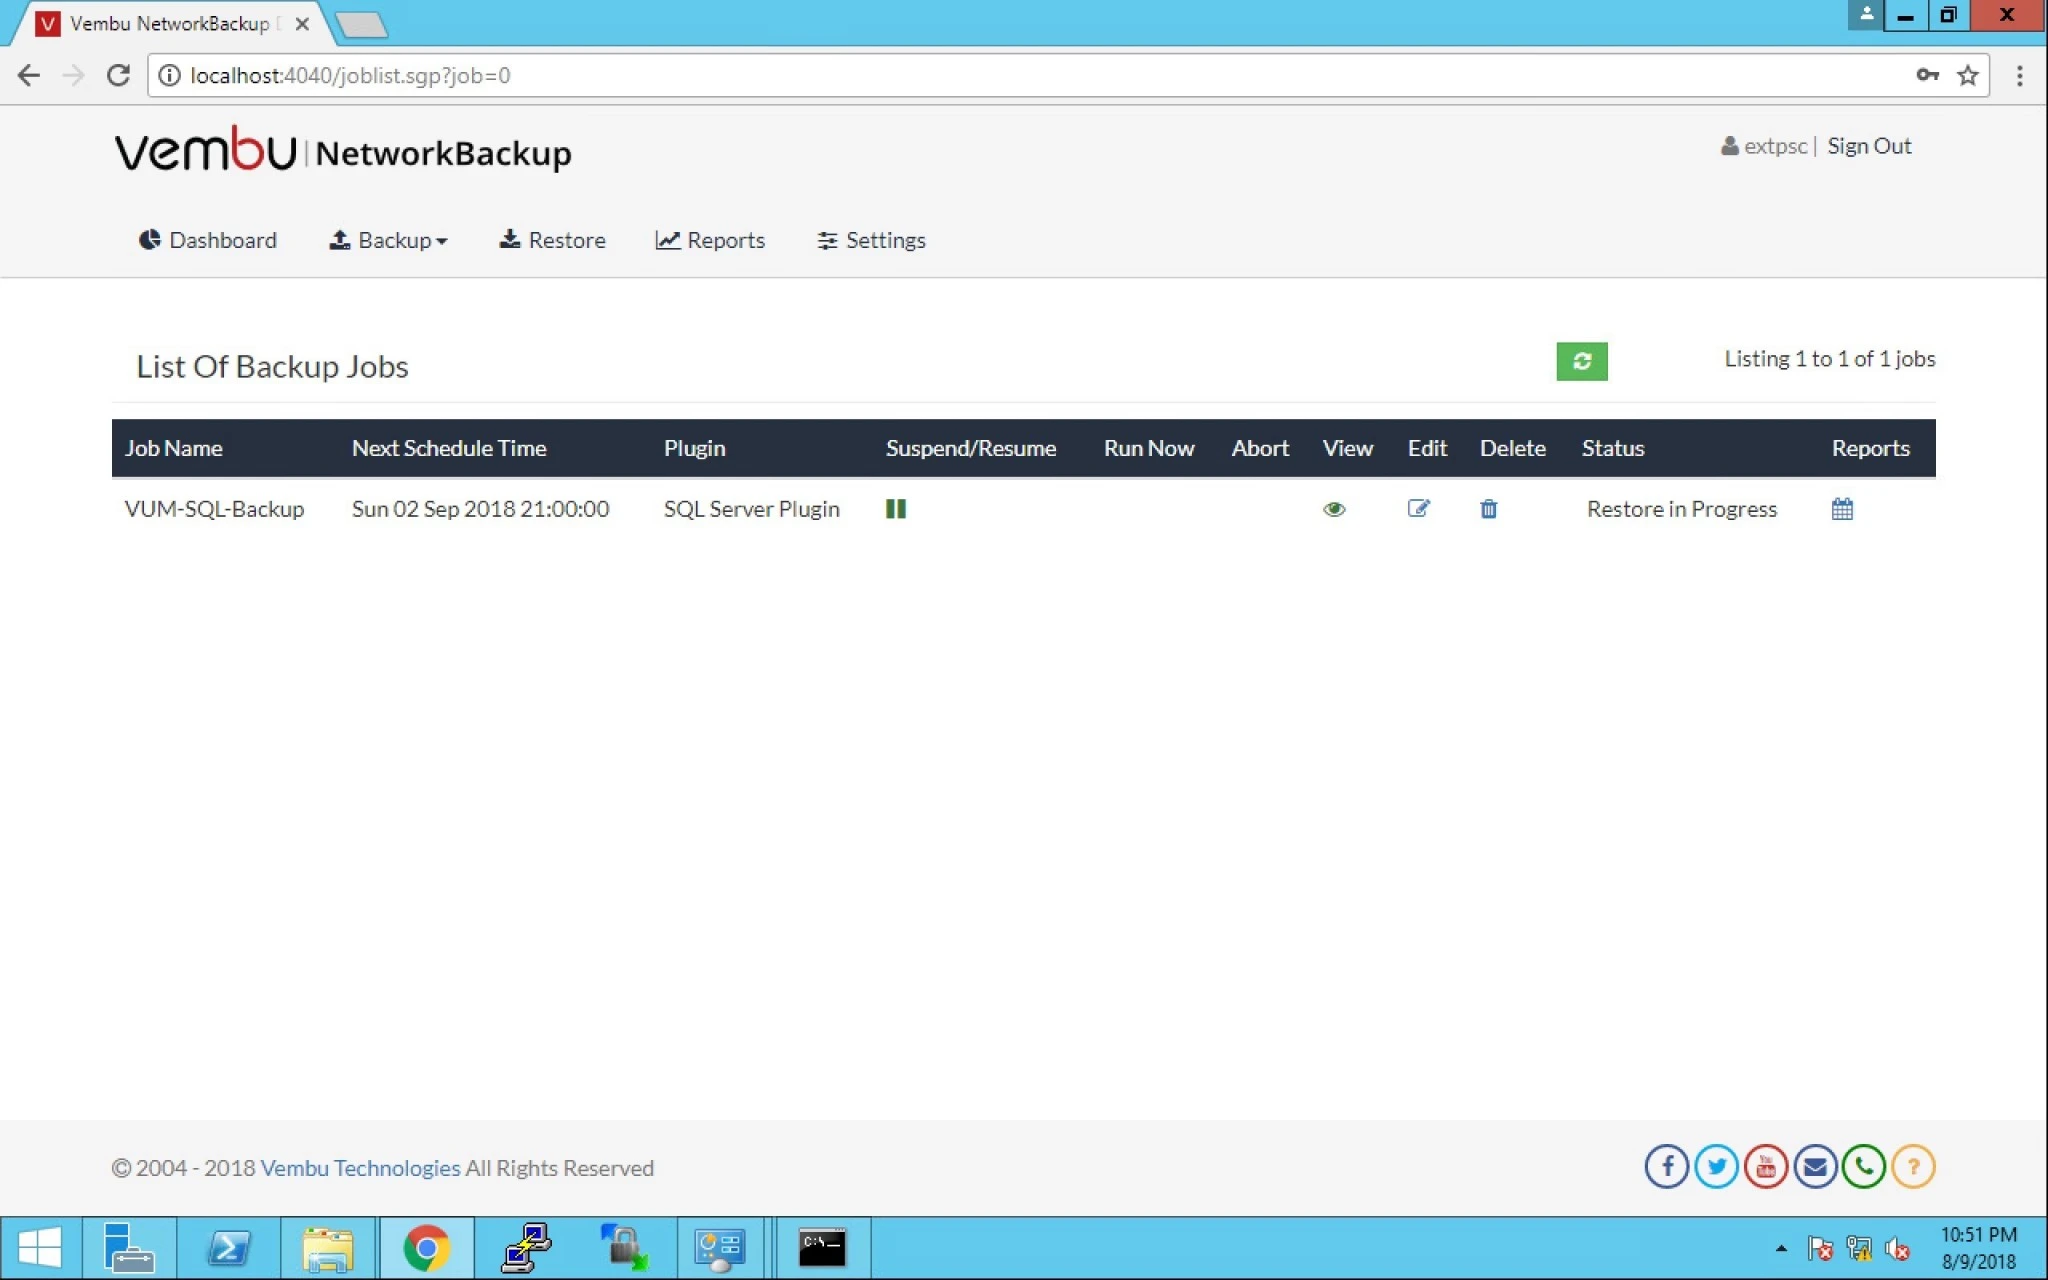
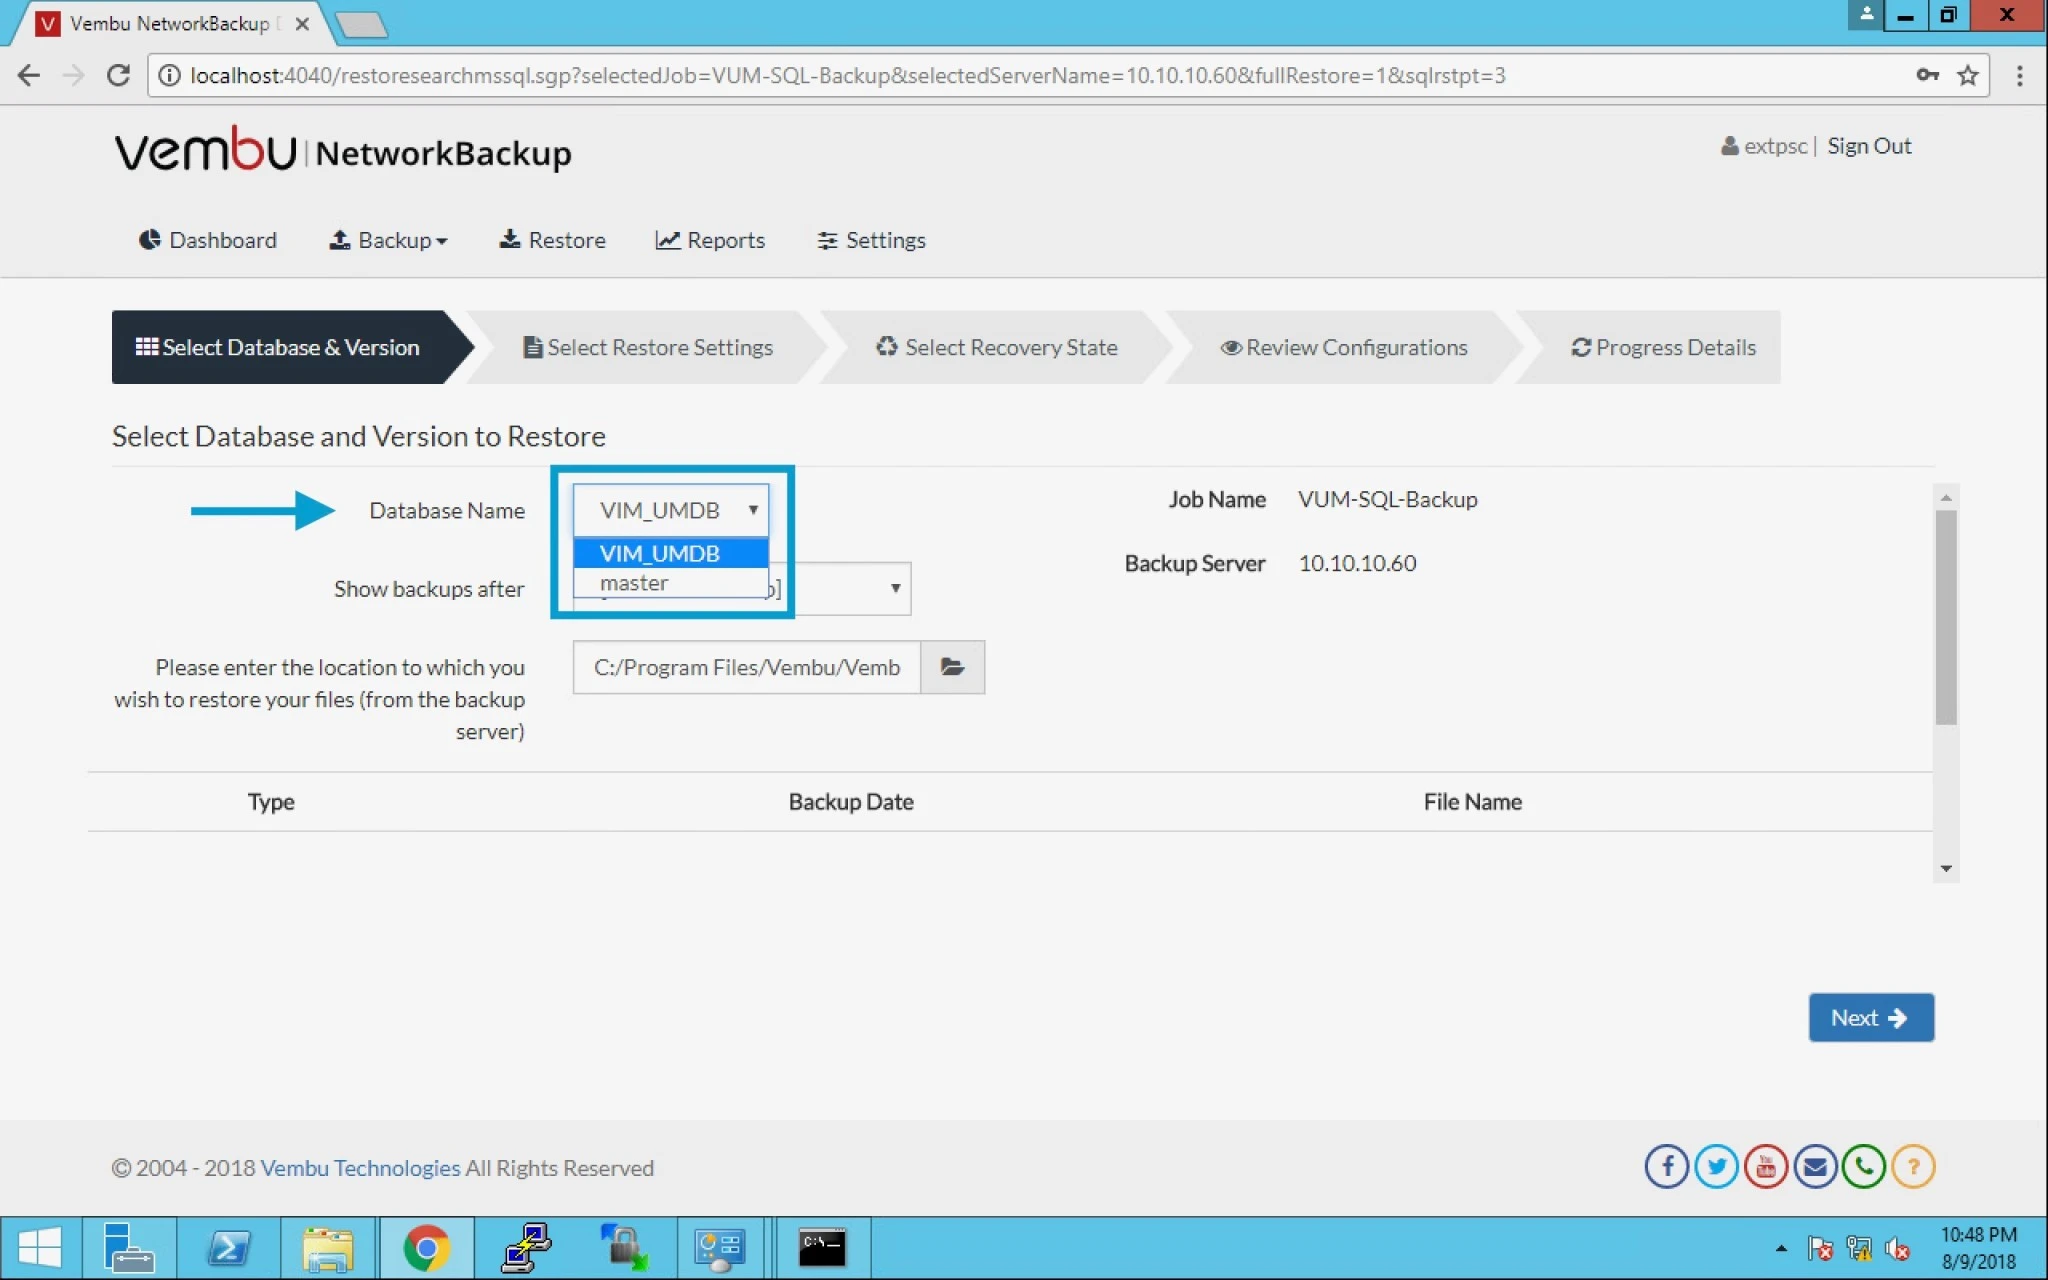
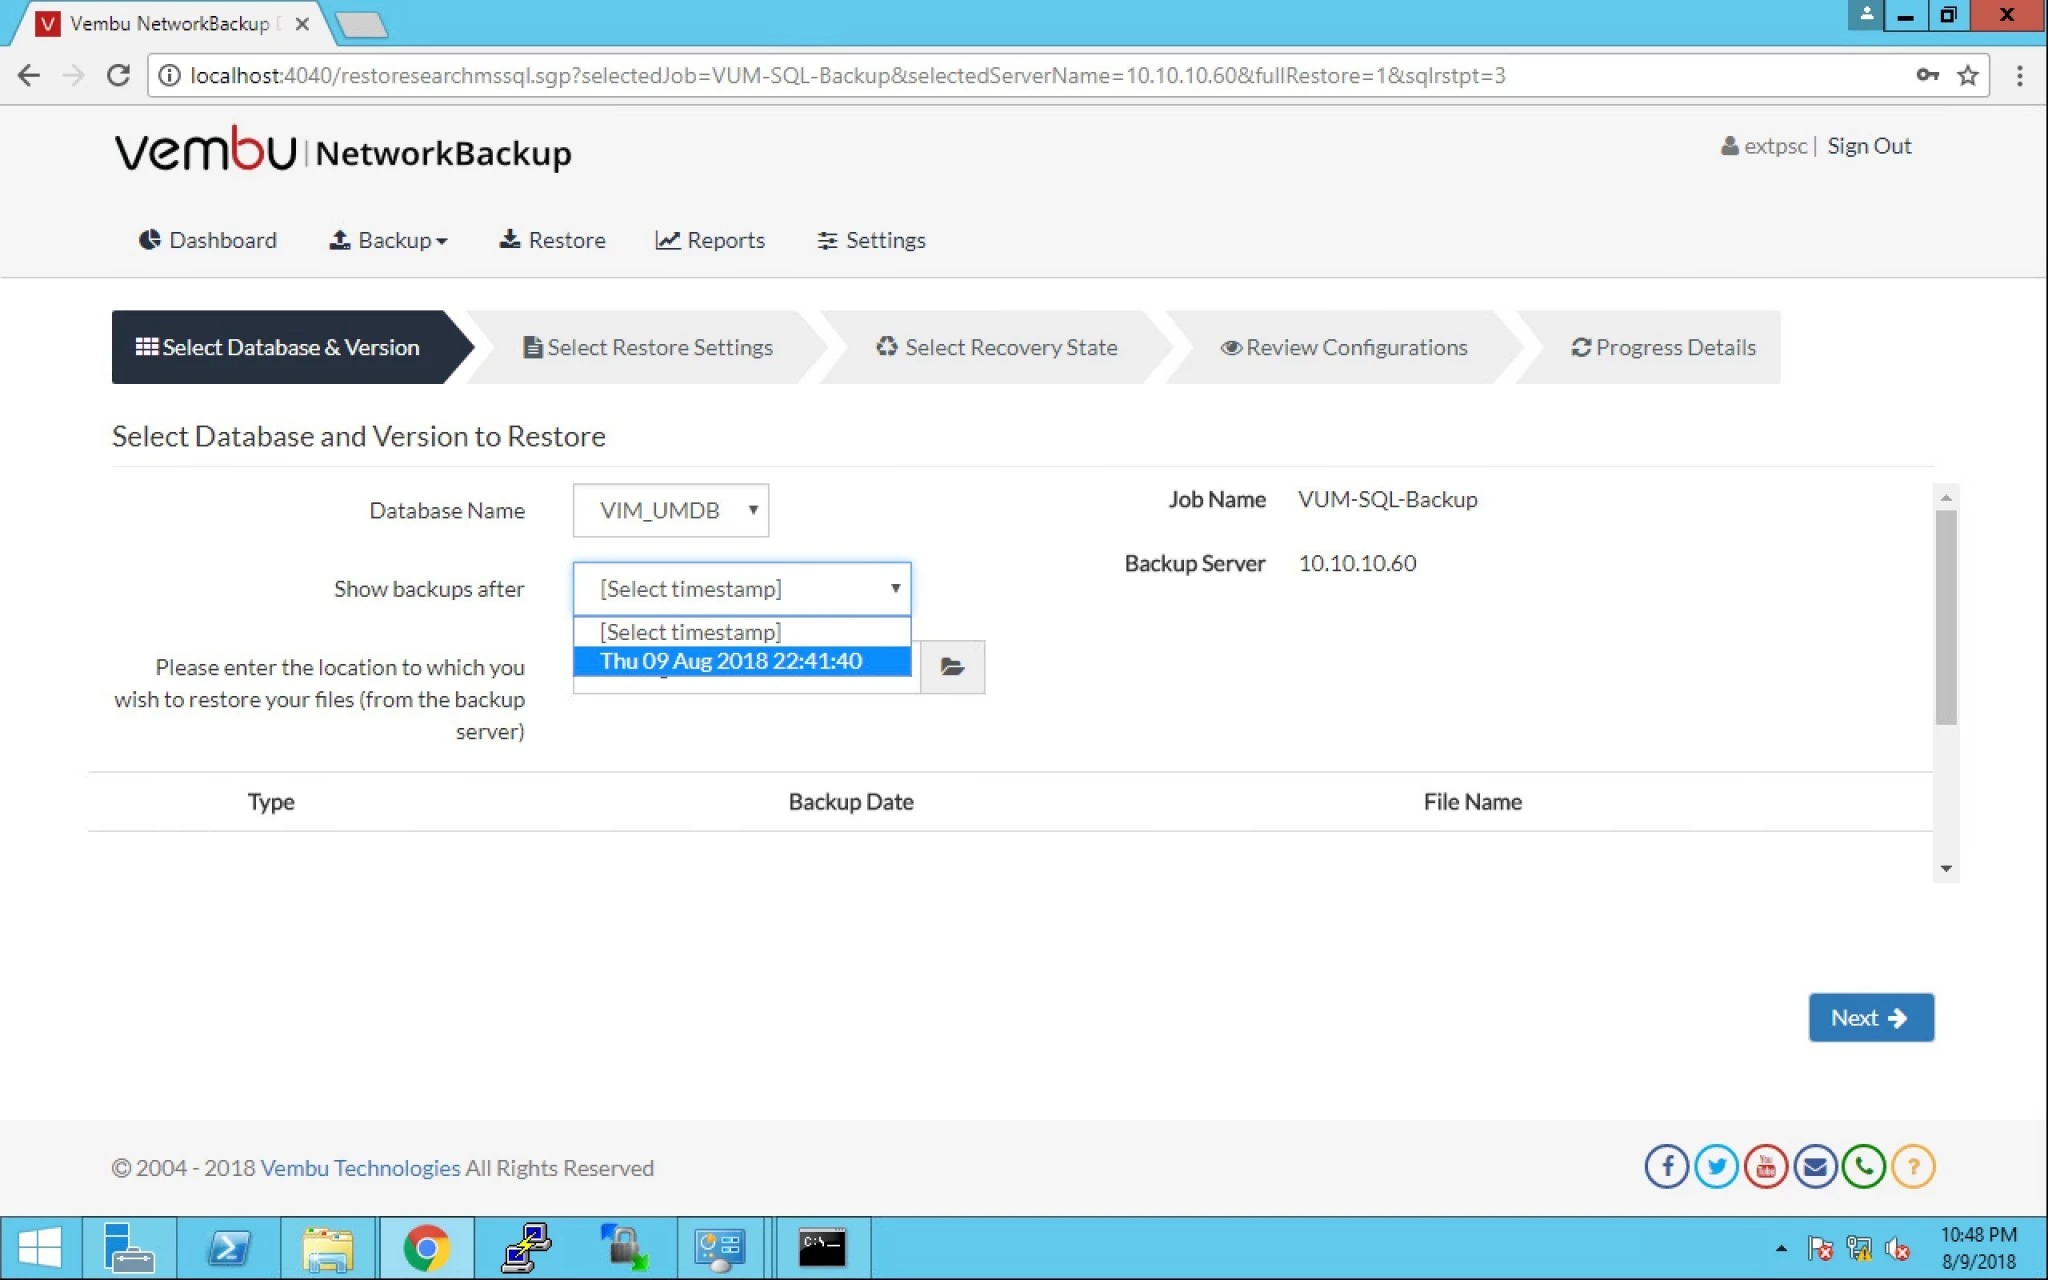
8. Now select the below information:

a) Database Name.

b) Select Time Stamp.

c) Location of file.



9. We have selected the VIM_UMDB as the database name.


10. We have selected the the Time Stamp of the backup for restore.


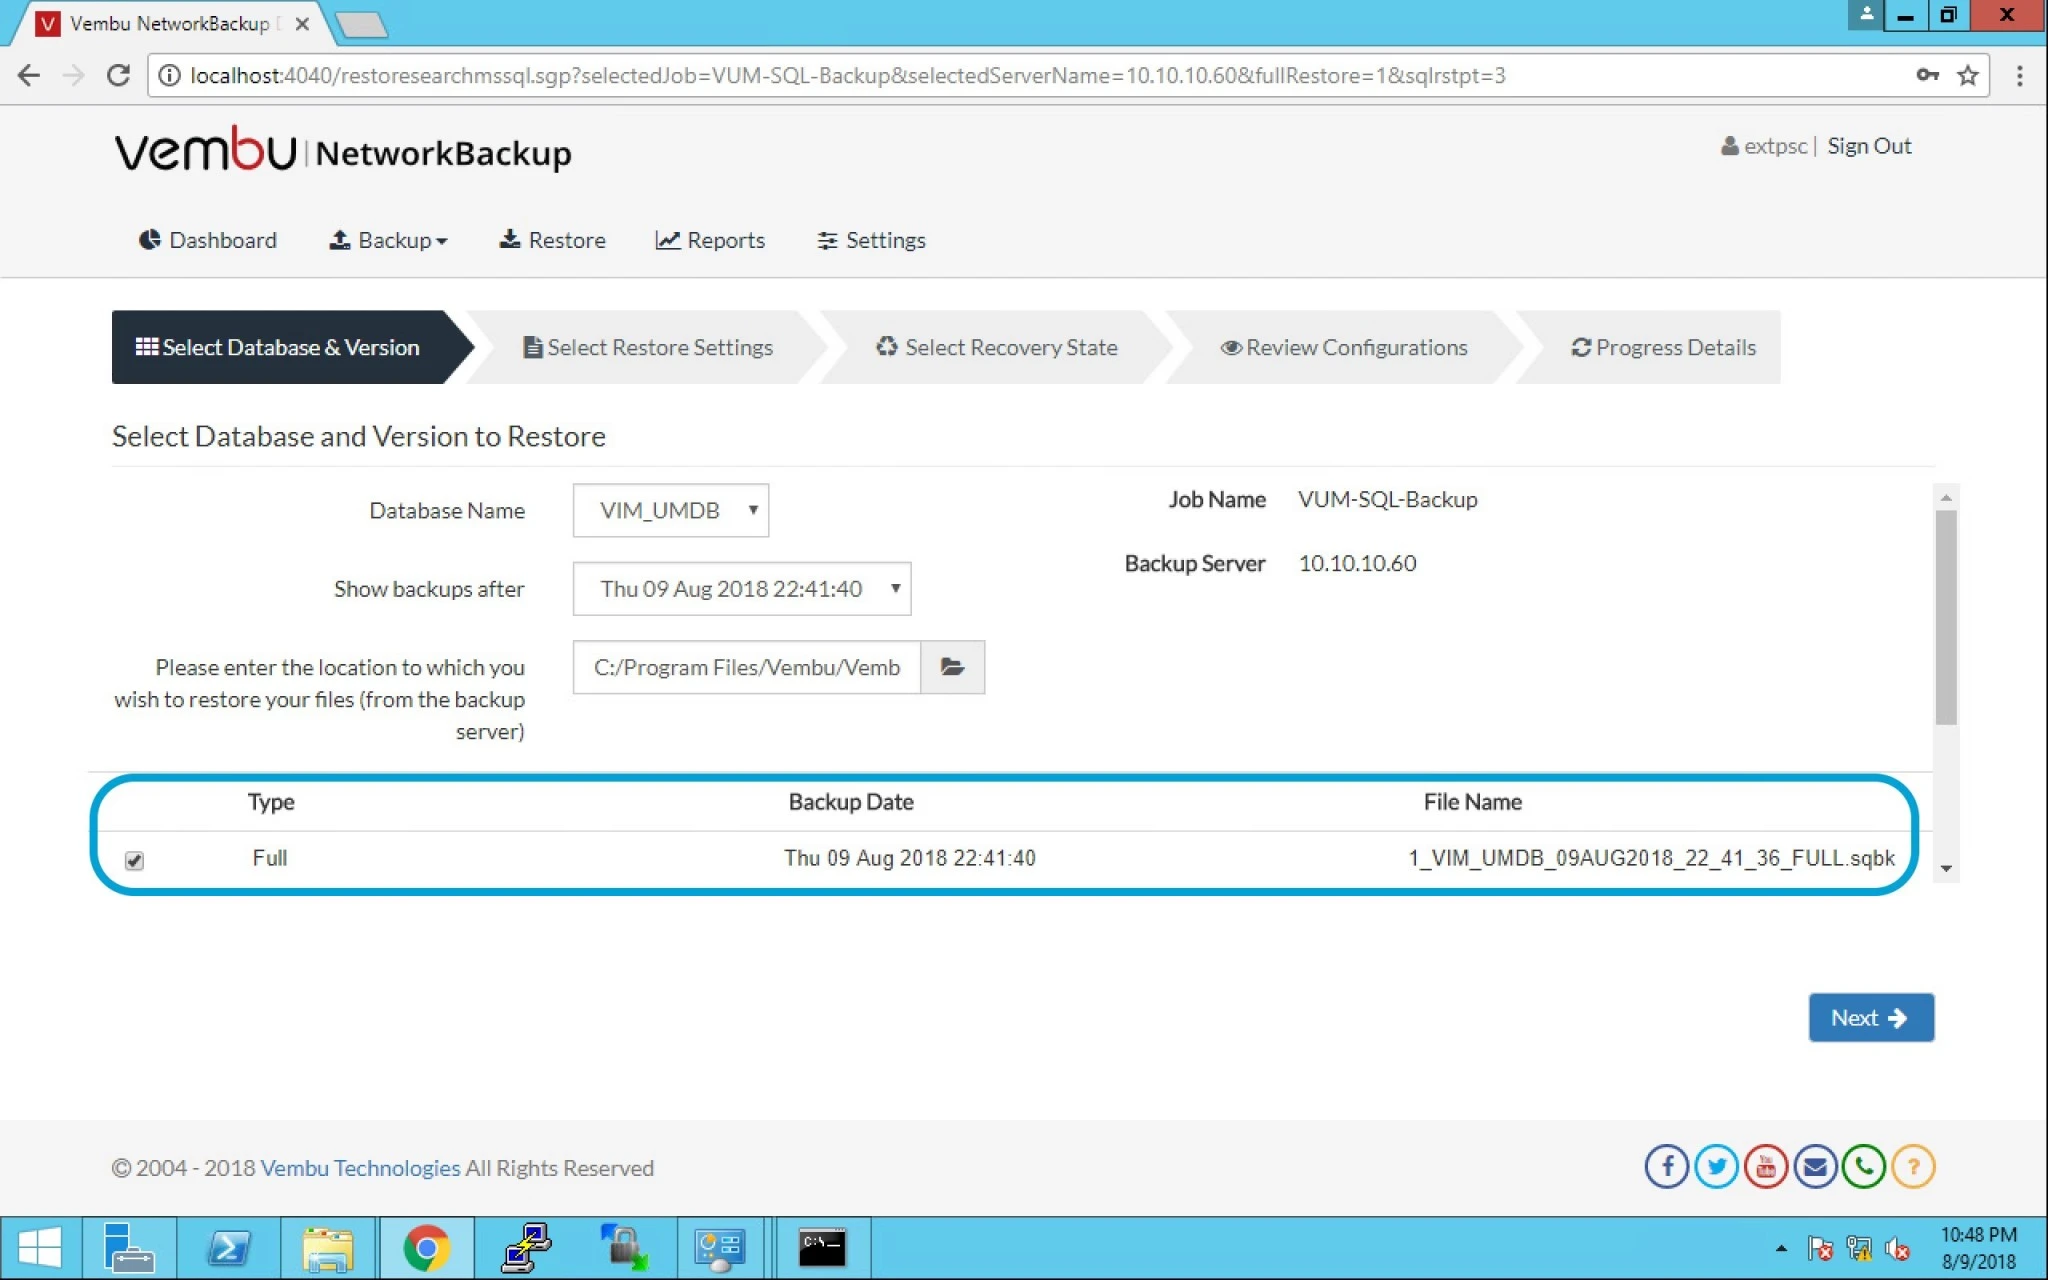
11. We have the prompt with the Full Backup to be restored option. Select Full and click next.


12. After restoring data from backup server, continue to auto restore data into SQL Server Database.

  • Choosing this option will let user restore data into SQL Server database, where user have the option to either overwrite an existing database or restore as separate database.
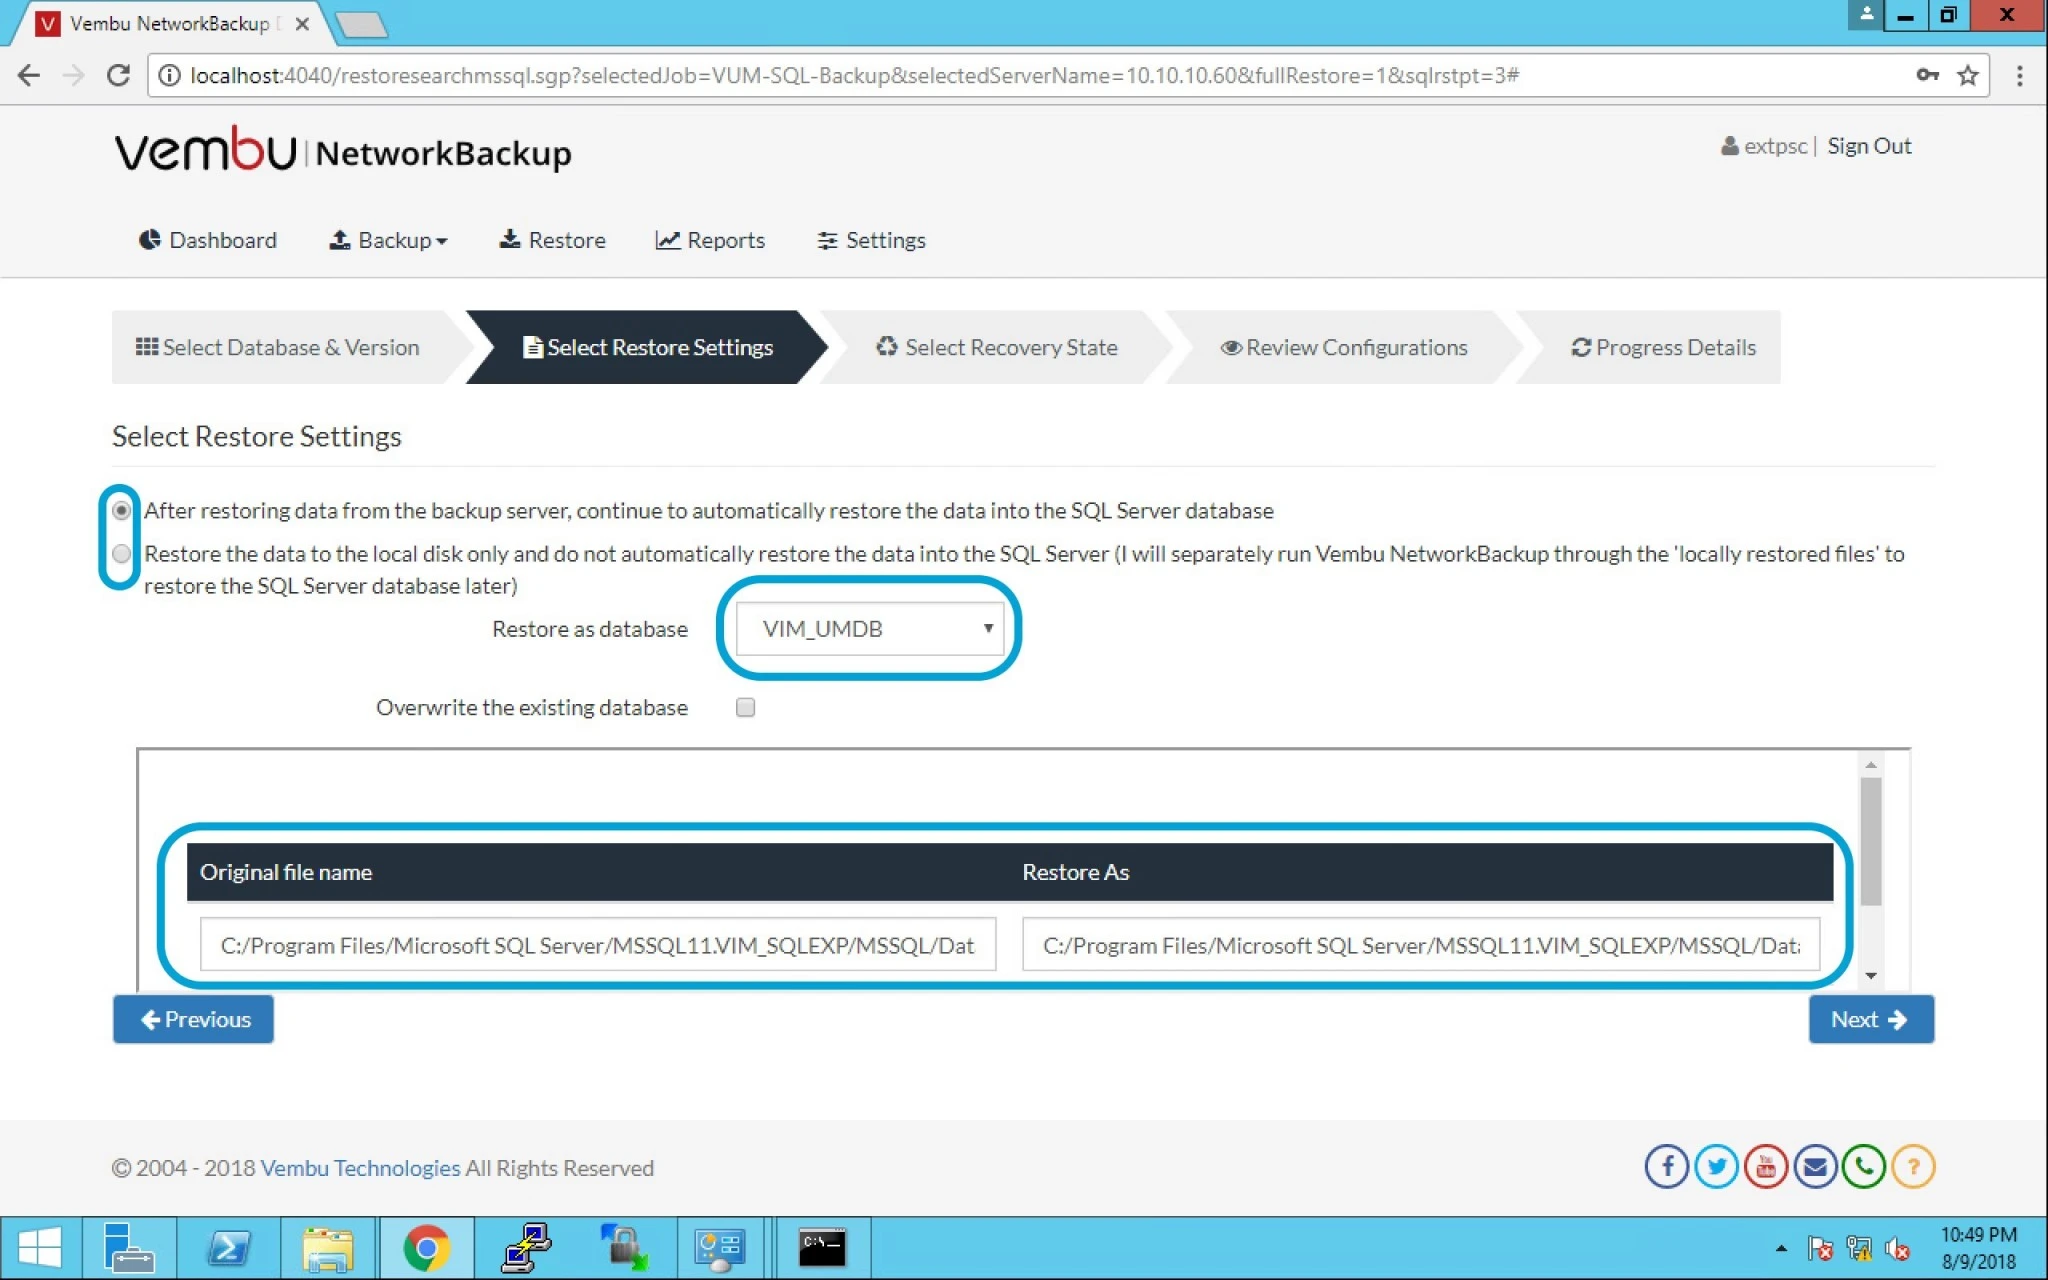



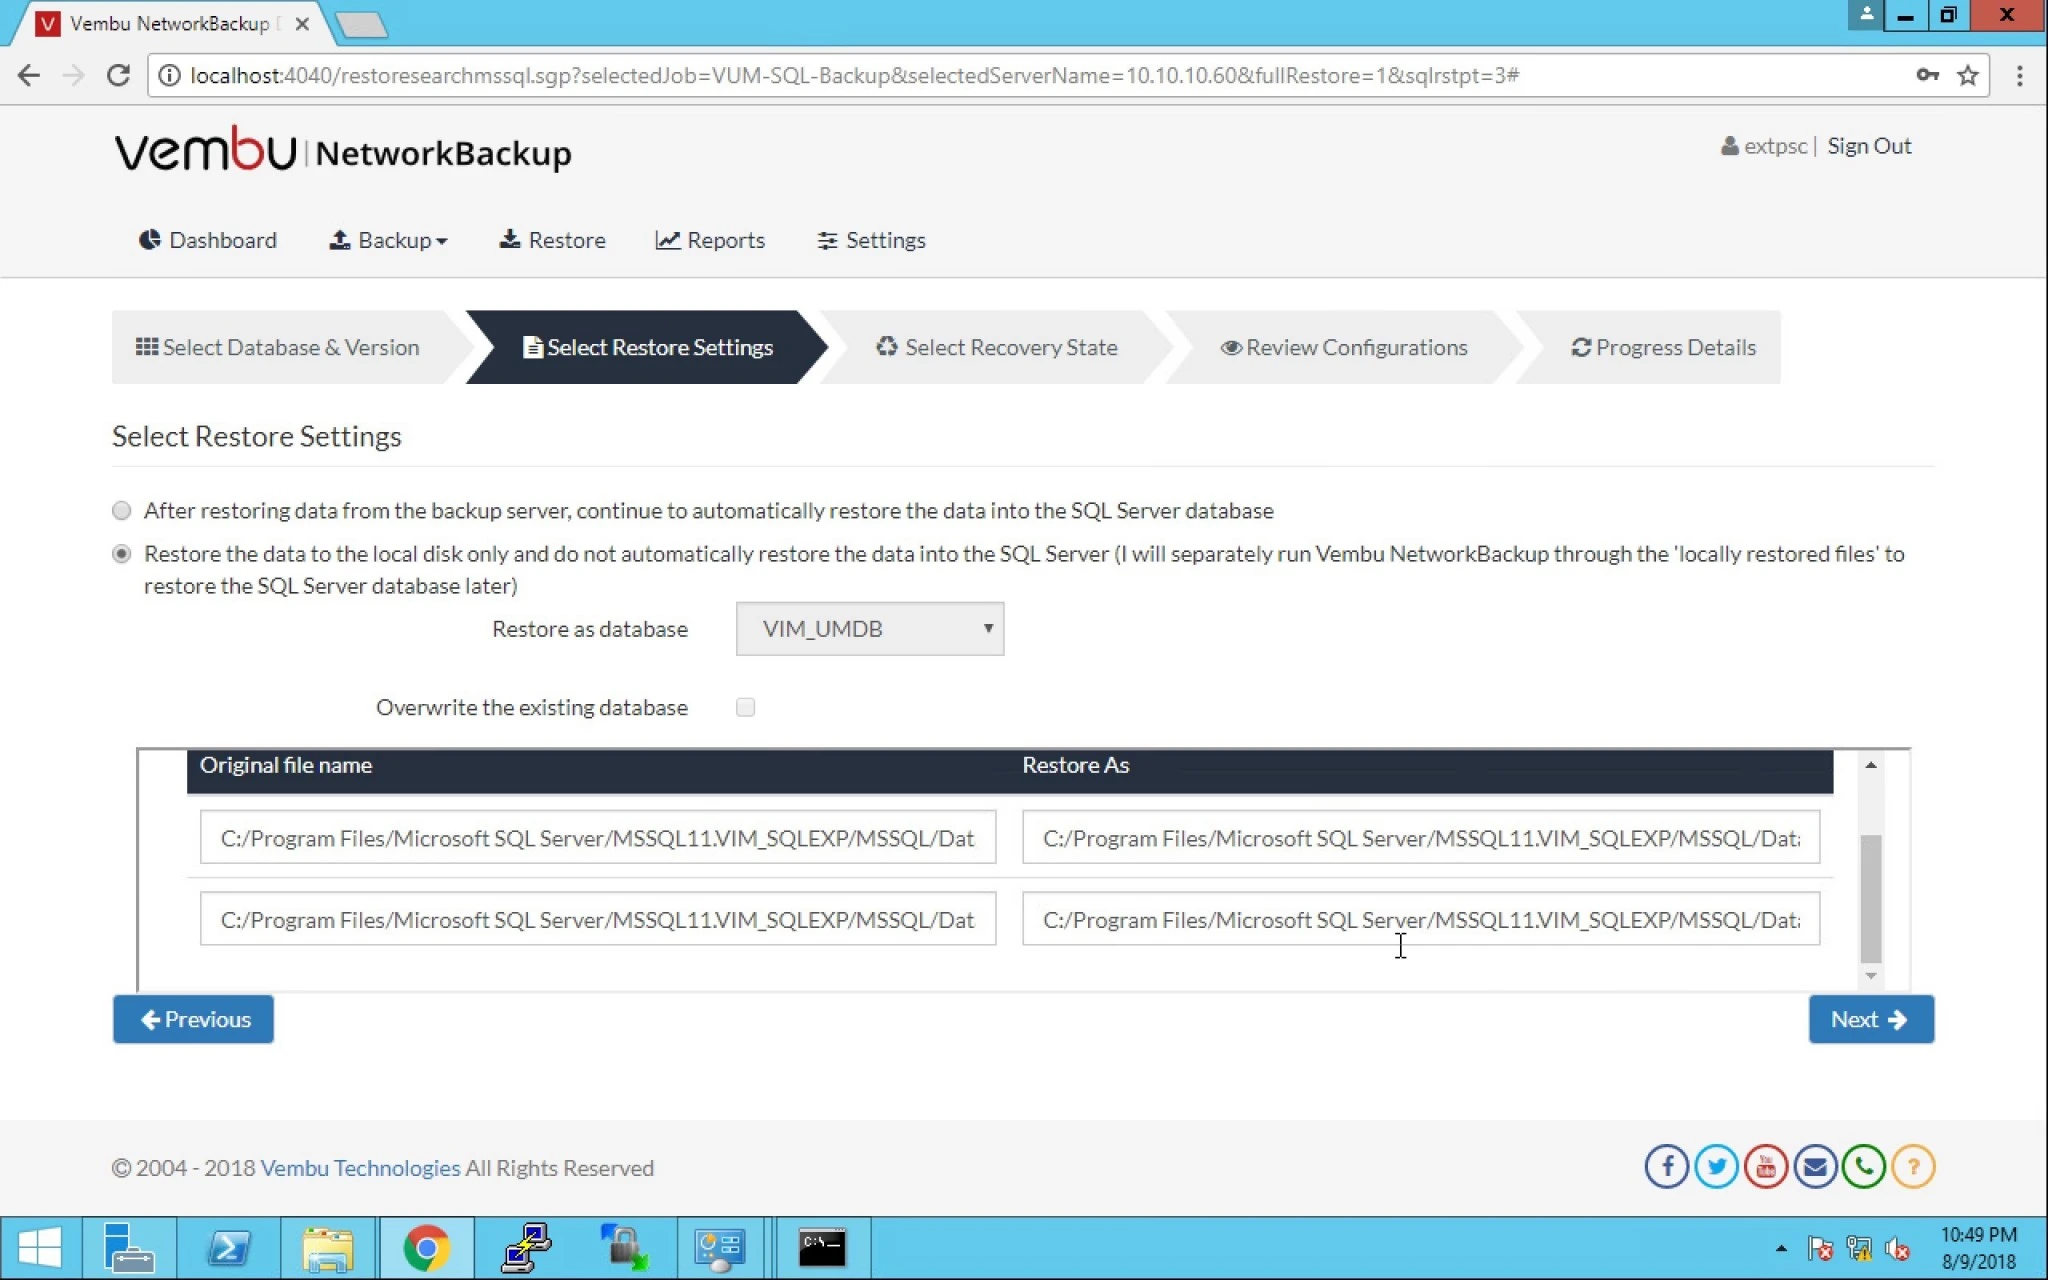
13. Restore data from backup server only (we will separately run Vembu NetworkBackup through the ‘locally restored files’ to restore the SQL Server database later).

  • Choosing this option will restore data in a separate user defined location instead restoring data into SQL Server.
 

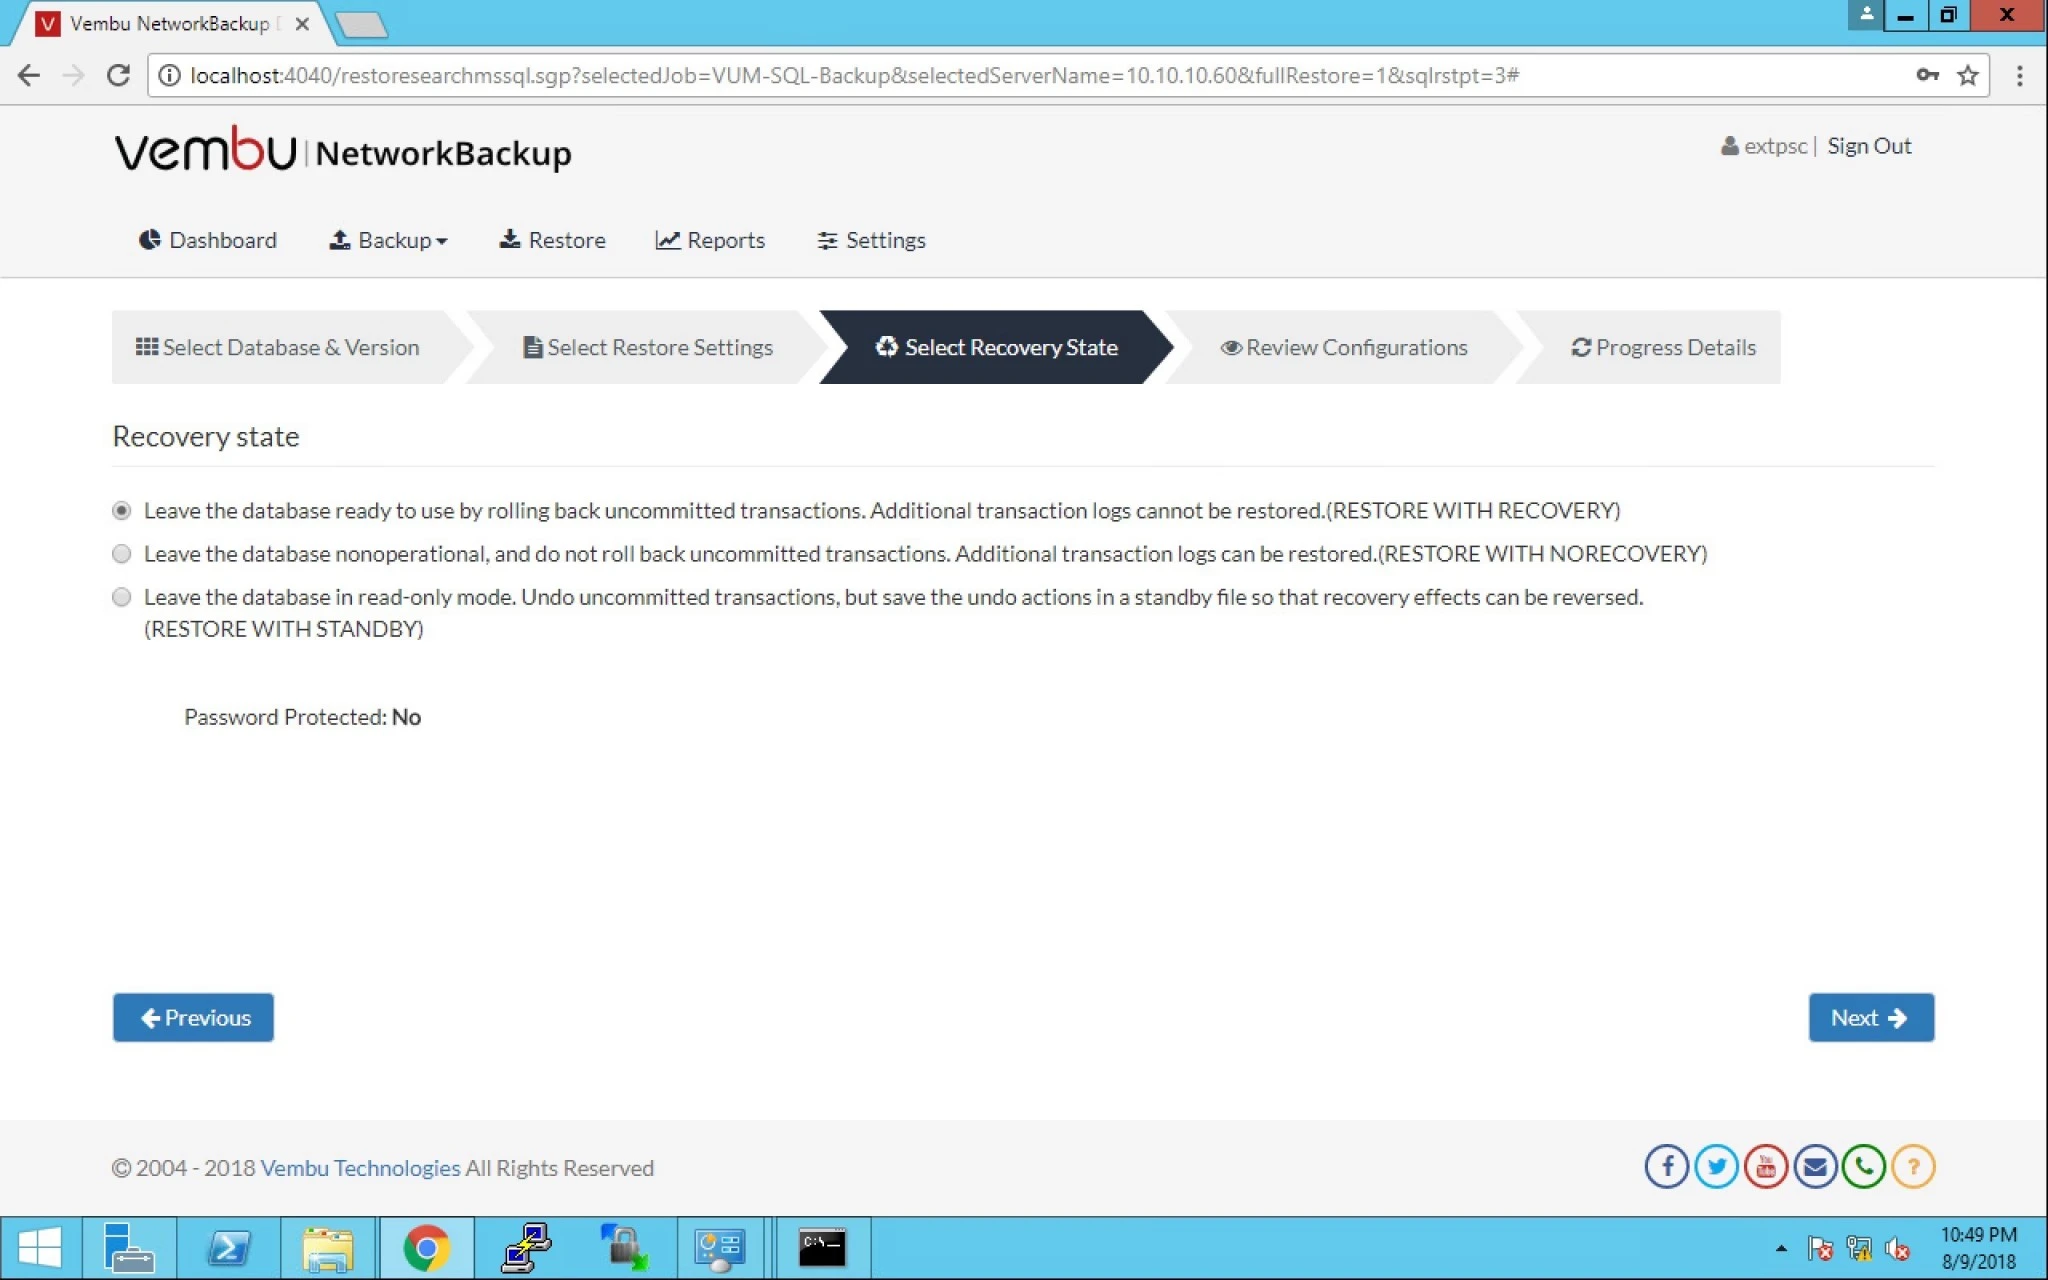
14.  We have got these three options given below:

  • Leave database in ready-to-use state by rolling back uncommitted transactions. Additional transaction logs cannot be restored (Restore with recovery).
  • Leave database non-operational, and do not rollback uncommitted transactions. Additional transaction logs can be restored (Restore with Non-Recovery).
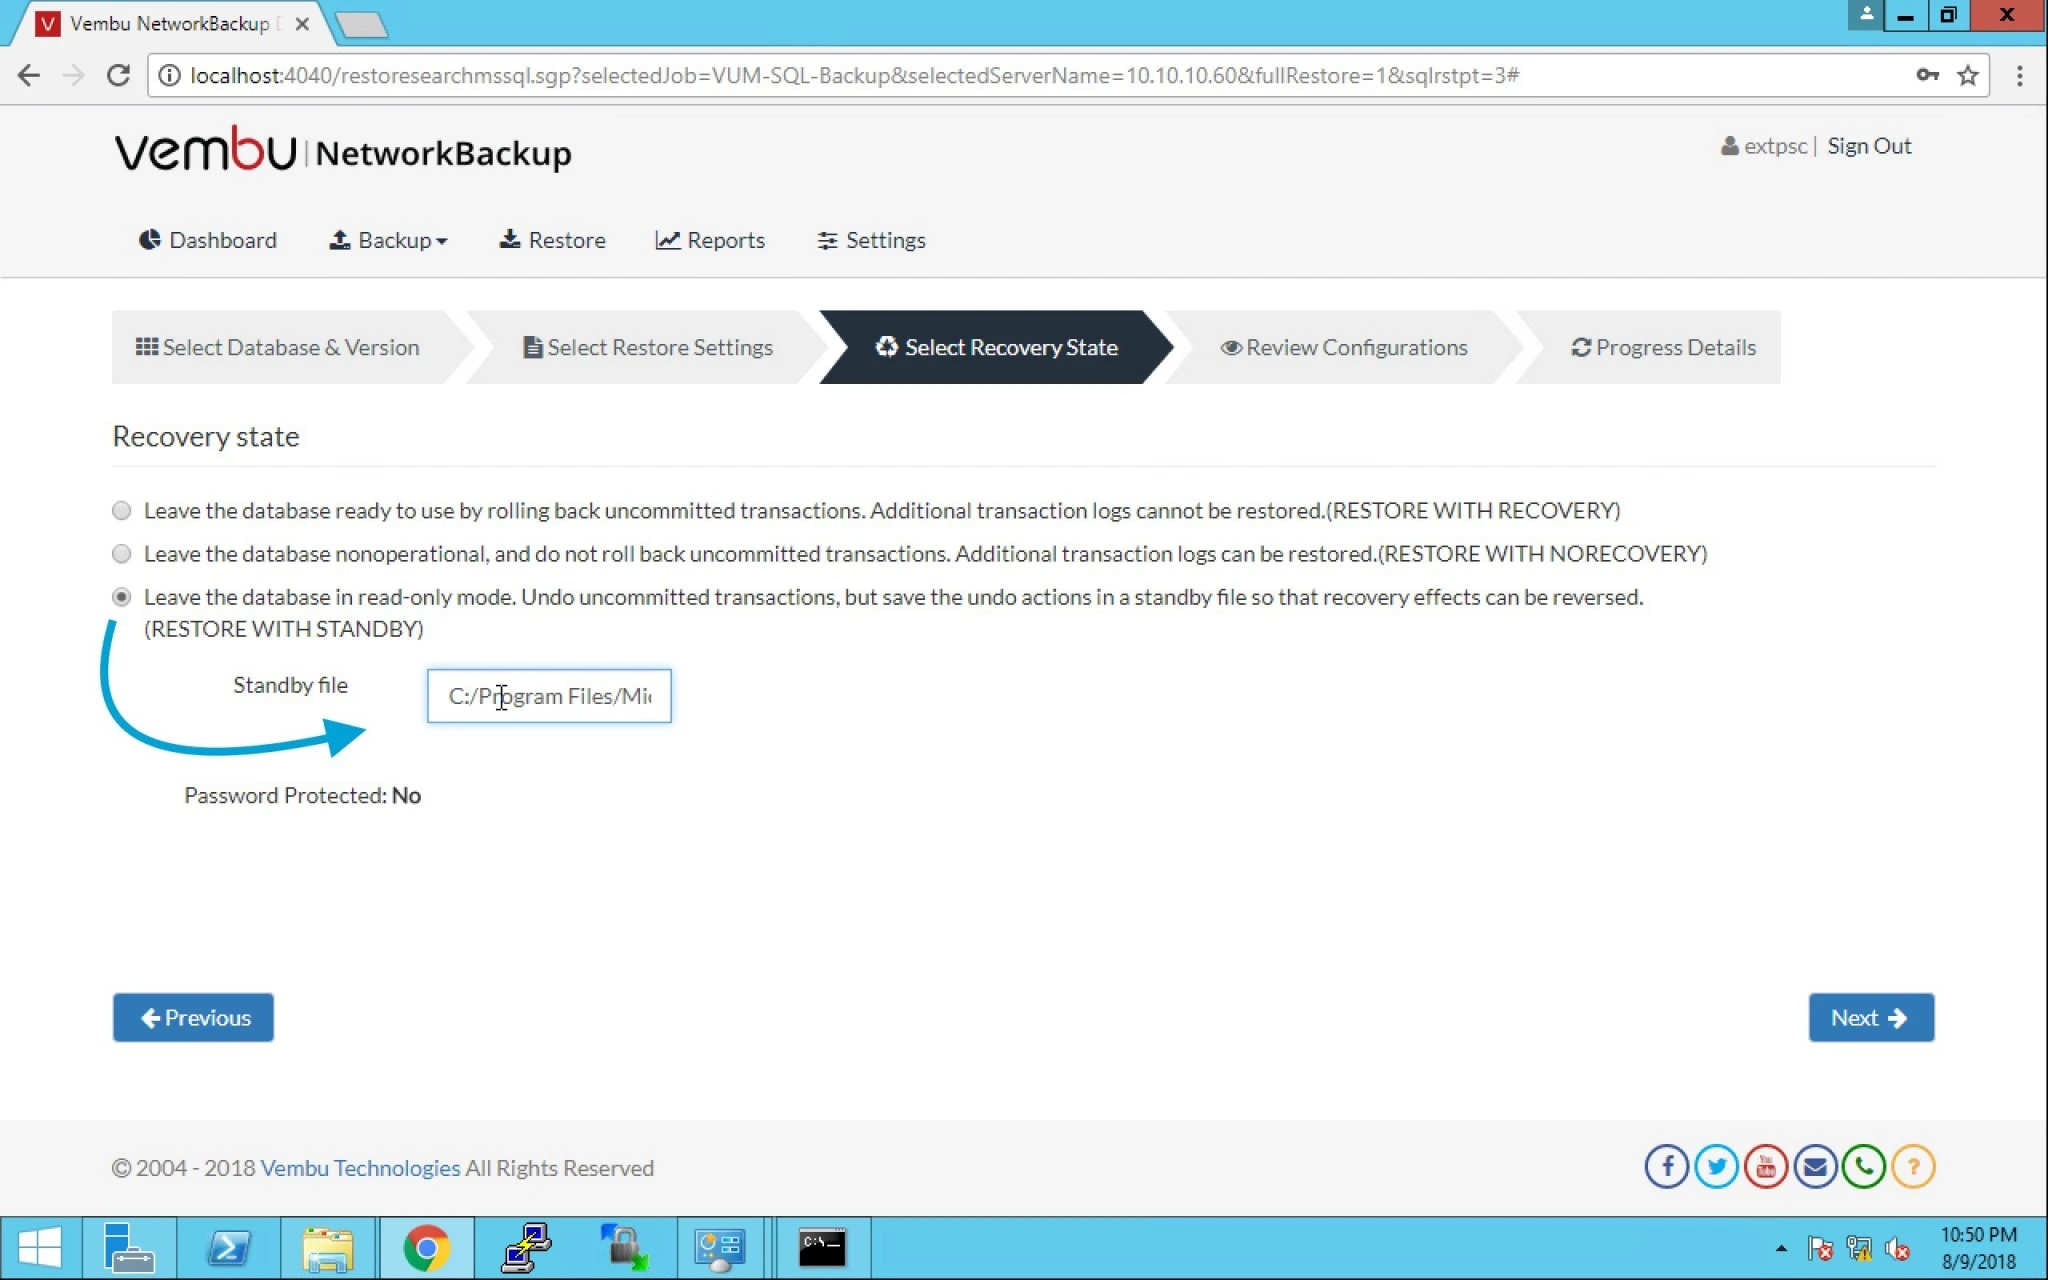
  • Leave database in read-only mode. Undo uncommitted transactions, but save undo action in a standby file so that recovery effects can be reversed (Restore with Standby).
 

15. Lets choose the third option here and provide the Standby file location. Click Next.


16. Now you can review the configuration and click on Restore Now.
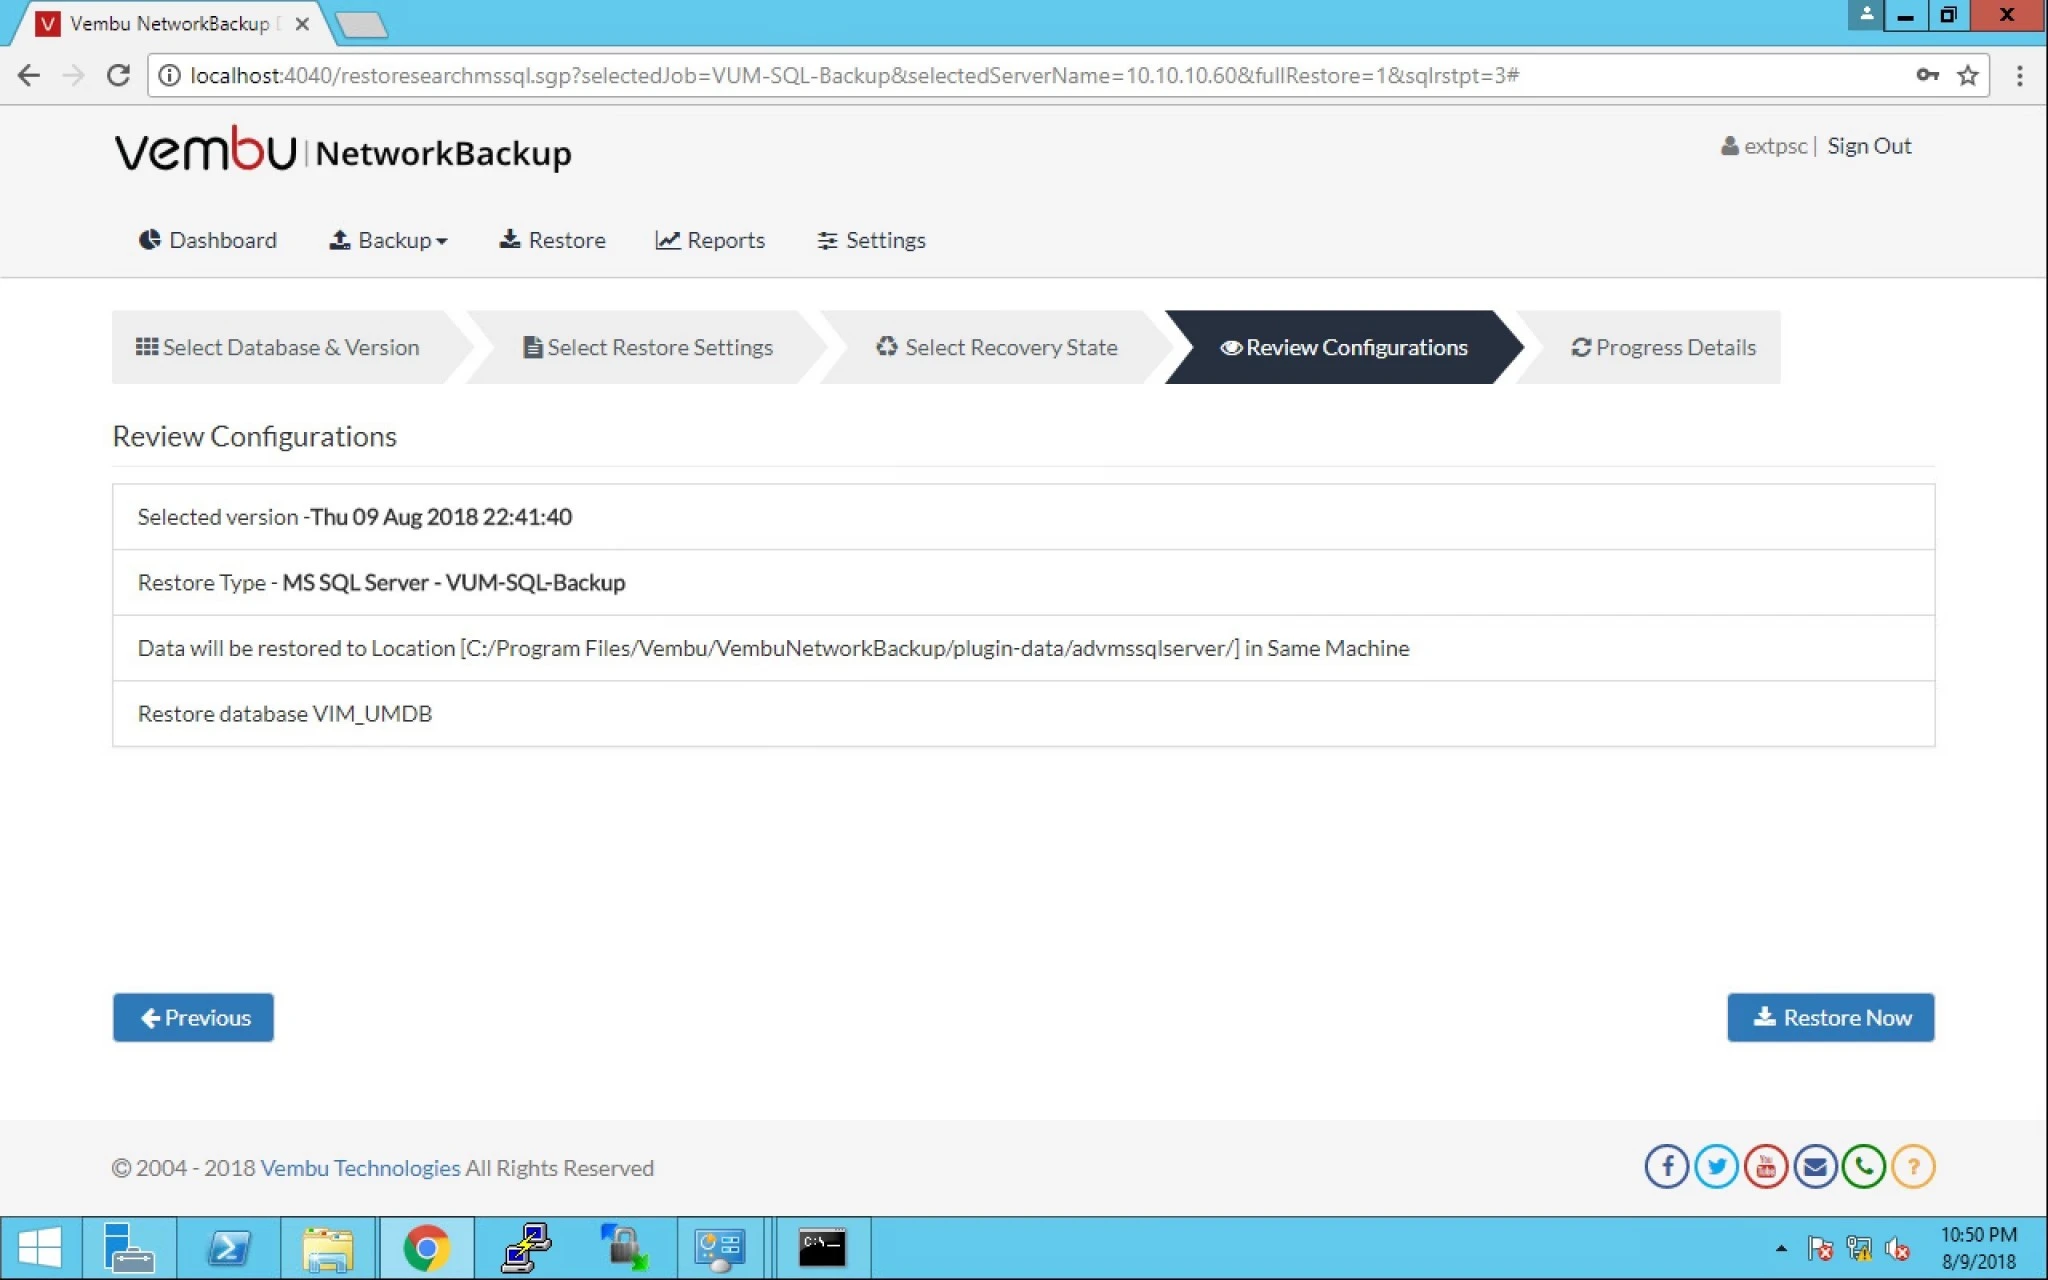


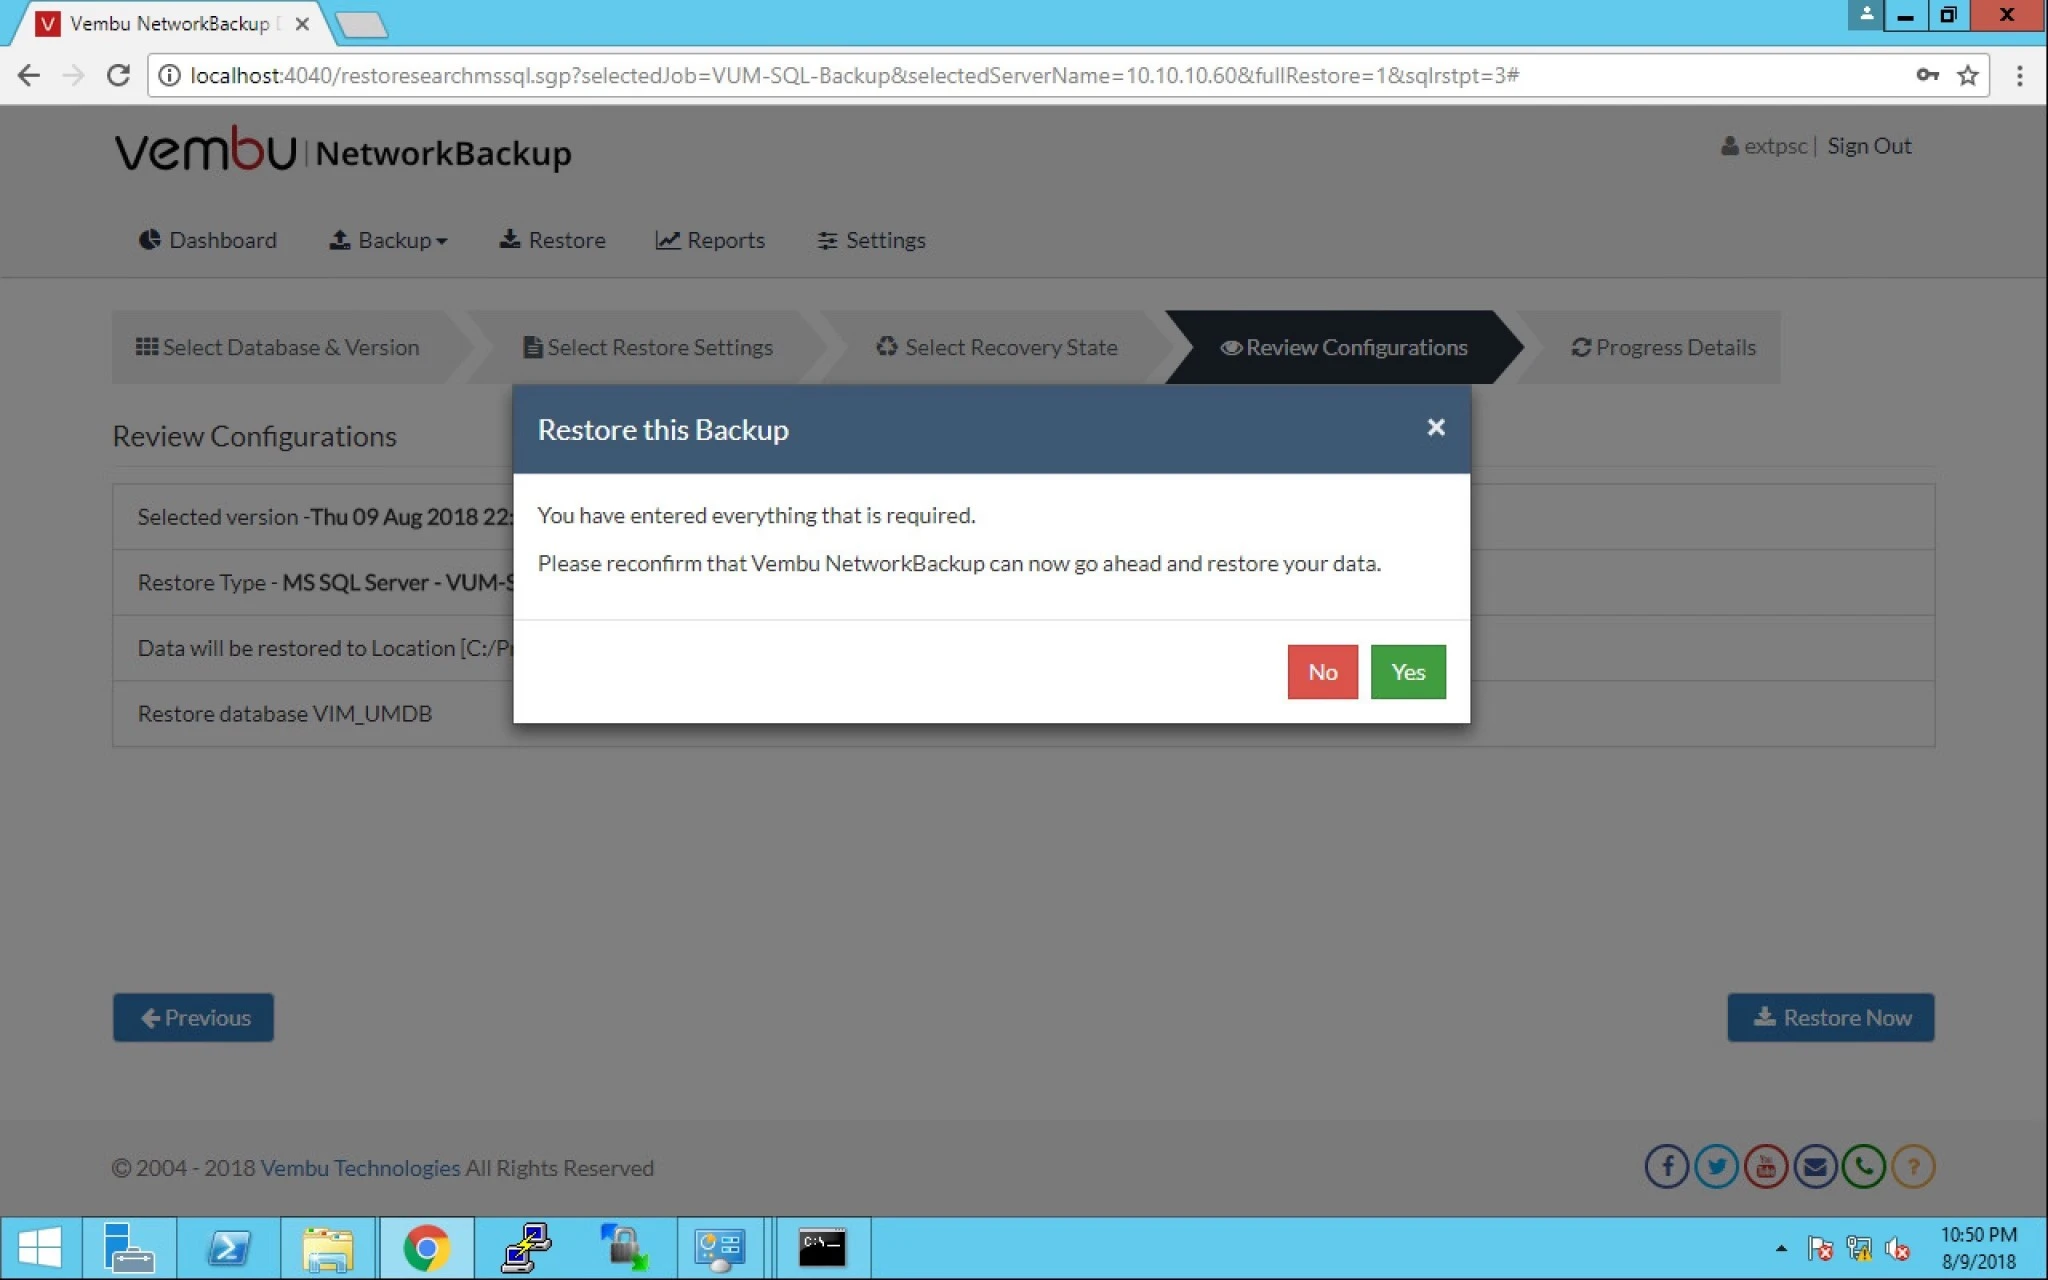
17. It will prompt you to confirm the restore operation to be executed. Click yes.


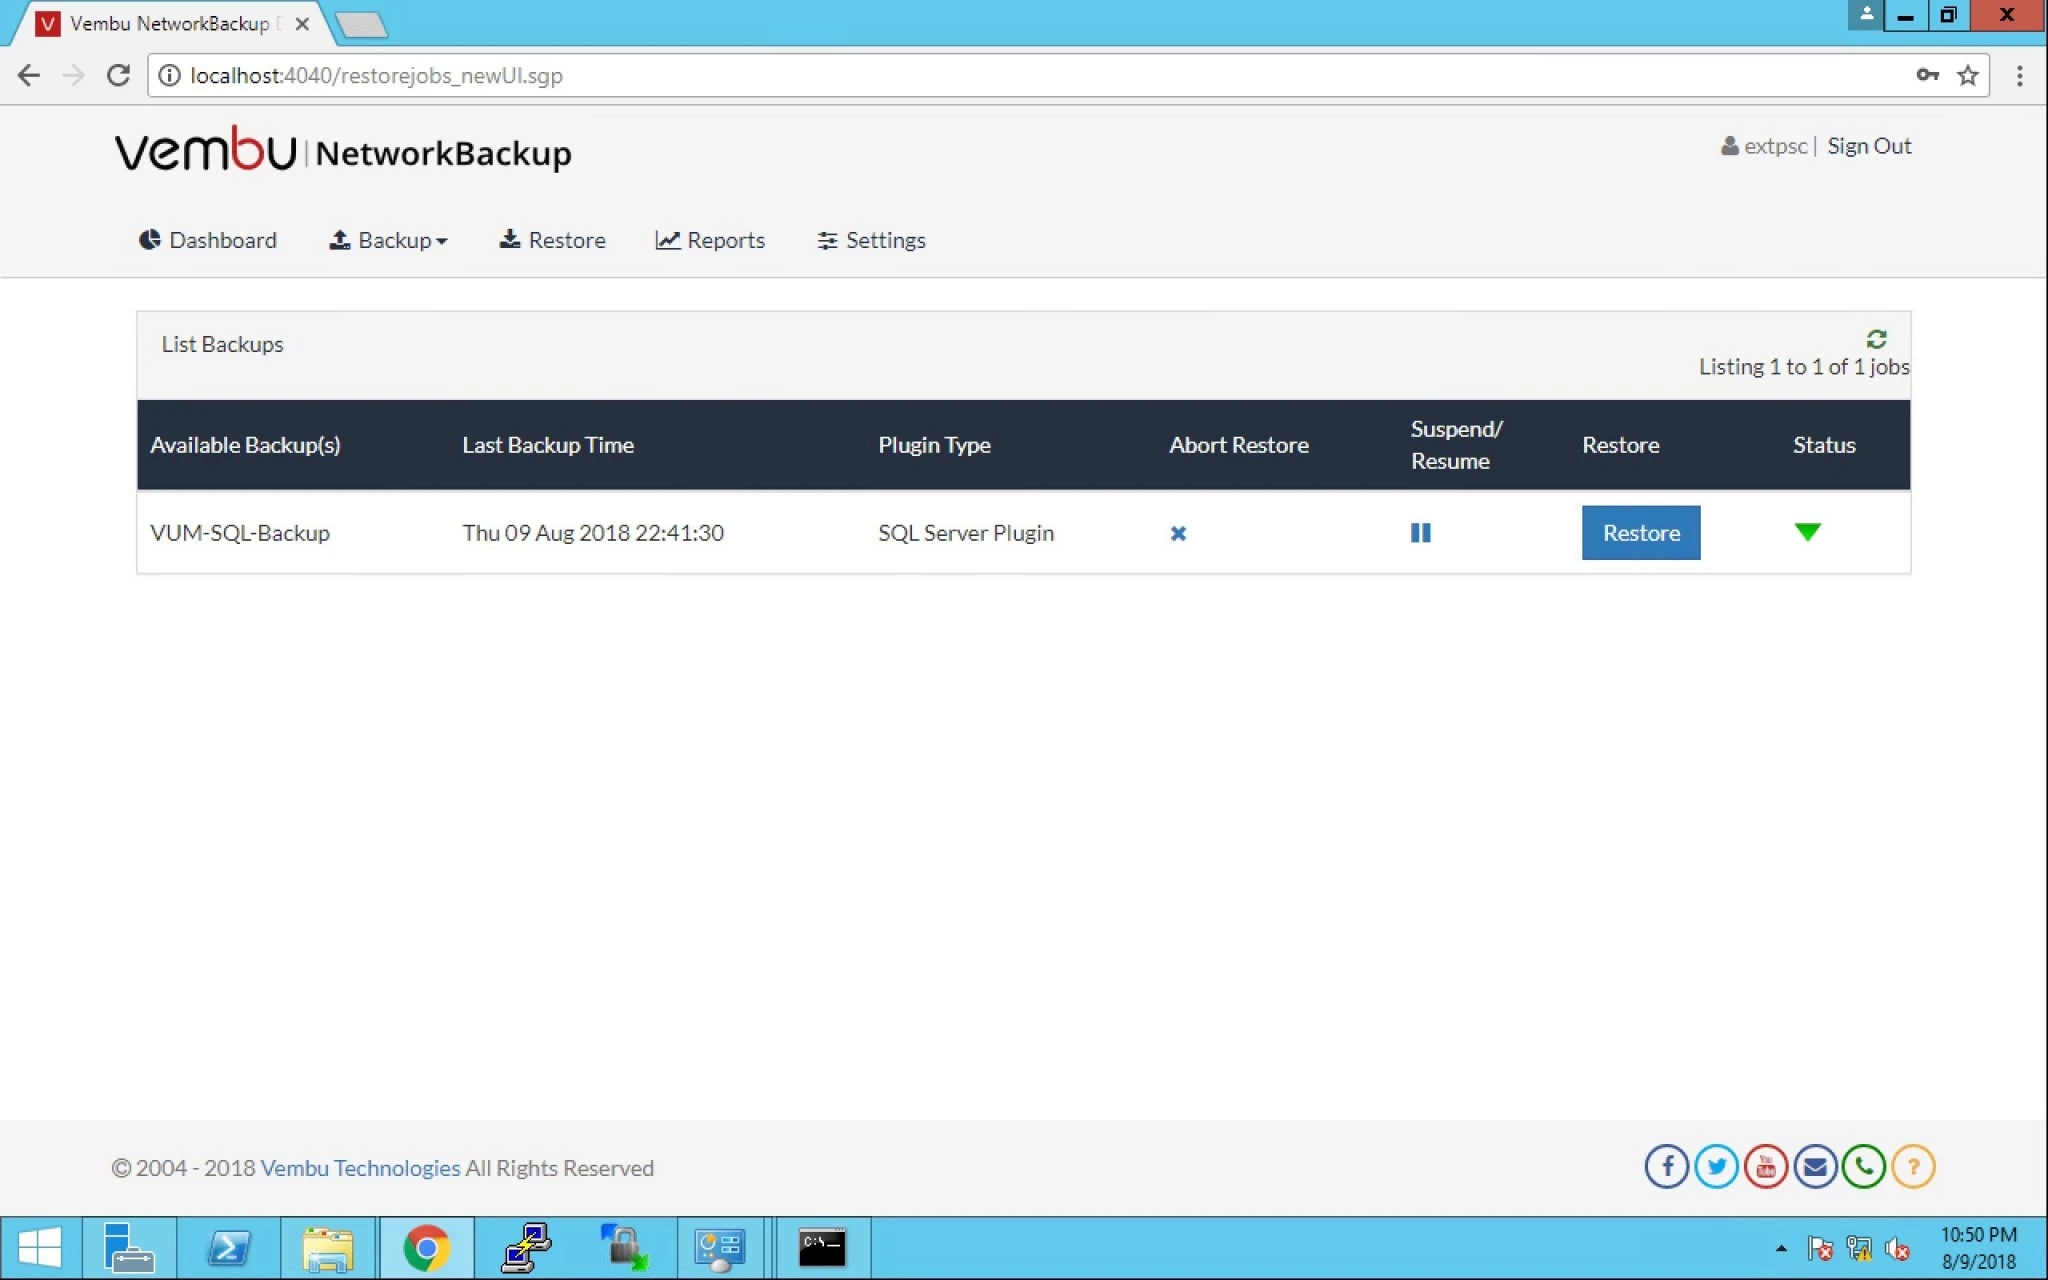
18. You can see the status for successful completion of the restore job.


19. You can also check the report by clicking on Reports > Restore Reports.
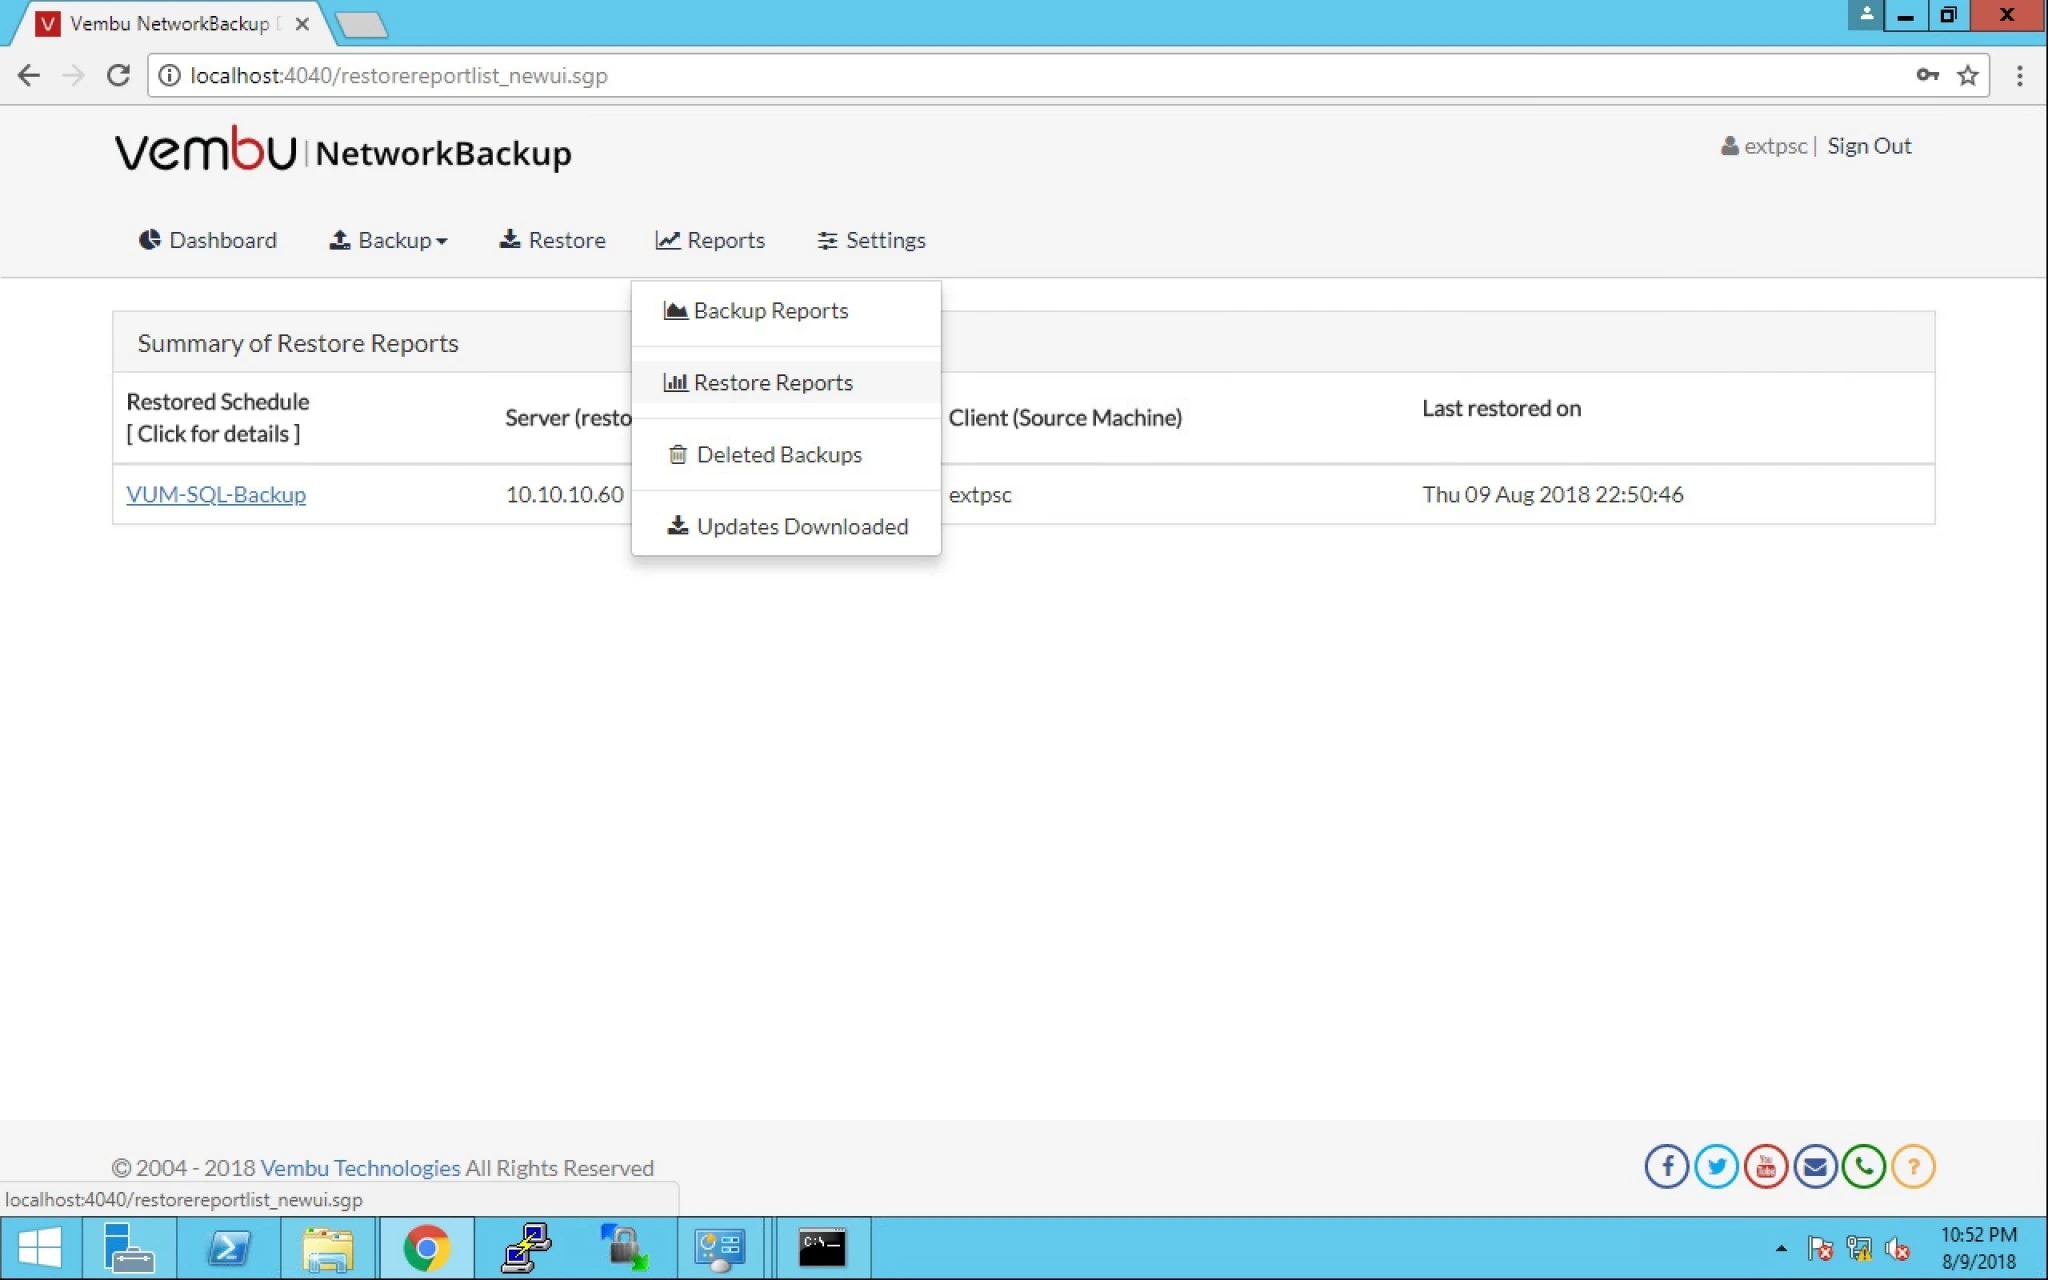


20. Click on Summary option and on VM hyperlink for report.
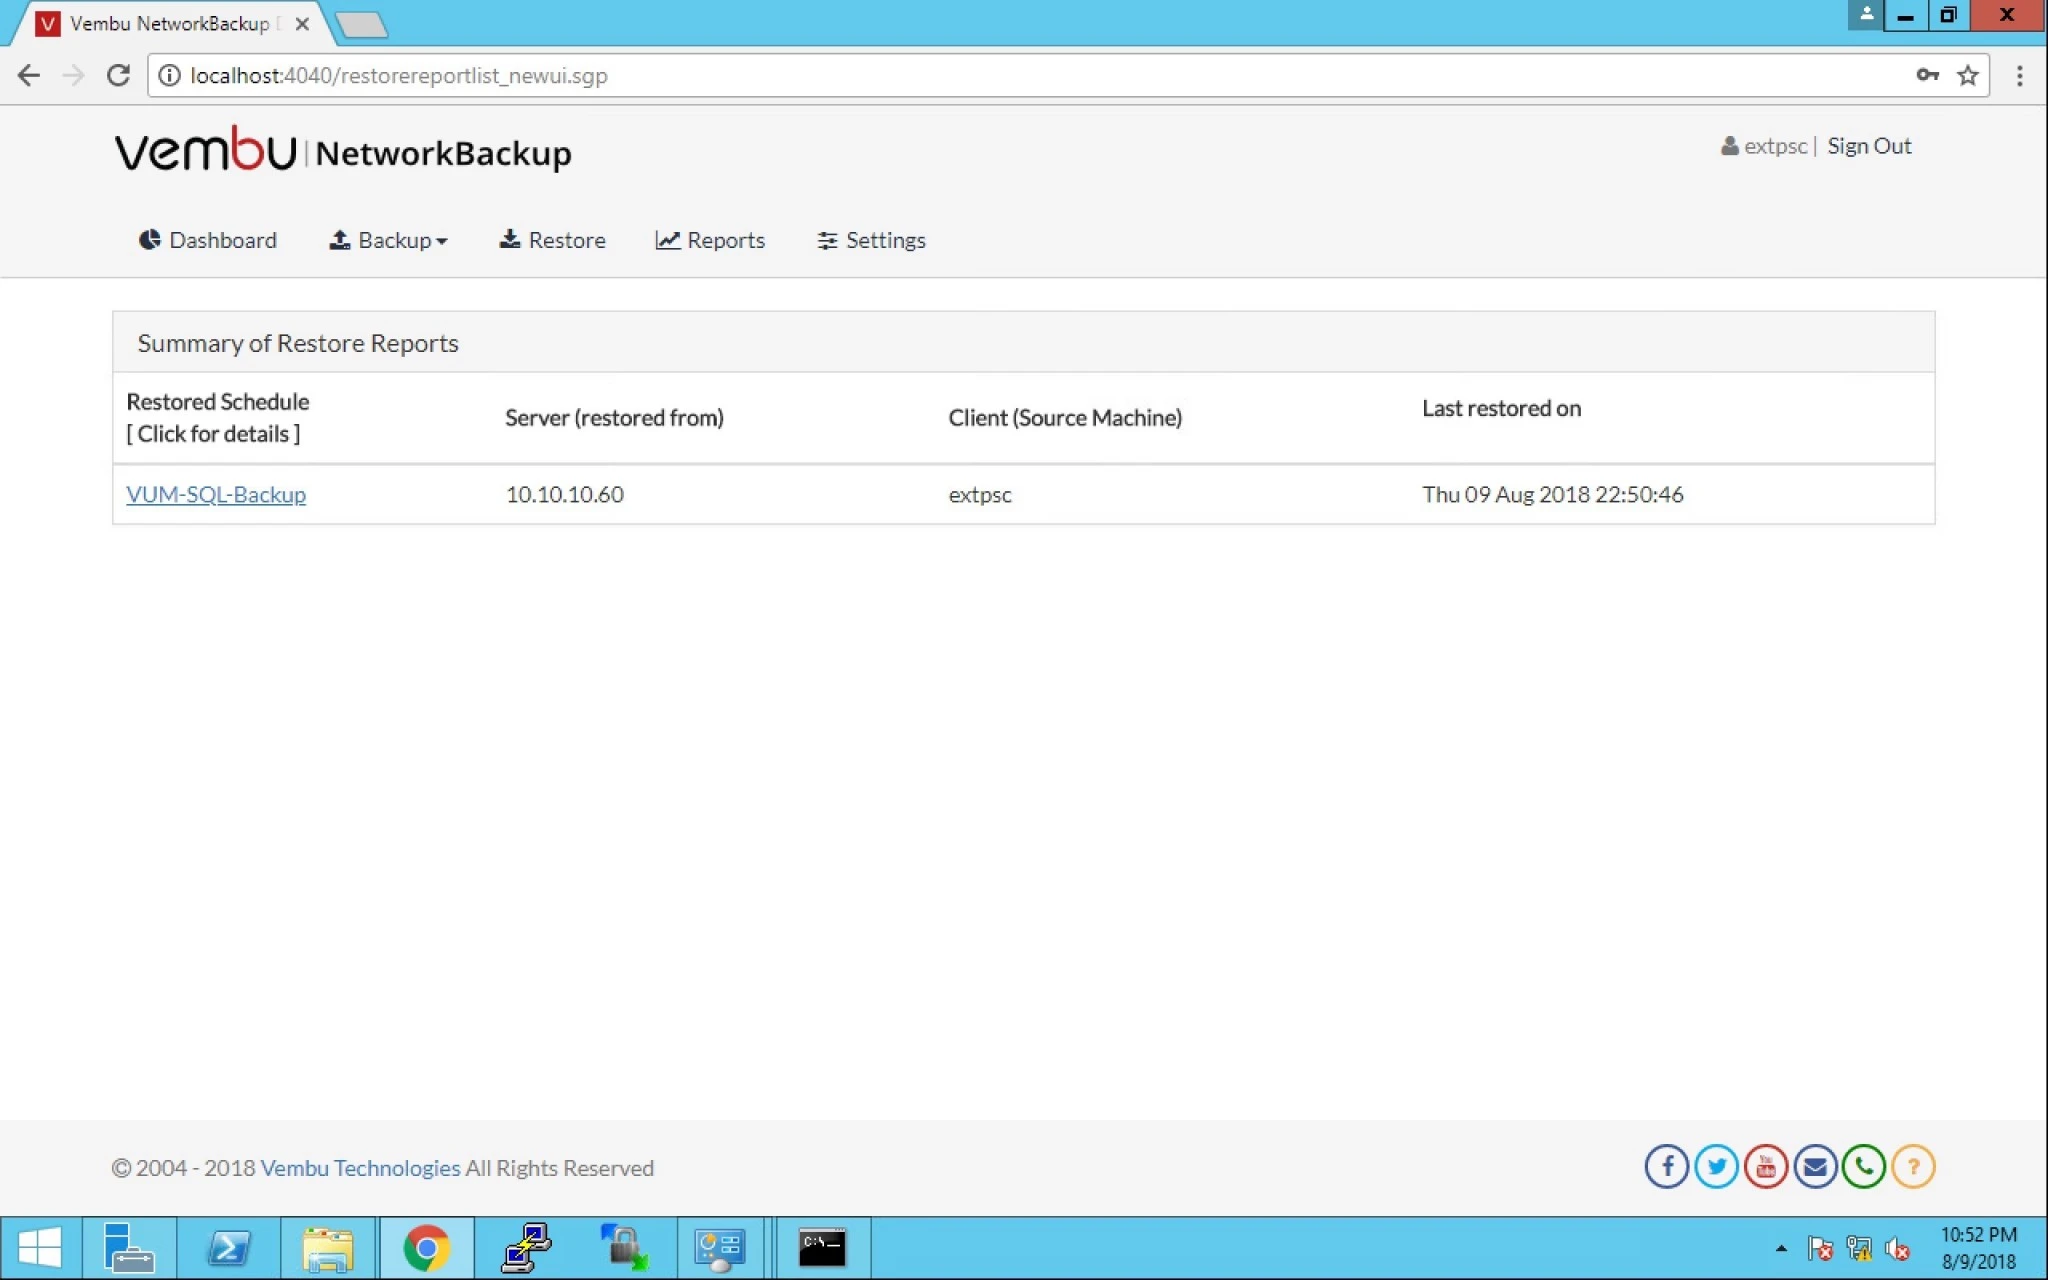


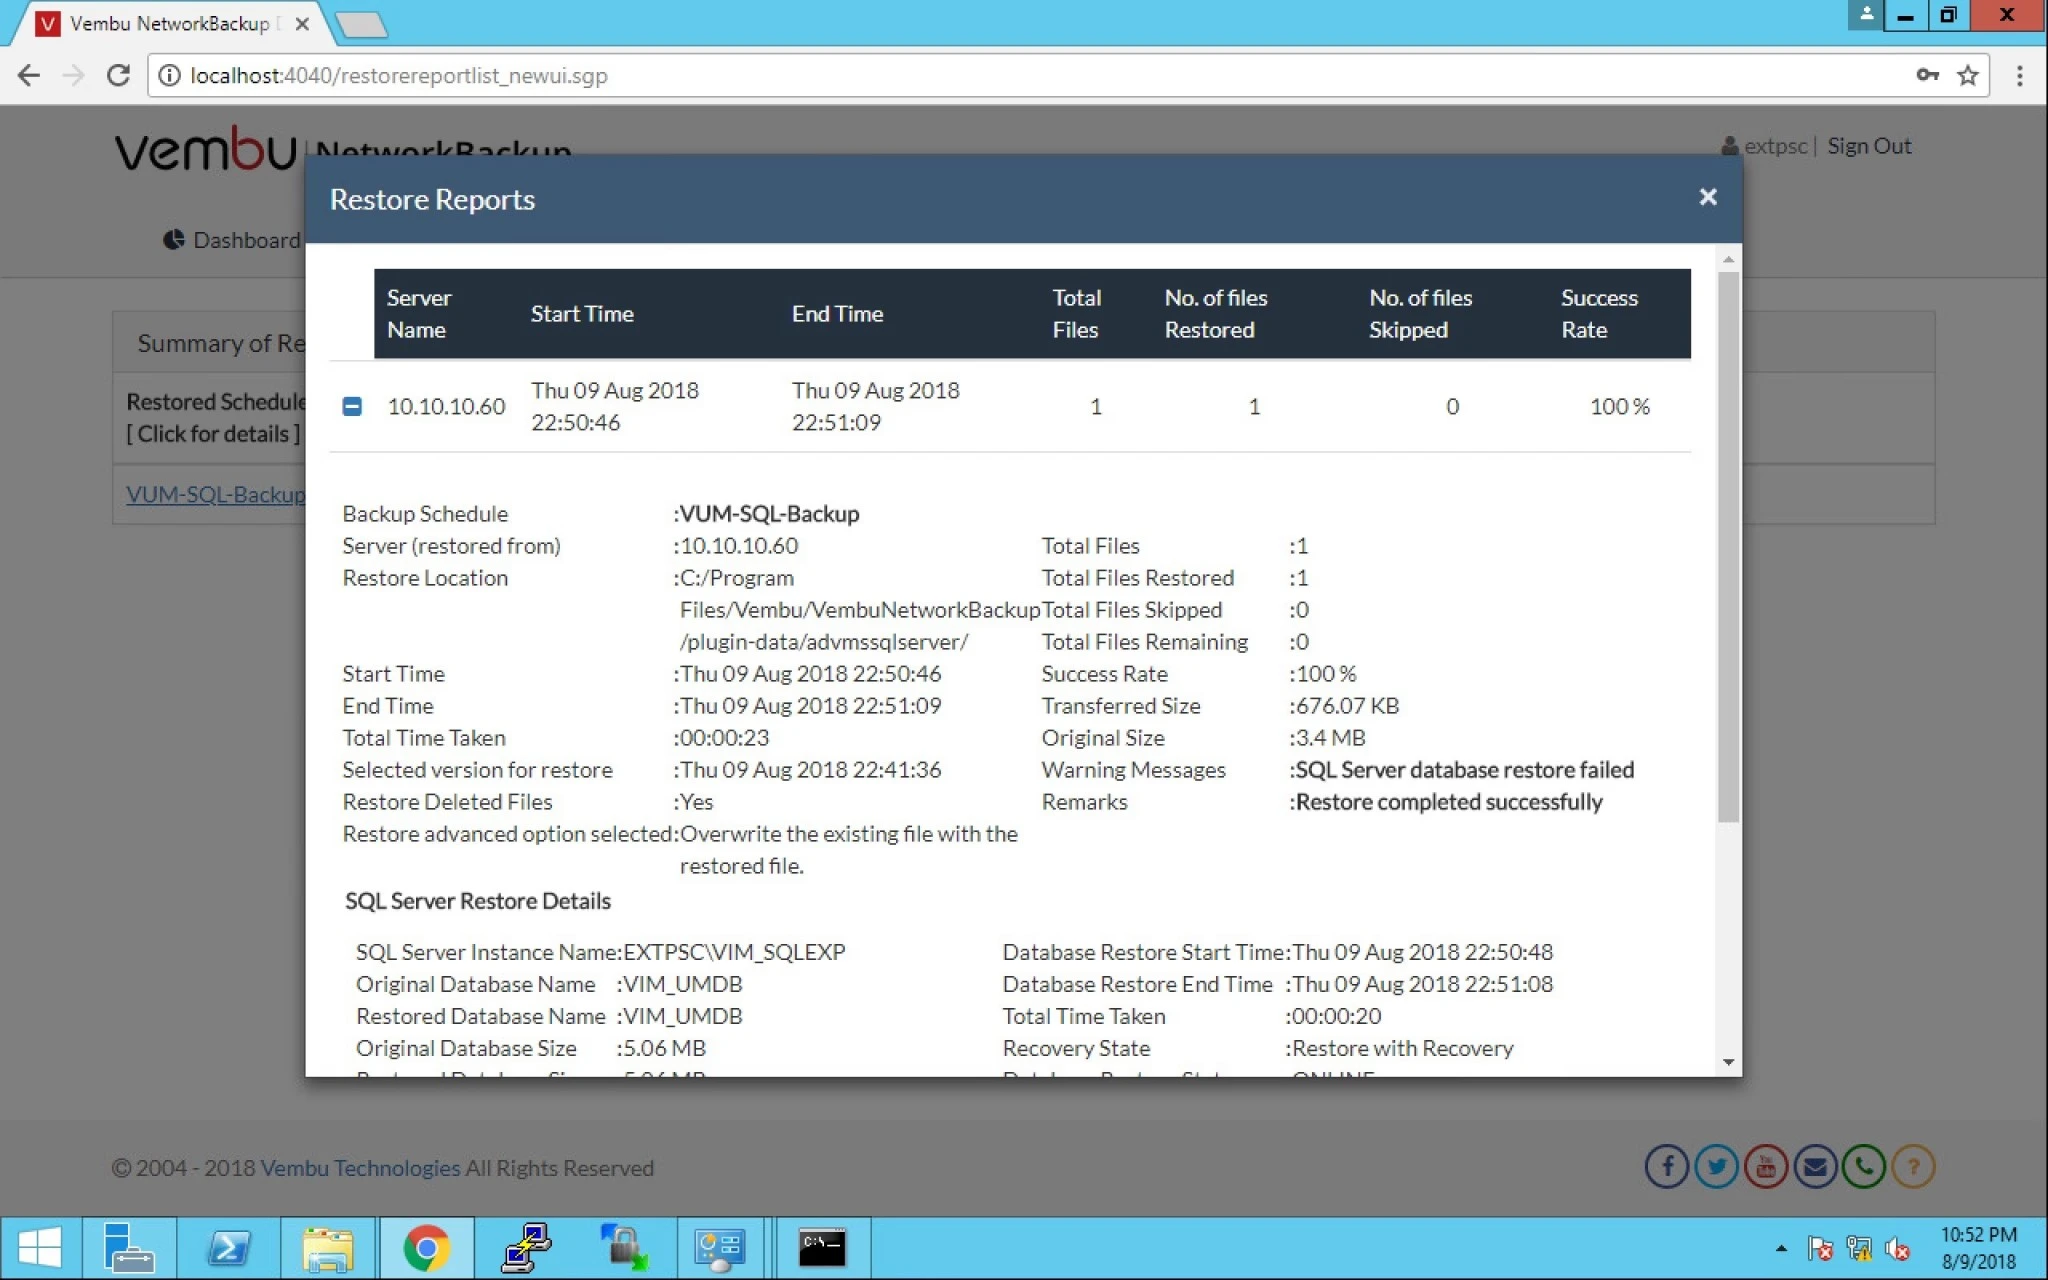
21. This is the restore report with all the details.
 

0

How to Backup MS SQL via Vembu

Topic Outline:

Backup MS SQL Database

Database Options

Scheduling

Differential & Transaction

Encryption 


If you are using Vembu BDR suits then you have a application backup option also. we will take MS SQL backup via Vembu Network Backup.

  1. First download the Vembu Network Backup (Click here).

2.  After that install on the server where you are running MS SQL.

3.  Open the console by typing URL : http://IP of server:4040 where the port is 4040.

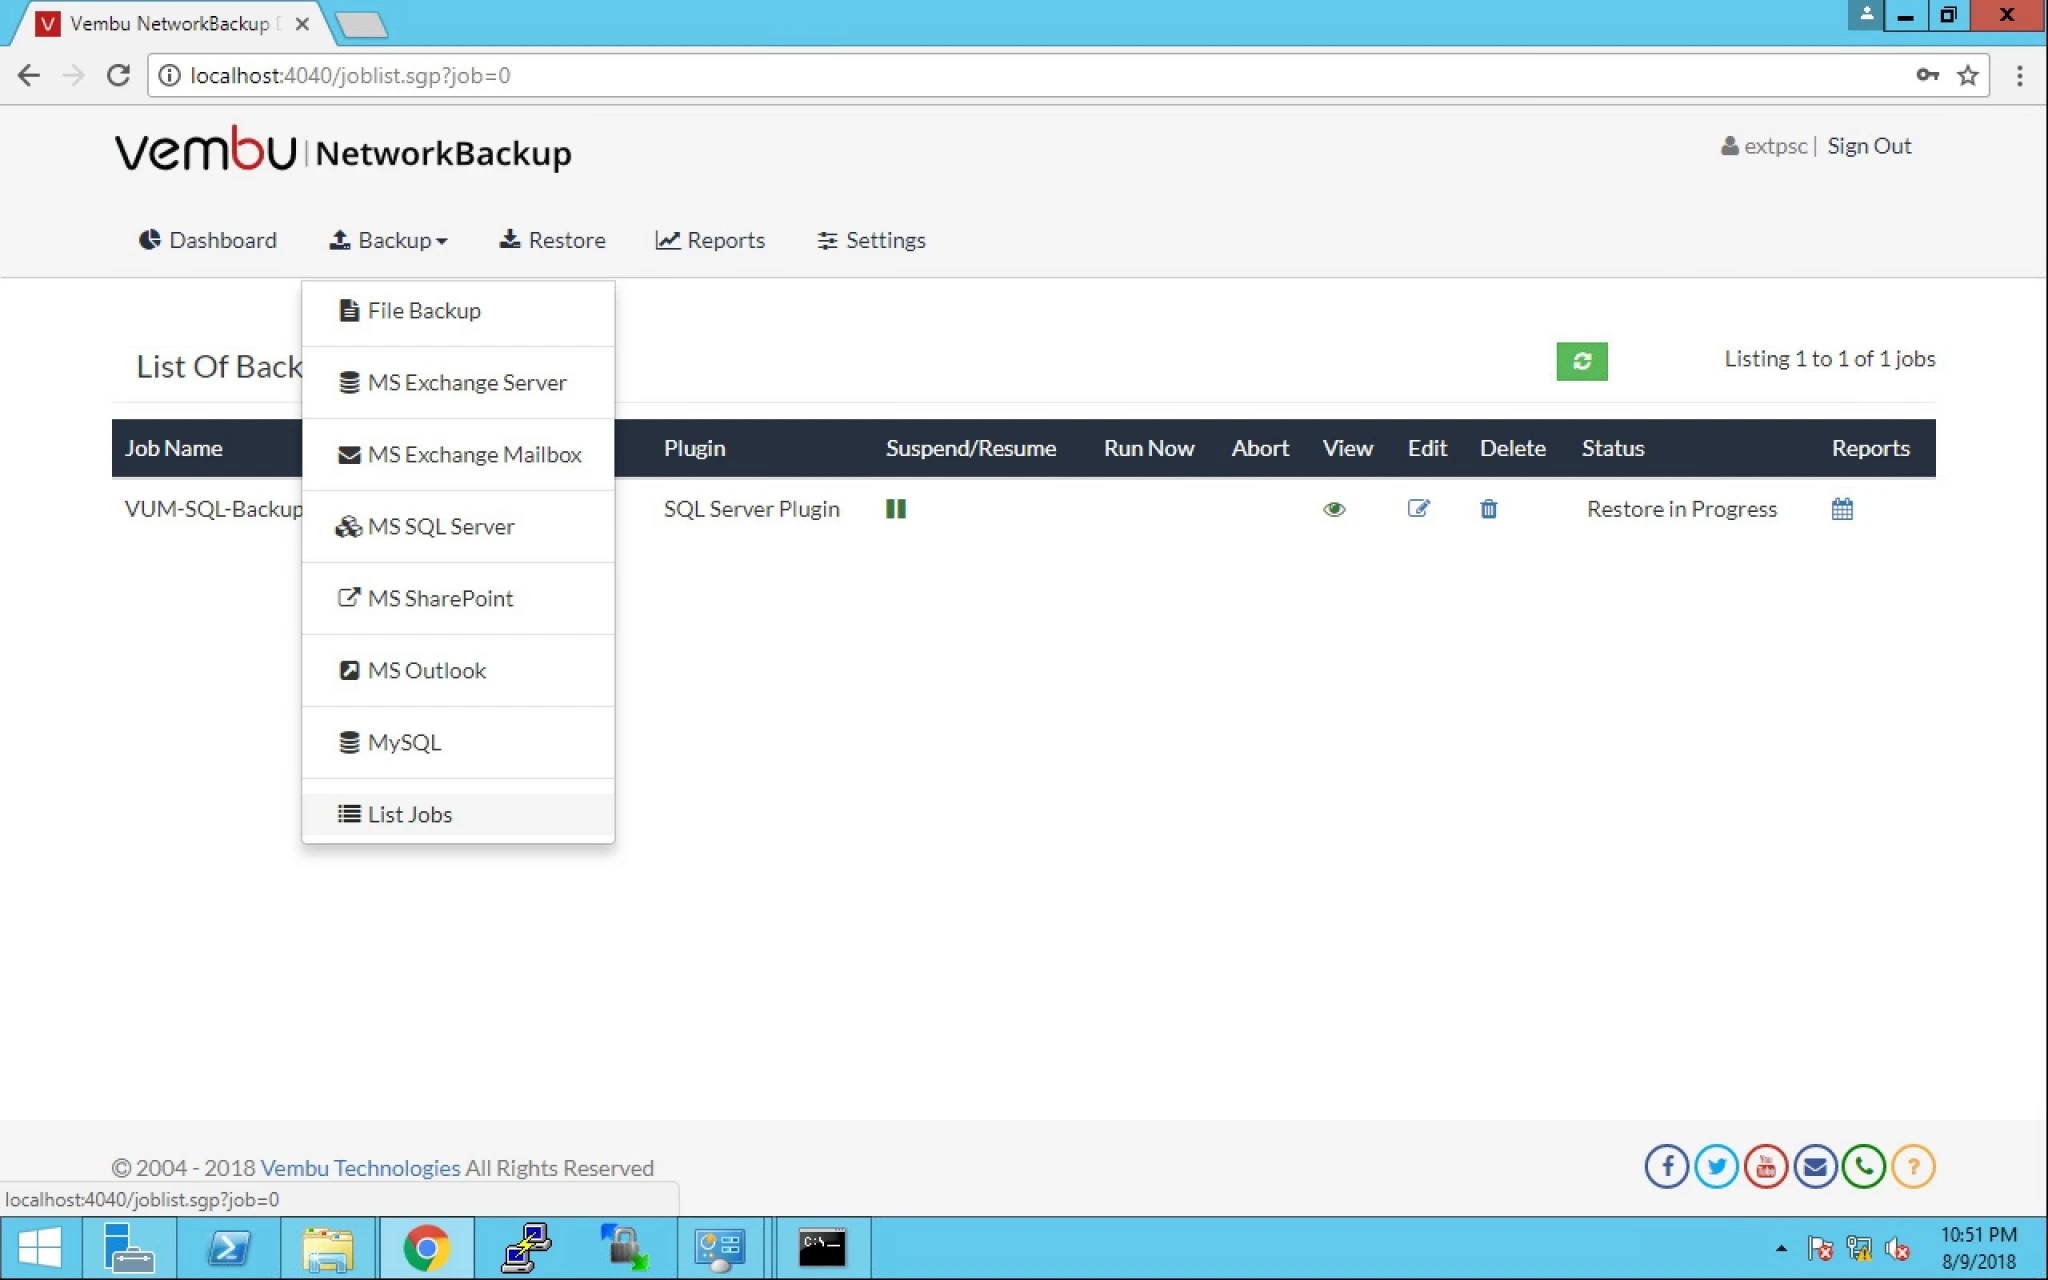
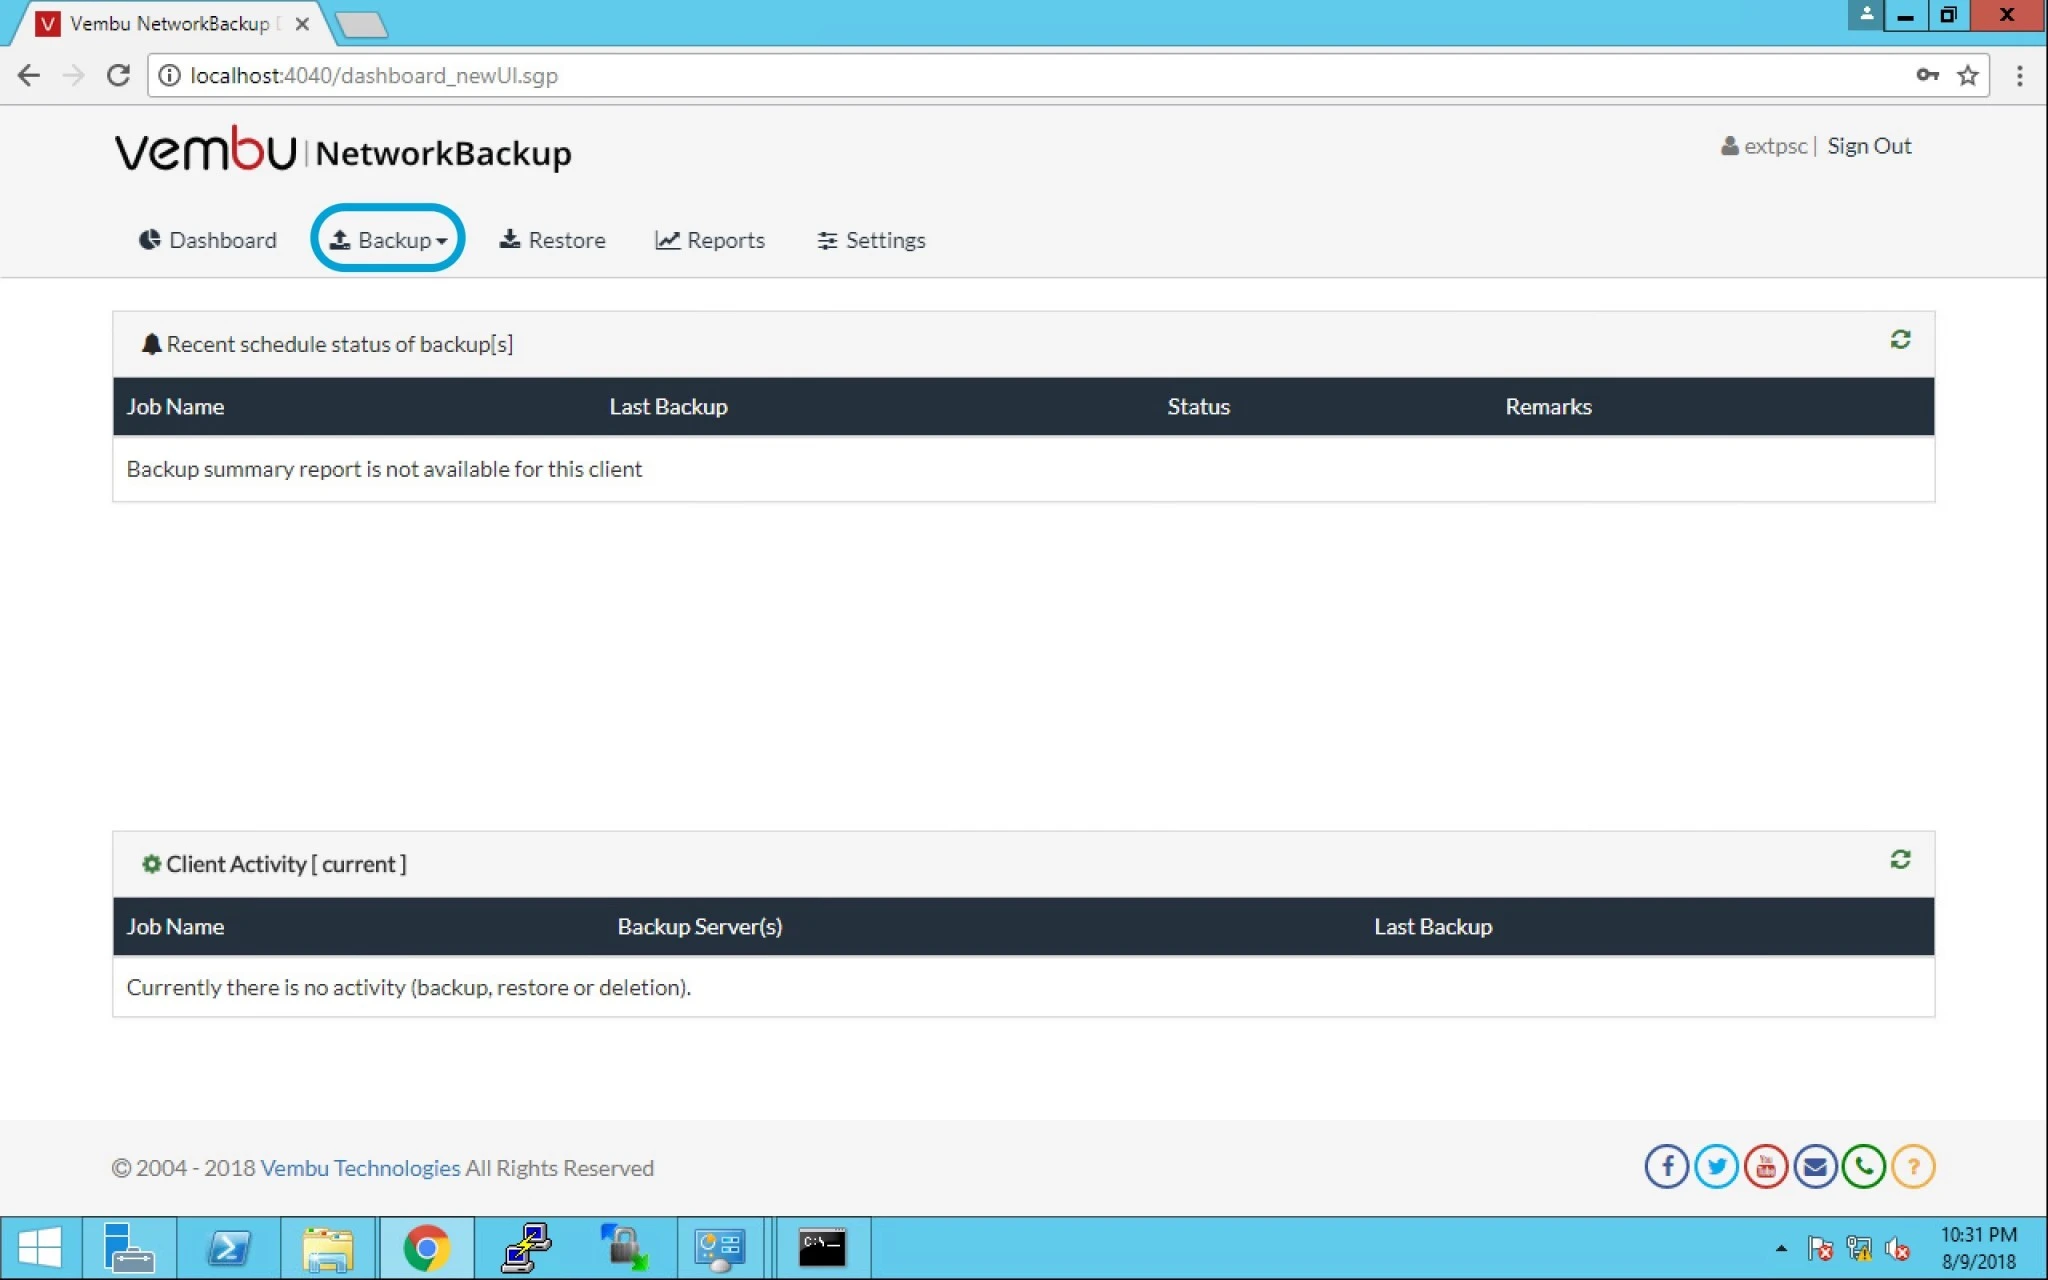
4.  Go to Backup tab as seen in the below image.


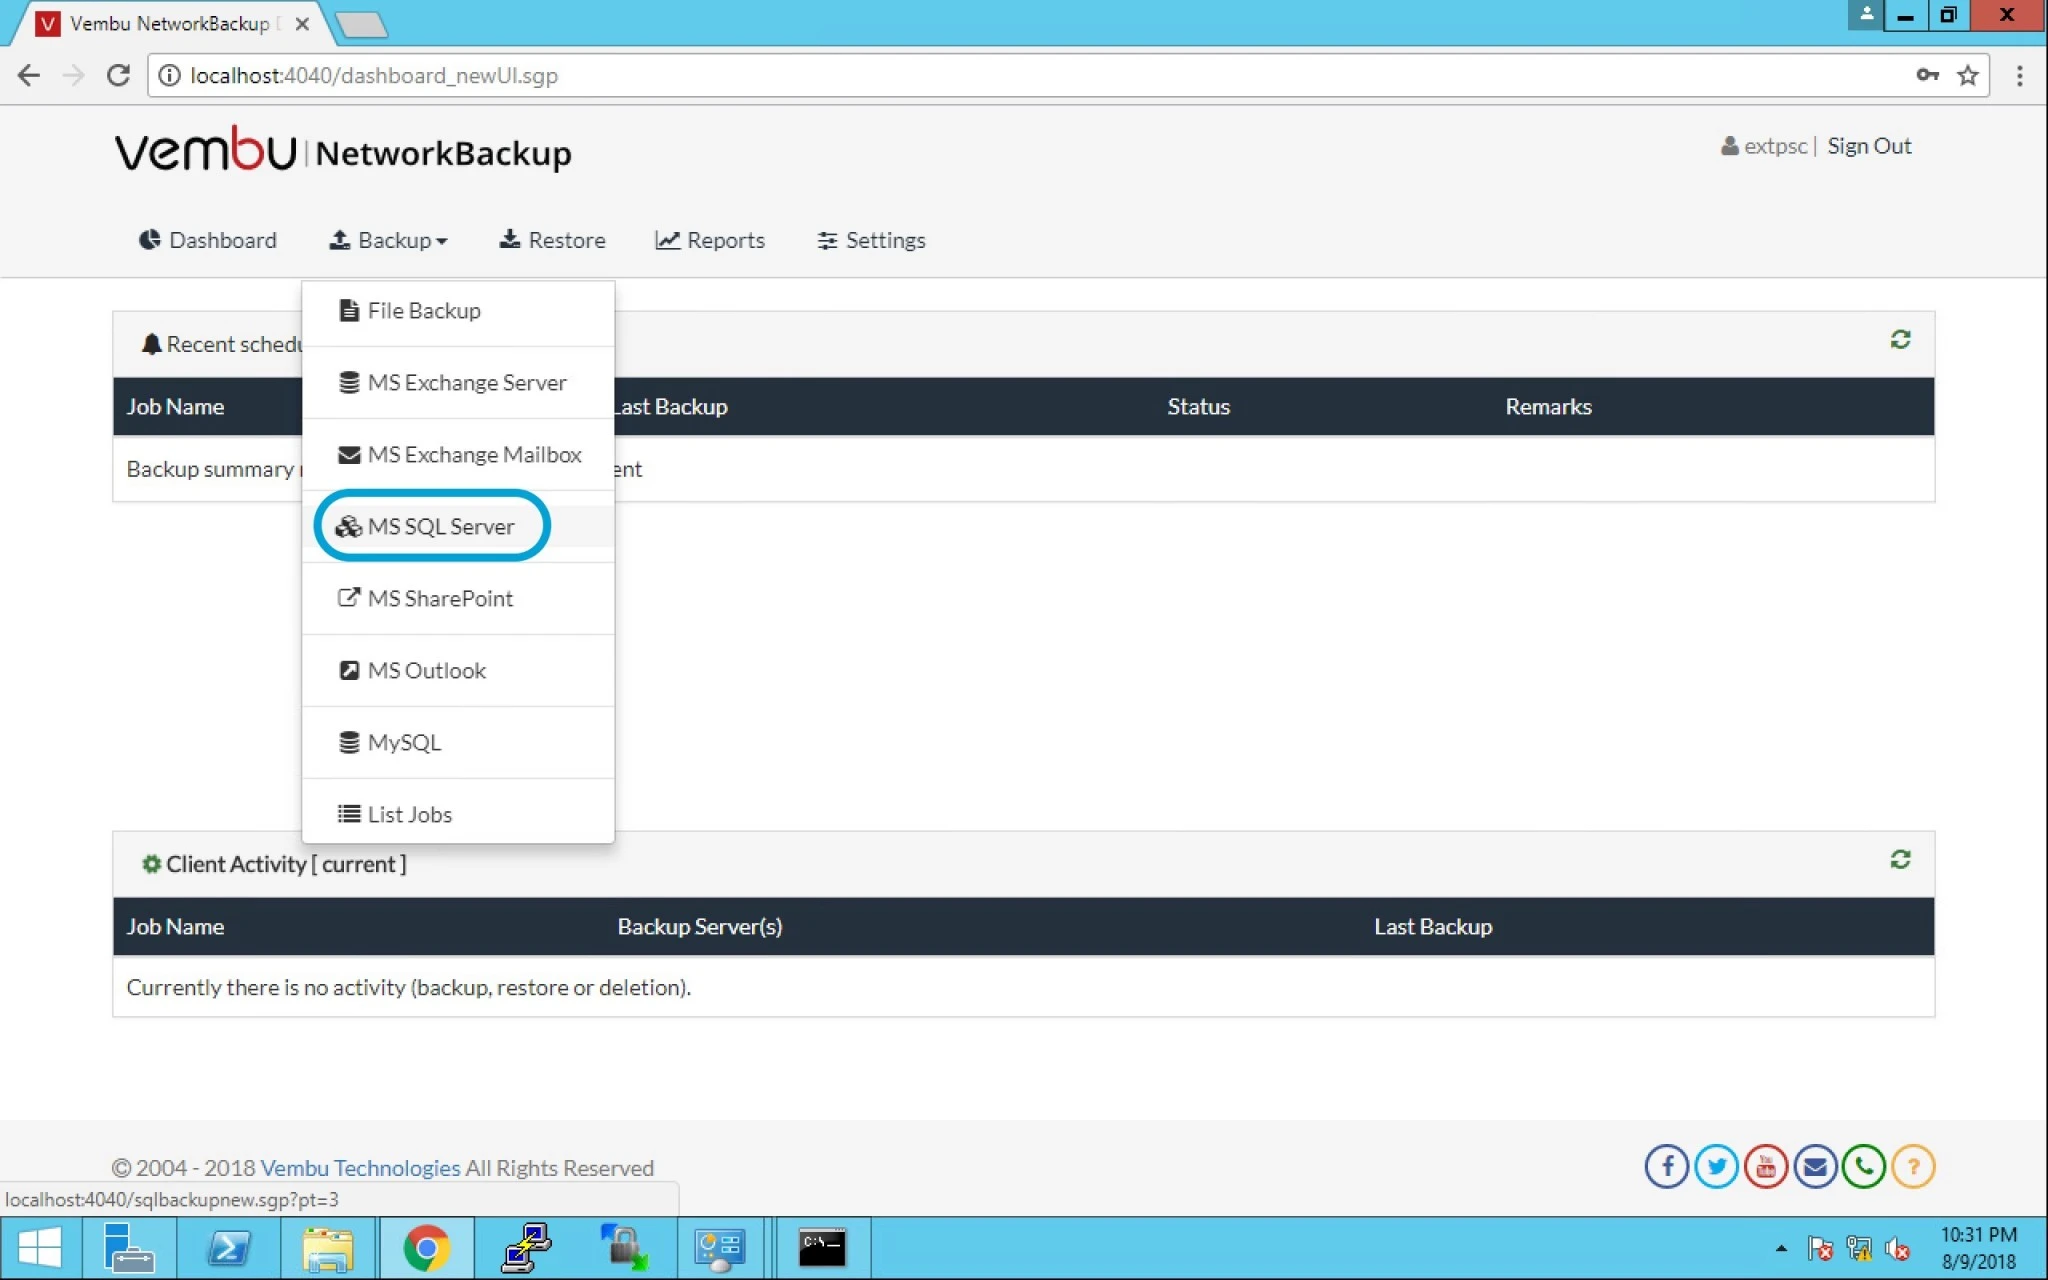
5. Now Click on the MS SQL Server option.


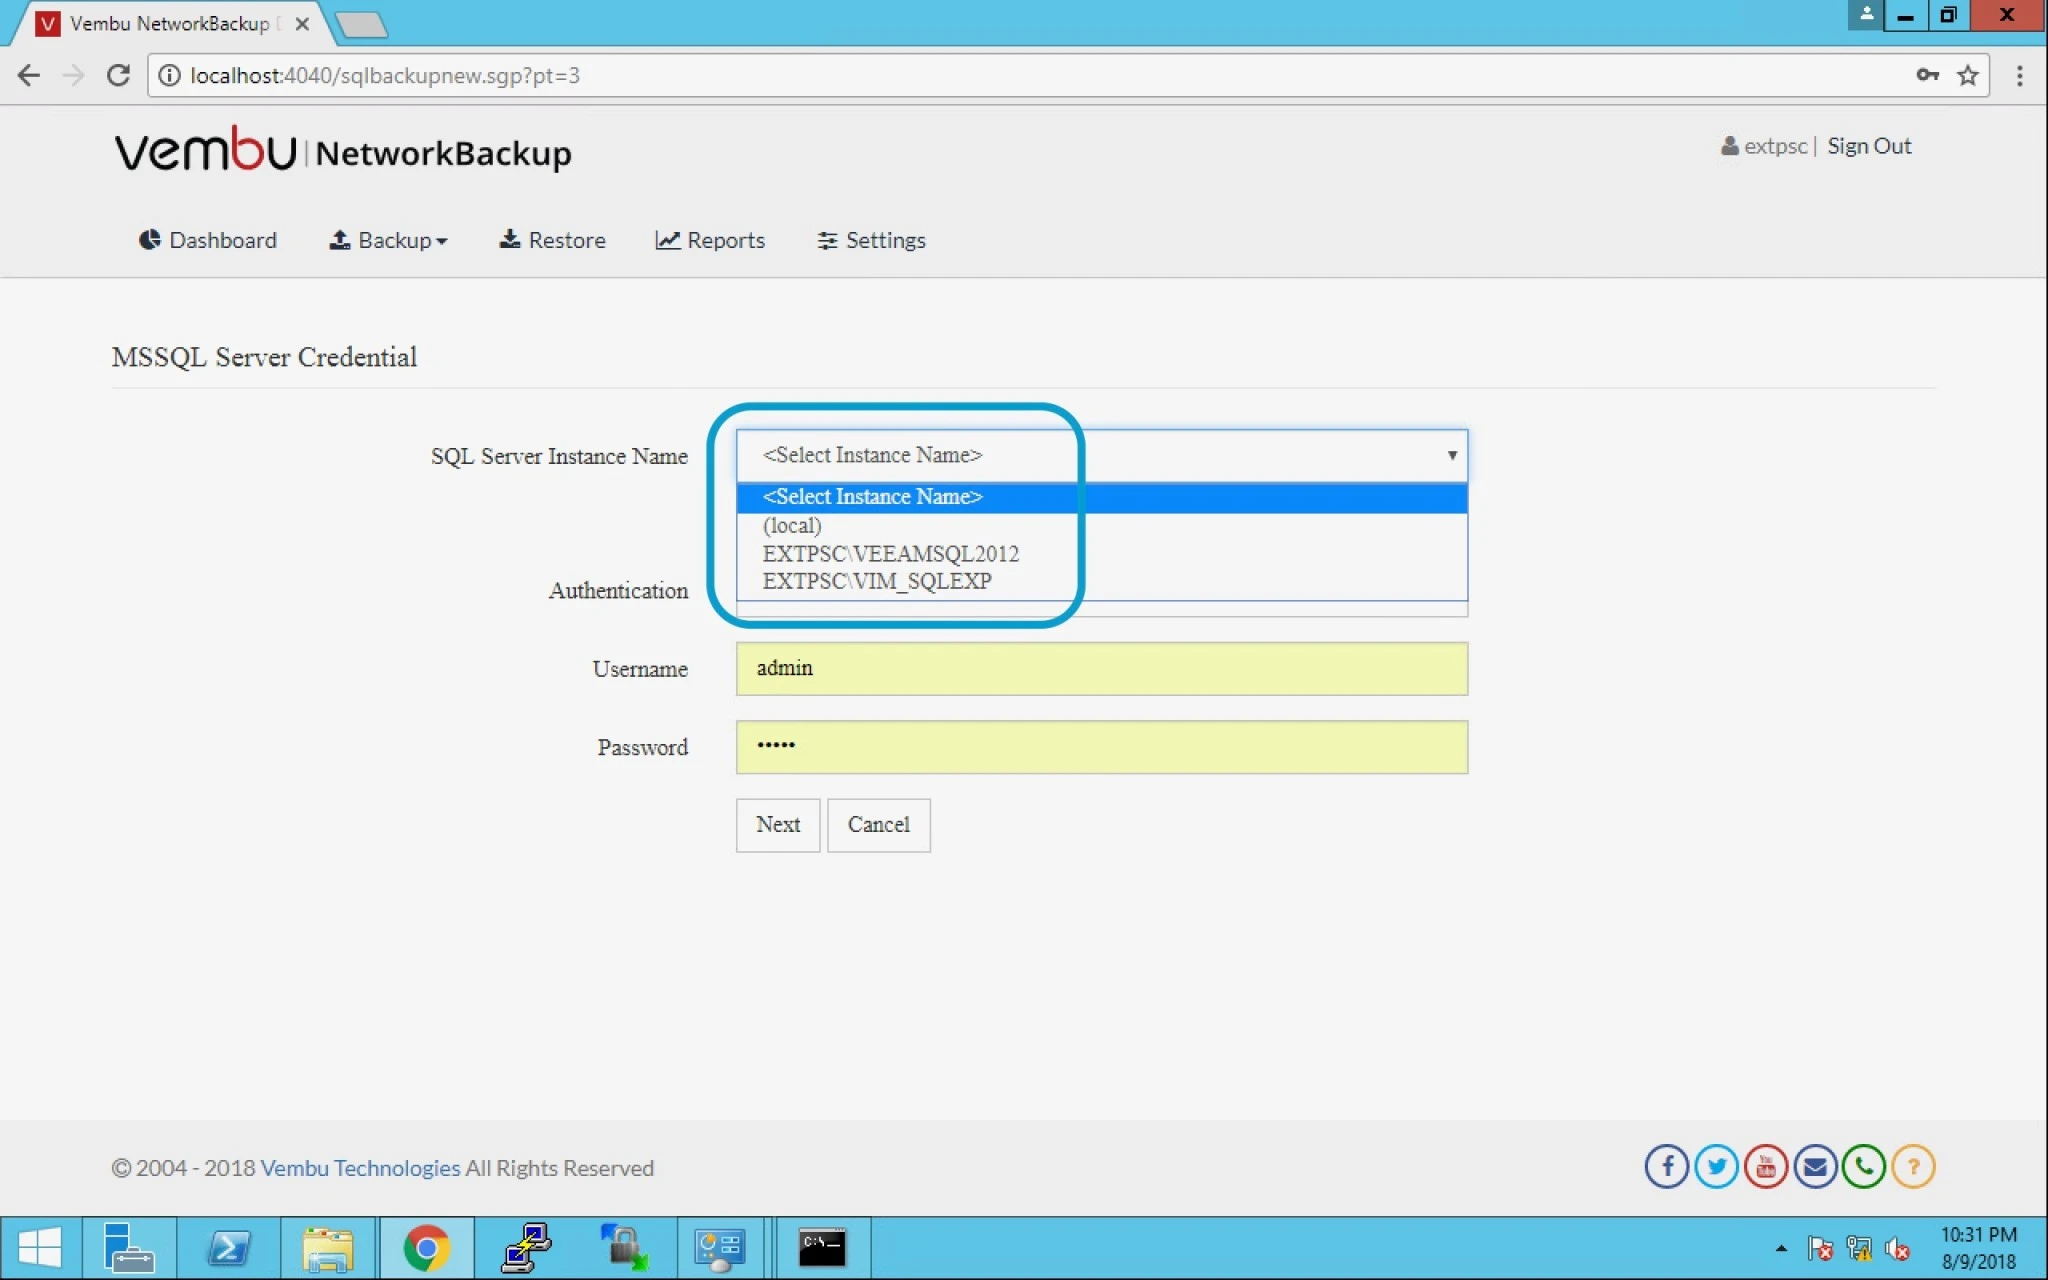
6. After this you can see below options:

SQL Server Instance name – you can select the database as per your requirement.


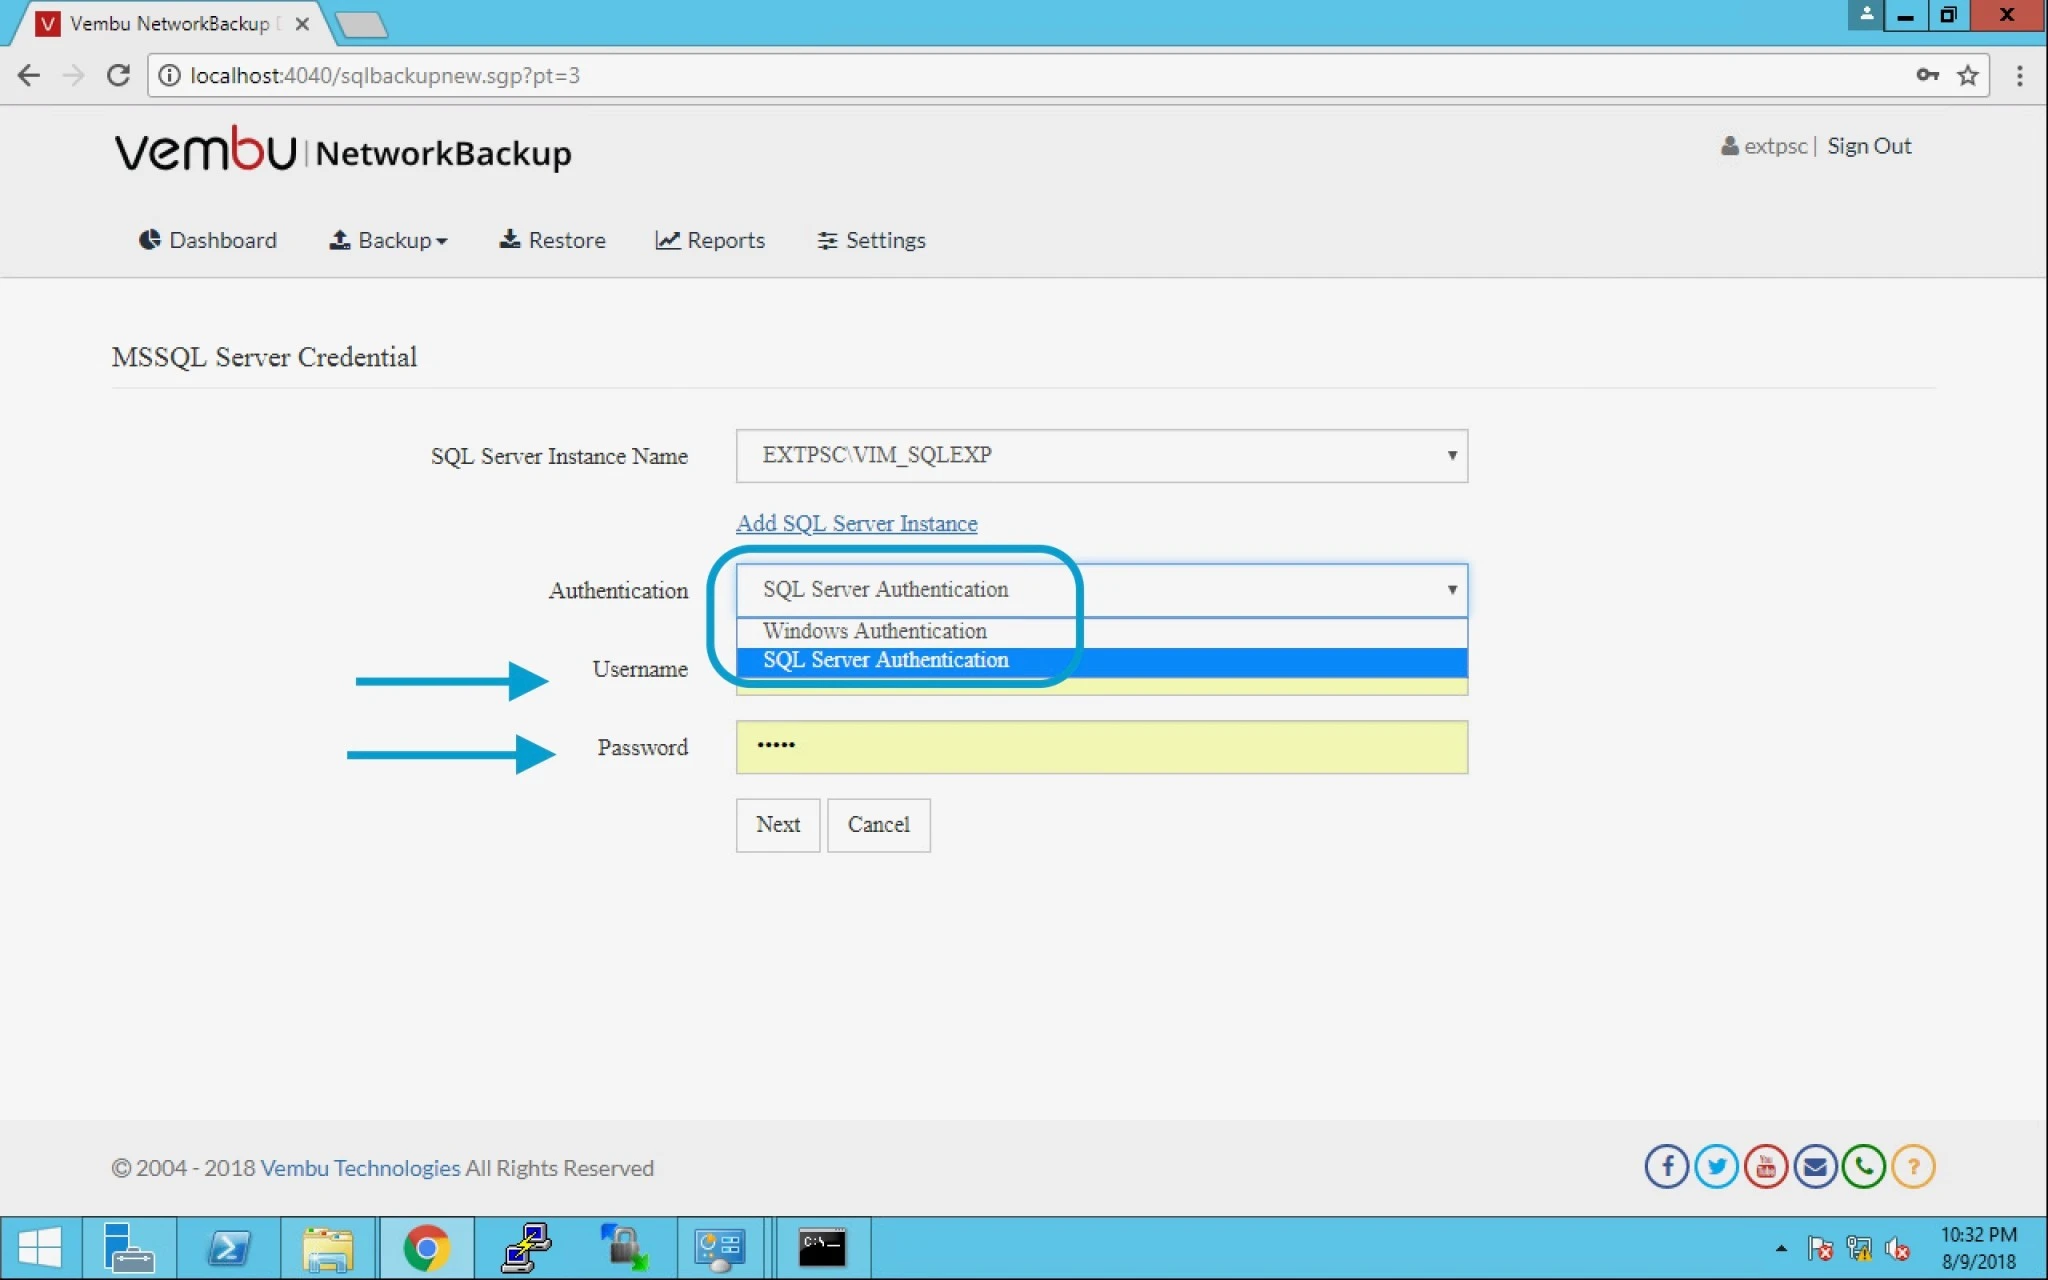
7.  Authentication – use Windows or SQL Server Authentication.

Provide username and Password. Click next.


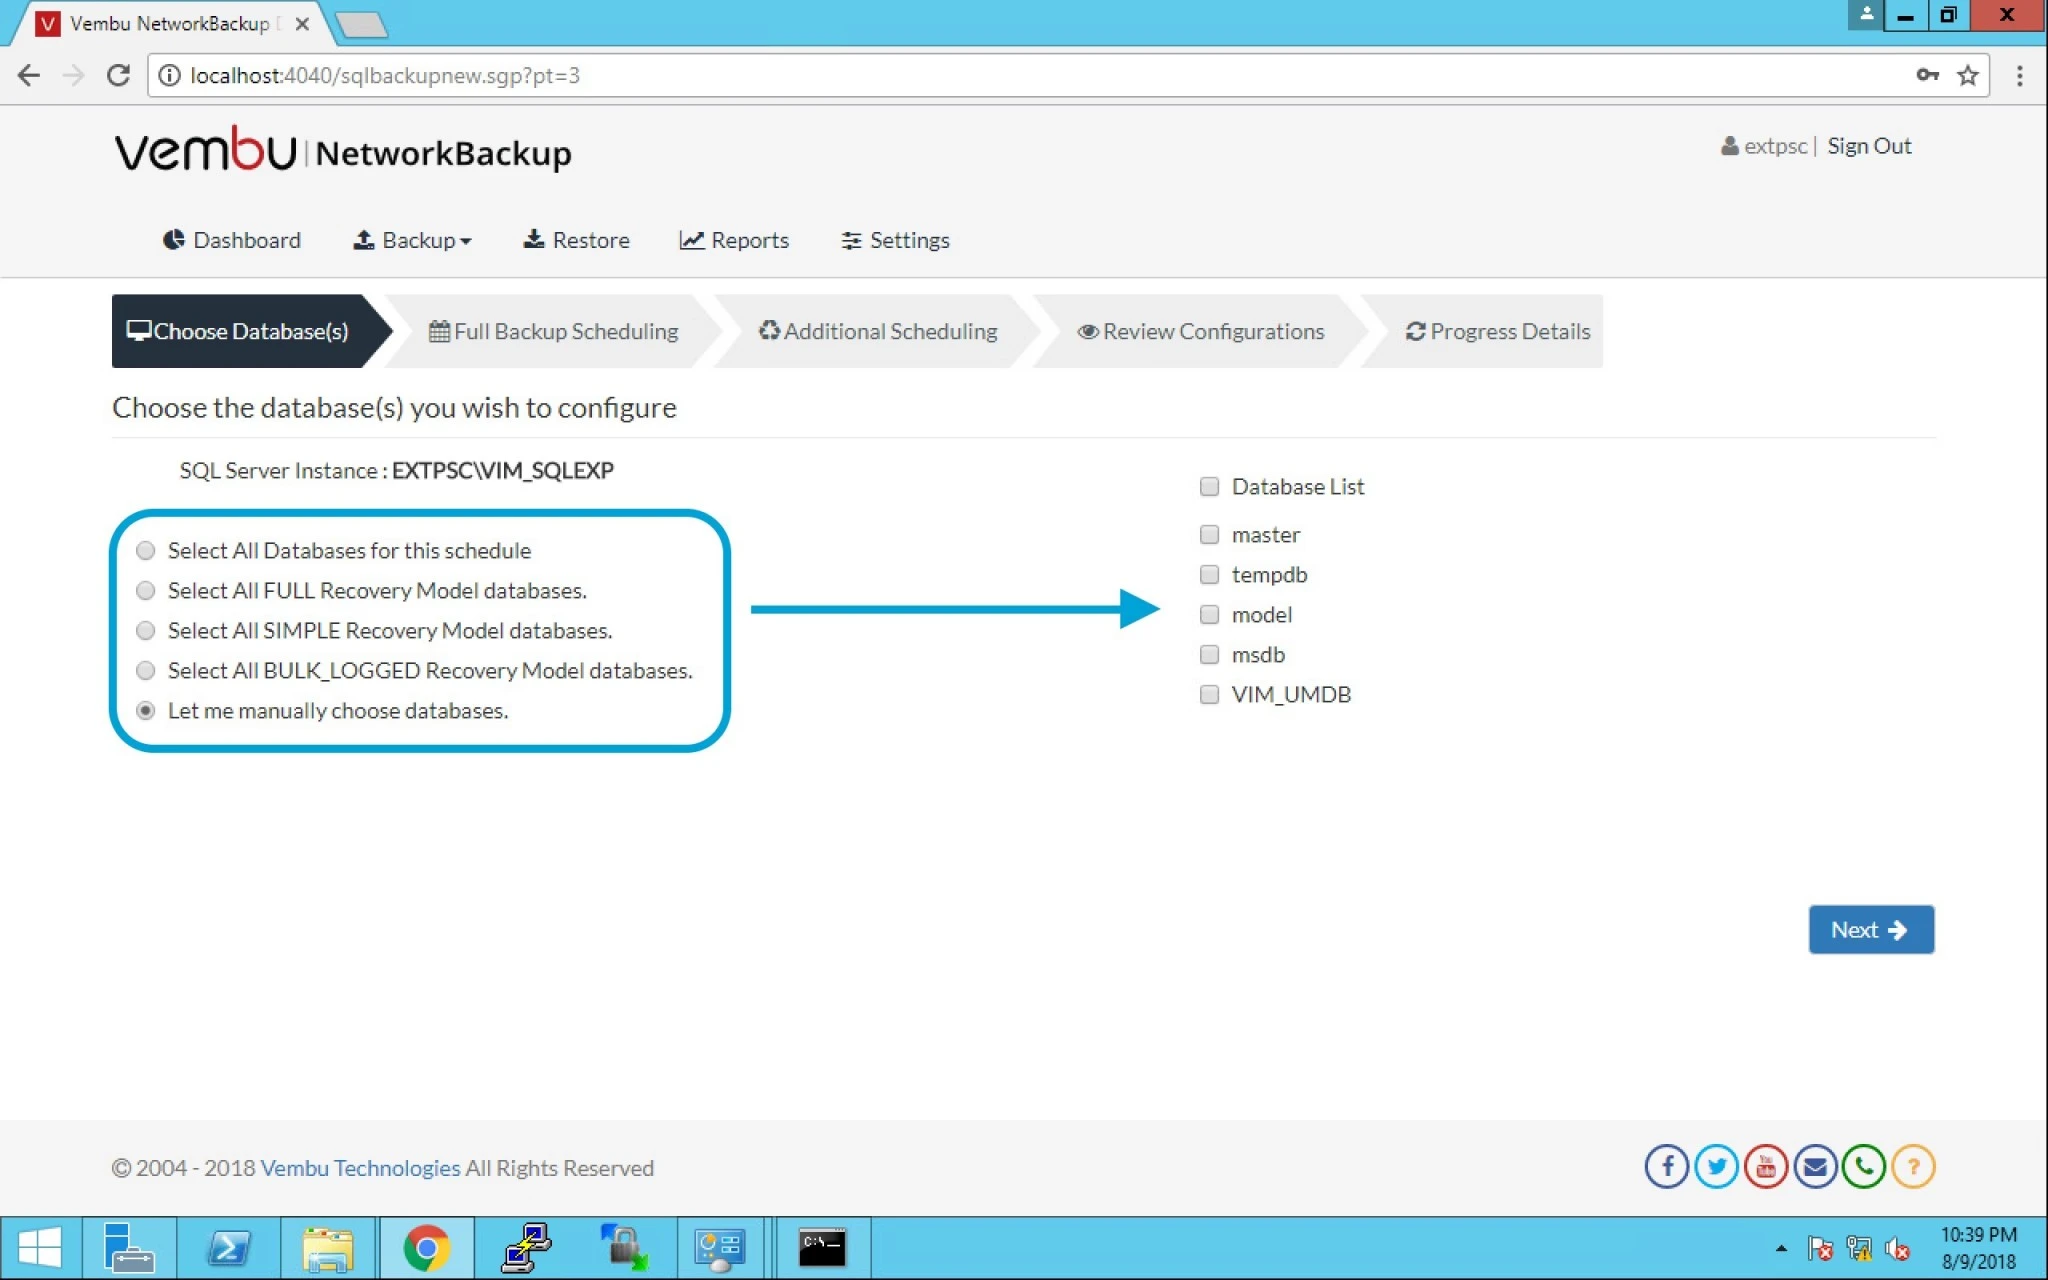
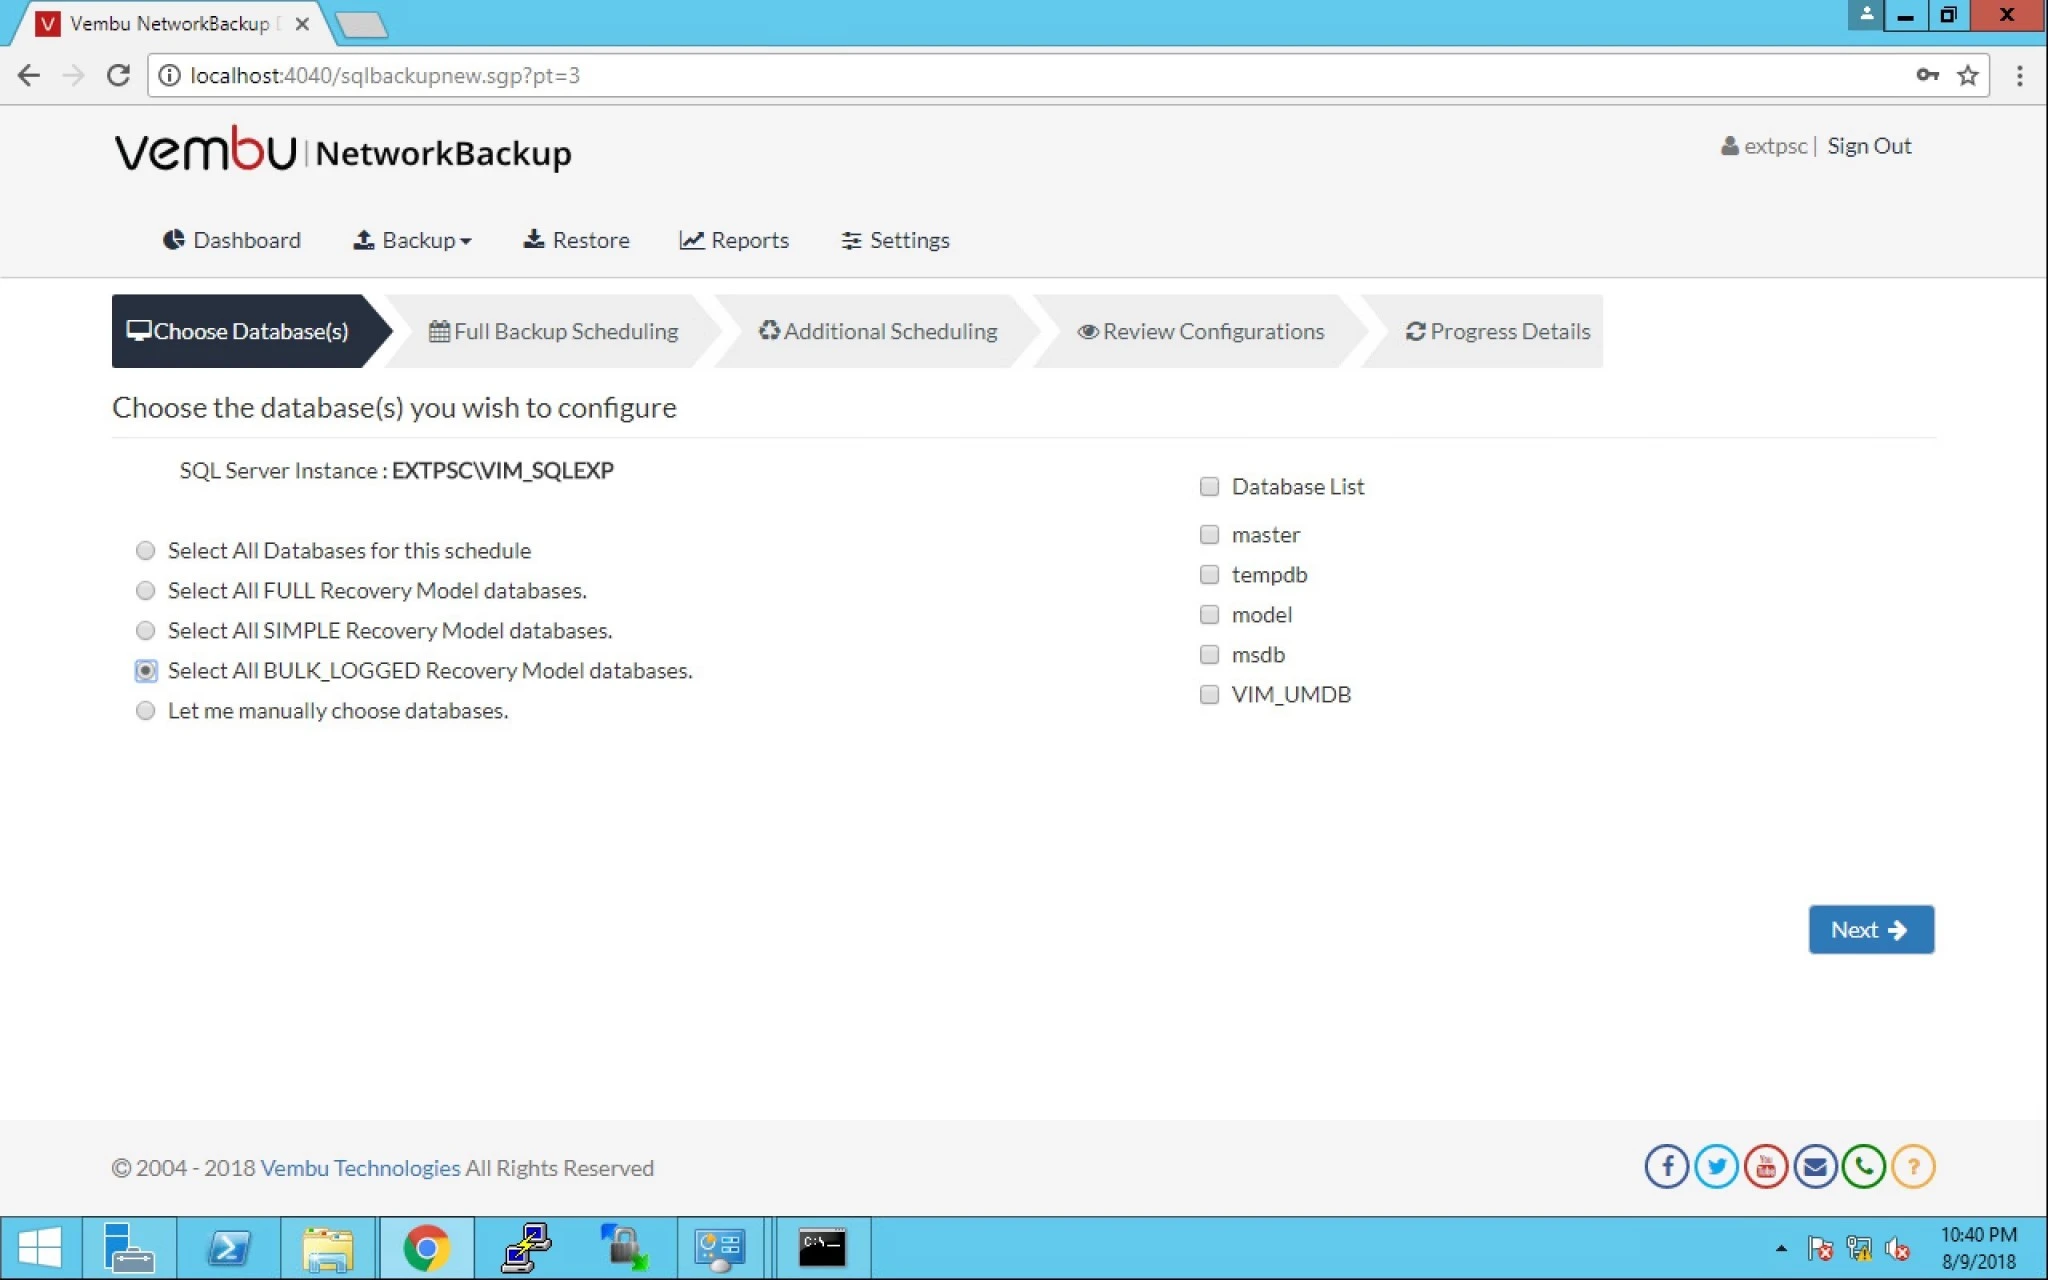
8. After choosing database, you can now select from the given below options to backup SQL instance.


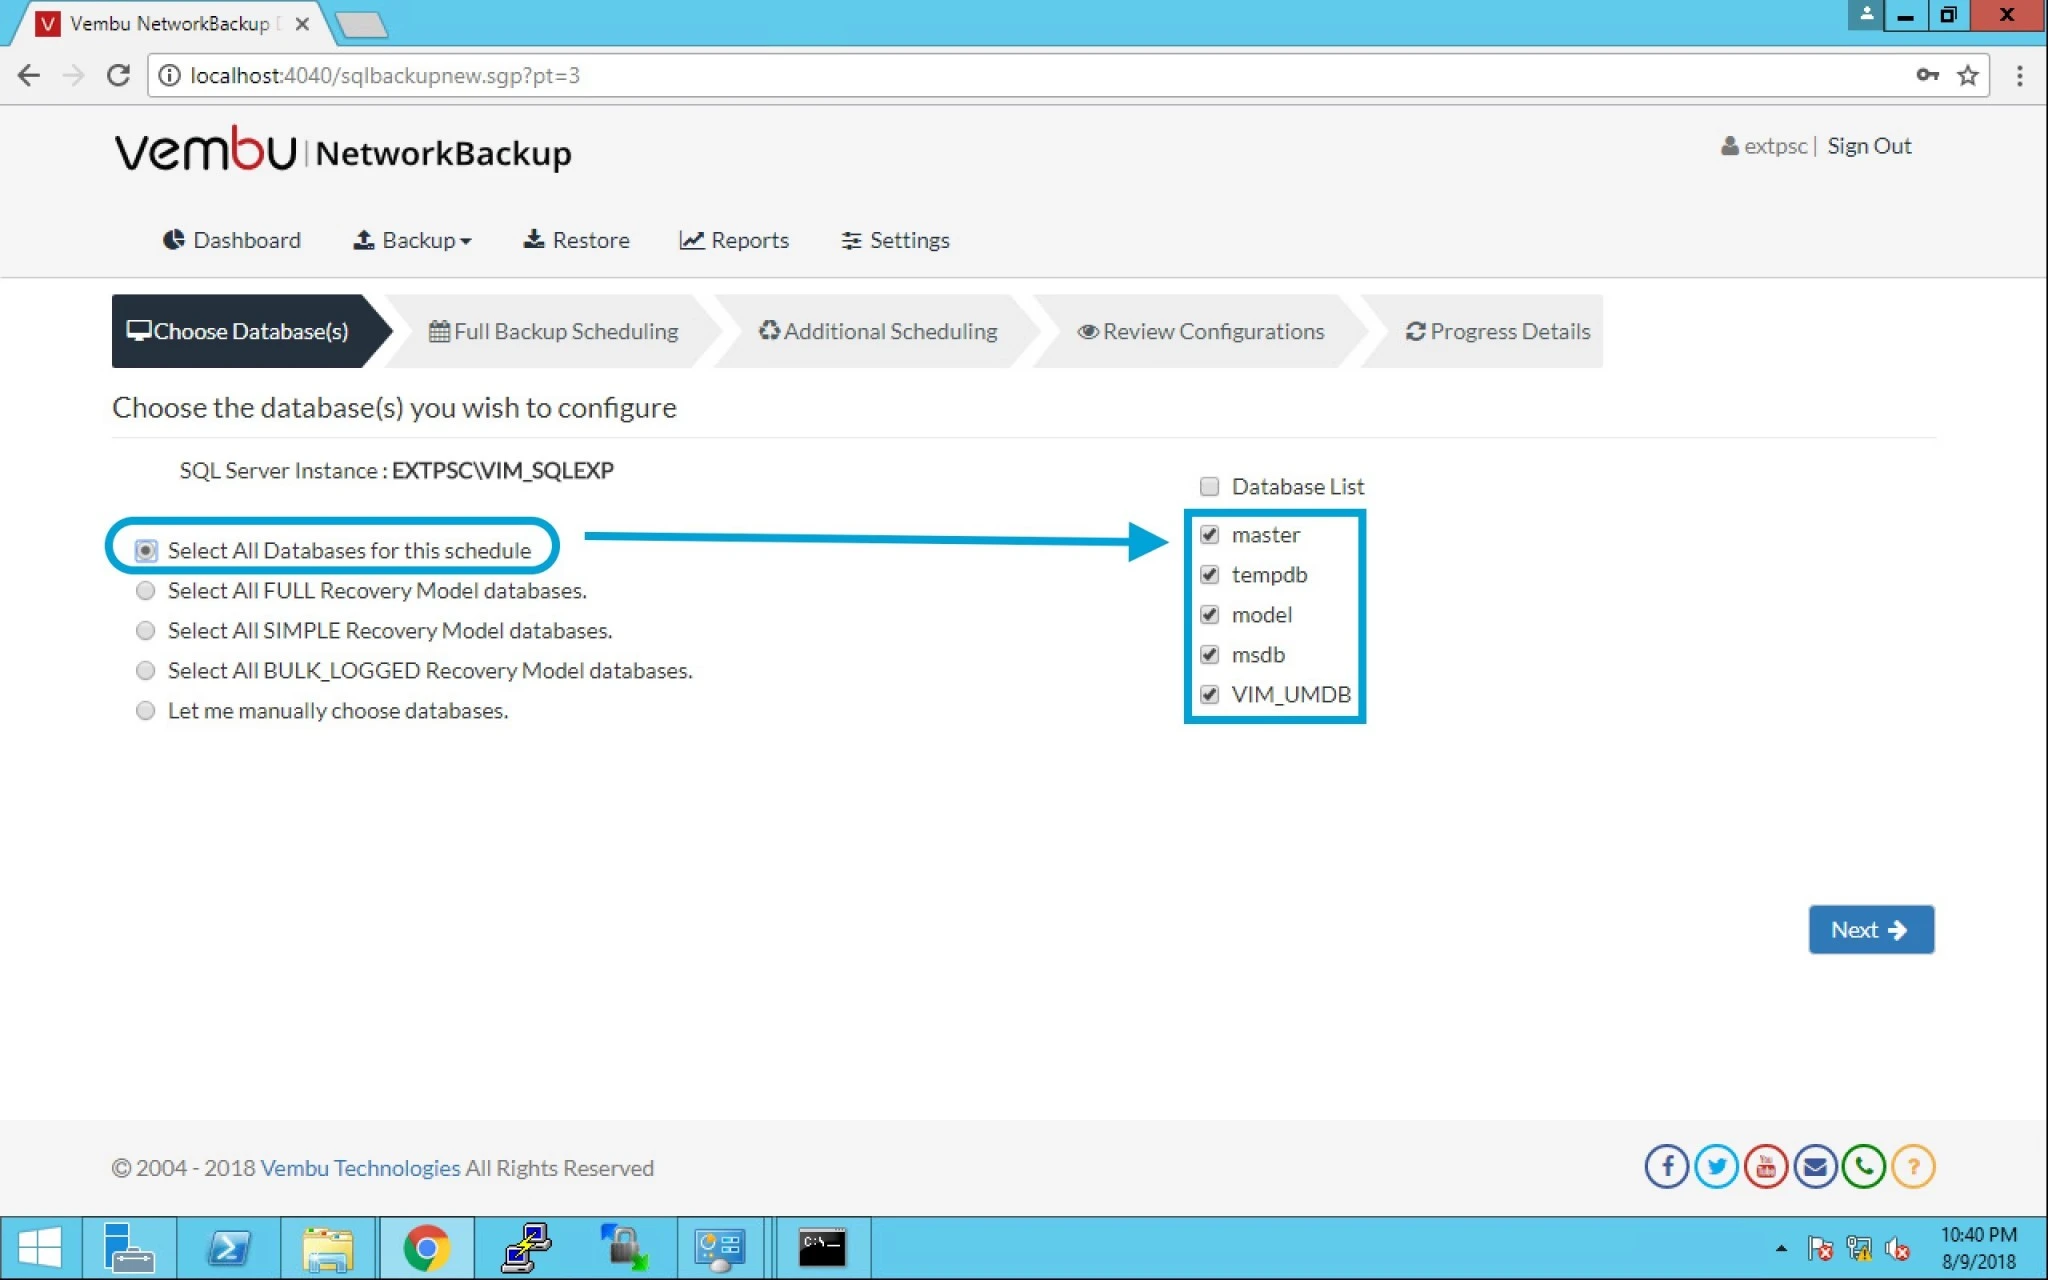
9. Lets assume we choose the first option then it will automatically select the table given on right hand side.


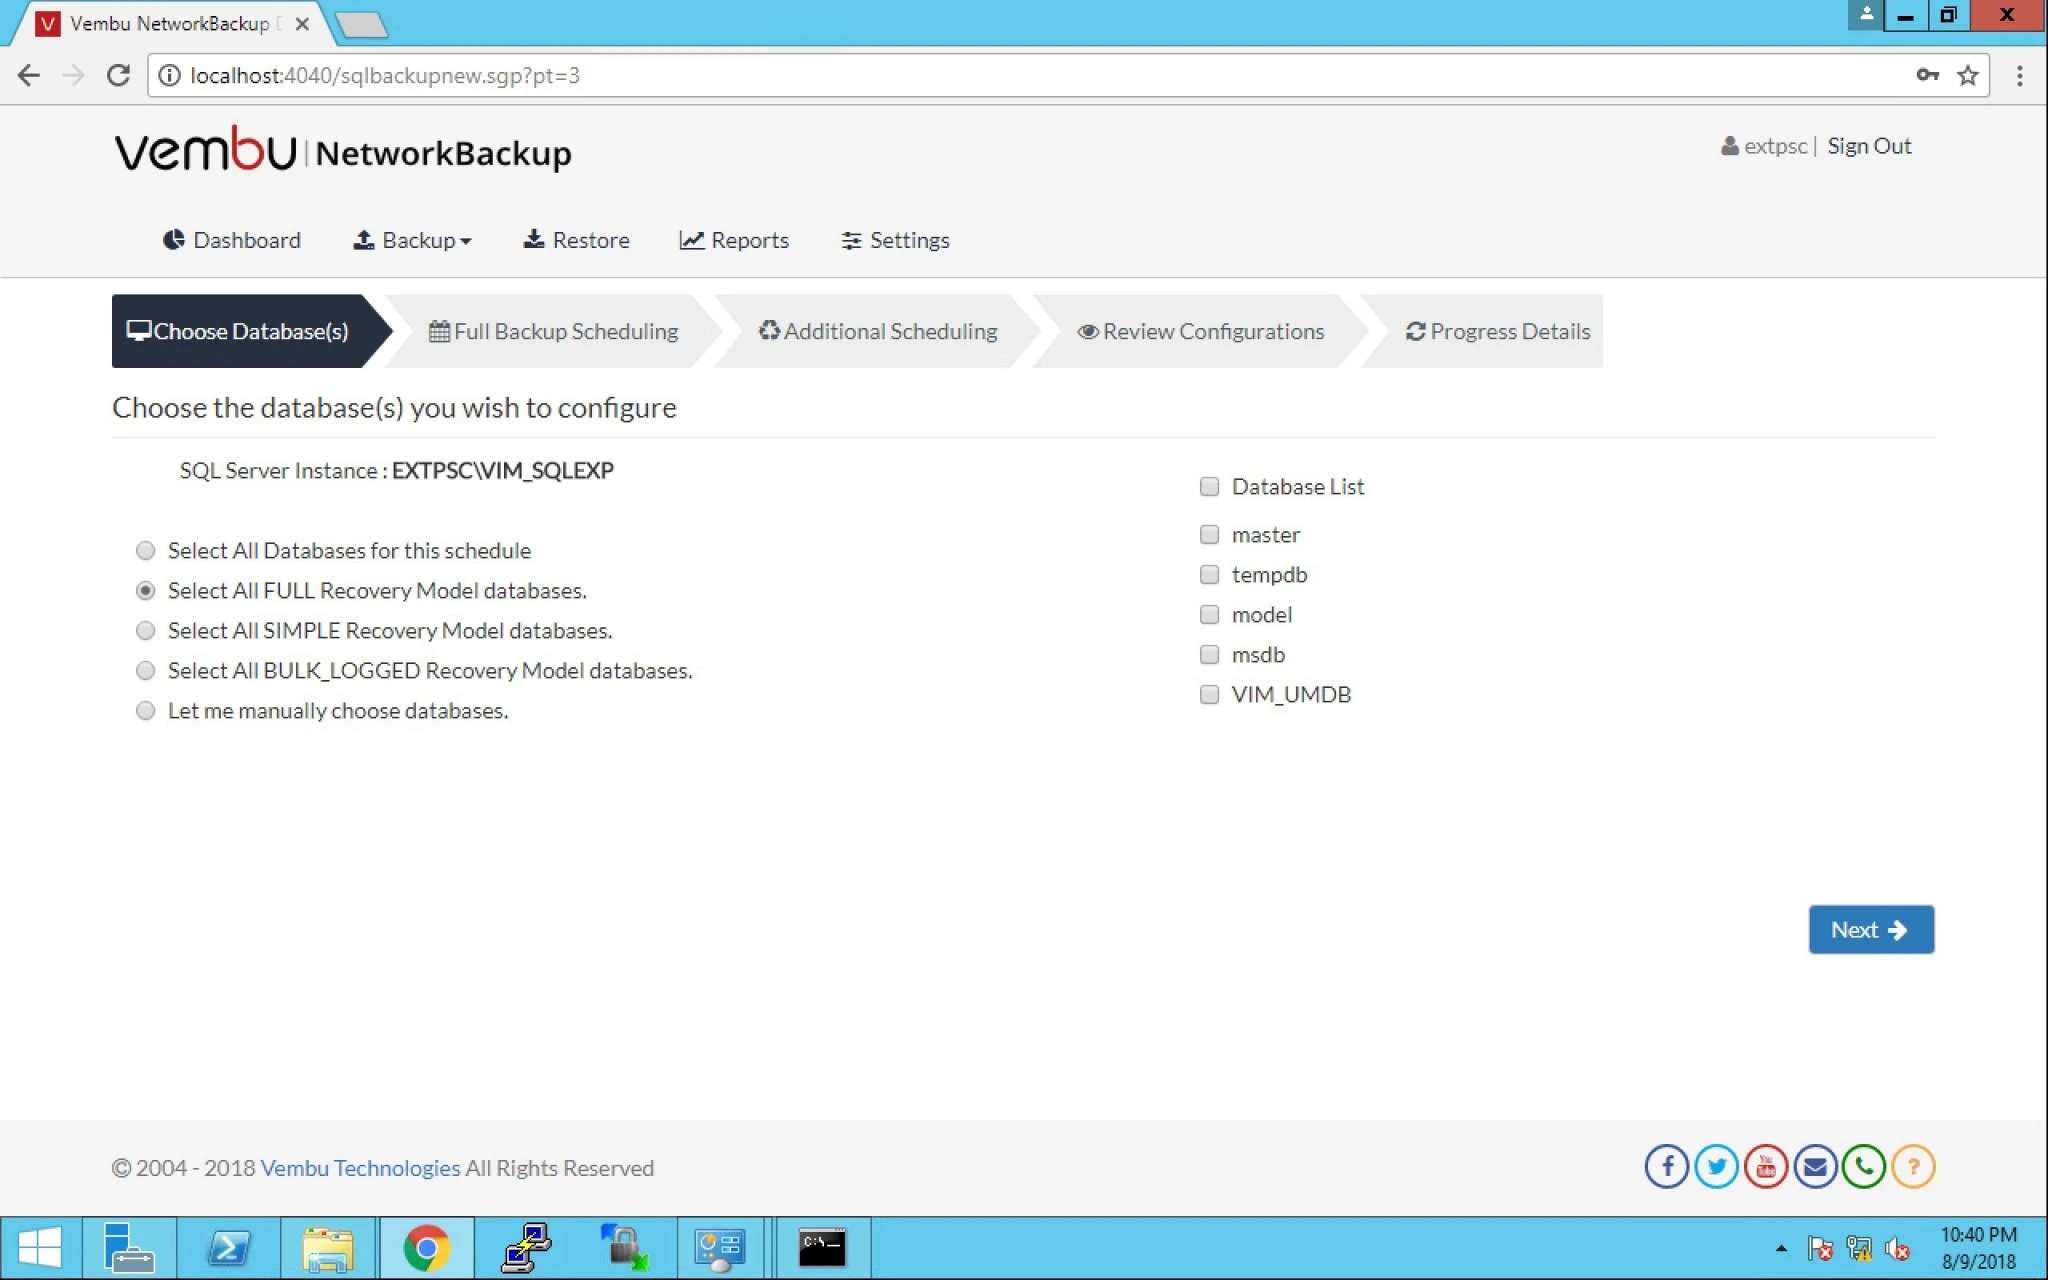
10. Similarly when we choose the second option “All FULL Recovery Model databases”, the R.H.S table isn’t selected automatically.


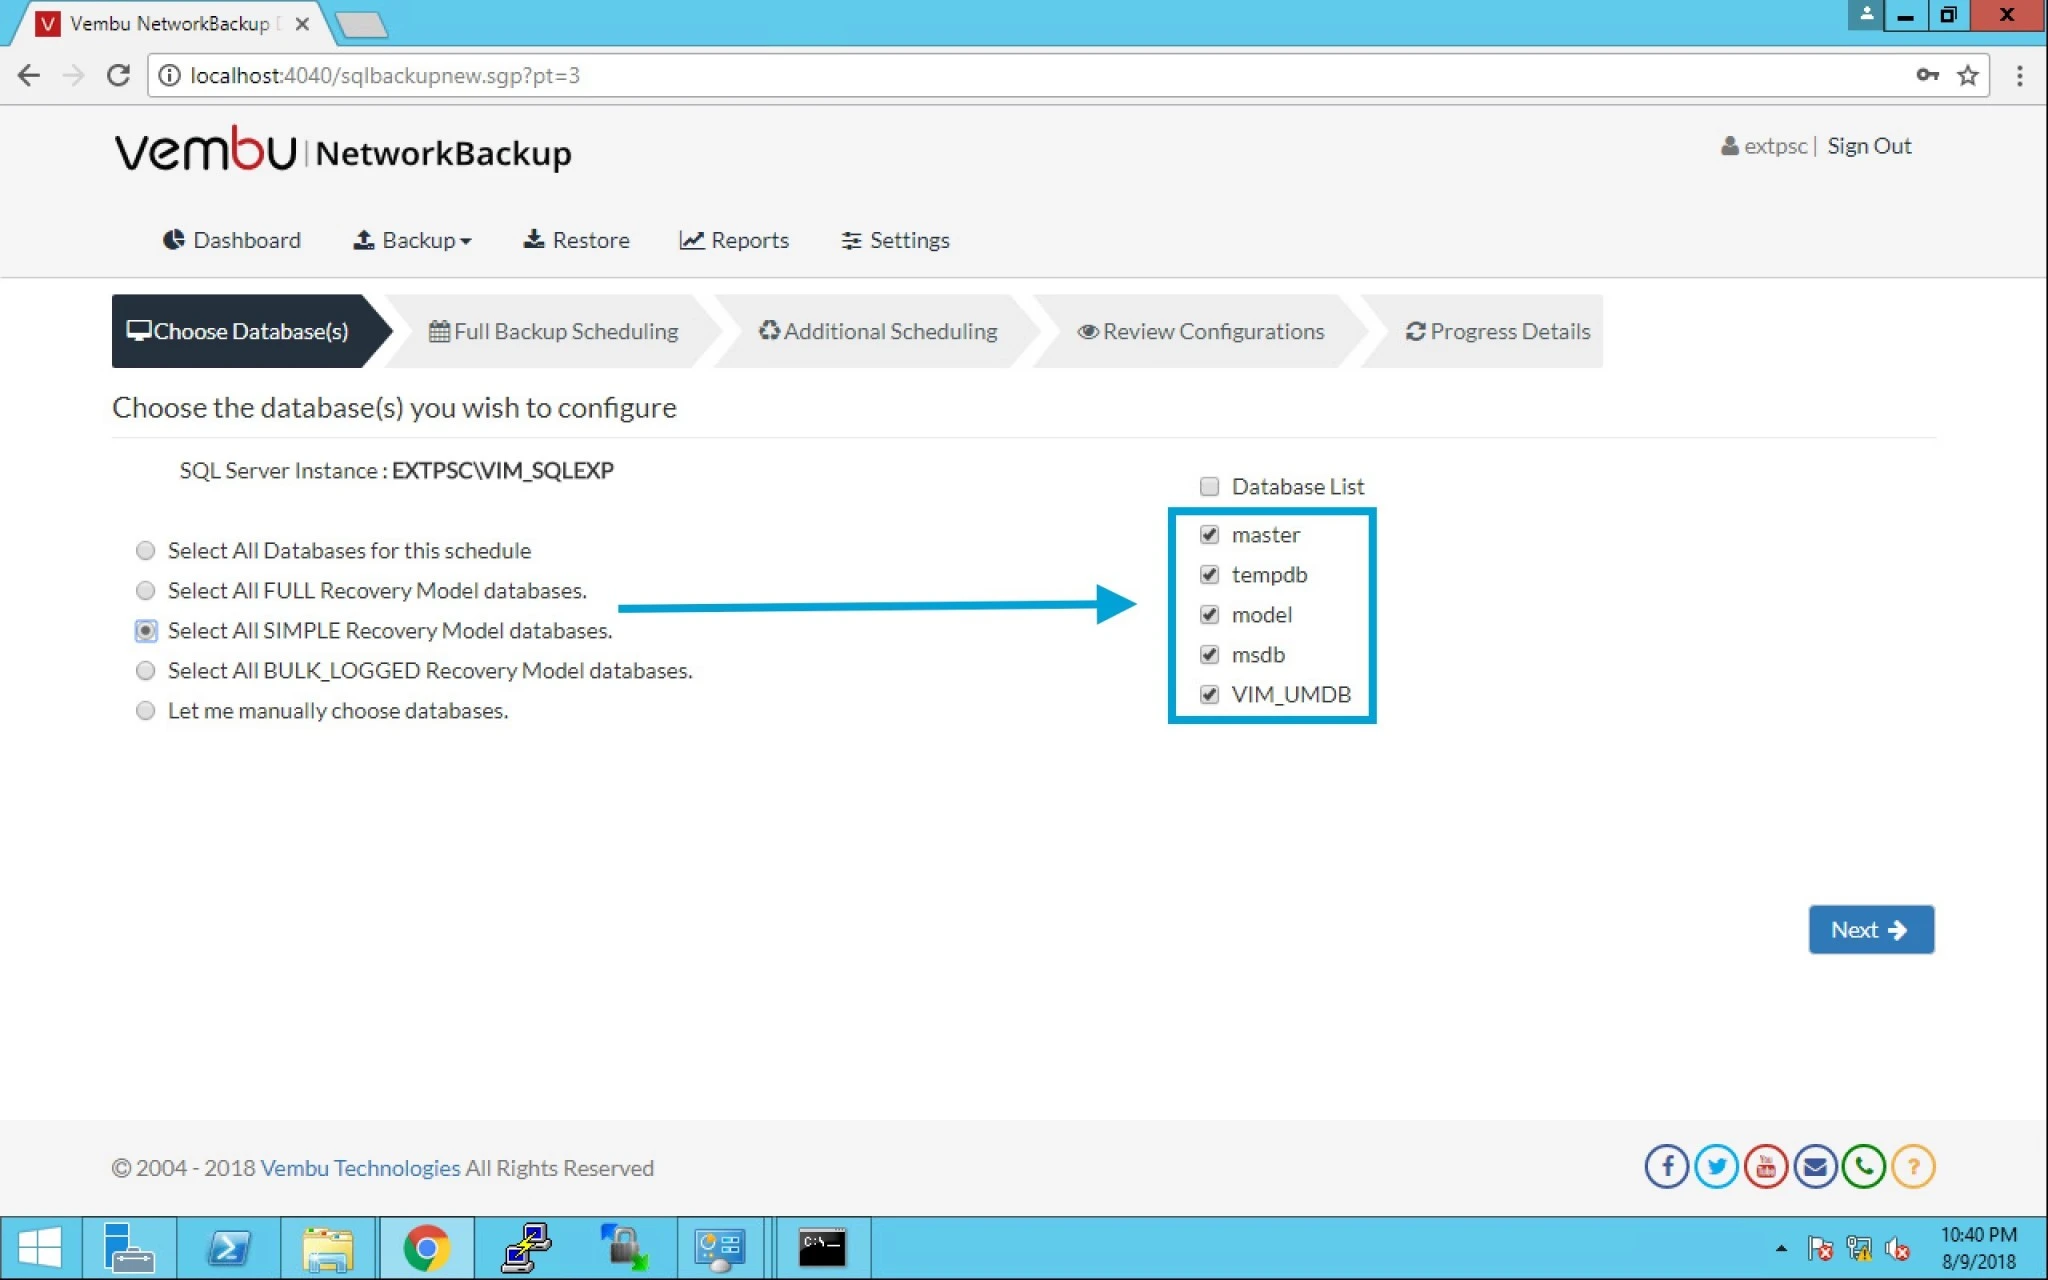
11.  When we go ahead and select the third option “All SIMPLE Recovery Model databases”, the R.H.S table is selected by default.


12. Select “All BULK_LOGGED Recovery Model databases” will not automatically select the R.H.S table.


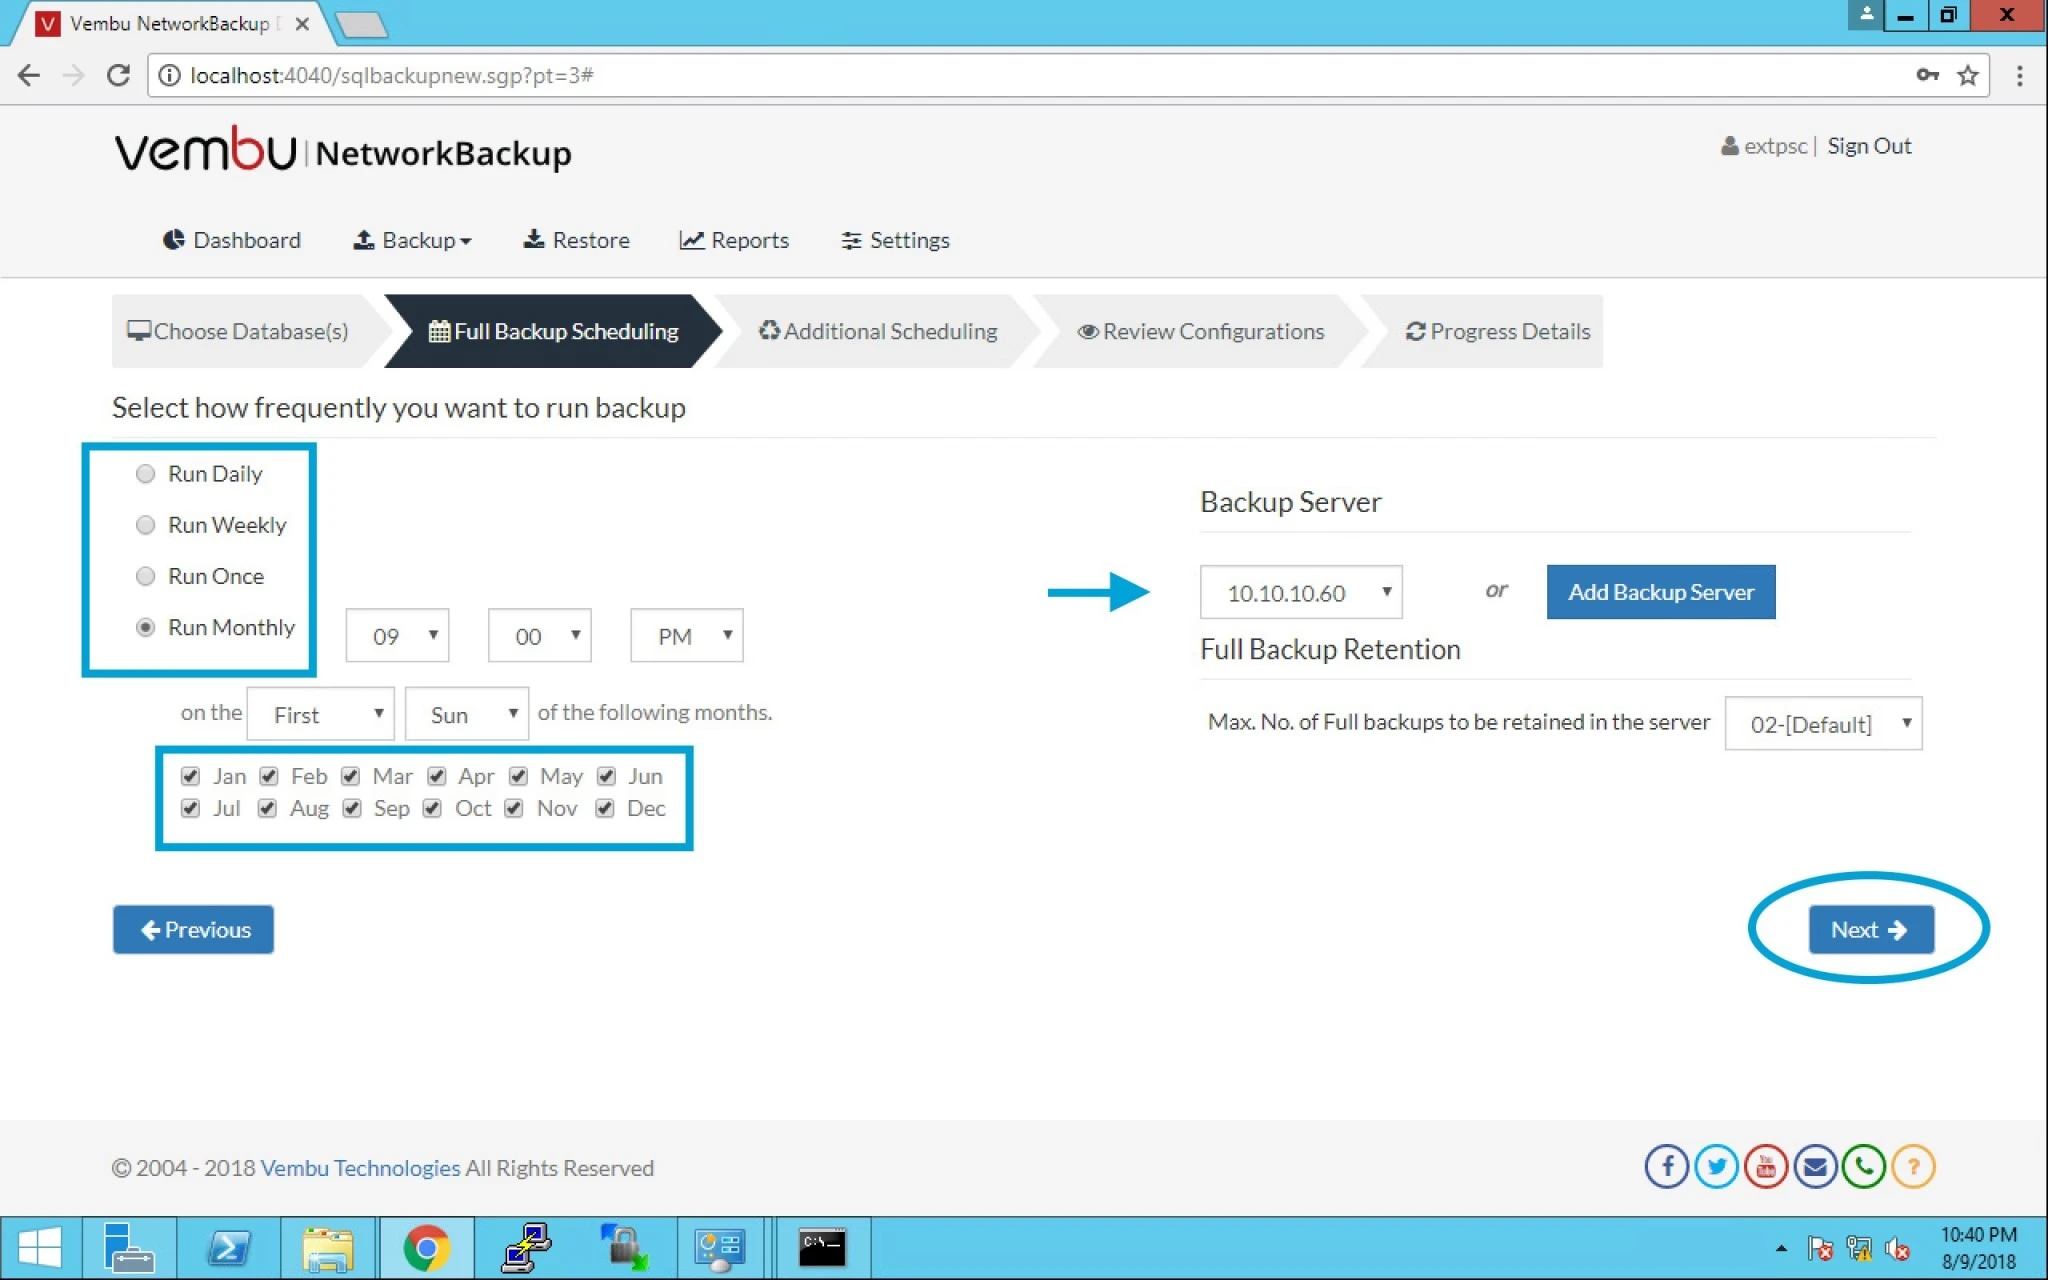
13.  In this option you can select the Frequency or when it will take backup like as given below:

a) Run Daily

b) Run Weekly

c) Run Once

d) Run Monthly

You can specify the time as well.


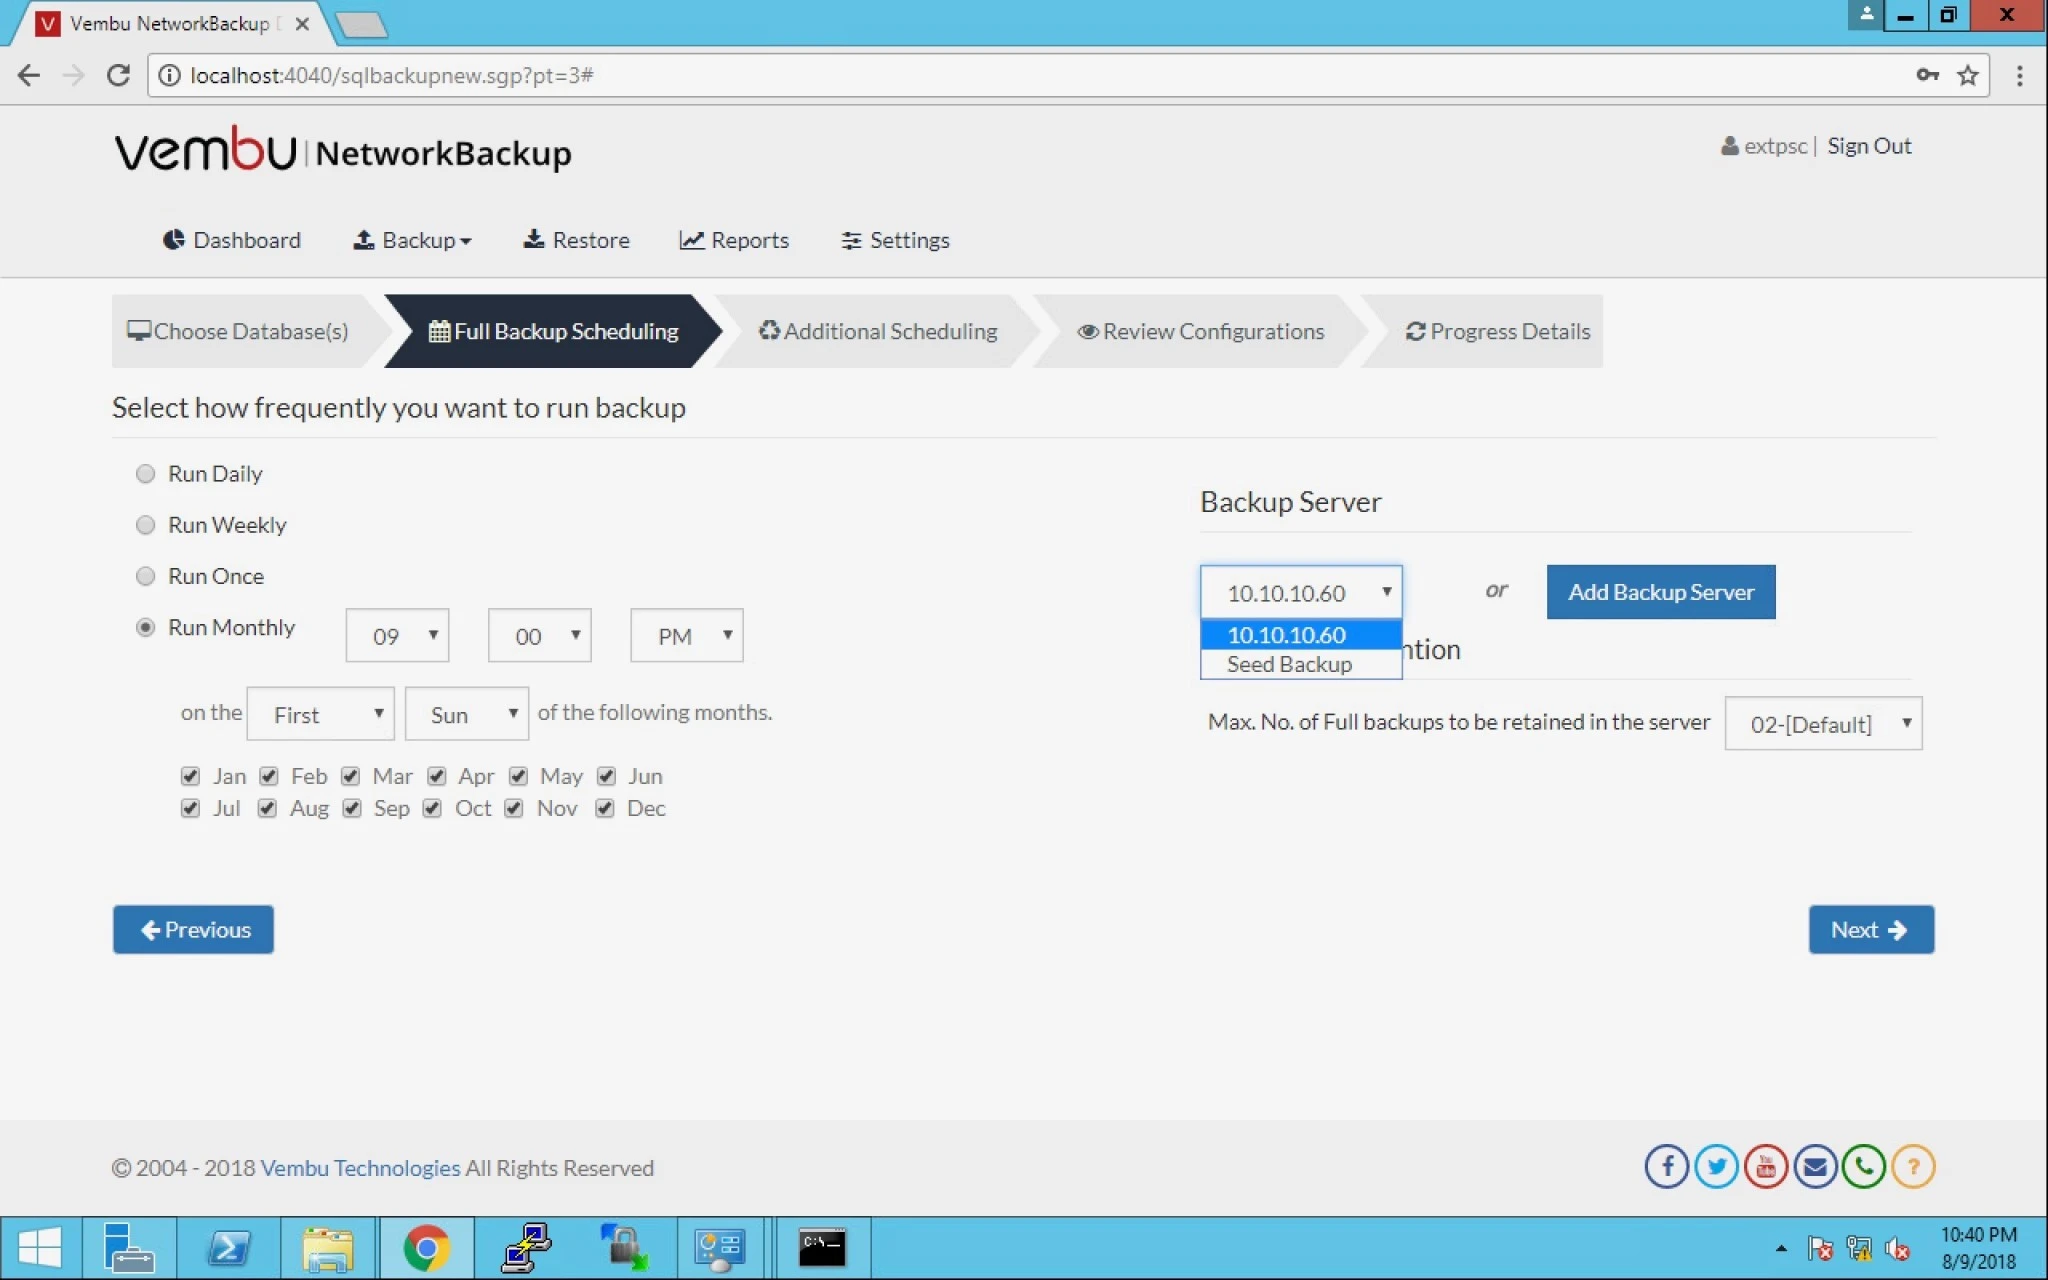
14. On the right hand side you can select Backup server or you have the option to add a backup server right here.


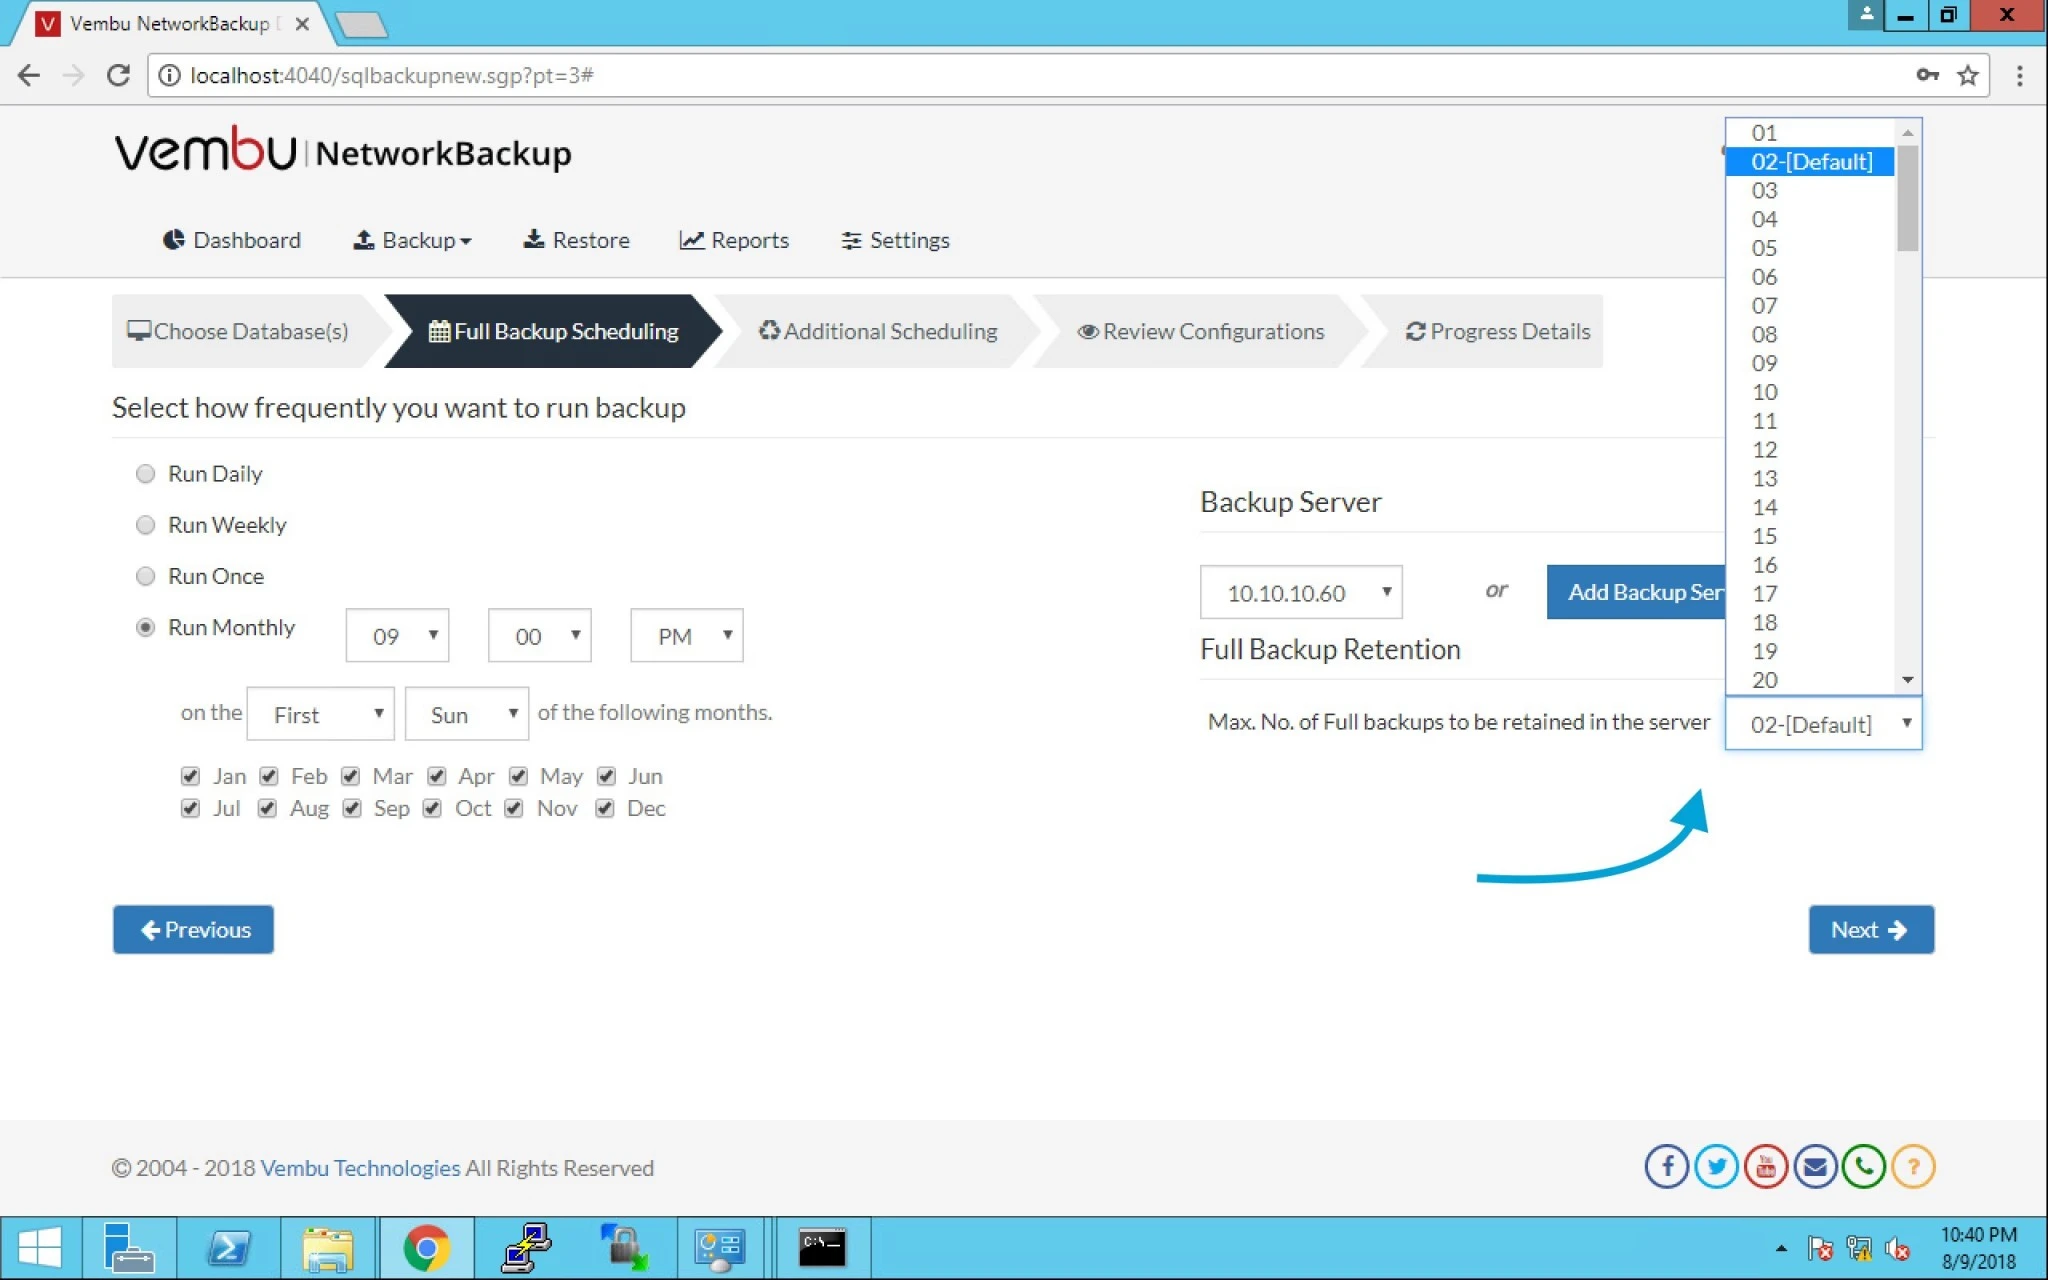
15. Here you can select Retention for this backup and click next.


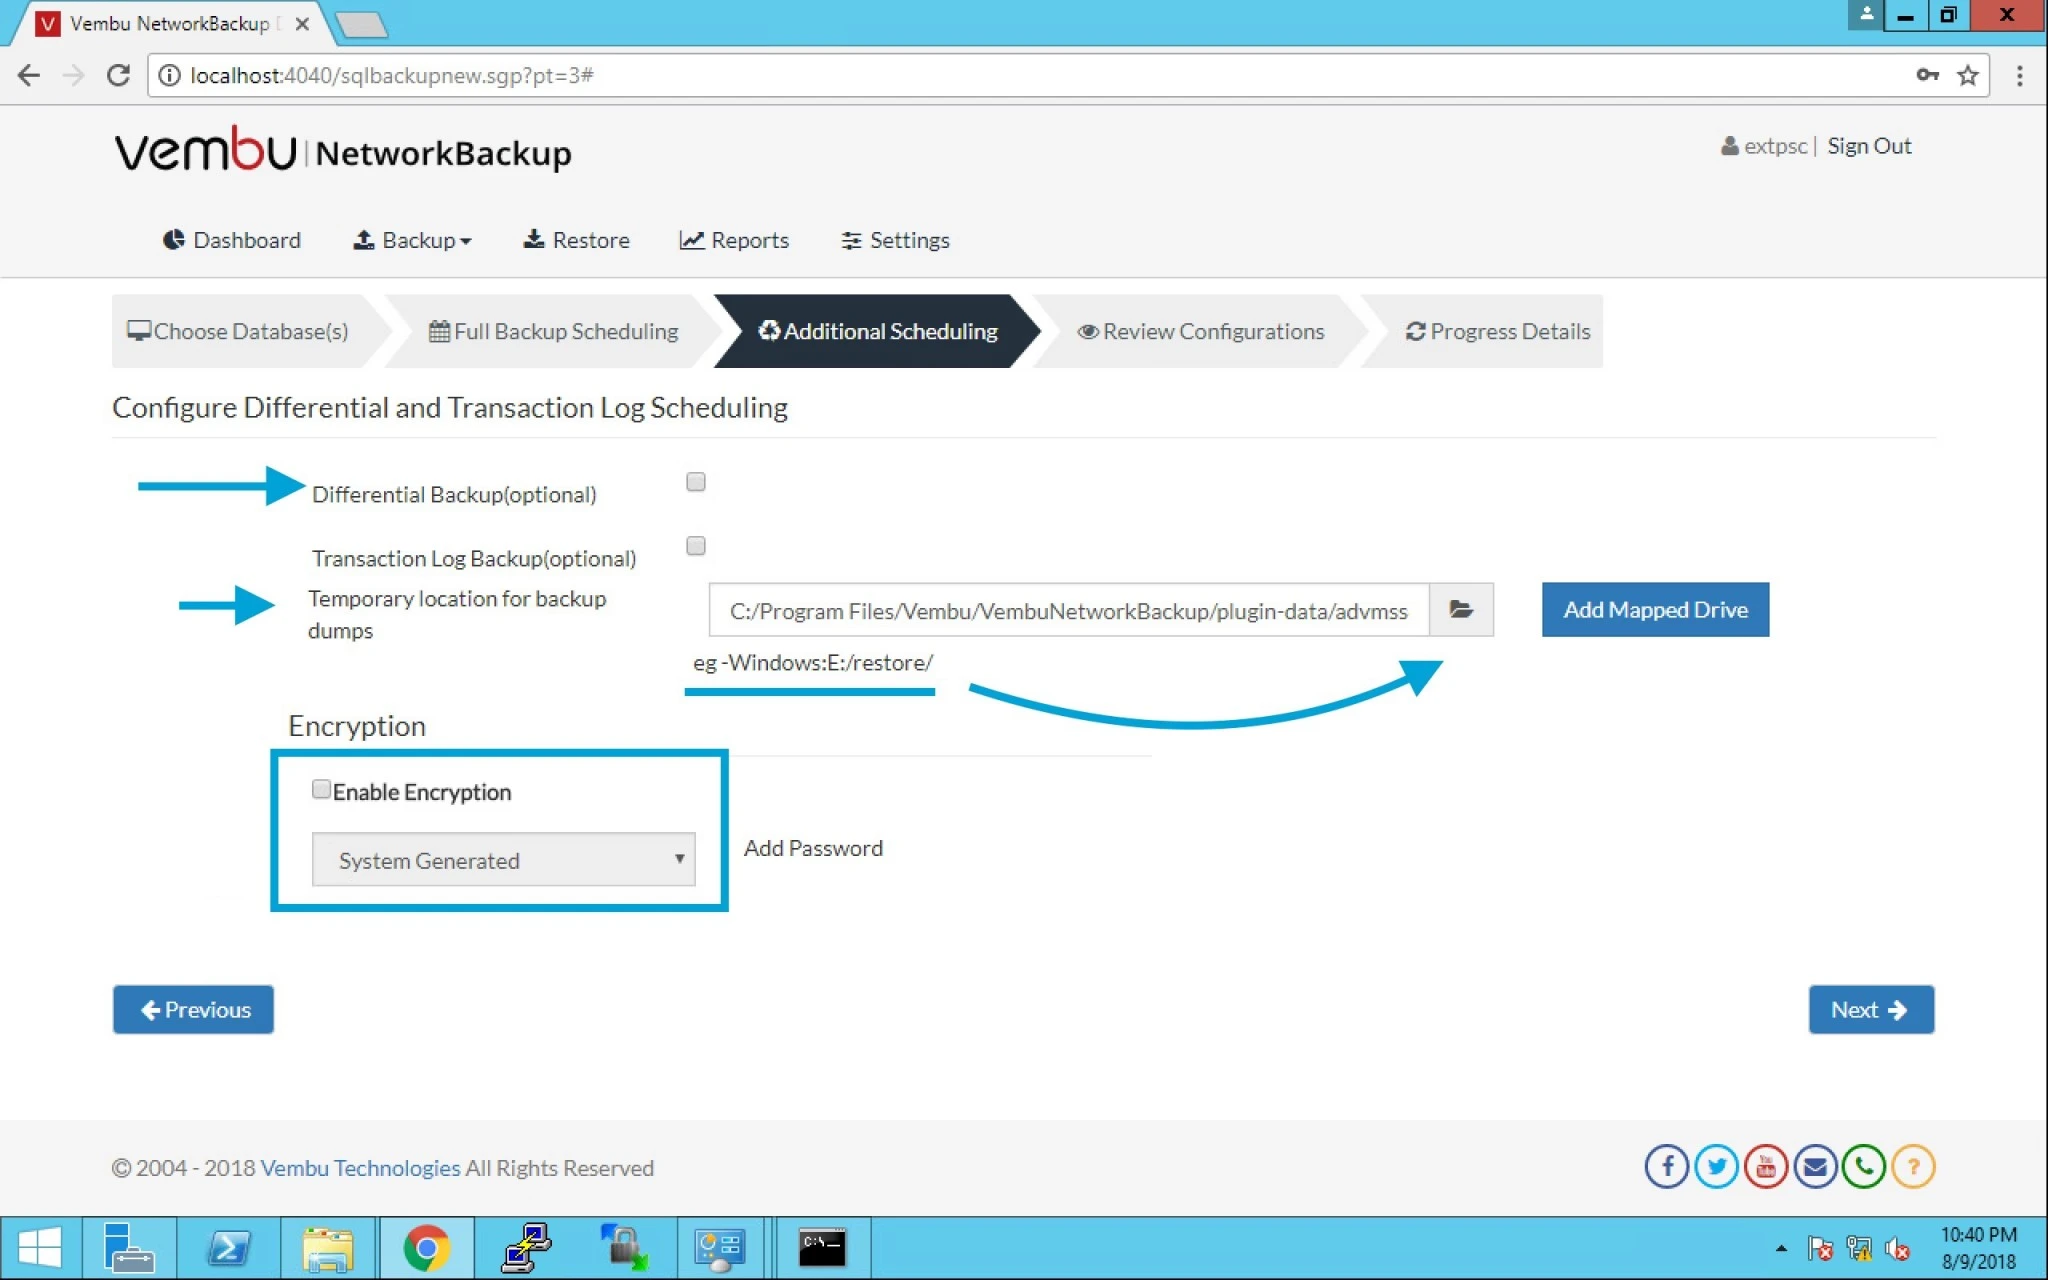
16. Here you have the options like Differential backup or Transaction Log Backup or even you can keep this in Temporary location.

Note: you can also select Encryption as per company policy or customer requirement.


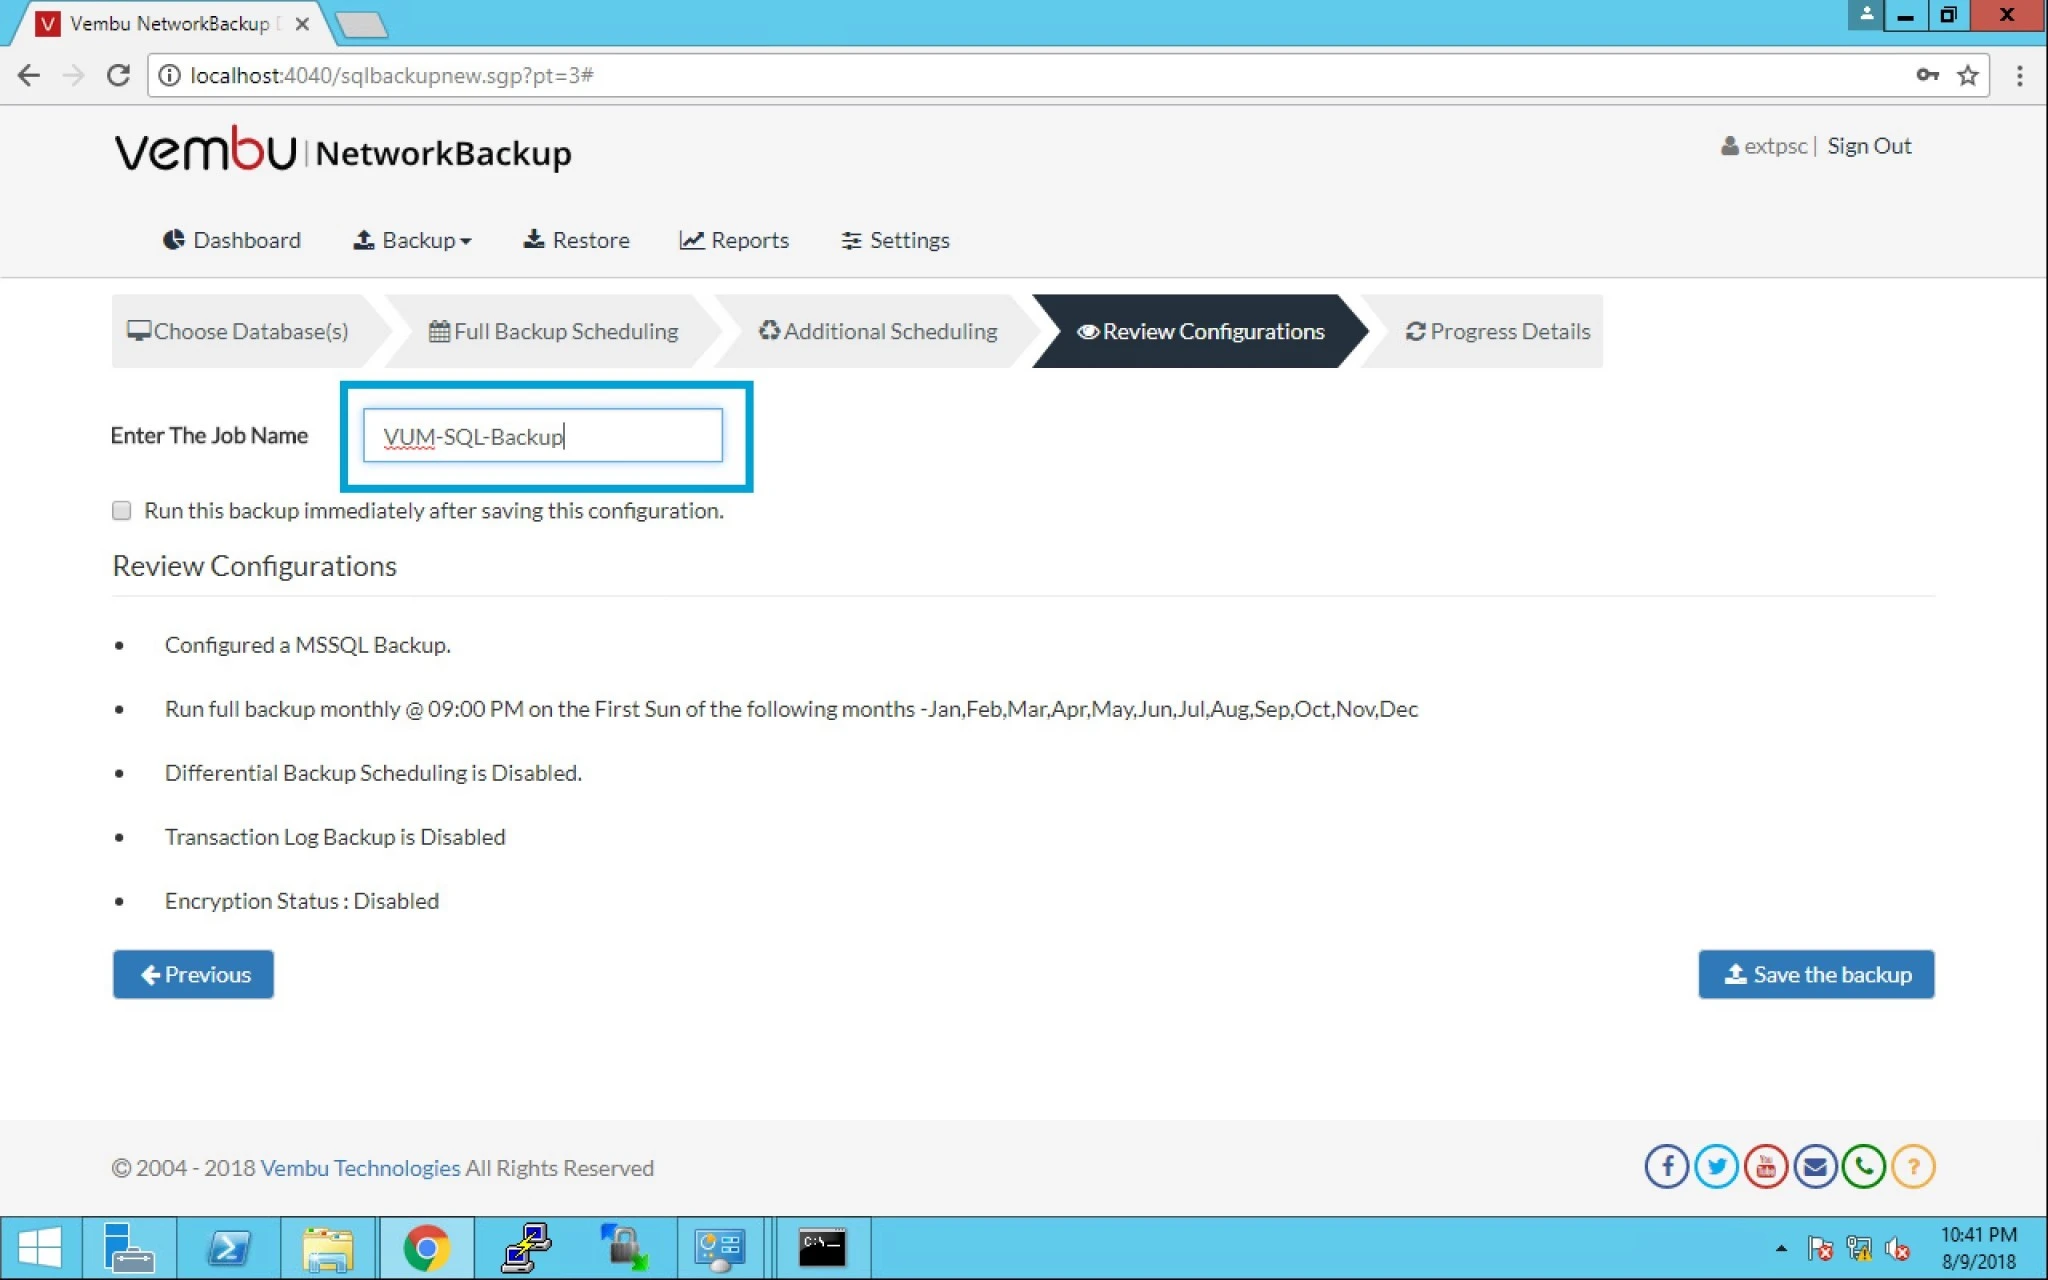
17. Enter your Job name and save the backup. Click next.


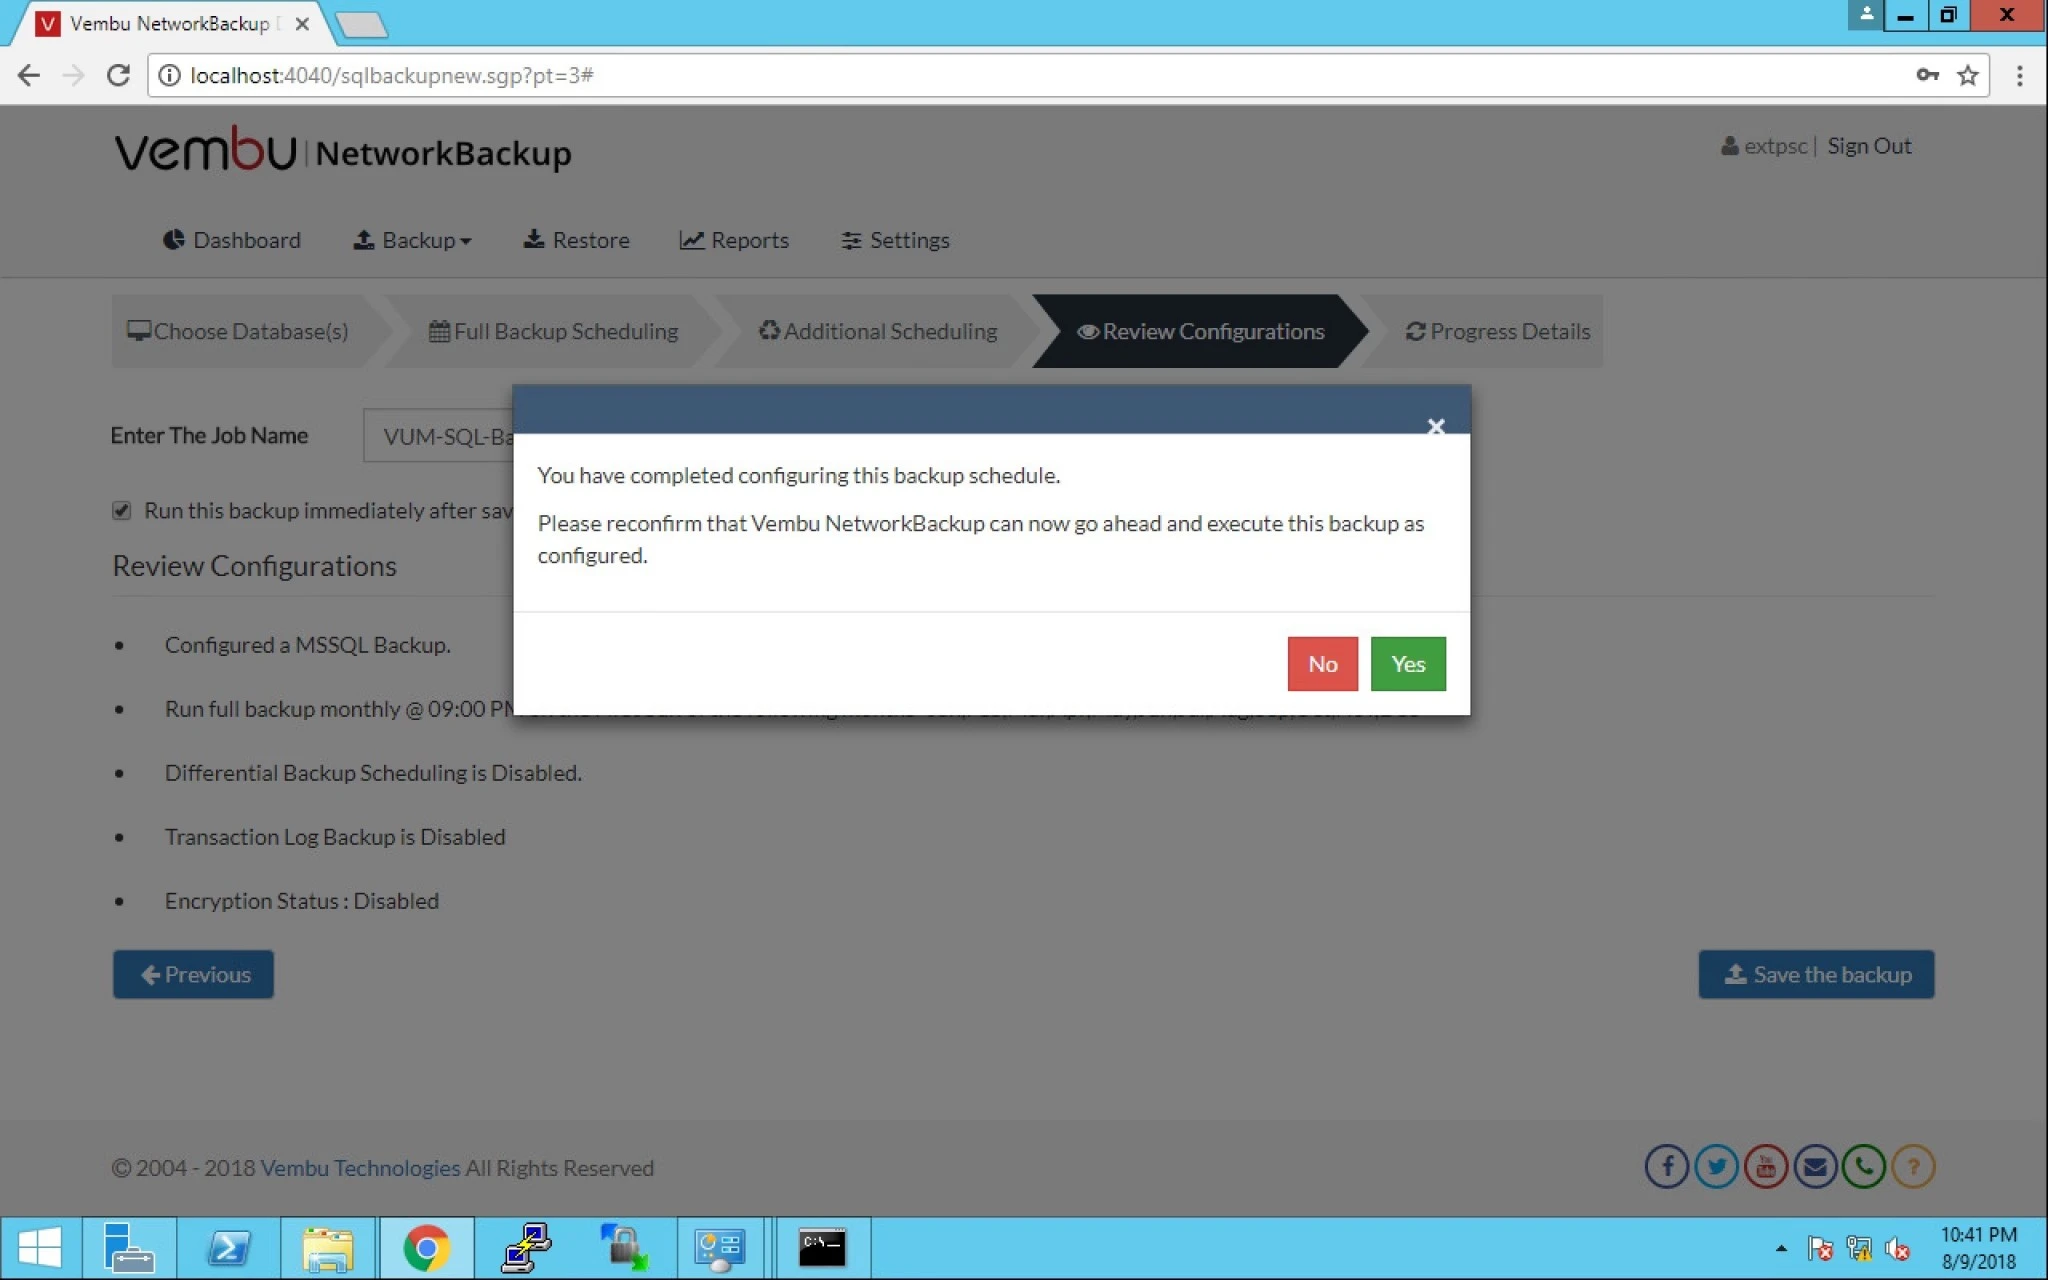
18. It will prompt you to reconfirm to go ahead and execute the backup configured.


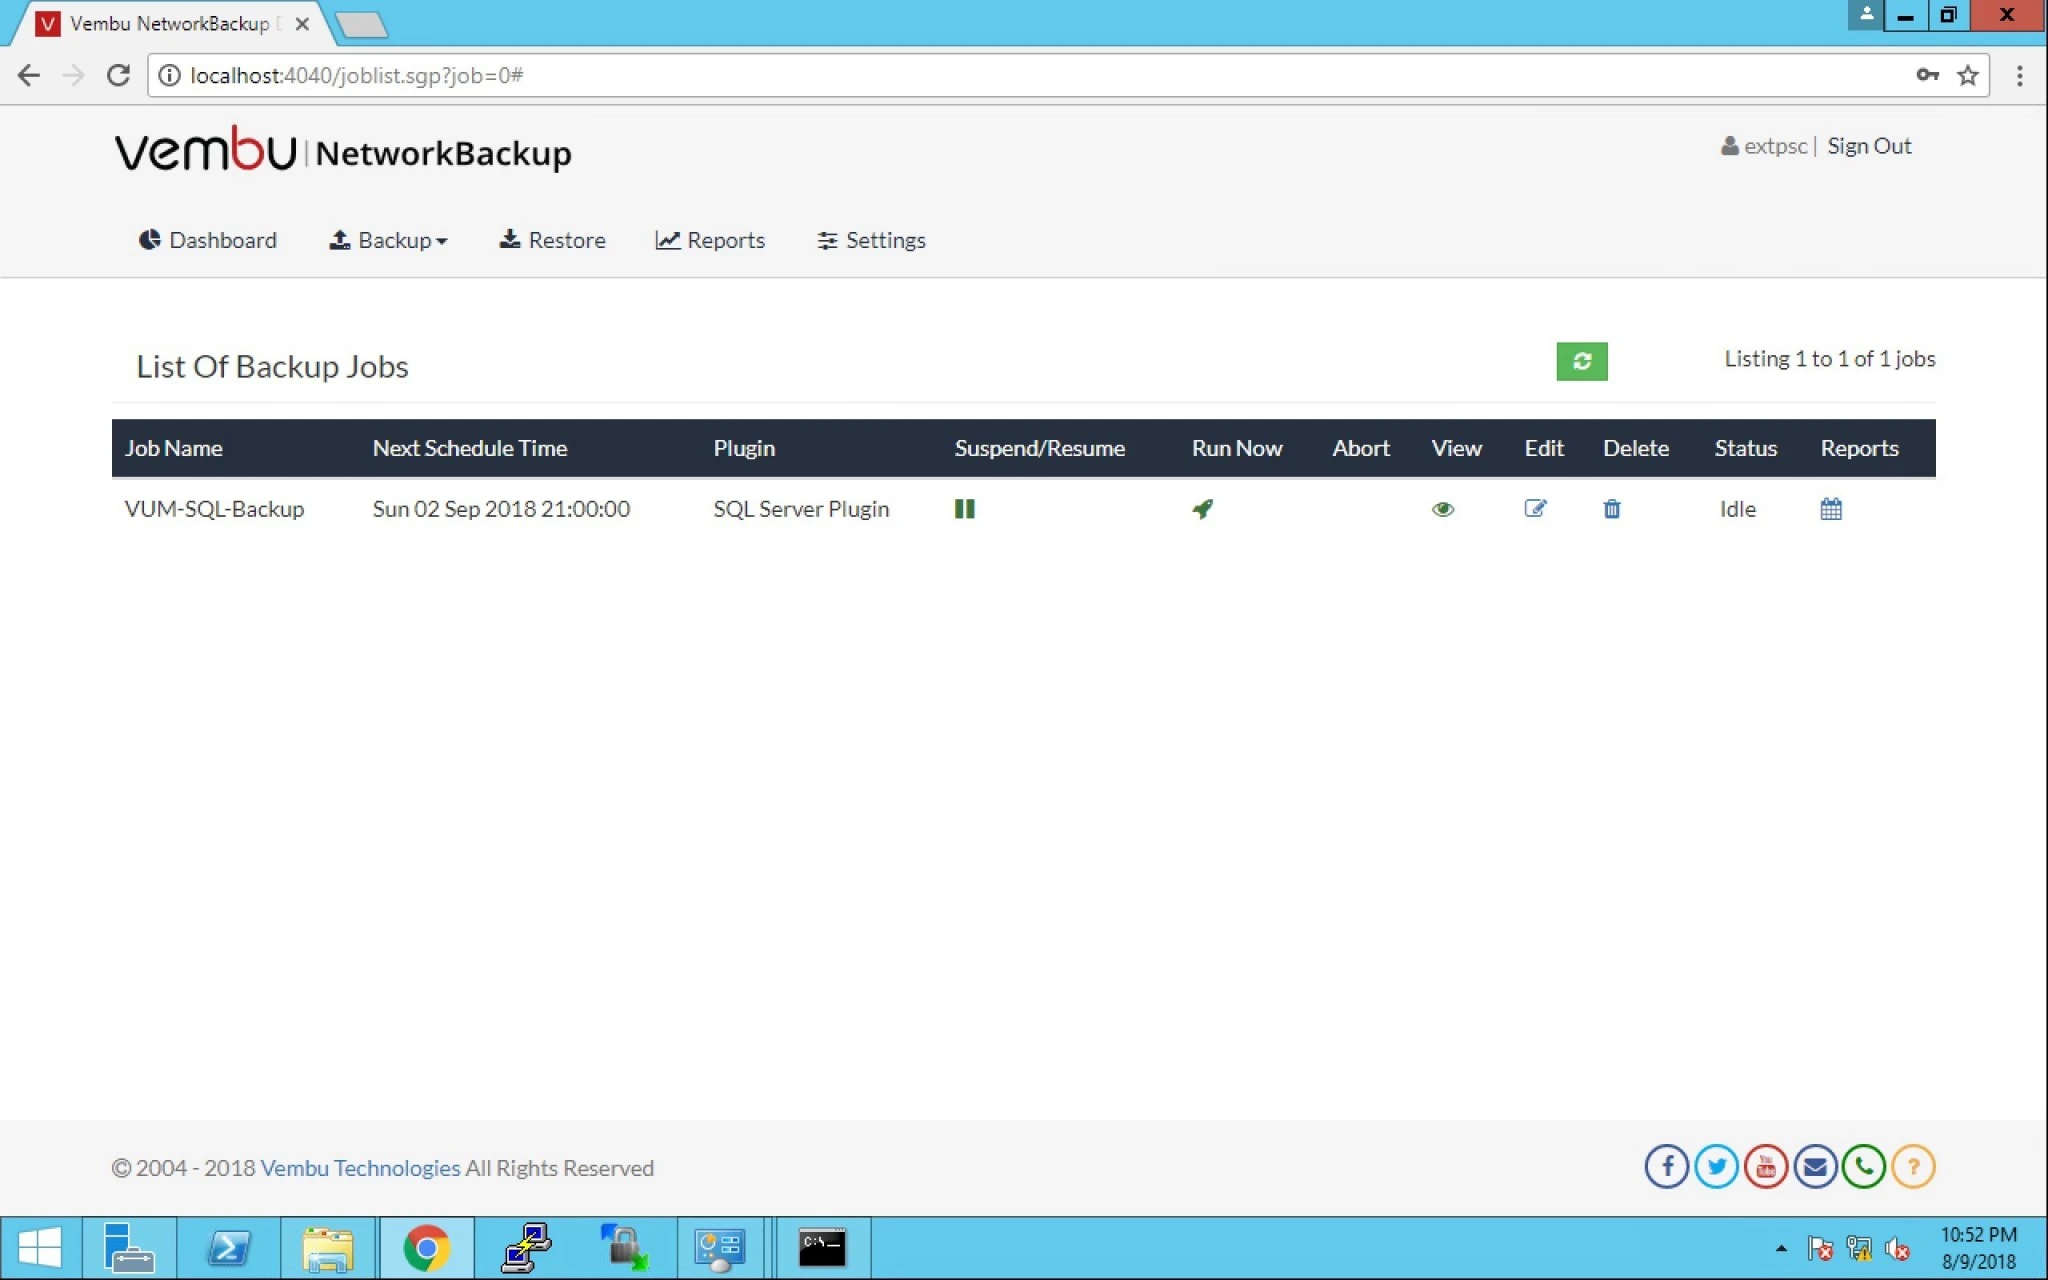
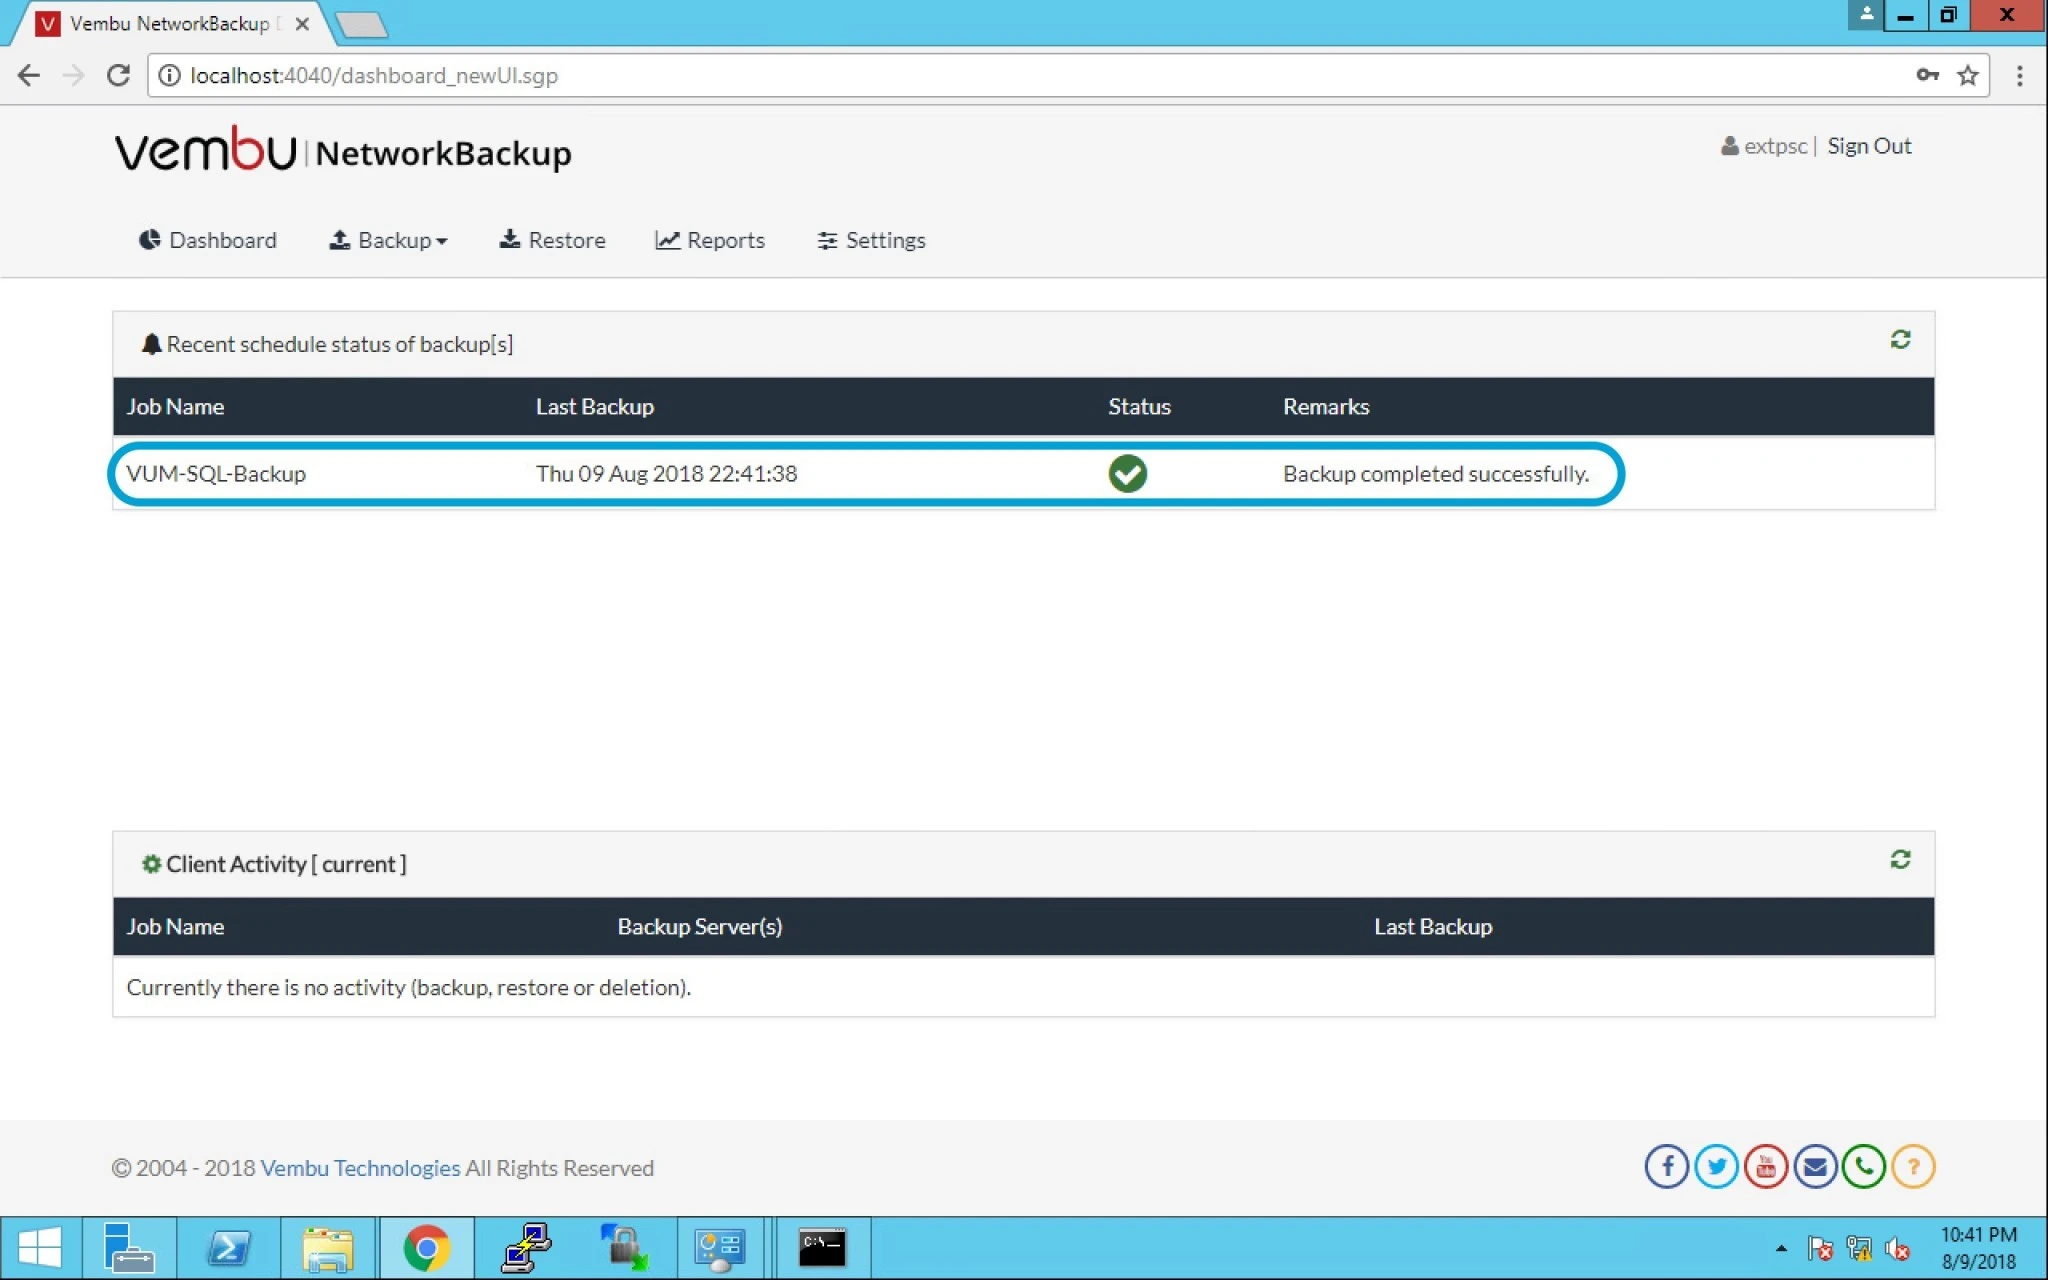
19. You can check the status under dashboard option for the backup executed successfully.


0

Vembu BDR Disaster Recovery Option

Topic Outline:

Disaster Recovery

Restore Options

Restore Time

Restore Report


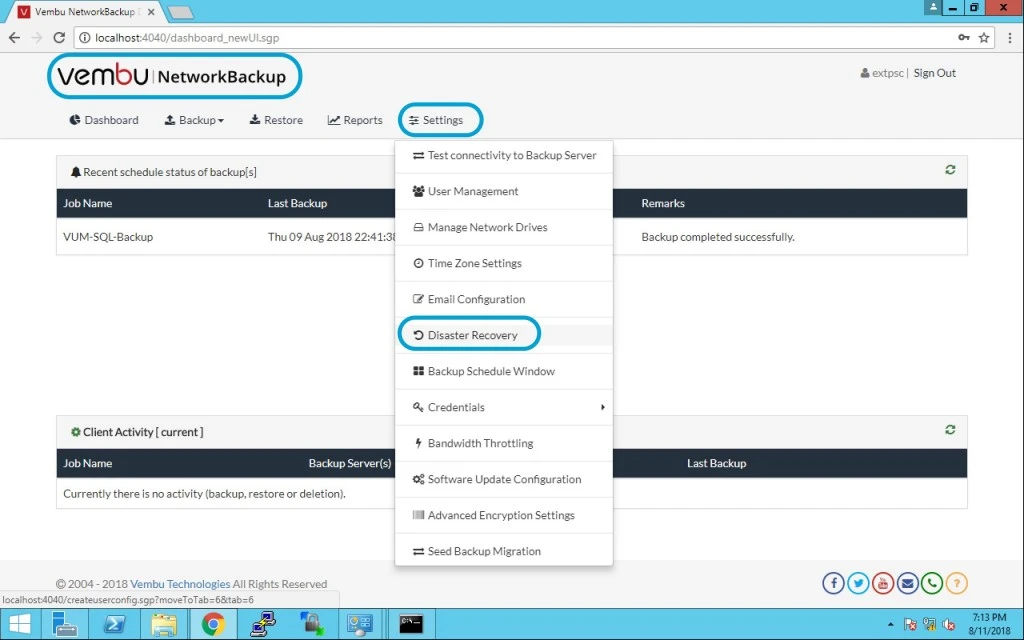
When there is a requirement for a client machine to reinstall a fresh Vembu NetworkBackup, in a case you loose all the configured backup jobs. In such a situation the Disaster recovery solutions is a life saving solution and that allows you to restore client configuration from backup servers.

Lets assume you have a client data which is relocated to another machine where resuming backup jobs will be required.

Note: If the backup job is encrypted or password protected, then the user will be required to provide the secured key or password by editing the backup job before resuming it.


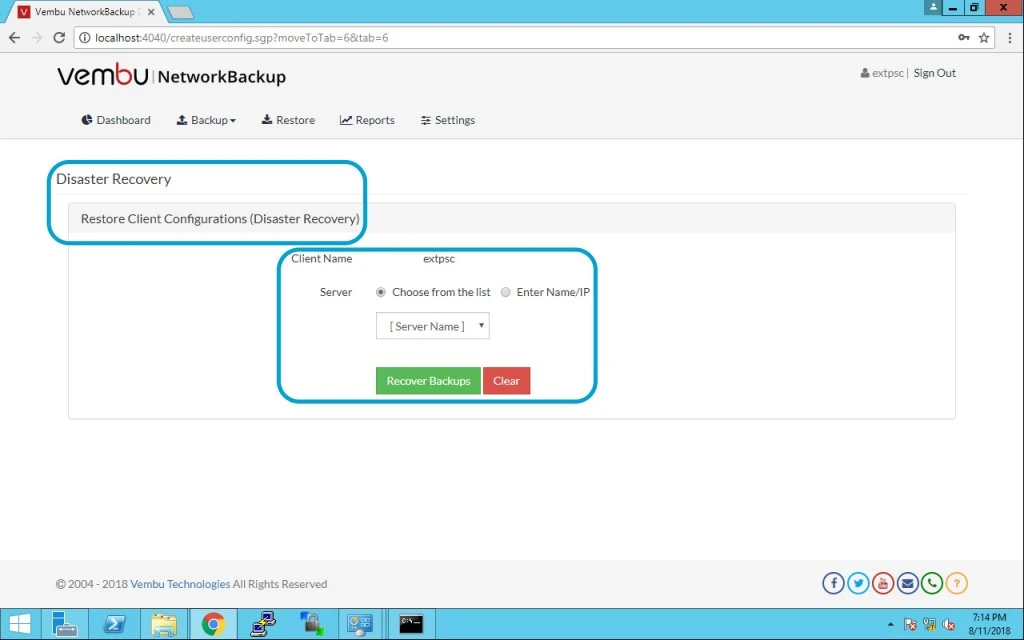
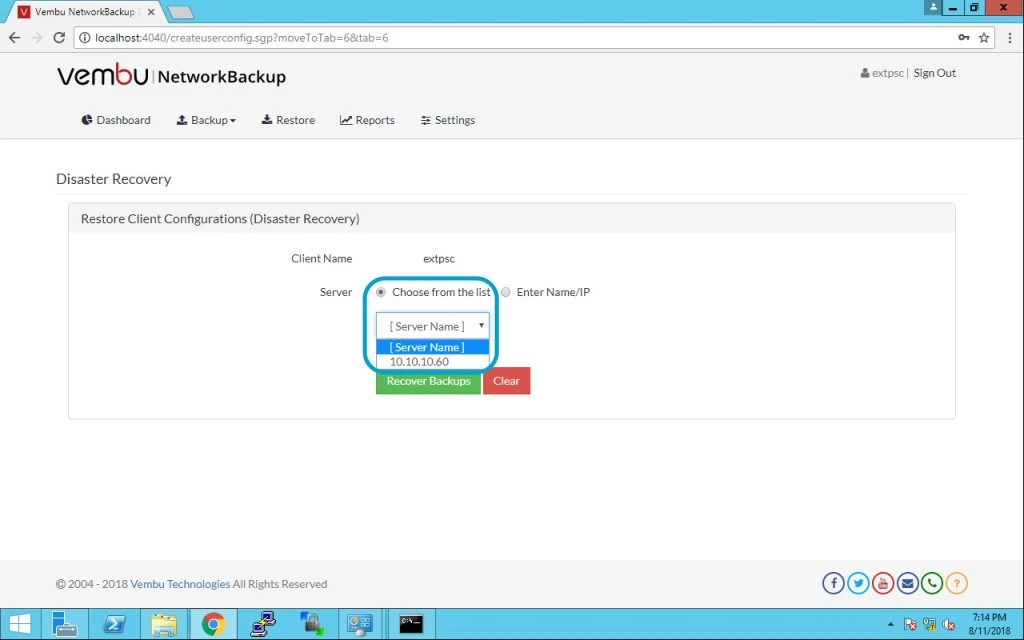
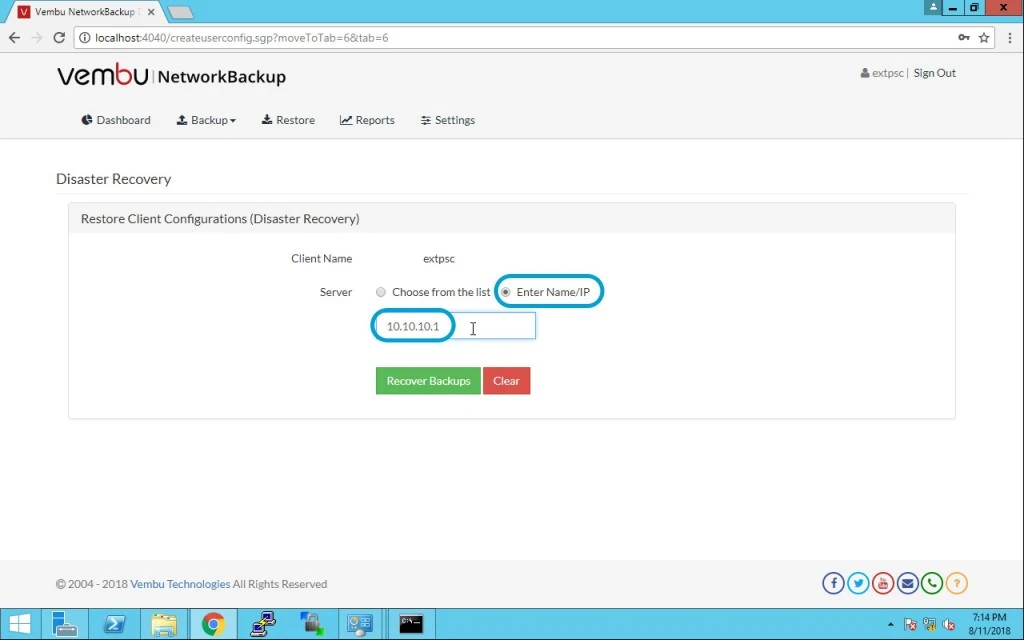
Choose servers

  • User can either choose servers from the list of added servers or provide a server IP


  • Note: Before doing this disaster recovery task it should be well tested and functioning perfectly via test connectivity.


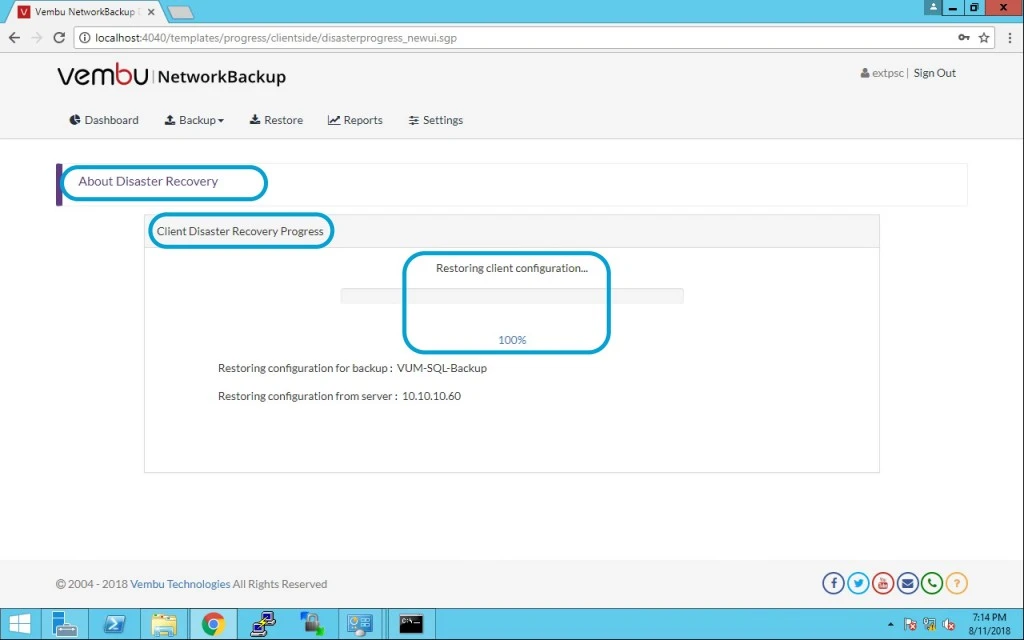
Here you can see the progress and percentage for completion.(Note: In my case this is fast and done in seconds)


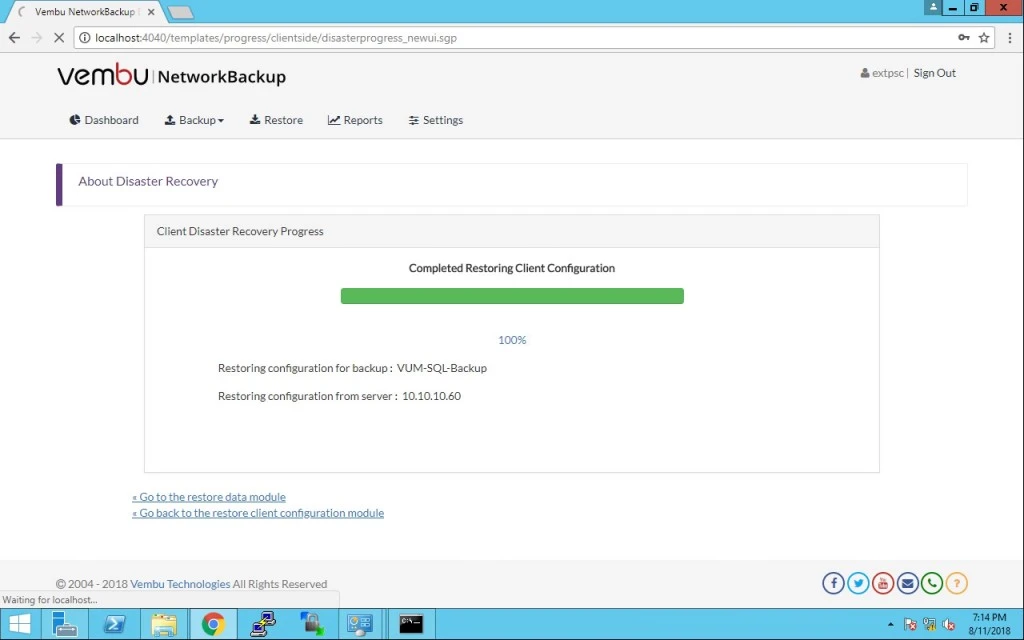
After completion of this restore job you can see below status.


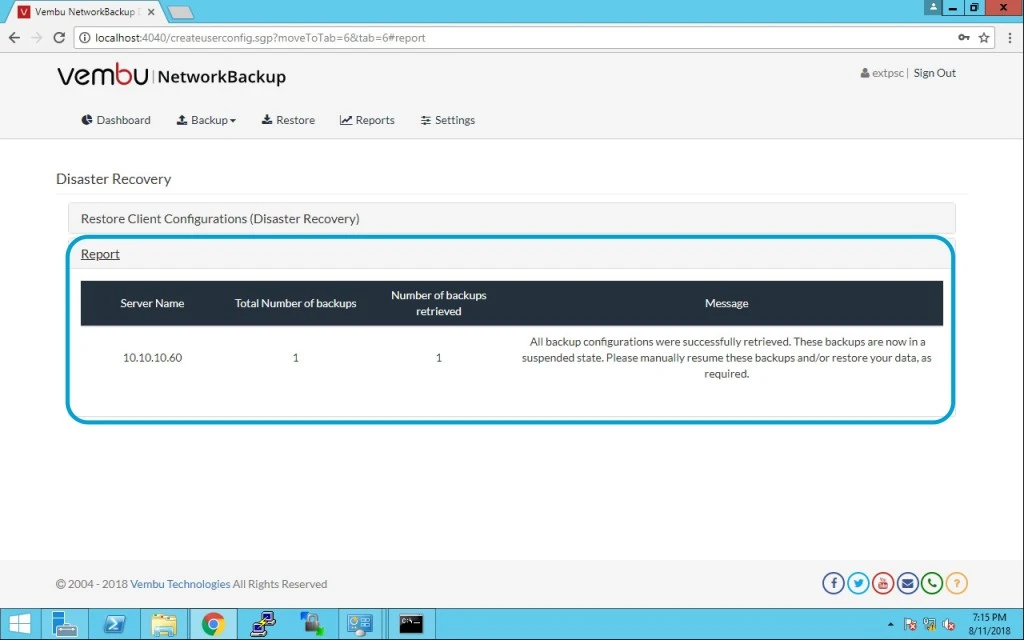
Once restore completes successfully, you will be redirected to reports page with the report for successful restore completion. Here you can see all the reports for disaster recovery.

0

Vembu BDR User Management

Topic Outlines:

User Management

New User

User Password Management


In the organisation, we have to manage or control the user management for better logs and tracking. In Vembu BDR suit you can achieve by create user or multiple users and assign them the permissions on user basis.

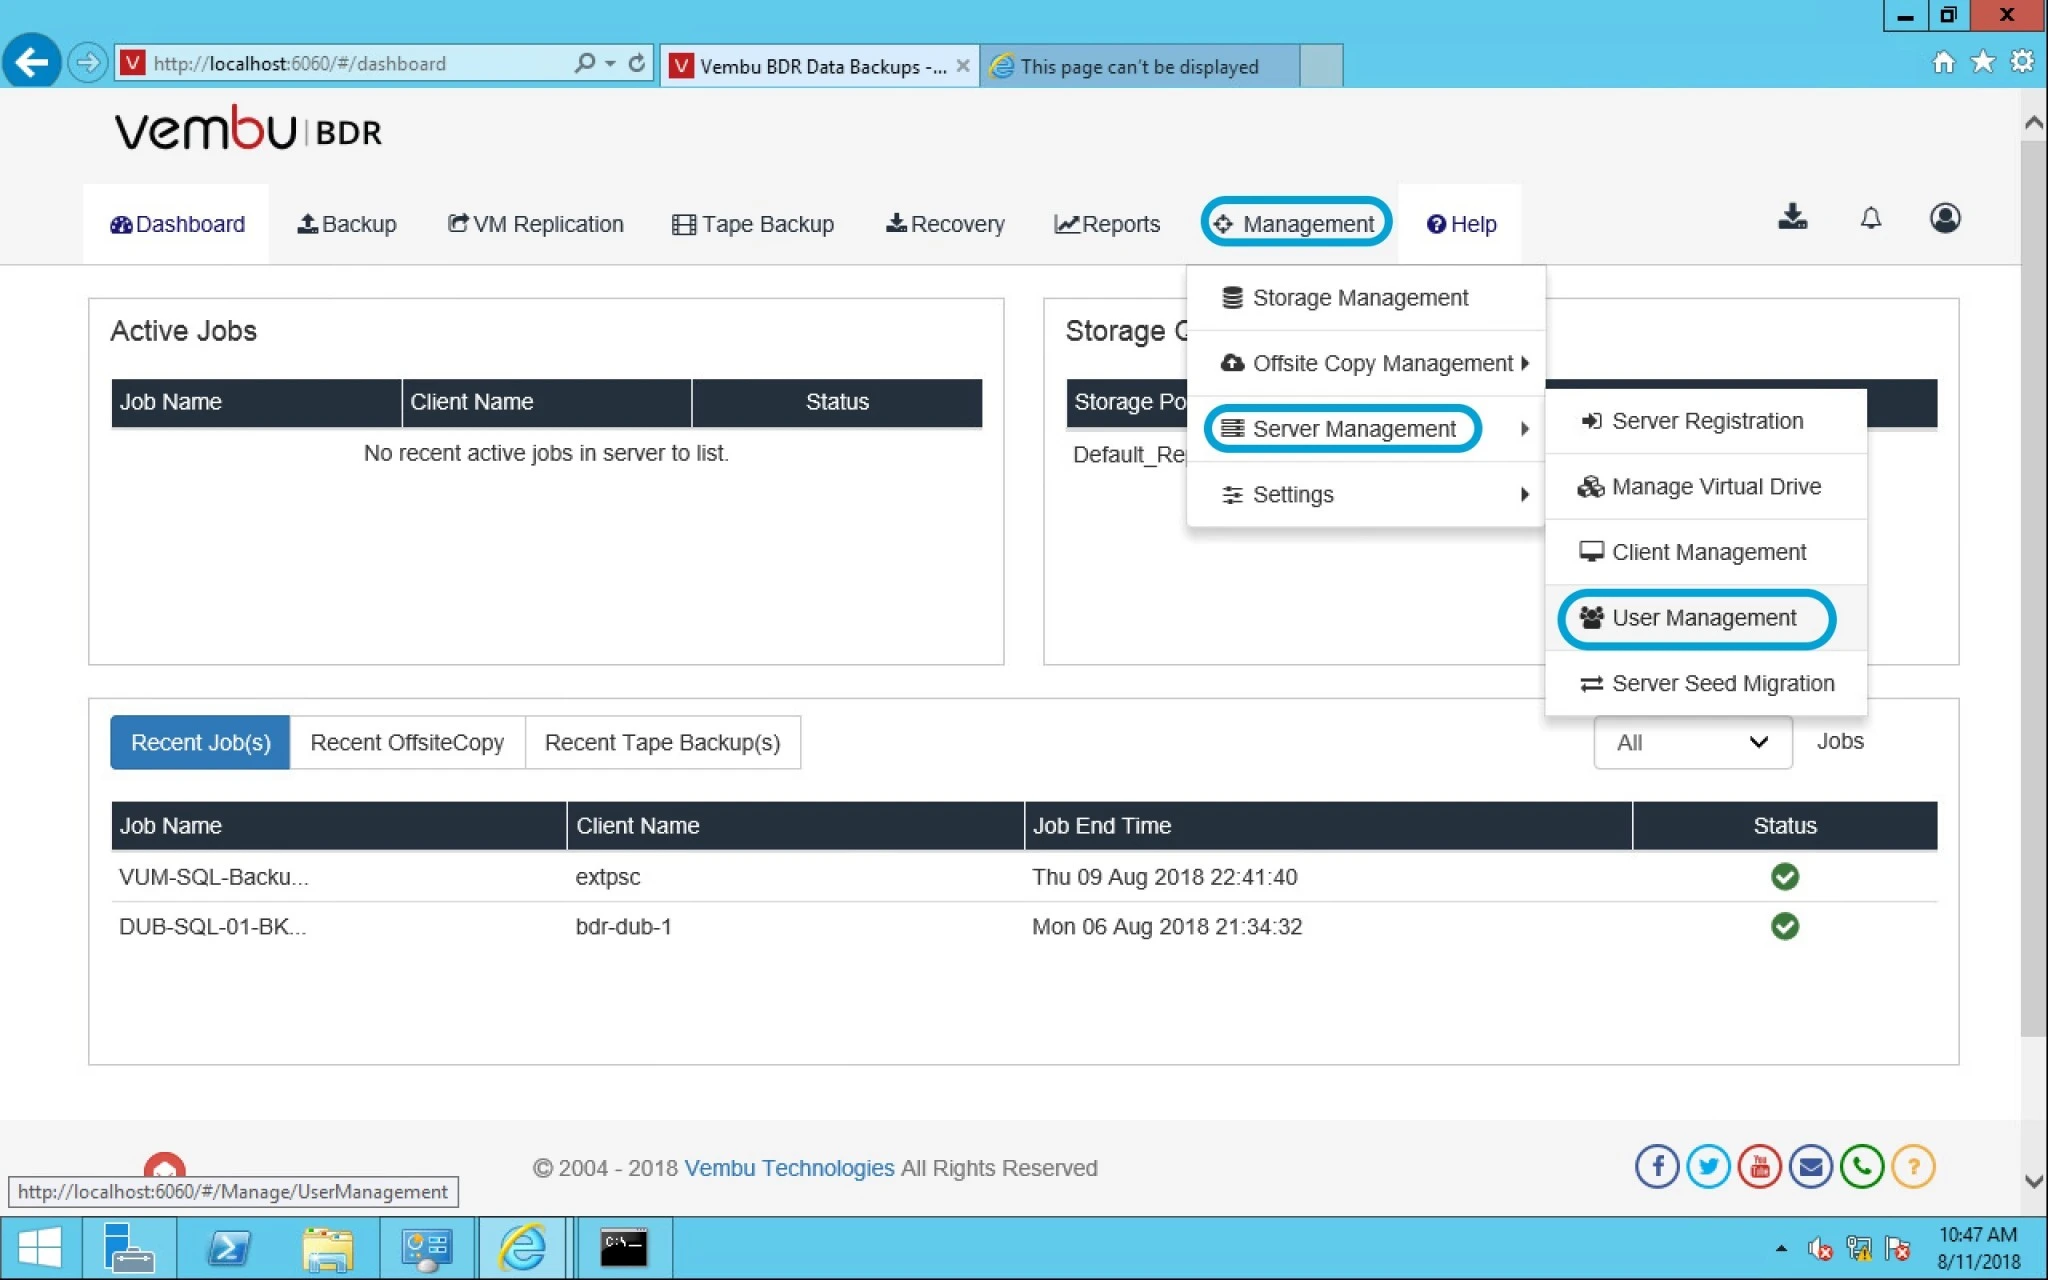
Now Login into Vembu BDR console > Management > under Server management > click on User management.


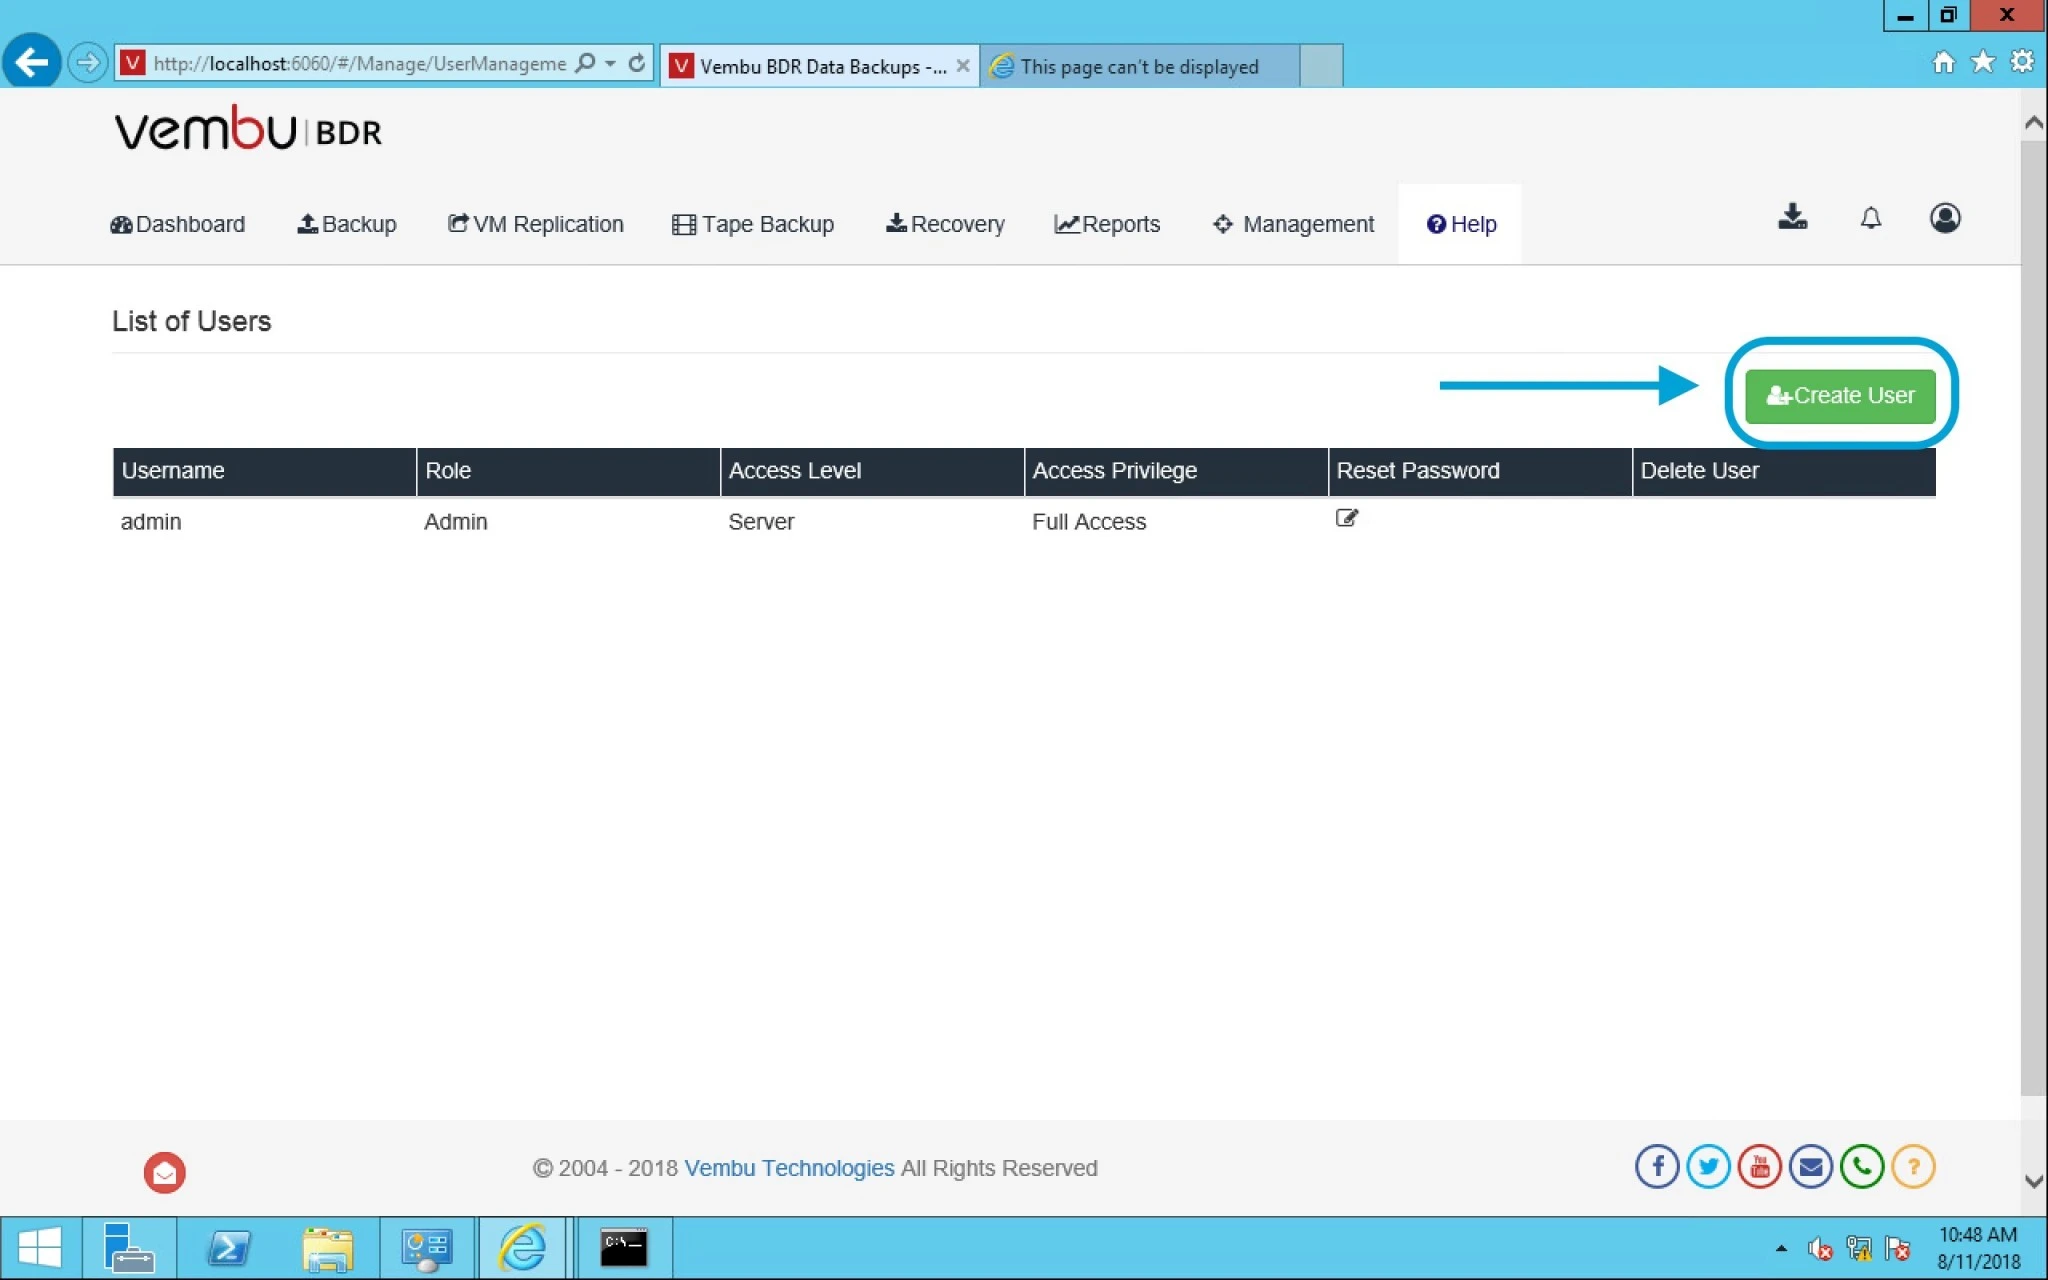
On this page, click on Create user button.


It will prompt you a window with following options given below:

  • User name- Provide user name as per requirement.
  • Access privilege- Full access or just read only.
  • Password- Password for user login
  • Confirm Password- Confirm password provided

Finally click on Create user option.


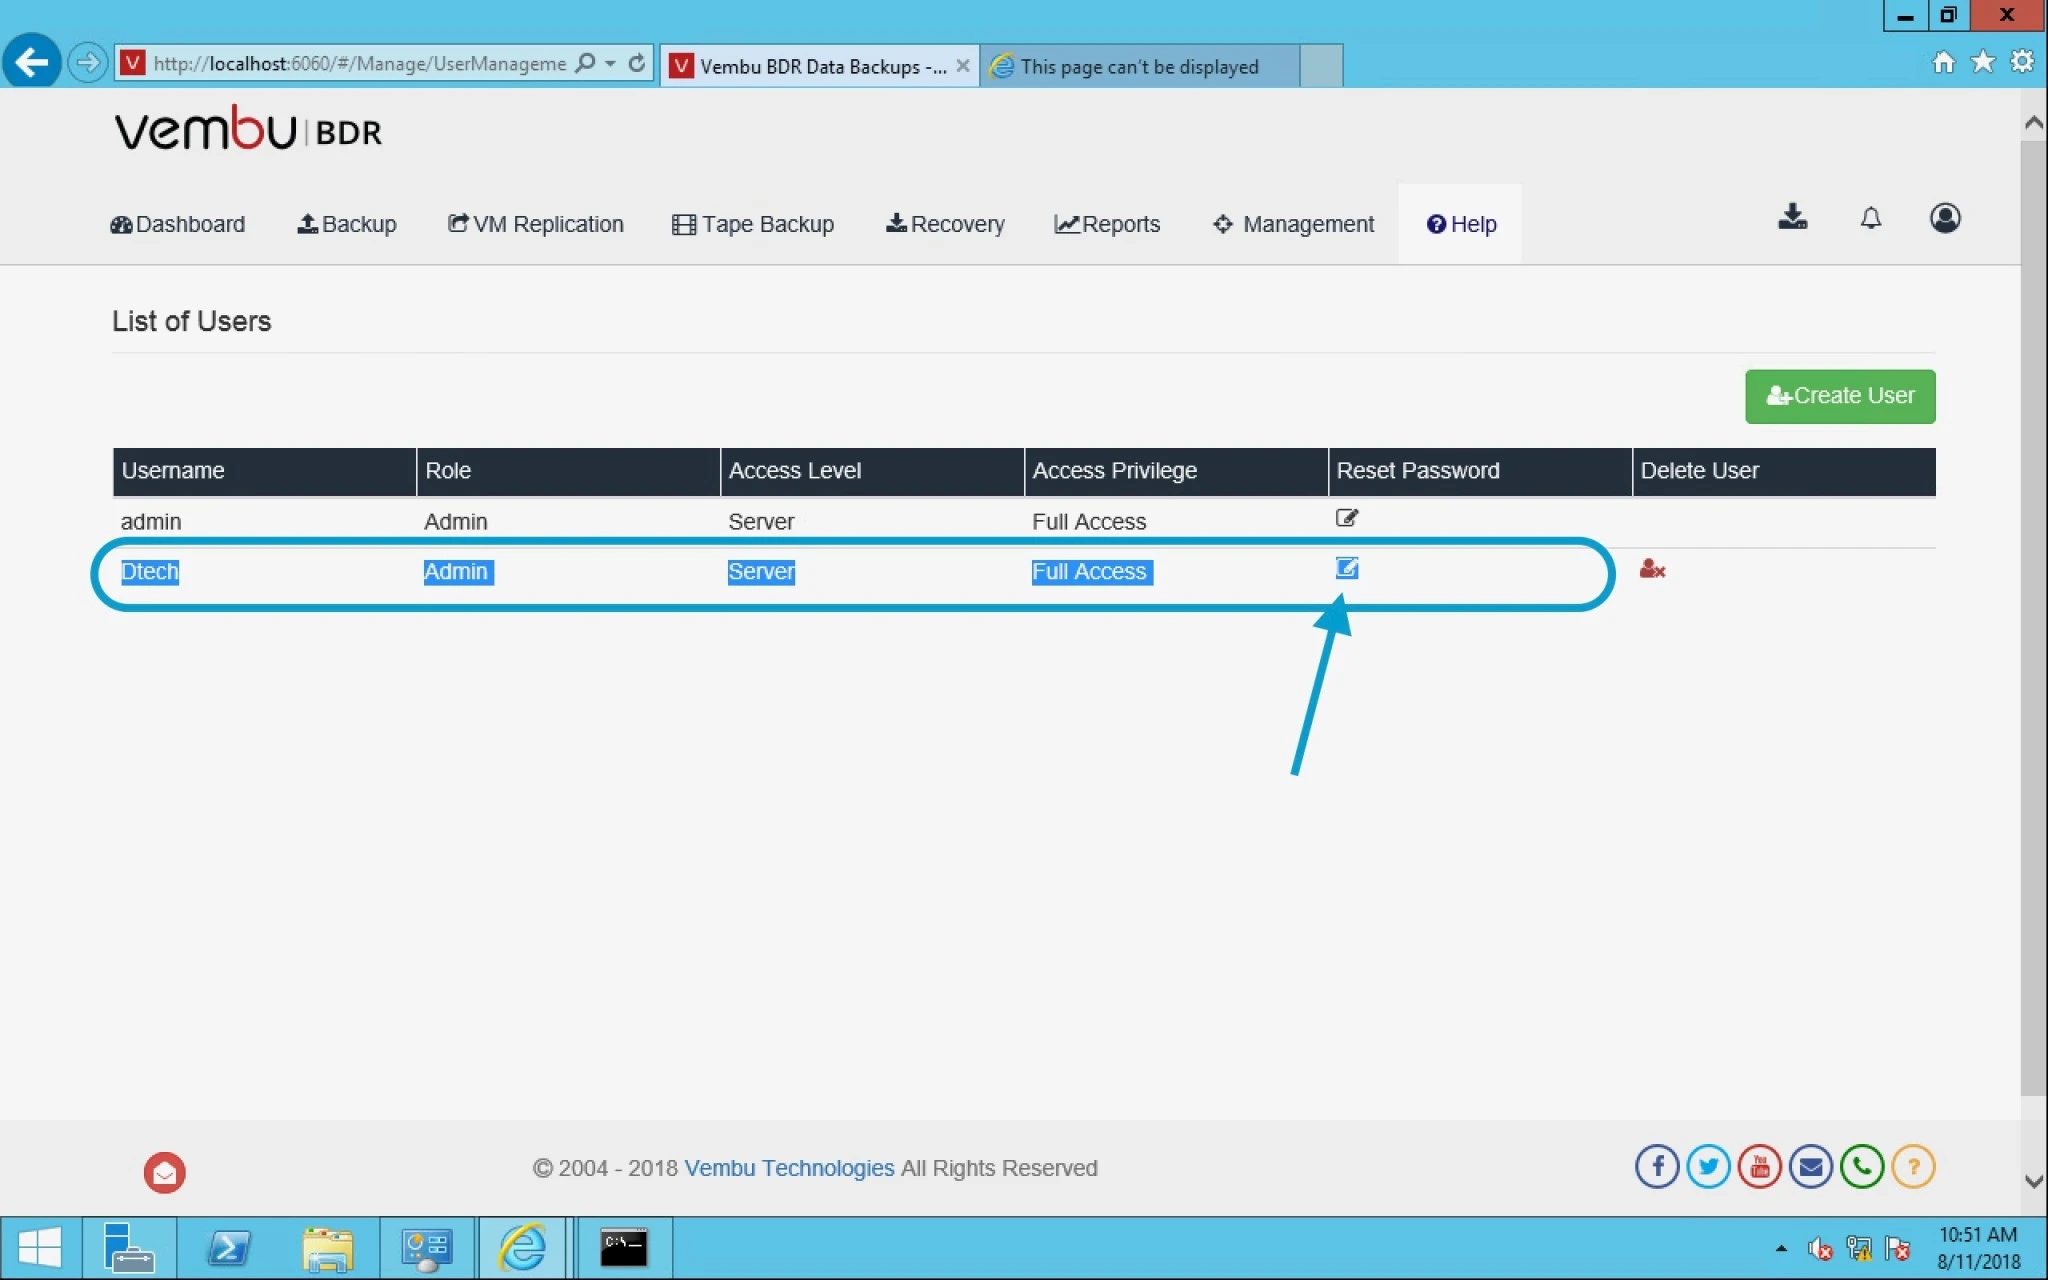
After creation of a user,  you can see that user under list of Users along with their access privilege status and the reset password option. From here you can also delete a user.


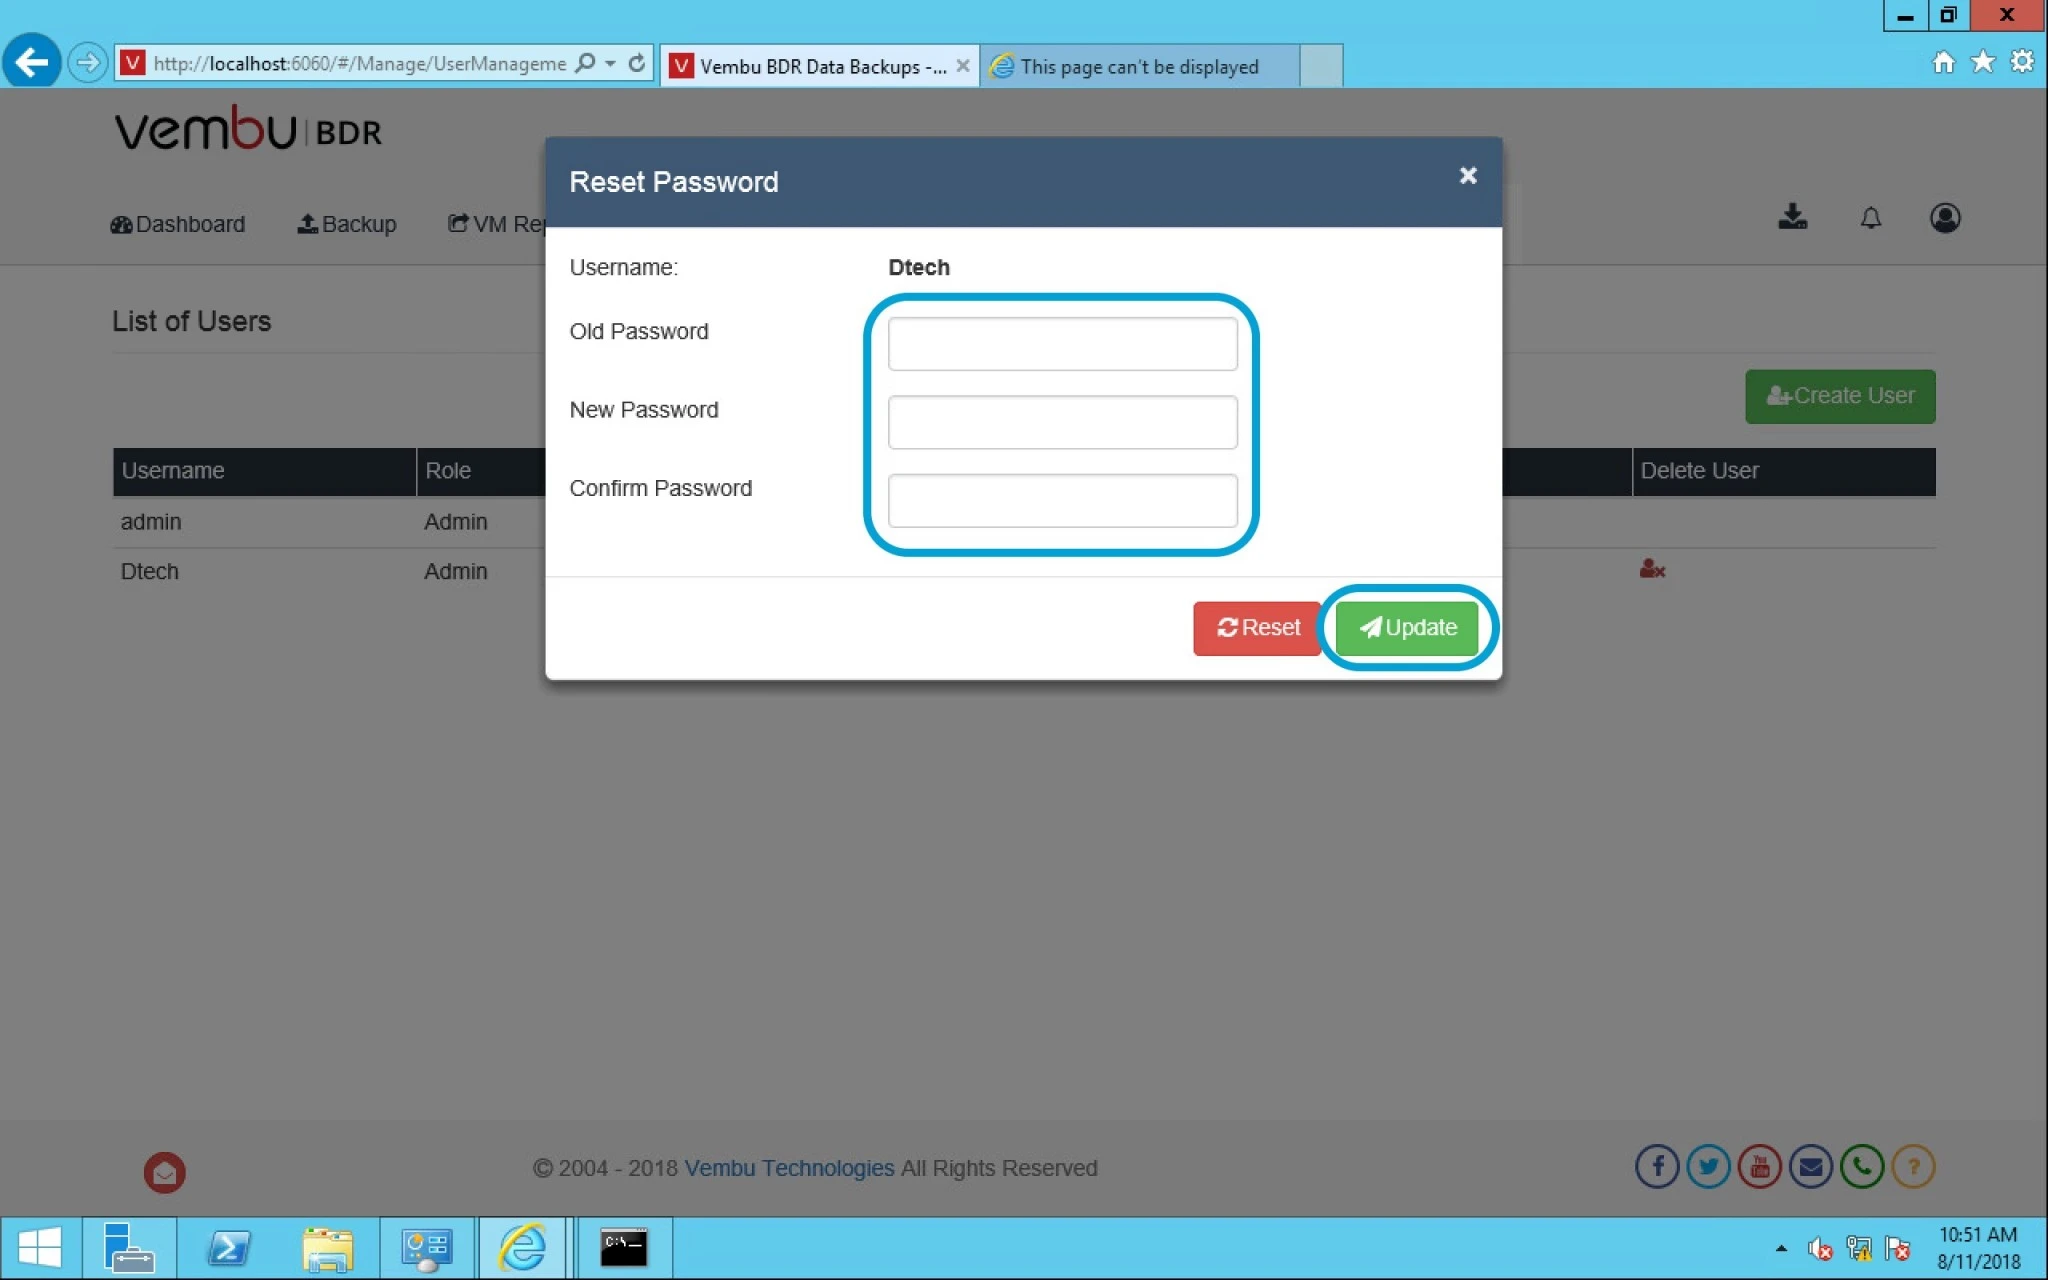
After user creation or in case of a user forgot their password then you can use edit option from lists user and change the password here and click on update.